User Guide of ERPNext Product Image Search
ERPNext Product Image Search lets shoppers find products by photo. Also, it works with any Frappe Webshop store.
Shoppers often know what a product looks like but not what it is called. For example, they may have a photo but no product name, SKU, or brand.
When text search returns nothing, they leave. So the Website Product Image Search app adds a camera icon to your search bar, and customers see similar products instantly.
In this guide, you will first install ERPNext Product Image Search. Then you will configure it, generate embeddings, and fix common issues.
New to the storefront? In that case, first read the official guide to setting up e-commerce in ERPNext.
How ERPNext Product Image Search Works
The app relies on image embeddings. In other words, an embedding is a list of numbers that describes what an image looks like.
First, the ResNet50 deep learning model creates an embedding for each product image. Then the app saves it as a Product Image Embedding record.
When a shopper uploads a photo, the app creates an embedding for it too. After that, it compares the two using cosine similarity.
Finally, the closest matches appear as results. To learn more, read our article on how to build visual image search in e-commerce.
Key Features of ERPNext Product Image Search
- Adds a camera icon to the Webshop search bars, so shoppers can search by photo.
- Shows an optional preview before the search runs.
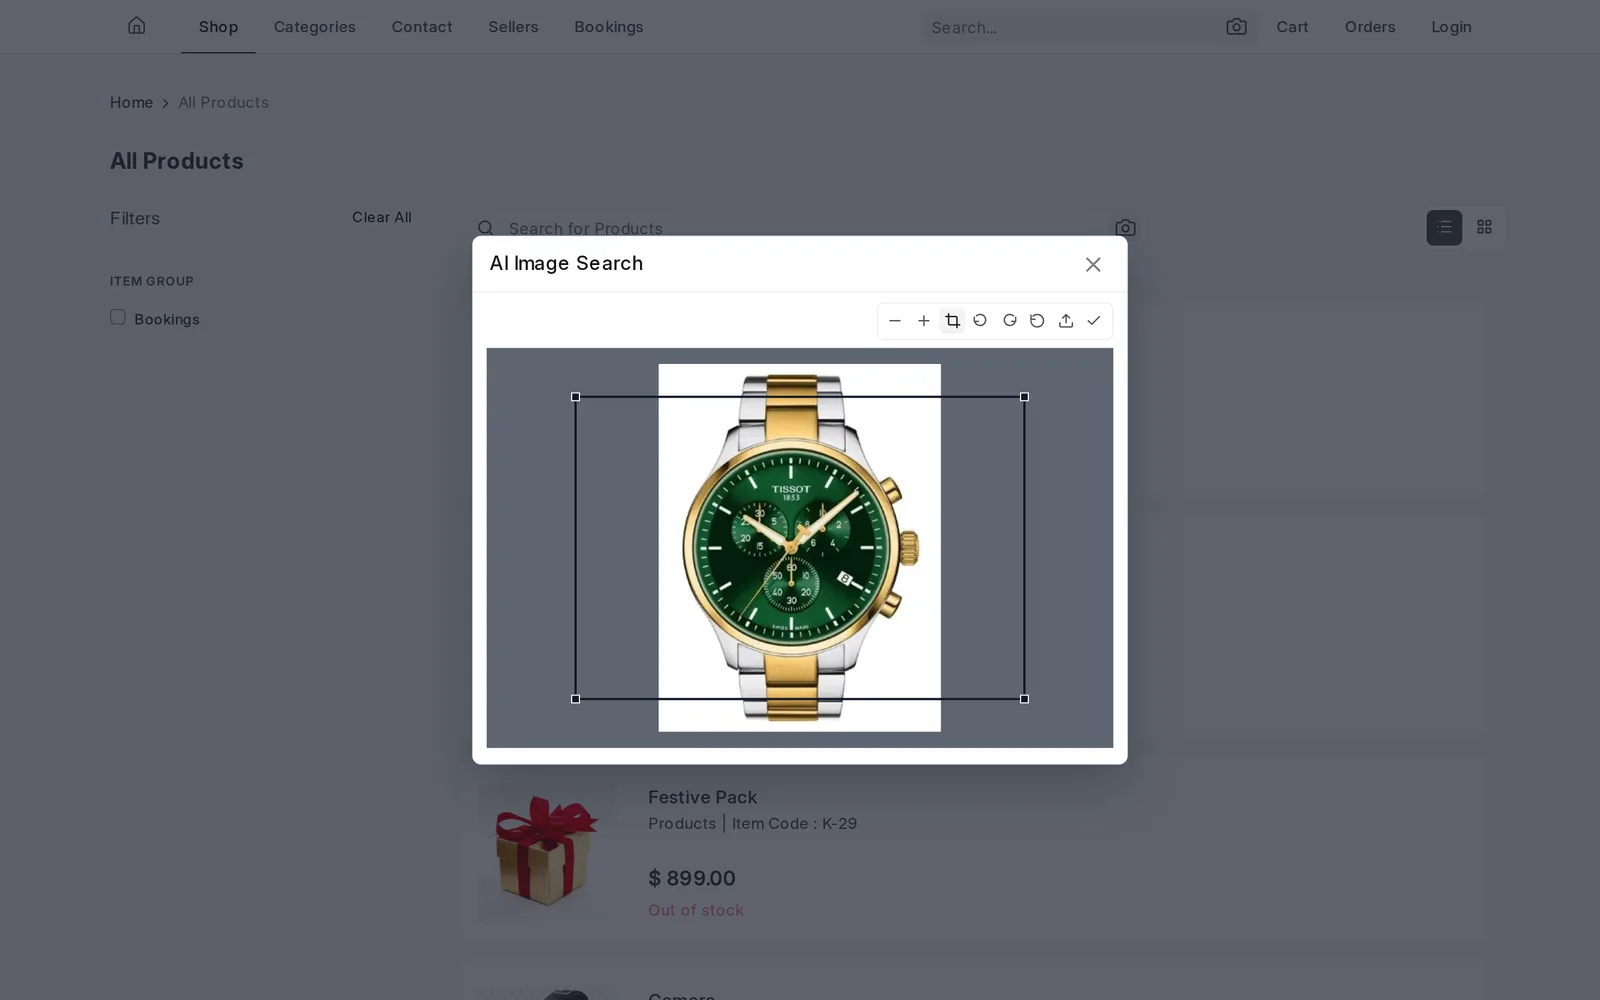
- Includes an image editor with zoom, rotate, crop, reset, and re-upload.
- Displays a loading spinner while the app finds matches.
- Searches all published Website Items or, instead, only the items you select.
- Lets you set a Score Threshold so you control how strict matching is.
- Lets you limit results with Maximum Suggestions.
- Shows each result with image, name, price, and a product link.
- Flags embeddings as stale when you update an item, and deletes them when you delete it.
- Also gives Website Managers one place to manage everything in the Website workspace.
Requirements
Before you install the app, make sure your site has the following:
- ERPNext and Webshop
- The Python packages
torch,torchvision, andPillow, because the app needs them to generate embeddings
How to Install ERPNext Product Image Search
First, place the app in your Frappe bench apps folder. Then install it on your site:
bench --site your-site install-app website_product_image_search
bench --site your-site migrate
bench --site your-site clear-cache
Replace your-site with your site name. Next, confirm the installation:
bench --site your-site list-apps
As a result, website_product_image_search should appear in the list.
After that, open the Website workspace in ERPNext Desk. There you will see an Image Search section with two links:
- Image Search Configuration
- Product Image Embedding

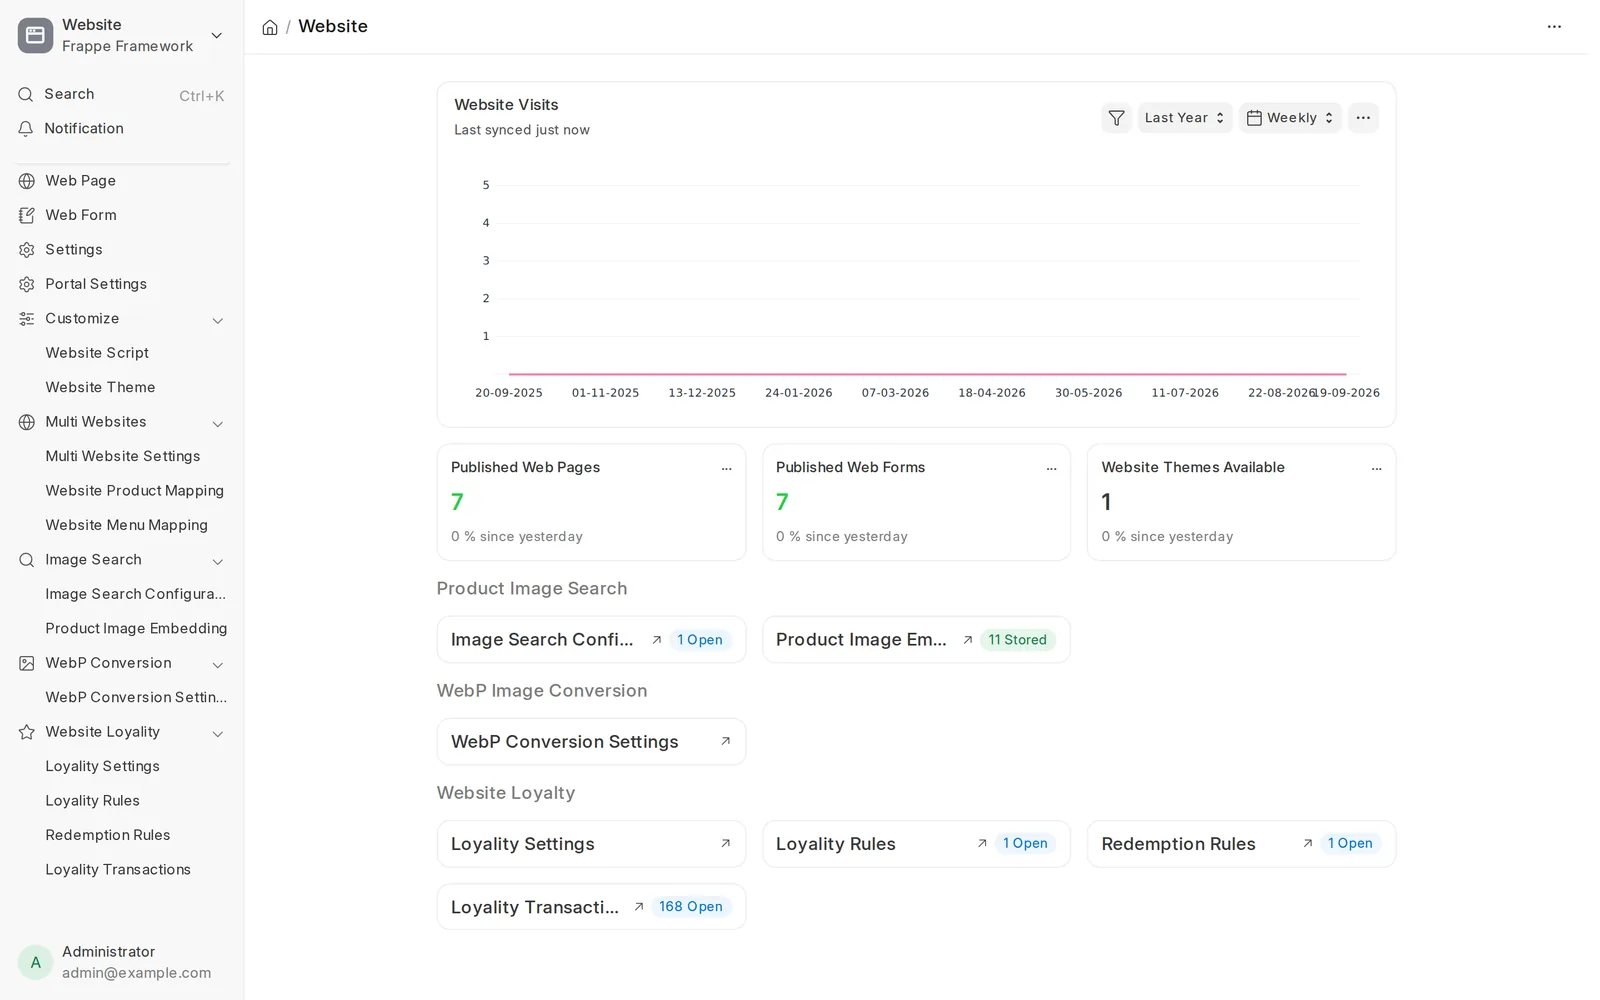
If the links do not appear, run migrate and clear-cache again. Then hard refresh the browser.
Create an ERPNext Image Search Configuration
The configuration decides which products shoppers can find and how strict matching is. So set it up first:
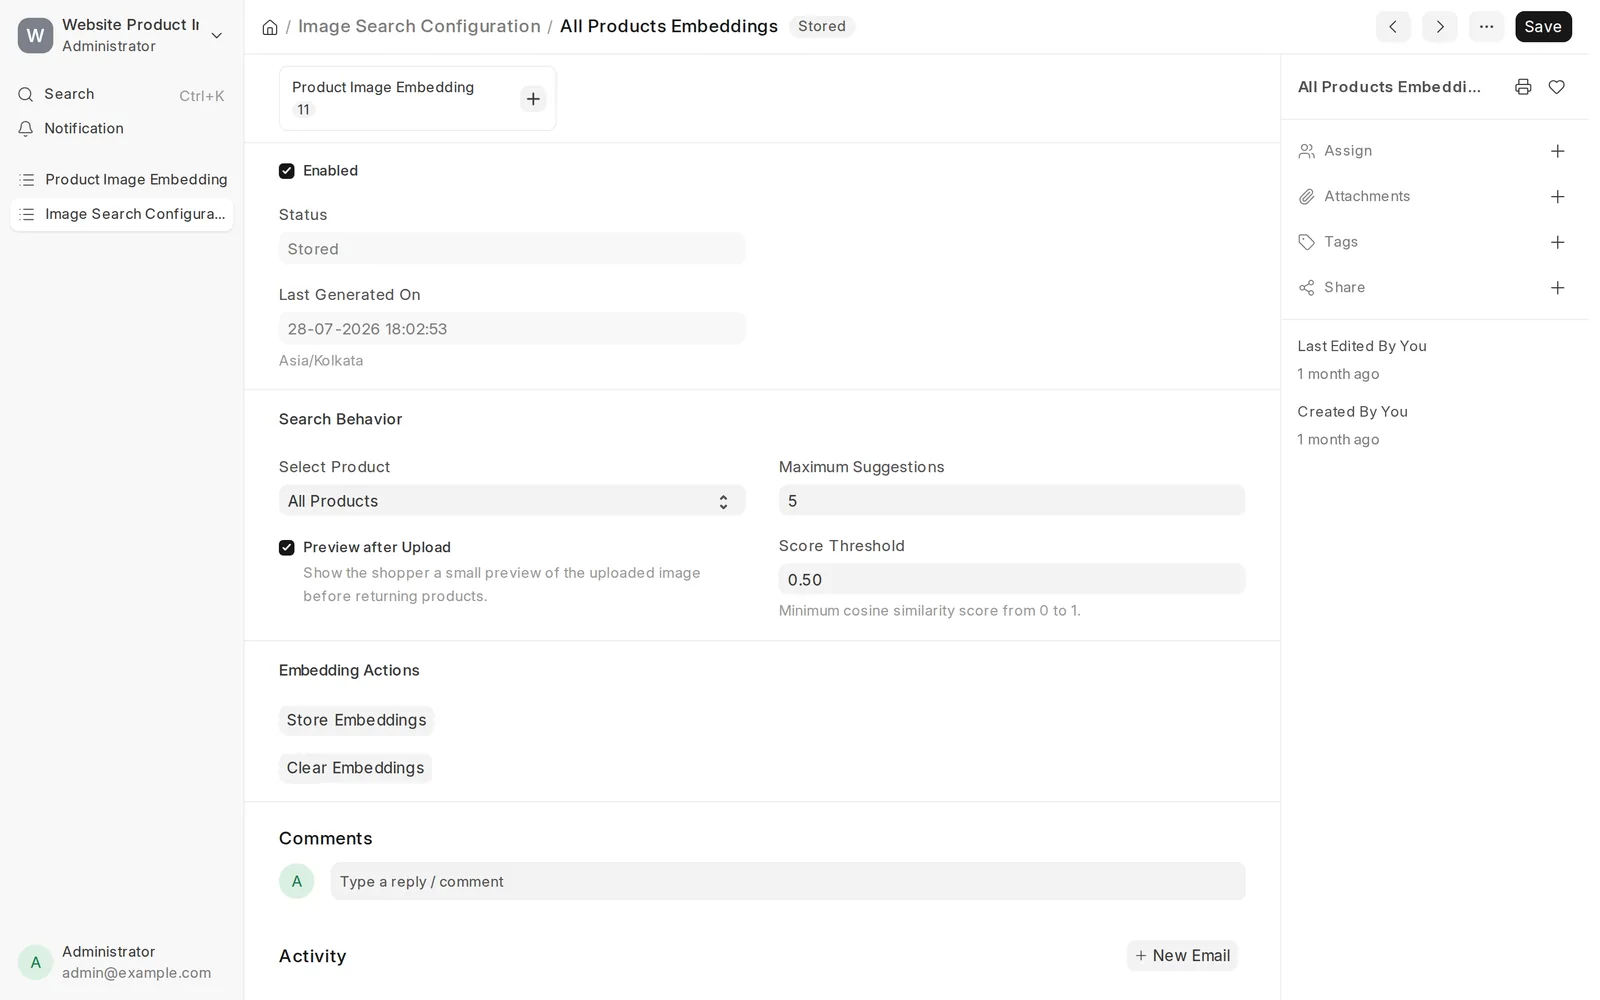
- First, go to Website > Image Search Configuration.
- Then click Add Image Search Configuration.
- Next, enter a Configuration Name, for example All Products Embeddings.
- Also, check Enabled.
- In Select Product, choose All Products or Selected Products.
- Check Preview after Upload if shoppers should see their photo before results.
- After that, set Maximum Suggestions, for example
5. - Then set Score Threshold between
0and1. - Finally, click Save.
Choose a Score Threshold
The Score Threshold sets the minimum similarity a product needs before it appears in results.
| Threshold | Matching | Result |
|---|---|---|
| 0.20 | Loose | Many results, but some weak matches |
| 0.50 | Medium | Balanced results, so a good default |
| 0.70 | Strict | Strong matches, although fewer results |
| 0.90 | Very strict | Only very close matches, so often none |
For example, a threshold of 0.70 hides products that score below 0.70. For a live store, however, start between 0.60 and 0.75.
Choose Products for ERPNext Image Search
All Products
Choose All Products when shoppers should find your whole published catalog by image.
When you store embeddings, the app then reads every published Website Item. It uses the item’s image, or the linked Item’s image, to generate an embedding.
This option gives you full catalog search with the simplest setup. However, keep in mind:
- The app only includes published Website Items.
- It also skips products that have no image.
- Large catalogs take longer, so plan for extra processing time.
Selected Products
Choose Selected Products when shoppers should only find specific items. In that case, a Products table appears where you add Website Items.
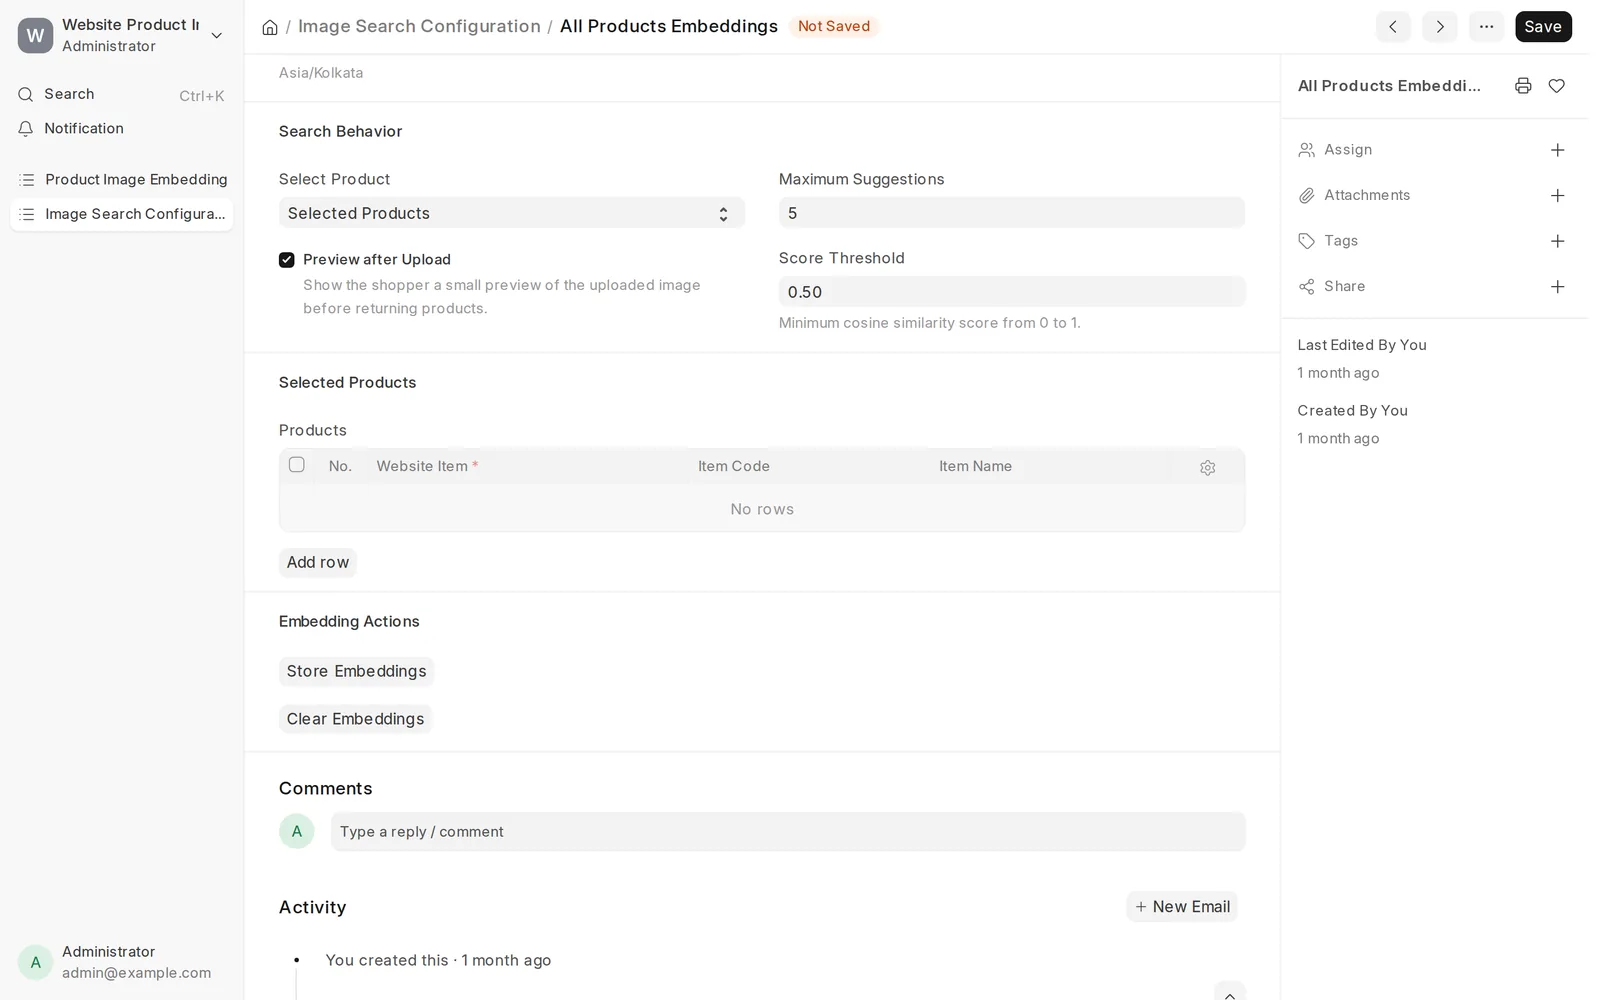
This option works well when you want to:
- Test image search with a small set of products first.
- Limit search to certain categories, for example during a campaign.
- Leave out products that have poor-quality photos.
- Generate embeddings faster, because the app processes fewer images.
However, products outside the table never appear in results. So remember to add new products when needed.
Store Product Image Embeddings for Search
Image search only returns results after you generate embeddings. So follow these steps:
- First, open your saved Image Search Configuration.
- Then make sure Enabled is on.
- If you chose Selected Products, also add products to the table.
- Next, click Store Embeddings under Embedding Actions.
- Wait until processing finishes.
- Finally, review the status and the new Product Image Embedding records.
This action first deletes old embeddings for the configuration. Then it generates fresh ones and sets the status to Stored.
If the app cannot process an image, however, it sets that record to Failed.
Clear Embeddings
To remove all embeddings for a configuration, open it and click Clear Embeddings. Then confirm the action.
As a result, the status changes to Draft. The configuration then returns no results until you store embeddings again.
Refresh Stale Embeddings
The app watches your Website Items. When you update an item, the app flags its embeddings and configuration as Stale.
Similarly, when you delete an item, the app deletes its embeddings. So if a configuration shows Stale, click Store Embeddings again.
Review the Product Image Embedding List
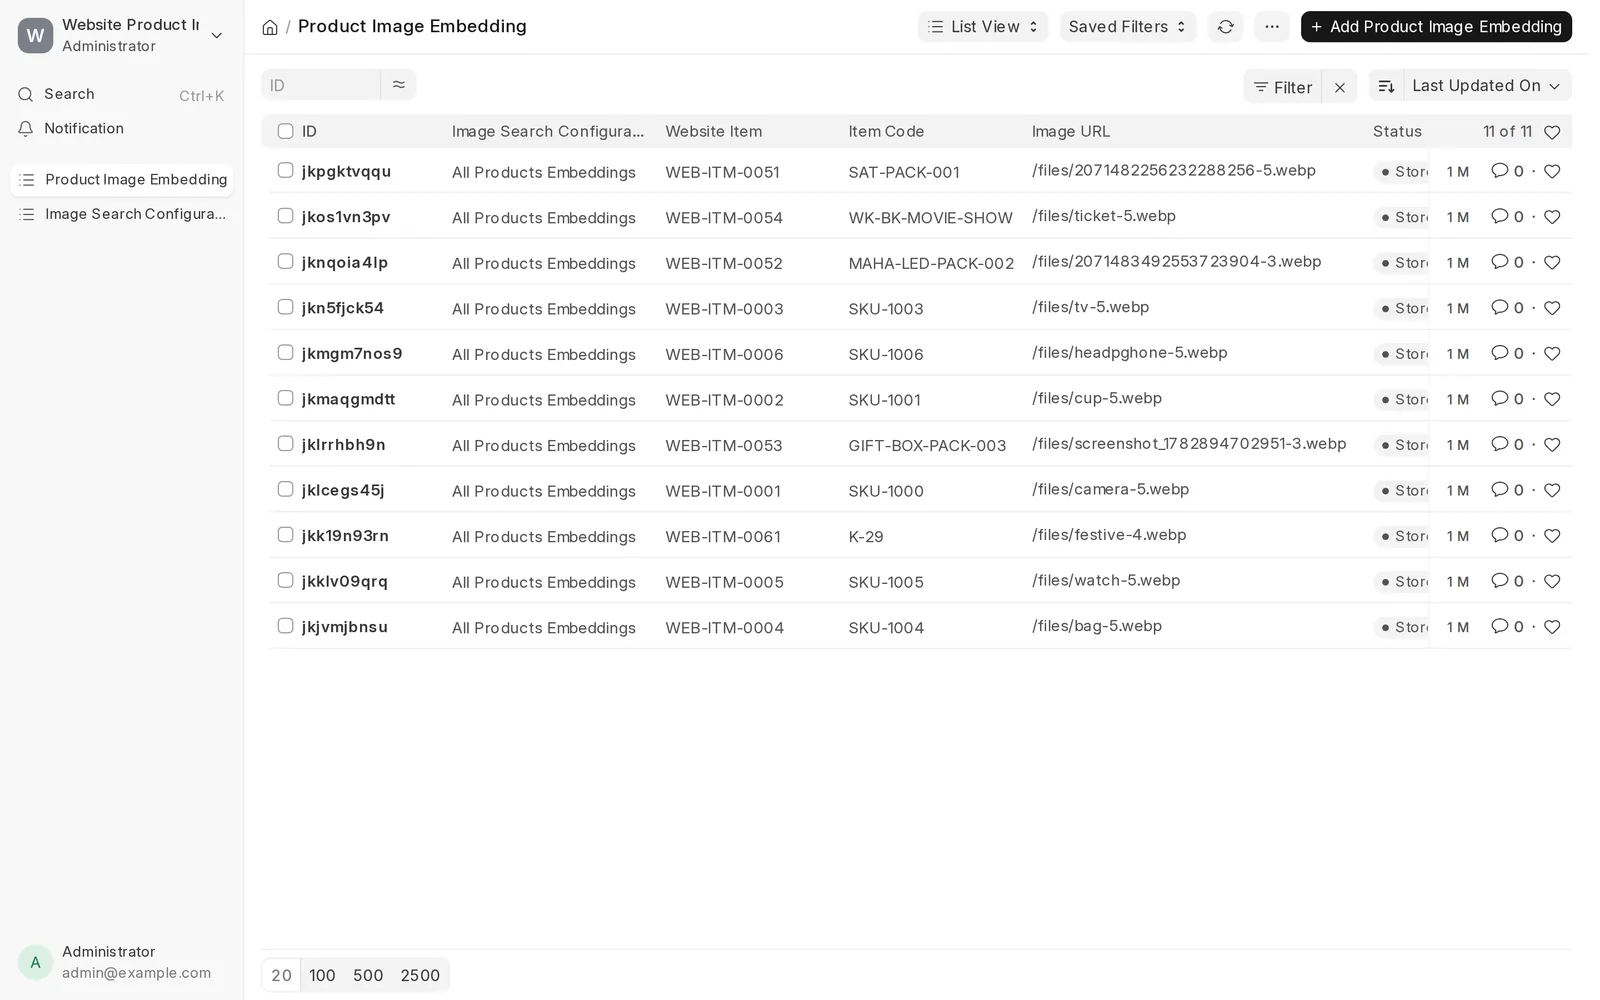
Go to Website > Product Image Embedding to review the records. However, you never need to create or edit them yourself.
Each record shows the Image Search Configuration, Website Item, Item Code, Image URL, and Status.
How Customers Use ERPNext Product Image Search
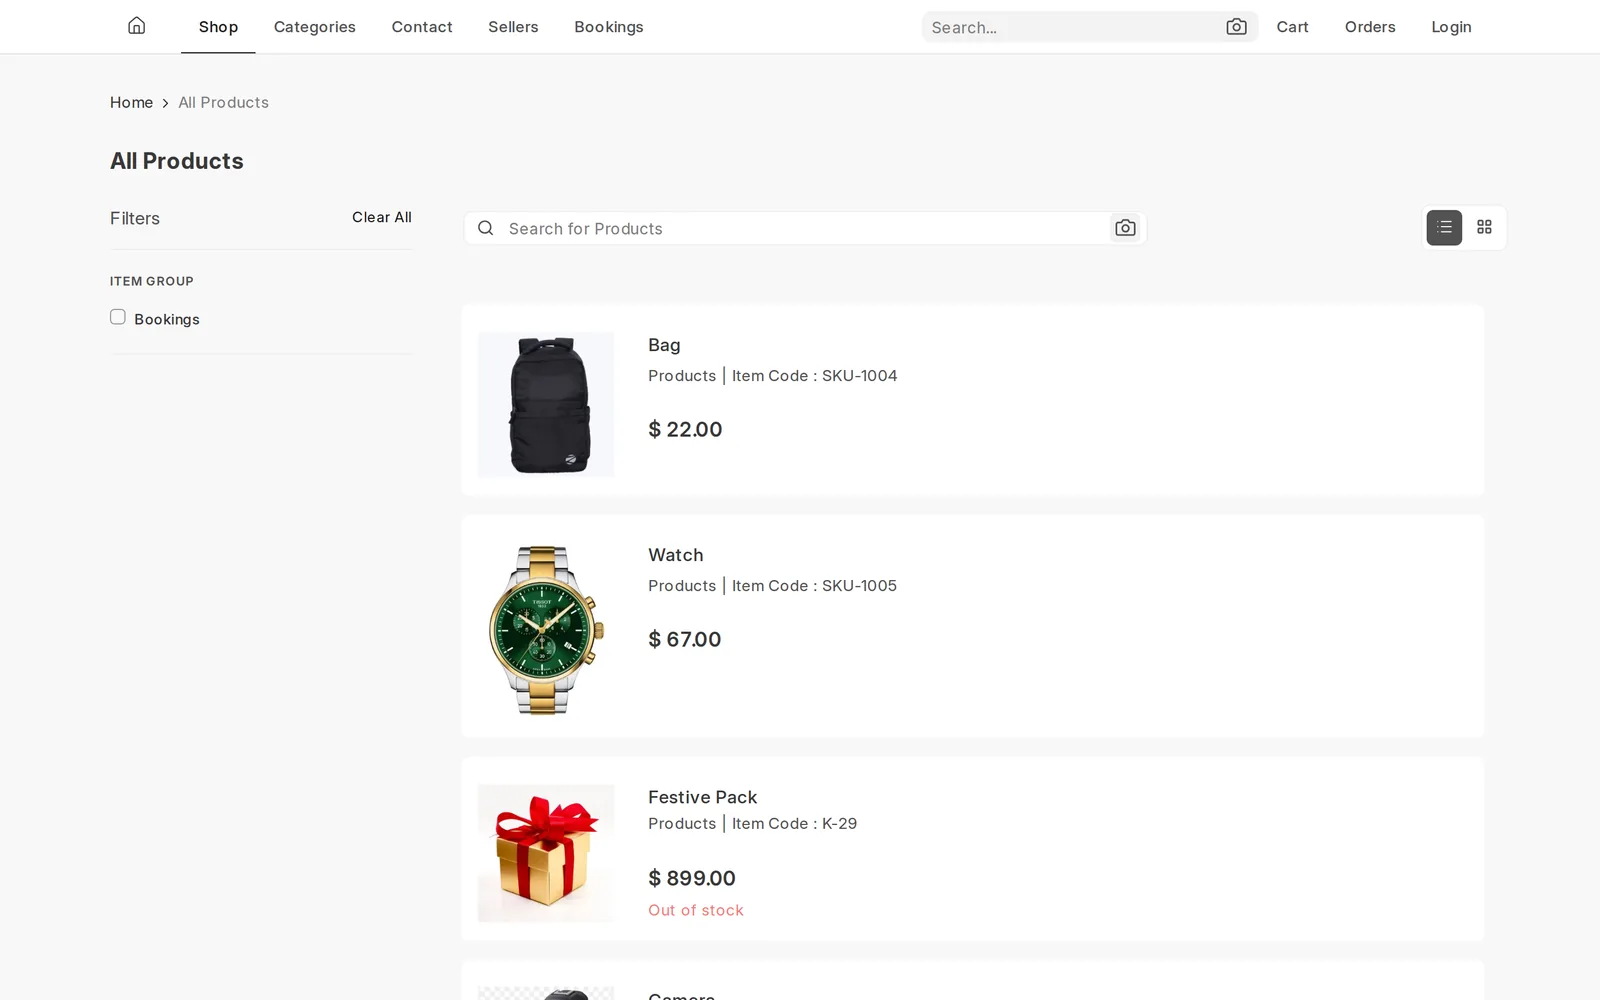
Step 1: First, the customer clicks the camera icon in the header search bar or on the All Products page.
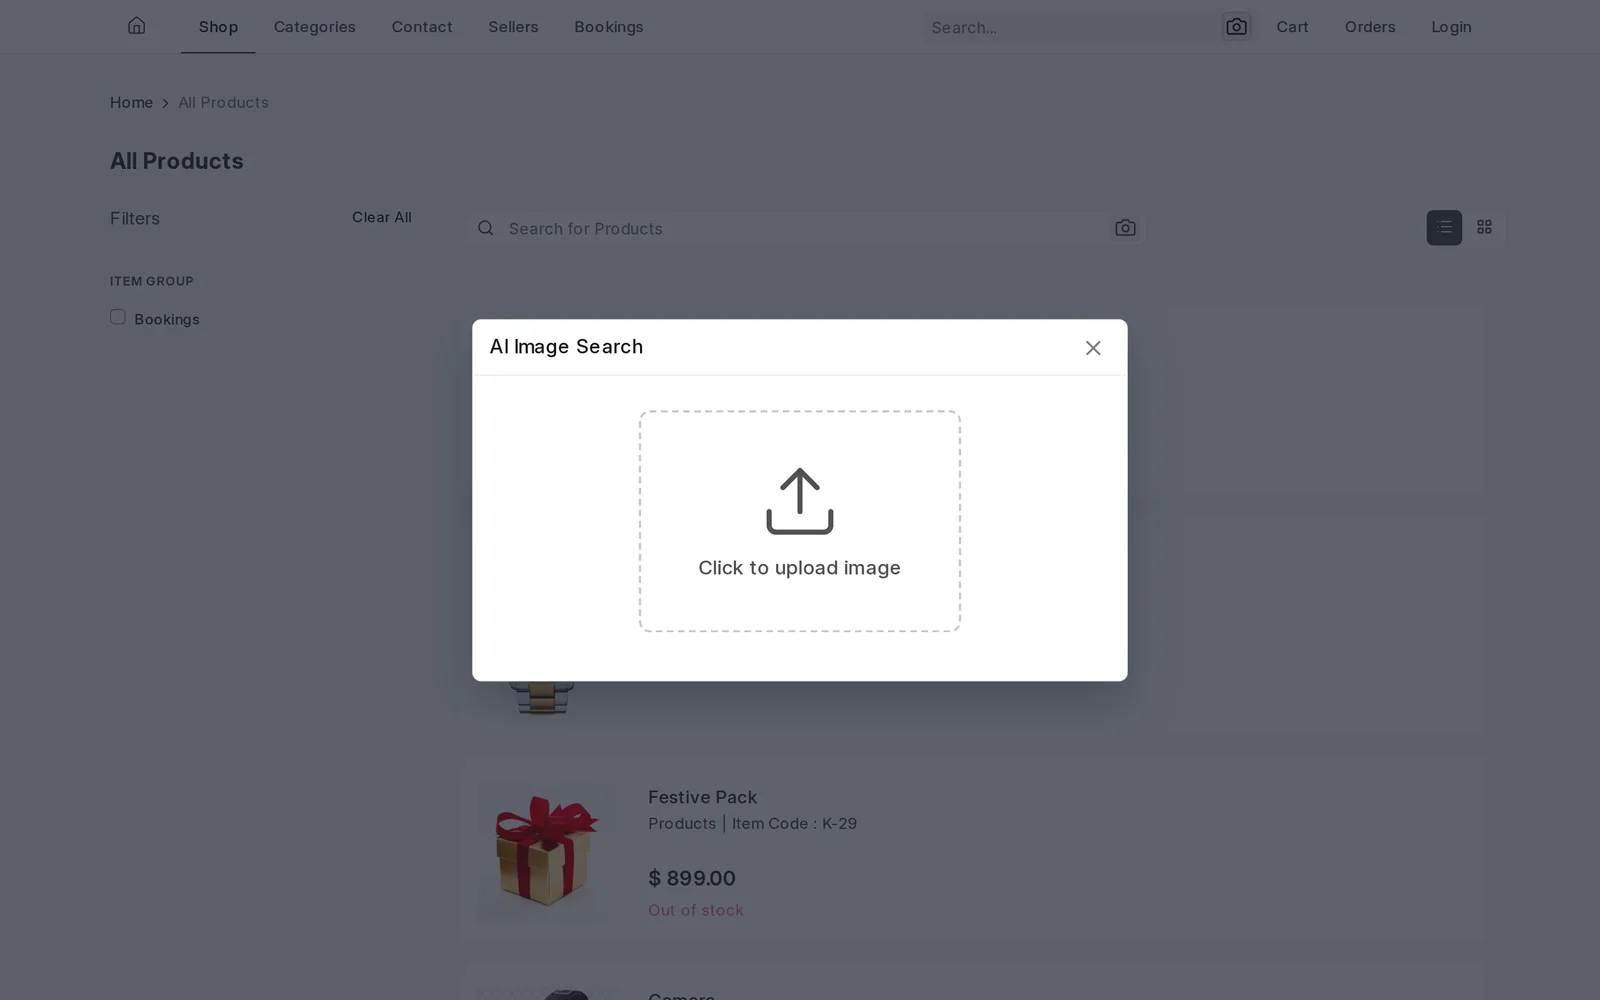
Step 2: Then the AI Image Search dialog opens, and the customer uploads a product photo.
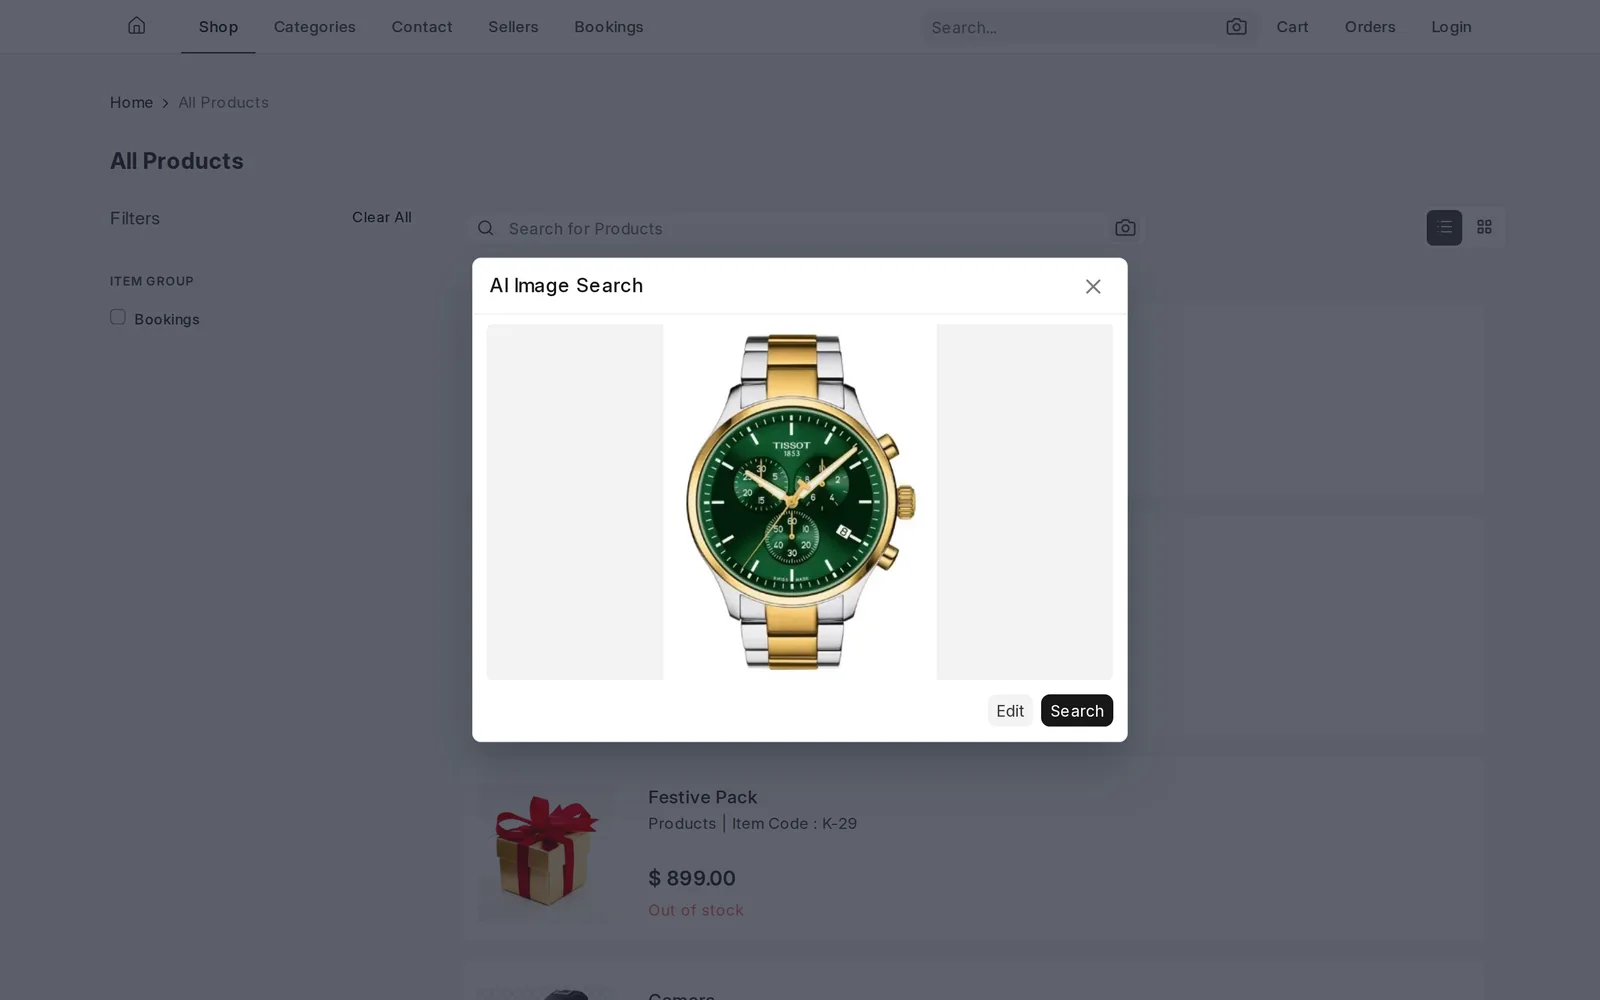
Step 3: Next, the customer previews the photo and clicks Search. Alternatively, they click Edit to adjust it first.
Step 4: In the editor, the customer can zoom, crop, and rotate the photo. They can also reset it, upload another image, and save.
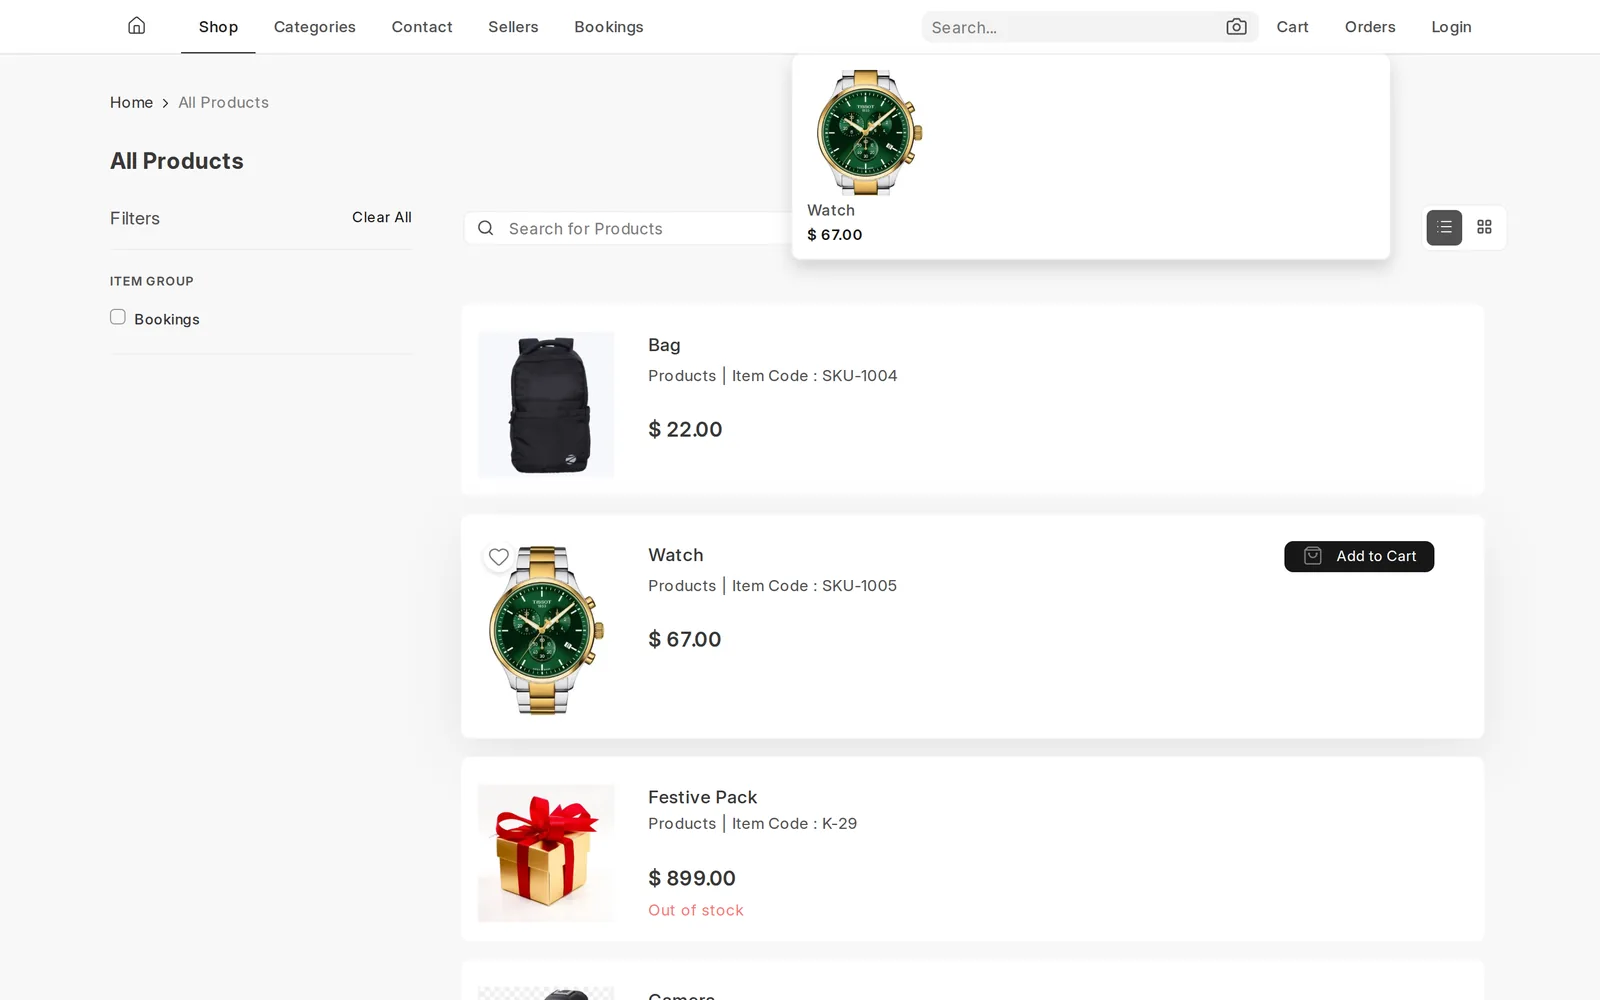
Step 5: While the app finds matches, a loading spinner appears. Then similar products show below the search bar with image, name, and price.
Finally, the customer clicks a result to open the product page.
Recommended Setup for ERPNext Image Search
- First, publish 10 to 20 Website Items with clear images.
- Then create a configuration with Selected Products and add those items.
- Next, set Maximum Suggestions to
5and Score Threshold to0.50. - After that, save and click Store Embeddings.
- Then open your webshop, click the camera icon, and upload a product photo.
- Finally, check the results and adjust the threshold if needed.
Once you like the results, switch to All Products for full catalog search. Then store embeddings again and test with real customer photos.
Troubleshooting ERPNext Product Image Search
The Camera Icon Does Not Appear
- First, check that you installed the app.
- Also check that an enabled configuration has Stored or Stale status.
- Then run
bench --site your-site clear-cacheand hard refresh the website.
No Results in ERPNext Image Search
- First, confirm you enabled the configuration and stored embeddings.
- Also confirm the Website Items are live and have images.
- Then lower the Score Threshold, for example from
0.70to0.50.
Wrong or Weak Matches Appear
In this case, raise the Score Threshold. For example, change 0.40 to 0.60, or 0.60 to 0.75.
Selected Products Are Missing From Image Search
- First, confirm the product sits in the Products table, is live, and has an image.
- Then run Store Embeddings again after you add products.
Store Embeddings Fails
- First, confirm that
torch,torchvision, andPillowexist in your environment. - Also check that product image files exist and open correctly.
- Then make sure the server can reach remote image URLs.
- Finally, read the Error Log, fix the image, and store embeddings again.
More ERPNext Webshop Apps
You can also extend your store with these related Webkul apps:
- ERPNext Website Product Pack, so you can sell packs with their own pricing.
- ERPNext Website Product Stock, so shoppers see stock on the storefront.
- ERPNext Website Store Locator, so customers find your physical stores.
In addition, browse all our ERPNext apps on the Webkul Store. You can also read more ERPNext articles on our blog.
Conclusion
ERPNext Product Image Search makes your Webshop easier to use. As a result, customers find products from a photo, even without the product name.
Moreover, setup takes only a few minutes. First create a configuration, then choose products, set a threshold, and store embeddings.
If you need help or a custom feature, contact our team through our ERP development services page.