WooCommerce POS Stripe Card Swipe Reader Add-on
WooCommerce POS Stripe card swipe add-on offers the functionality to integrate the Stripe card swipe machine into the POS.
The extension allows POS sales merchants to make payments by connecting the Stripe payment gateway to the card swipe machine.
The POS agents can make payments and generate the invoice after making the payment.
Note:
- This plugin is an add-on to WooCommerce POS System. So you need to download the WooCommerce Point of Sale System first.
- To connect the Stripe card swipe terminal (Machine) with the POS Outlet, you need to have a Stripe Reader S700, BBPOS WisePOS E and Verifone P400 type of card reader. You may check Stripe Card Swipe terminals.
- Stripe terminal supports specific countries and currencies, you may check stripe terminal country & currencies.
- How to add stripe terminal devices you can check the reference here.
- We provide a production version of the plugin. If you want a development version then you can get it at an additional cost. Please contact support@webkul.com for it.
Note:
This plugin is now compatible with WooCommerce’s latest High-Performance Order Storage (HPOS) and Cart and Checkout block.
Apart from that, you can also process the payments at the POS outlet using the WooCommerce POS Square Payment Terminal plugin via customer’s credit/debit cards.
This plugin is also compatible with WooCommerce POS Customer Checkout.
Check a brief overview of the plugin –
Features
- The store admin can make a stripe intent payment via POS.
- The POS agents can make a default payment gateway as a stripe.
- The POS sales agent can store tests as well as live keys.
- They can allow simulators for test payments via Stripe.
- Support for almost all kinds of cards including Visa, Mastercard, American Express & Discover.
- Auto connects stripe reader.
- Multiple stripe reader connection.
- After payment confirmation, the sales agent can generate the invoice.
- The sales agent can also generate stripe invoices.
- Admin can manage stripe readers and locations from admin dashboard.
- Tip option can be displayed on stripe reader screen.
- Cancel option displayed on stripe reader screen to cancel payment.
- Payment can be captured either manually or automatically both.
- The Plugin is multisite compatible
- Split payment option with Stripe and cash.
Installation
The user will get a zip file that needs to be uploaded in the “Add New” menu option in the WordPress admin panel.

So, for this login to WordPress Admin Panel and in the Dashboard hover your mouse over the “Plugins” menu option and select the “Add New” option.
After this, the user will see an option on the top of the page that is “Upload Plugin”, click the option to upload the zip file.

On clicking the “Upload Plugin” option, the user will see a “Choose File” button. Thus, click on the button to browse for the zip file as per the image below.


After browsing the file, click on the “Install Now” button so as to install the plugin as per the snapshot.
Once the user installs the plugin, a message “Plugin installed successfully” displays and an “Activate Plugin” is visible to activate the plugin.
So, the user needs to click on the “Activate Plugin” button to activate the plugin.

Activate and Update Plugin
Check out how to activate the WooCommerce Plugin through the purchase code and get updates on Webkul Modules directly on the Plugins page
How to get the API keys – For Configuration
First Step: Go to https://dashboard.stripe.com/login and enter your login details.


Second Step: Now on the Home tab, the test keys will display.


Third Step: Click the Developers option present in the top right corner then the API Keys menu option on the side panel to see the live Publishable key(API Publishable Key).


Now, click the “Reveal test key token” to get your Secret Key(API Key). Clicking the “Reveal test key token” will bring up the – Secret Key(API Key).
How to Setup Stripe Terminal Device
There are 2 ways to setup the Stripe Terminal Device. You can set it up through Stripe Terminal or through Admin Configuration.
Admin Configuration
After successful installation of Stripe Connect the admin can configure this under WooCommerce > Settings > Payments>POS Stripe Reader Gateway.


Now, the admin will enable the plugin to configure it. Here, the store admin will make the following configurations:

Enable/Disable – Here admin needs to click on the checkbox to enable the module.
Default Gateway- Select the Default Gateway option if you want to make it the default payment gateway to make POS payments.
Title- Enter the title for the payment gateway.
Description- The admin can add the description which will display to the user during checkout.
Allow Auto Connect – Enabling this option will auto connect the first available Stripe Pos Device.
Use Simulator- When the device is not available, enable the simulator for testing payment via the terminal.
Card Number- Enter the card number to test.
Test Mode- The store admin will be able to test when he will select the Test Mode option
Stripe Test Publishable Key- Enter the publishable key to test.
Test Private Key- Enter the private key to test.
Live Publishable Key- Here, the store admin will enter the live publishable key when the device is integrated with the stripe payment gateway.
Live Private Key- The store admin will enter the live publishable key when the device is integrated with the stripe payment gateway.
POS Payment Configuration
Once the reader gateway is configured, Admin navigates to Point of Sale>Settings>Payment to configure the POS Stripe Reader for the point of sale. It is visble as per below image,

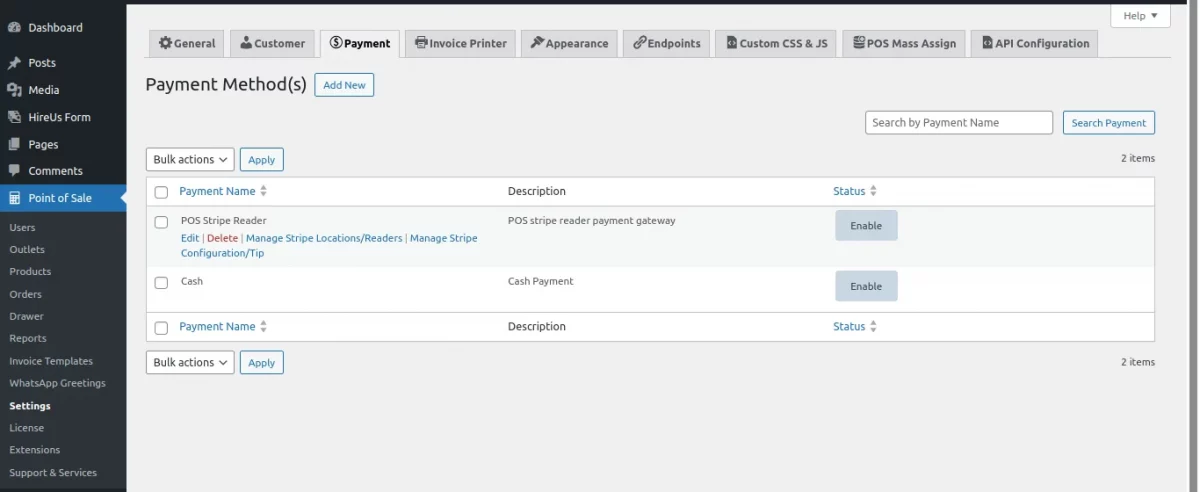
Here, the admin can manage the payment methods and add new ones as well.
For POS Stripe Reader Payment Method, Admin can perform the following,
- Edit – Edit details of Payment Method
- Delete – Delete the payment method
- Manage Stripe Locations/Readers – Manage the Stripe reader Location list, add new Location and manage the reader as well.
- Manage Stripe Configuration/Tip – Select the configuration for tipping.
Manage Stripe Locations/Readers


From here, admin manages the Stripe Location list and can also add new location as per requirement. From here, they can manage the Reader as well by tapping on Manage Reader.
To add a new reader, they simply tap on Add New Reader button and set the Reader Label and enter Reader Registration Code.

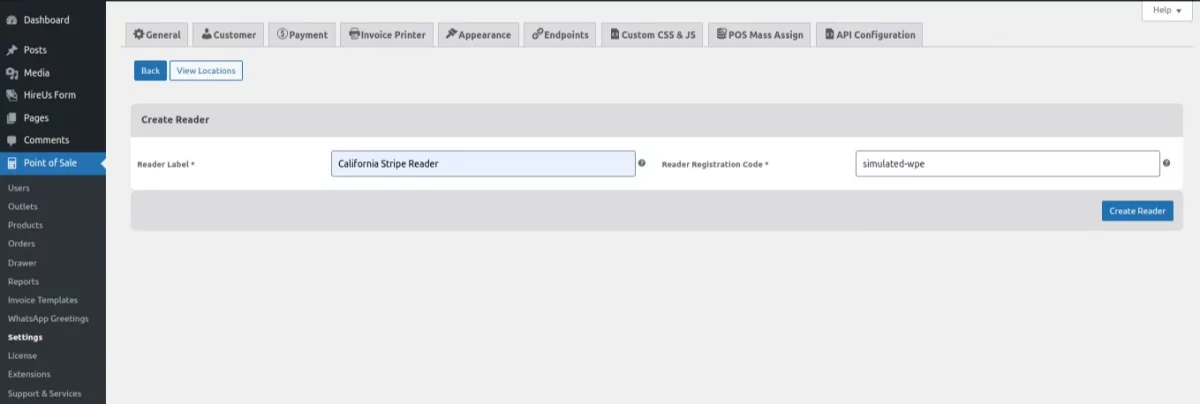
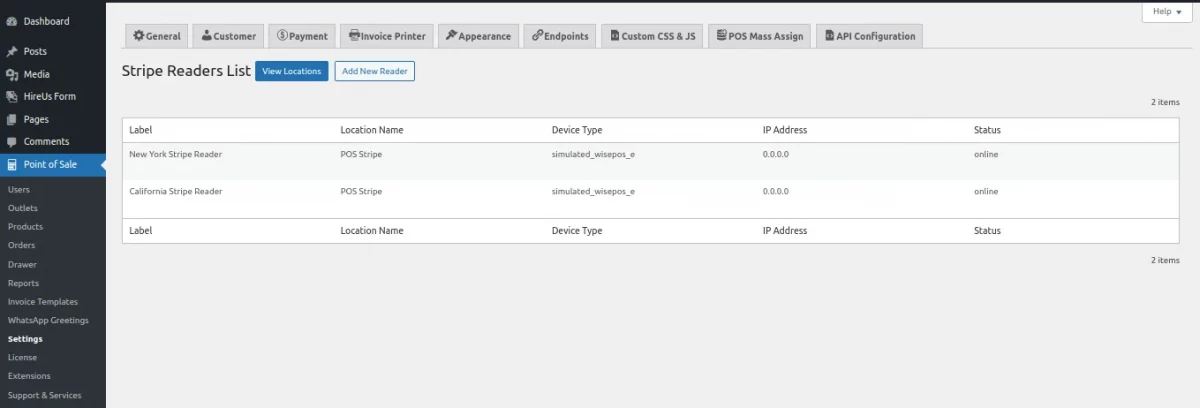
Now, tap on Create Reader and it’ll be visible under the Stripe Readers List as per below image,

Manage Stripe Configuration/Tip
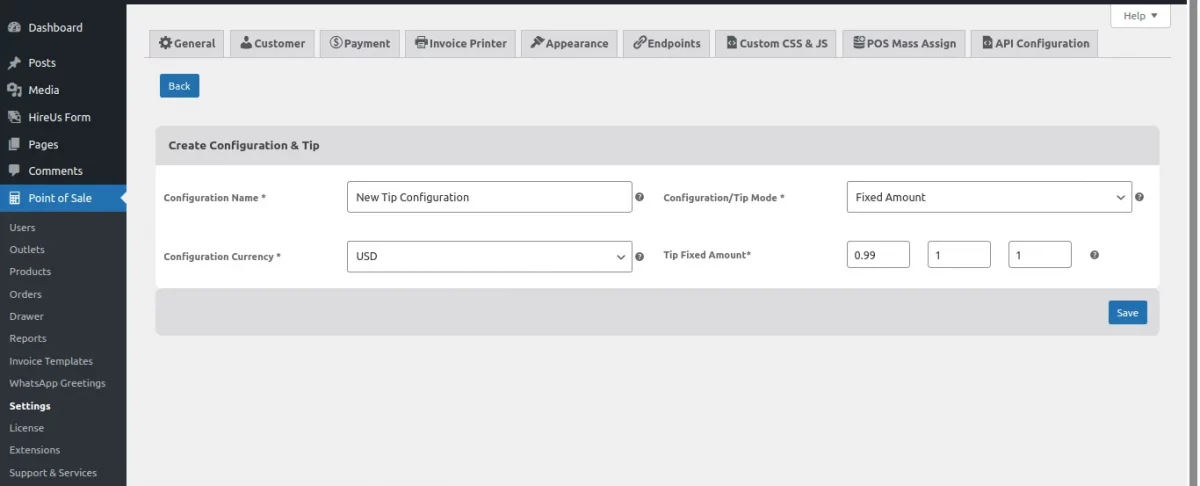
Admin can create new tip configurations. here, they get the following options,
- Configuration Name – Enter Stripe configuration and tip name.
- Configuration/Tip Mode – Set the mode as Fixed Amount, Percentage or Smart Tips.
- Configuration Currency – Set the currency of configuration.
- Tip Fixed amount – Enter three fixed amount to display on reader for tip.
Customer View
The customer can connect multiple card swipe machines and can see the listing and the status of all the devices.

Now, the POS agent will add the products to the cart and proceed to checkout he has to select the POS Stripe Reader option as shown
If you require expert assistance or want to develop custom unique functionality, hire WooCommerce Developers for your project.

Now, the POS agent will enter the amount and click on the Confirm Payment and Generate Invoice button to make payment.

Next, the payment screen will be visible on the Stripe Reader. From there, customers can pay through their cards and they’ll also be able to add Tips as set by admin or a custom tip.
If customers do not wish to add a tip, they can simply tap on the No Tip option.
A Cancel button is also displayed on the Stripe reader screen to cancel the payment.


Thus, the payment is made and the order receipt will be generated as shown below.


Stripe Invoice
Sales agents can also generate invoices through the Stripe payment gateway after making the payment.
To generate a stripe invoice navigate to Order > Print Stripe Invoice.
Click on click here.

Now, it will redirect to the new tab and the sales agent can download the invoice.

Support
For any technical assistance kindly raise a ticket or reach us by email at support@webkul.com.
For any queries or custom development needs, our WooCommerce POS Development Services team is here to help. Contact us to learn more
Also, discover various solutions to add more features and enhance your online store by visiting the WooCommerce plugins.
Thanks for Your Time! Have a Good Day !!