User Guide for Etsy Odoo Connector
Table of Content
Odoo Multichannel Etsy Connector is a dependent module on Odoo Multi-Channel Sale Module, which is the framework module to provide the structure to integrate Etsy with Odoo. Install the base module first for Odoo Multichannel Etsy Connector to work properly.
Introduction
Etsy is an evolving marketplace platform which is leading all over the world. It offers global exposure to the sellers and attracts buyers to purchase the products. Etsy is a simple yet effective marketplace as it offers abundant features to the users.
If your business depends on all different platforms then you need to look for a platform which offers a centralized data management solution.
Odoo is a complete business solution which lets you manage all backend part in a centralised way. It is a perfect software to manage the data of your Etsy stores.
But, how to connect Etsy store(s) with Odoo?
Odoo Multichannel Etsy Connector offers you the perfect solution to connect Odoo to Etsy. Whether it is seller data(like orders and catalogs) or inventory you can manage it all without any hassles. Odoo Multichannel Etsy Connector facilitates synchronization, import and export as per your business requirements.
FEATURES
Here is the concise list of the features. Visit the Store Page to know the detailed features of Odoo Multichannel Etsy Connector
- The Etsy Odoo Connector provides the following features:
- Import Products, Customers, and Orders from Etsy to Odoo using:
- Import All
- Import by IDs
- Import by Date (From)
- Export new Products and Categories from Odoo to Etsy.
- Update existing Etsy Products and Categories directly from Odoo.
- Automatically create and link imported orders with their respective customers.
- Import complete order information, including:
- Products
- Taxes
- Shipping Details
- Payment Information
- Order Status
- Configure the Etsy instance using the Etsy Access Key and Shop Name.
- Generate Callback URL for Etsy application configuration.
- Fetch Etsy credentials directly from Odoo.
- Verify the Etsy application using the Check Etsy App option.
- Migrate Etsy access to V3 using the Migrate in V3 option.
- Configure Order State Mapping between Etsy and Odoo Sales Orders.
- Automatically synchronize Products, Customers, and Orders using Cron Jobs.
- Synchronize inventory using:
- Quantity on Hand
- Free Quantity
- Forecasted Quantity
- Configure inventory synchronization based on Warehouse and Stock Location.
- Synchronize Order Status from Odoo to Etsy.
- Synchronize Product Details including:
- Title
- Description
- Price
- SKU
- Inventory
- Images
- Variants
- Synchronize Product Images.
- Maintain Synchronization History and Mapping Records.
- View Synchronization Logs and Error Reports.
- Manage multiple Etsy shop instances.
- Support Manual and Automatic Synchronization.
INSTALLATION
1) After purchasing Odoo Etsy connector, you will get a link at your registered email Id to download the module.
2) Extract the file on your system after the download finishes. You will be able to see a folder named- ‘etsy_odoo_bridge’.
3) Copy and paste this folder inside your Odoo Add-Ons path.
4) Now, open the Odoo App and click on the Settings menu. Here, click on Activate the Developer Mode.
5) Then, open on Apps menu and click on ‘Update Modules List’.
6) In the search bar, remove all the filters and search ‘etsy_odoo_bridge’.
8) You will be able to see the module in the search result. Click on ‘Install’ to install it.
WORKFLOW
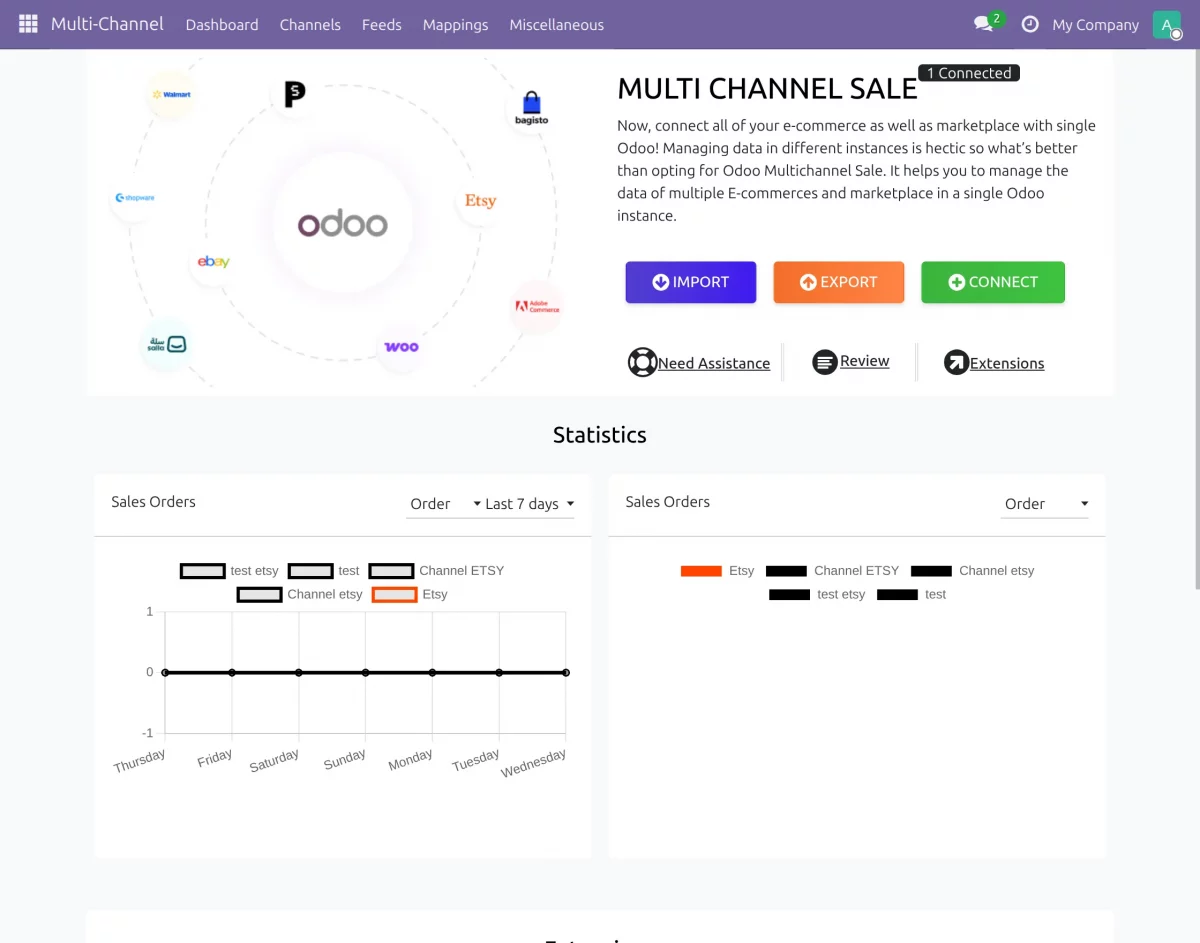
1. Open the Multi-Channel Dashboard
Log in to your Odoo database.
Navigate to:
Multi-Channel → Dashboard
Click Create to create a new Etsy instance.

2. Configure Etsy Instance
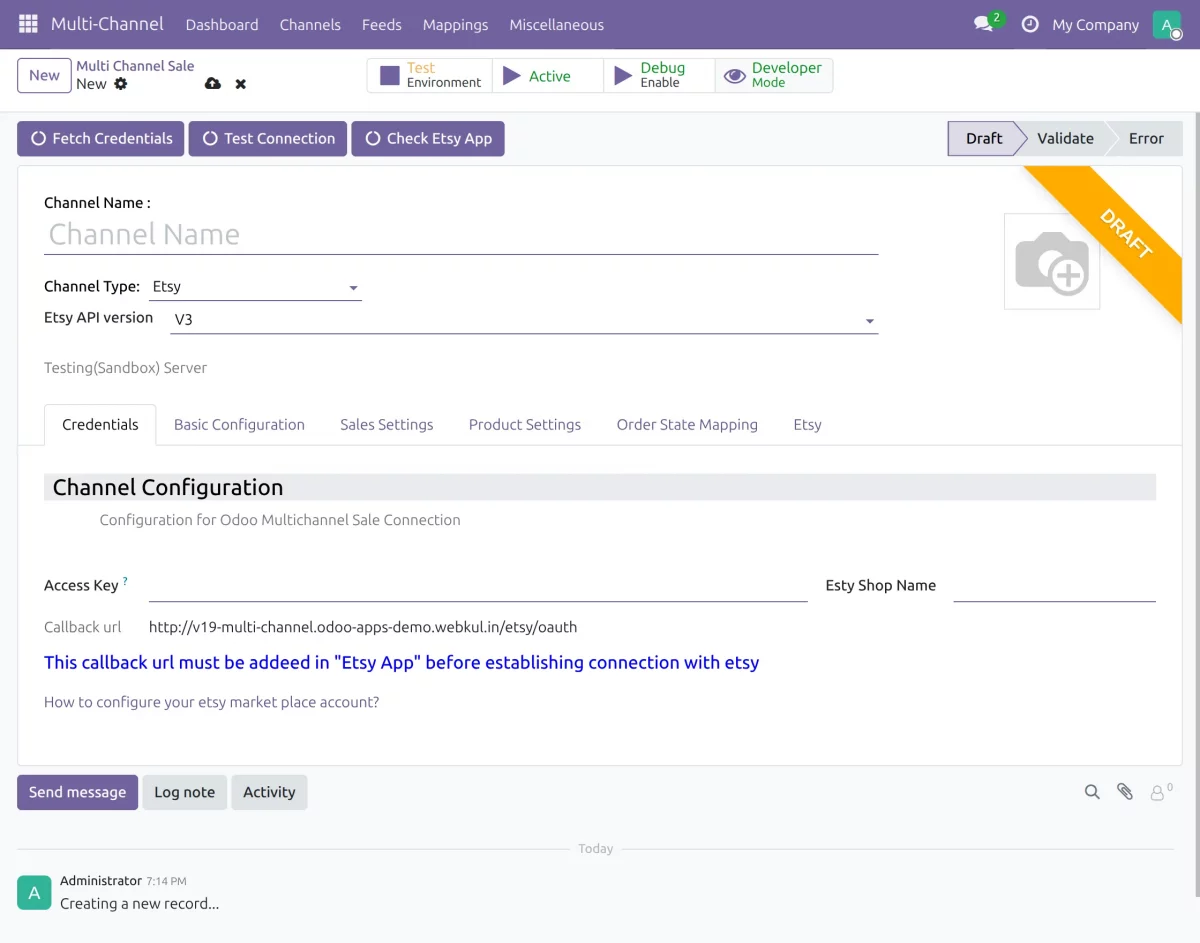
Enter the required channel details.
Configure:
- Channel Name
- Channel Type
- Shop Name
- Etsy Access Key
Note:
Etsy Access Key = Etsy Key String : Etsy Shared Secret Key
To configure the Etsy Access Key, combine the Etsy Key String and Etsy Shared Secret Key using a colon (:) and enter the generated value into the Etsy Access Key field.
The connector generates the Callback URL, which should be configured in your Etsy application.
3. Configure Etsy Application
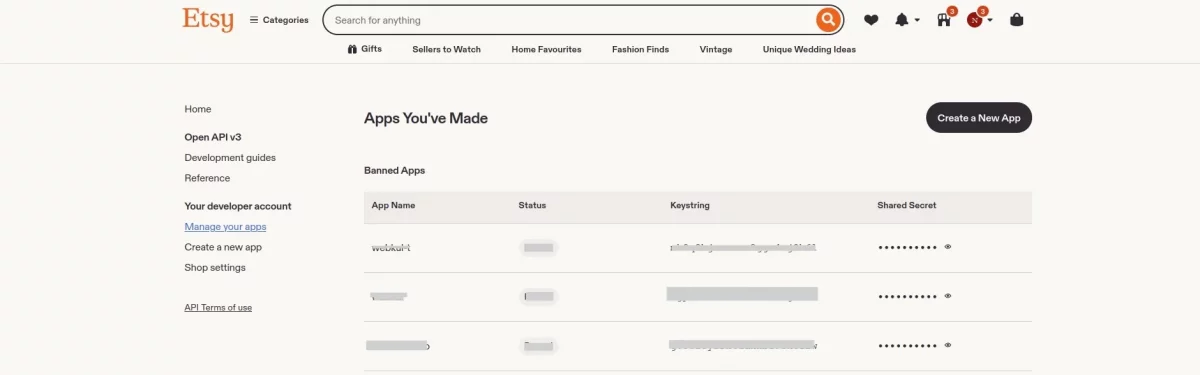
Open your Etsy Developer application.
Configure the generated Callback URL.
Save the configuration.
Return to Odoo.

4. Fetch Etsy Credentials
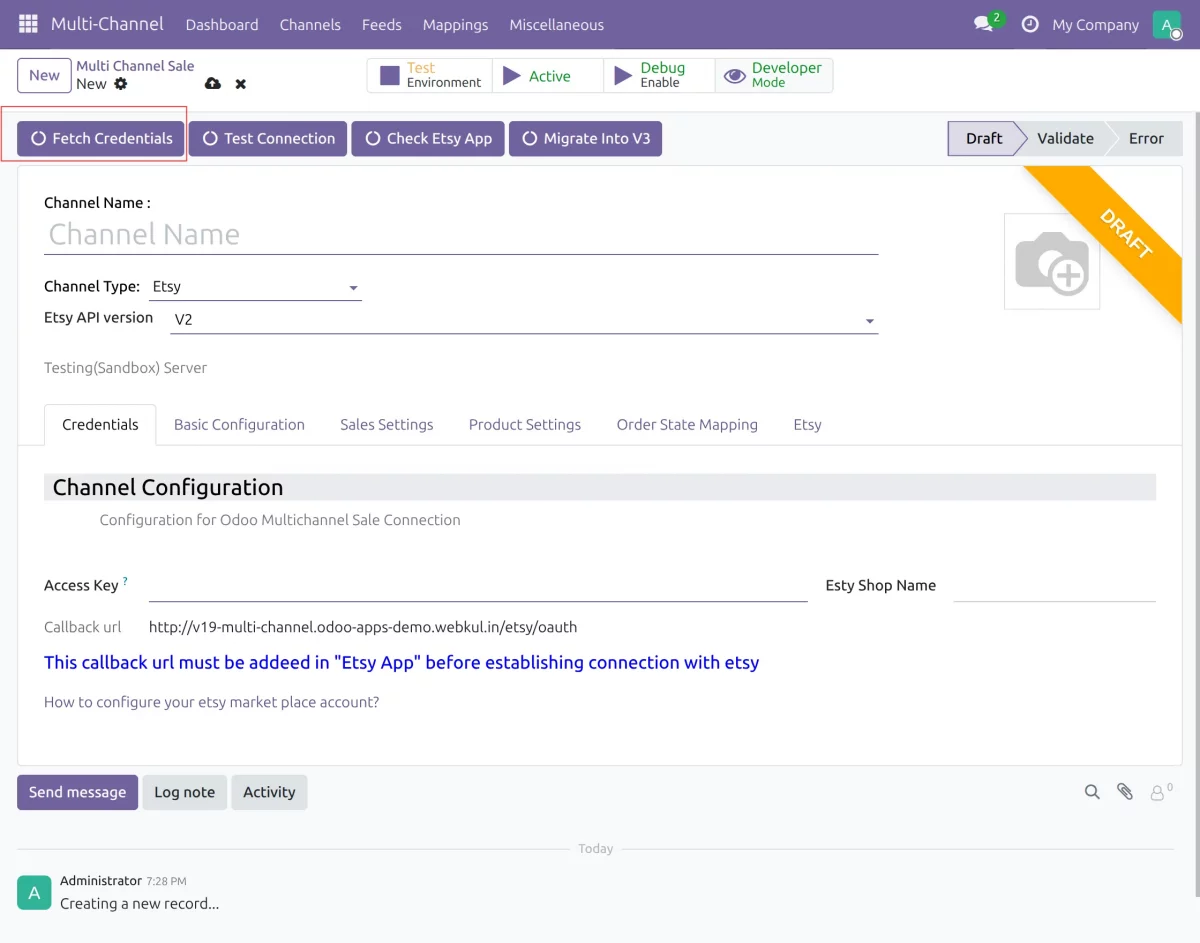
Click Fetch Credentials.
The connector retrieves the required authorization details from Etsy.
After fetching the credentials, use Check Etsy App to verify the connection.
If your Etsy application requires migration, click Migrate in V3 to migrate the access to Etsy V3.
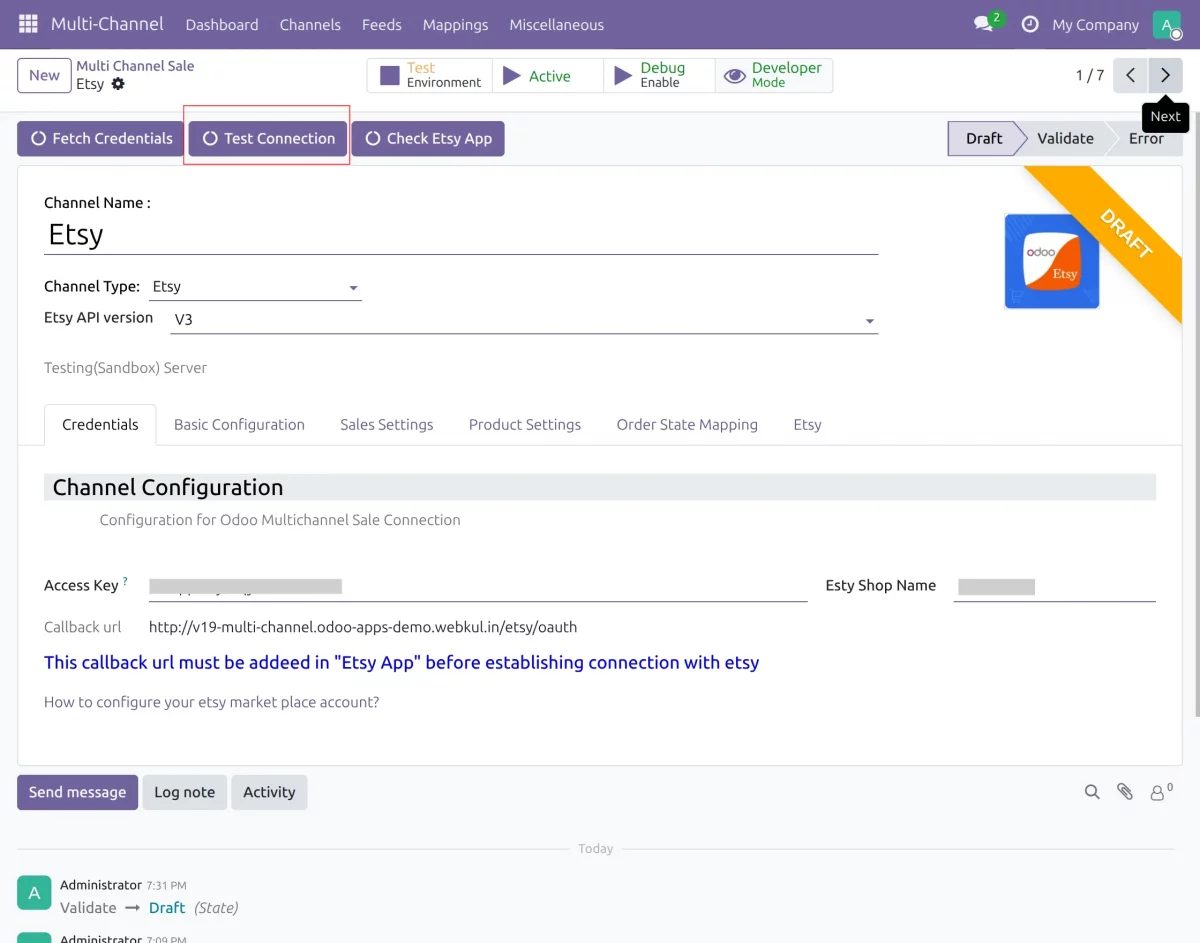
5. Test the Connection
After configuring the credentials, save the instance.
Verify the connection to ensure Etsy and Odoo are successfully connected.
6. Configure Order State Mapping
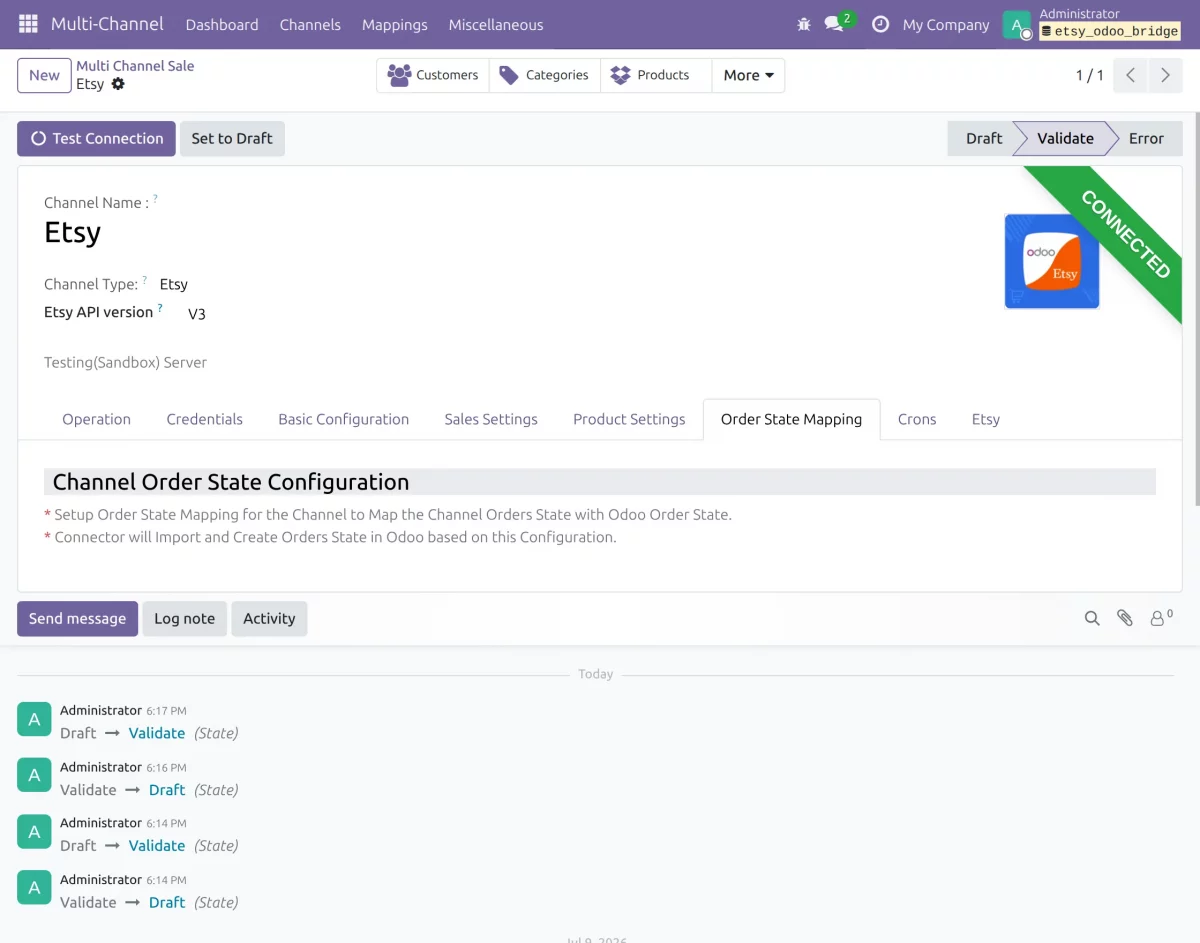
Open the Order State Mapping section.
Map Etsy order statuses with Odoo Sales Order states.
This ensures imported orders automatically receive the appropriate Sales Order state.
7. Configure Basic Settings
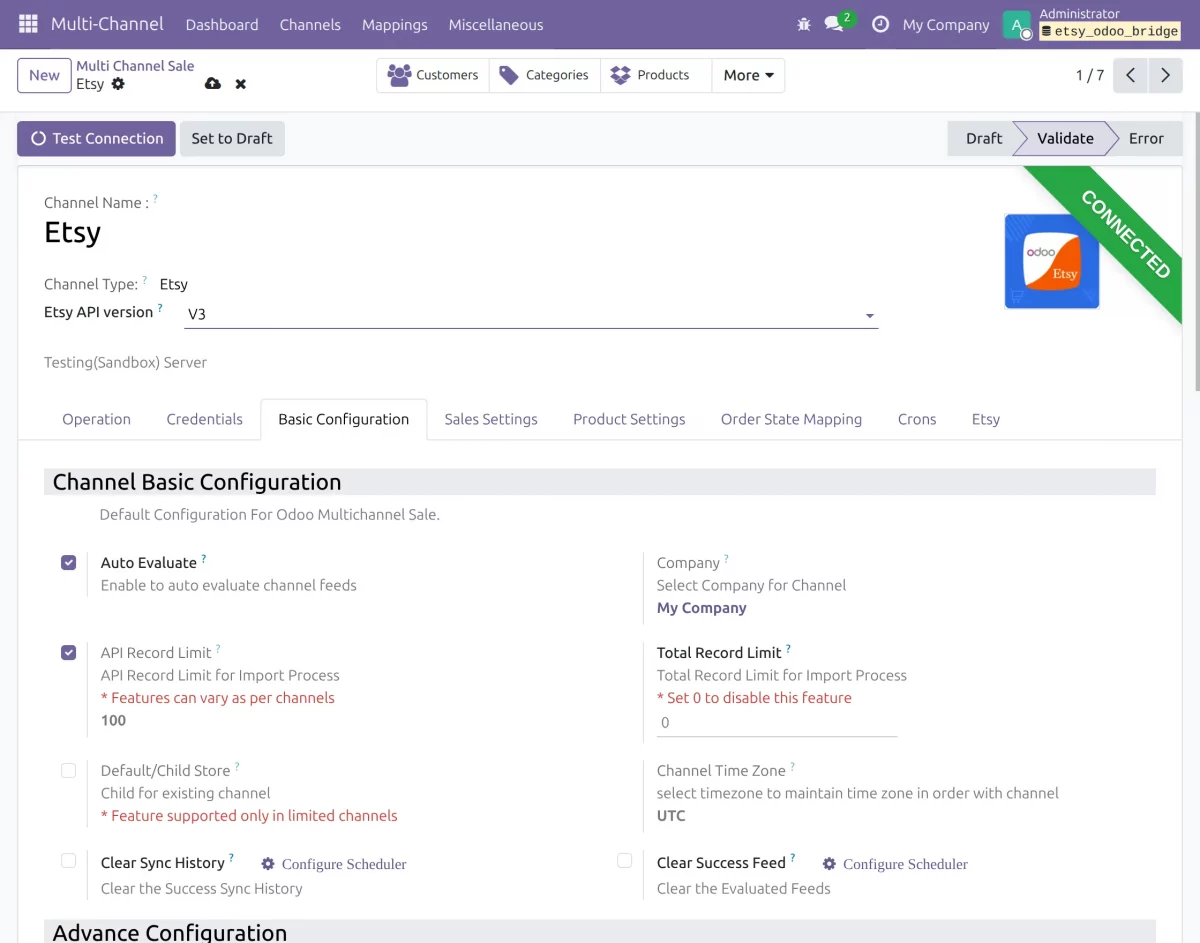
Configure the required channel settings.
Examples include:
- Sales Team
- Warehouse
- Stock Location
- Default Category
- Default Pricelist
- SKU Pattern (if applicable)
Configure inventory synchronization using:
- Quantity on Hand
- Free Quantity
- Forecasted Quantity
Select the Warehouse and Stock Location that should be used for stock synchronization.
8. Configure Synchronization Options
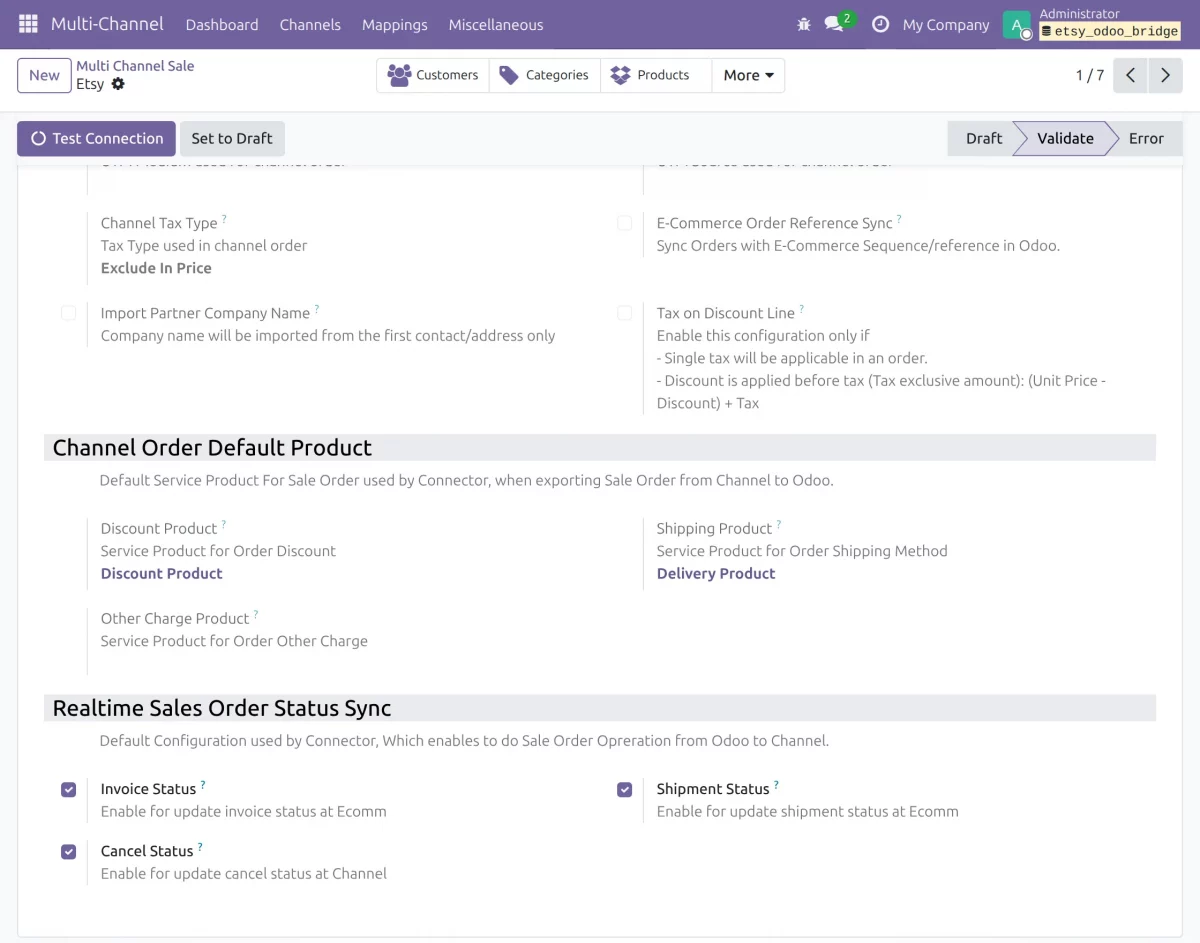
Enable or disable synchronization according to your business requirements.
Available options include:
- Product Quantity (Inventory) Synchronization
- Order Status Synchronization (Cancel Order)
- Invoice Status Synchronization
- Delivery Status Synchronization
Invoice Status, Delivery Status, and Order Status synchronization are performed automatically based on the configured channel synchronization settings.
Manual Product Quantity (Inventory) Synchronization is available through the Odoo Multi-Channel Sale base module, allowing you to manually synchronize product inventory from Odoo to the connected Etsy shop whenever required.
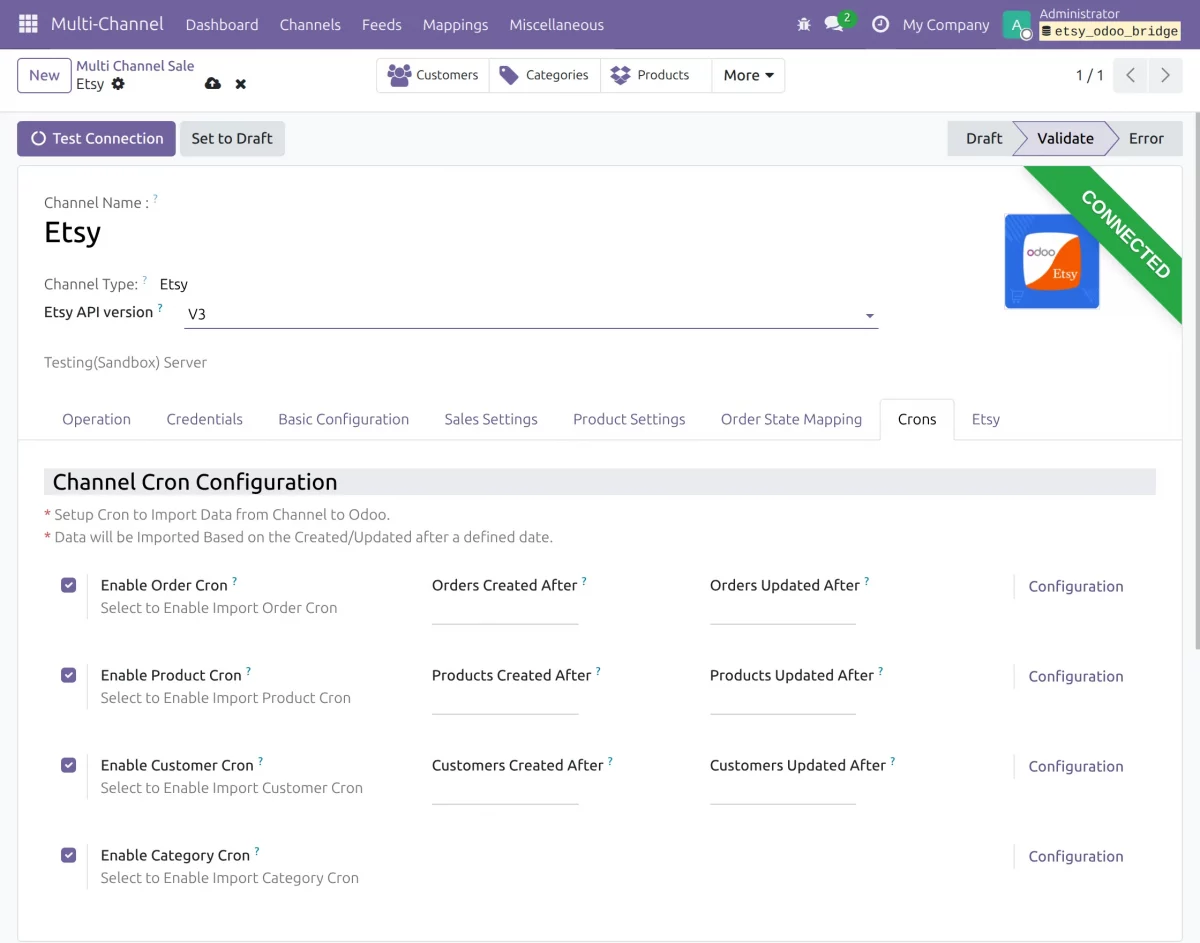
9. Configure Cron Jobs
Navigate to the Scheduler configuration.
Configure automatic synchronization for:
- Products
- Customers
- Orders
Cron jobs automatically synchronize the selected records at scheduled intervals.
10. Import Data from Etsy
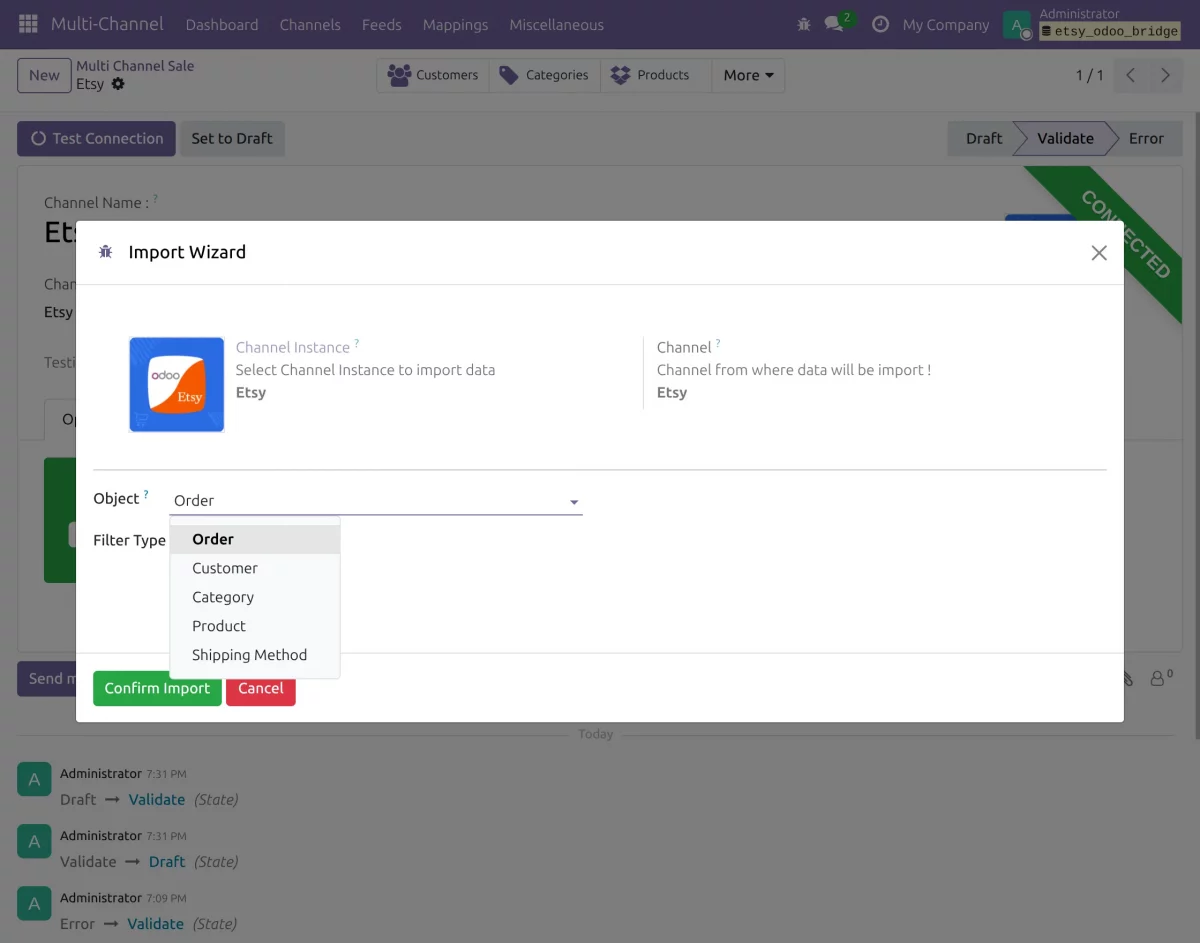
Open the Etsy Dashboard.
Click Import.
Select the object to import.
Available objects include:
- Products
- Categories
- Customers
- Orders
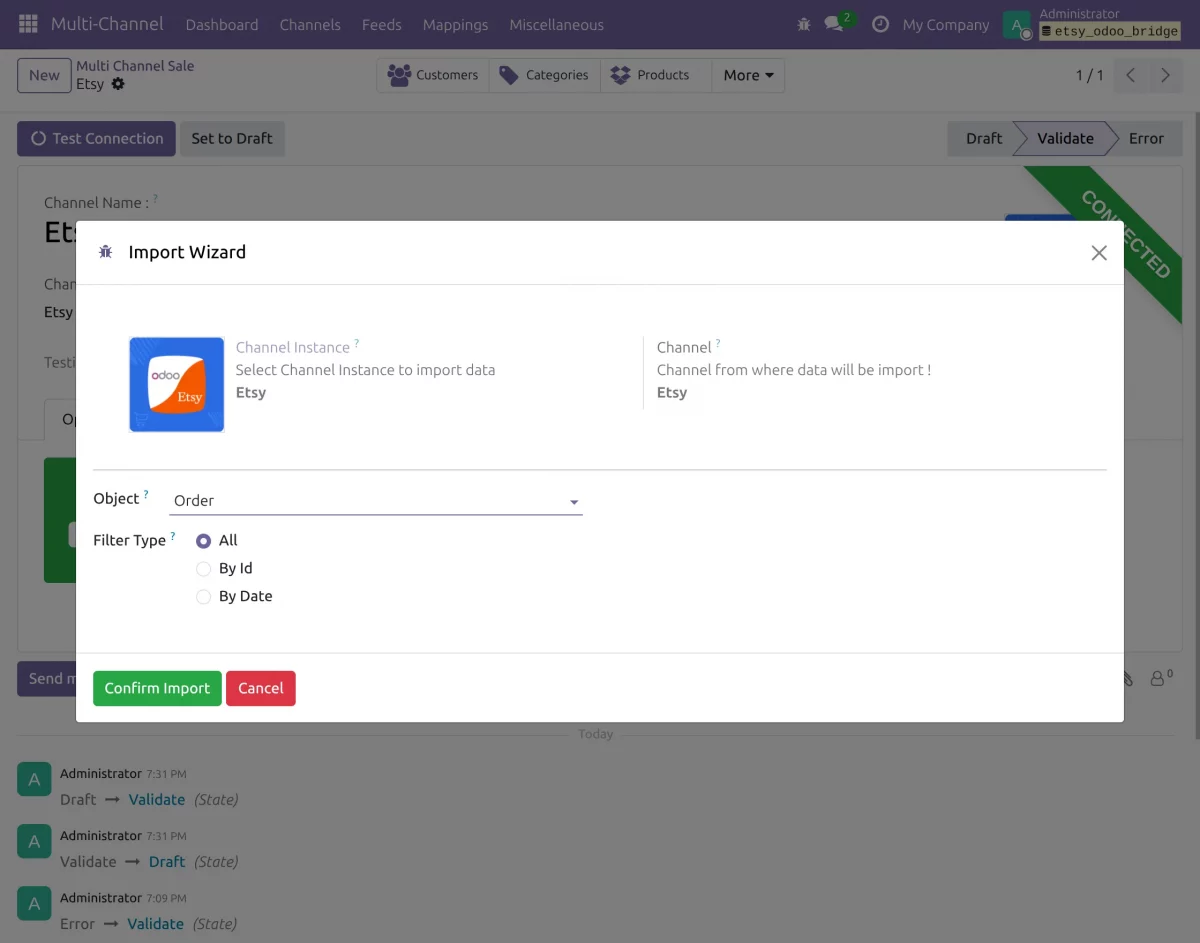
Choose one of the import filters.
Supported filters:
- Import All
- Import by IDs
- Import by Date (From)
Start the synchronization.
Imported orders automatically create or link their corresponding customers in Odoo.
The connector imports complete order information, including:
- Products
- Taxes
- Shipping Details
- Payment Information
- Order Status
11. Export Data to Etsy
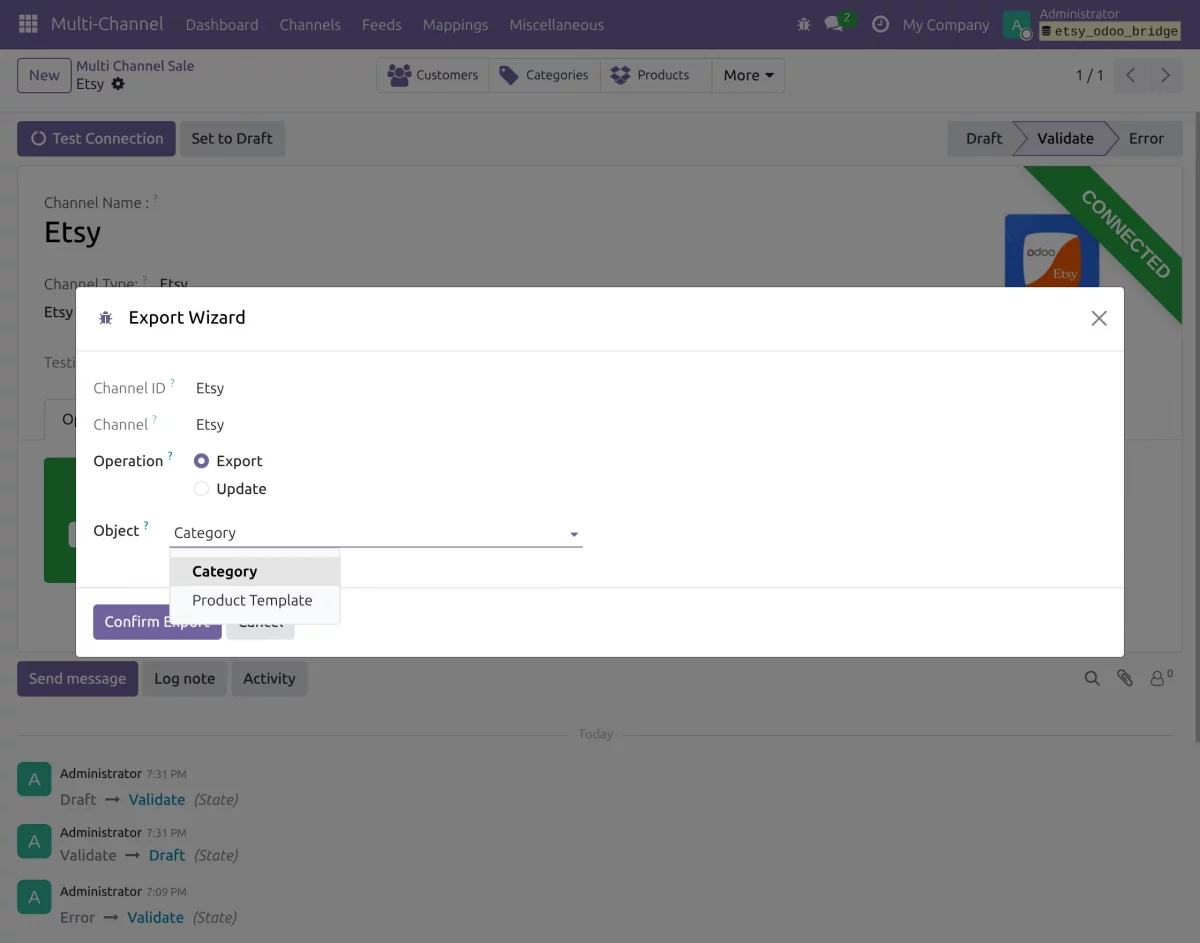
Click Export.
Choose the object.
Supported exports include:
- Products
- Categories
You can:
- Export new products.
- Update existing Etsy products.
- Export new categories.
- Update existing Etsy categories.
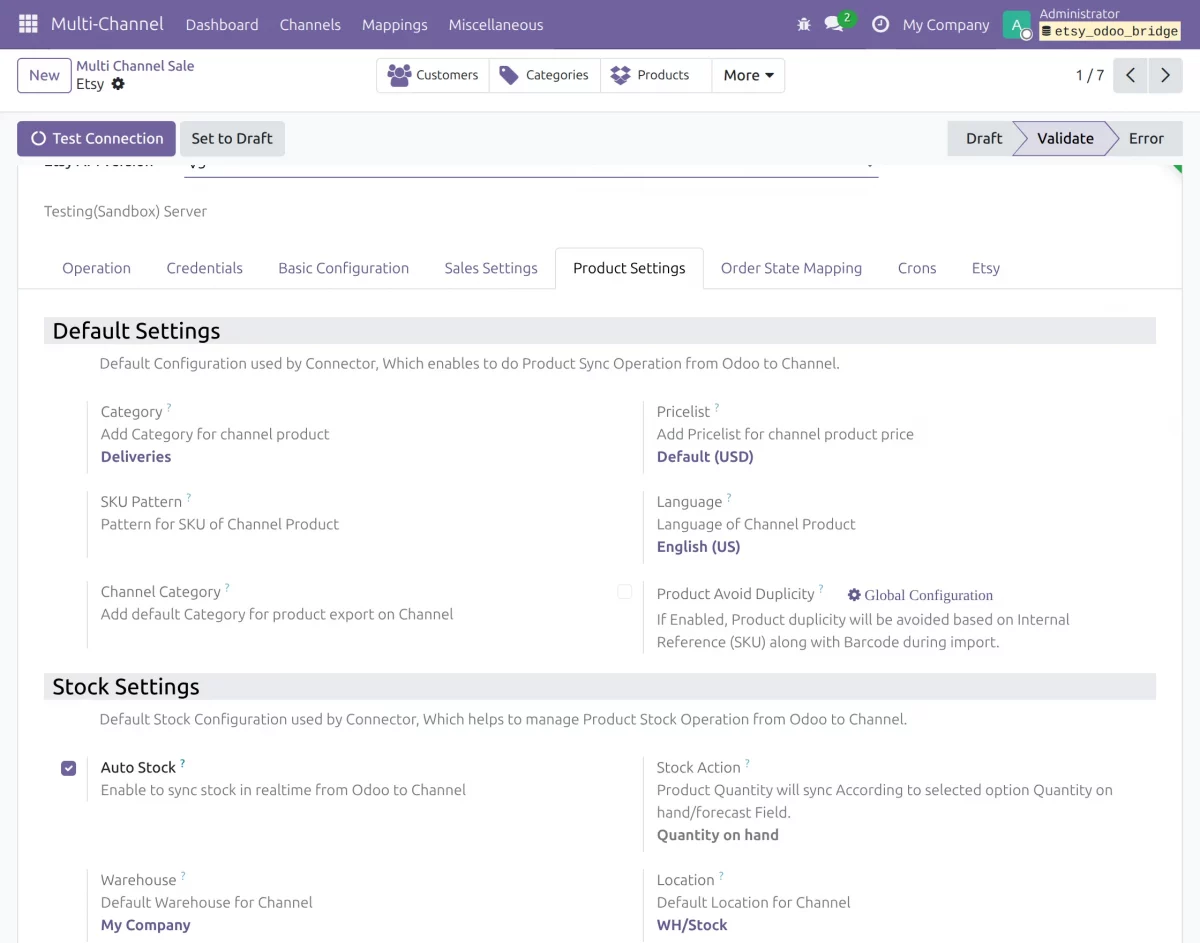
12. Product Synchronization
The connector synchronizes product information between Etsy and Odoo.
Supported product details include:
- Title
- Description
- Price
- SKU
- Inventory
- Images
- Variants
Product images are also synchronized from Etsy into Odoo.
13. Synchronization History
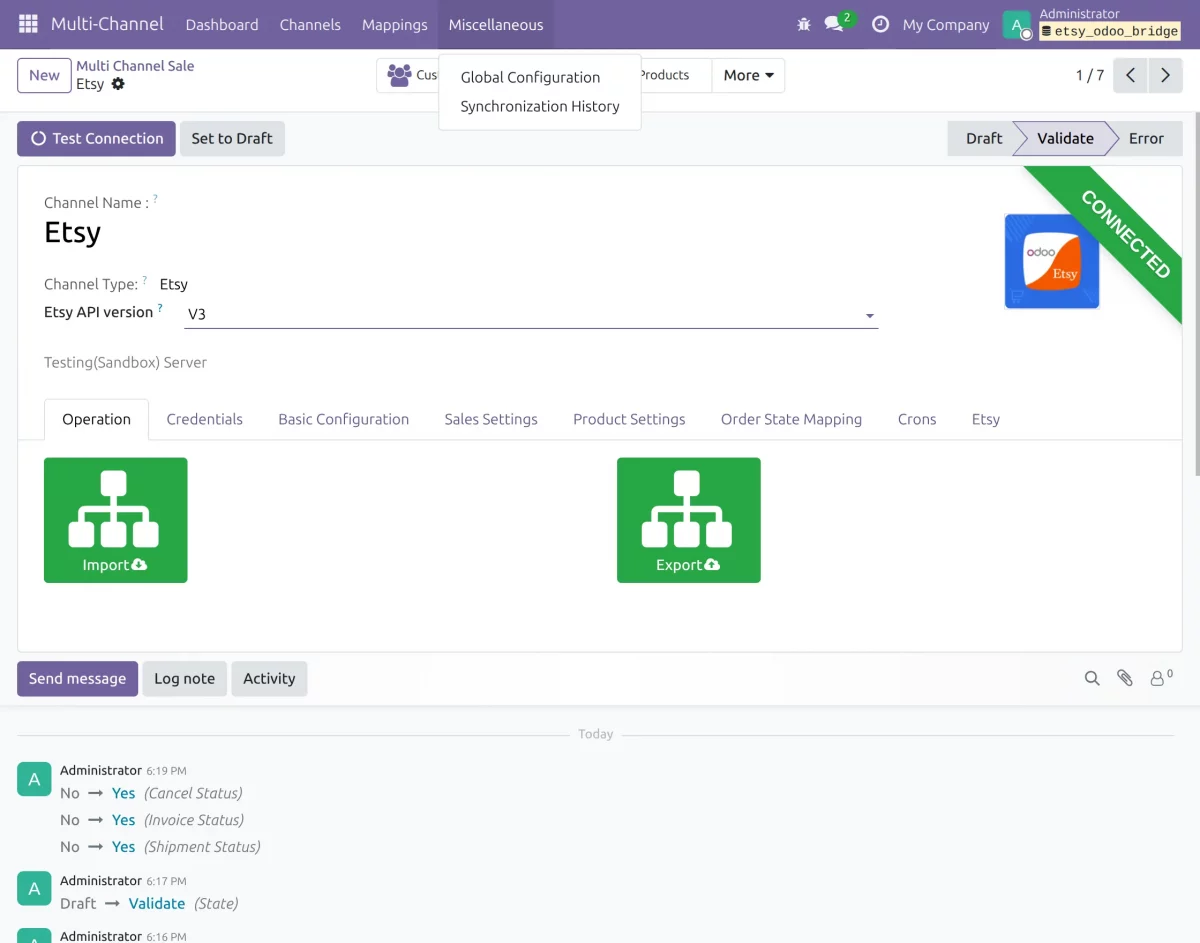
The connector maintains synchronization records for:
- Products
- Customers
- Orders
These records help track every synchronization operation.
14. Mapping Records
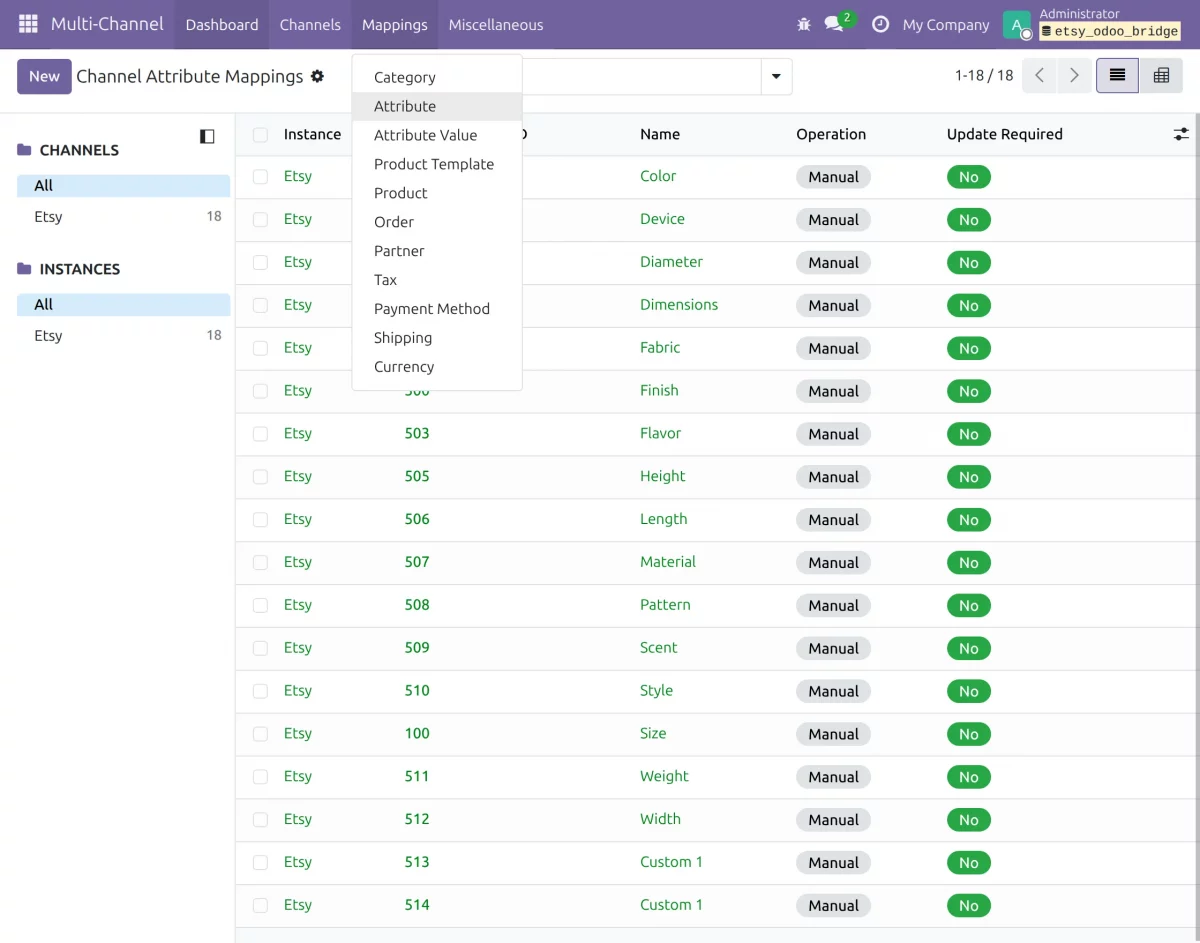
The connector maintains mapping records between Etsy and Odoo entities.
Mappings are created for:
- Products
- Categories
- Product Attributes
- Customers
- Orders
- Taxes
- Shipping Methods
- Payment Methods
- Other product- and order-related data required for synchronization
These mappings help prevent duplicate records and simplify future synchronizations.
Need Help?
Hope you find the guide helpful! Please feel free to share your feedback in the comments below.
If you still have any issues/queries, please create a ticket at the UV Desk.
I hope this helps. In case of any further queries, contact us at our support mail:support@webkul.com
Thanks for paying attention!!