User Guide for Odoo Multichannel Sale
Table of Content
Introduction
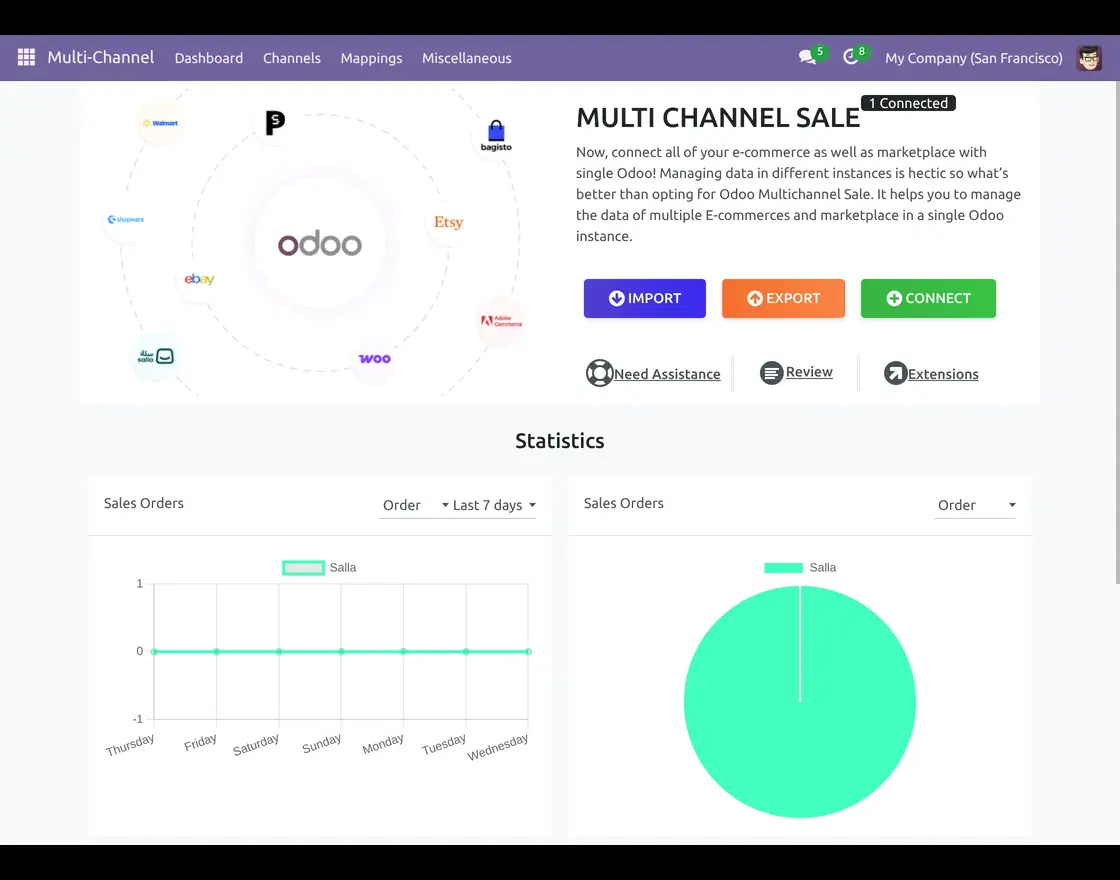
Odoo Multichannel Sale is a perfect solution to manage your external online stores from Odoo.It connects multiple sales platforms with your Odoo backend easily.
You can link Shopify, WooCommerce, Salla, Adobe Commerce(Magento), PrestaShop, BigCommerce, and Bagisto without any technical complexity.
The module adds simple buttons to help import, export, and sync data smoothly. Odoo Multichannel Sale helps you manage orders, stock, and customers from one place.
This reduces manual effort and keeps all channels updated in real time.
You can also look into the Odoo 19 migration, which is now available, to review its enhanced features.
Features
- Odoo Multichannel Sale helps connect multiple online stores and marketplaces.
- Import and export products, orders, and customers with one click
- Keep your stock updated in real time across all platforms
- Track sales, inventory, and customer data with a smart dashboard
- Set up scheduled data sync using built-in cron jobs
- View sync history and records through the feed management system
- Map order statuses between sales channels and Odoo correctly
- Control and manage all connected stores from one Odoo screen
- Perform real-time or bulk operations for faster data handling
Installation
- Once you purchase the App from Webkul store, you will receive a link to download the module’s zip file.
- Extract the file on your system after the download finishes. As a result, you will be able to see a folder named- ‘odoo_multi_channel_sale’.
- Copy and paste this folder inside your Odoo Add-Ons path.
- Now, open Odoo App and click on the Settings menu. Here, click on Activate Developer Mode.
- Then, open Apps menu and click on ‘Update Modules List.’
- In the search bar, remove all the filters and search ‘odoo_multi_channel_sale’
- You will be able to see the module in the search results. Click on ‘Install’ to install it.
Workflow
- After installing Odoo Multichannel Sale module, login to your Odoo database and navigate to the Multichannel module from the main dashboard.
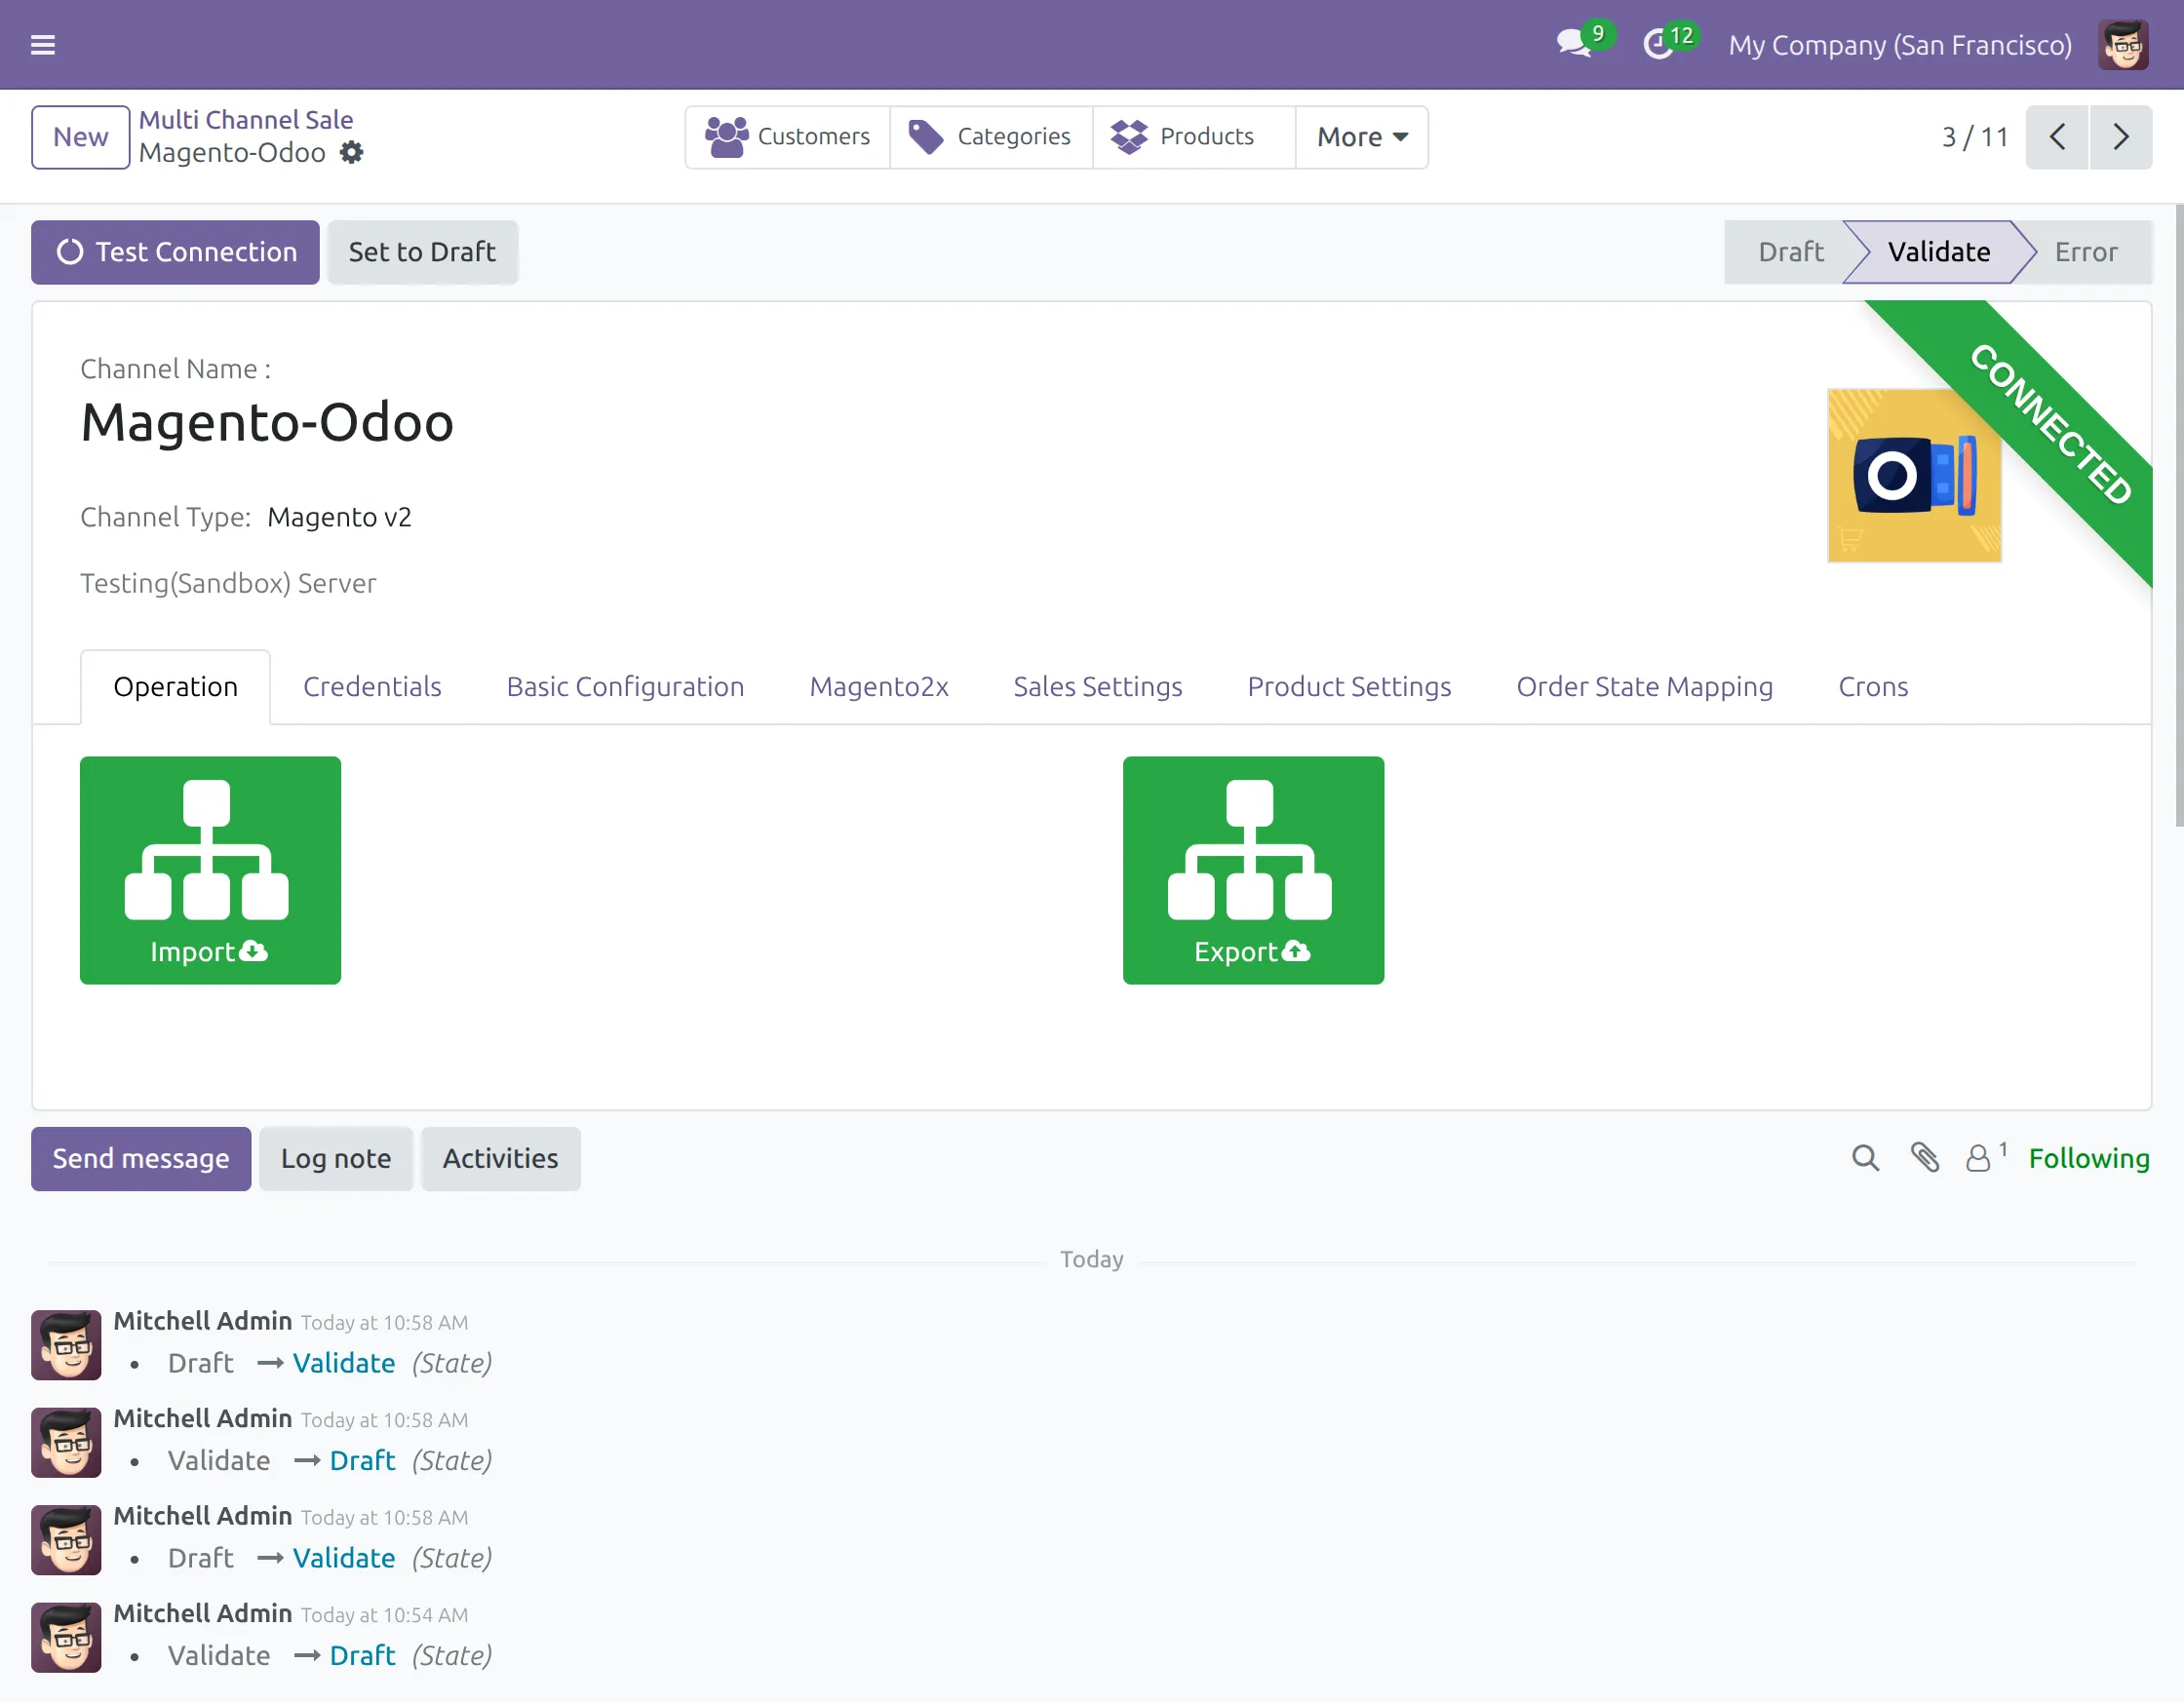
Now, click on the connect button to connect any marketplace or e-commerce platform with Odoo instance.

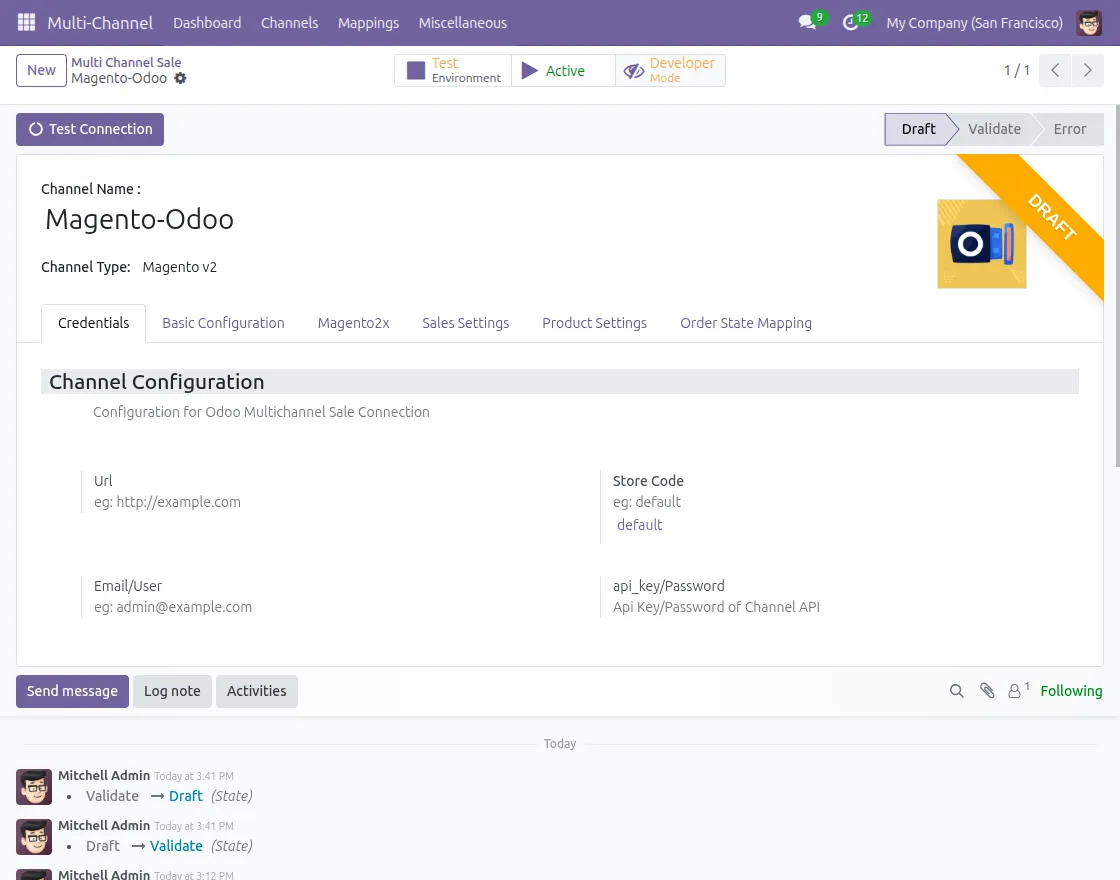
2. Enter your channel name, select the channel type, and add required credentials like URL, email, and API key.
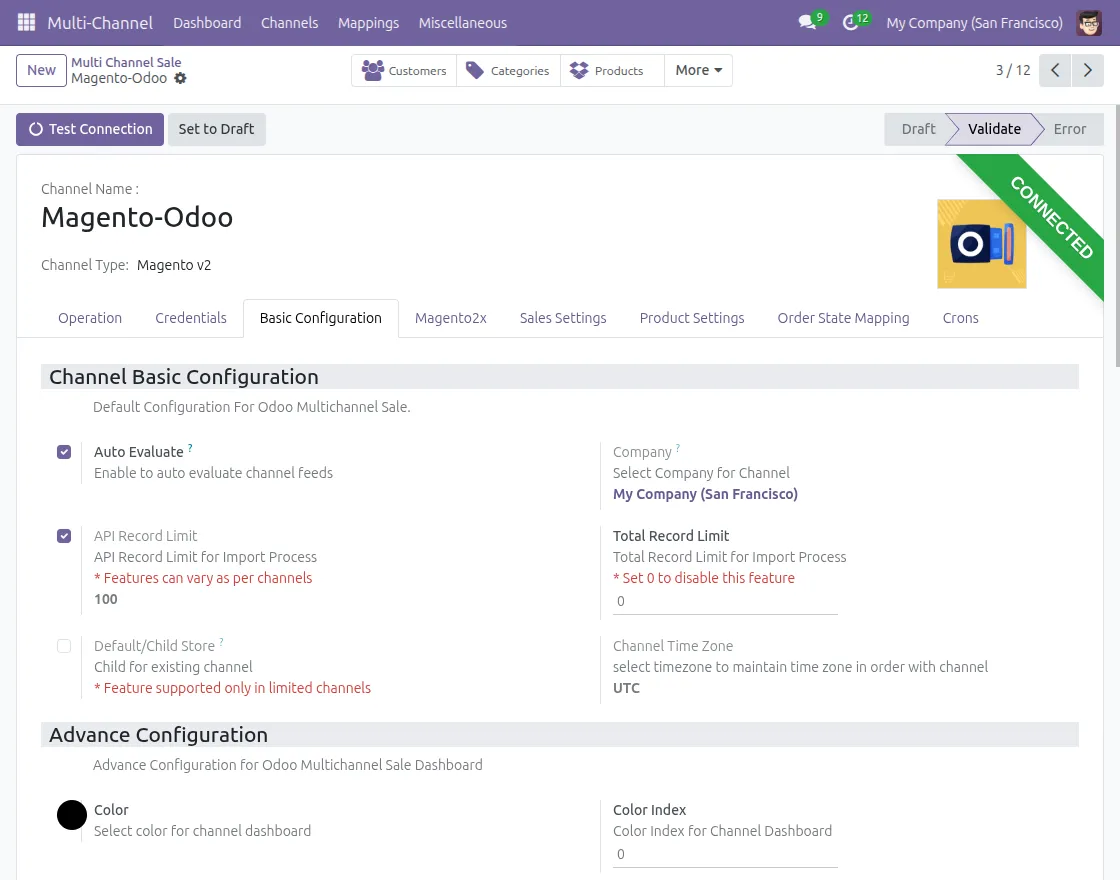
3. Go to the Basic Configuration tab to set up default product sync settings for your selected channel.
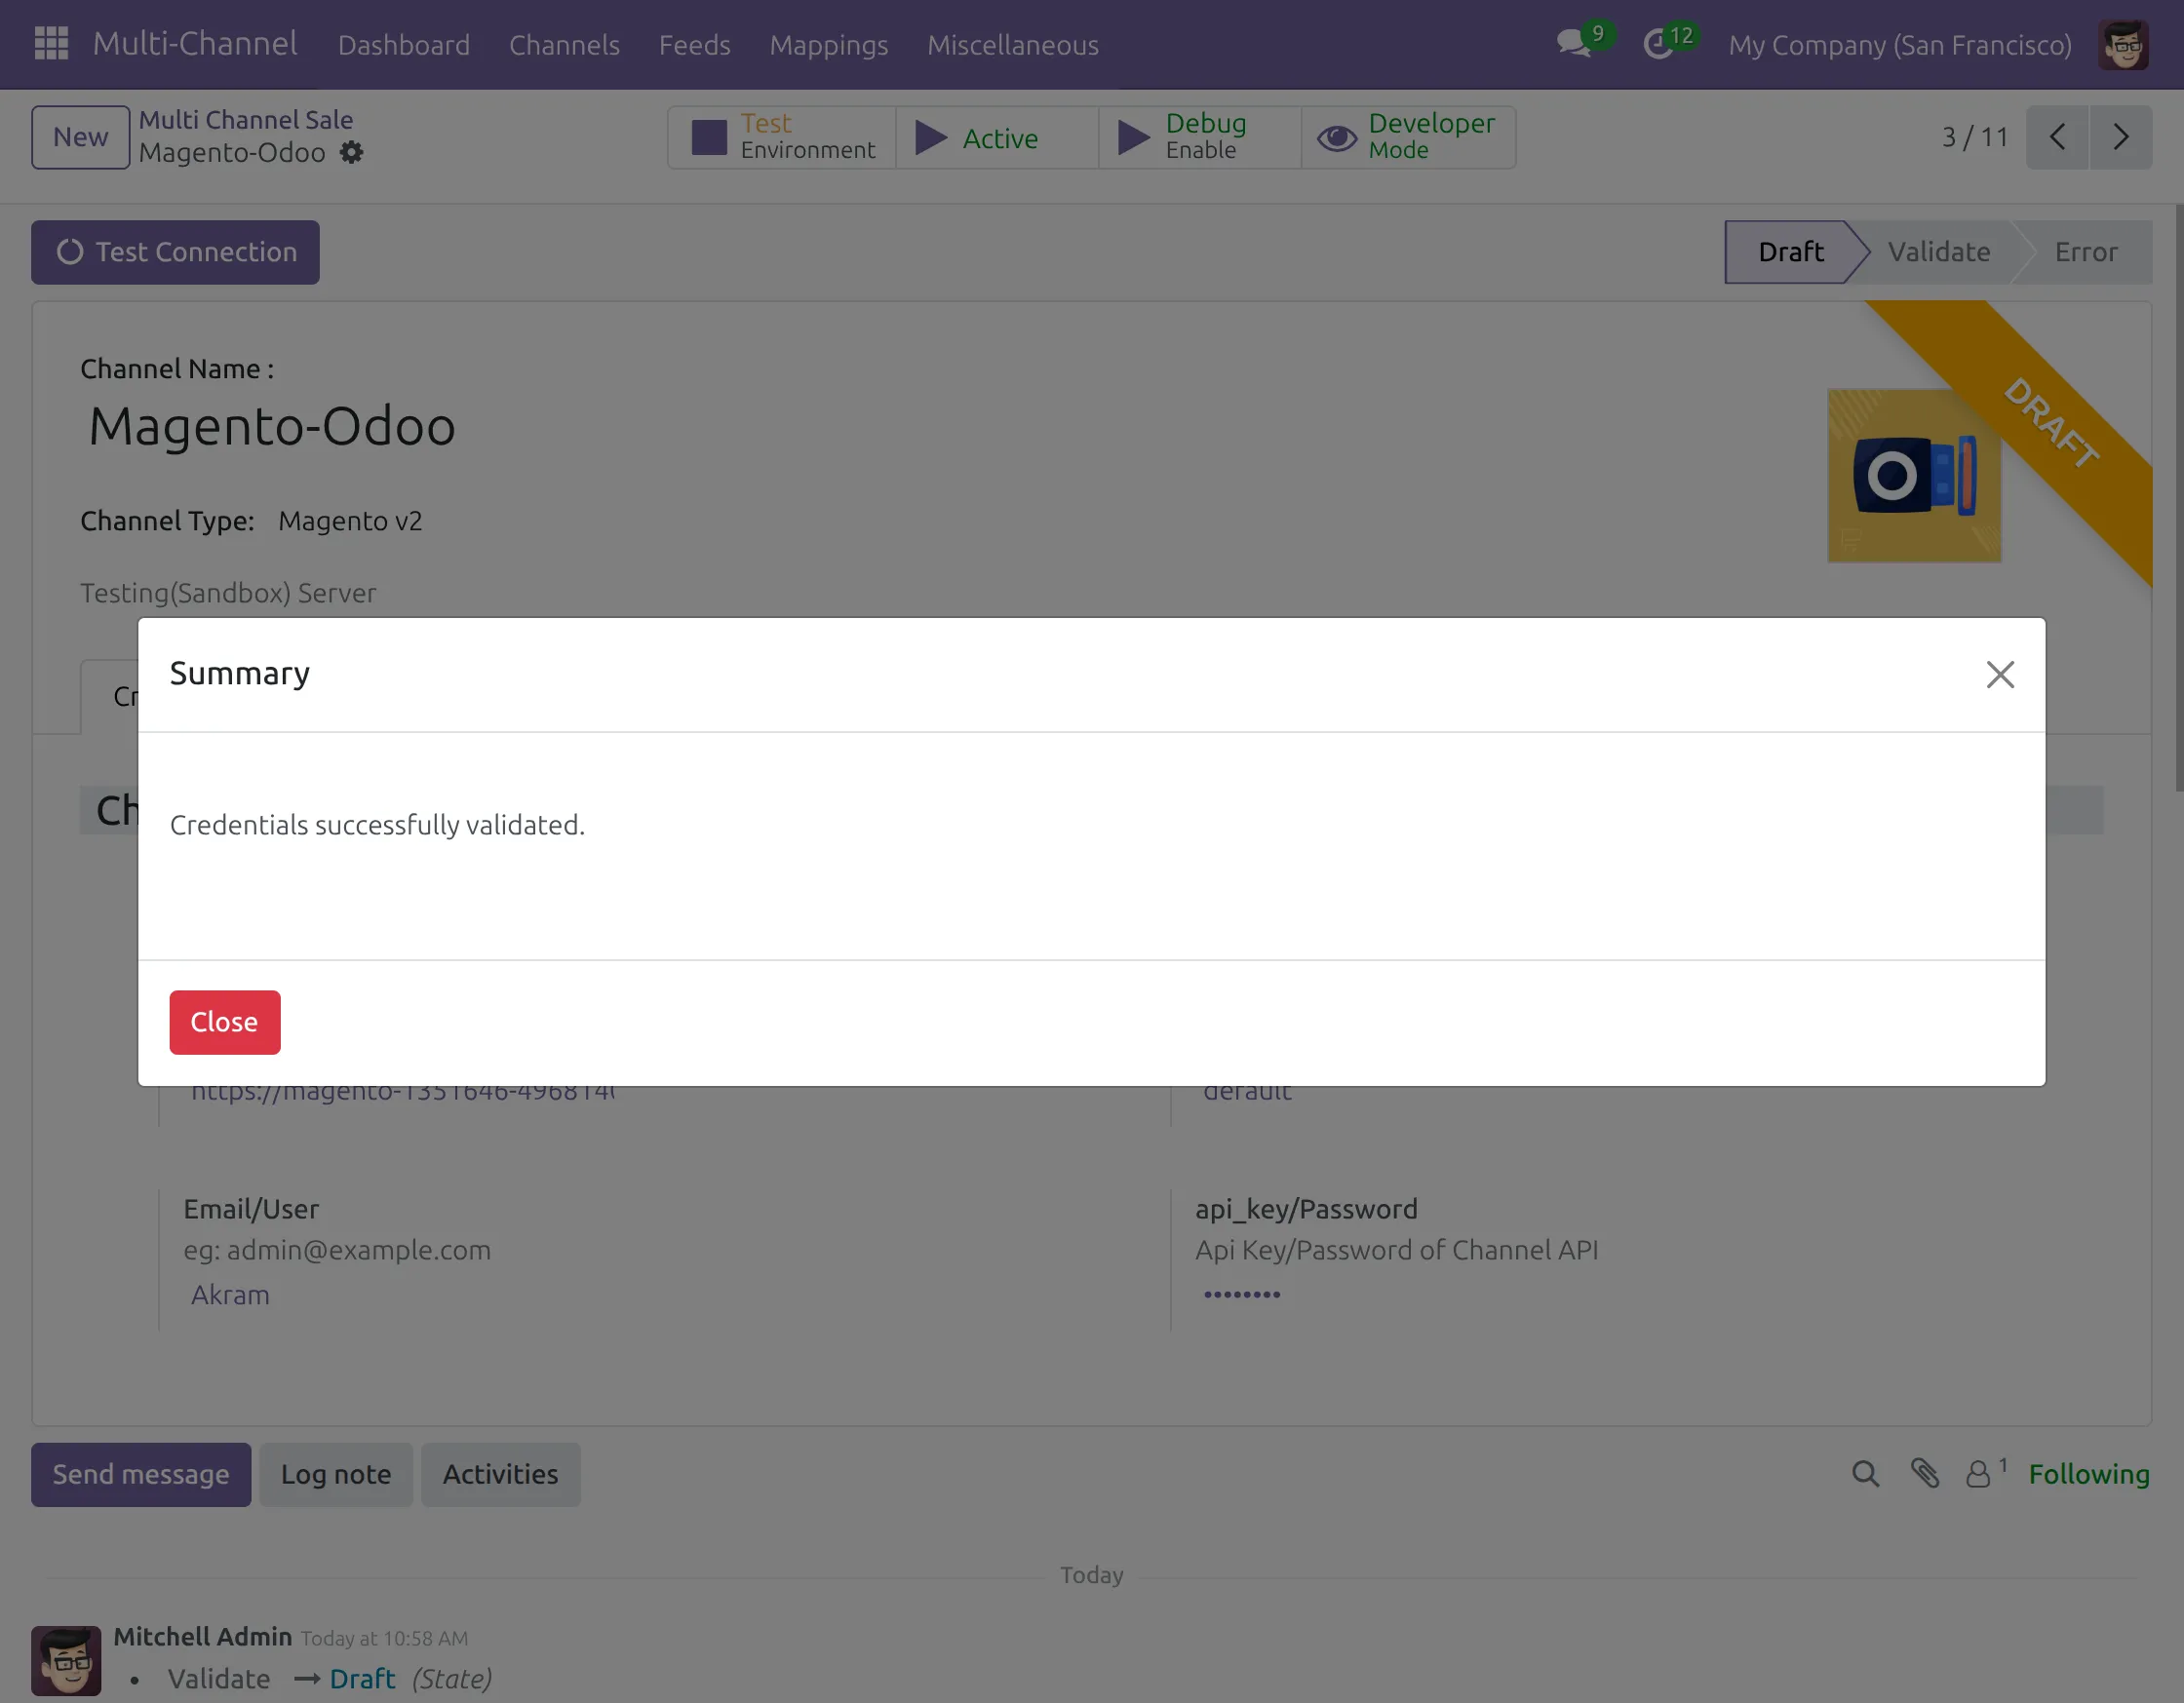
4. Click on “Test Connection” to verify the setup. Once successful, a confirmation pop-up will appear.
5.Go to the “Operations” tab, where you will find Import and Export options for data management.
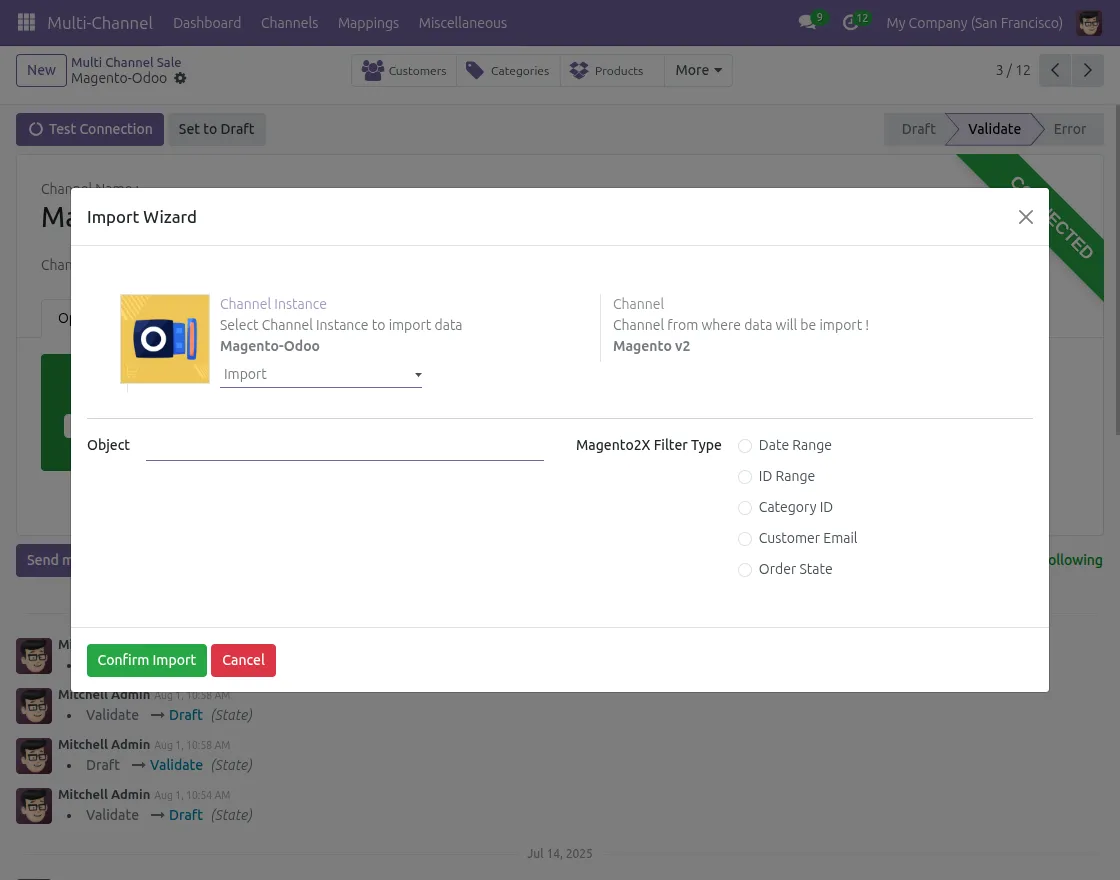
6. Click “Import” button to open the import wizard and bring data from your channel to Odoo.
In the import wizard, choose object type (products, categories, customers), apply filters, and click “Import” to complete.
7. Import process completes successfully with a popup showing “Import Success” message, and data is imported and updated to Odoo.

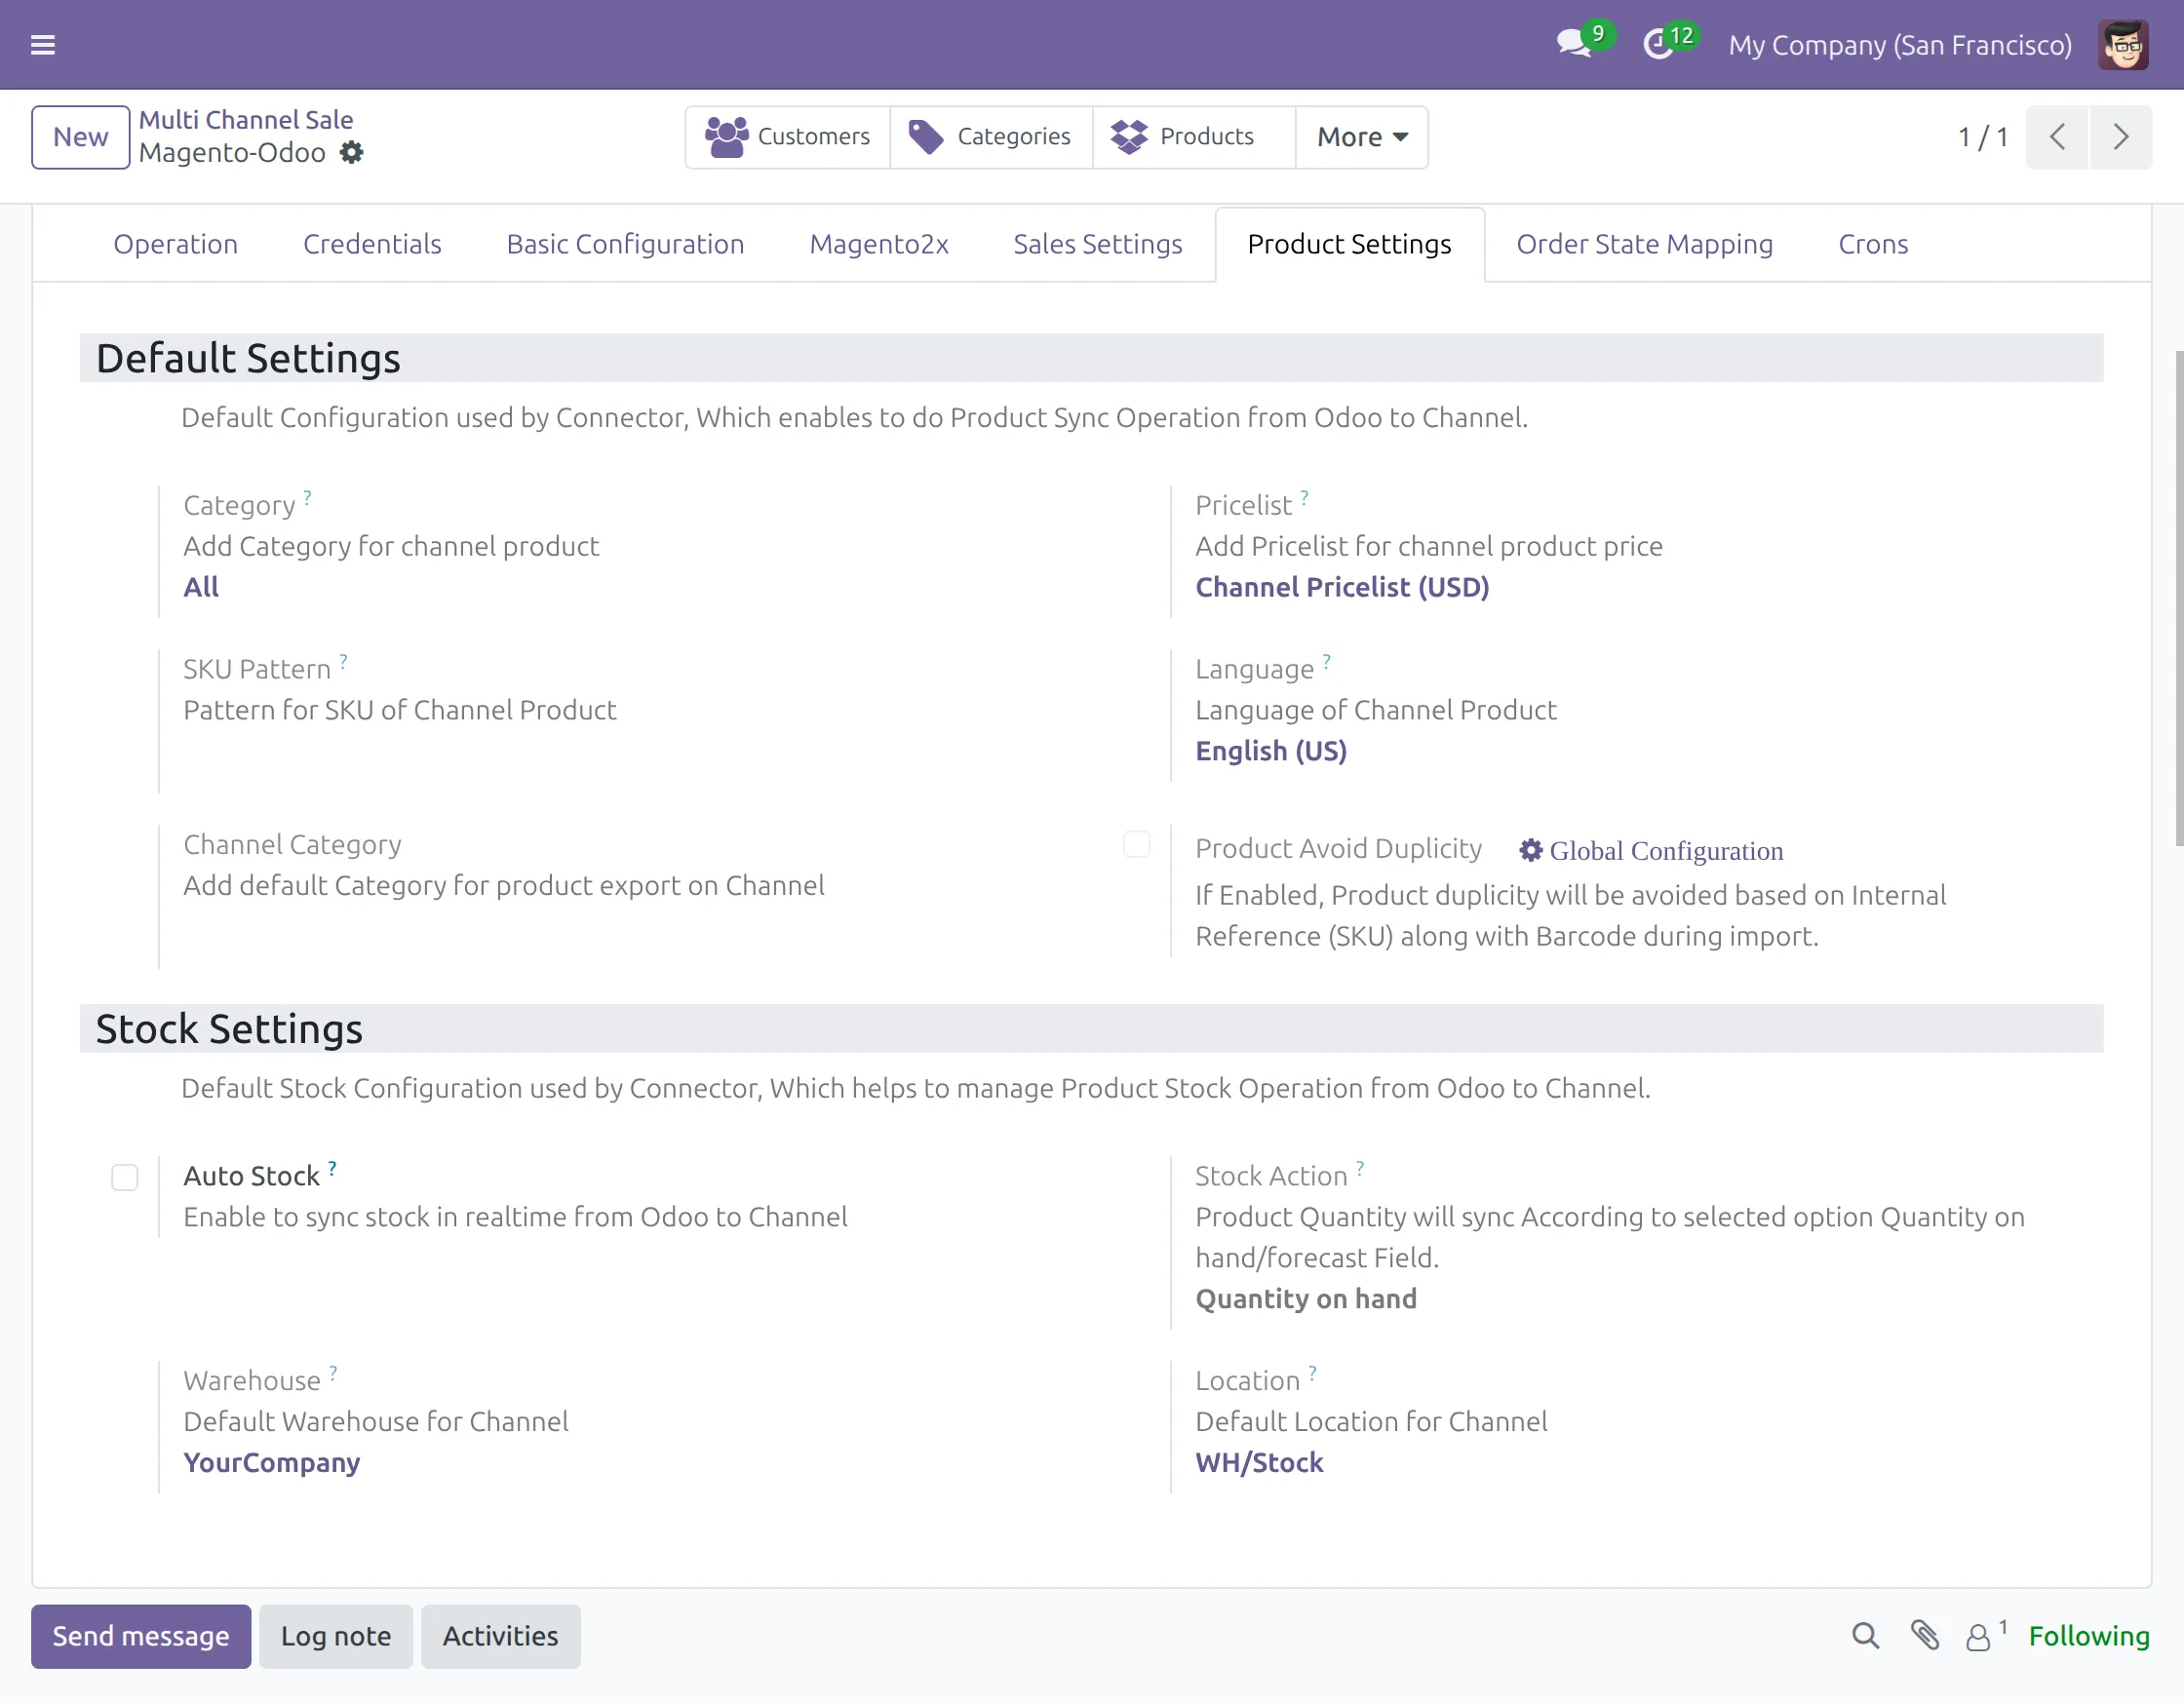
8. Configure the “Product Settings” tab for the default pricelist, stock settings, and auto stock update options.
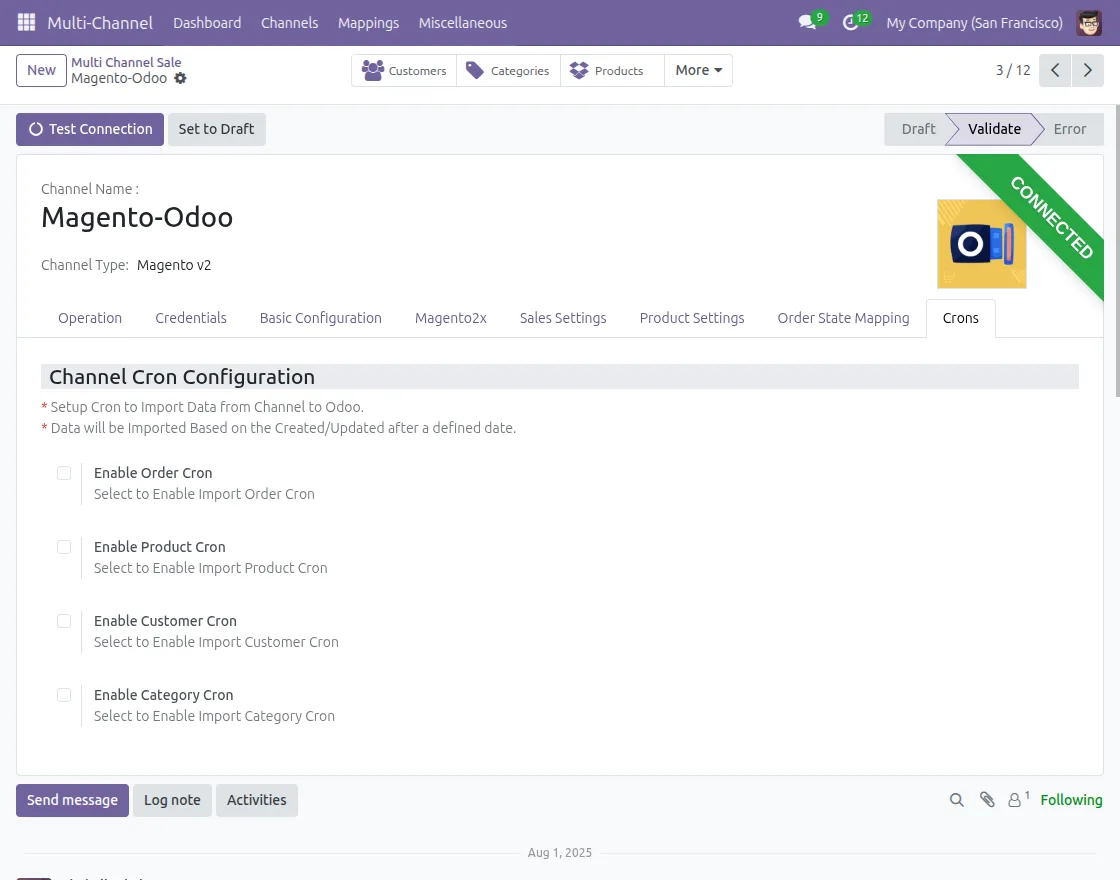
9. Enable “Cron Settings” to automate order imports, stock sync, and product updates for seamless operation.
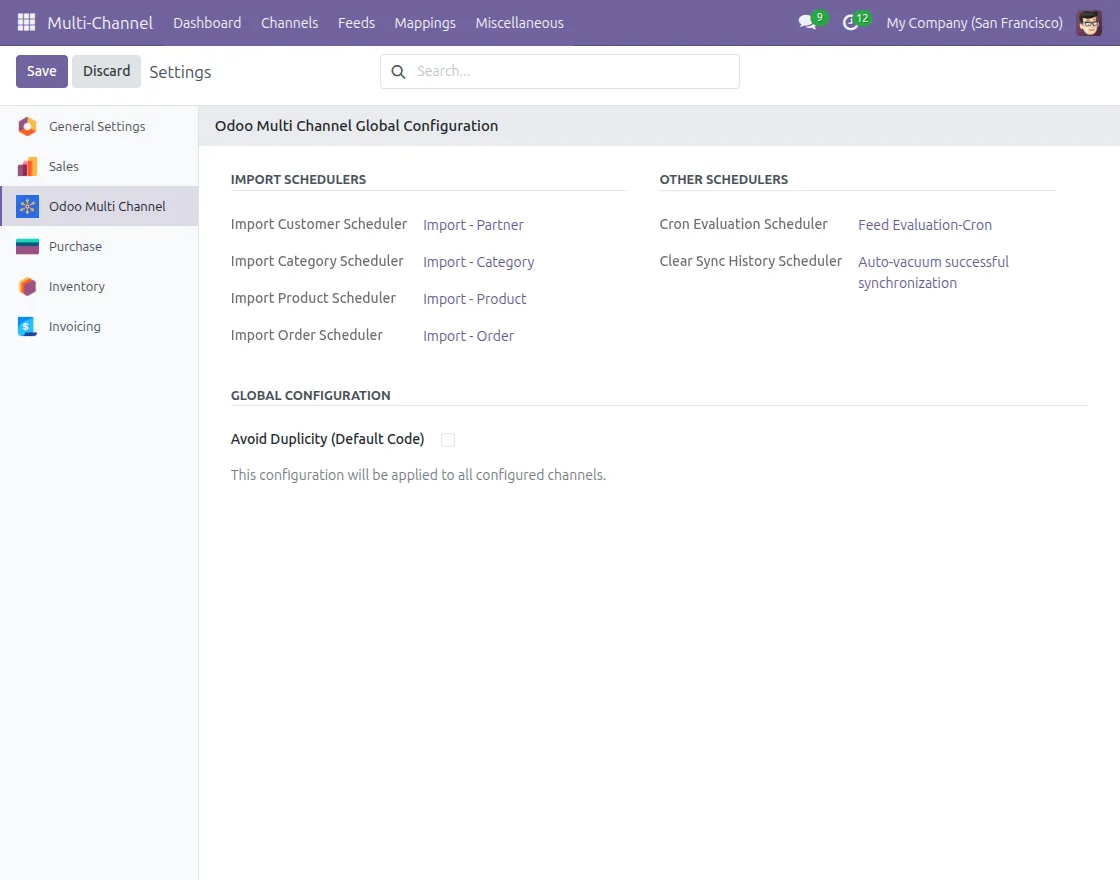
10. Access “Global Configuration” under the Miscellaneous tab to manage global settings and additional configuration options.
Need Help?
Hope you find the guide helpful! Please feel free to share your feedback in the comments below.
If you still have any issues/queries, please create a ticket at the UV Desk.
I hope this helps. In case of any further queries, contact us at our support mail:support@webkul.com
Thanks for paying attention!!