Quick Order for WooCommerce
It is design to reduce the number of steps required to place an order and allow customers to add products quickly.
It provides the most convenient steps for a wholesaler to place orders with an autocomplete search box and displays the auto-suggestions for products.
When customers enter the product’s name into the field which helps to pick-up items instantly.
Additionally, this allows customers to import CSV files to add to their cart a bunch of Products.
Quick Order for WooCommerce plugin enhances the overall shopping experience for your customer by adding a simple, intuitive way to purchase your products.
Note –
- This plugin does not support External/Affiliate and Grouped product types.
- Quick Order for WooCommerce is compatible with multisite.
- This plugin is now compatible with WooCommerce’s latest High-Performance Order Storage (HPOS) and Cart and Checkout block.
- We provide a production version of the plugin. If you want a development version, you can get it for an additional cost. Please contact support@webkul.com for it.
Module Activation
Check the working of the implemented feature in the video mentioned below –
Features
- Allow customers to purchase products from a single page.
- Auto-suggestion along with ajax search to find the product quickly.
- One-click action to add multiple products to the shopping cart.
- CSV import feature to add to cart bunch of products in one go.
- Customers can search for a product using the product name.
- Update product quantity on the quick order page.
- Add multiple different products to quick order.
- Select variable product options such as – color, size.
- The customer can add additional rows as needed.
- The admin can allow the customer to view an empty set of fields while quickly ordering the products.
Installation
The user will get a zip file which he has to upload in the “Add New” menu option in the WordPress admin panel.
For this login to WordPress Admin Panel and under the dashboard hover your mouse over the “Plugins” menu option which brings out a Sub-Menu and then select the “Add New” option.


By clicking on the “Upload Plugin” option, below that you will see a button “Choose File” click on the button to browse for the zip file as per the snapshot below.

After browsing the file, click the “Install Now” button to install the plugin as per the snapshot.

Now when the plugin is install correctly, you will see the success message and an option to activate the plugin. Click on “Activate Plugin” to activate the installed plugin.

Update Permalink under “Settings > Permalinks” as “Post name” as in the below snapshot.
Note: Checkout how to Activate WooCommerce Plugin through the purchase code and get updates on Webkul Modules directly on the Plugins page.
Module Translation
To know how to translate the module, you can click here.
Configuration
After successful installation of the WooCommerce Quick Order Plugin, the admin can navigate to the admin dashboard and configure the plugin under “WooCommerce Quick Order” as shown in the image below.


The admin can set the configurations for WooCommerce Quick Order as under-
Allow Quick Order from- The admin may set this field as ‘Both CSV and Table,’ ‘Quick Order Table,’ or ‘Upload CSV.’
- If the admin configures “Both CSV and Table,” the customers can upload products through a CSV file or directly in the table itself.
- On configuring the “Quick Order table,” the customers can add products directly to the table.
- If the admin configures ‘Upload CSV’, the system will upload products only through the CSV file.
Show Blank Rows- The admin can set this field as Yes or No. Setting it as ‘Yes’ will introduce an empty set of fields in the Quick Order section.
Thus, the Quick Order Section in the front end will appear as below-

No. of rows to add: The admin can define the number of rows to add to the quick order to add products.
Default no. of Rows: The admin can define the default number of rows present on the quick order page.
Want to see combination field: They may set this as “Yes or No.”
Search Product By – The admin may set this as ‘Both Name and SKU,’ ‘Product Name’ or ‘SKU.’ If the admin selects:-
- “Both Name and SKU”: The customer can search for products either by the product name or its SKU.
- “Product Name”: You can search for the products using their names.
- “SKU”: The admin can search for products using their SKUs.
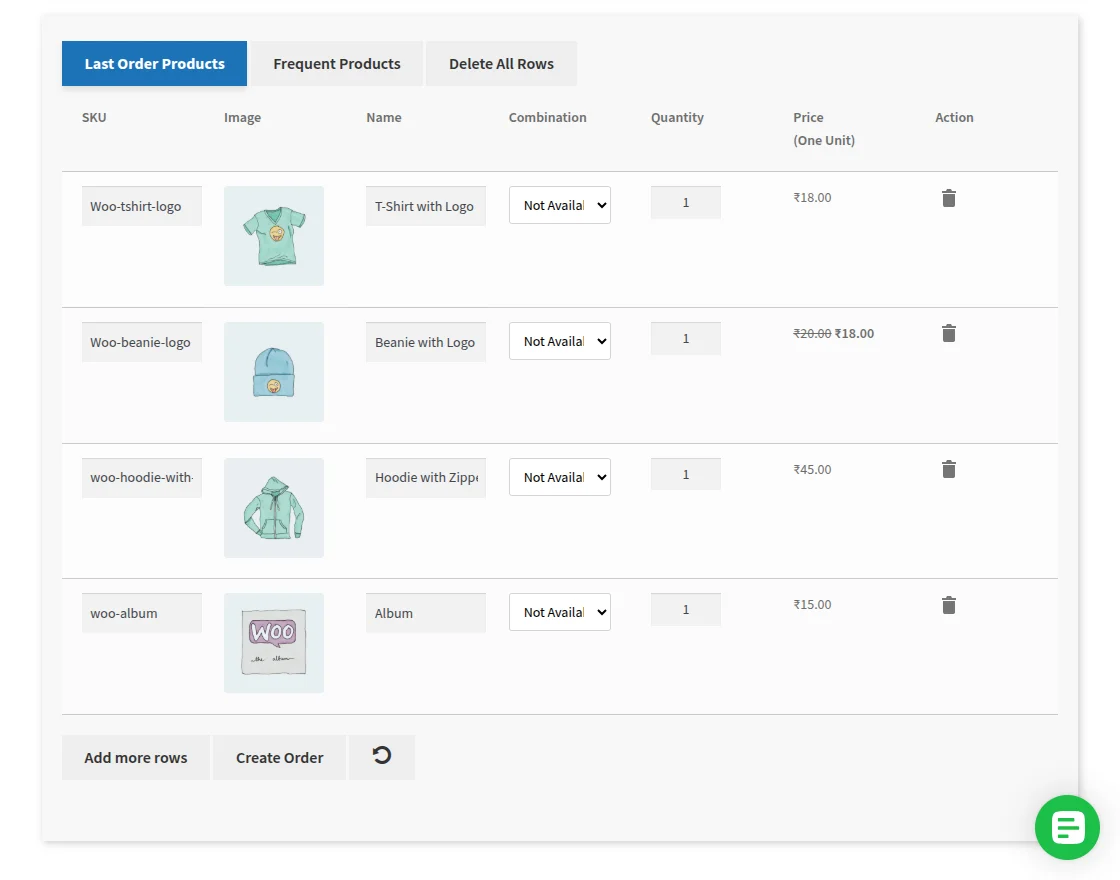
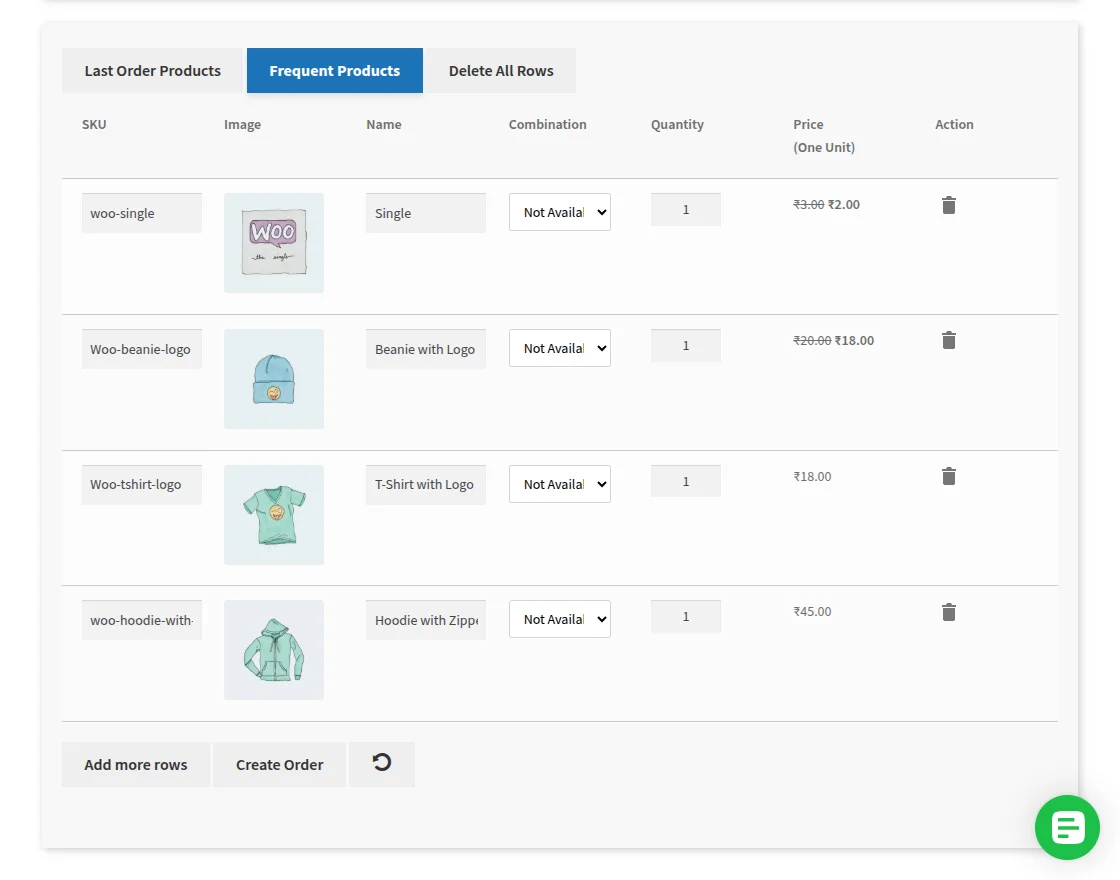
Based on the configured number of rows, the system will auto-fill the page with the latest products.
Customers can also view ‘Last Order Products’ and ‘Frequent Products’ as shown in the images below.
Workflow
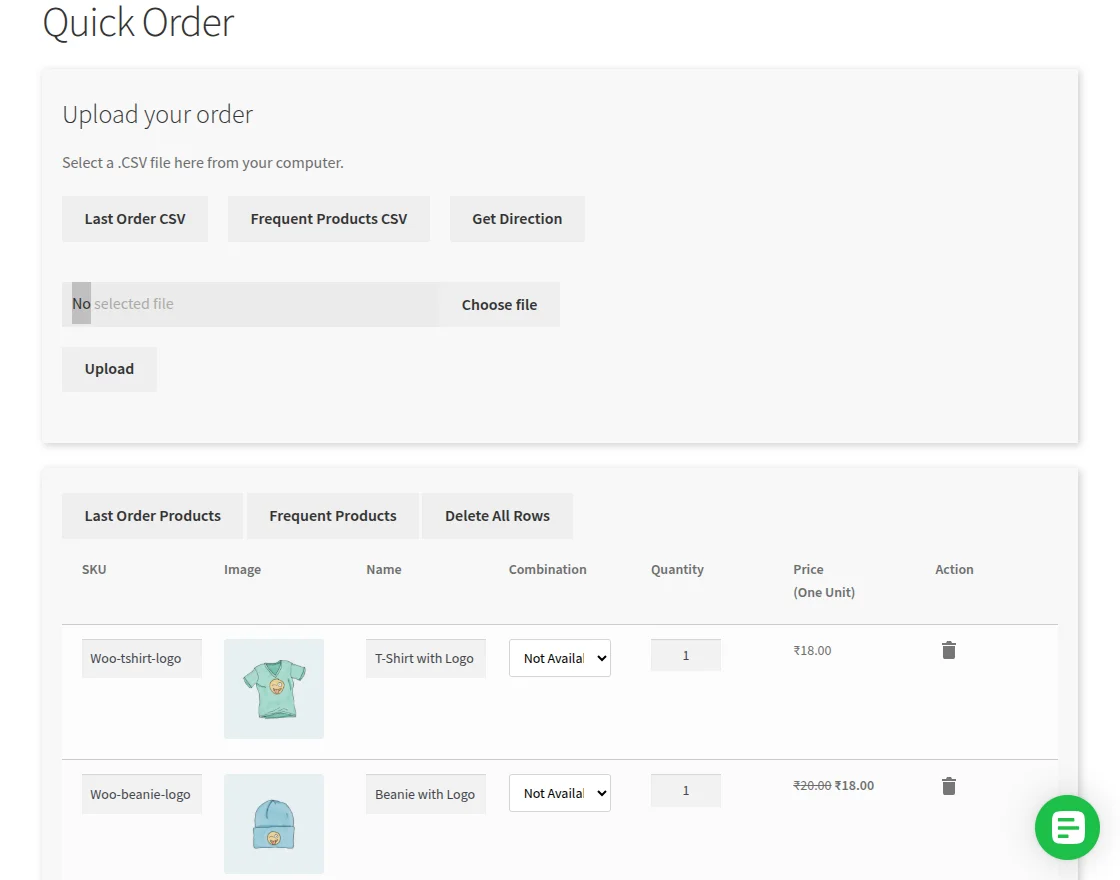
As per the configuration, the system will display the quick order page as shown in the image below on the front-end.
It has 3 rows configured by default, and the system has enabled quick order CSV upload.
The buyer can add more rows to the quick order by clicking “Add more rows”.
Here the buyer can search the product with the product name and pick the product from the auto-suggestion.

After selecting the product, it will display in quick order like the below image. The buyer can edit the quantity as per the desired requirement.


If the product is a variable product, then the buyer can select the desired variation under “Combination” as below image.


The buyer can create an order by clicking ‘Create Order’. The system will add the products to the cart, and the customer can proceed with the checkout.

Add products by CSV
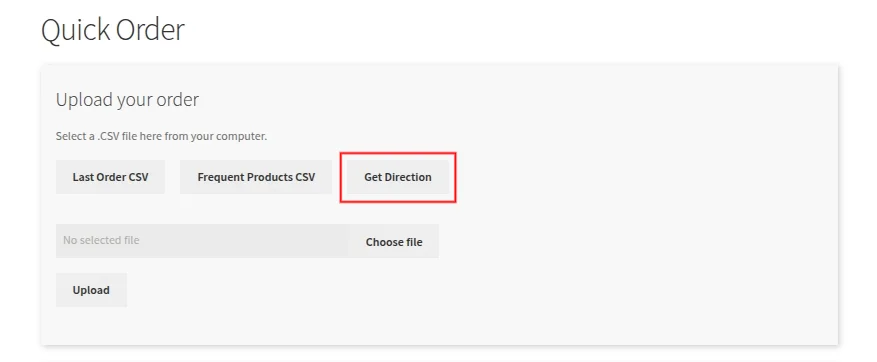
The buyer can add products to the quick order with the help of CSV as well. The buyer just needs to download the Sample CSV file. Sample CSV file is available under “Get Direction”.
Customers can click on ‘Last Order CSV’ and ‘Frequent Products CSV’ to download a file with SKU/Product Id and Quantity columns for quick and easy reordering.


After downloading the file the buyer can enter the product information into the CSV file as per the requirements.
Here only two fields are available. The first is SKU/Product Id and the second is the desired number of Quantity.

Clicking ‘Upload’ will upload the selected CSV file to the quick order.


Display Your Custom Shop Page
Now that you have registered your custom shop page, you can display it on your WordPress site.
Create a new page in WordPress, and in the page editor, add the [quick_order] shortcode where you want your custom shop page to appear.


With these steps, you’ve created the foundation for your custom shop page. However, this is just a basic setup.
That’s all for the Quick Order for WooCommerce.
In case of any query, you can create a ticket at webkul.uvdesk.com or mail us at support@webkul.com and let us know your views to make the plugin better.