User Guide For CS-Cart Modified Category Menu
Table of Content
CS-Cart Modified Category Menu Add-on allows store administrators to enhance storefront navigation by displaying a customizable category menu bar.
The add-on provides options to personalize the menu with different background colors, font colors, and heading background colors to match the store’s design.
Additionally, administrators can display a menu list icon and place the category menu block on any storefront page as required, ensuring a seamless and user-friendly shopping experience.
The add-on helps to enhance the overall view of the category menu of the website, as per the theme used.
Note: Before installing the add-on, extract the downloaded package.
- Install the License Manager add-on first.
- Then install the required add-on.
- Follow the license activation steps to generate your license key.
Check a brief overview of the storefront working of the plugin –
CS-Cart Modified Category Menu Features
- The Admin can add colors to the background of the category menu tab.
- The Admin has the option to add the font color of the category menu tab.
- Admin can add the heading’s background color to the category menu tab.
- Admin can list all categories and first child categories in the menu tab.
- The customers can change the language of the storefront from the menu tab.
- The option to change the currency of the storefront from the menu tab is available.
- Customers can also check their profile details from this menu tab.
- Well integrated with CS-Cart, CS-Cart Multivendor, CS-Cart Multivendor-Plus, and CS-Cart Multivendor Ultimate.
Flow Of Installation And Configuration:
Step 1
When you download the “CS-Cart Modified Category Menu”, you’ll get one zip file and the install.txt file. Read it carefully and follow it. After that, install the zip file.
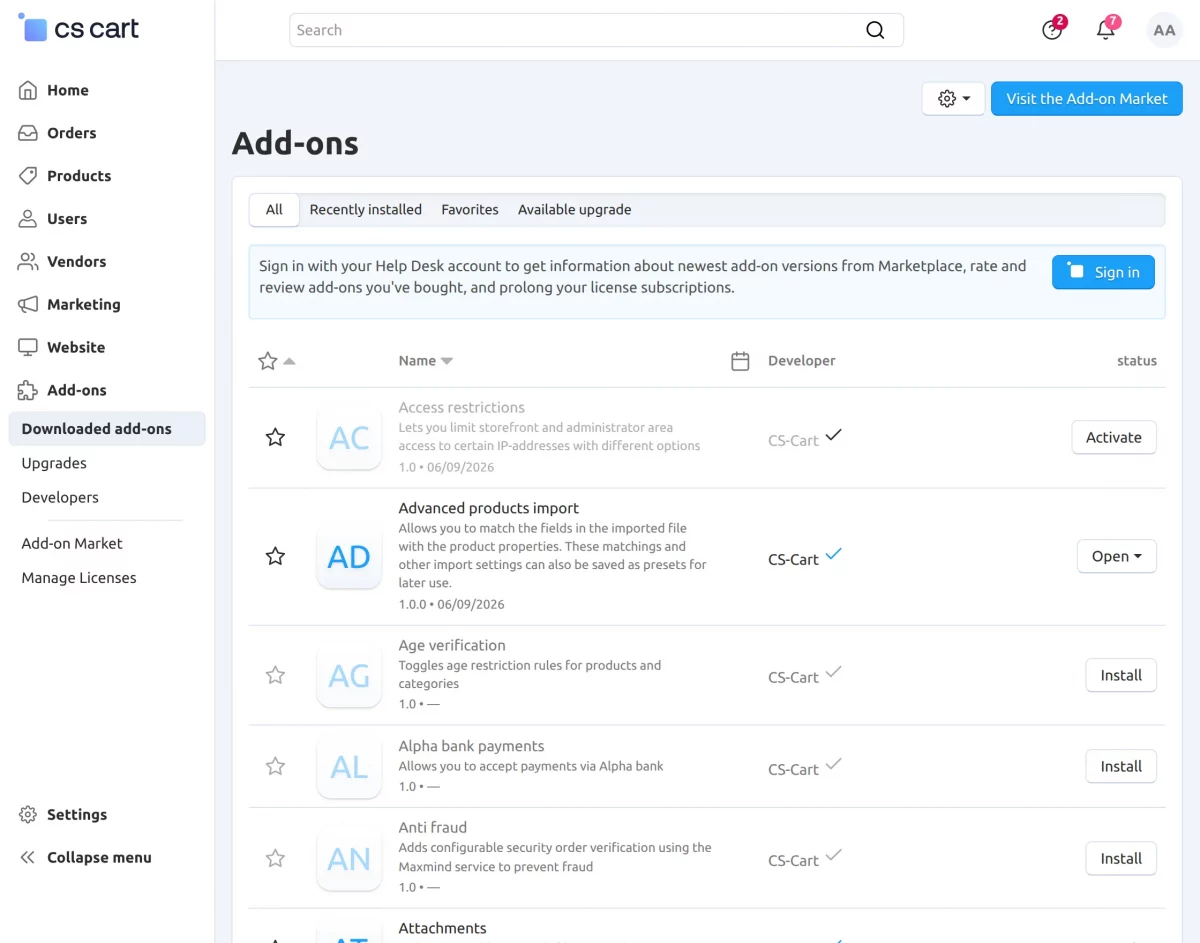
Navigate to Add-ons > Downloaded add-ons and click on the settings icon. You can manually install the zip file as shown below:

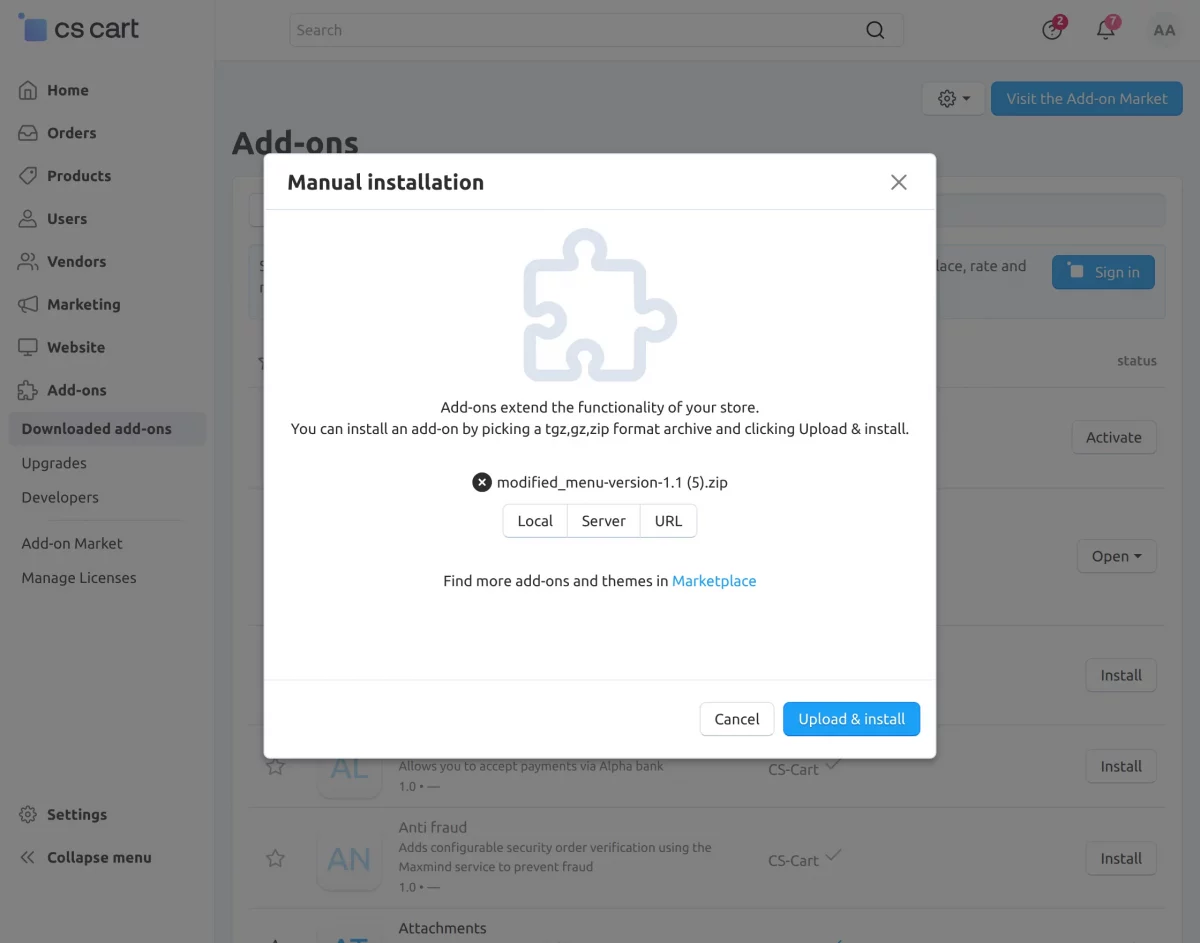
Click on “Local” to browse the zip file and then click on “Upload & Install” as shown below in the snapshot.
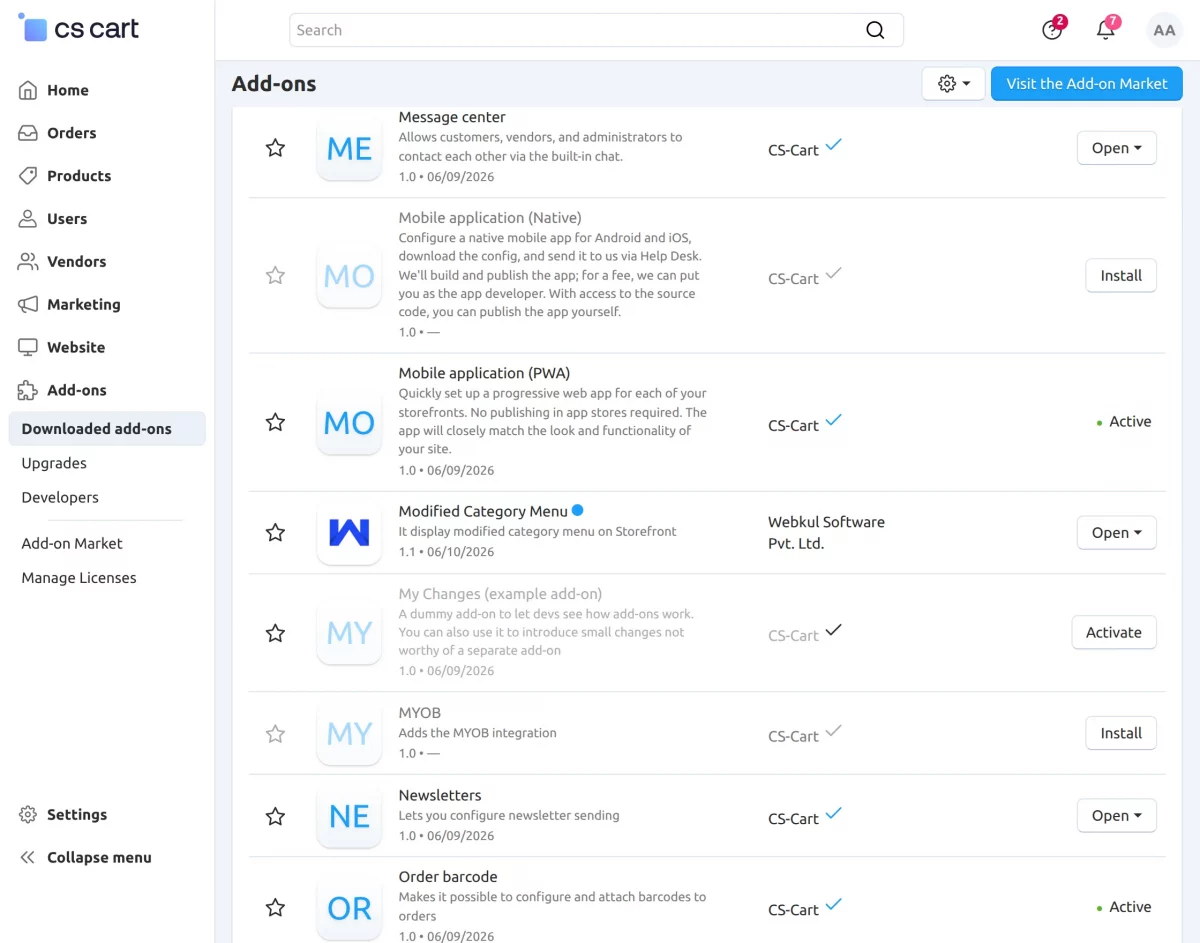
Activate Add-on
Once you install and activate the CS-Cart Modified Category Menu add-on, you can begin configuring its settings.
Step 2
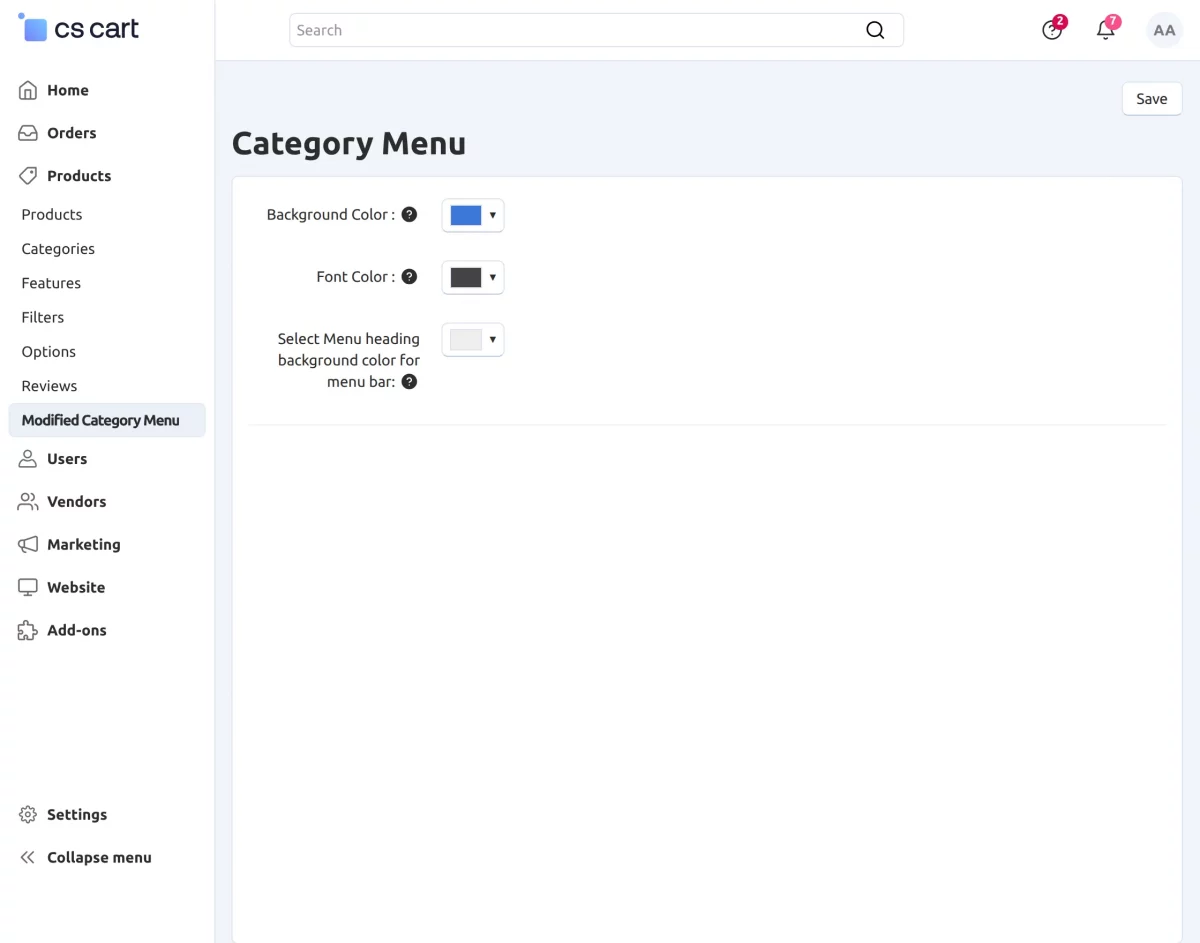
Now, after the successful installation of the add-on, go to the Products > Modified Category Menu to create a menu tab for the storefront.
Select the desired colors for the Category Menu that you want to display on the Storefront as shown:-
Step 3
To add a Modified Category Menu on the front end.
Go to Website > Themes > Layouts and select the Category Menu Block as shown below –
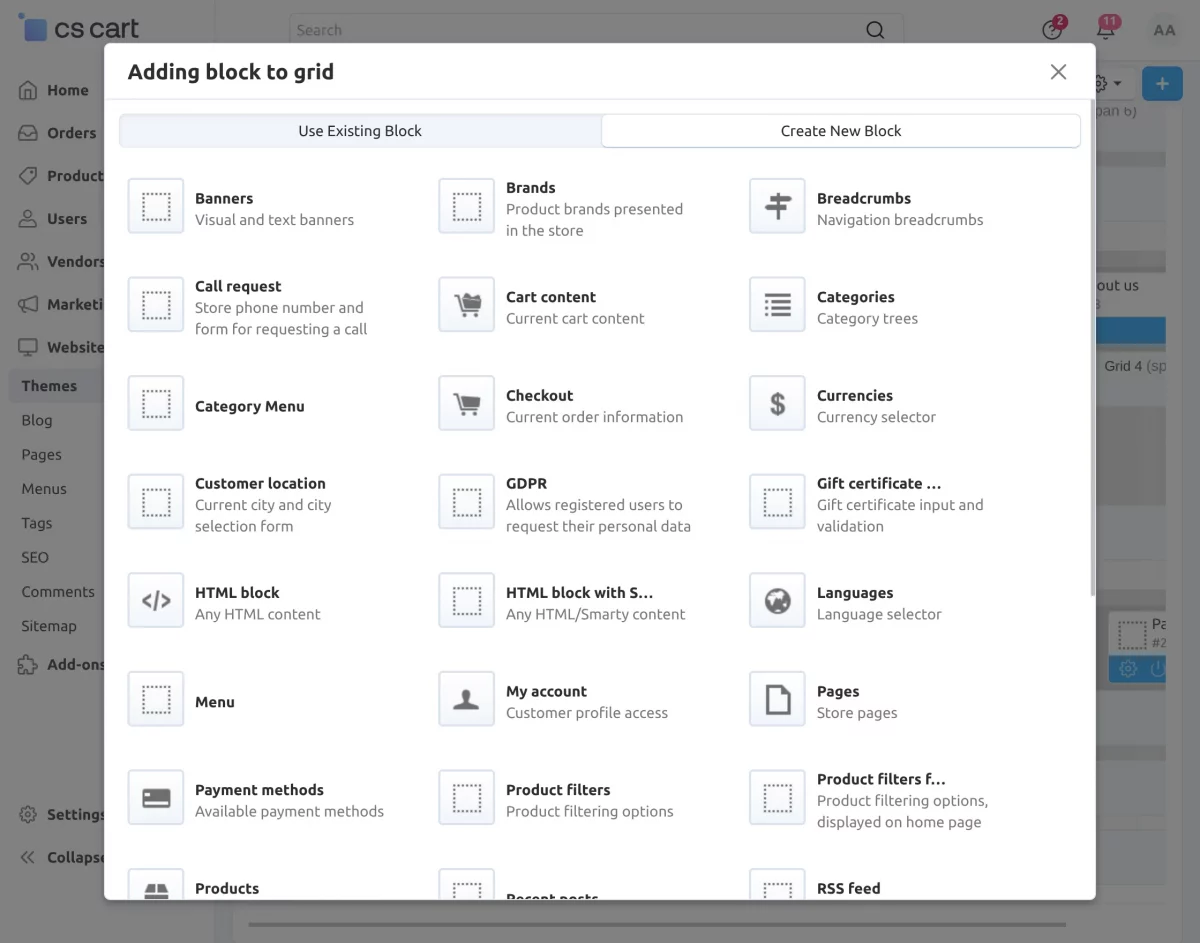
Click on the Category Menu block and enter a name for the block. Then, configure the settings as required.
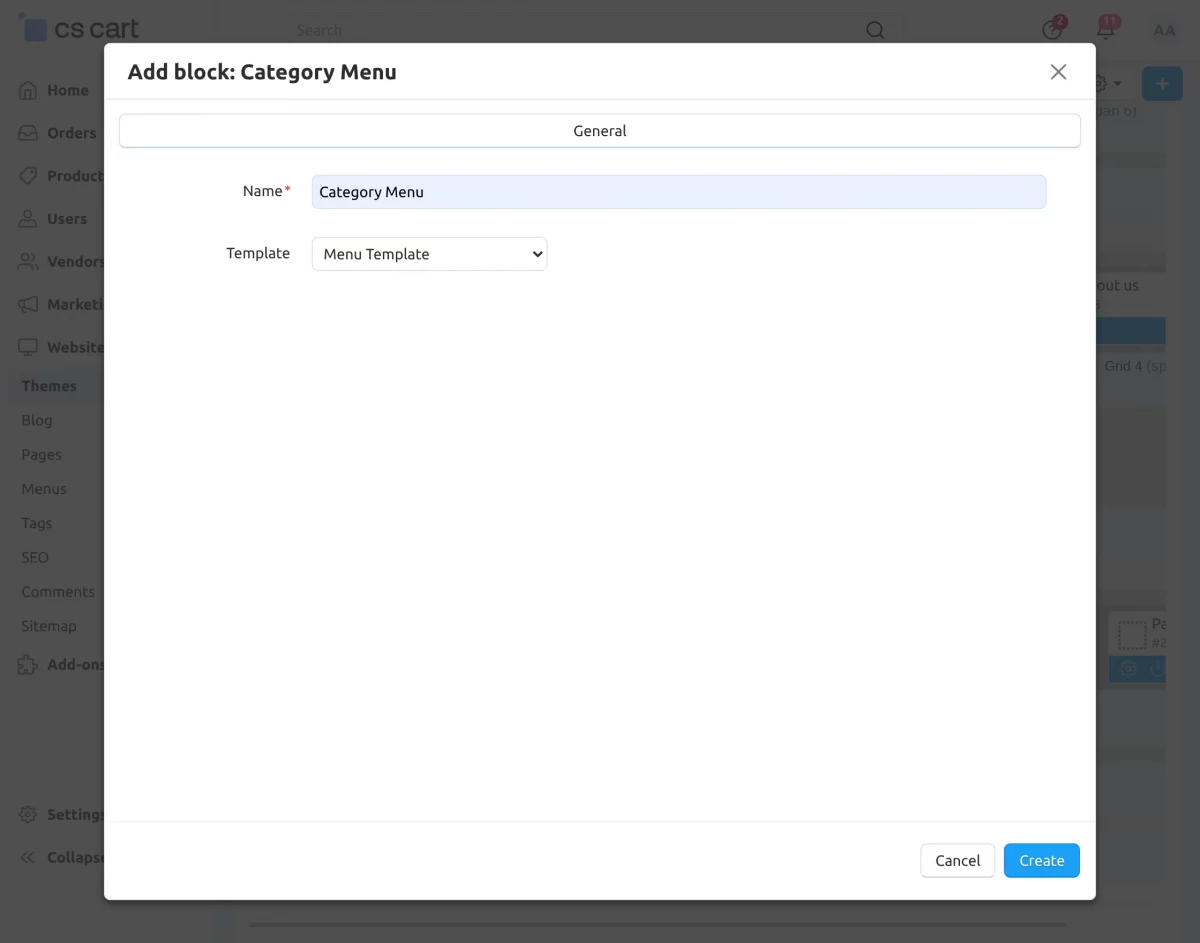
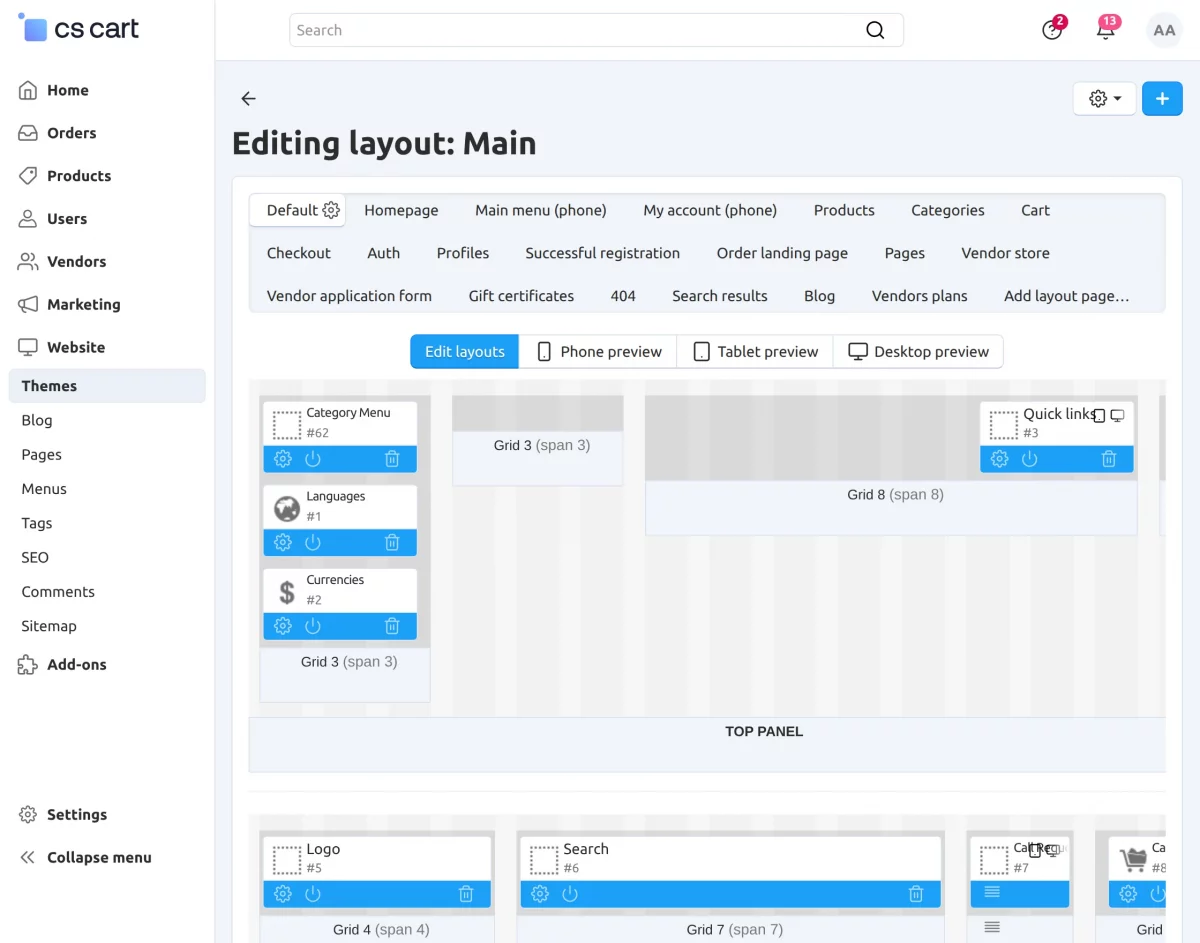
Go to Websites → Themes → Layouts and add the Category Menu block to the desired location where you want it to appear on the storefront.
Front-End View
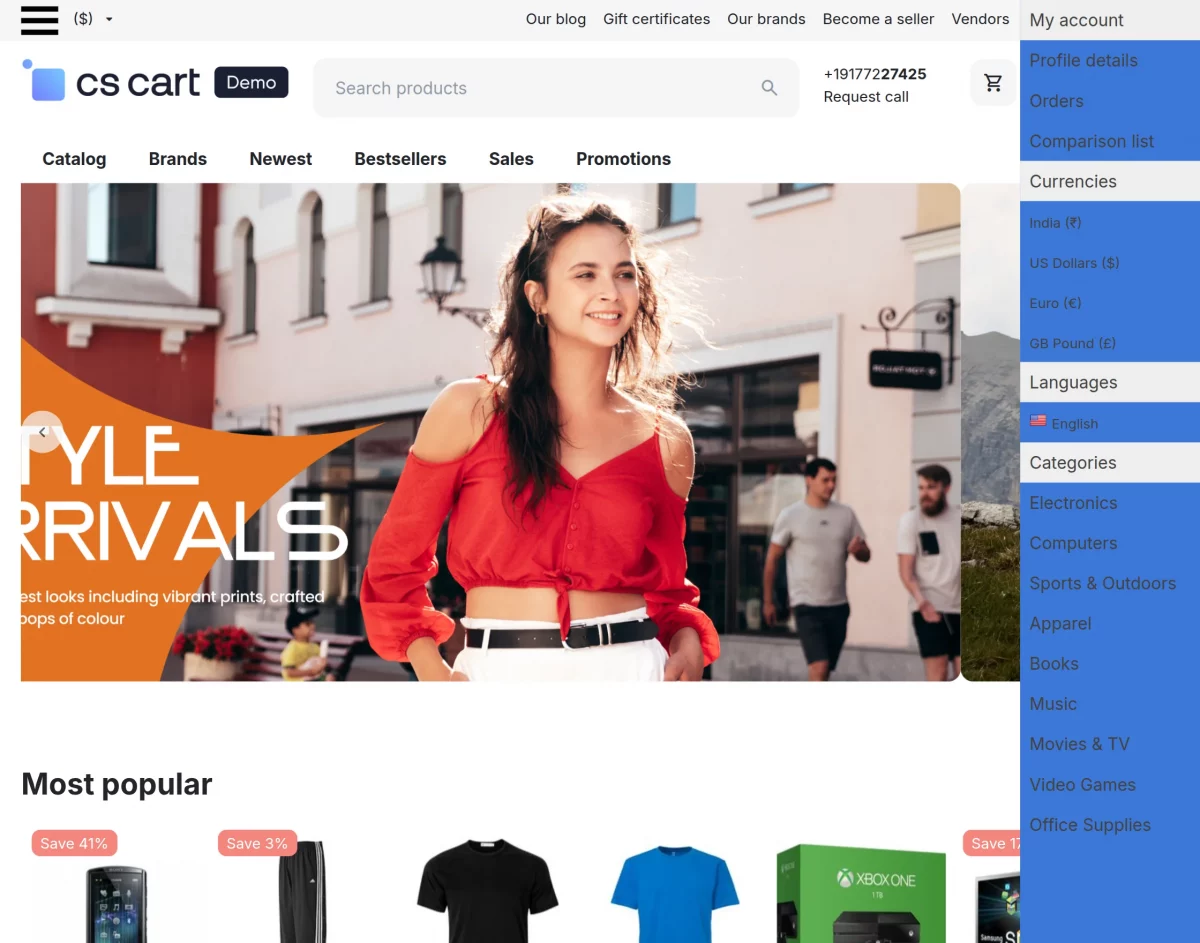
The Modified Category Menu tab is available on the frontend –
When the customer clicks on the tab, it will open a category menu on the right side of the storefront.
From here, the customer can check all the listed categories, and can change the language and currencies of the storefront from the menu tab.
The customers can check all the order details and profile details from here, as shown –
Support:
If you have any questions, suggestions, or customization requests, feel free to contact us at support@webkul.com or submit a ticket at webkul.uvdesk.com.
Explore our premium-quality CS Cart Extensions to enhance your store functionality.
You can also explore our CS-Cart Development Services and Quality CS-Cart add-ons.