PrestaShop Virtual Product Combination {User Guide}
PrestaShop Virtual Product Combination module facilitates the store owners to create combinations of virtual products.
Associate file with each product combination that will be available to customer after competing the purchase.
With this module, the admin can now add multiple variants of dematerialized products like software, ebooks, etc.
Check the video mentioned below for an overview of the workflow of this extension:
Features of PrestaShop Virtual Product Combination
- Create combinations of virtual products.
- The admin can associate different files with different combinations.
- Restrict the number of downloads for file associated with combination.
- Set expiry date for file associated with the combination.
- Set the number of days for which customers can access the file.
- Add and manage virtual product combinations files from a single place.
How to Install PrestaShop Virtual Product Combination
The installation is quite simple just like the standard PrestaShop modules.
- Firstly, go to the module manager in the back office and click on ‘upload a module’.
- After that, drag and drop the module file or select the file from the system.
- In this way, the module installation will be successful.


Custom Hook Information
Note: There is no need of custom hook After the version 4.1.3 and above.
If ‘new product page’ is enabled, then add the following hook.
{{ renderhook('displayWkAdminProductsCombinationBottom', { 'wkData': combinationForm }) }}
Path:
on src/PrestaShopBundle/Resources/views/Admin/Sell/Catalog/Product/Combination/edit.html.twig file.
Place:
If PrestaShop 8.x.x: Line 37 under the {% block content %} block and just before {% endblock %}.
If PrestaShop 1.7.8.x: Line 50 under the {% block content %} block and before the closing {% endblock %}.
Note: There is no need to add a hook in case you are not using new product page V2.
PrestaShop Virtual Product Combination Workflow
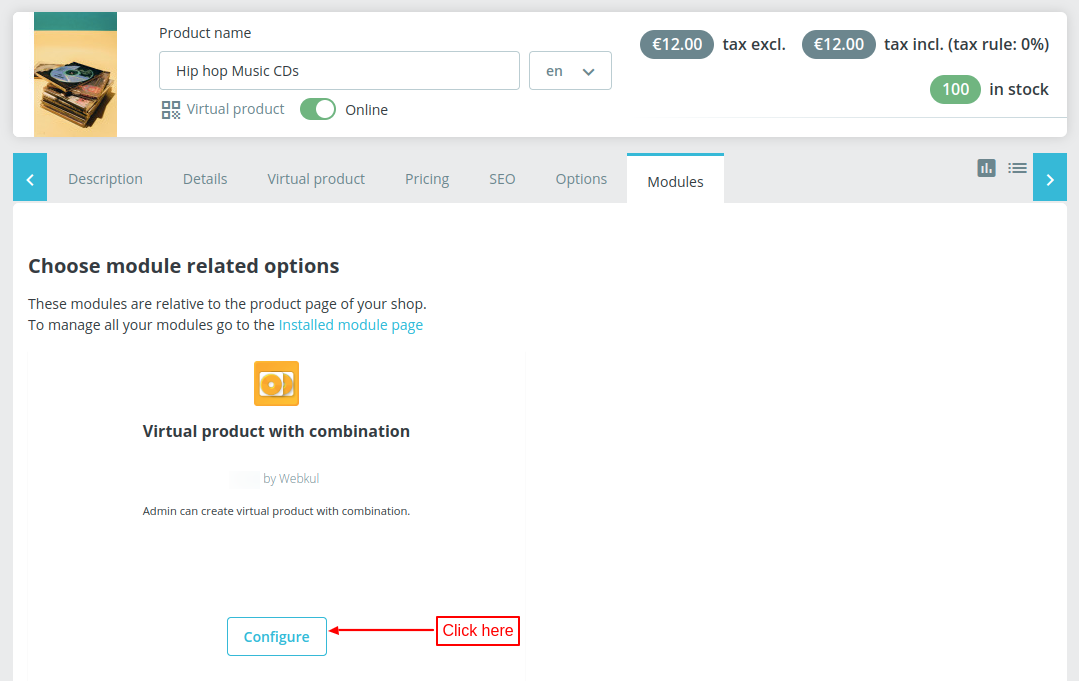
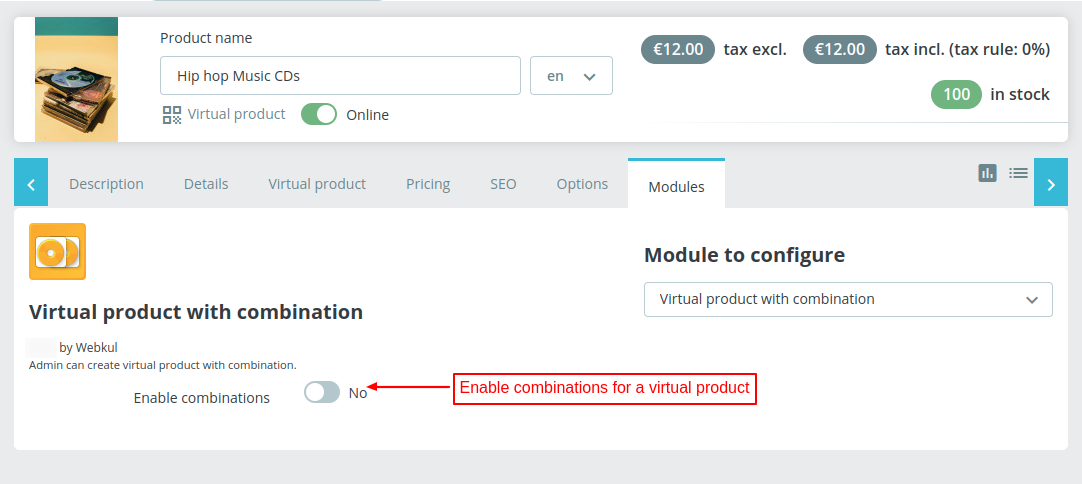
For adding the combinations to the virtual product, the admin needs to enable combinations in the product page. Go to catalog > Products > Edit Product > Modules.


Once the admin has enabled combinations and saved the setting, a new tab ‘Combinations’ get available as show in the below screenshot.

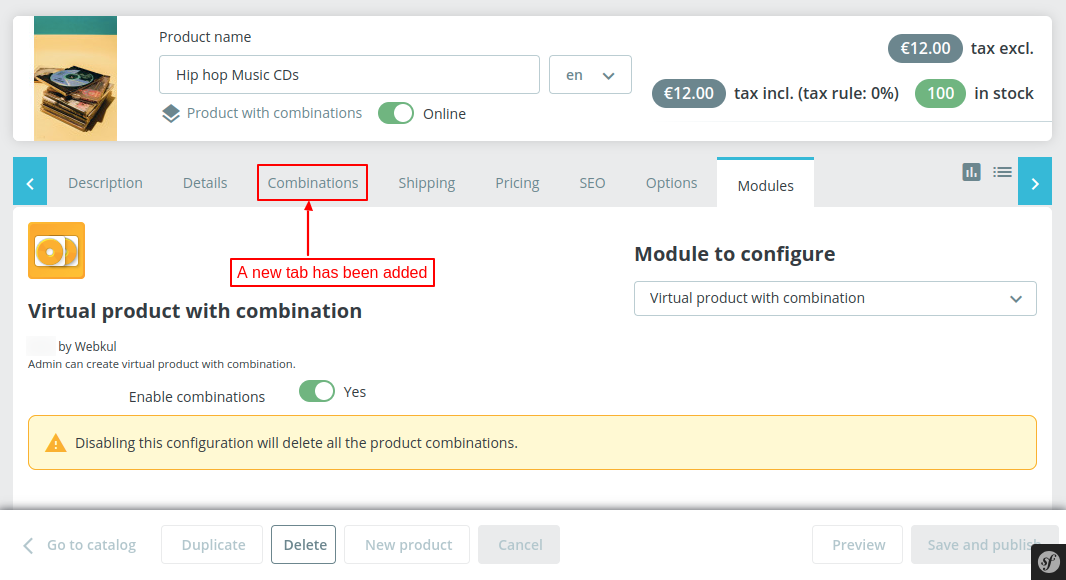
From this tab, the admin can add and manage combination for the virtual product. The process of adding combinations of the virtual product is similar to that of standard products.


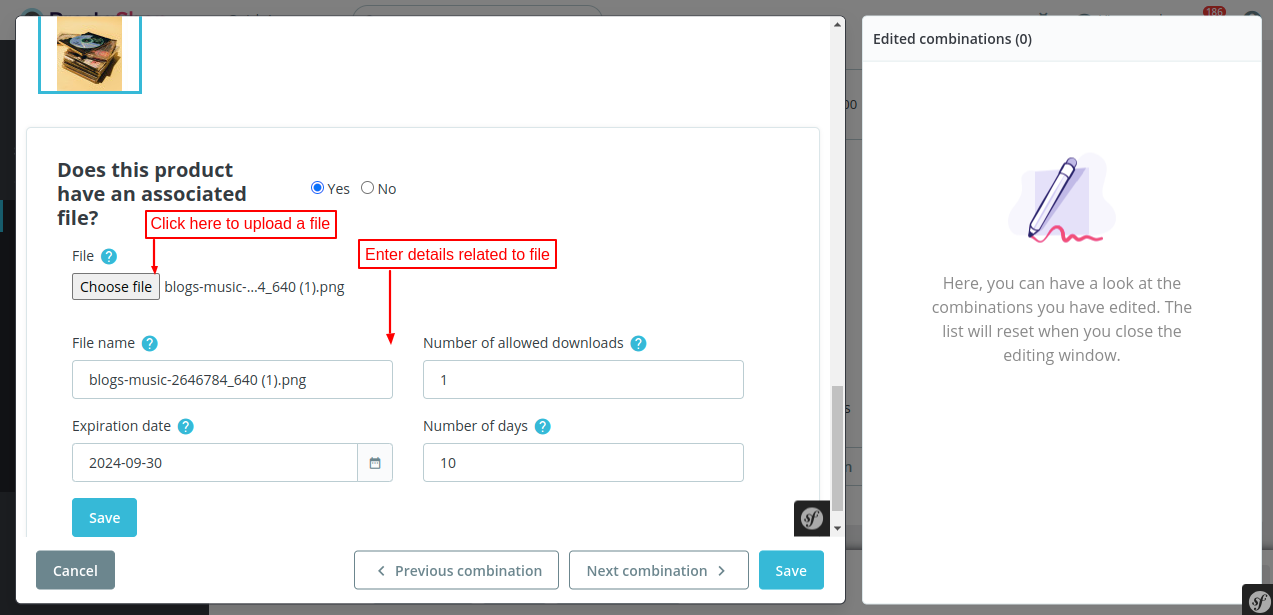
Click on the edit button to associate file with the combination. On clicking the button, a popup appears on the page where the admin can upload a file and add details related to it.

Virtual Combination File
After the successful installation of the module, a new tab “Virtual Combination File” gets available in the back office. Under this tab, all the virtual products of the store are listed.
The admin can add files for the combinations of virtual products from here.

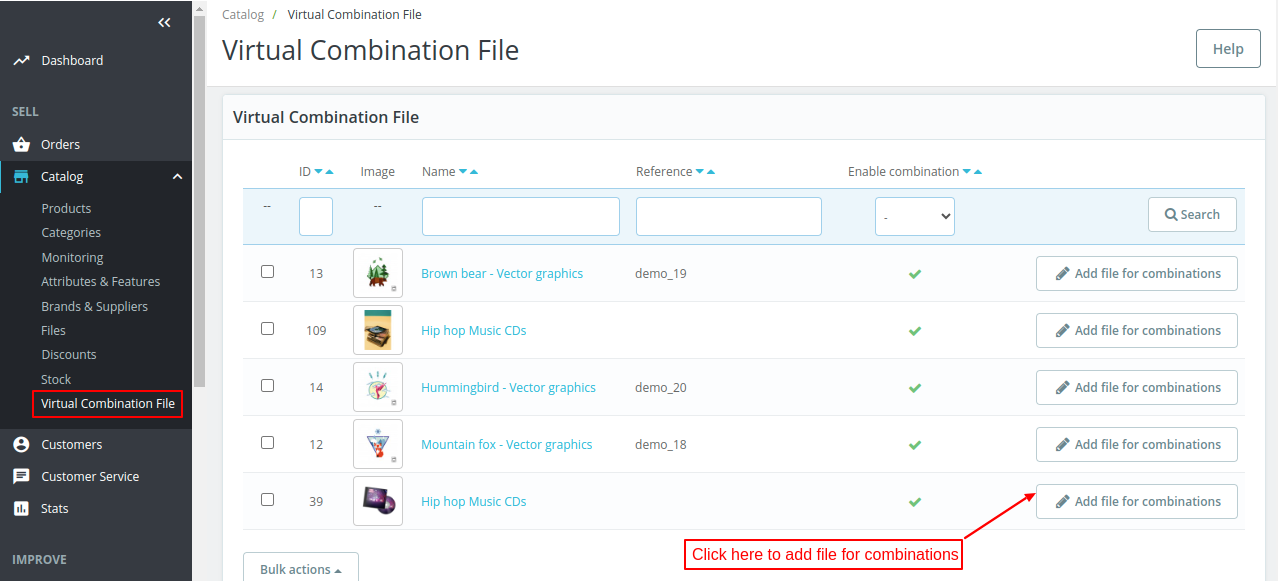
Click on “Add file for combinations” button.

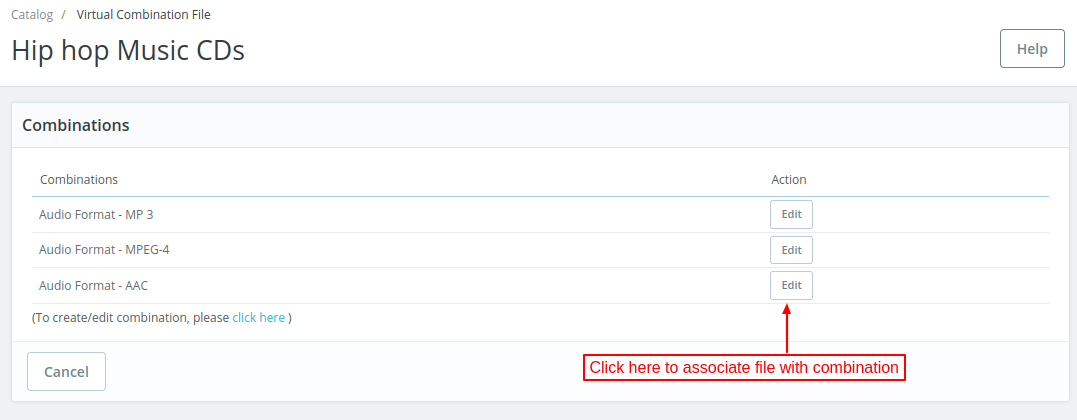
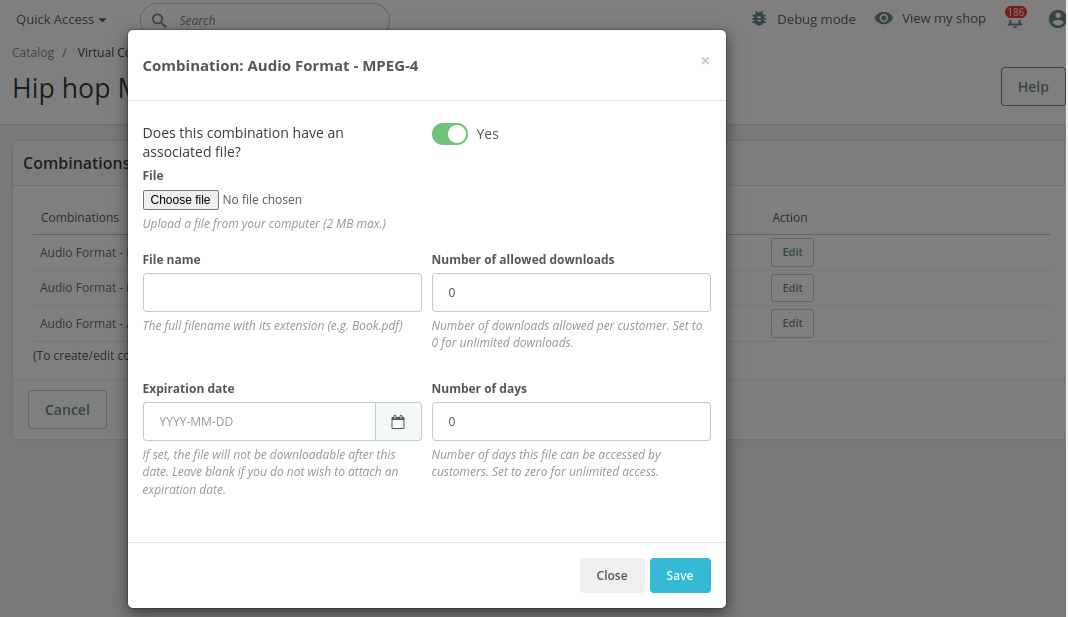
On clicking the “Edit” button, a popup appears on the page where the admin can:
- Upload file for a combination.
- Specify file name.
- Set the number of downloads allowed pr customer.
- Set expiry date of a file.
- Specify number of days for which file can be accessed by customers.

Customer End Flow
When a customer visits the virtual product page, he can view the combinations added by the admin.

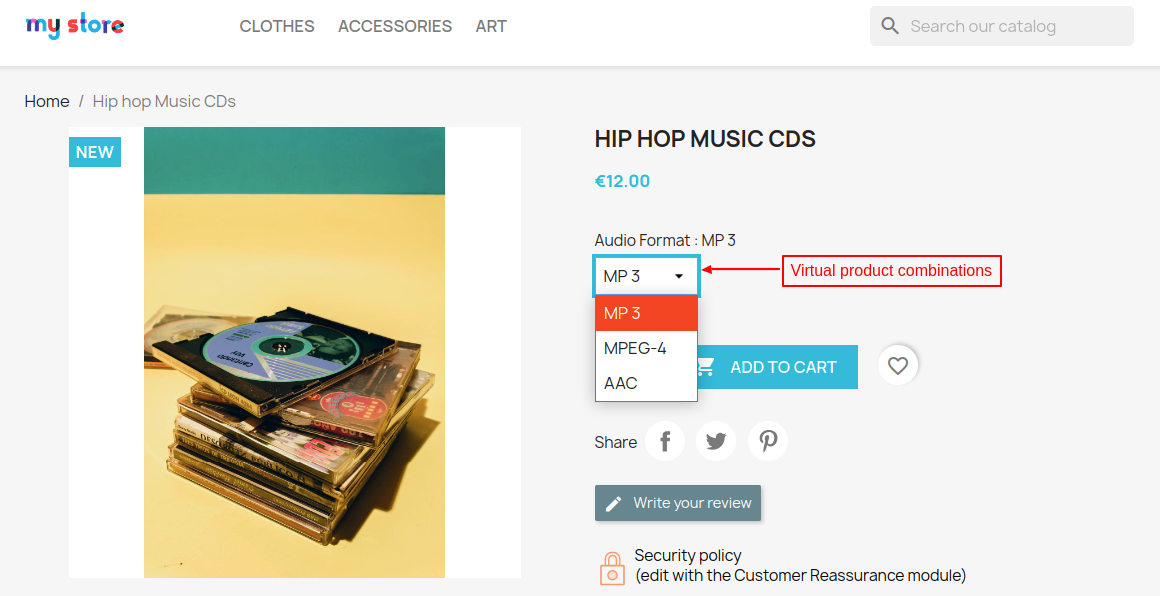
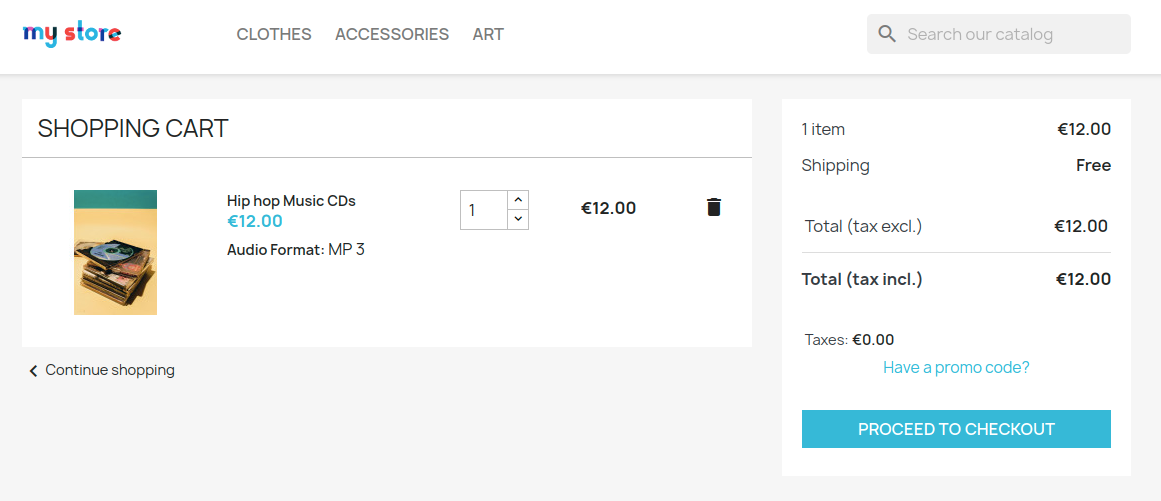
Customers can proceed with shopping by adding any combination of the product to the cart and place the order.


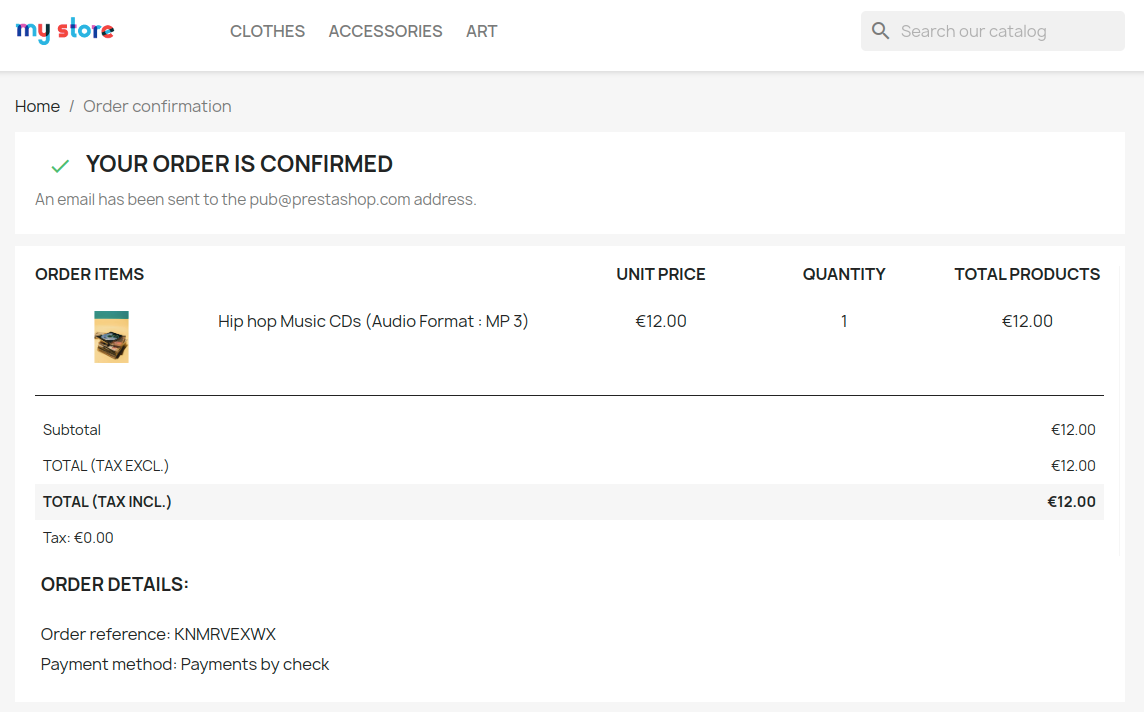
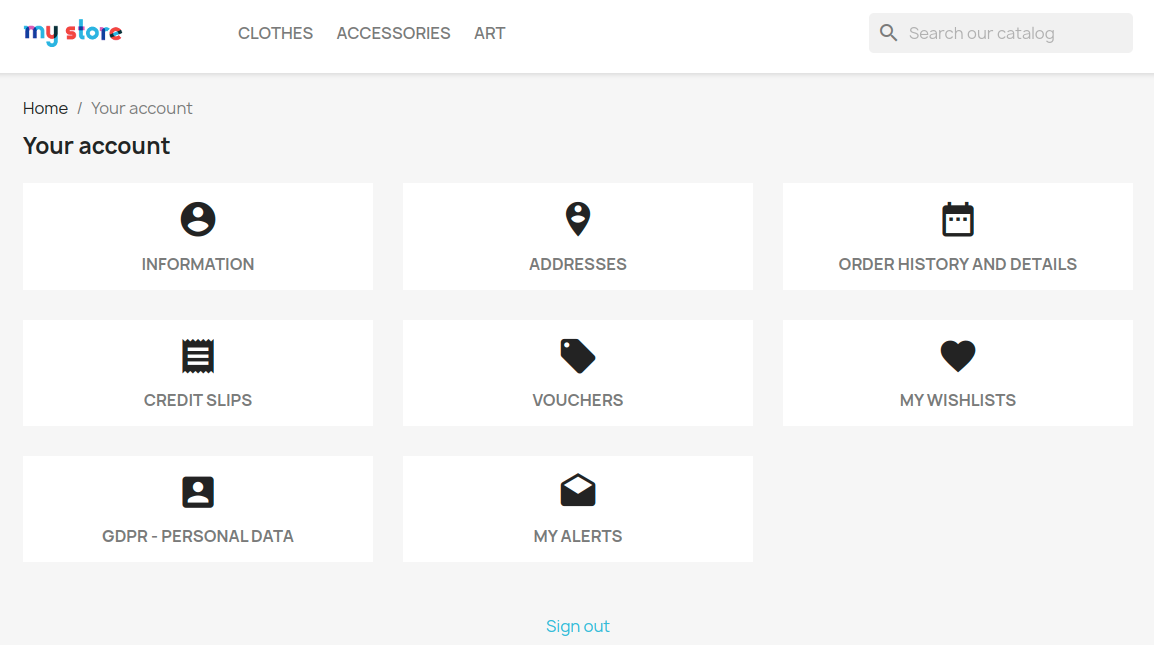
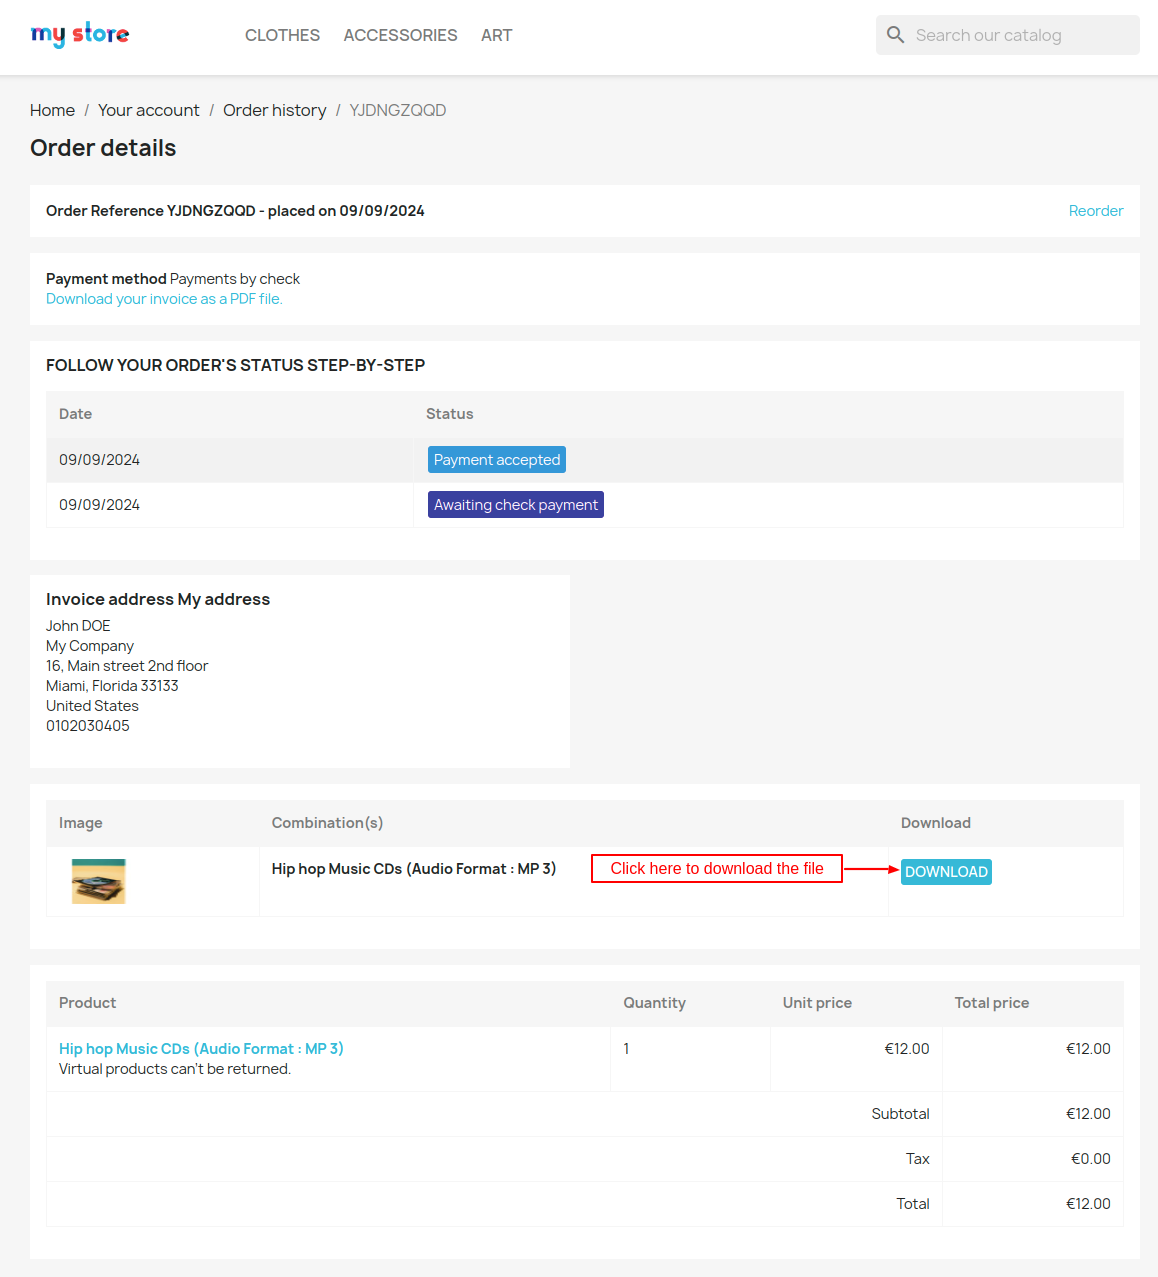
After placing the order successfully, a customer can check his order details by clicking on “Order history & details”.

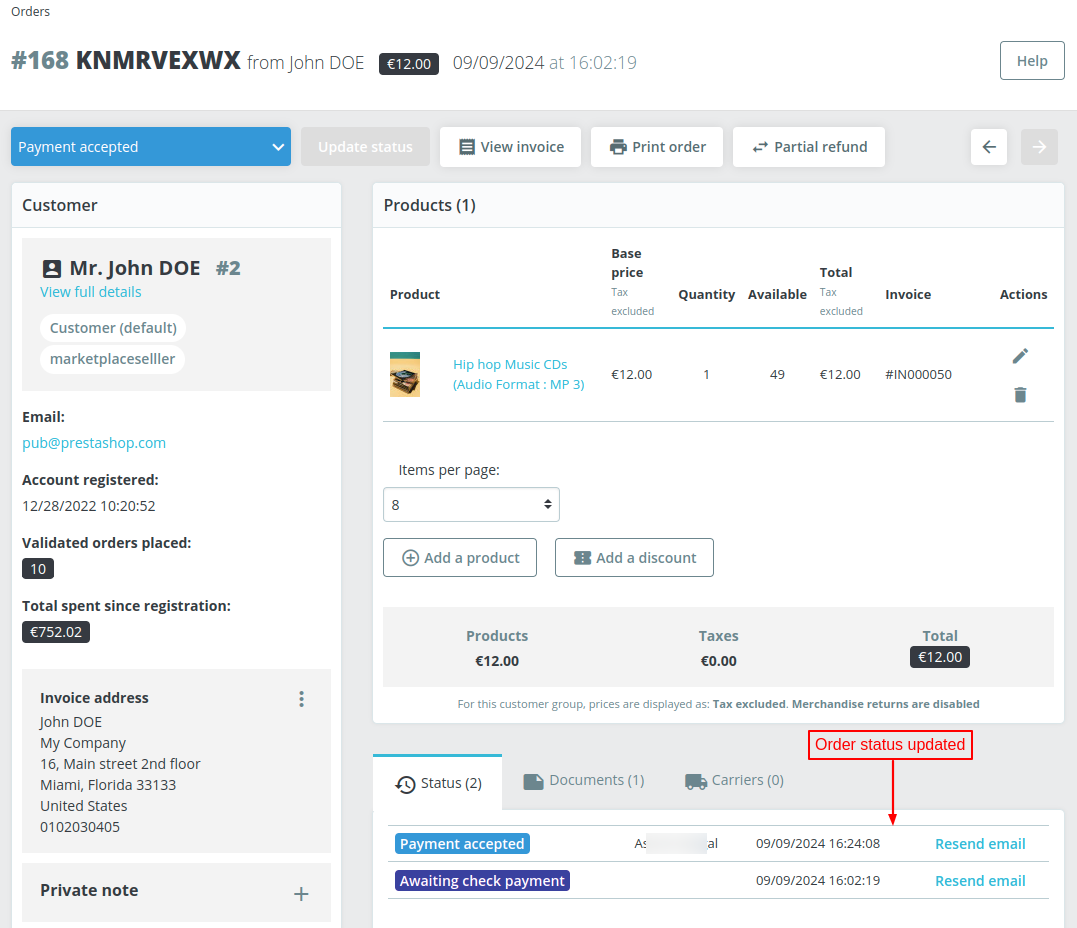
The file associated with the order will not be available to download till the admin updates the order status to “Payment accepted”.

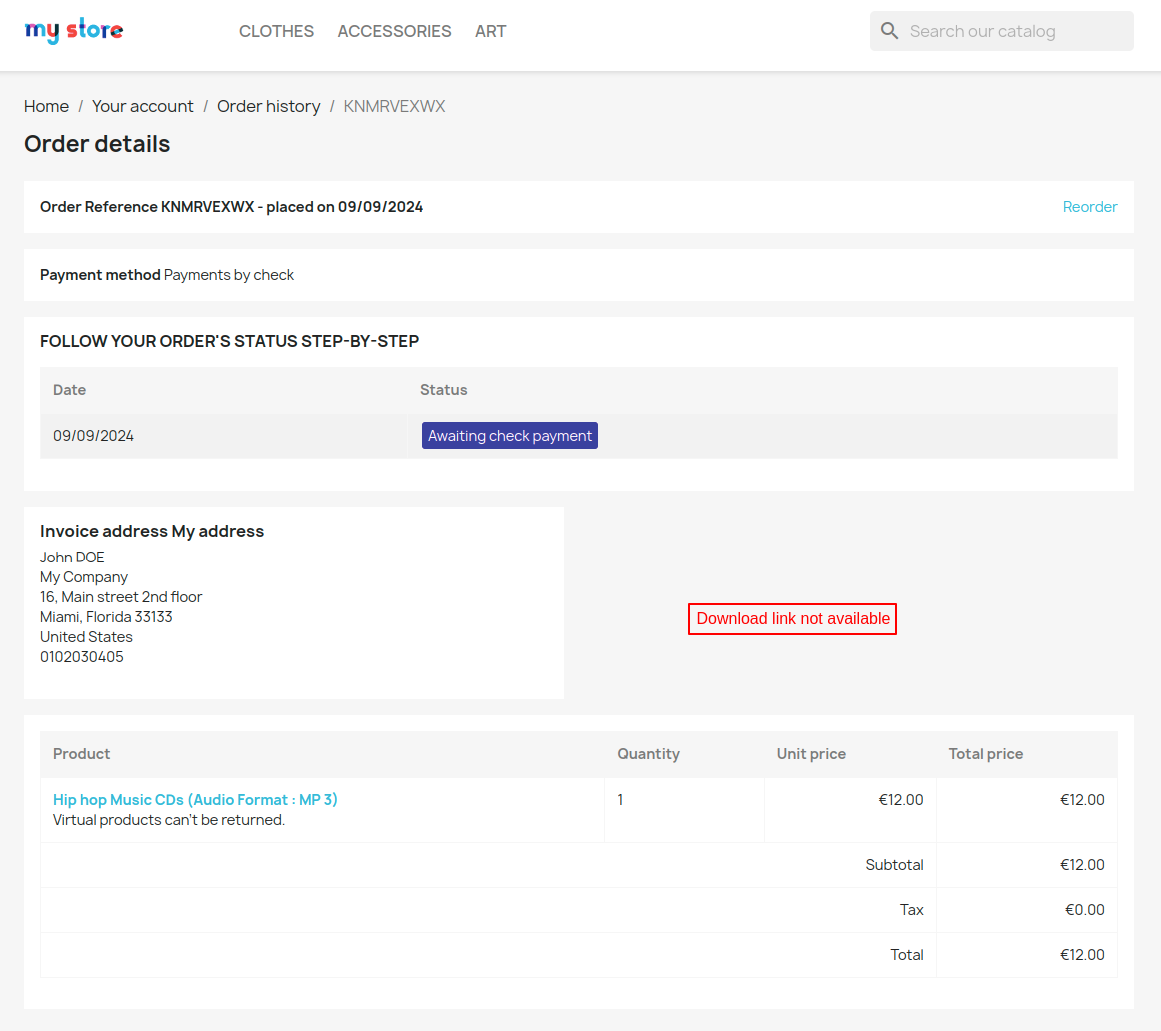
Once the admin has updated the order status, then the customer can download the file associated with the product.

Customers can now see the download link on the order details page as shown in the screenshot below.

So, this was all about the PrestaShop Virtual Product Combination module. I hope this document will help you in checking the functionality of the module in a better way.
Also, do let us know about your views in the comments.
Support
For any kind of technical assistance or query, please raise a ticket at http://webkul.uvdesk.com or send us a mail at support@webkul.com
Also, please explore our PrestaShop development services & vast range of featureful PrestaShop Addons.