Prestashop Geolocation | Auto-set Currency and Language
The accessibility factor plays a significant role in the expansion of the eCommerce domain, breaking boundaries and eliminating the invisible barriers between merchants and customers.
Now, customers can order any product they like from anywhere on the internet, as long as the merchant promises delivery.
In cross-border transactions, language and currency often serve as barriers to converting potential clients.
However, this no longer needs to be an issue, thanks to the Prestashop Geolocation module.
You do not need to worry about your overseas customers anymore as they’ll not face any problem navigating the shop.
On using this module, you would already be showing the content of your shop & even the price of products in the native language & currency of the user.
This will not only help customers in transacting easily but will also help them to understand the product features much clearer than before.
Note: This module is compatible with PrestaShop version Multi-Store compatible.
Features of Prestashop Geolocation Module
- Update the currency of the shop on the basis of the user’s location.
- Update the language of the shop on the basis of the user’s location.
- Log entry of all the users who tried to access the website in a separate module file.
- Set the default language & currency of the shop for various countries.
- Enable catalog mode for certain countries to restrict those customers from buying products.
How to Install the Prestashop Geolocation Module
- Firstly, go to the module manager in back office and click on ‘upload a module’.
- After that, drag and drop the module file or select the file from the system.
- In this way, the module installation will be successful.


Configure Prestashop Geolocation Module
After successfully installing the module, firstly you will see the following message on the configuration page.
As per the new modification, now you need to download the geolocation data file from the MaxMind website.
In order to download the geolocation data file, you need to register on the MaxMind website first. After creating the account, you will be able to download the “GeoLite2City” file from the website.

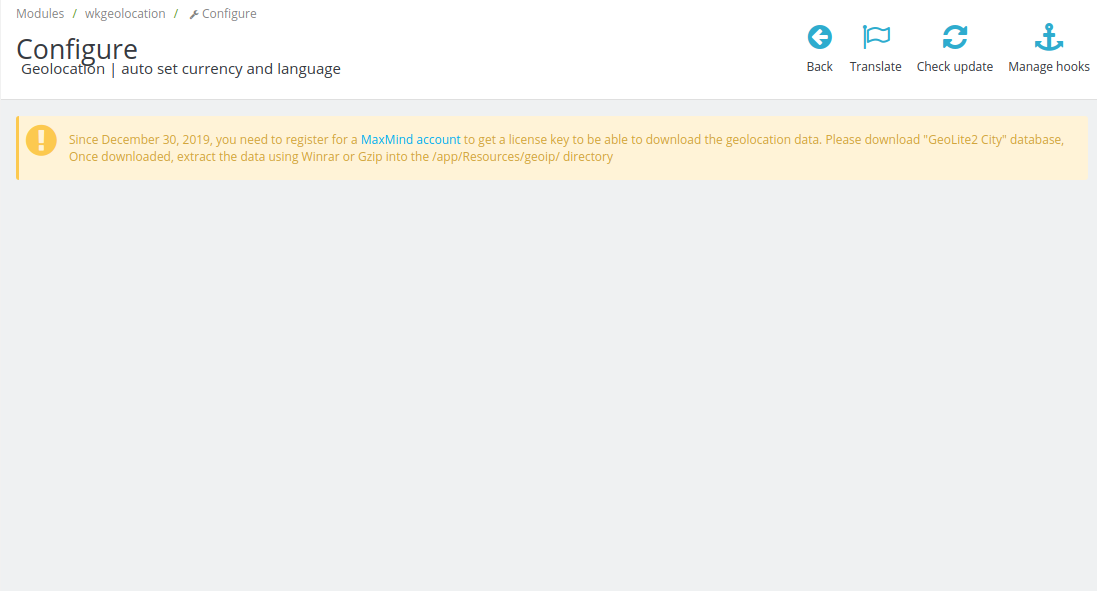
Upon successful download of the file, proceed to extract the file in the given below directories.
- In Prestashop 1.7, you need to extract it into app/Resources/GeoIP/ directory.
- Whereas, In Prestashop 1.6, you need to extract it into module folder/views/lib/vendor/resource.
After performing the above actions, you will be able to view the configuration page of the module. The configuration consists of various options. Let’s understand their significance one by one.
- Auto Change Currency: Enable this option to automatically change the currency on the basis of the users country.
- Auto Change Language: On enabling this option, you can automatically change the language on the basis of the users country.
- Shop Currency: Set a default currency for the countries which are yet inactive in the geolocation settings.
- Shop Language: Select a default language for the countries which are not active in the geolocation settings.
- Auto-fill Location Data in Address Form: Enable this option to automatically fill the location in the address form on the basis of the users country.
- Enable Logs: This option will let you log the data of users who tried to access the website.


Set Default Language & Currency
In the configuration settings, there is an option to set the default currency and language of the website.
That option is helpful when you have not set the default language and currency for any country.
Let’s understand this with an example how this works.
Suppose a customer from “Russia” visits your website. And, you have not set any default language and currency for “Russia” yet.
Hence, that customer will now see the product in default language & price in default currency.
However, you can always set the default language & currency for every country individually. So, to set the default language & currency for various countries.
Firstly, go to International section and then click on “Geolocation Settings” in the backend.


Workflow of the Prestashop Geolocation module
After configuring the module successfully, the functionality to update the language & currency automatically is added to the website.
Additionally, a new information block also displays on the home page to test the auto-update functionality.
Using the info, a customer can check whether the auto-update functionality is working correctly or not.


Catalog mode
Firstly, the information on the product page also becomes available in the native language of the user.
Another thing to understand here is about the catalog mode. In case, if you enable the catalog mode, then “add to cart” button hides from the product page.


At last, there is a functionality of auto-fill of location in the address form. Hence, now a customer will see that city & zip code is automatically filled based on the user’s location.
This automatic filling of city & zipcode is available in the configuration settings.
In case, if customer disables it, then this particular functionality won’t work.


So, this was all about Prestashop Geolocation Module. I hope this document will help you in checking the functionality of the module in a better way.
Also, do let us know about your views in the comments.
In case, if you are also looking to integrate auto-fill address functionality, then do checkout the blog.
Support
For any kind of technical assistance or query, please raise a ticket at http://webkul.uvdesk.com or send us a mail at support@webkul.com