OpenCart QuickBooks Desktop Connector
Considering the major advantages of Quickbooks desktop version, Webkul has integrated it with Opencart.
Now, using the Opencart QuickBooks Desktop Connector you will be able to sync your Opencart Store – Customer, Product, and Order details with the QuickBooks.
Also, when a new user registers, or you add a new product, and when an order is placed by the customers all of this data is synchronized with your QuickBooks Desktop.
For integrating QuickBooks Online with OpenCart, then please check out OpenCart QuickBooks Desktop Connector module.
Watch the video to check more about the plugin –
Note:
1. Quickbooks Desktop Enterprise and Quickbook Web Connector(http://marketplace.intuit.com/webconnector/) must be installed before using this module.
You may refer the link: https://community.intuit.com/articles/1502240-how-to-install-quickbooks-desktop for QuickBook installation.
2. You need to enabling verbose logging for QuickBooks Web Connector for Desktop (QBWC) – https://help.developer.intuit.com/s/article/QBWC-Logging
3. The module will only work correctly for the SSL certified sites.
4. Both the QuickBooks Desktop and the QuickBook Web Connector application must be simultaneously running on your system.
Also, you need to create a company file click here to know how to create one.
Please note that whichever company is open at the time of data sync, the data will be synchronized within that only.
5. This integration is tested with the QuickBooks Enterprise Solution 18.0 and should also work with older versions.
Note:
- Only some of the special symbols are allowed in the name, description fields. You may refer to the link here for more information.
- Every displayed Name must be unique across customer, employee and vendor in QuickBooks.
- There is a limit for the maximum number of characters (letters, numbers and so on) e.g. – Account Name: 31, Account Numbers: 7, Item name: 31, Employee Name (first and last): 25 etc.
Features
- The admin can synchronize the OpenCart store – Customers, Products, Orders, Quickbook Error Log, Import Quickbook Products, and Import Quickbook Customers with the QuickBooks Desktop.
- QuickBooks Error Logs allow the admin to track and resolve synchronization issues between OpenCart and QuickBooks.
- Import Quickbook Products from Quickbook to Opencart via CSV Format.
- Import Quickbook Customers from Quickbook to Opencart via CSV Format.
- Sync New Customer Registration from the OpenCart Store to the QuickBooks Desktop.
- Sync Adding a new Product from the OpenCart Store to the QuickBooks Desktop.
- Further Sync Orders placed in the OpenCart Store with QuickBooks Desktop.
- Auto-sync Order, Customer, and Product in QuickBooks Desktop when we add it in OpenCart.
- Auto-sync Customer and Product in QuickBooks Desktop when we edit it from OpenCart.
- Further Auto-sync Customer and Order in QuickBooks Desktop when we delete it from OpenCart.
- Guest Orders can be synchronized from OpenCart to QuickBooks.
- Mass Delete Option for Orders and Customers in OpenCart.
Installation
Customers will get a zip folder and they have to extract the contents of this zip folder on their system according to your Opencart version.
The extracted folder has admin, catalog, ocmod, system, and wk_qbd directories.
You need to transfer the admin, catalog, system and wk_qbd directories into the Opencart root directory on the server as shown below.

Once you have uploaded the folders, Navigate to Extensions> Extension Installer and upload the XML file.
The XML file can be found in the ocmod folder under the module directory.
In the ocmod folder select the Opencart version you are using under which you will find wkqbdc.ocmod.xml file.

After uploading the XML file go to the Extensions > Modification and click on refresh field.

Go to Users->User Groups and edit desired group(specially admin) and then give access and modify permission to all the uploaded files.

Admin Configuration – Opencart QuickBooks Desktop Connector
To configure the module, navigate to Extensions>Modules>Webkul Opencart QuickBooks Desktop Connector
Here, the admin will install and enable the Opencart QuickBooks Desktop Connector extension.

After clicking on the edit button, a new page will open up and from here the admin can configure the module.

Here, the admin will –
- Set the status of the module as Enable or Disabled as per the requirement.
- Set the Time Zone for the QuickBook Company.
- Input the App Name(you can enter app name as per your requirement) for QuickBook Web Connector.
- Enter the App Description(you can enter app description as per your requirement) for QuickBook Web Connector.
- Enter the QuickBook Webconnector User Name(you can enter a user name as per your requirement).
- Set the QuickBook Web Connector Password(you can enter a password as per your requirement and the same will be used for the app validation).
- Enter the time duration for the web connector scheduler in minutes. The value must be greater or equal to 5.
- Set the sync slot number and must be between 3 and 30.
Note:
After filling up all the information in the above section, the admin needs to save the configuration.After that will the download button for the QuickBook Web Connector be visible for use.
To create a QuickBook Web Connector app you need to follow the below steps :
Sequence of Steps:
Step 1: After entering all the information, in the above configuration settings, click the download button at the top right-hand side.
This will download a opencart.qwc file.
Step 2: Now, open the QuickBooks Web Connector on your system and click the Add an Application button.

Step 3: Clicking the Add an Application button will bring up a section to browse for the opencart.qwc file.
Browse the file and select it. After that you will be prompted for the access permissions, allow them to create your application.
After that, you will be able to see your created application.

Step 4: After selecting the opencart.qwc file you need to give certain permissions.
The pop-up that comes up click on Ok.

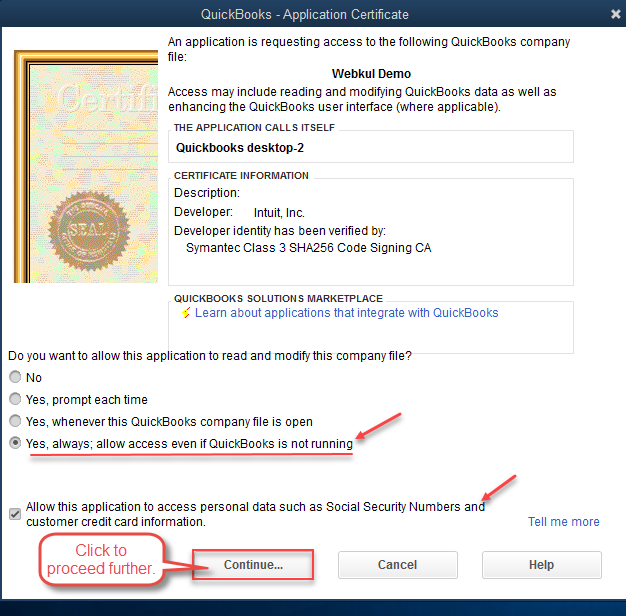
Step 5: After the above step you will see another pop-up.Check the options as shown below in the snapshot and then click the Continue button.
Step 6: Lastly, you will see the Access Confirmation pop-up box.Here, click the Done button as shown below in the snapshot.

Step 7: After you have created the application for the first time you will have to update the created app.To update, select the checkbox for the app and enter the password that you have set above for the QuickBooks Webconnector Password in the module.
Configuration settings under the admin panel and then click the Update Selected button.

Note:
For Updating the app at regular intervals, you can also keep the column Auto-Run checkbox marked and set the interval at which the app should get auto-updated.Step 8: Now open your QuickBooks Desktop on your system login and navigate to Edit>Preferences.

Step 9: After this, navigate to the Sales Tax >Company Preferences and click the Add Sales Tax Item.

Now, Step 10: This brings a pop-up. Here, under the Type section select the option Sales Tax Item from the drop-down option.
Also, enter the Sales Tax Name(You can keep anything but should not be “Opencart Tax“).
Lastly, make sure to set the Tax Rate = 0.0% and click the Ok button to confirm.

Step 11: After clicking the OK button in Step 1o, the Sales Tax Name will be created.
You need to select this sales tax name in Step 9.

Admin Management
After the successful installation of the extension, the admin will have the QuickBooks Desktop menu option with three sub-menu options.
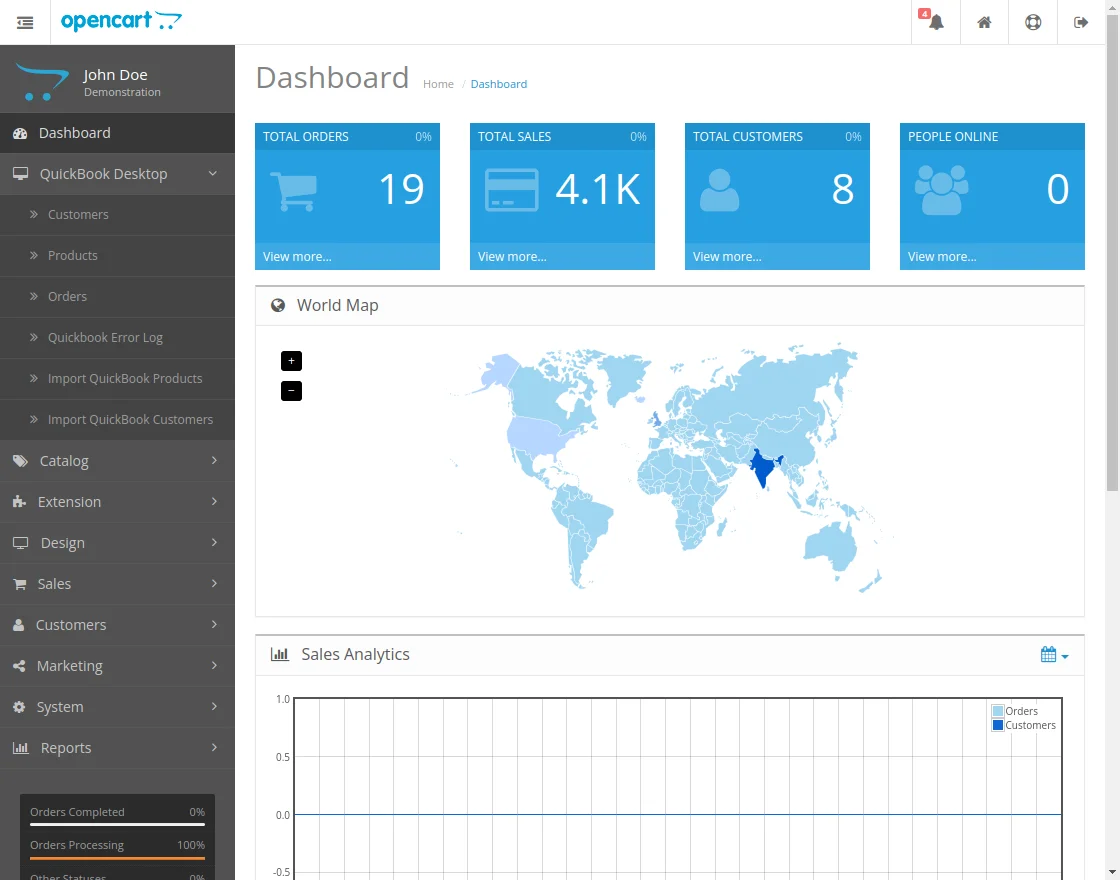
The three sub-menu options include –
- Customers
- Products
- Orders
- Quickbook Error Log
- Import Quickbook Products
- Import QUickbook Customers
Export Customers:
Under this section, the admin can see a list of all the synchronized customers from the open cart store to QuickBooks Desktop.
The admin can filter the customer list using various filters like – Opencart Customer ID, Customer Name, QuickBook Desktop Customer ID, and email.
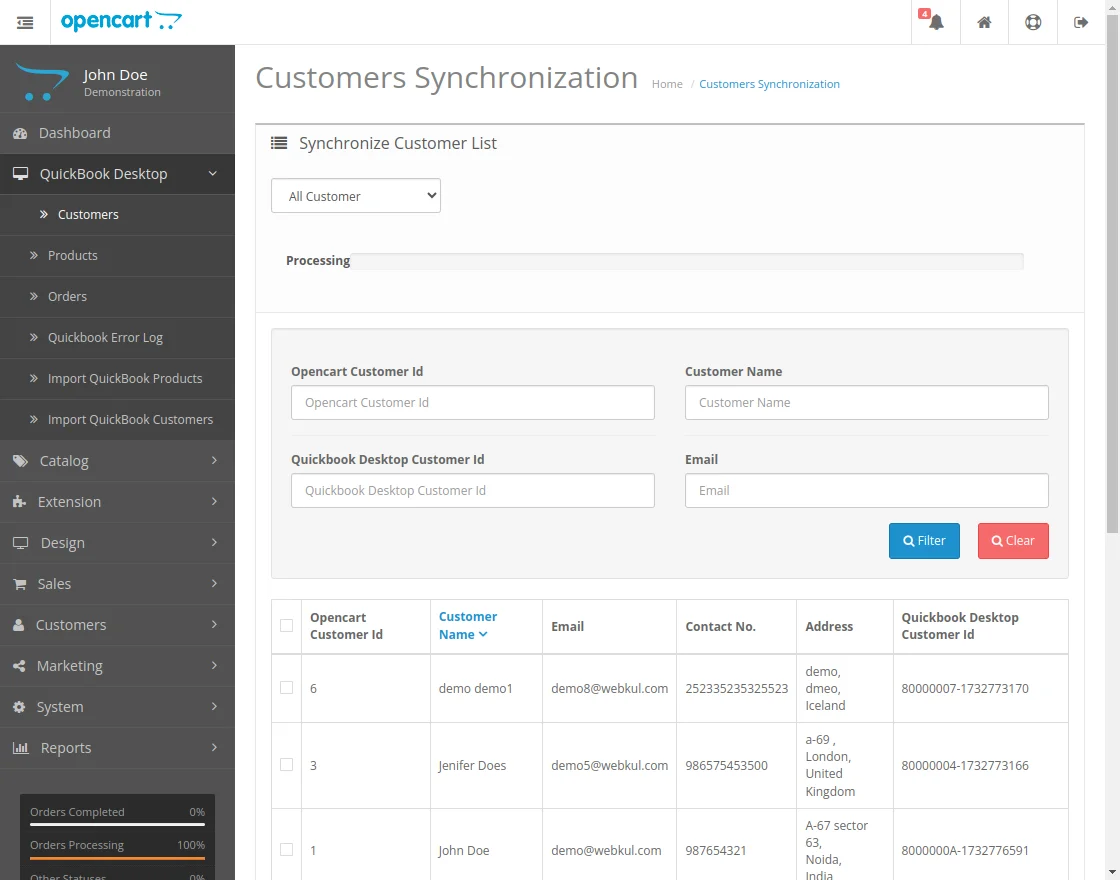
The admin can also export the open cart store customer list by clicking the Export Customer button.
Selecting to export All Customers or only the Enabled Customers as per the need.
Here, you can also delete the exported customer by checking the checkbox for the ones that you want to remove and then clicking the Delete Customers button.
Export Products:
Under this section, the admin can see all the synchronized products from Opencart to QuickBooks.
Admin can find the details related to the products like the – Product ID, Product Image, Name, Model, QuickBooks Desktop Product ID, Unit Price, and Sort Order.
The admin can also choose to export all the products or the enabled products only to QuickBooks.
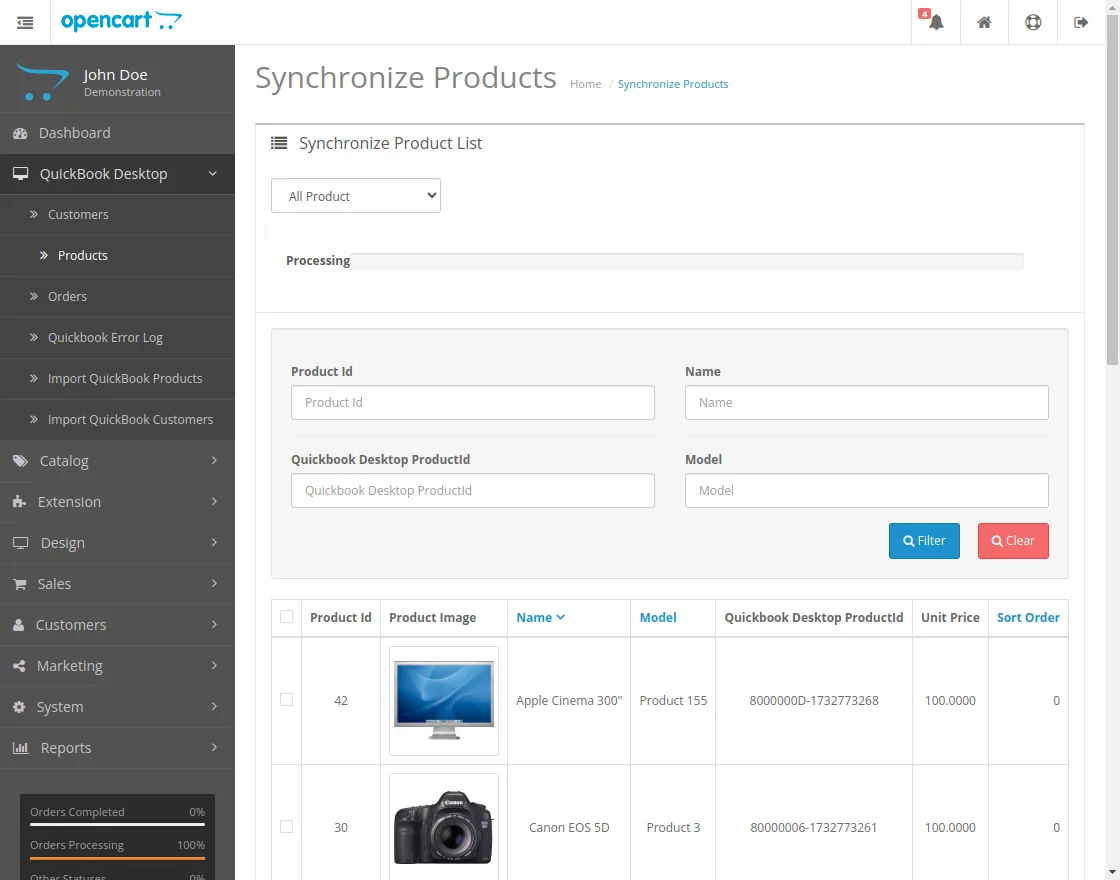
After clicking the Export Products button, the products will be added to the export queue and whenever the QuickBook Web Connector app runs the products will be added to the QuickBook.
The admin can also filter the products using – Product Id, Name, Quickbook Desktop Product Id, and Model name.
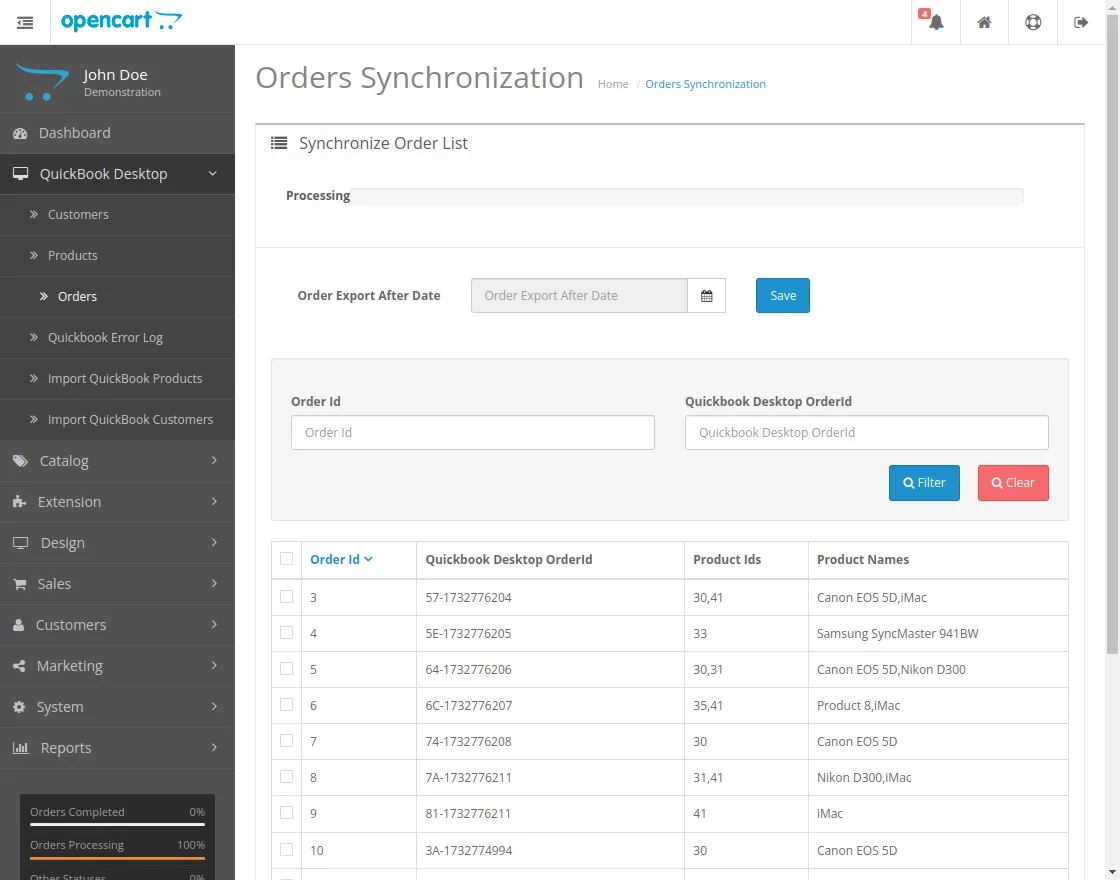
Export Orders:
Under the orders section, the admin can see all the Orders that have been synchronized from the Opencart store to the Quickbooks.
The admin can filter the order list using the Order ID and the Quickbook Desktop Order ID.
The admin can also click on the Export orders button to export the orders from the Opencart store to the Quickbooks desktop.
Note: Only those orders will be exported to Quickbook, whose products and customers are synced to Quickbooks.
Here, you can also delete the exported orders by checking the checkbox for the ones that you want to remove and then clicking the Delete Orders button.
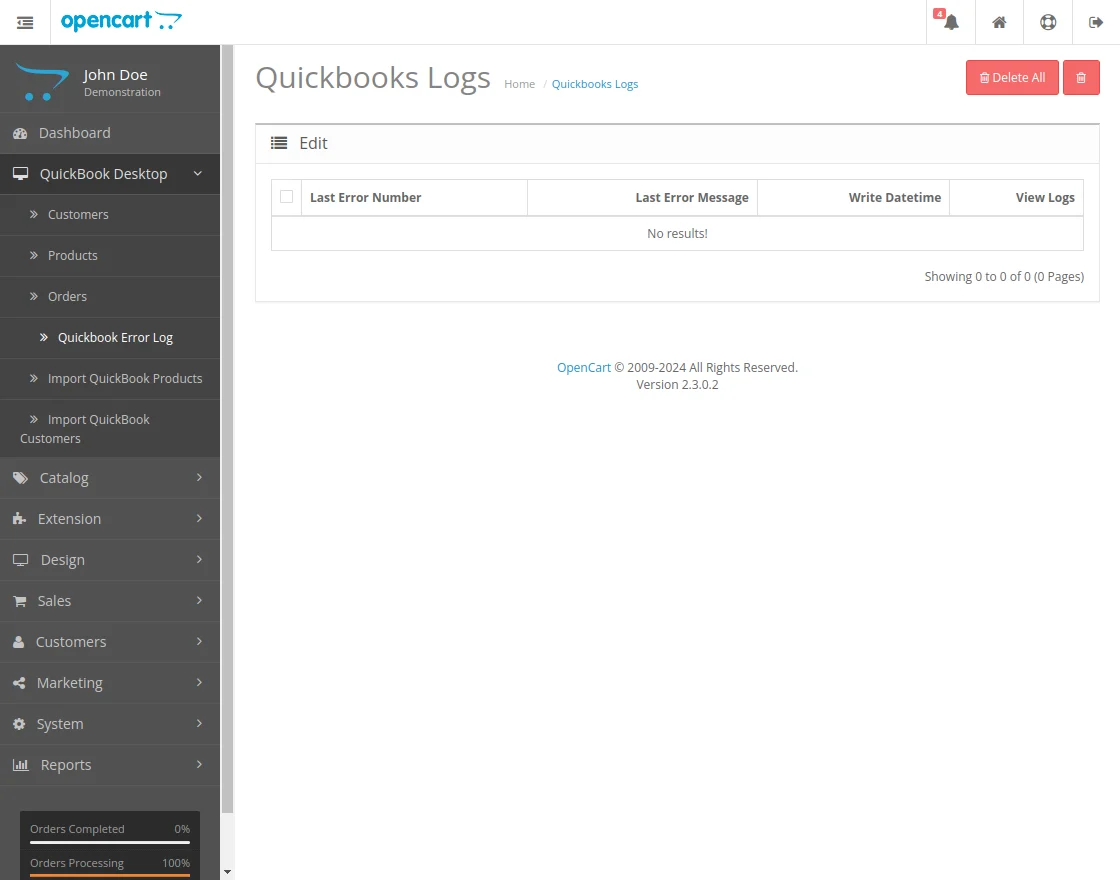
Quickbook Error Logs:
Under the section, the admin can see all the Error Logs that have been synchronized from the Opencart store to the Quickbooks.
Logs serve as a chronological record of events, illustrating the actions that preceded the error.
This functionality allows admins to backtrack and rectify configurations.
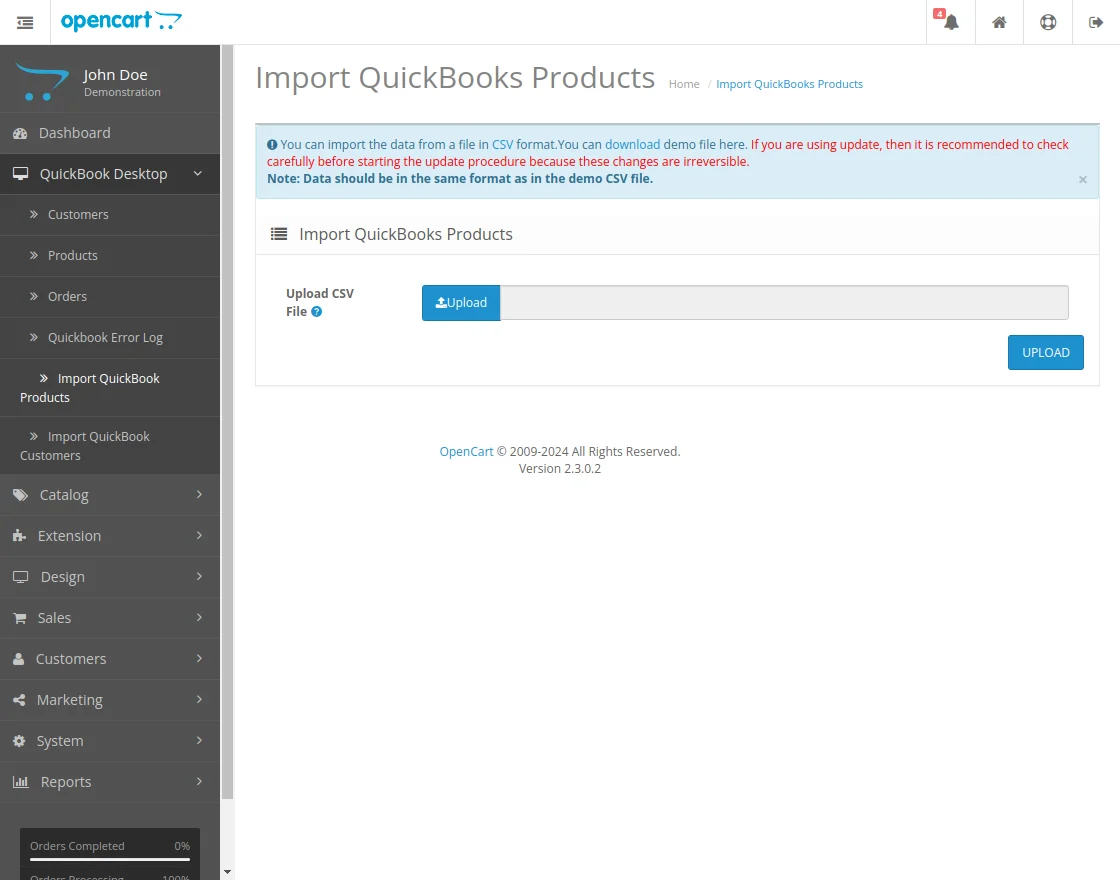
Import Quickbook Products:
Under this section, the admin can upload the CSV File to import the product on the Opencart.
Note: Data should be in the same format as in the demo CSV file.
Import Quickbook Customers:
Under this section, the admin can upload the CSV File to import the customer on the Opencart.

QuickBooks – Management
After the admin has manually or auto-synced the Products, Orders, Customers, Quickbook Error Log, Import Quickbook Products, and Import Quickbook Customers from the Opencart store to QuickBooks.
Admin can log in to their QuickBooks Desktop application to check the synced data.
Orders:
After login, navigate to the side panel Customer menu option.
Here, the admin can check the orders that will be visible customer wise as shown below in the snapshot.

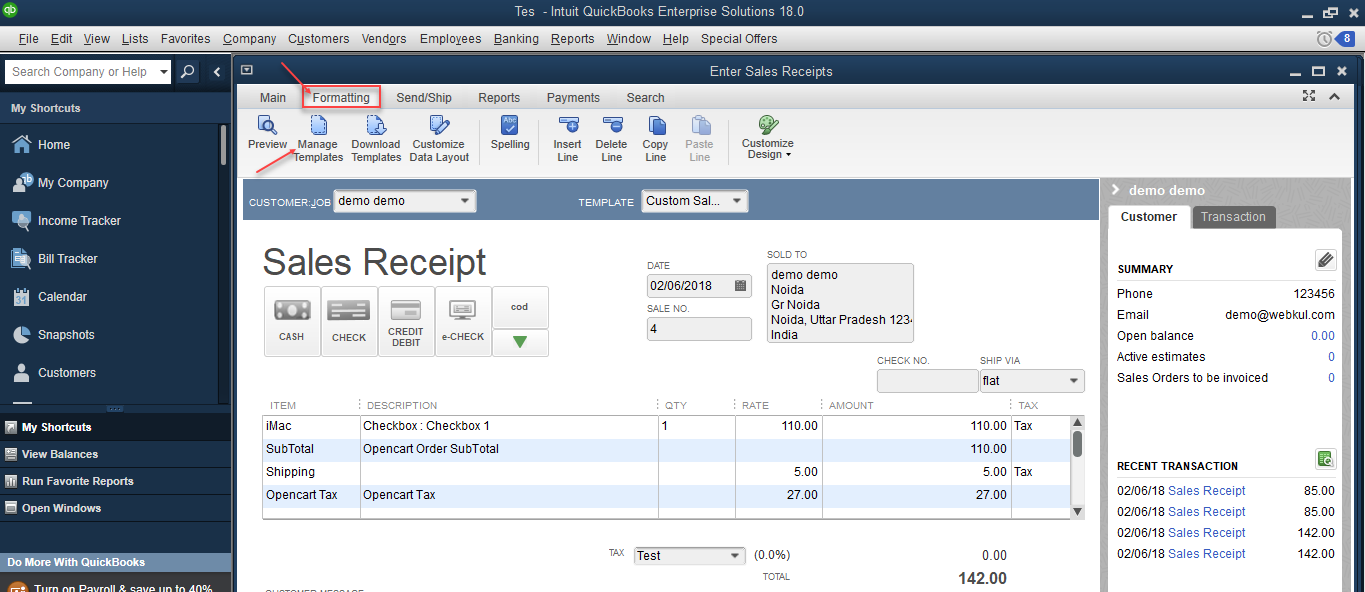
Clicking the sales receipt will bring up the details of the order as shown below in the snapshot.

Here, the admin will find the details like –
- Product options name & value selected by the customer while placing the order
- Payment Method Code
- Shipping Method Code
- Shipping Charge is visible
- Opencart Tax
Note:
The tax will not be visible under the Tax section. It’s because the QuickBooks API does not allow editing the Tax section.Displaying data on the Sales Receipt:
Navigate to sales receipts and then click on Formatting>Manage Template as shown below.
Now, a pop-up appears click the Ok button on it.

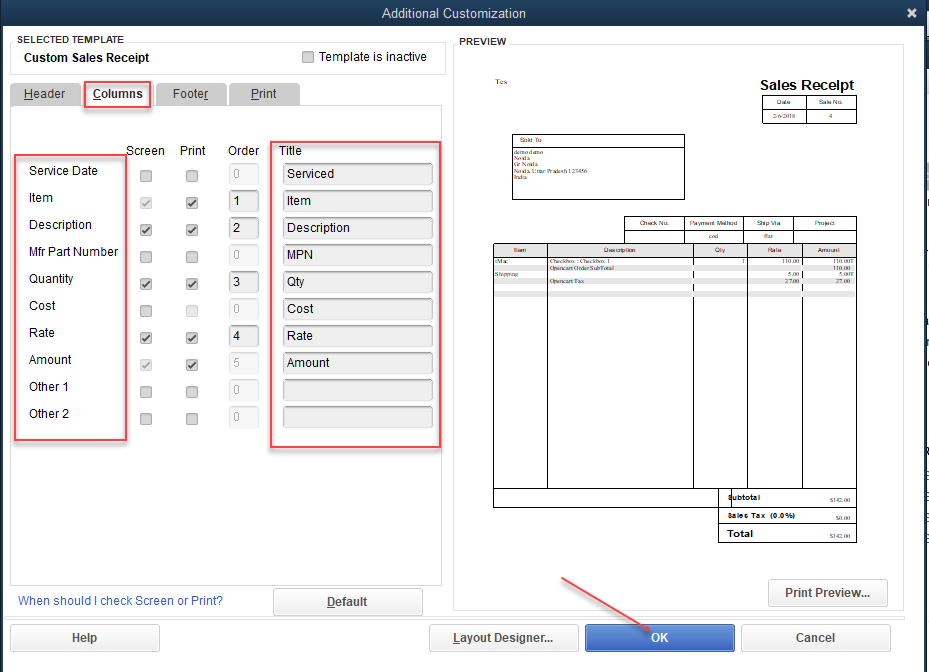
After this, the window that comes up click Additional Customization.

Lastly, select the options under the Header for the custom sales receipt like – Payment Method, Ship Via, Ship To, Sold To, etc. that should be visible in the sales receipt as shown below.

Note: The Ship Via Box will display the shipping method code.
Under the Columns tab, similarly, select the product details to show on the sales receipt.
Products/ Bulk Products:
To check the list of synced products navigate to Lists->Item List. The section with the products synced with QuickBooks Desktop appears.

The admin can double tap any product to edit the product details as shown below in the snapshot.

Customers/ All Import Quickbook Customers:
On the left panel, go to the Customers menu option to view all the customers synced with QuickBooks Desktop.
Select a customer and it will bring up the customer details as shown below in the snapshot.

That’s all for the Opencart QuickBooks Desktop Connector module. Still, have a query or a doubt regarding the extension get back to us at support@webkul.com or just raise a ticket at webkul.uvdesk.com

