User Guide for Odoo Website Rental Sale
Table of Content
INTRODUCTION
Odoo Website Rental Sale enables you to offer rental products through the Odoo eCommerce website. Customers can browse available rental products and select them for a specific rental period.
Customers can choose pickup and return dates to view the rental duration and applicable rental price. The refundable security amount is also displayed before adding the product to the cart.
After confirming the rental order, customers can access their Rental Orders from the website account. They can review the rental product, rental period, total amount, and order status.
NOTE: Odoo Website Rental Sale Module works in conjunction with the following module:
First, you must install this module in your system for Odoo Website Rental Sale module to work correctly.
FEATURES
- Configure rental products with agreements, rental units, rates, and security amounts.
- Display available rental products with a clear ‘For Rent’ label.
- Let customers select pickup and return dates and times online.
- Calculate rental duration from the selected rental dates.
- Apply configured rental rates to the selected rental period.
- Display the refundable security amount before cart addition.
- Keep rental dates, security, taxes, and totals visible during checkout.
- Confirm rental bookings directly through the website.
- Let customers track rental orders from their website account.
INSTALLATION
- Once you purchase the App from Webkul store, you will receive the link to download the zip file of the module.
- Extract the file on your system after the download finishes. You will be able to see a folder named ‘odoo_website_sale_rental’.
- Copy and paste this folder inside your Odoo Add-Ons path.
- Now, open the Odoo App and click on the Settings menu. Here, click on Activate Developer Mode.
- Then, open the Apps menu and click on ‘Update Modules List.’
- In the search bar, remove all the filters and search‘odoo_website_sale_rental’.
- You will be able to see the module in the search results. Click on ‘Install’ to install it.
WORKFLOW
CONFIGURATION
1. Create a Product Agreement
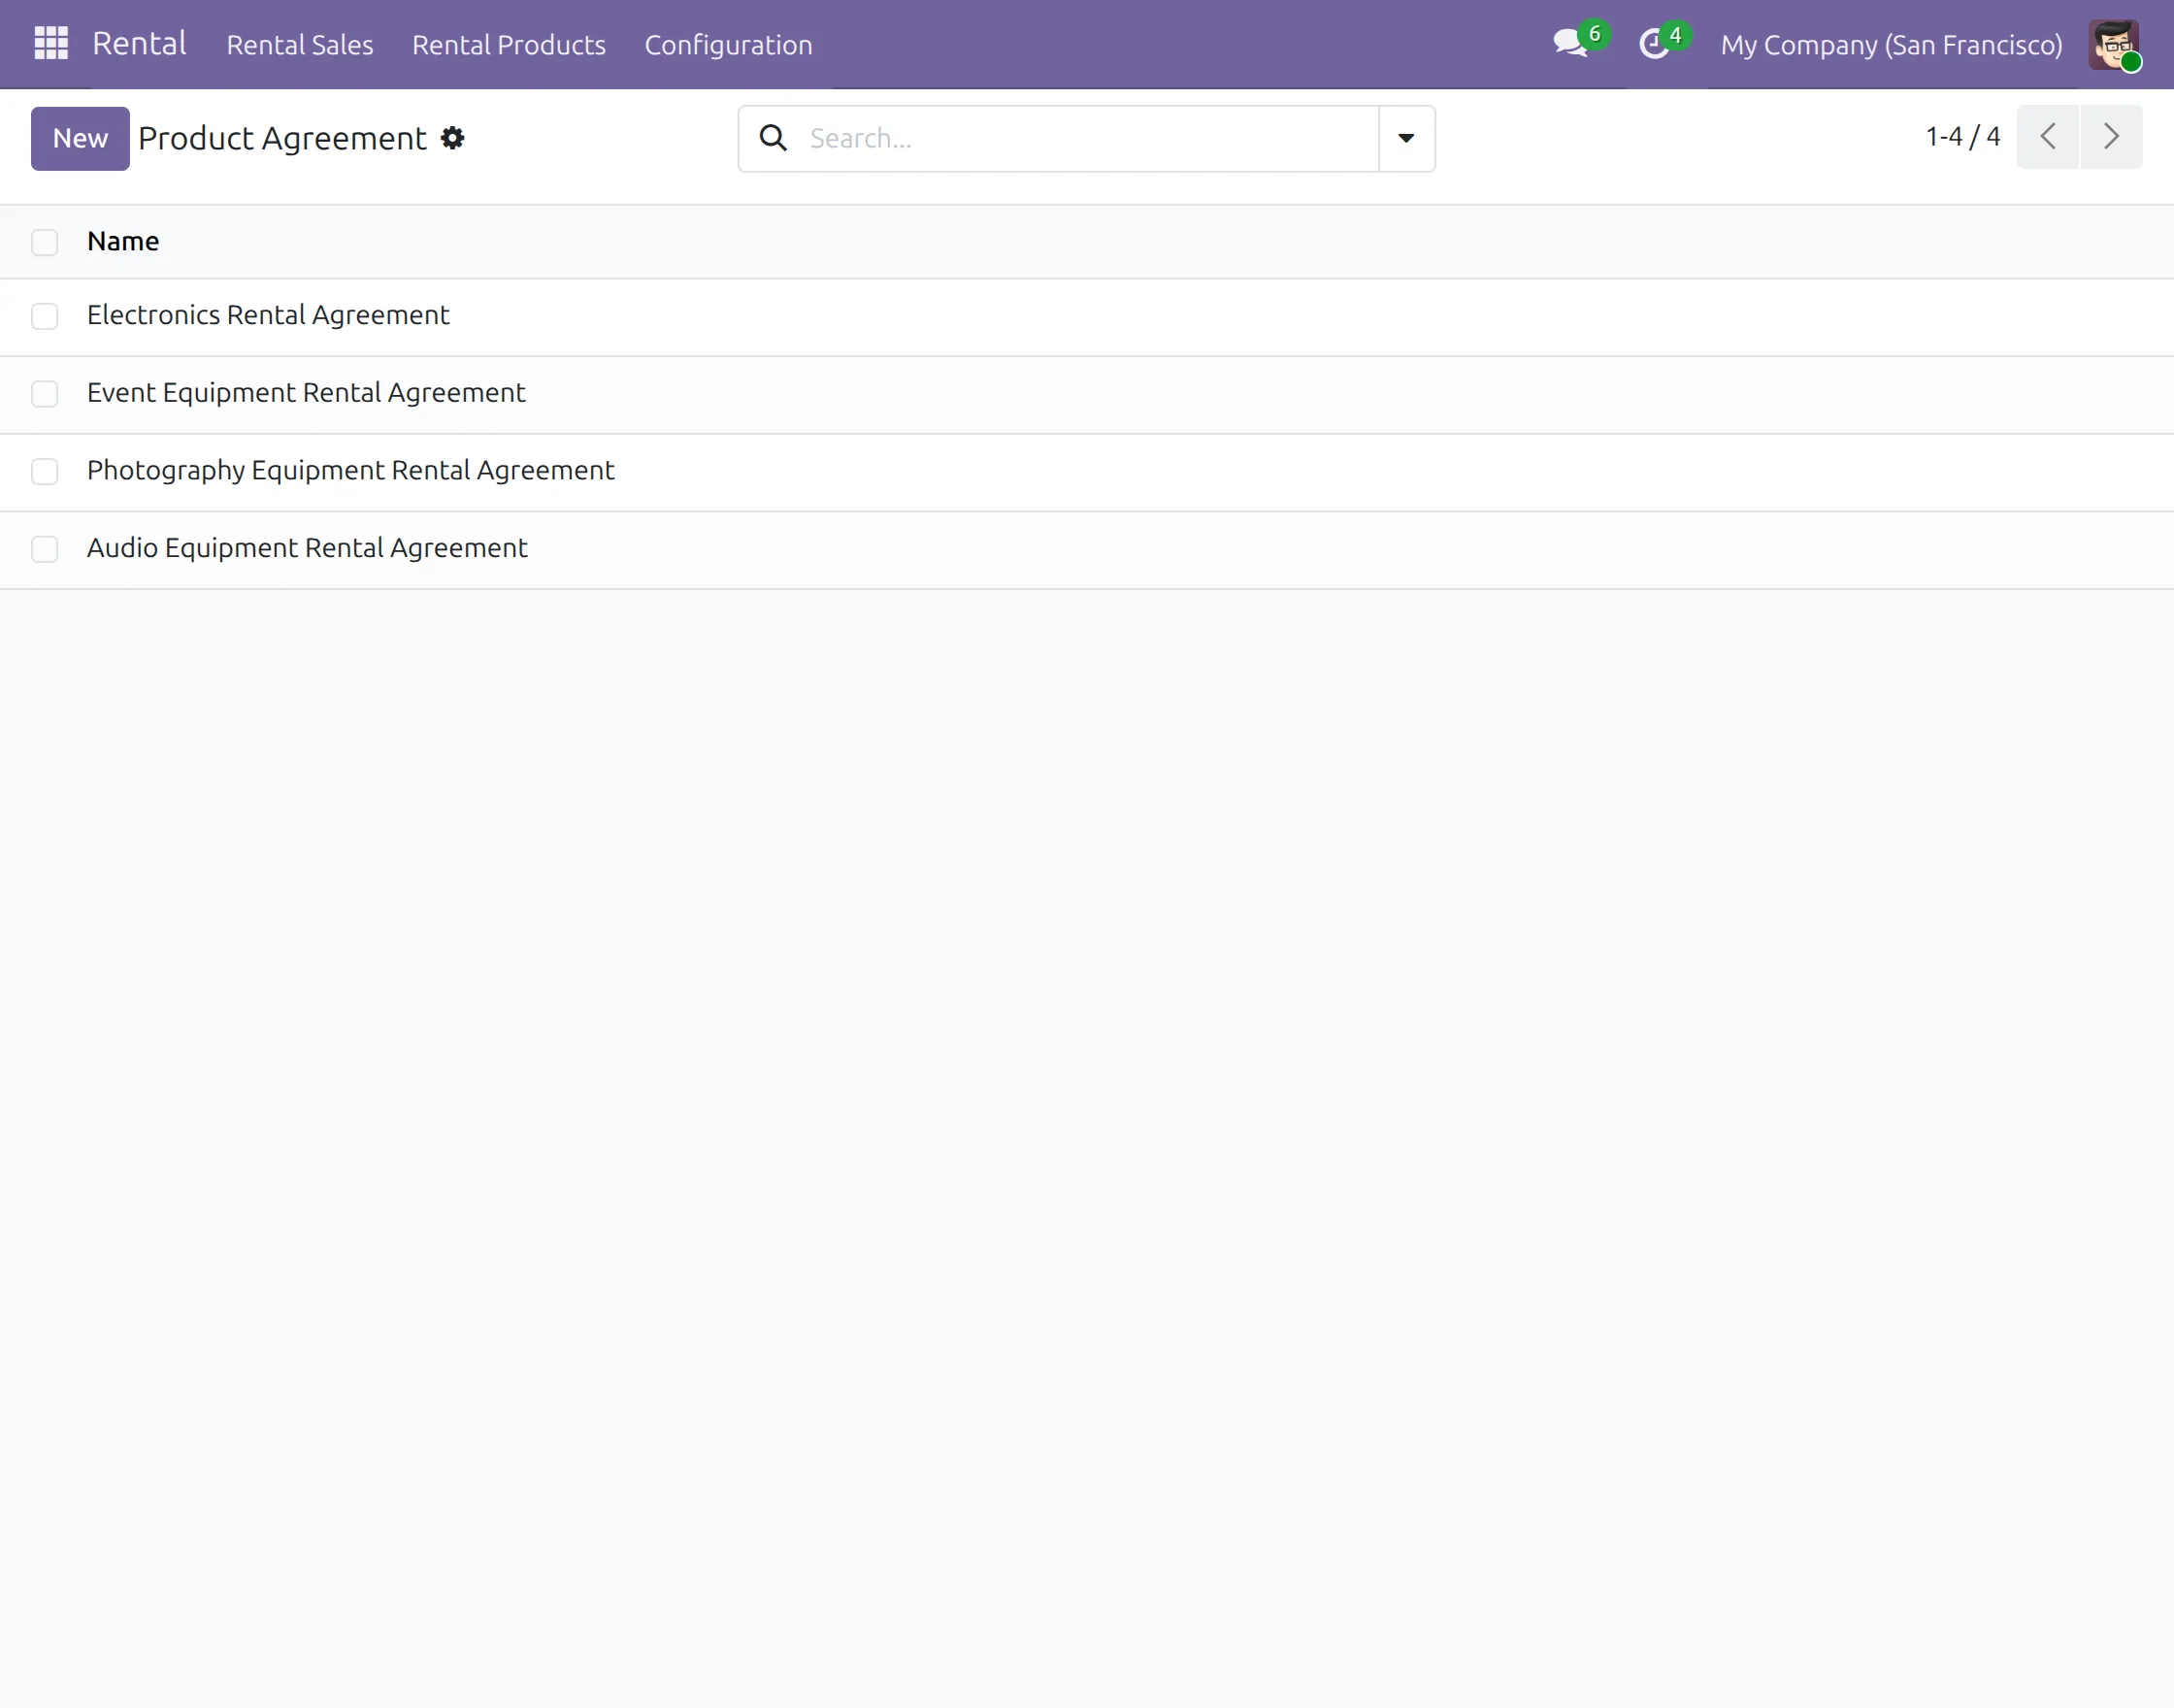
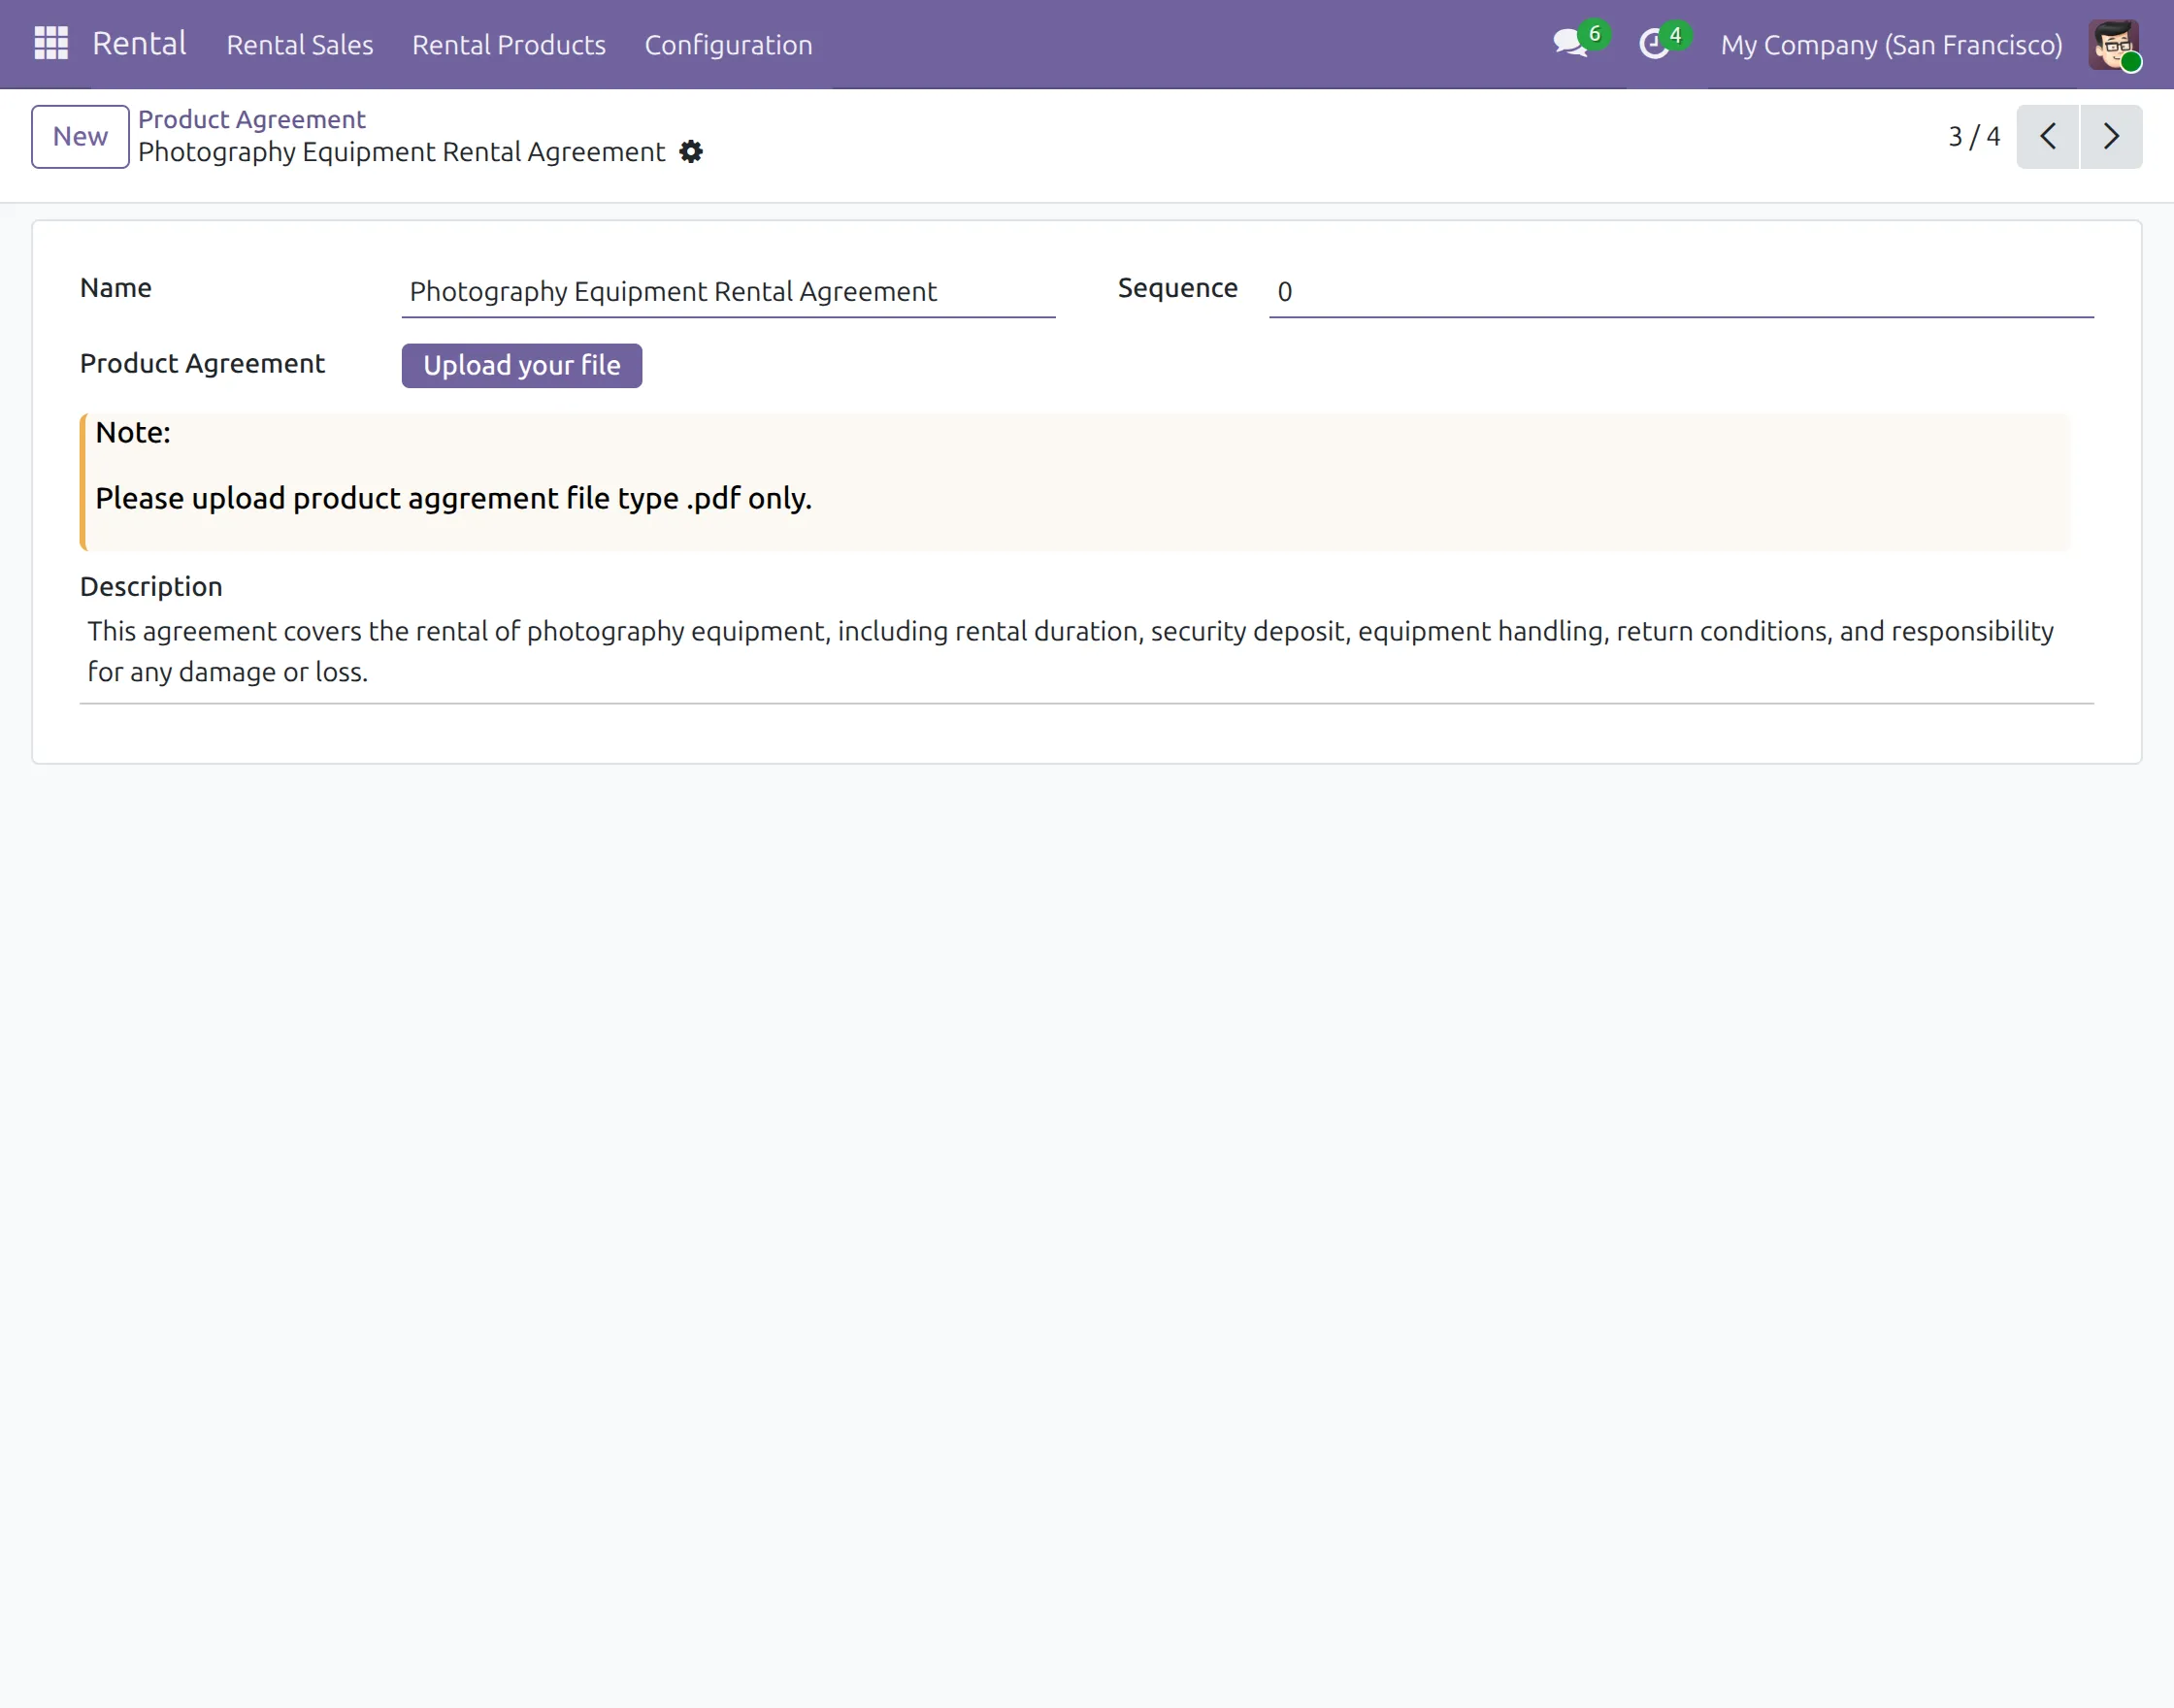
Go to Rental → Configuration → Product Agreements and create a rental agreement.
Enter the agreement name and sequence, then upload the agreement file. The module accepts the product agreement in PDF format.
Add a description explaining the rental terms and save the agreement.
2. Configure Rental Units
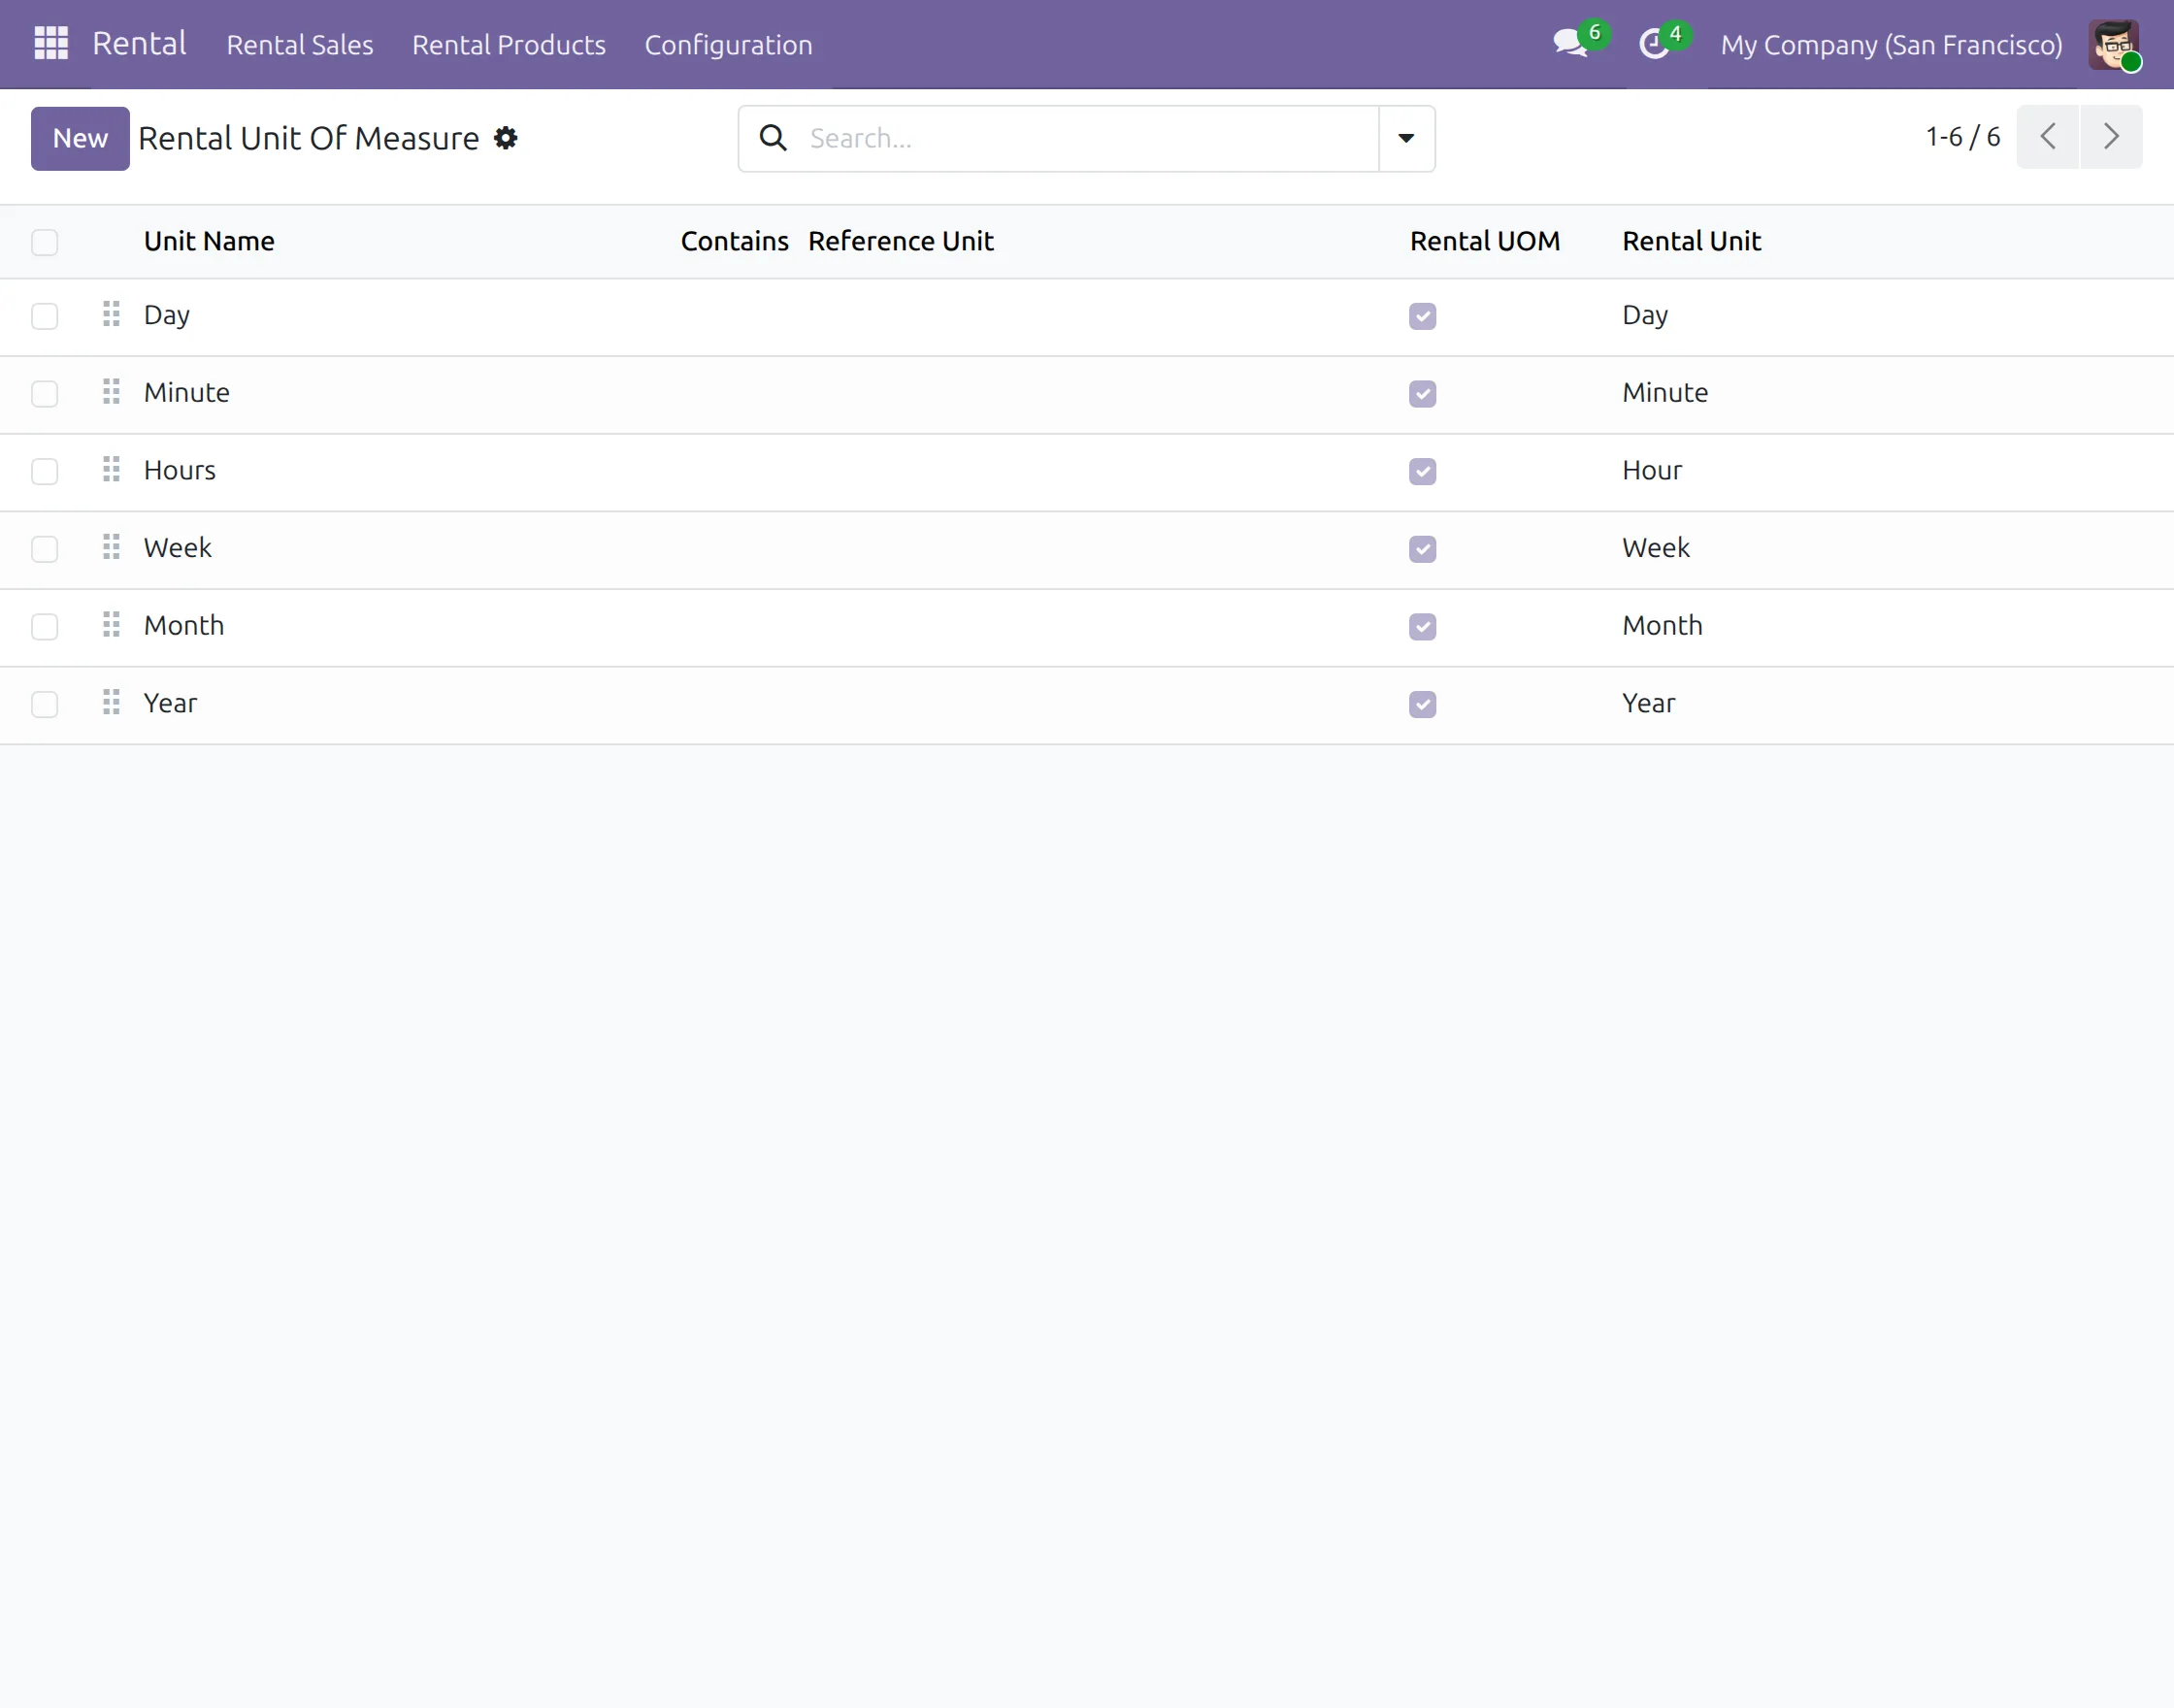
Go to Rental → Configuration → Rental Unit of Measure.
Configure the units used for rental periods, such as Minute, Hour, Day, Week, Month, or Year.
These rental units can then be used to define the available rental tenure and pricing for products.
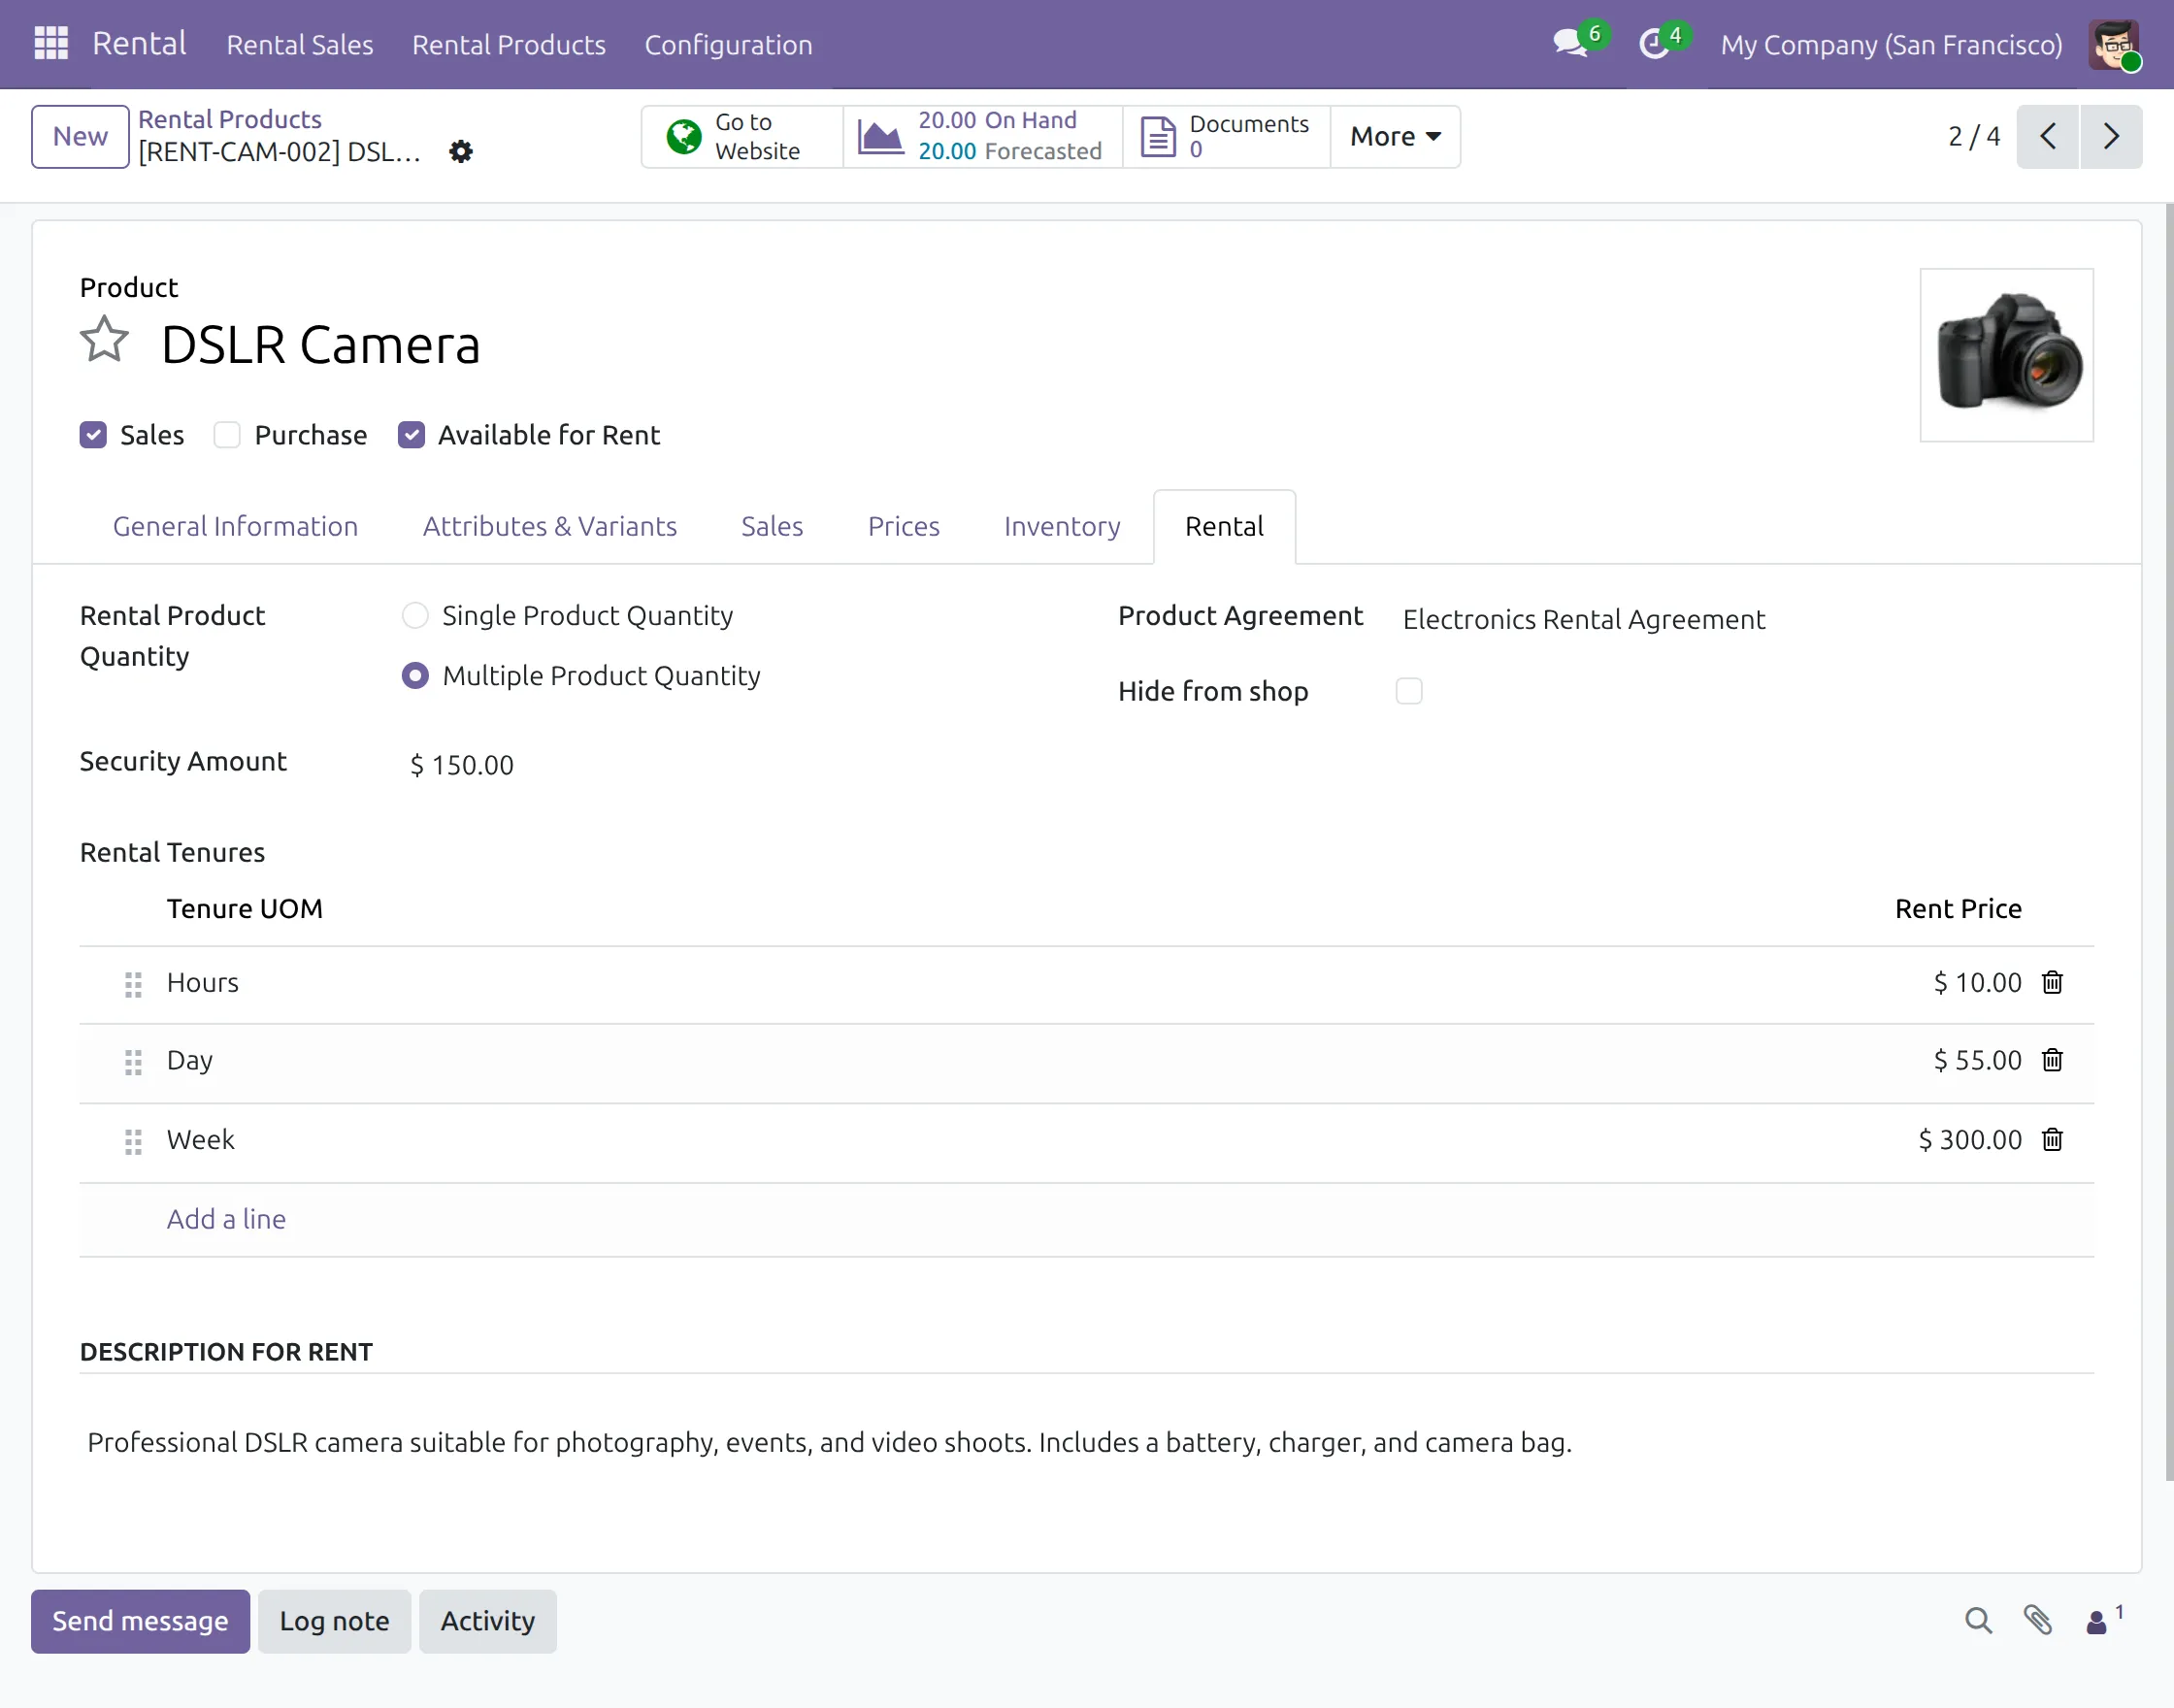
3. Configure the Rental Product
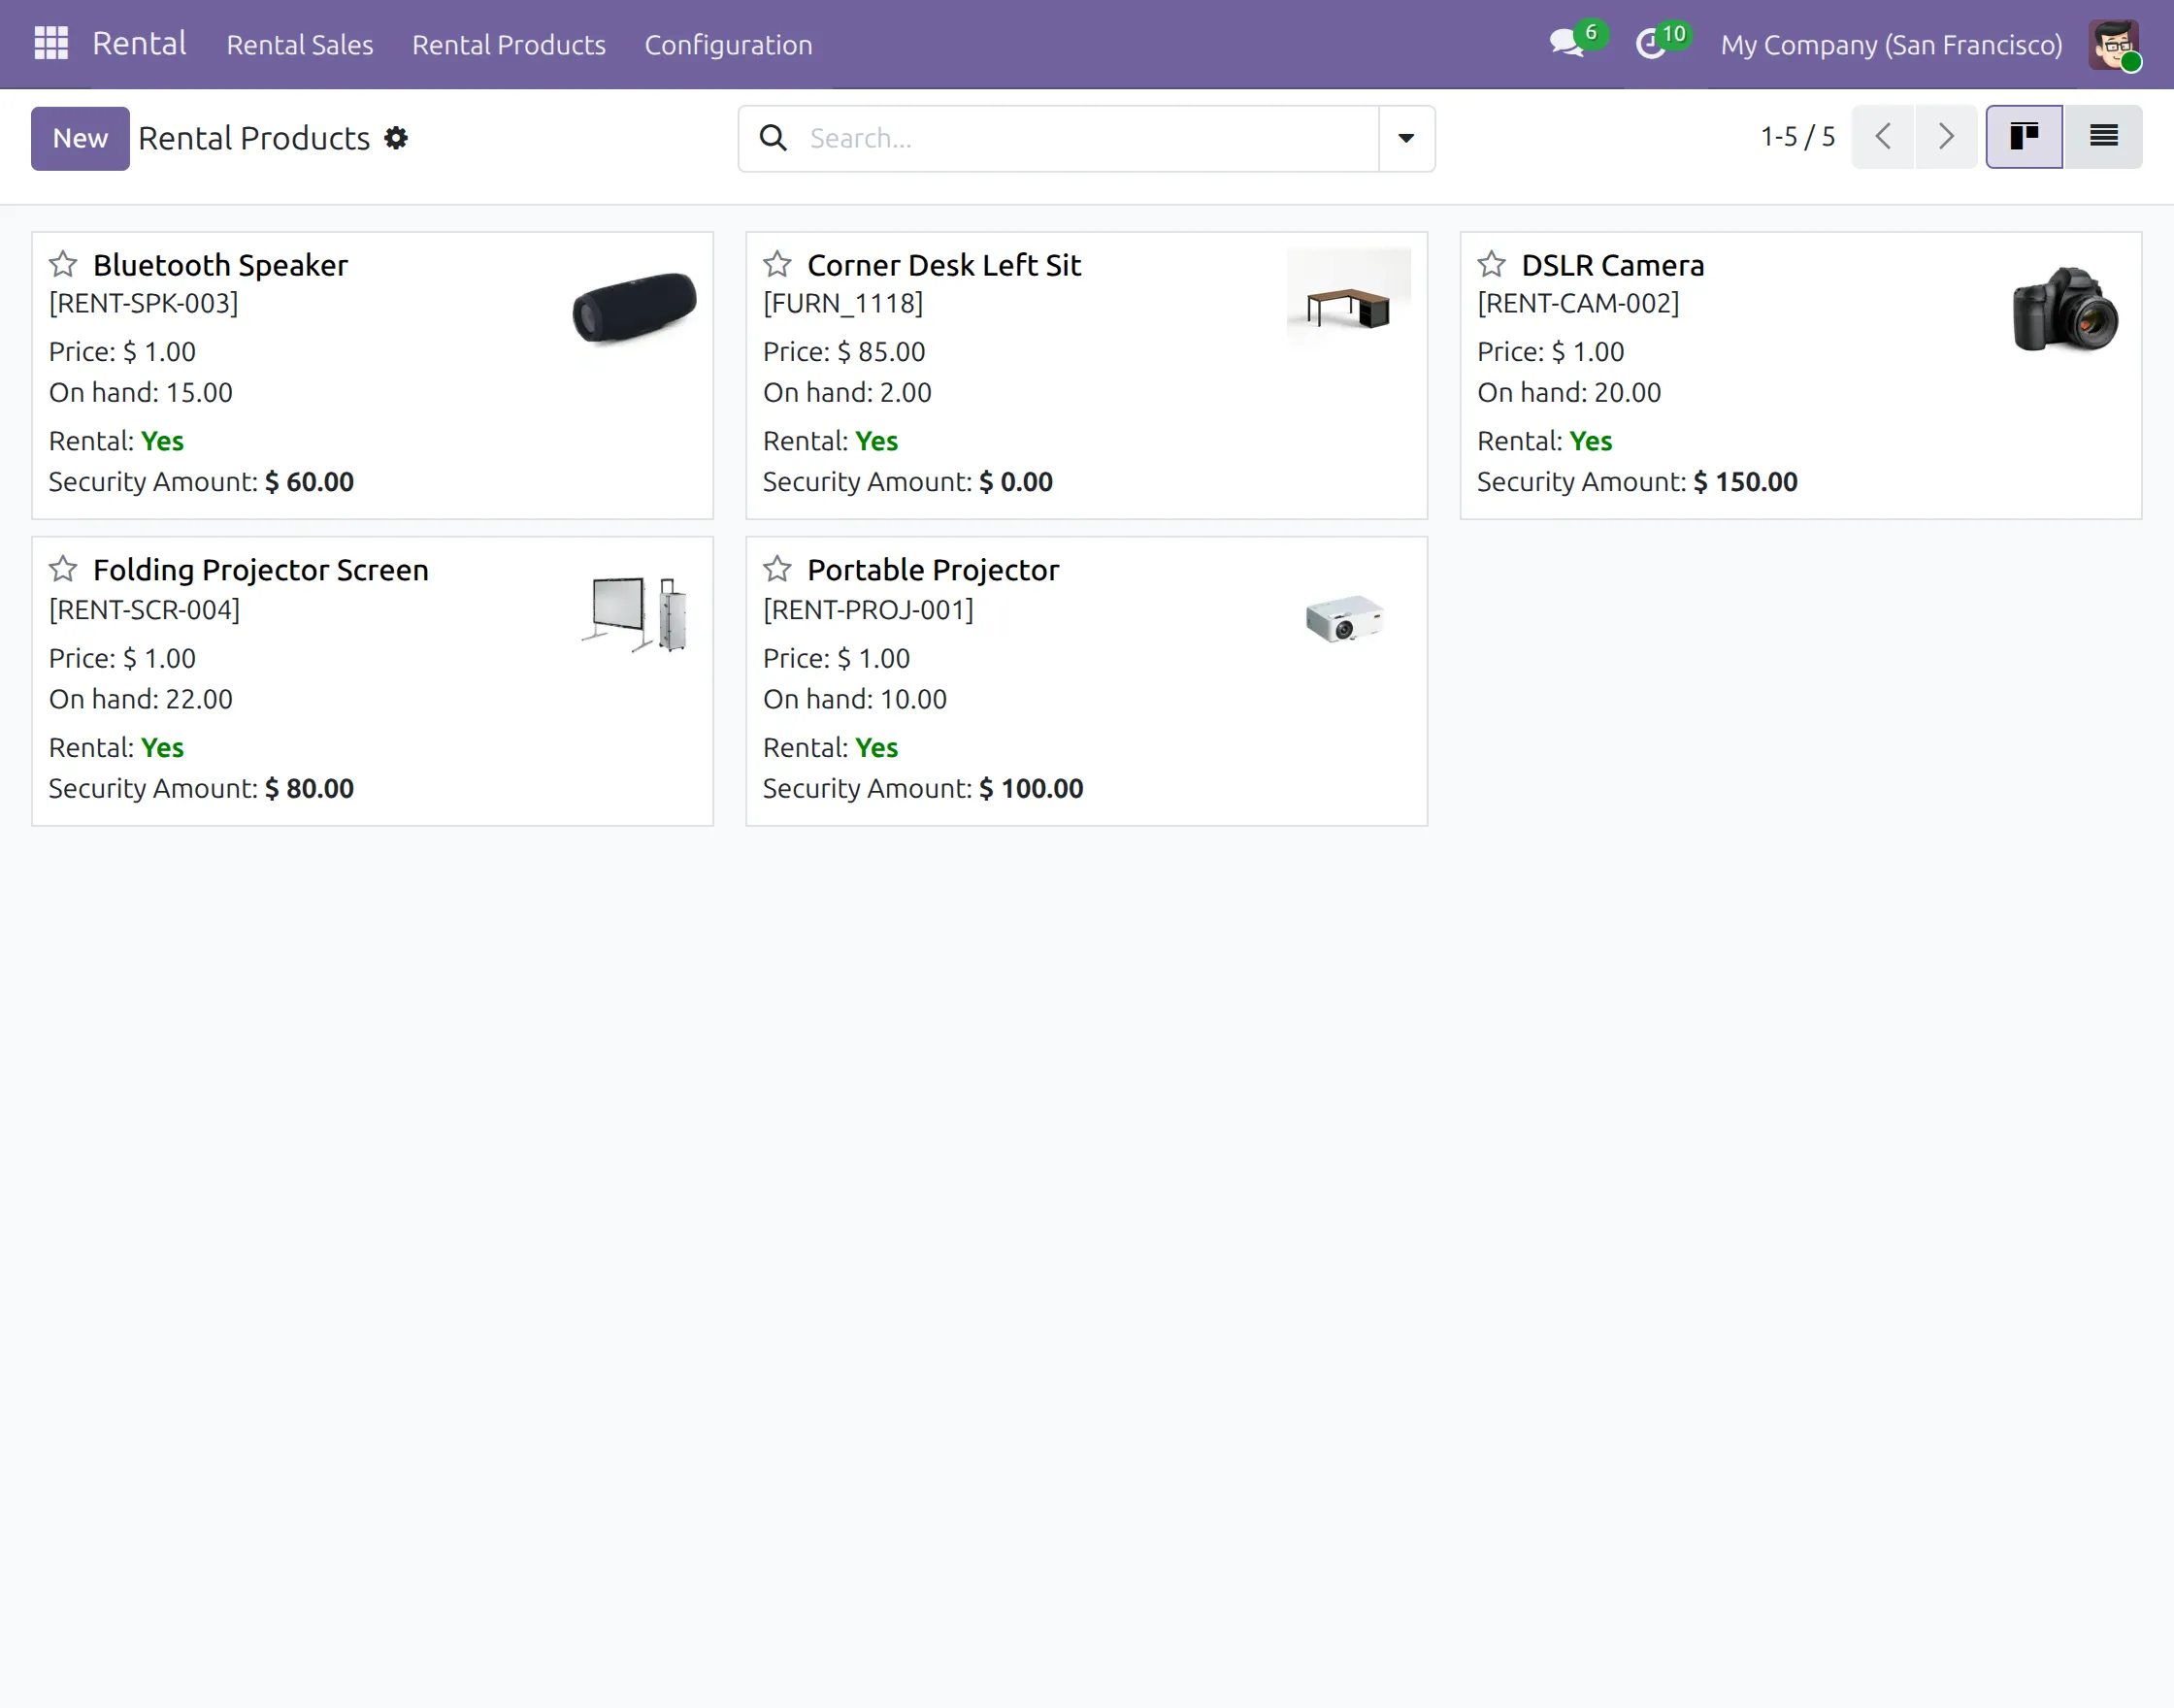
Go to Rental → Rental Products and open the product you want to offer for rent.
Enable Available for Rent and open the Rental tab. Configure the required rental details, including:
- Rental product quantity.
- Security amount.
- Product agreement.
- Rental tenure.
- Rental price for each applicable tenure.
- Description for rent.
Save the product after completing the configuration.
4. Browse Rental Products
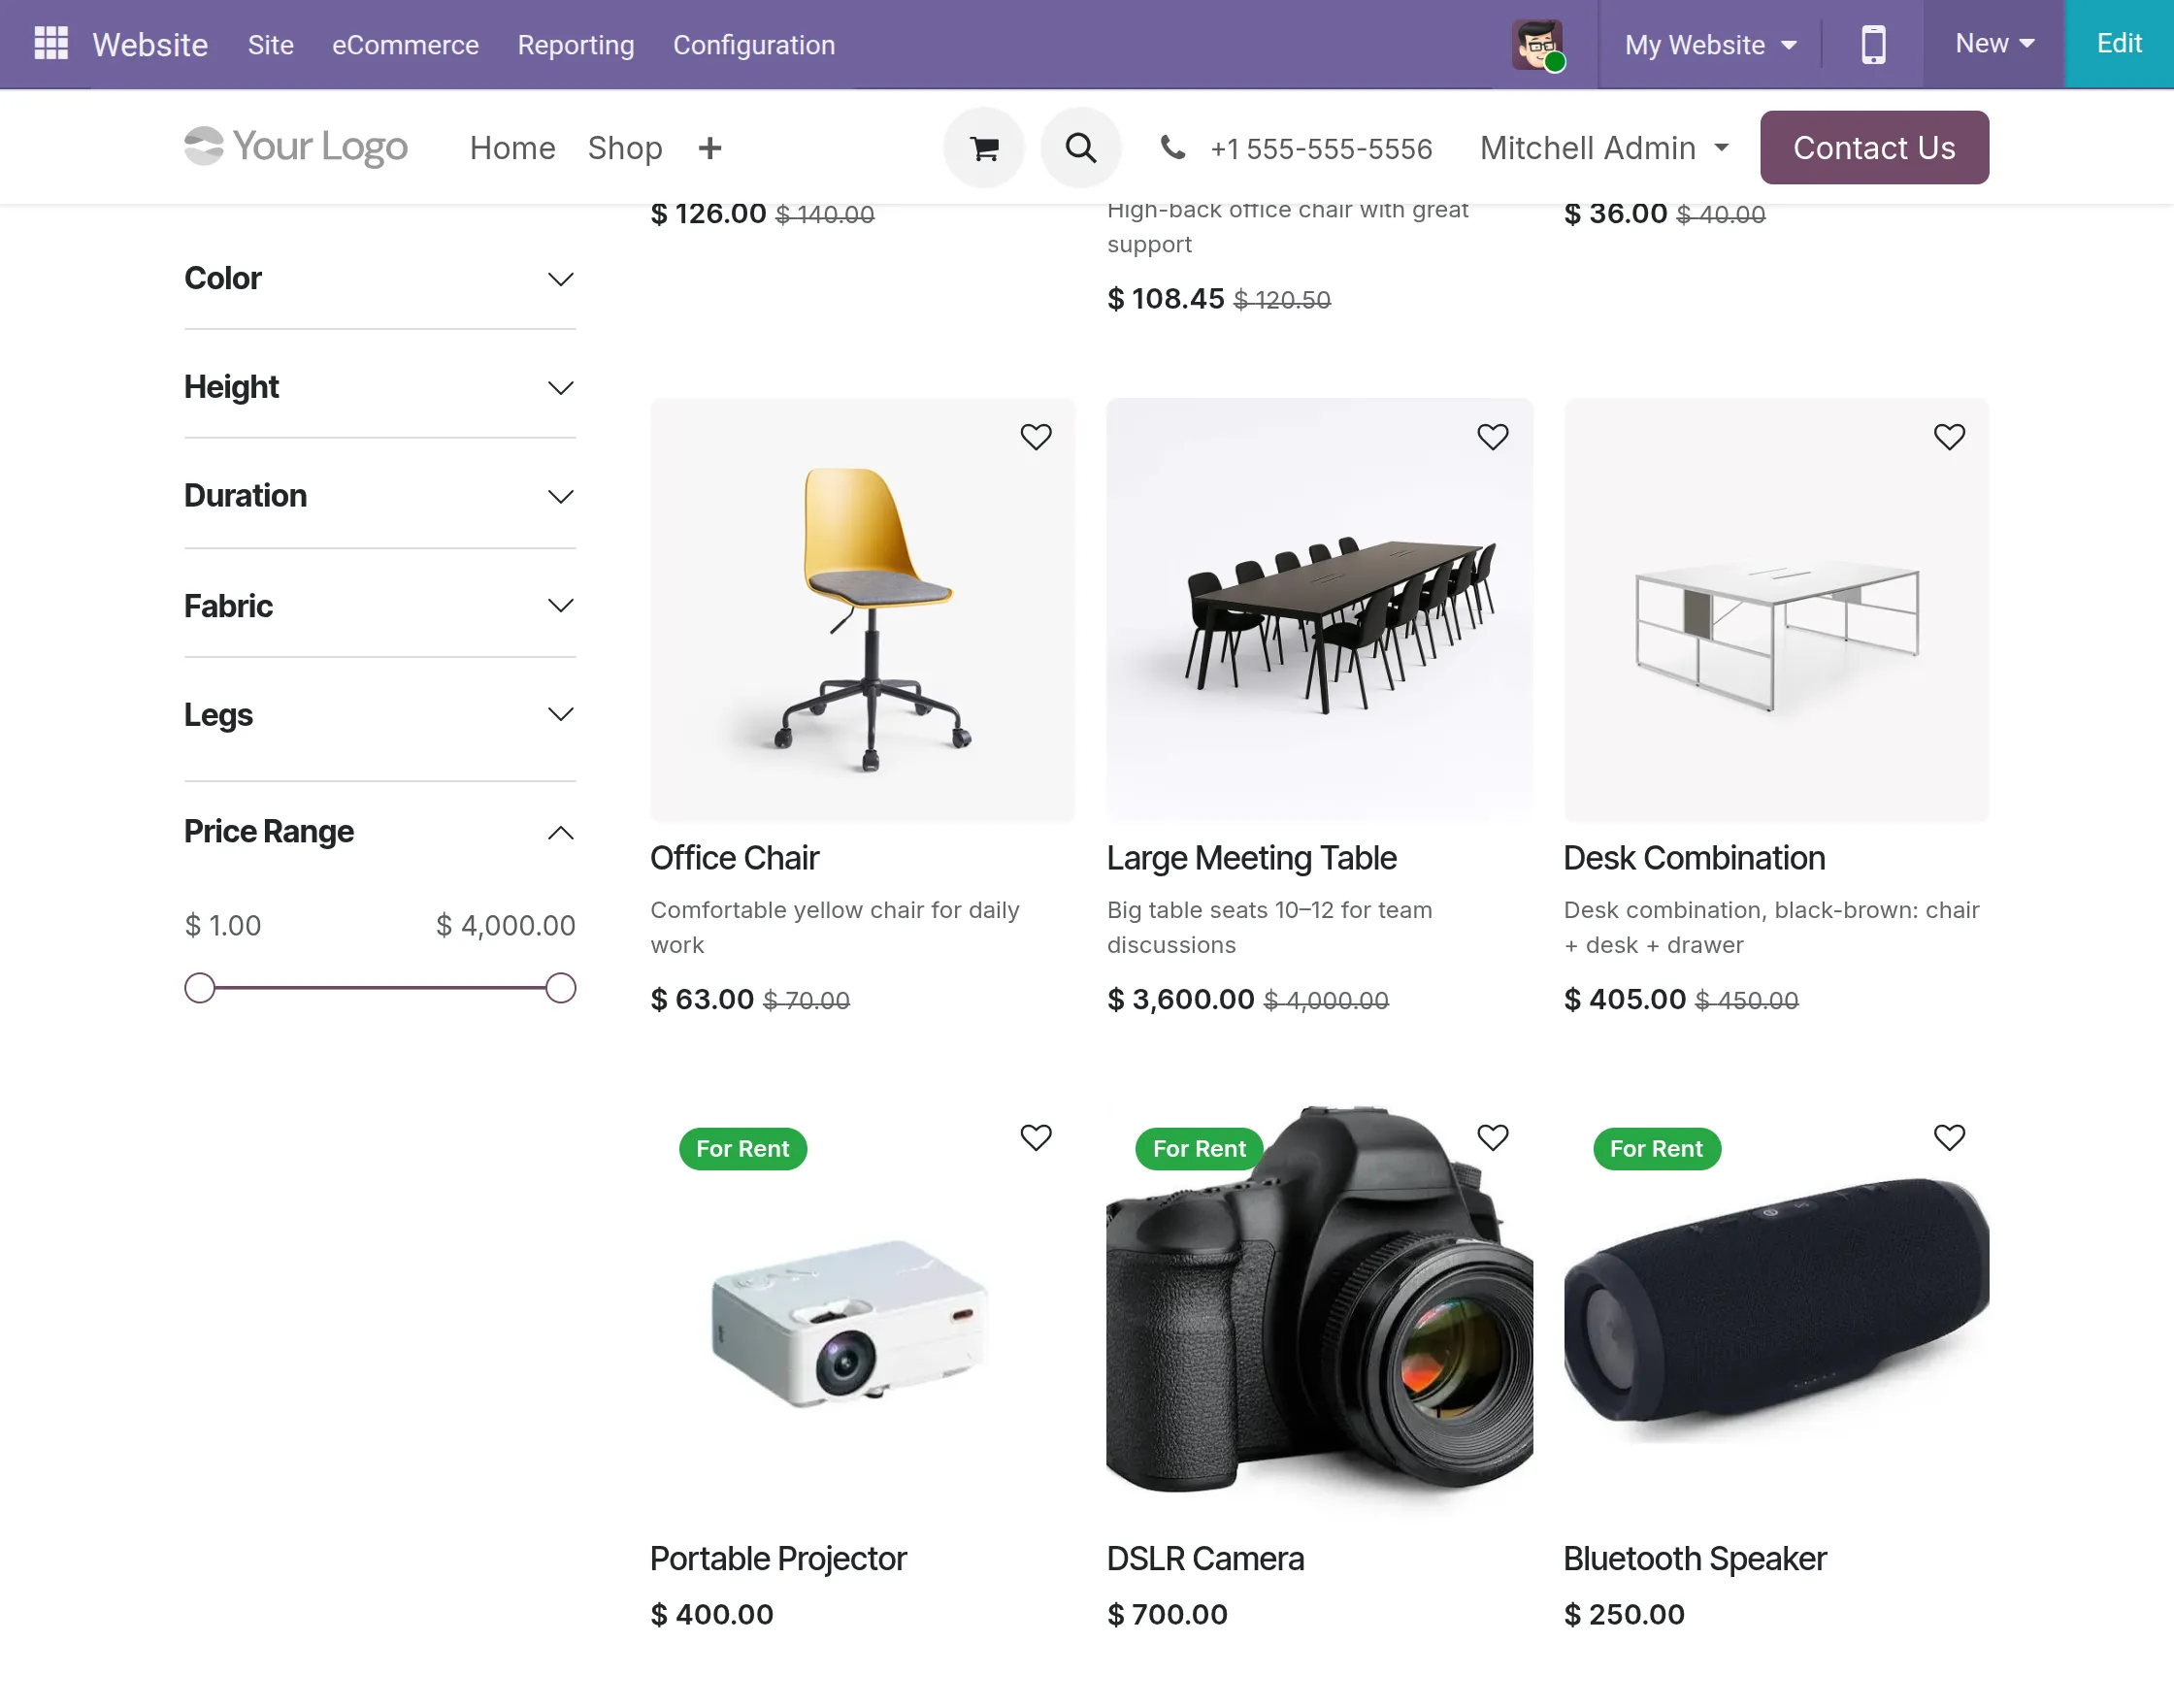
Once the product is configured, customers can open the Odoo website shop.
Rental products are displayed with a For Rent label along with their images, names, descriptions, and prices.
Customers can browse products through the available website categories.
5. Select Rental Dates
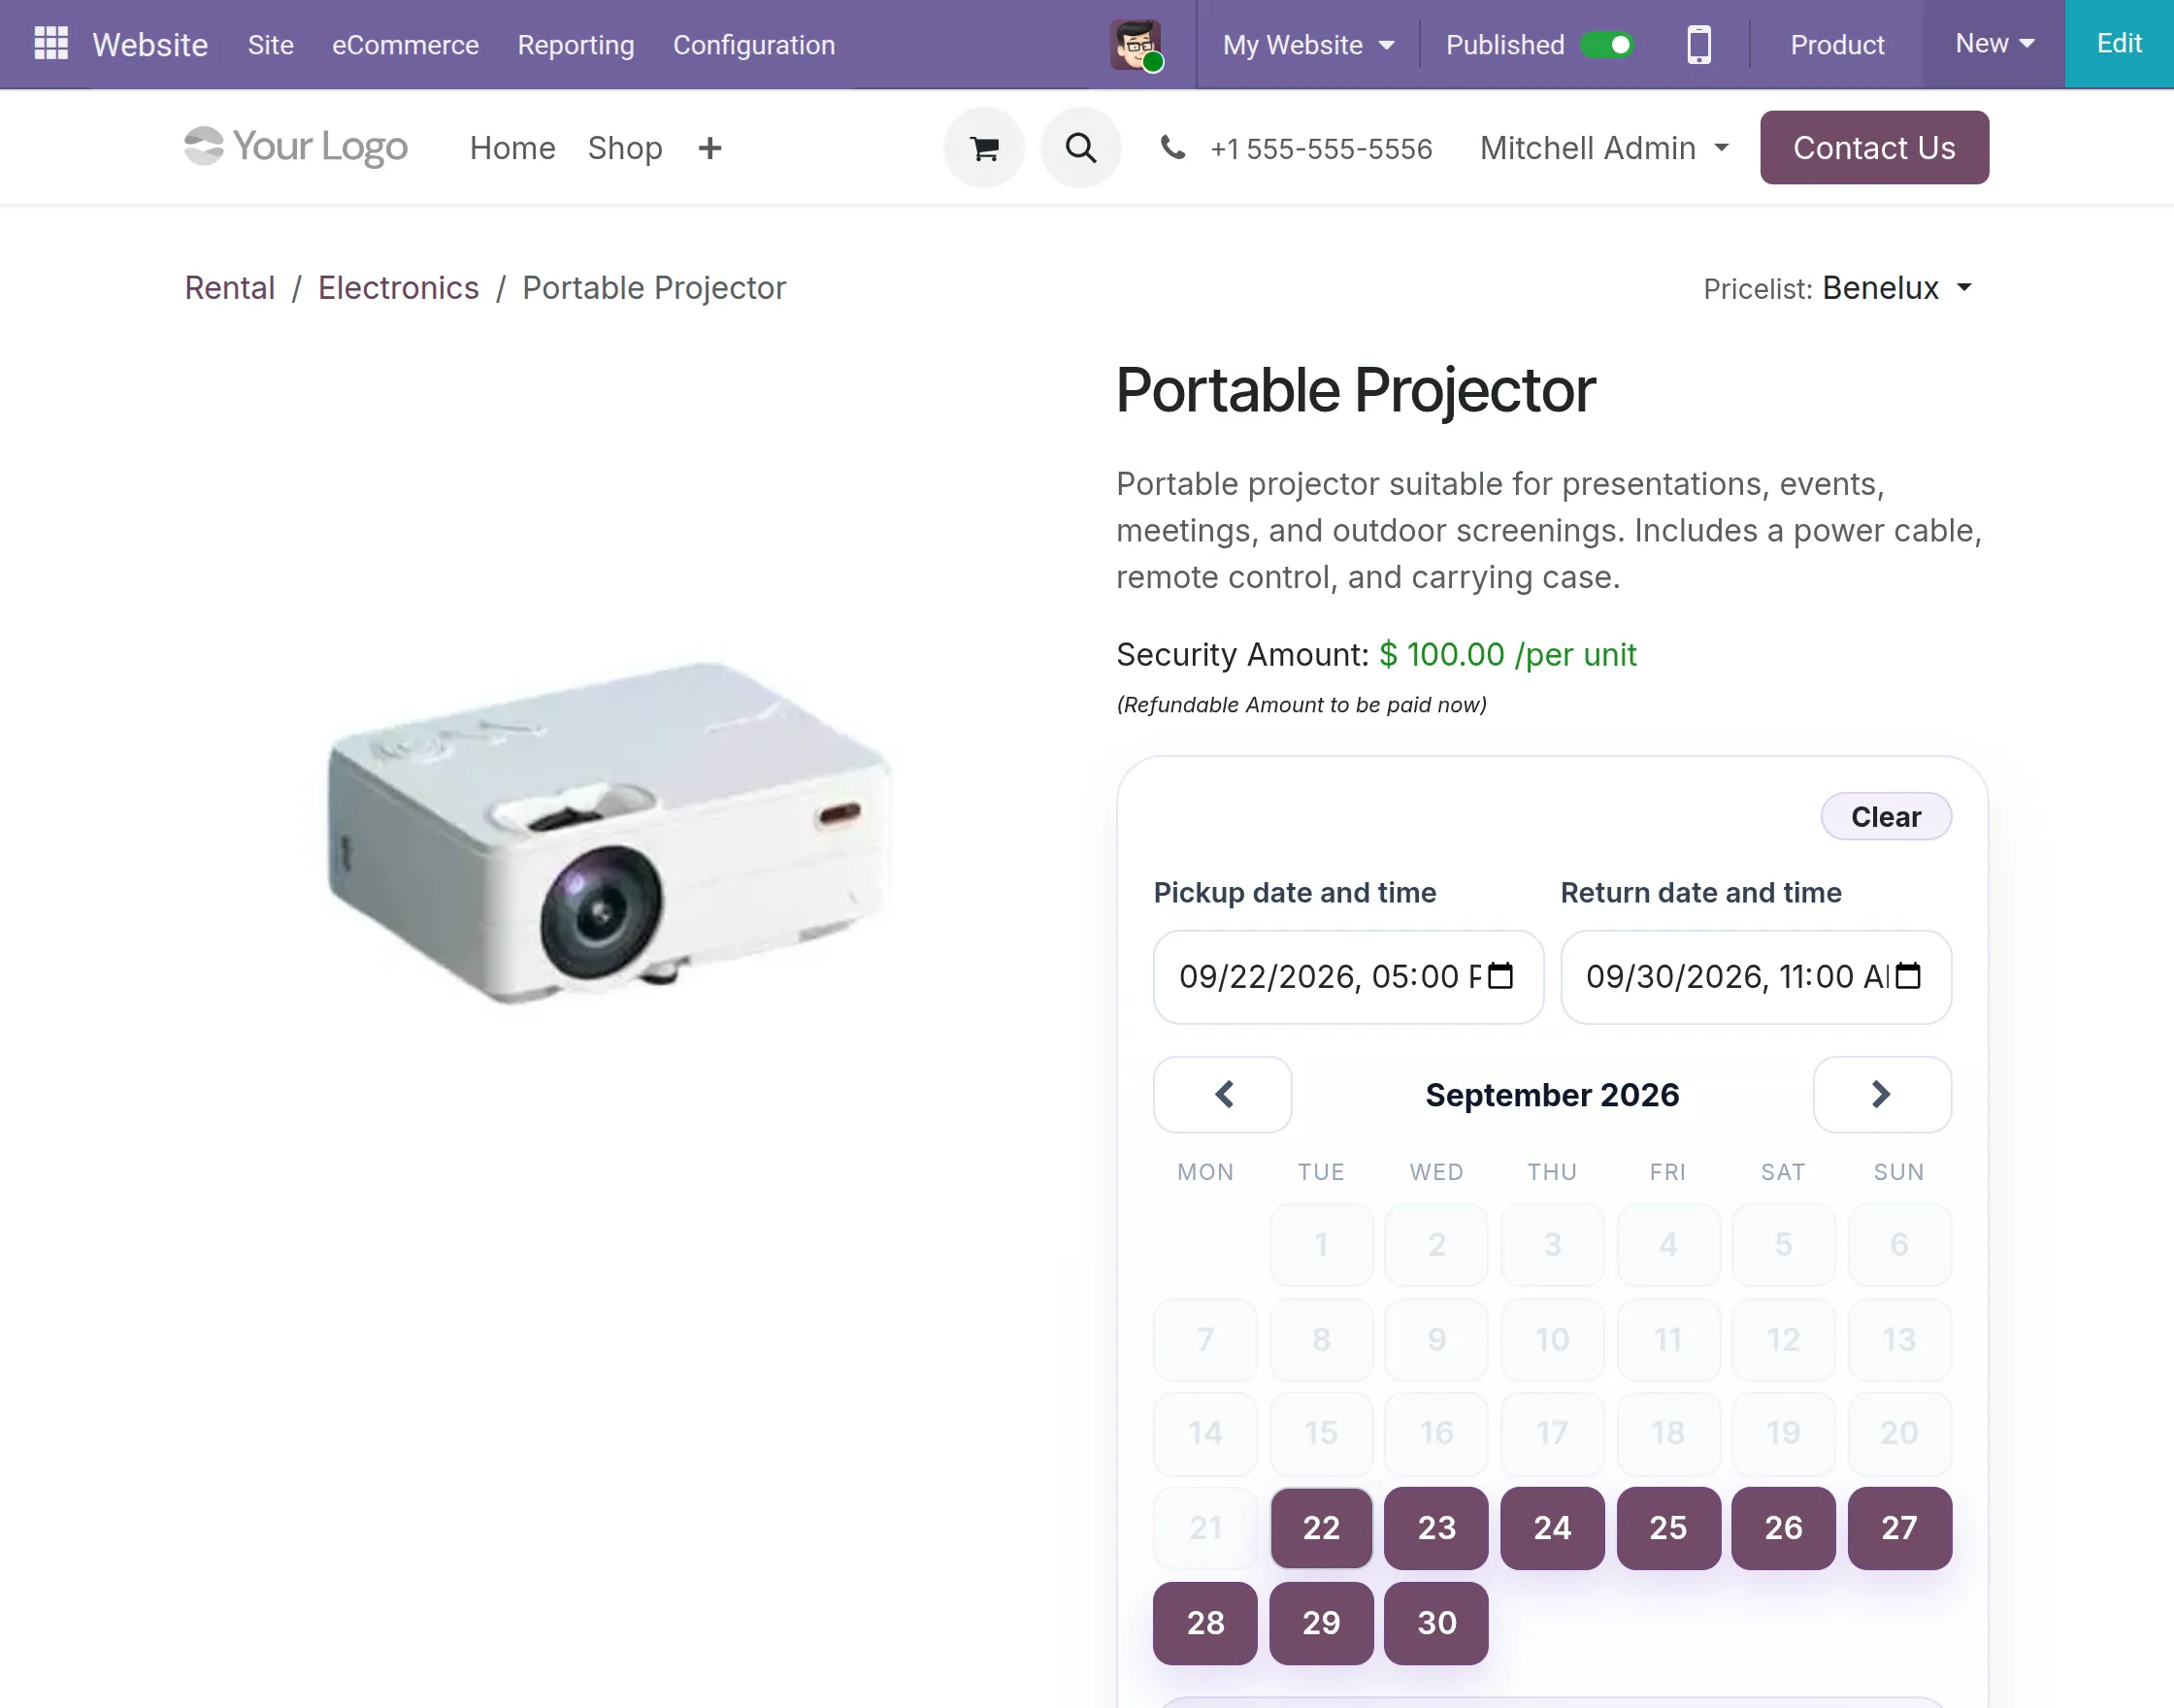
Open a rental product from the website.
On the product page, customers can select the required pickup date and time and return date and time.
The selected dates determine the rental period for the booking. The refundable security amount is also displayed before the product is added to the cart.
6. Check Rental Duration and Pricing
After selecting the rental dates, the website displays the calculated rental duration.
The rental amount is calculated using the configured rental rate and selected rental period. Customers can review the amount before adding the product to the cart.
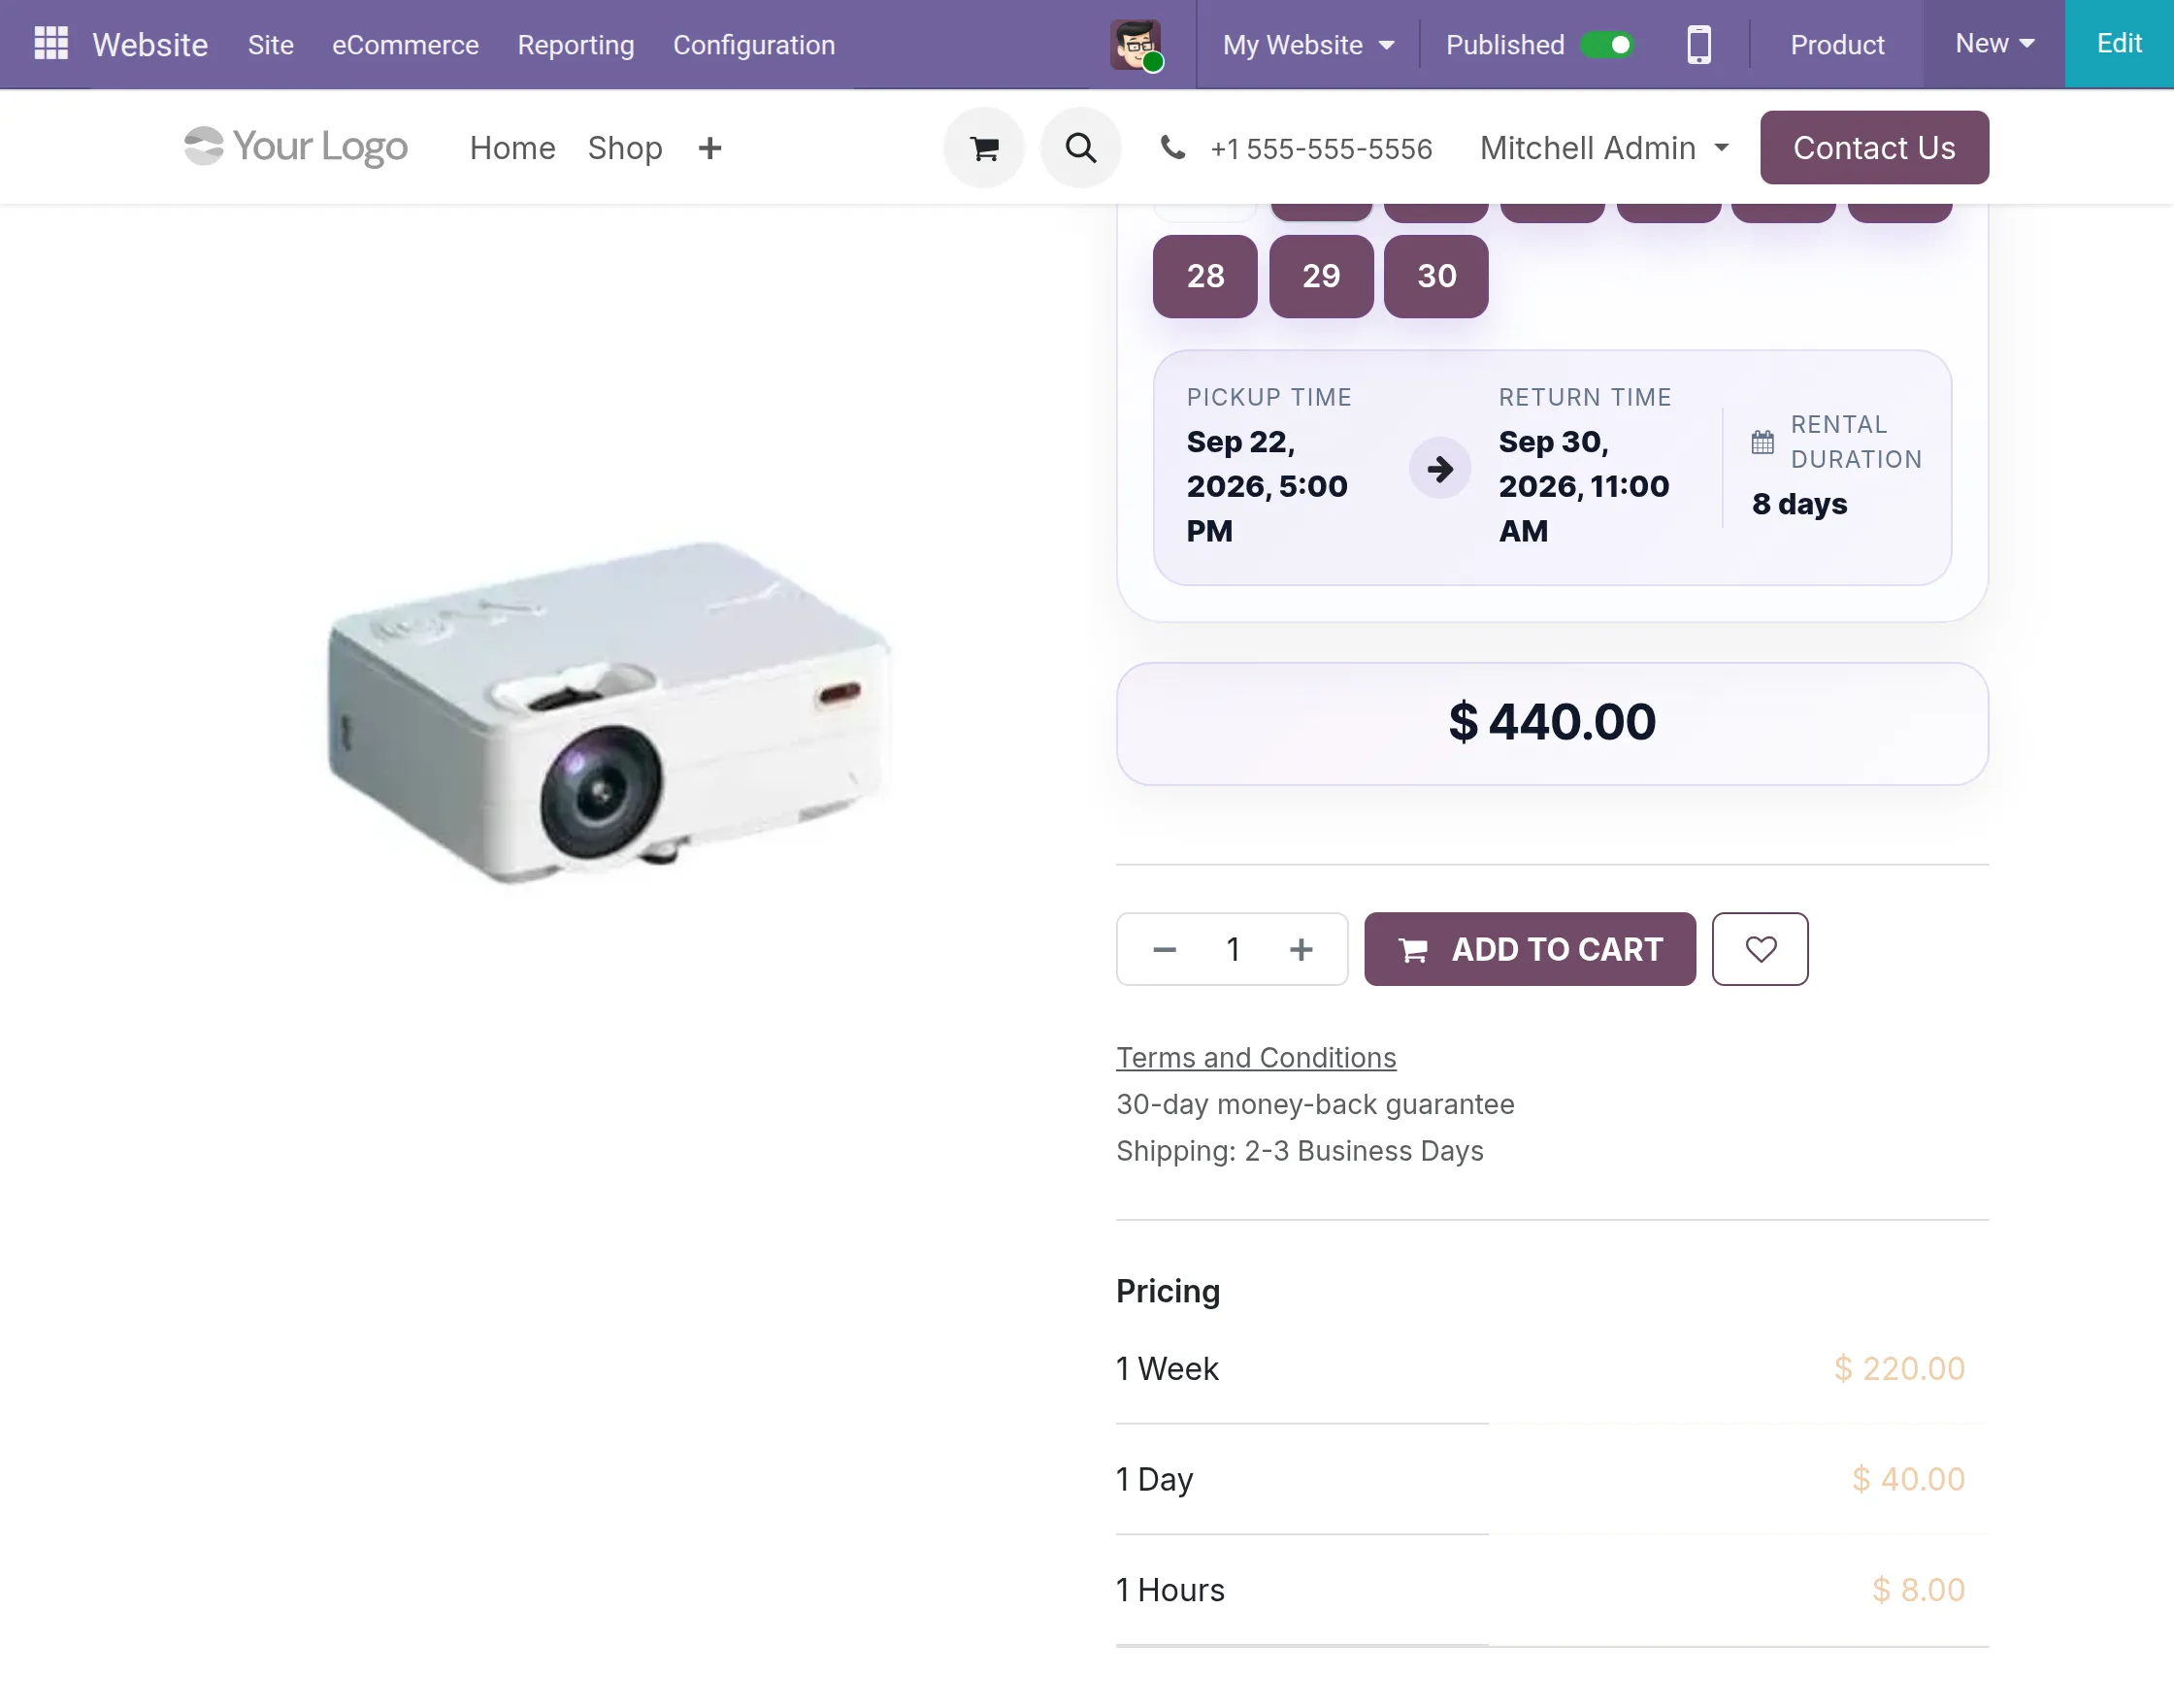
The provided workflow shows an 8-day rental duration with the calculated rental amount and the configured weekly, daily, and hourly pricing.
7. Review Rental Details in Cart
Add the rental product to the cart and proceed to the order review.
The cart displays the selected product, rental dates, refundable security amount, subtotal, taxes, and total amount.
Customers can review these rental details before continuing with checkout.
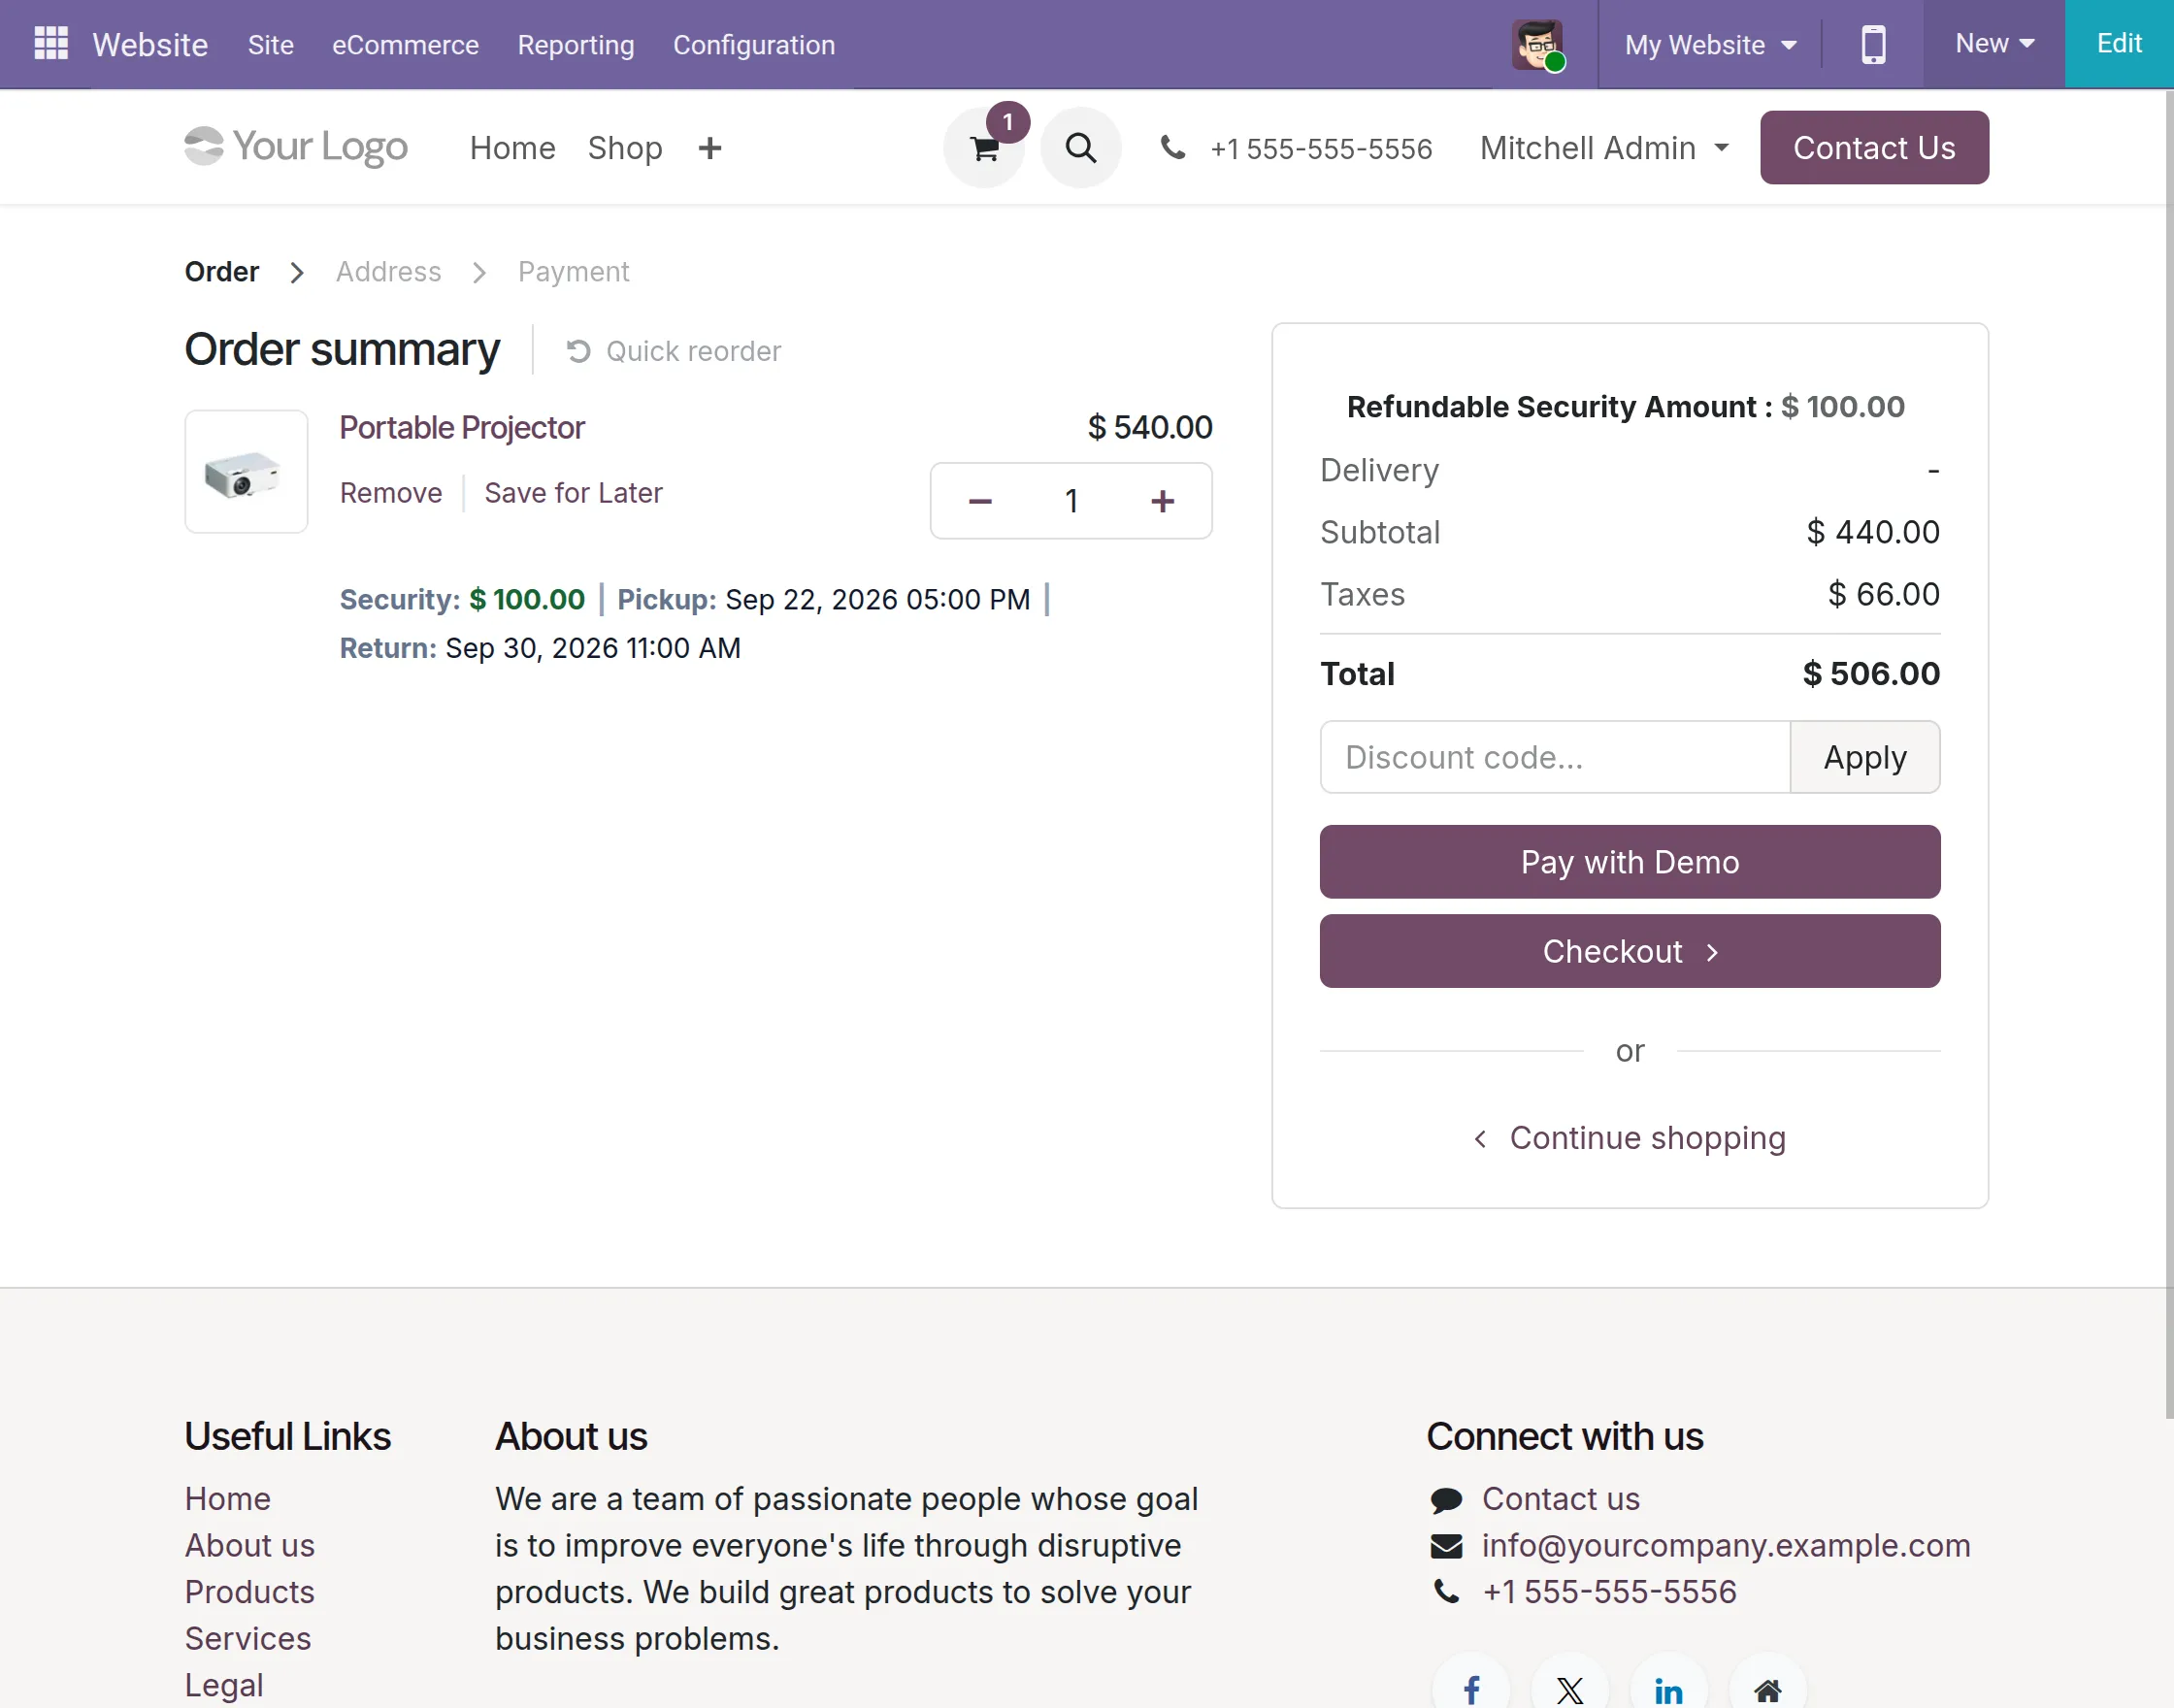
The cart workflow specifically keeps the rental dates and security amount visible alongside the order total.
8. Confirm the Rental Order
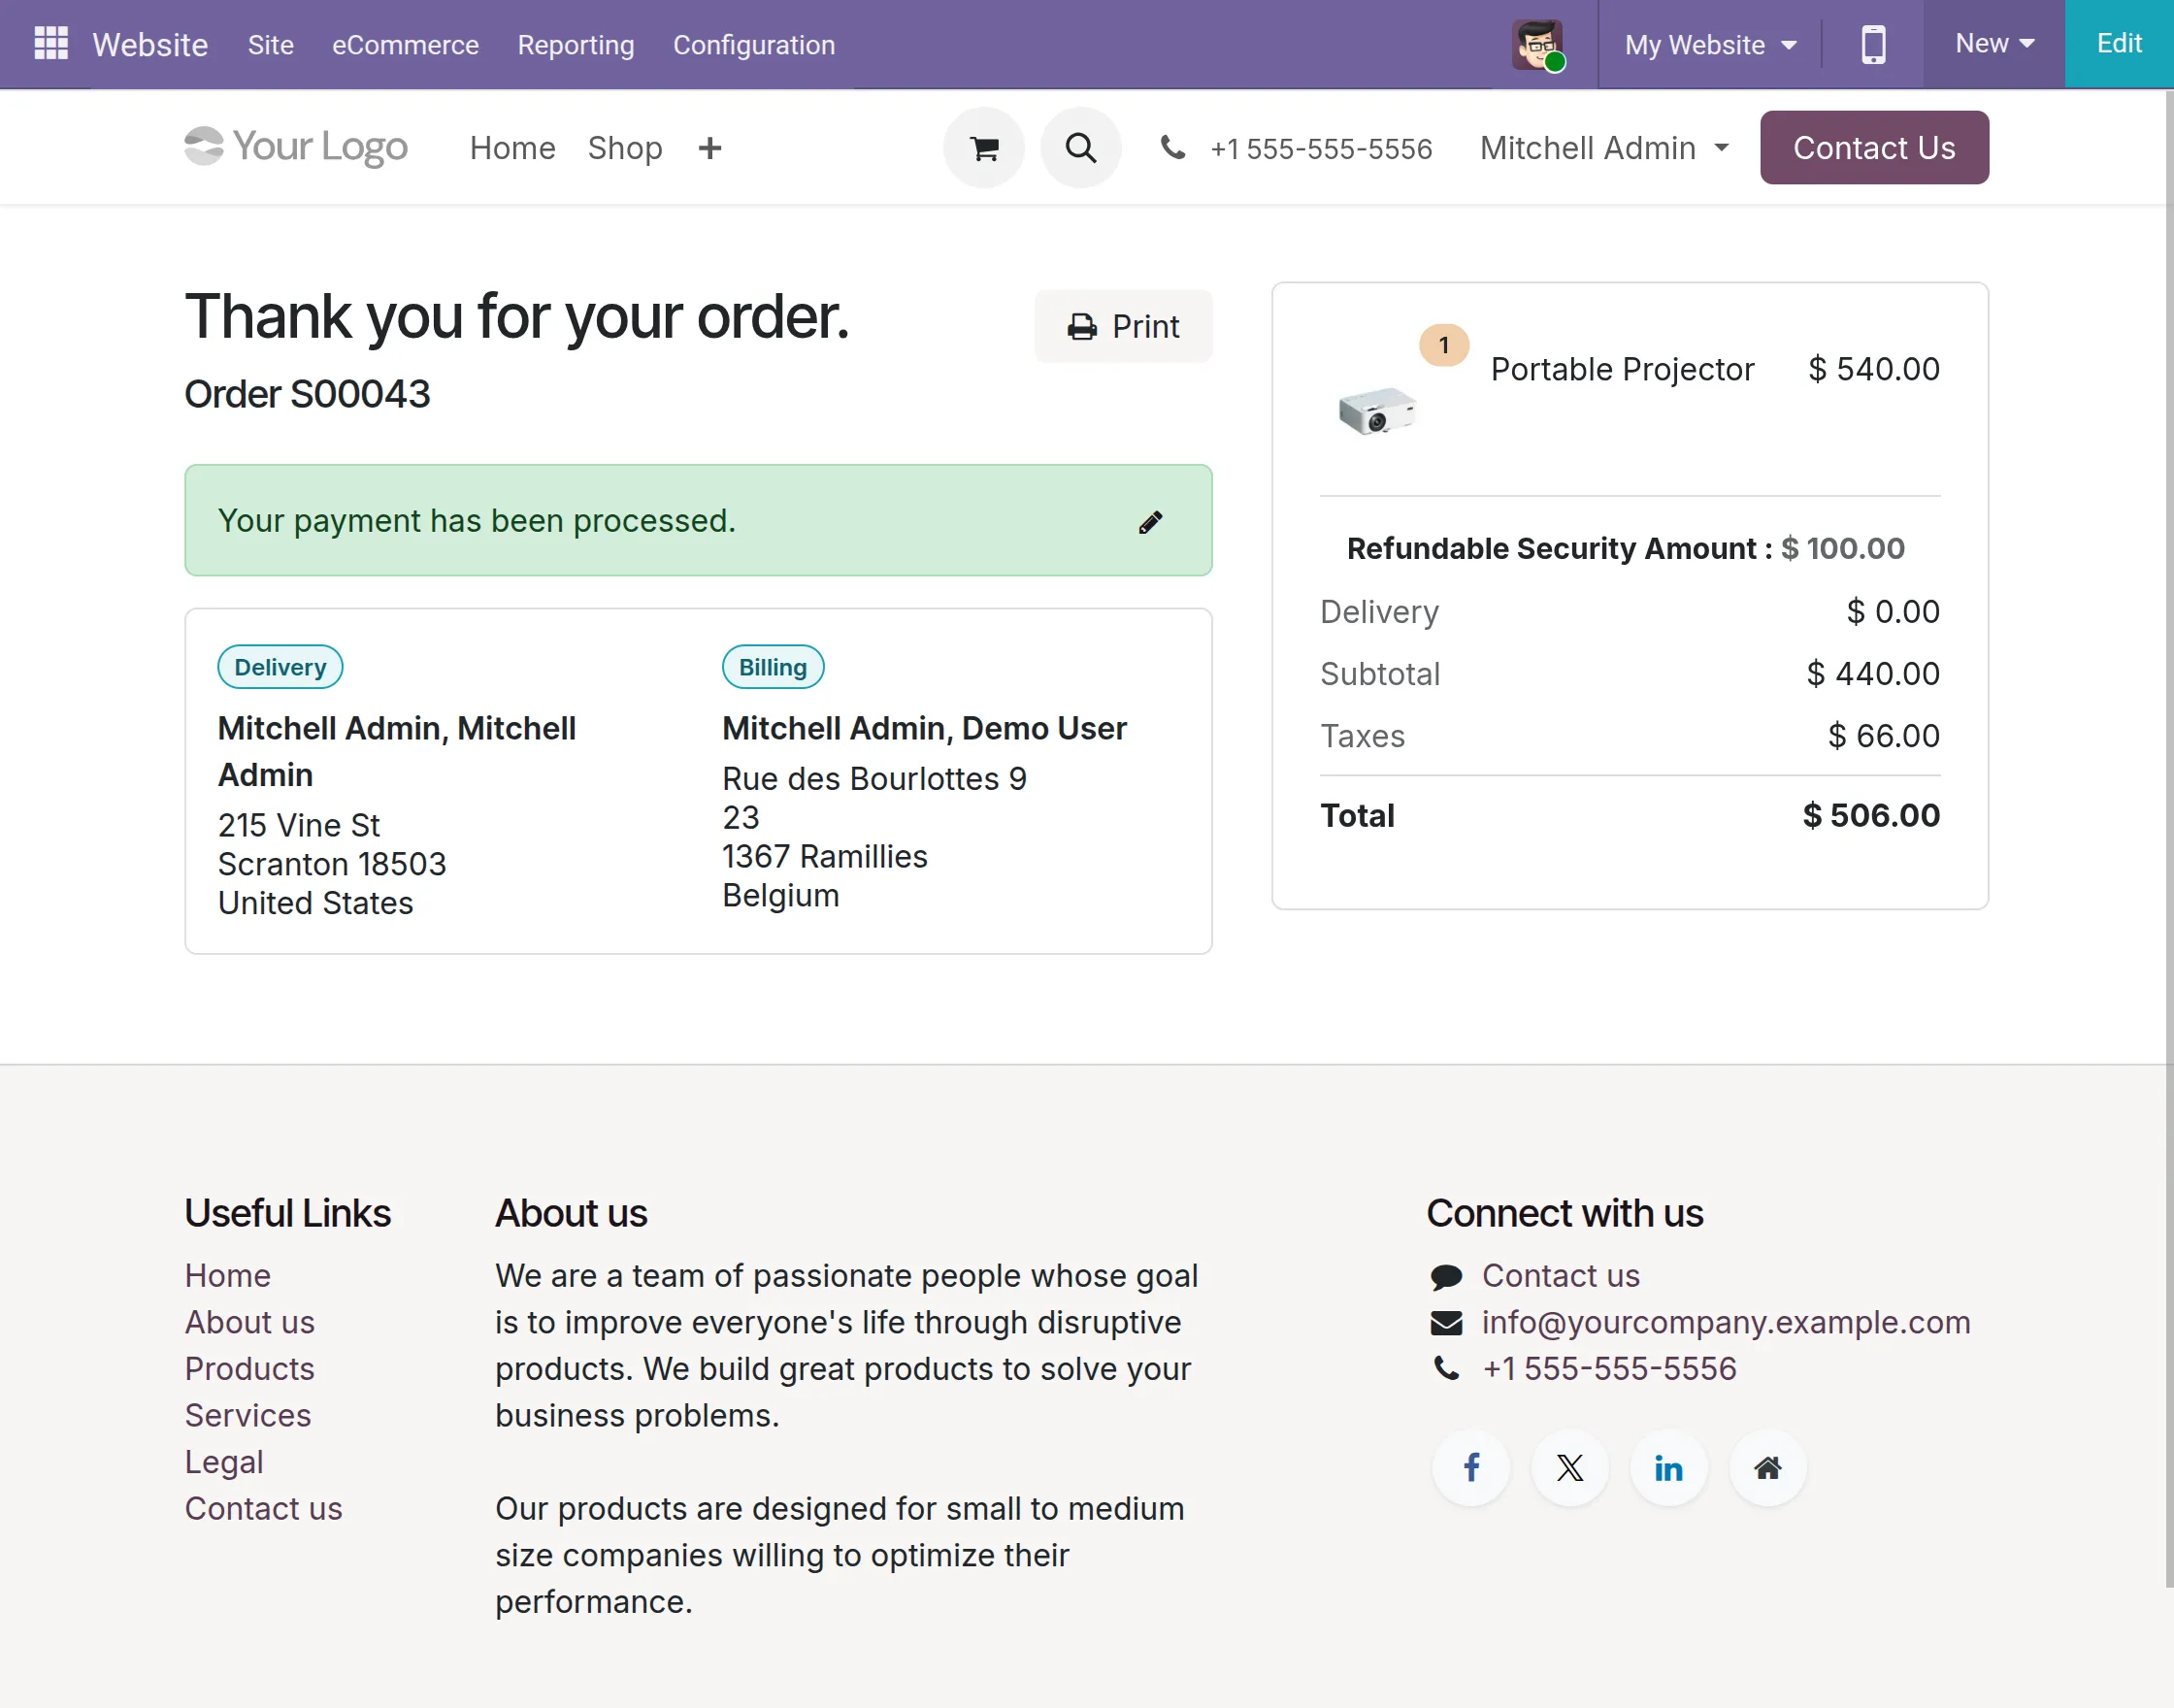
Proceed with the website checkout and complete the payment.
After successful confirmation, the website displays the order confirmation with the rental product, refundable security amount, subtotal, taxes, and total.
9. Access Rental Orders from Customer Account
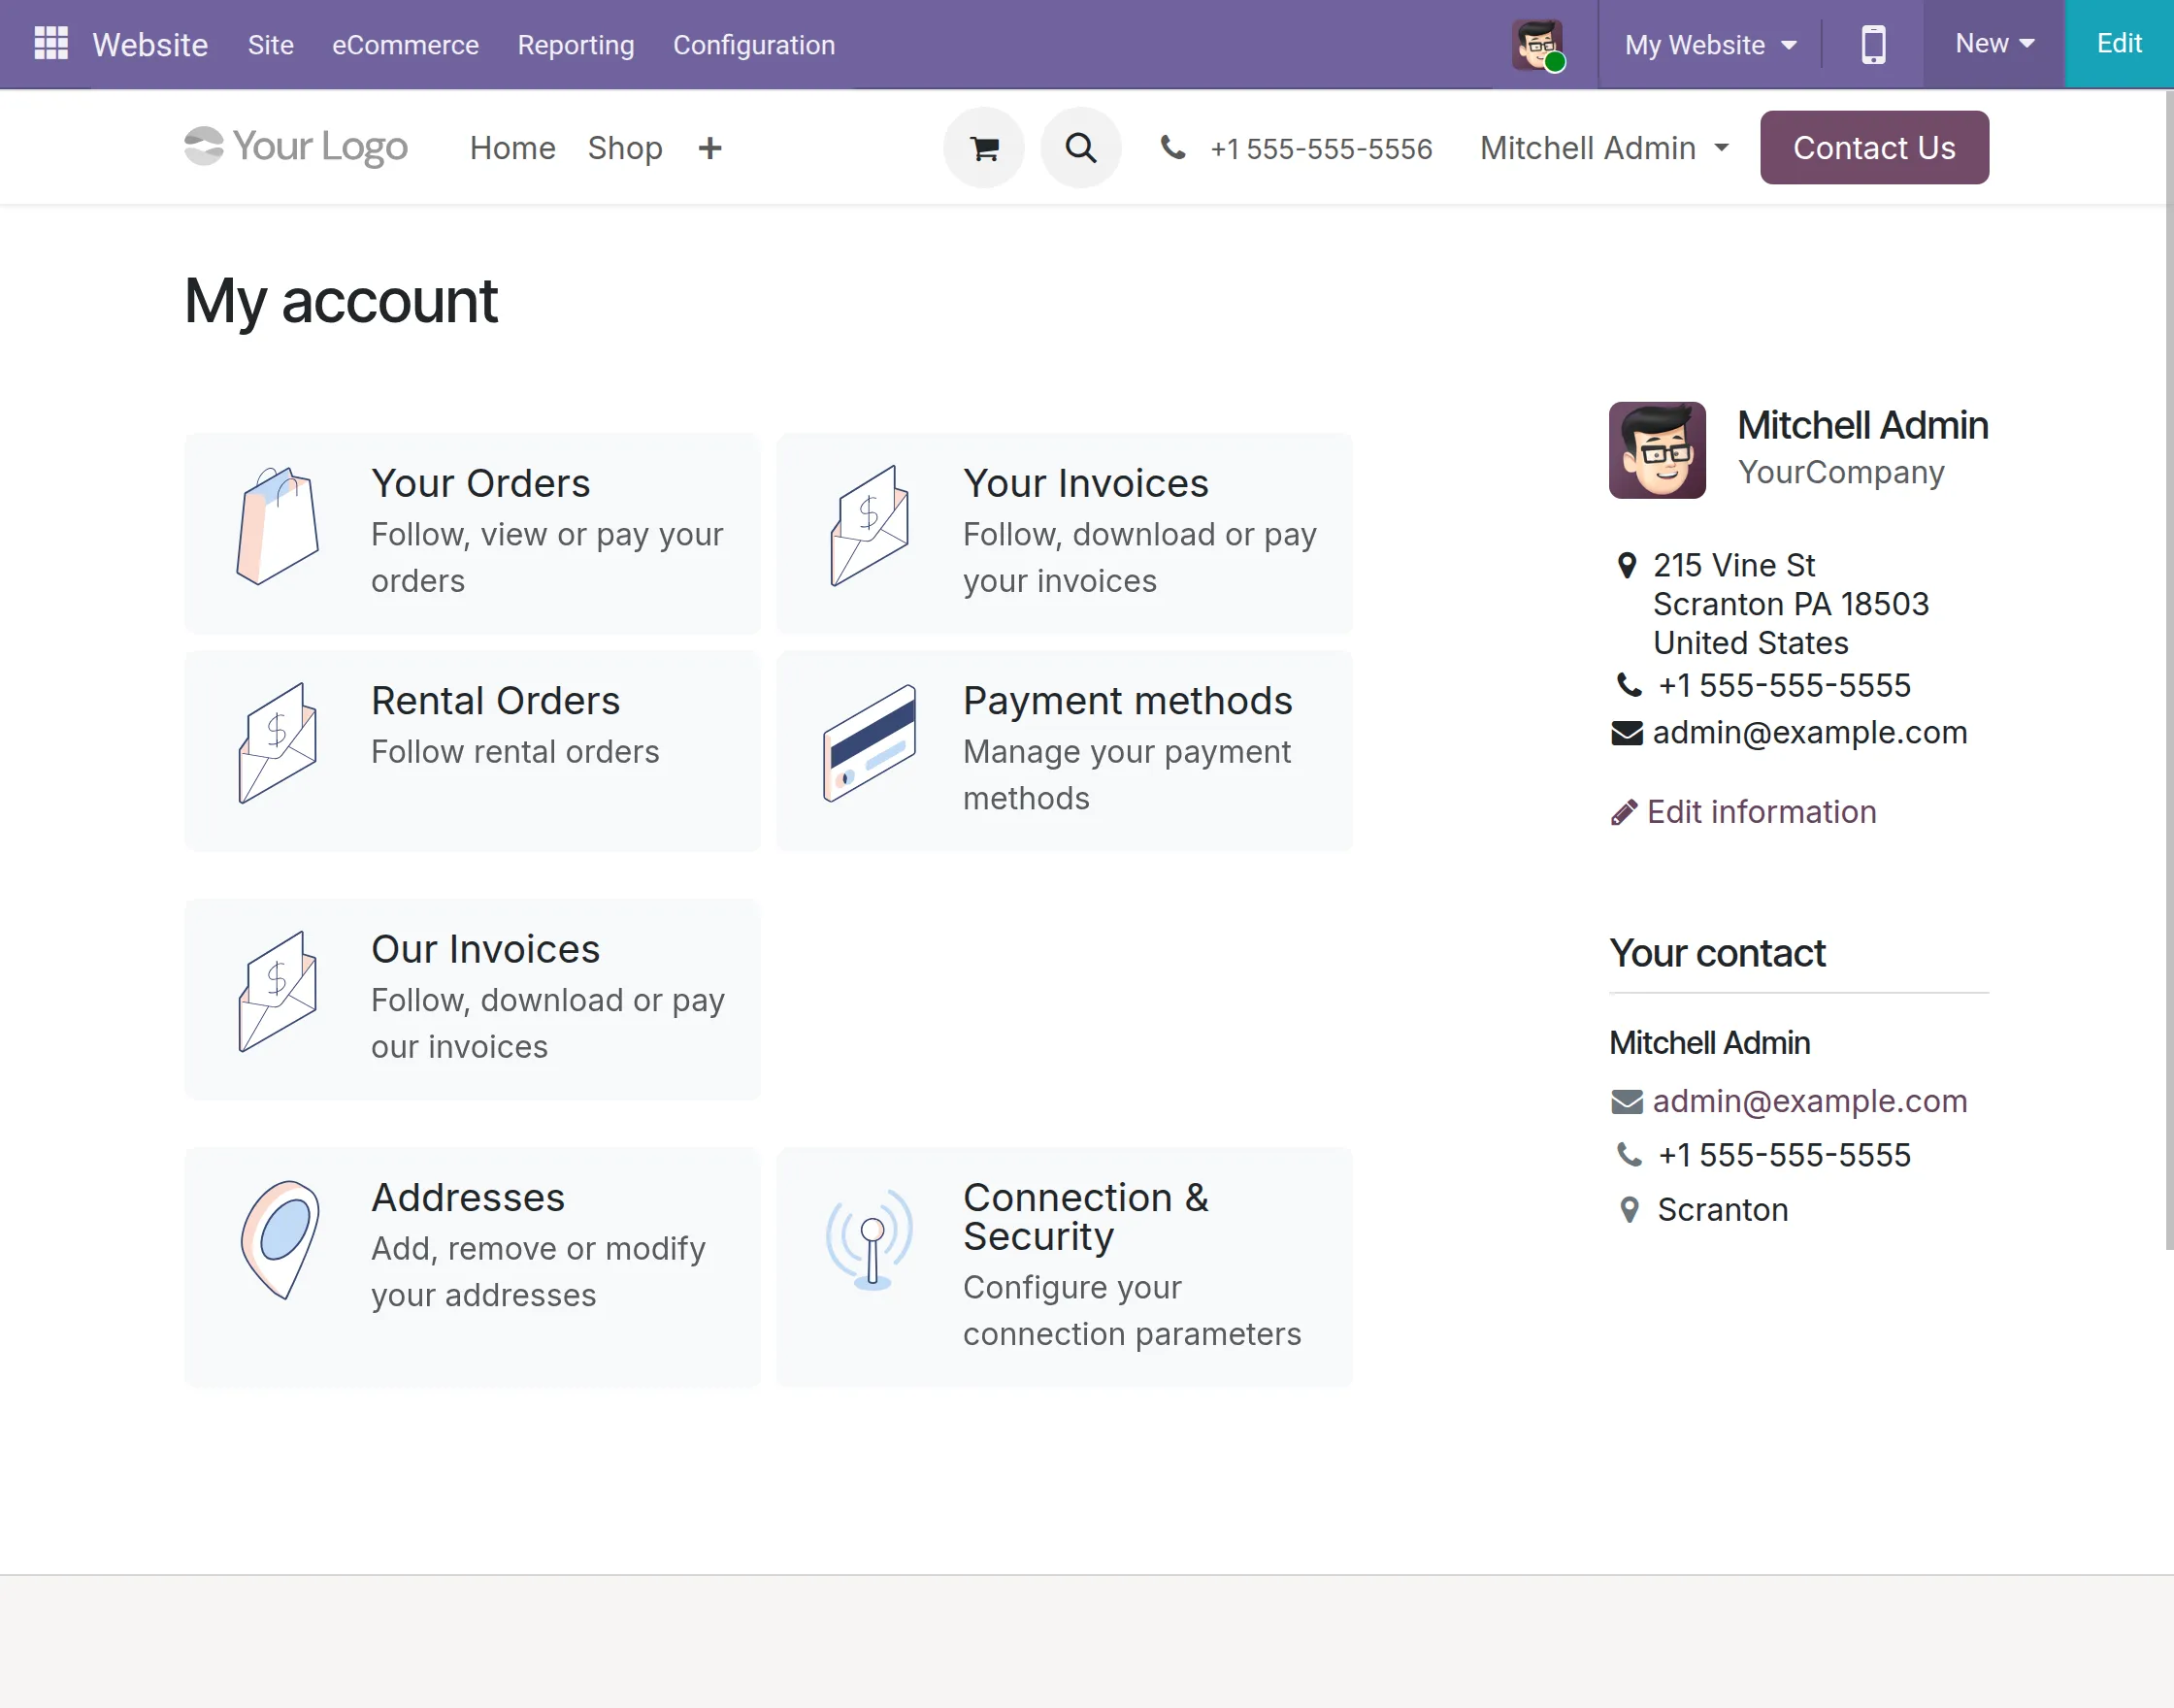
Customers can open their My Account page and access Rental Orders.
This section provides access to the customer’s confirmed rental bookings.
10. Track Rental Order Status
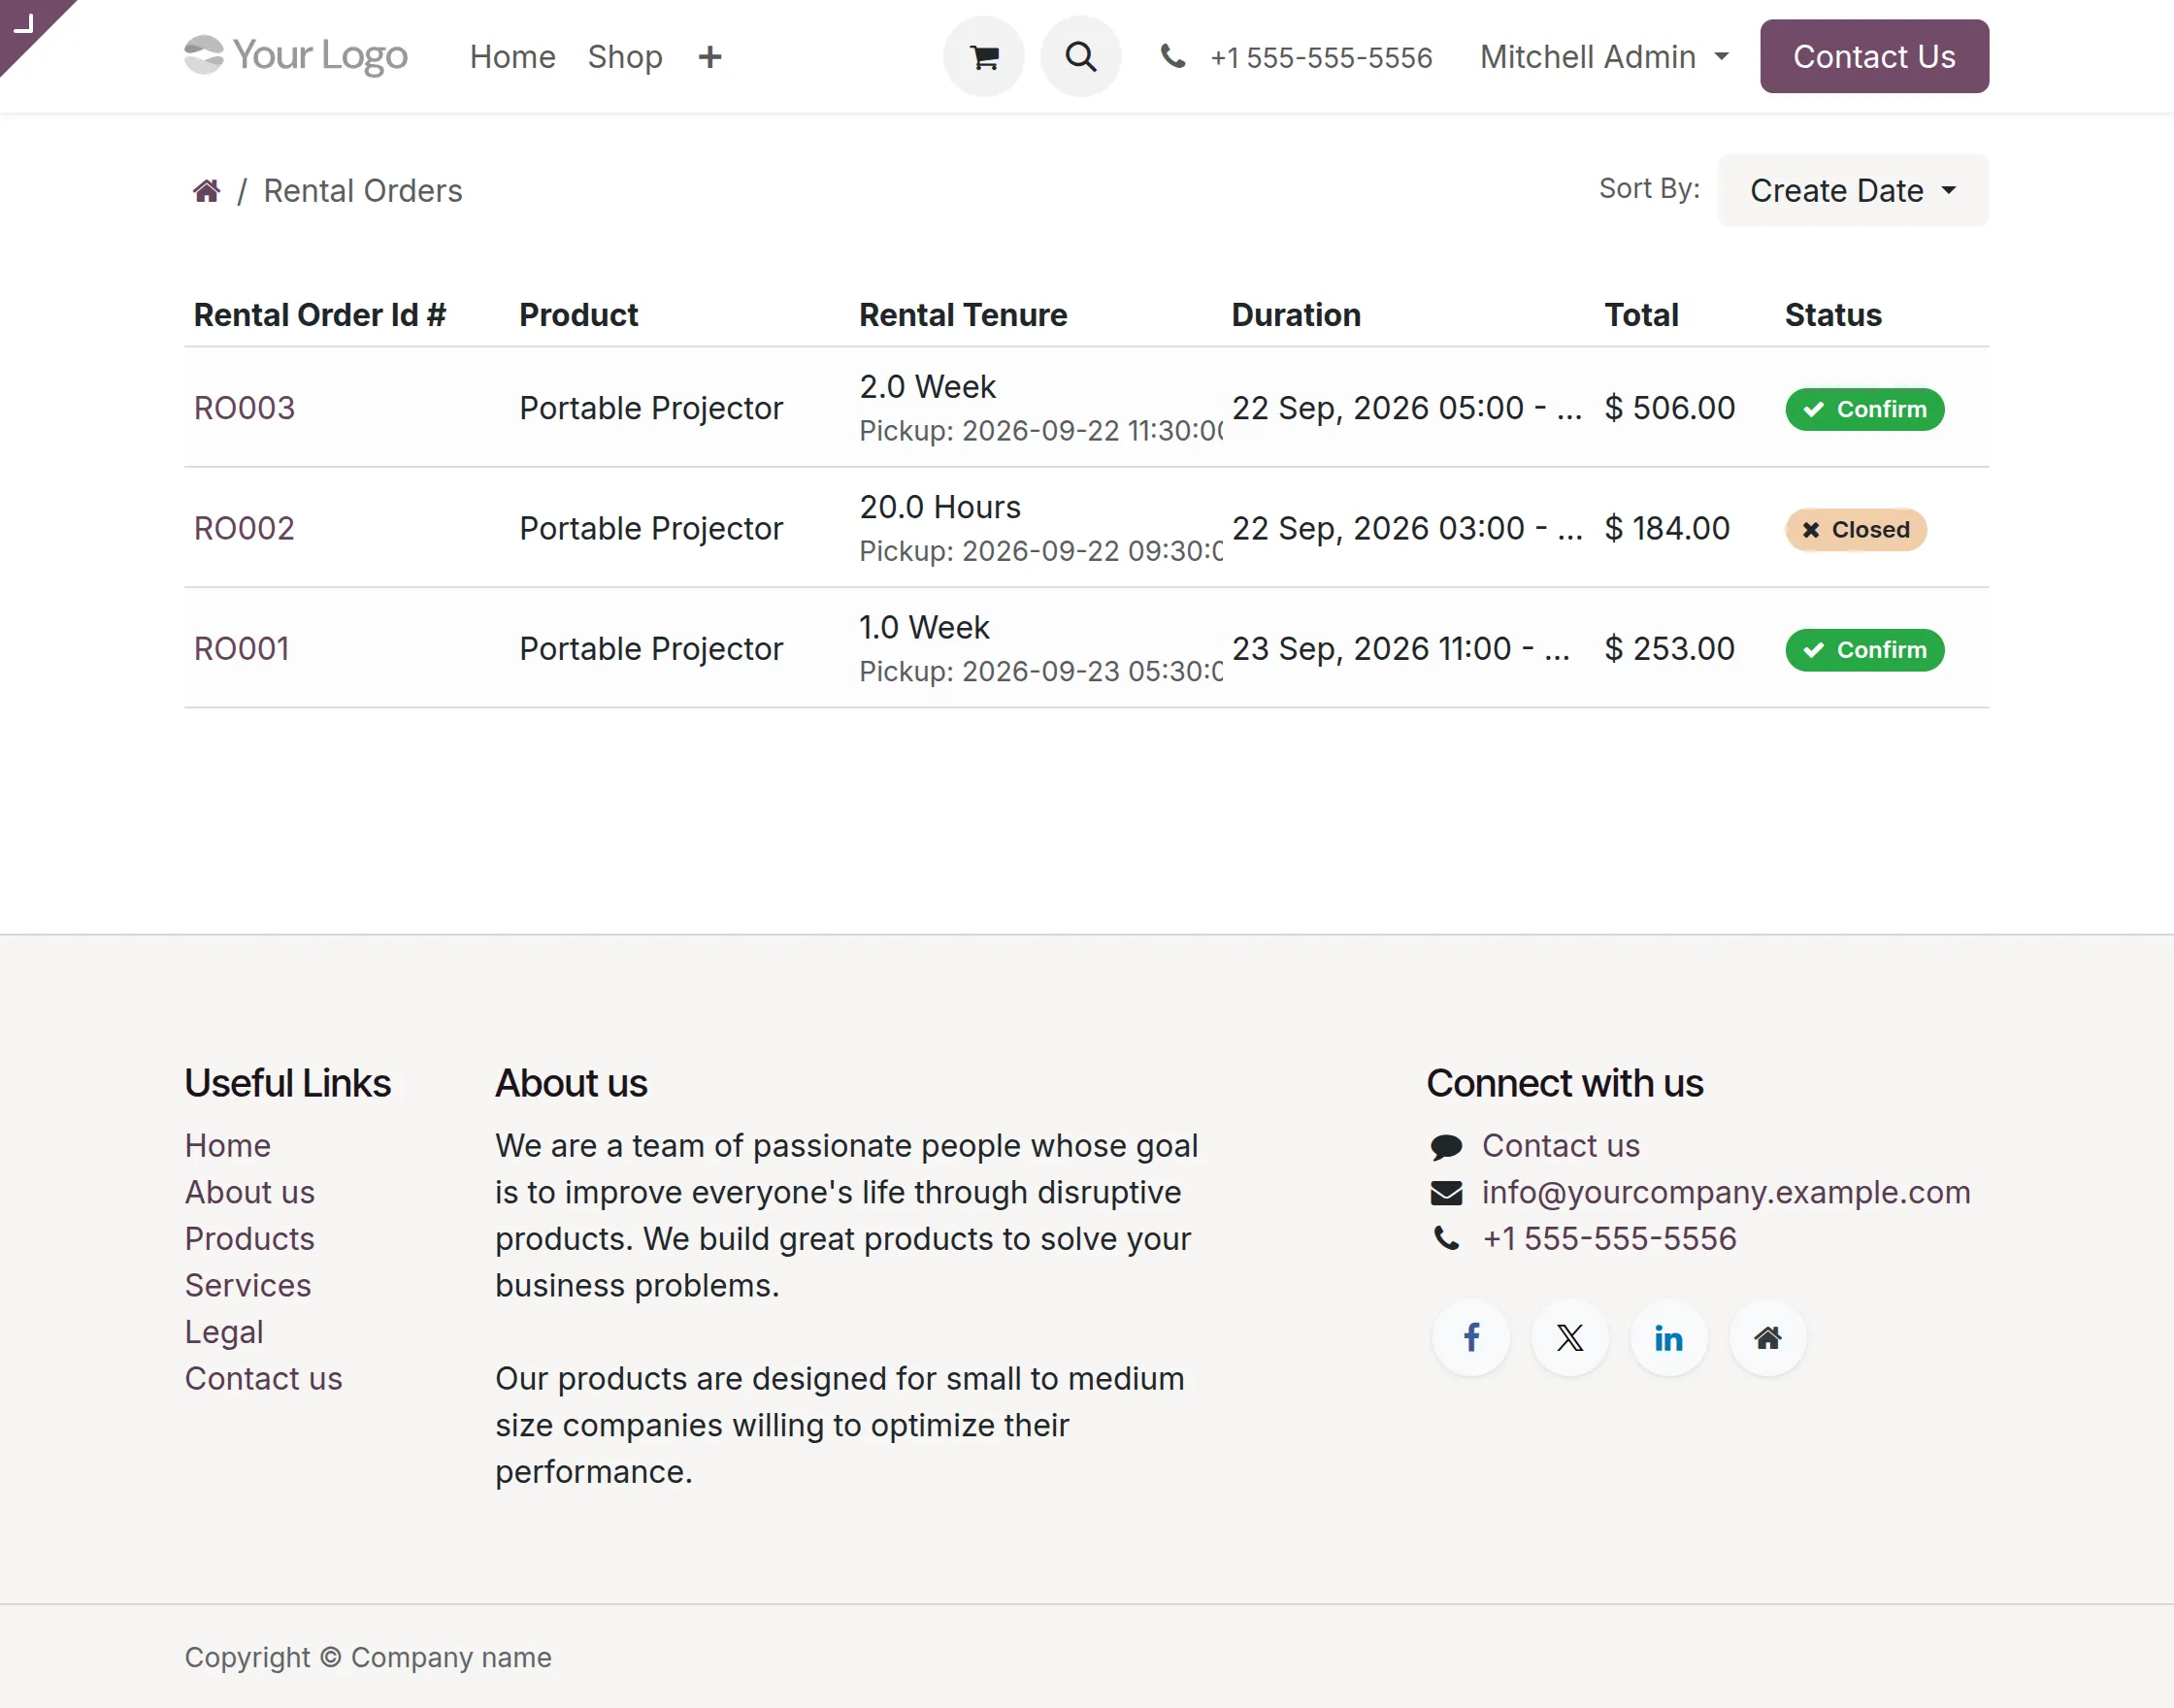
Open Rental Orders to view the available rental bookings.
Customers can review the rental order number, product, rental tenure, duration, total amount, security amount, and current status.
OTHER ODOO MODULES
- Odoo Marketplace Rental Sale
- POS Rental Management
- Odoo Website Sale Rental for Enterprise
- Odoo SKU Generator
- Marketplace POS Extension
- Odoo Website Auction
NEED HELP?
Hope you find the guide helpful! Please feel free to share your feedback in the comments below.
If you still have any issues/queries regarding the module, please raise a ticket at https://webkul.uvdesk.com/en/customer/create-ticket/.
Also, please explore our Odoo development services & an extensive range of quality Odoo Apps.
For any doubts, contact us at support@webkul.com.
Thanks for paying attention!!