User Guide for Odoo eBay Connector
Table of Content
Introduction
Odoo eBay Connector links your eBay seller account with Odoo, so you can run your eBay business from one ERP system.
It syncs products, orders, customers, categories, shipping methods, and other marketplace data between eBay and Odoo.
Because both systems stay up to date on their own, your team spends far less time on manual data entry.
Whether you run one eBay store or several seller accounts, you can manage listings, stock, and orders from a single platform.
Prerequisites for the Odoo eBay Connector
The Odoo eBay Connector needs the following module to work in Odoo:
Install the Odoo Multichannel Sale module first, and then install the Odoo eBay Connector on top of it.
Features of the Odoo eBay Connector
- Import products, orders, categories, customers, and more from eBay to Odoo.
- Import marketplace data from eBay to Odoo manually or automatically with scheduled cron jobs.
- Import complete product information from eBay to Odoo, including categories, attributes, and attribute values.
- Sync customer details, including billing and shipping addresses.
- Export or update products and categories from Odoo to eBay using the eBay item specifics set up in Odoo.
- Configure eBay order state mapping with Odoo order statuses.
- Enable real-time stock synchronization between Odoo and eBay.
- Manage multiple eBay instances from a centralized dashboard.
- Monitor sync history and data mappings from within the connector.
- Schedule automatic product synchronization from Odoo to eBay at predefined intervals.
How to Install the Odoo eBay Connector
- After purchasing the module from the Webkul Store, you will receive a download link for the module ZIP file.
- Extract the downloaded ZIP file. A folder named ebay_odoo_bridge will be created.
- Copy the ebay_odoo_bridge folder into your Odoo Add-ons directory.
- Open your Odoo instance and navigate to Settings.
- Enable Developer Mode.
- Navigate to Apps and click Update Modules List.
- Remove all filters from the Apps search bar and search for ebay_odoo_bridge.
- Click Install to complete the installation.
How to Configure the Odoo eBay Connector
Create an eBay Channel Instance in Odoo
- Log in to your Odoo instance and navigate to Multichannel from the left-side menu.

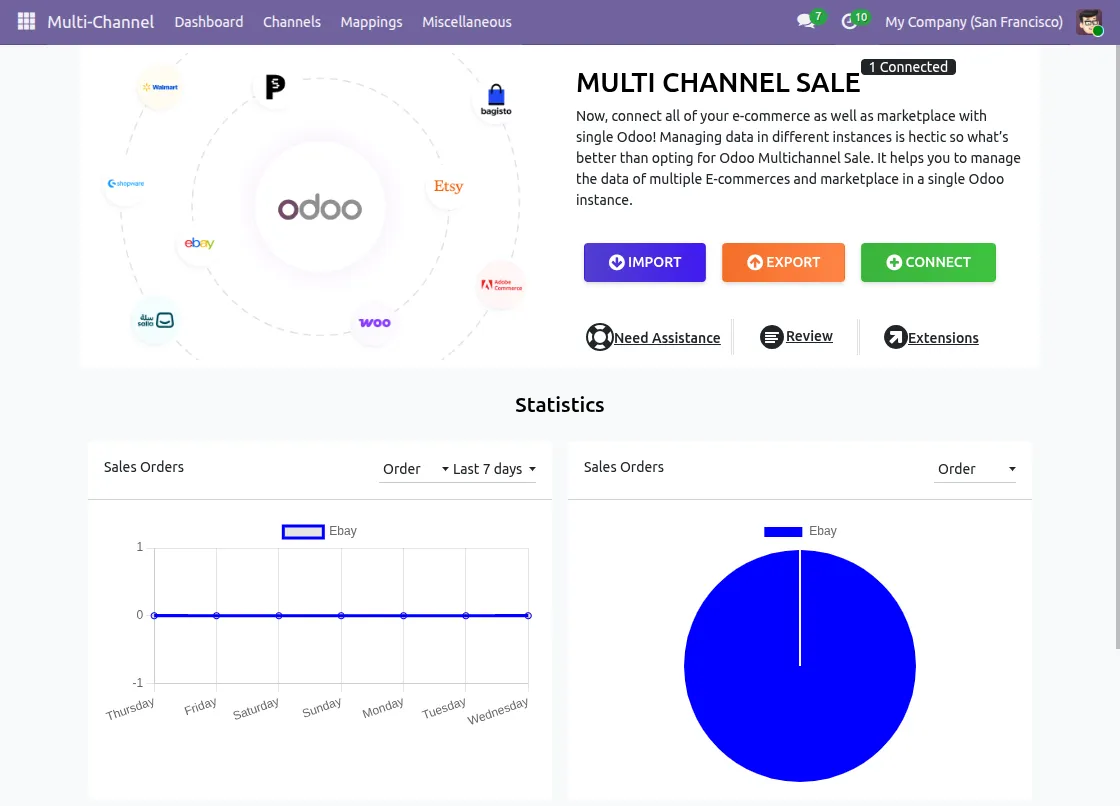
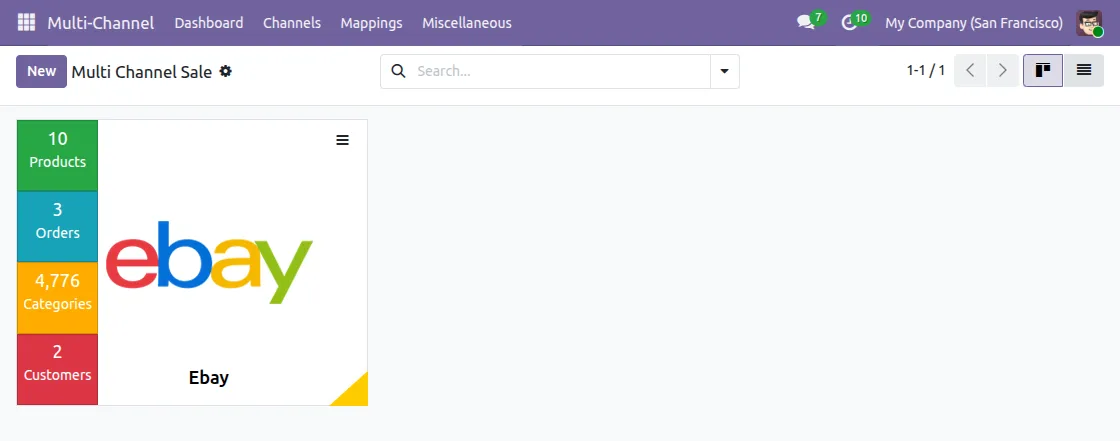
- Go to Channel → Instances to manage your marketplace connections. Click New to create a new channel instance.

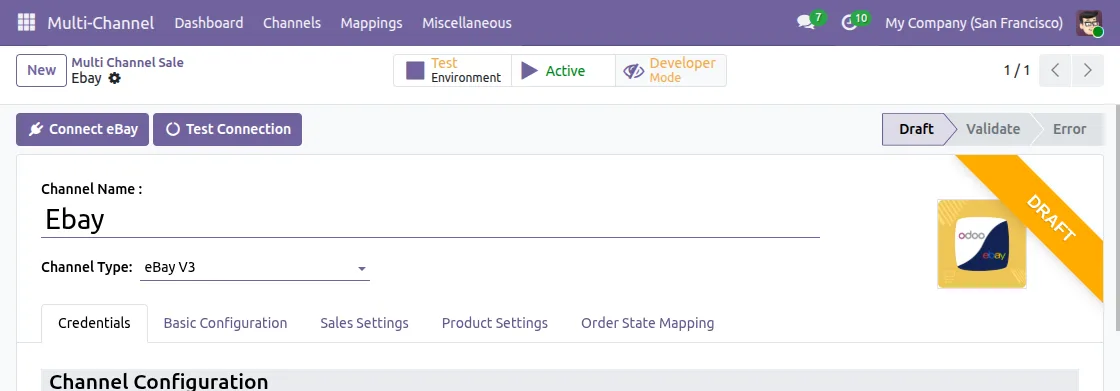
- Enter a name for the channel and select eBay as the Channel Type.

Generate eBay API Credentials
To connect your eBay seller account with Odoo, generate the required API credentials from the eBay Developer Portal.
- Sign in to your eBay Developer account. If you do not have an account, create one using your eBay credentials.
- Navigate to My Applications and create a new application.
- Copy the following credentials:
- App ID
- Dev ID
- Cert ID

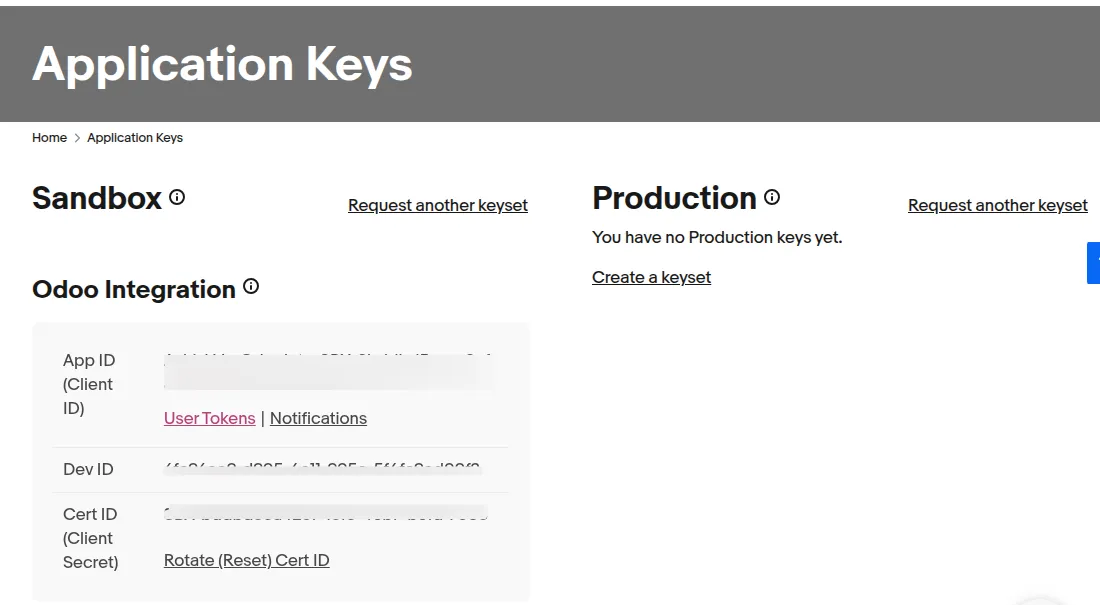
- These credentials are available for both Sandbox and Production environments.
- To find your RuName, open User Tokens for your application and scroll to the OAuth Token section. Copy the RuName (Redirect URL Name) from the redirect configuration.

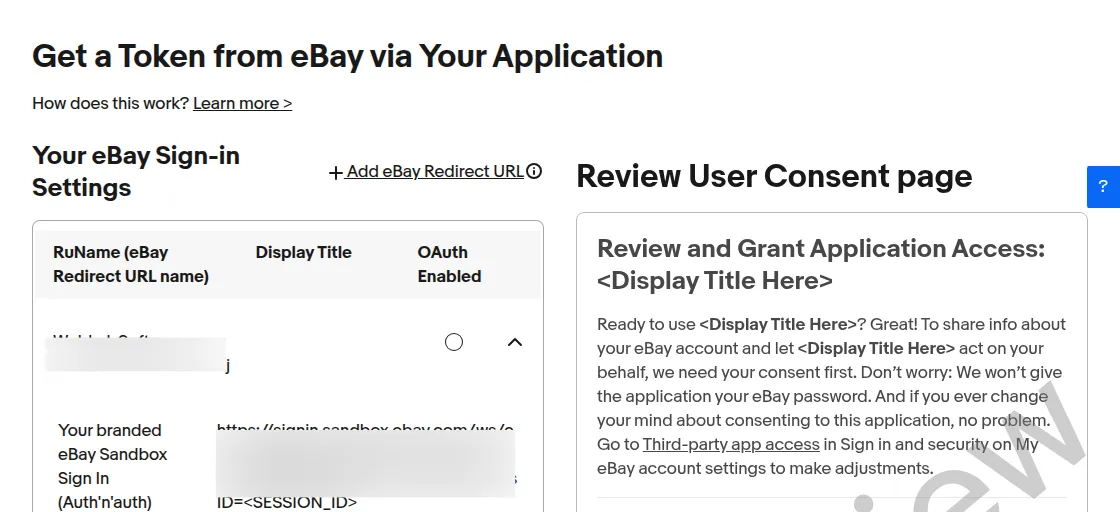
Connect Your eBay Account to Odoo
- Open the created eBay instance.
- Enter the credentials obtained from eBay.

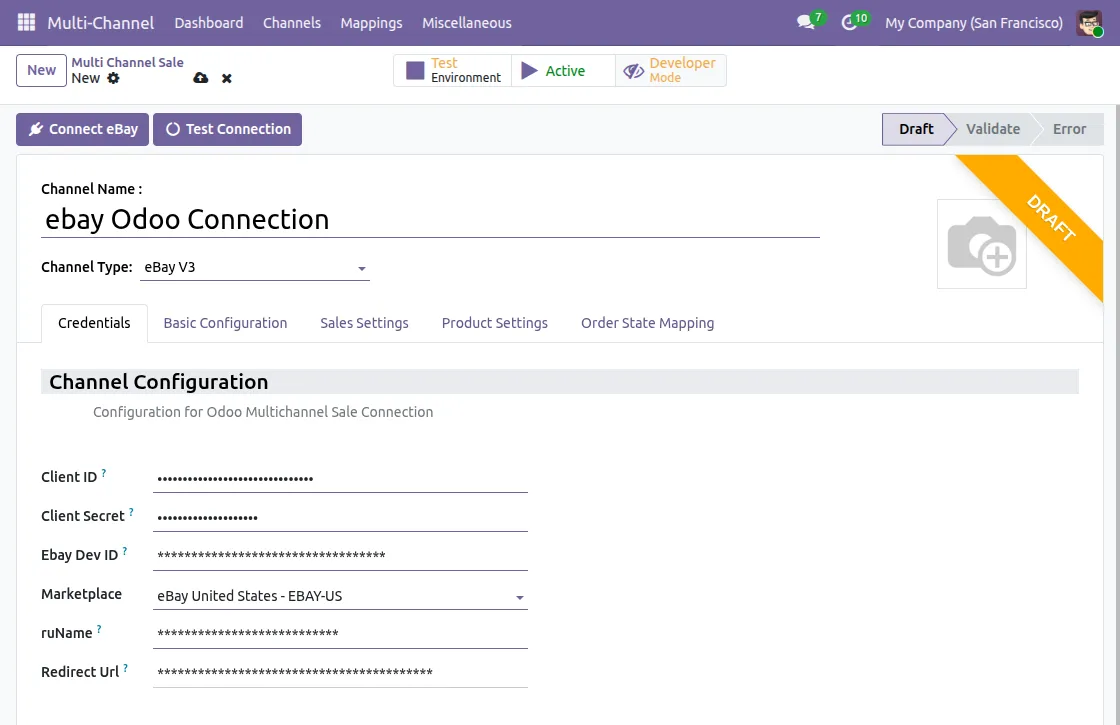
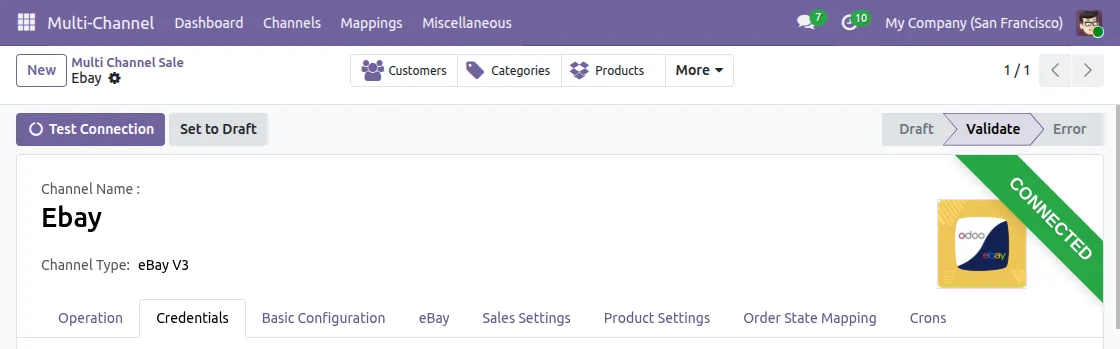
- Click Test Connection. After successful verification, the instance status changes to Connected.

Basic Channel Configuration
Open the Basic Configuration tab and configure the channel settings as required.

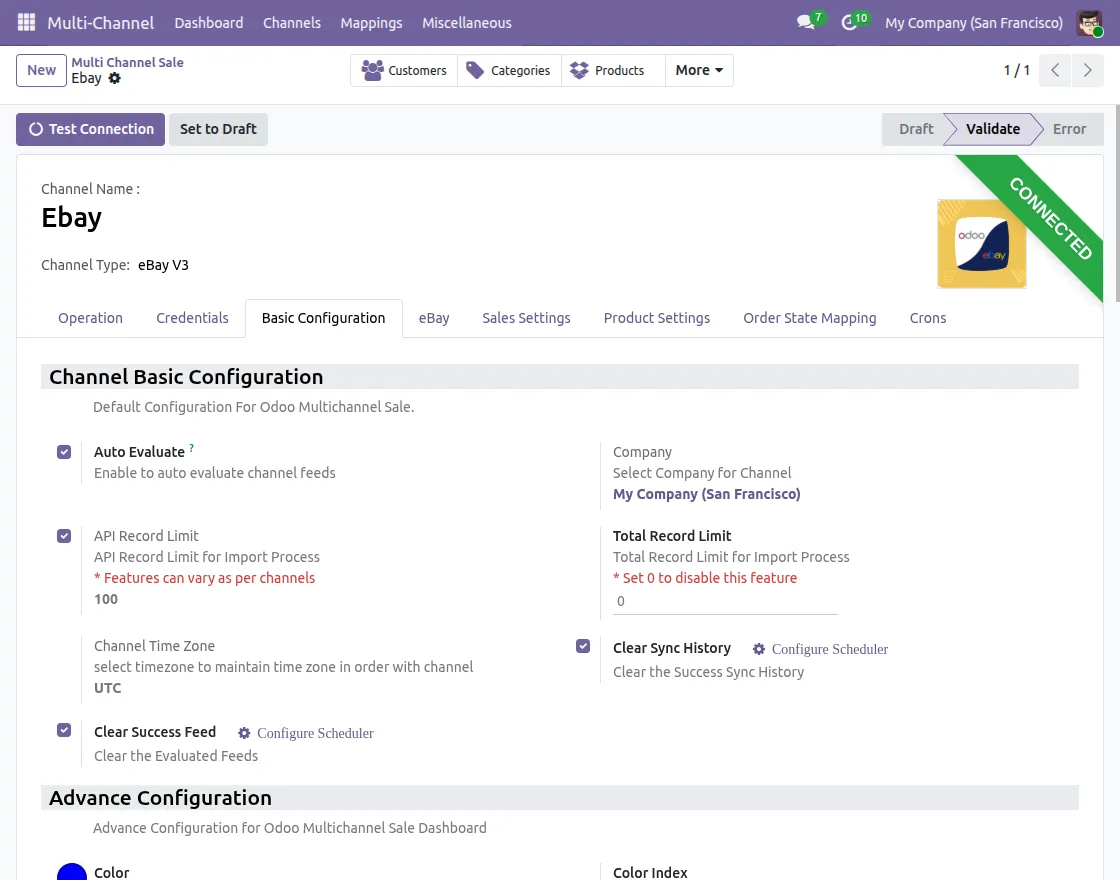
- Auto Evaluate: Automatically evaluates the feed after the import process.
- API Record Limit: Defines the maximum number of records fetched in a single API request (recommended: 100).
- Default/Child Store: Select the parent store from which orders and customers will be imported for the child store.
- Total Record Limit: Limits the total number of records imported.
- Channel Time Zone: Select the time zone to synchronize order dates with the eBay marketplace.
Configure eBay Default Operations
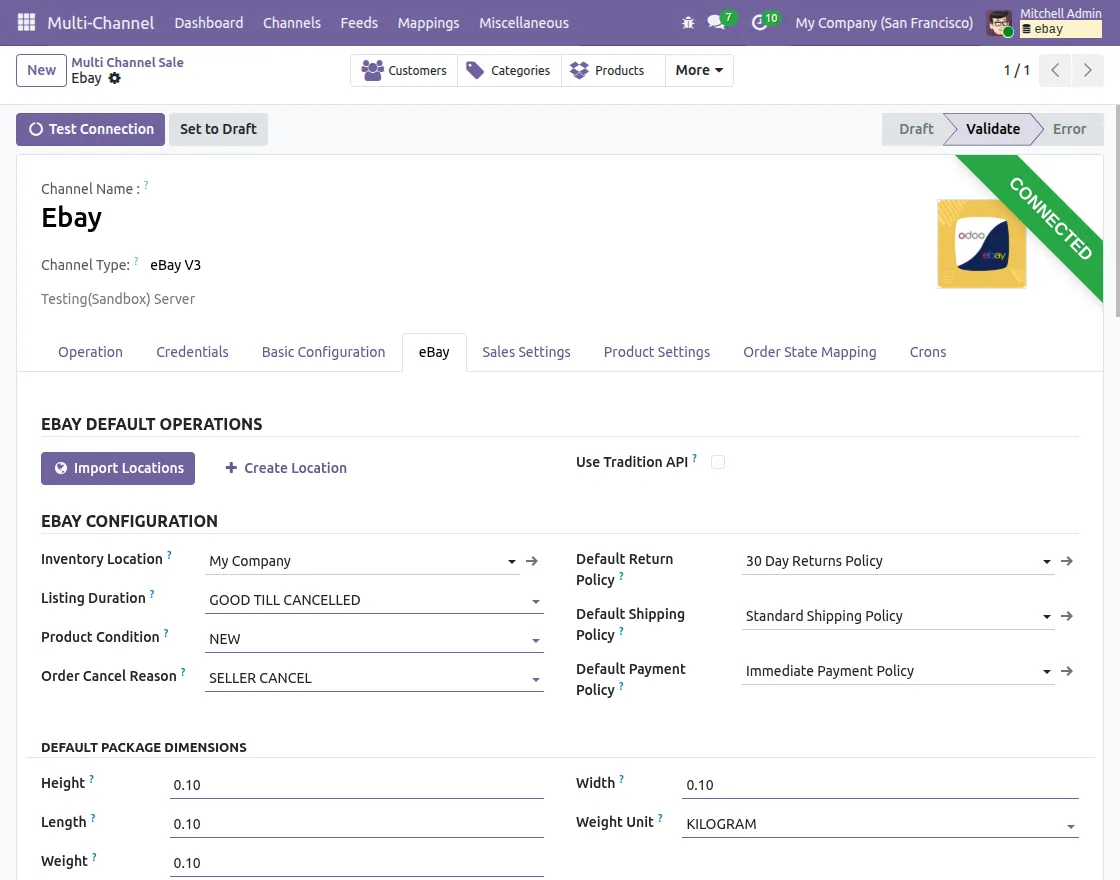
Sync eBay Inventory Locations
Synchronize your eBay Inventory Locations with Odoo to map inventory locations before exporting products to eBay.
This makes sure that each product is listed from the right eBay inventory location.
Default eBay Listing Settings
Configure the default eBay settings used during synchronization from Odoo to eBay.
- Inventory Location: Select the default eBay inventory location where exported product inventory will be managed.
- Listing Duration: Select the default duration for product listings on eBay.
- Product Condition: Choose the default product condition, such as New, Used, or Acceptable.
- Order Cancel Reason: Select the default cancellation reason used when canceling orders on eBay.
- Return Policy: Select the default return policy for exported products.
- Shipping Policy: Select the default shipping policy applied during product export.
- Payment Policy: Select the default payment policy for exported products.
- Package Dimensions: Configure the default package dimensions used when exporting products from Odoo to eBay.
Configure Sales Order Settings
Channel Sales Order

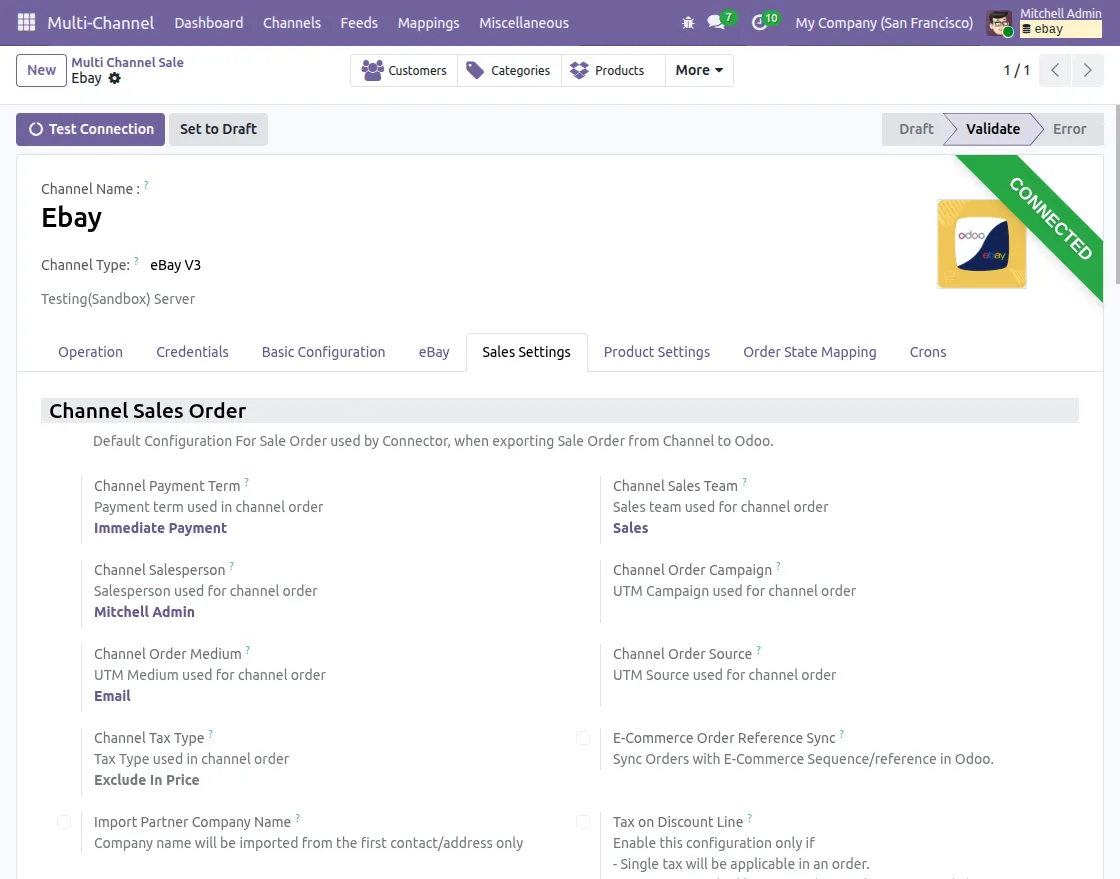
Navigate to Sales Settings → Channel Sales Order and configure the sales order settings.
- E-Commerce Order Reference Sync: Creates imported sales orders using the eBay order reference.
Channel Order Default Product
Navigate to Sales Settings → Channel Order Default Product.
Configure the default service products used for Shipping and Discount while creating sales orders.
Real-Time Sales Order Status Sync
Navigate to Sales Settings → Realtime Sales Order Status Sync.
Configure the default settings used to synchronize sales order operations between Odoo and eBay.
Configure Product and Stock Settings
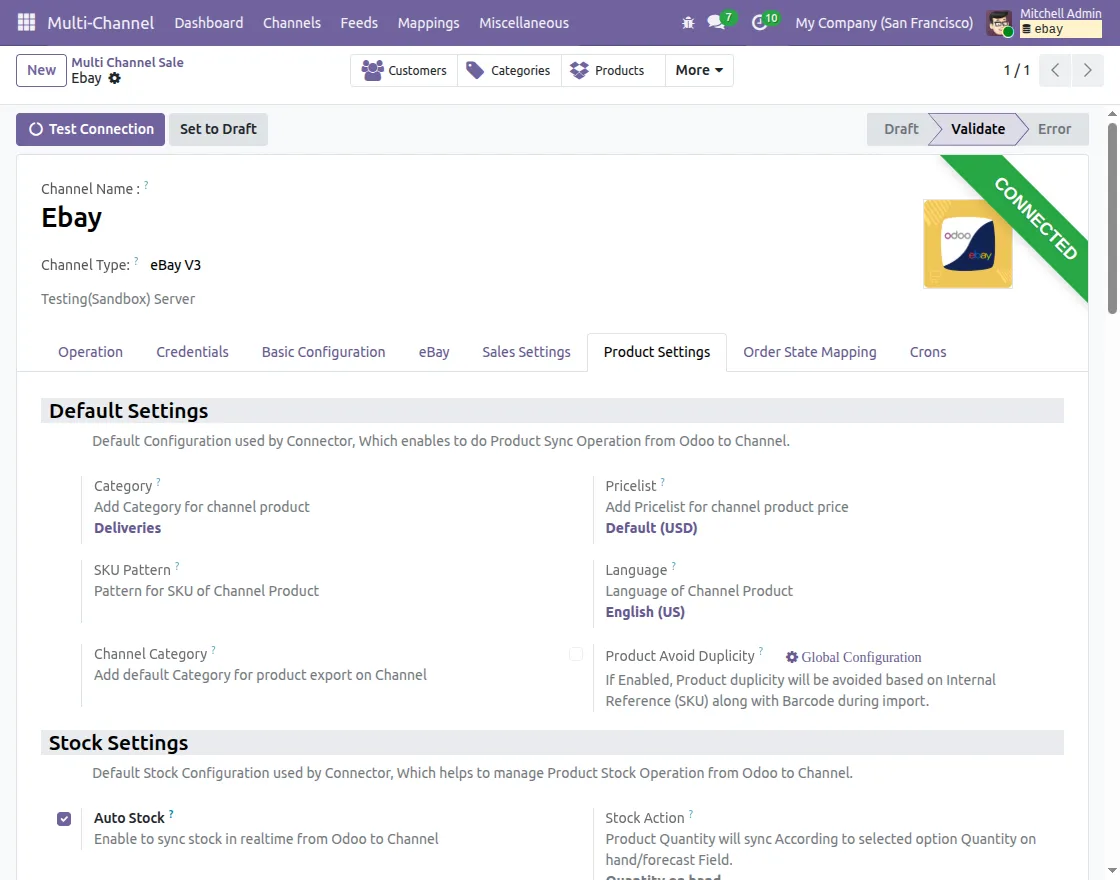
Default Product Settings
Navigate to Product Settings → Default Settings.
Configure the default product settings for imported and exported products.
Image: Default Settings
- Category: Default Odoo category for imported products.
- Pricelist: Default pricelist for imported eBay products.
- SKU Pattern: Generates SKUs for products without an existing SKU.
- Language: Default marketplace language.
- Channel Category: Default eBay category for product export.
Stock Sync Settings
Navigate to Product Settings → Stock Settings.
Configure the stock synchronization settings.
Image: Stock Settings
- Auto Stock: Synchronizes inventory automatically from Odoo to eBay.
- Stock Action: Select whether stock is synced using Quantity on Hand or Forecast Quantity.
- Warehouse: Default warehouse used for inventory management.
- Location: Default stock location for imported products.
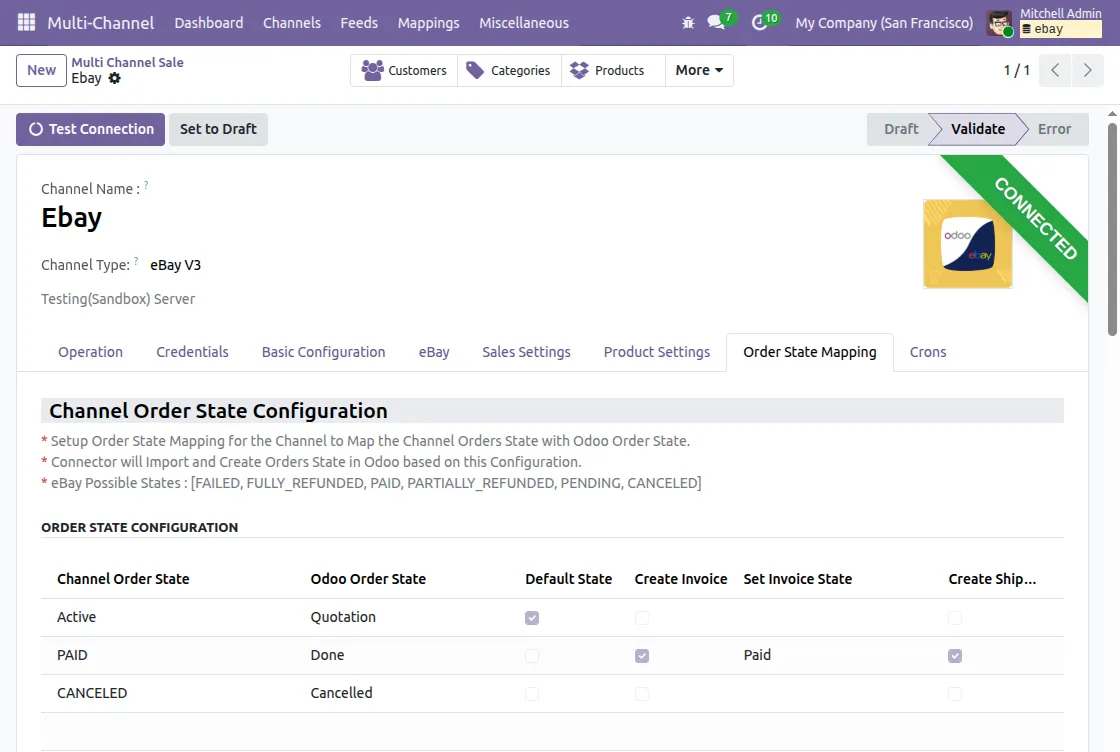
Map eBay Order Status to Odoo
Navigate to Order State Mapping and create mappings between eBay order statuses and Odoo sales order states.

Schedule Automatic Sync With Cron Jobs
Channel Cron Configuration
Navigate to Cron → Channel Cron Configuration.

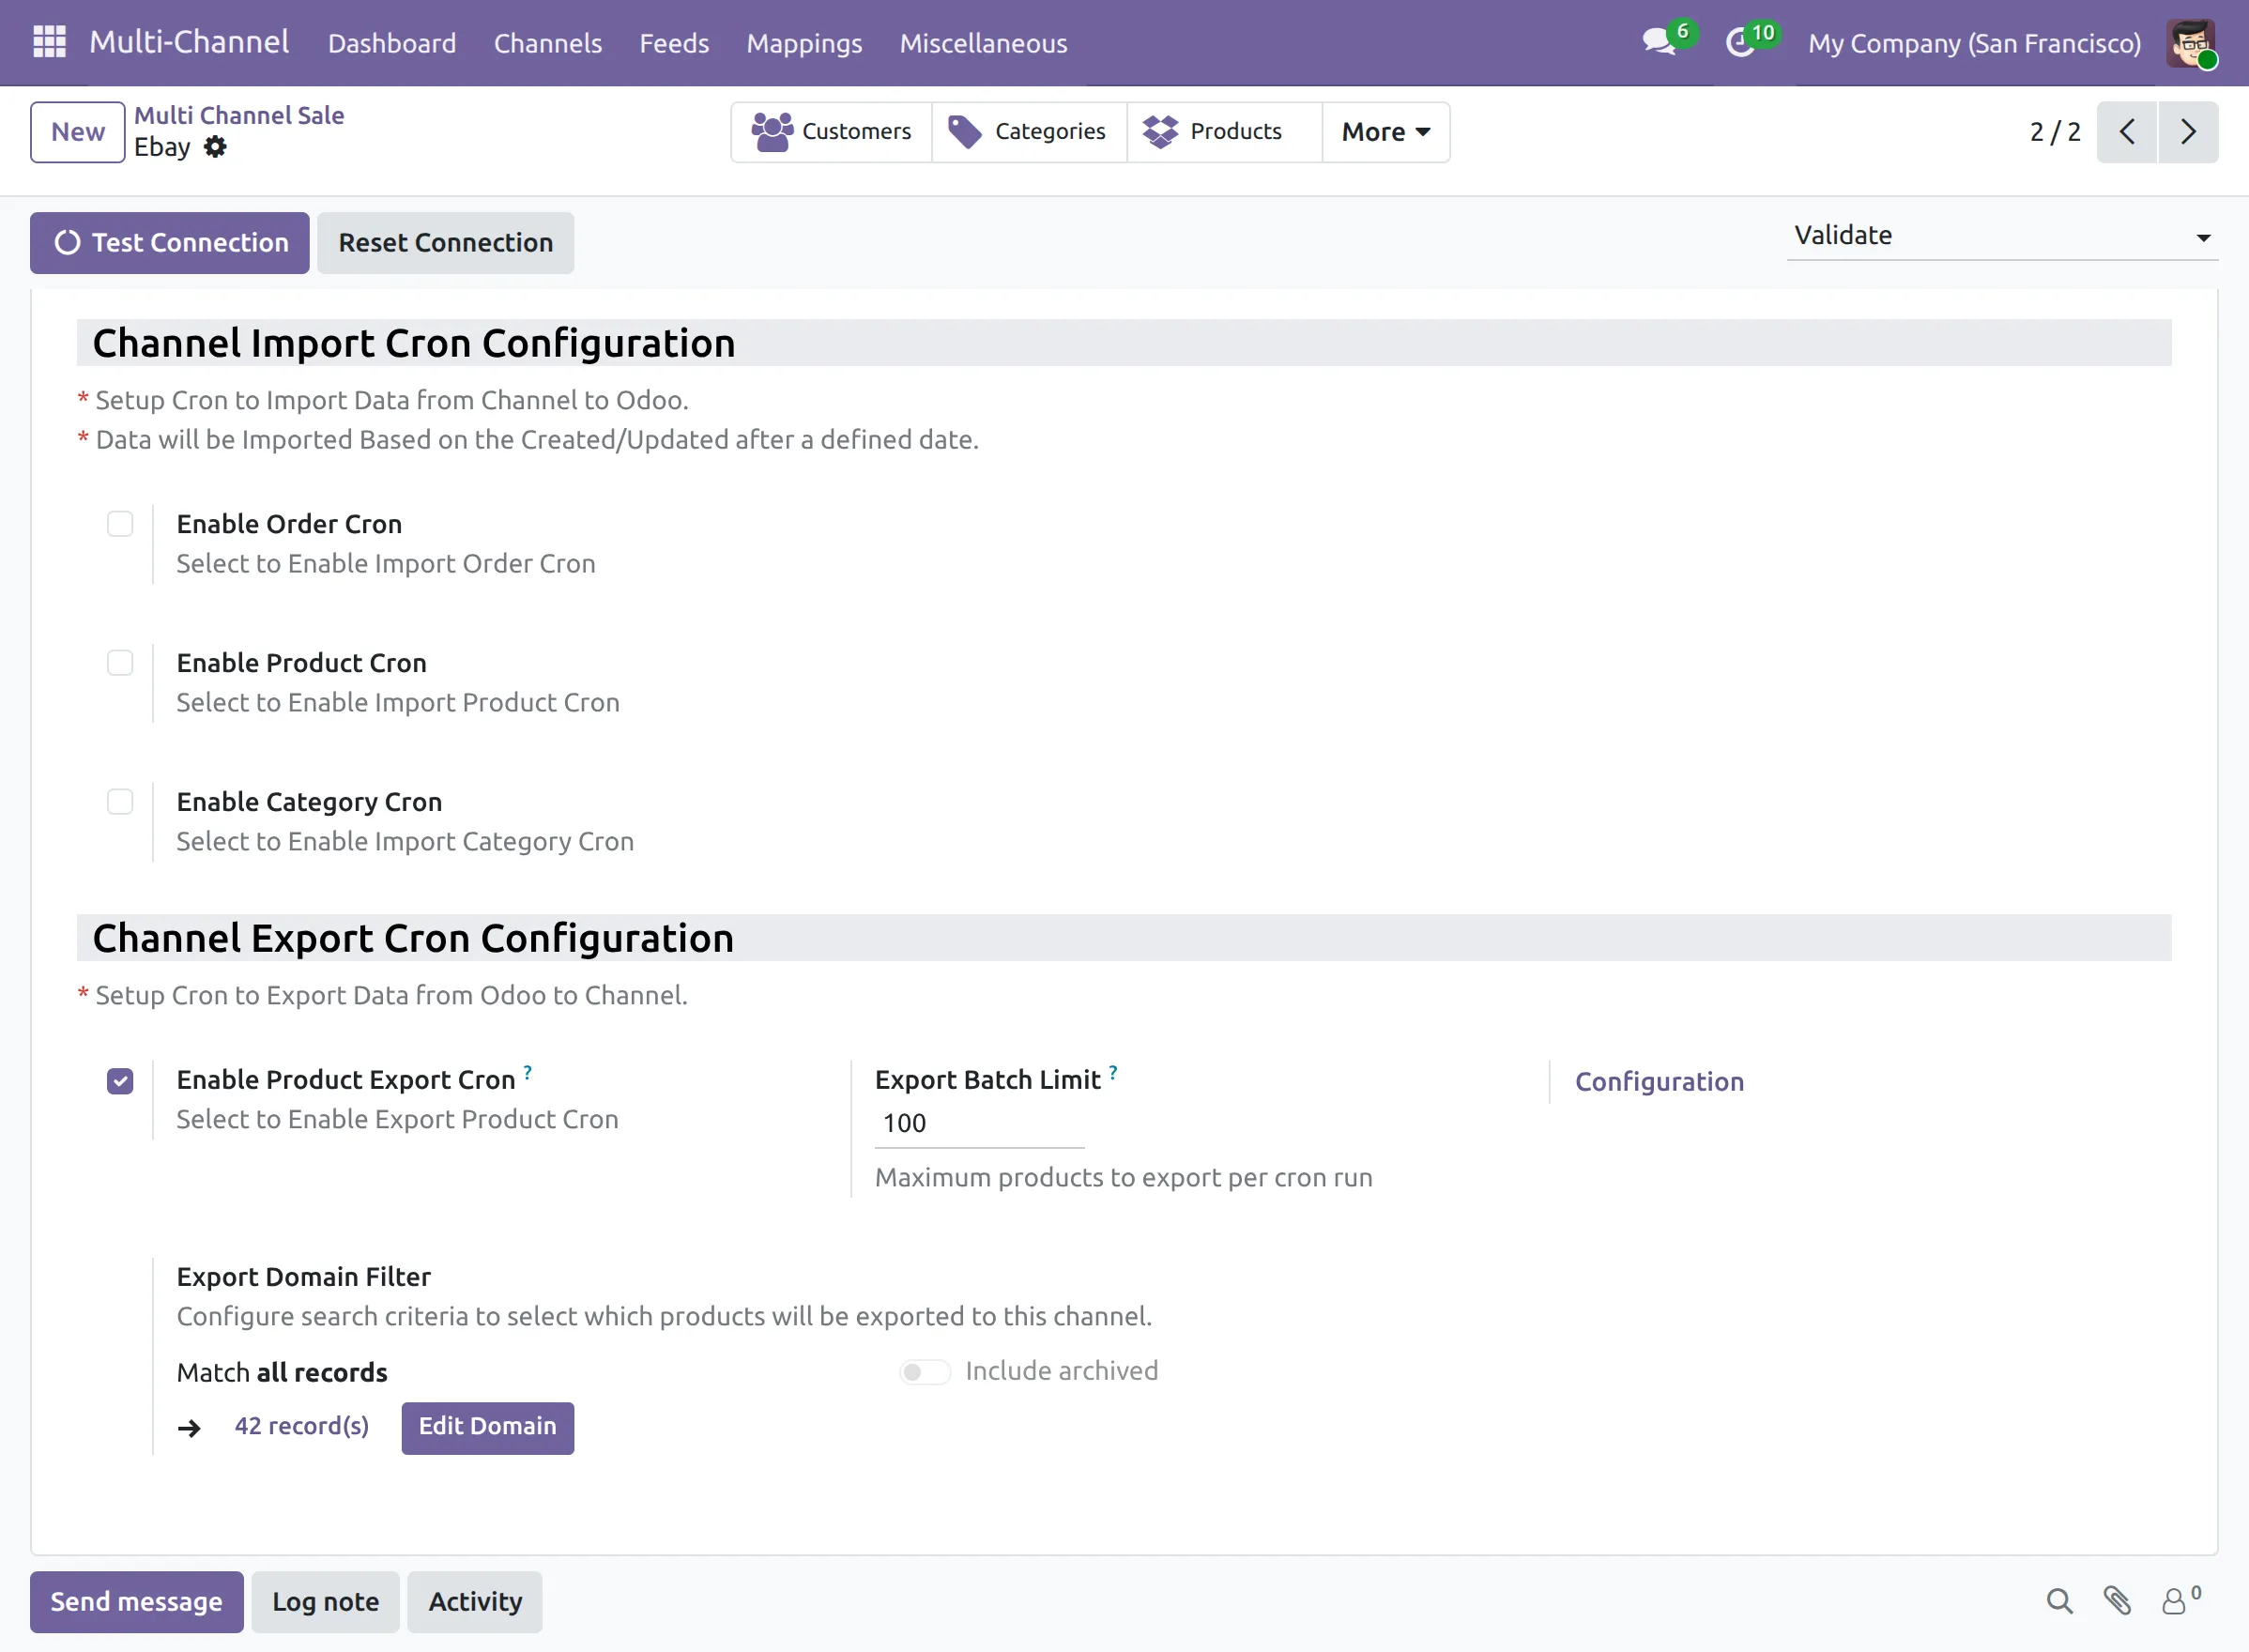
Set up scheduled sync to import the following records from eBay to Odoo:
- Products
- Categories
- Customers
- Orders
- Order Status
You can also schedule automatic exports of the following records to eBay:
- Products
The cron imports and exports records based on the configured Created/Updated After date.
Import Data From eBay to Odoo
Navigate to the Multichannel Dashboard to view synchronization statistics and marketplace activities.

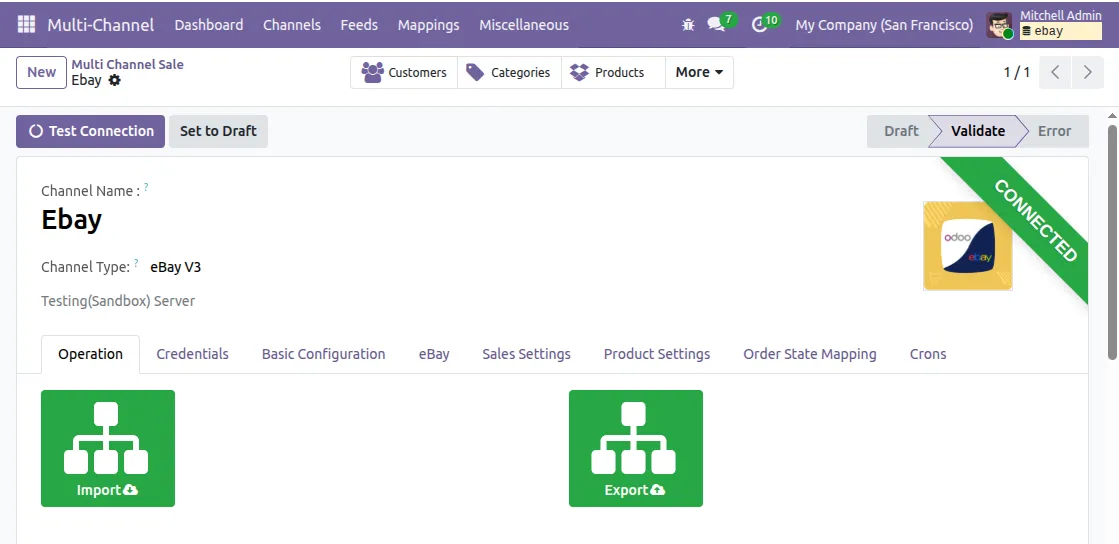
Click Import to open the Import Wizard.

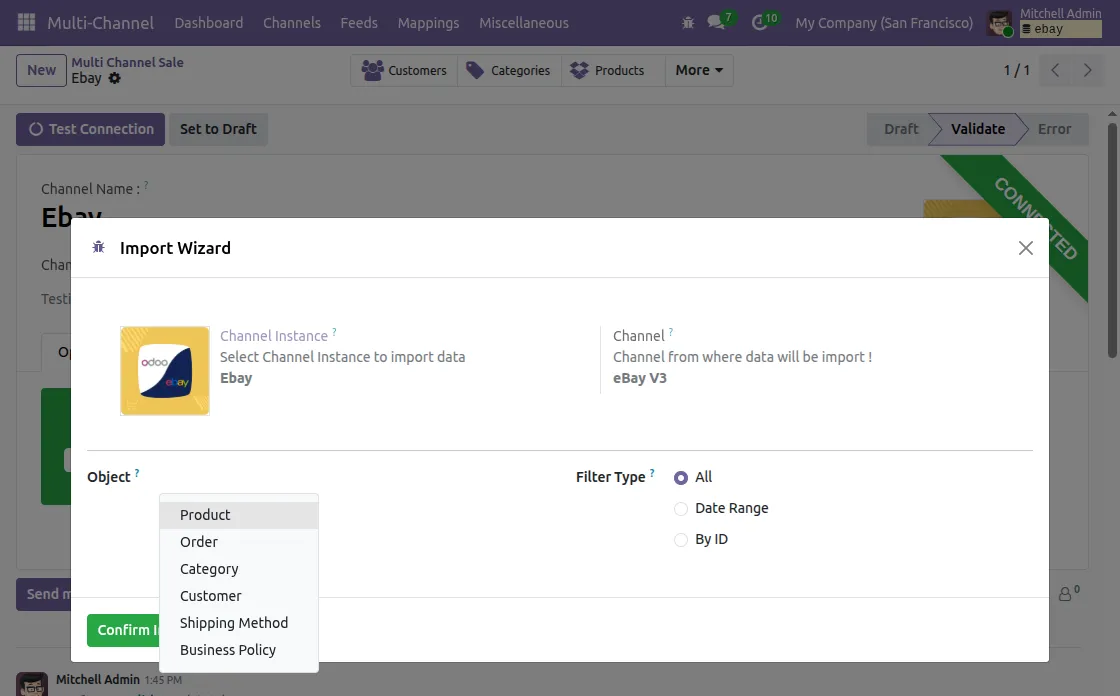
Select the Channel Instance and choose the object to import.
Supported import objects:
- Products
- Orders
- Categories
- Customers
- Shipping Methods
- Business Policies
Click Confirm Import to start the import process.
Export Data From Odoo to eBay
Set Up eBay Product Details in Odoo
Before you export products to eBay, set up the eBay details for each product in Odoo.
These settings decide how the product will be listed on the eBay marketplace.
Open the desired product in Odoo and navigate to the eBay tab.

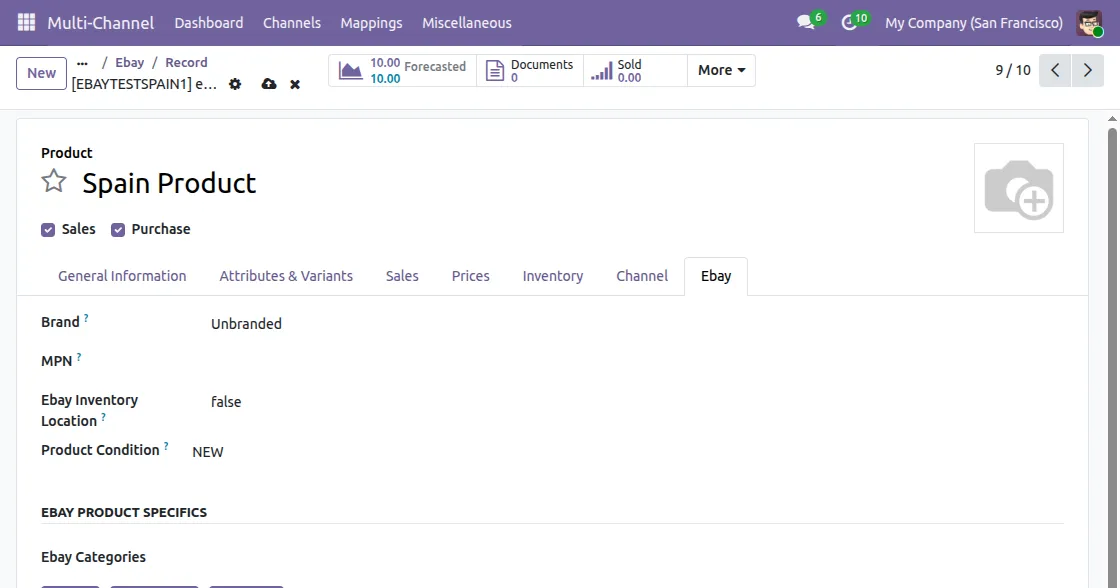
Select the right eBay Category for the product from the categories you imported earlier from eBay.
Then click Get Specifications to fetch the item specifics for that category directly from eBay.
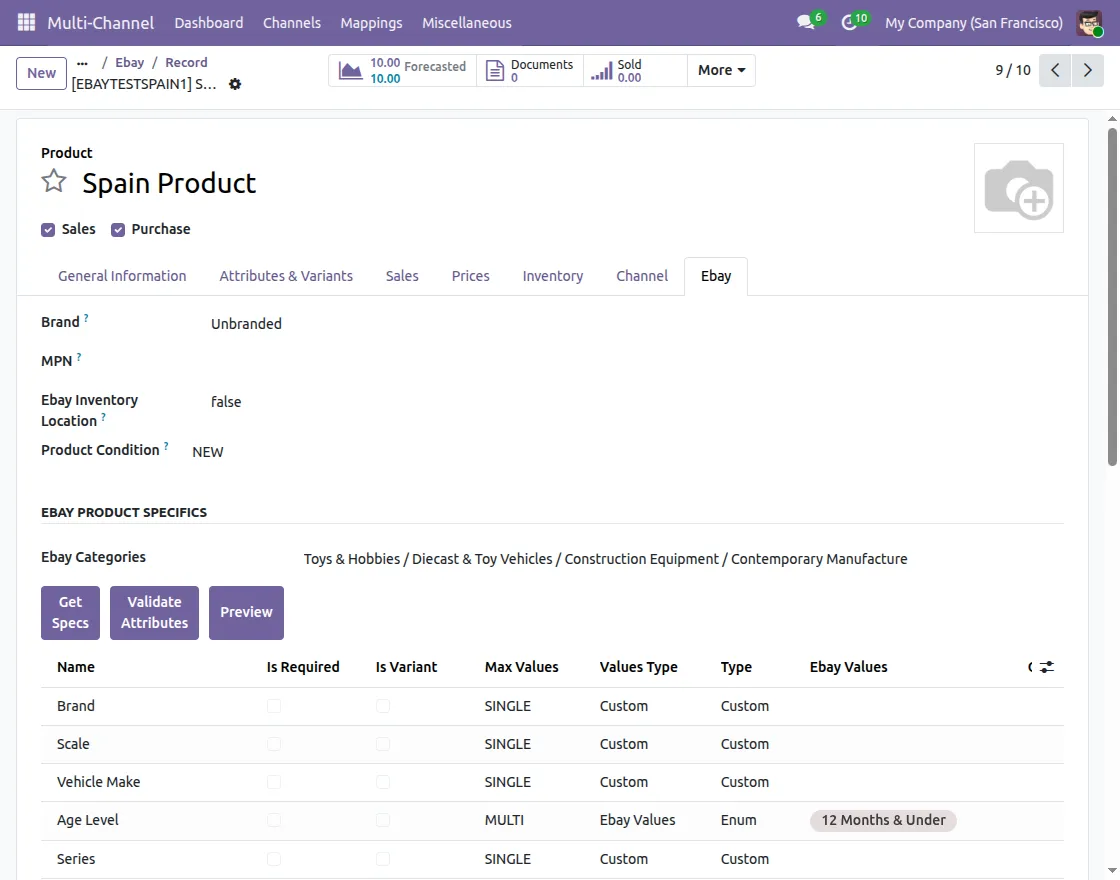
Add, update, or remove the required specifications so that they match your product details.
These specifications are sent to eBay along with the product when it is synchronized.
You can set up many products the same way and then sync them from Odoo to eBay in bulk with the Export Wizard.
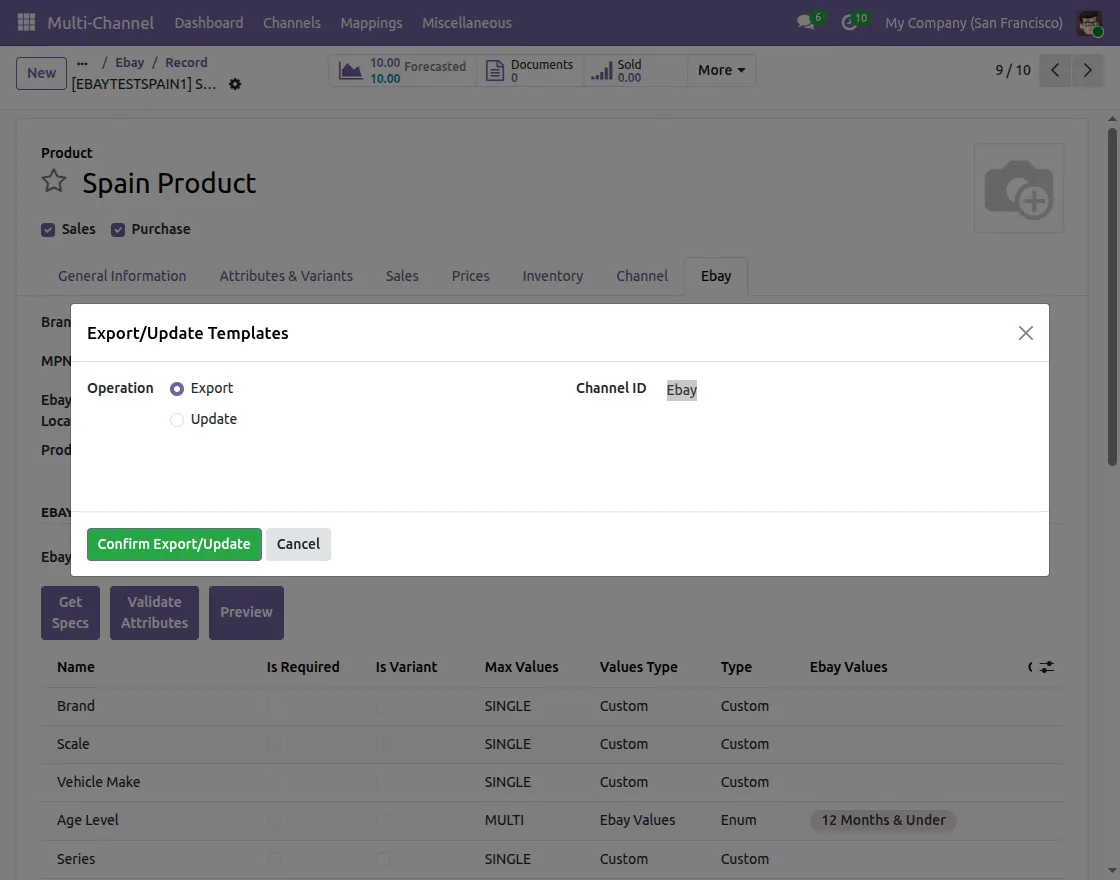
To sync an individual product, open the product, click the Action menu, and select Export to eBay.
Export Products and Categories to eBay in Bulk
Click Export from the Multichannel Dashboard to open the Export Wizard.

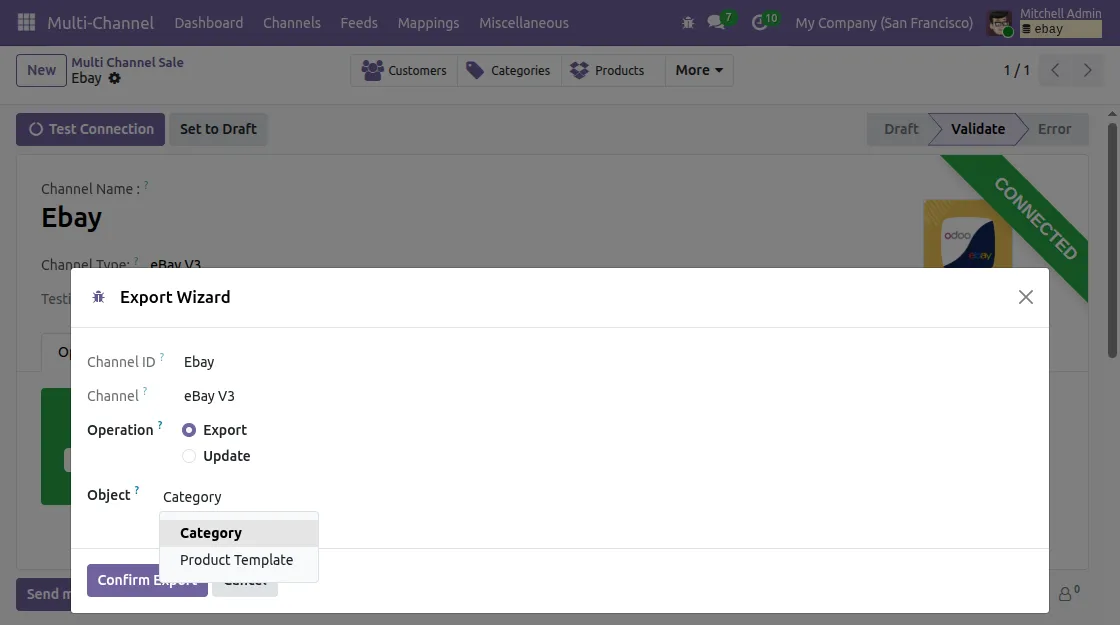
Select the Channel Instance and choose the required operation:
- Export
- Update
Then select the object to export.
Supported export objects:
- Categories
- Product Templates
Click Confirm Export to export the selected records to eBay.
Need Help?
Hope you find this guide helpful.
If you have any questions or face any issues while using the module, please raise a support ticket through the UV Desk.
For further assistance, contact us at support@webkul.com.
Thank you for choosing Webkul.