Odoo Marketplace Seller Store Pickup’s User Manual
INTRODUCTION
Odoo Marketplace Seller Store Pickup : Simplify Order Collection with Store Pickup!
Make self-pickup easy for customers by adding the Odoo Marketplace Seller Store Pickup module to the user’s online store. Sellers can add multiple pickup spots.
Reduce the hassle of last-mile delivery with this user-friendly feature, and let customers choose the most convenient store location and time for pickup.
Now, the problem arrives when the customer cannot come to the store for pickup and also is not able to pay online.
The Odoo Marketplace Cash On Delivery (COD), allows customers to pay when the order is safely delivered to their homes.
Prerequisites For Using Odoo Marketplace Seller Store Pickup
Module works together with the following modules:
You must install the above-mentioned modules to use Odoo Marketplace Seller Store Pickup.
Features
- Odoo Marketplace Seller Store Pickup allows customers to pick up orders from physical stores.
- Enables sellers to add multiple store locations with detailed information (address, contact number, timings).
- Supports Geolocation API for precise store location on Google Maps.
- Customers can select the pickup date and time based on availability.
- Sellers can update stock quantities for each store location.
- Reduces delivery costs and times by enabling local order pickups.
- Sends automated notifications to customers regarding their pickup status and reminders.
- Customers can choose the nearest store at their convenience for picking up their order during checkout
Looking to implement ERP in your system? Check out Odoo Implementation! It’s your go-to solution for seamless integration and enhanced efficiency.
INSTALLATION
- Once you purchase the Odoo Marketplace Seller Store Pickup from the Webkul store, you will receive the link to download the zip file of the module.
- Extract the file on your system after the download finishes. As a result, you will be able to see a folder named- ‘marketplace_store_pickup’
- Copy and paste this folder inside your Odoo Add-Ons path.
- Now, open the Odoo App and click on the Settings menu. Here, click on Activate the Developer Mode.
- Then, open the Apps menu and click on ‘Update Modules List.’
- In the search bar, remove all the filters and search ‘marketplace_store_pickup’
- You will be able to see the module in the search results. Click on ‘Install’ to install it.
Before moving further, explore our Odoo development services & an extensive range of quality Odoo Apps.
WORKFLOW
Configuring the Store-Pickup delivery Method in the backend
- Once the installation is completed, log in as admin and visit the Odoo website app backend, then you can find the configuration tab on the navigation bar.
Here you can change settings,manage warehouses, products and deliveries.
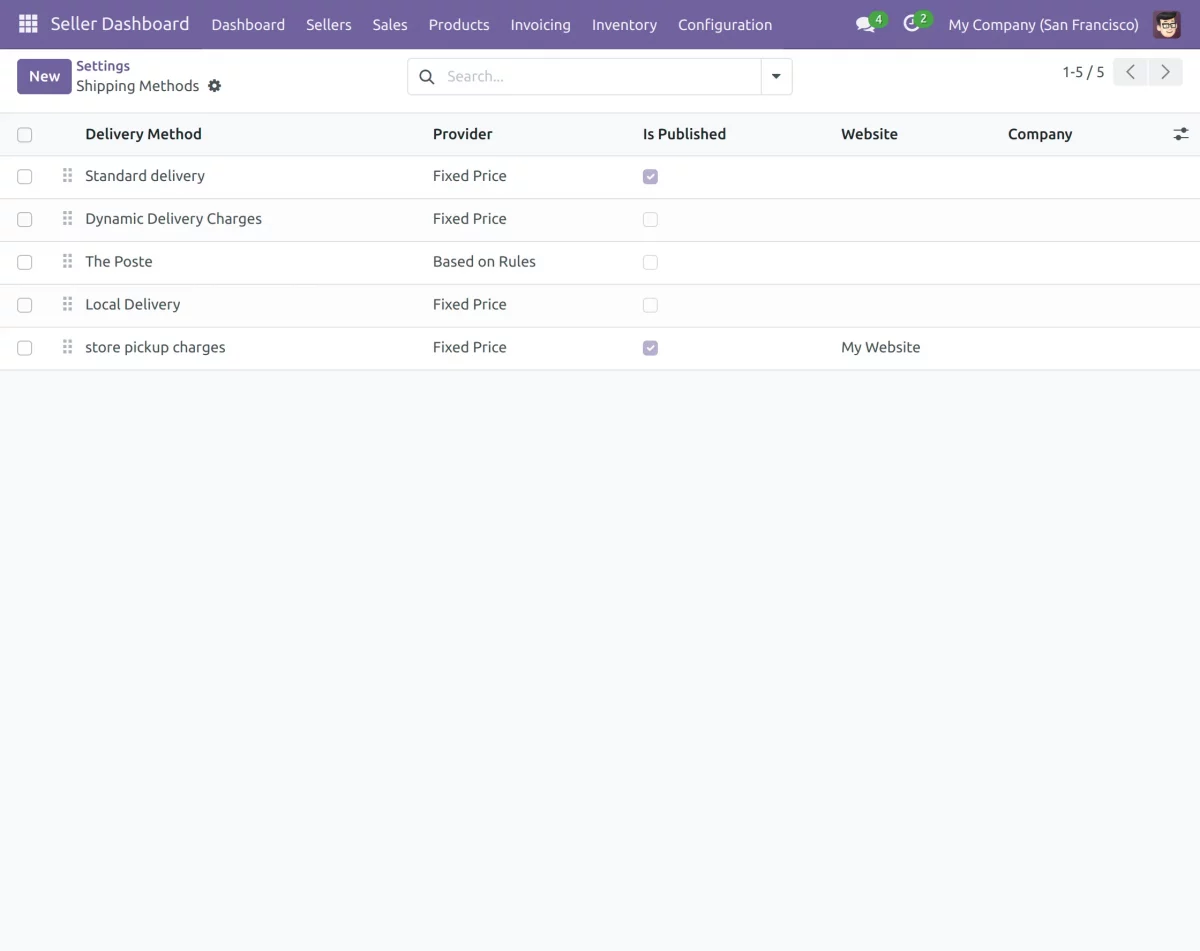
Configuration>>Settings>>Sales>> Delivery >> Shipping Methods.

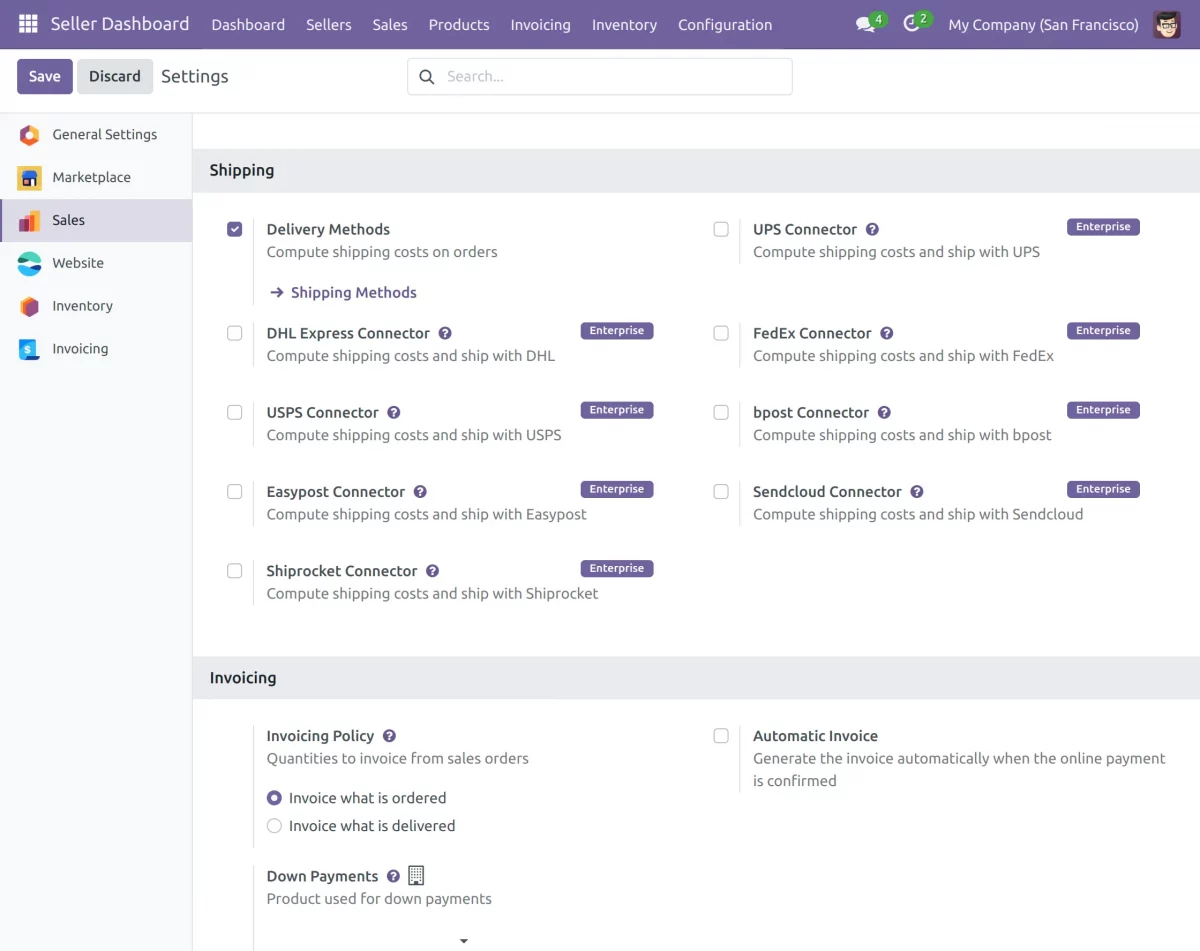
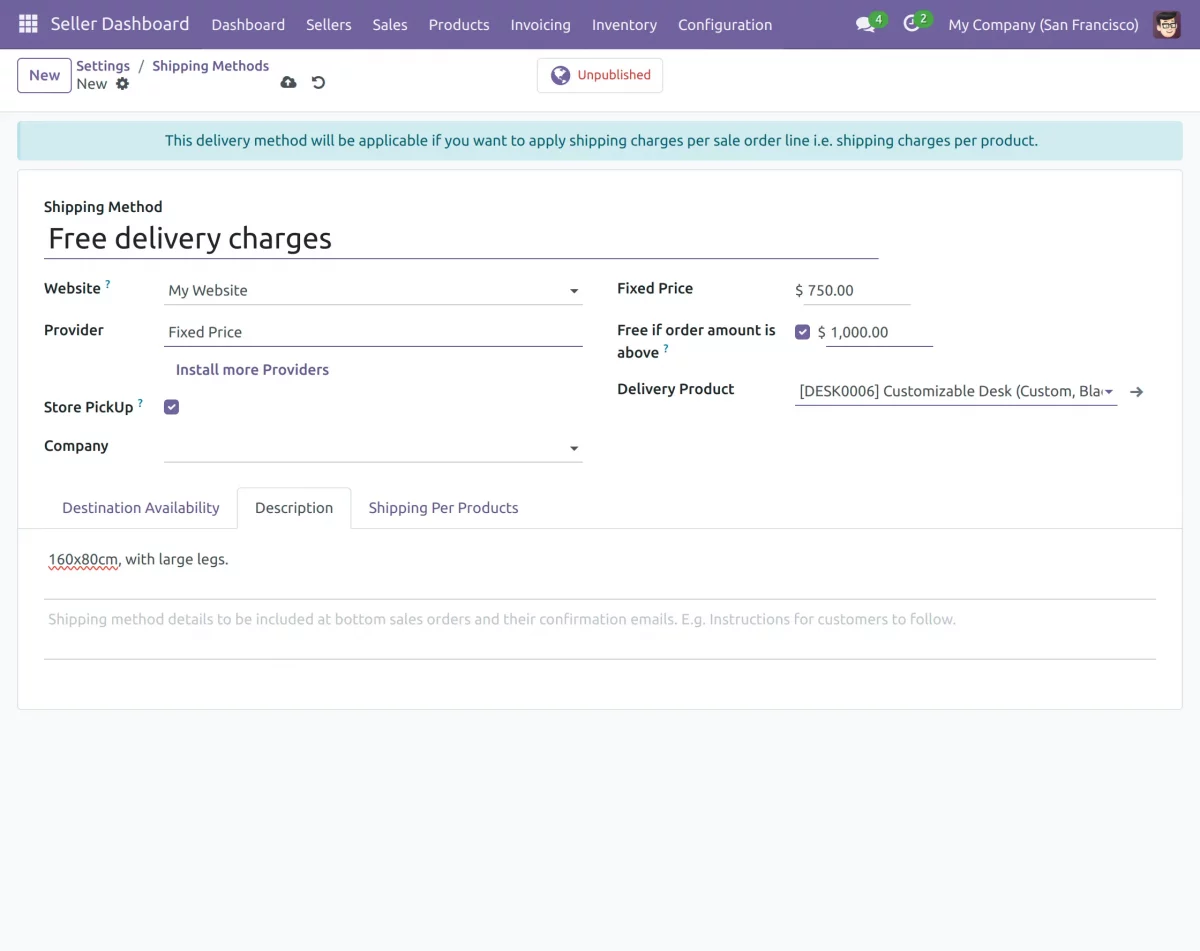
- After clicking on the ‘shipping methods’ on the dropdown, click on ‘New’ to create a new delivery method-store pick up according to how the seller wants.
- Enter the name and other details. To allow the store pickup option for the customers, check on the checkbox next to the field- ‘Store PickUp’ and save
Admin view
Configuring Seller Store Pickup Locations
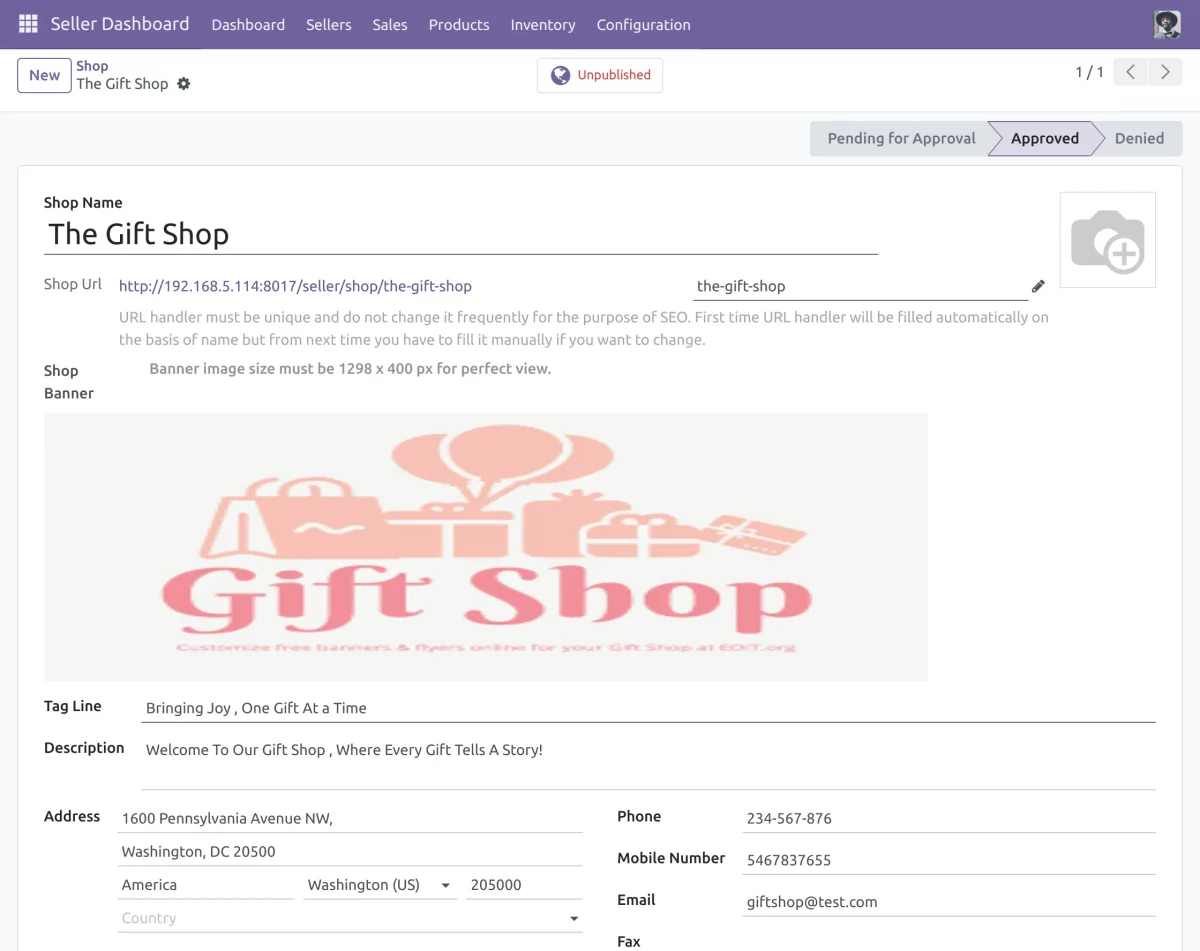
- The seller can add multiple shop locations to facilitate store pickup for the convenience of the customers. Sign in as admin.
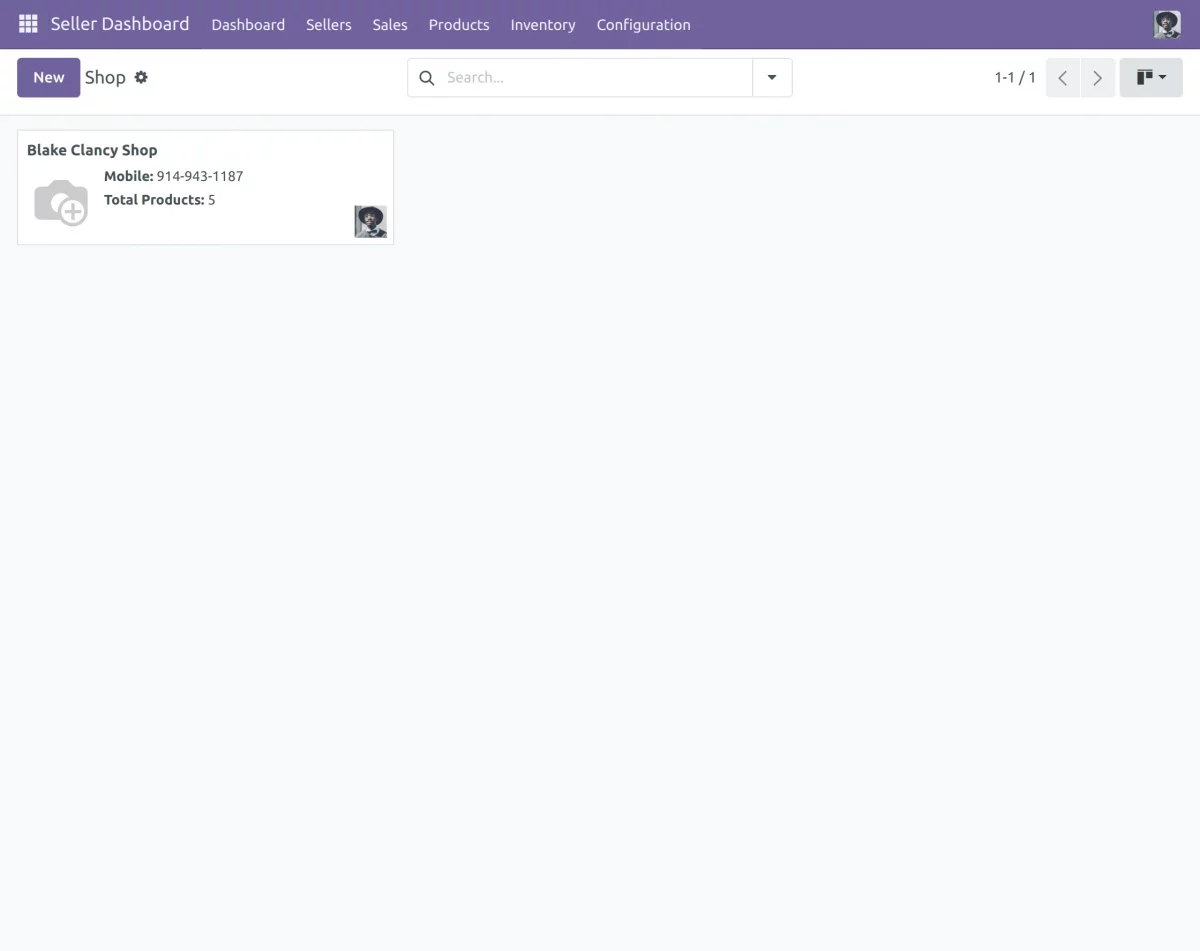
- Once you have logged in as a seller, click on the Seller Dashboard. Then, go to Shops>>Seller Shops>> New.
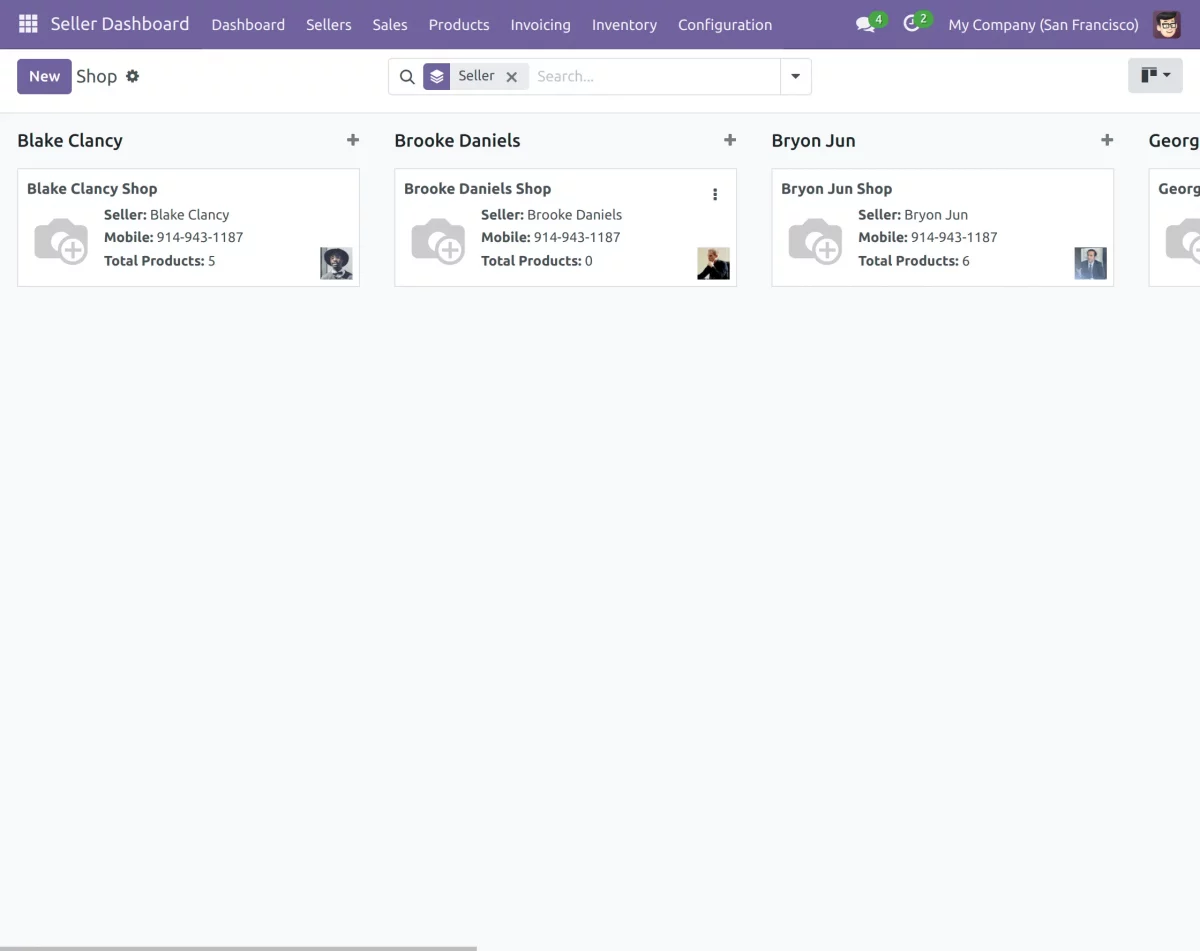
- Enter the name of the shop . Enter various details like the name of seller , description, mobile number,etc . Then, add the address of the store location.
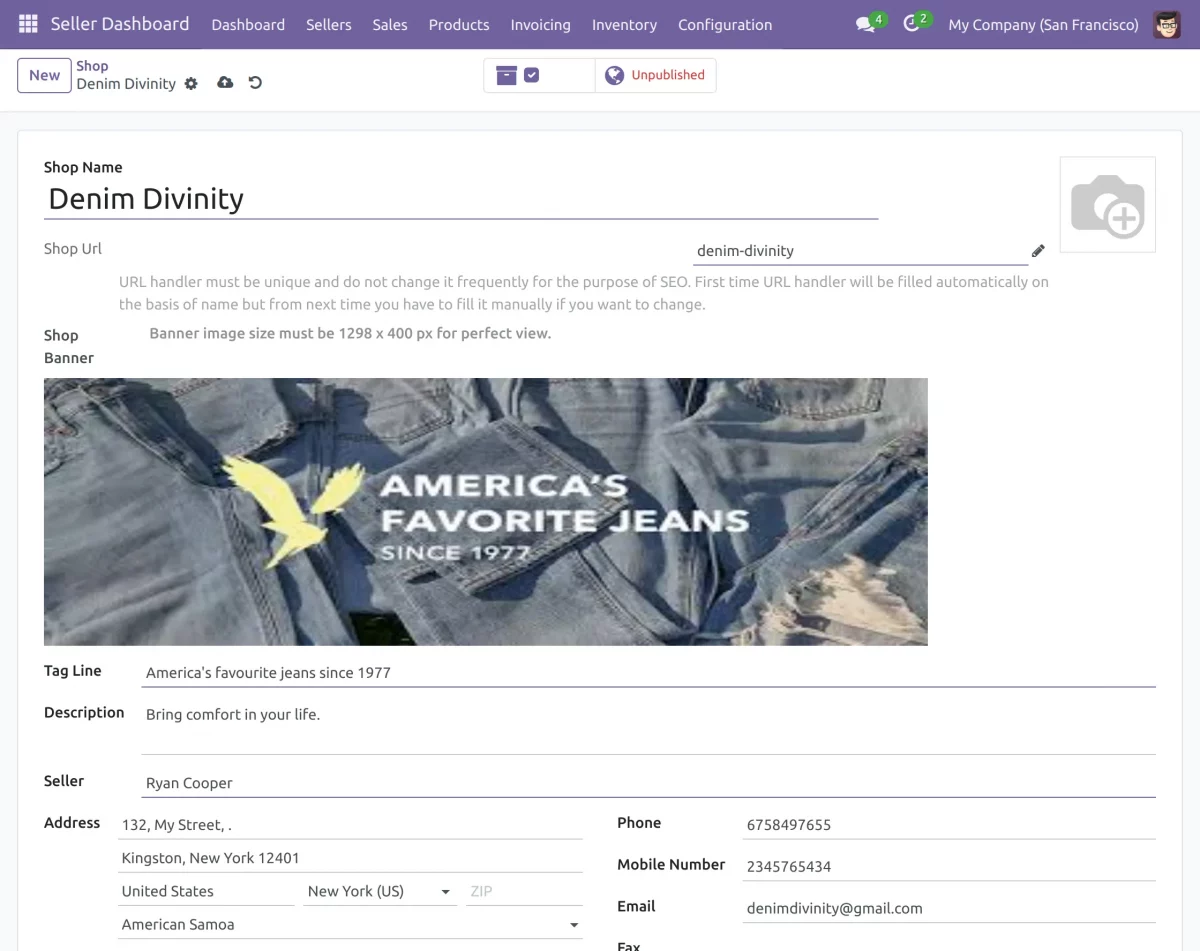
- Each shop is given its own inventory location.
- Products can be placed in different storage locations for store pickup. Only those assigned to these locations will be available for pickup.
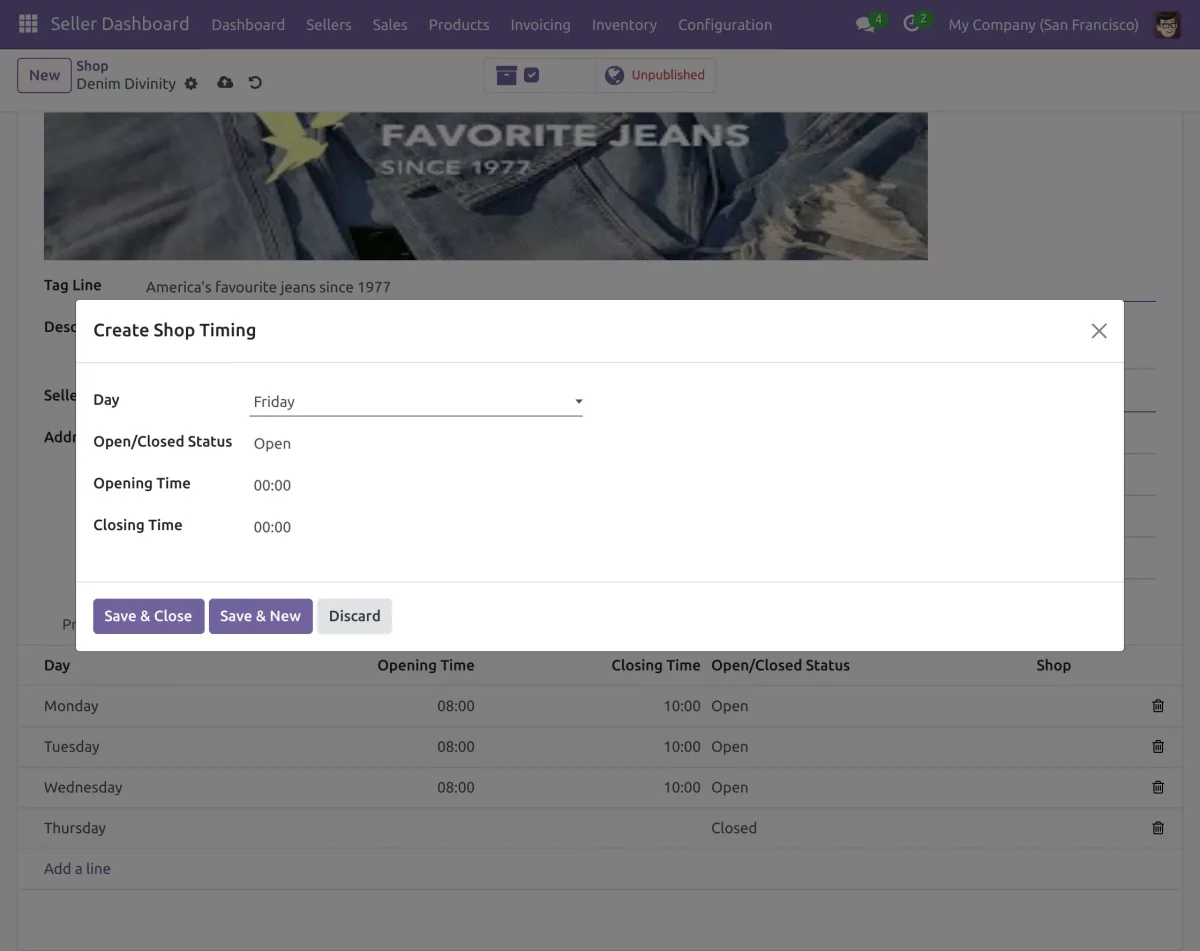
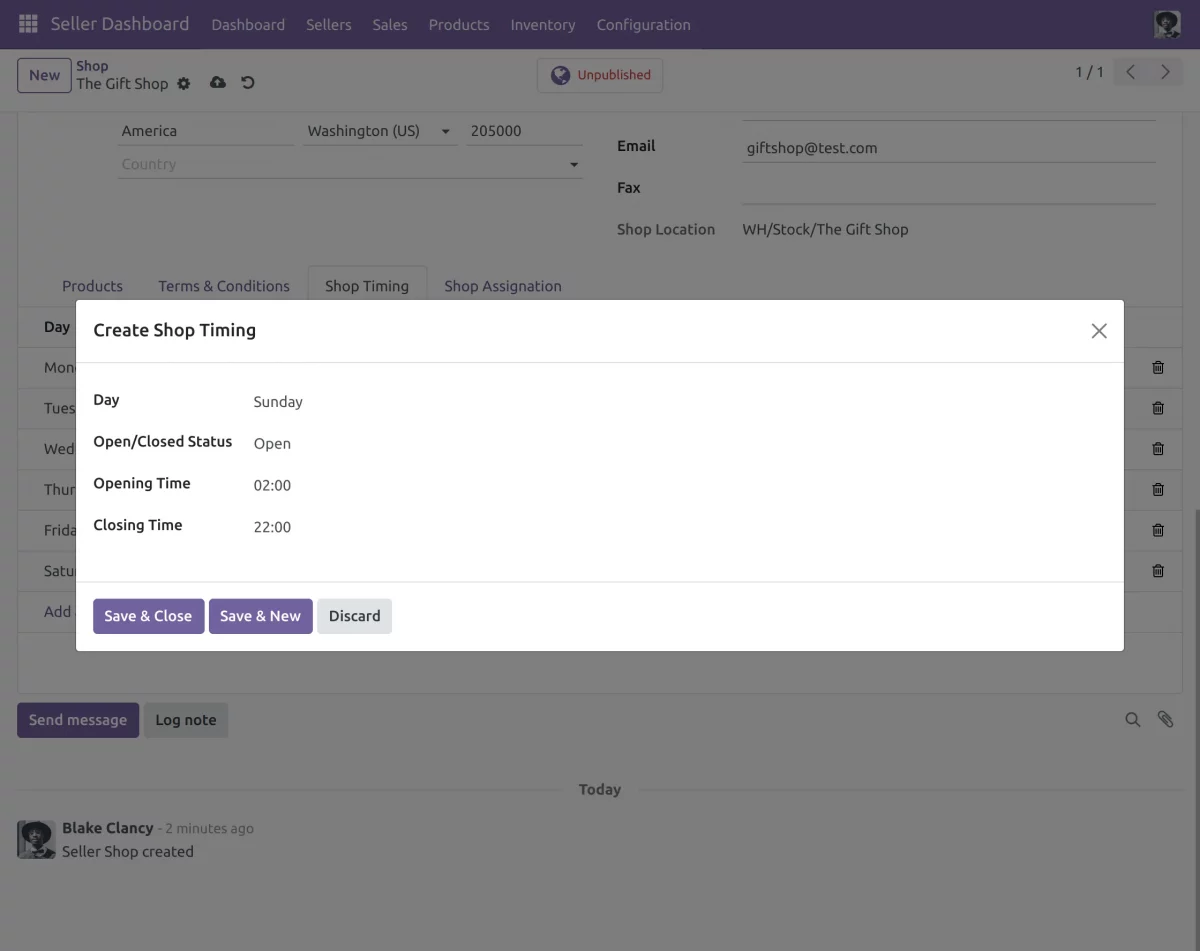
- Now, click on the Shop Timings tab to set the opening and closing timings for the particular shop location.
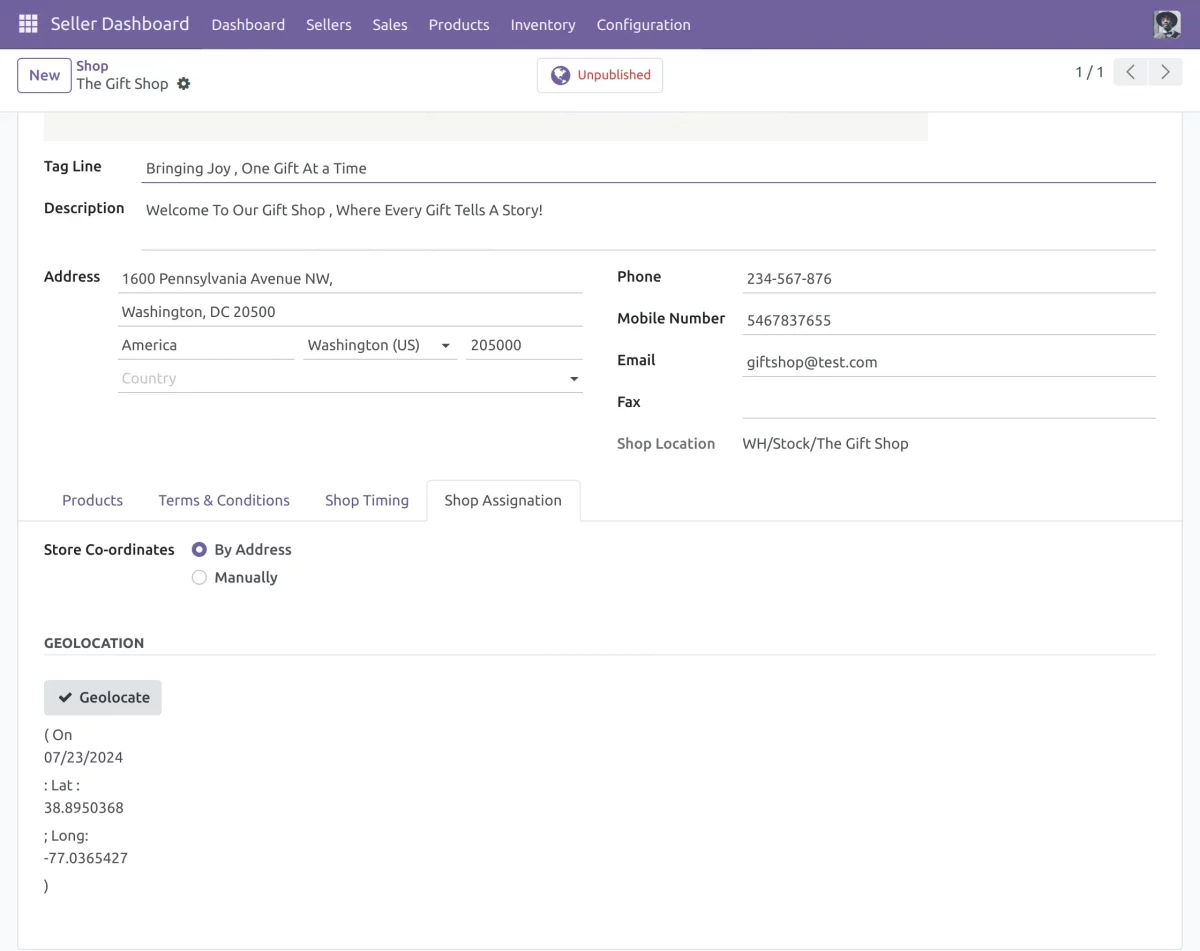
- To add the location on the google maps click on Shop Assignation tab. Enter the coordinates manually or automatically using the Geolocation.
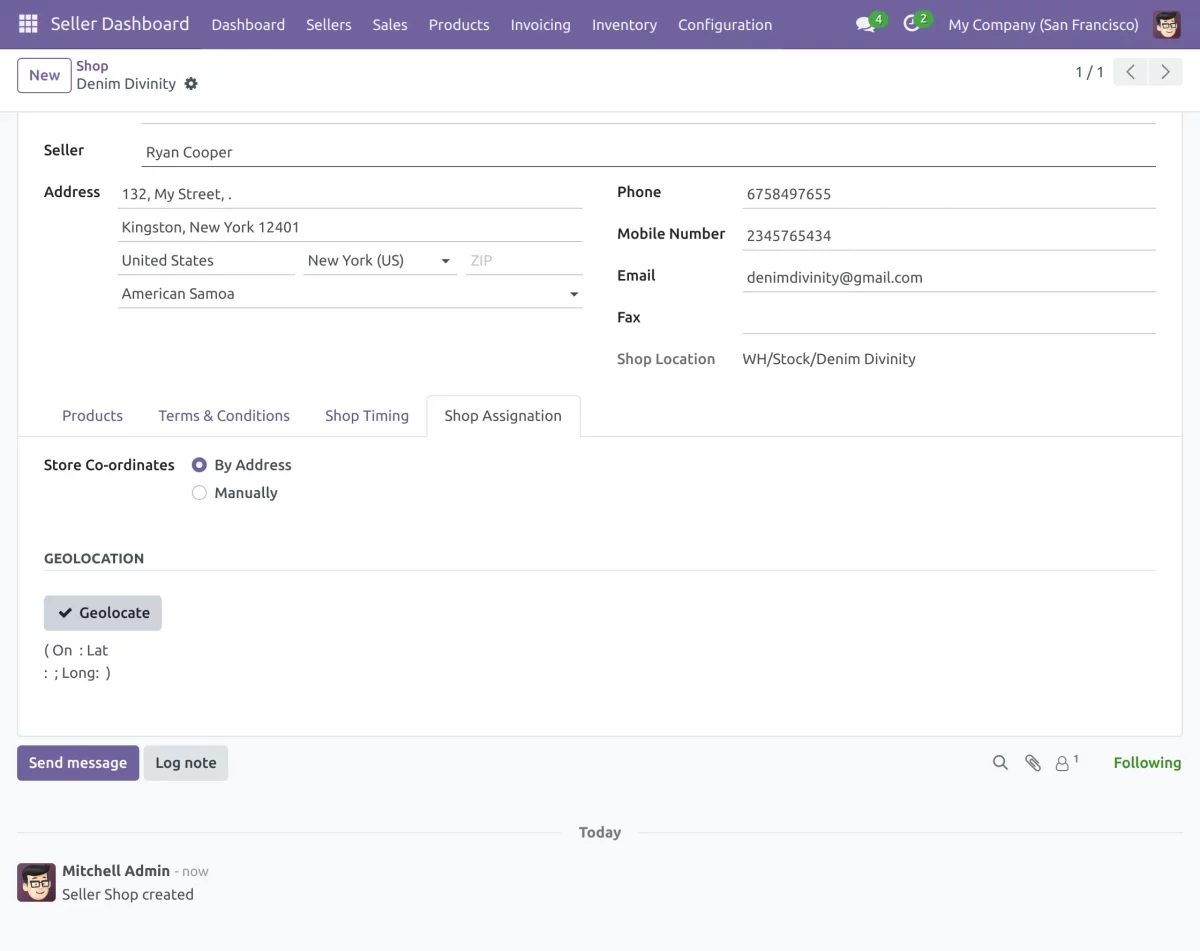
(For using Google Maps to add the geolocation of the stores in the Odoo backend follow the steps given at the bottom of the guide to configure the maps in Odoo.)
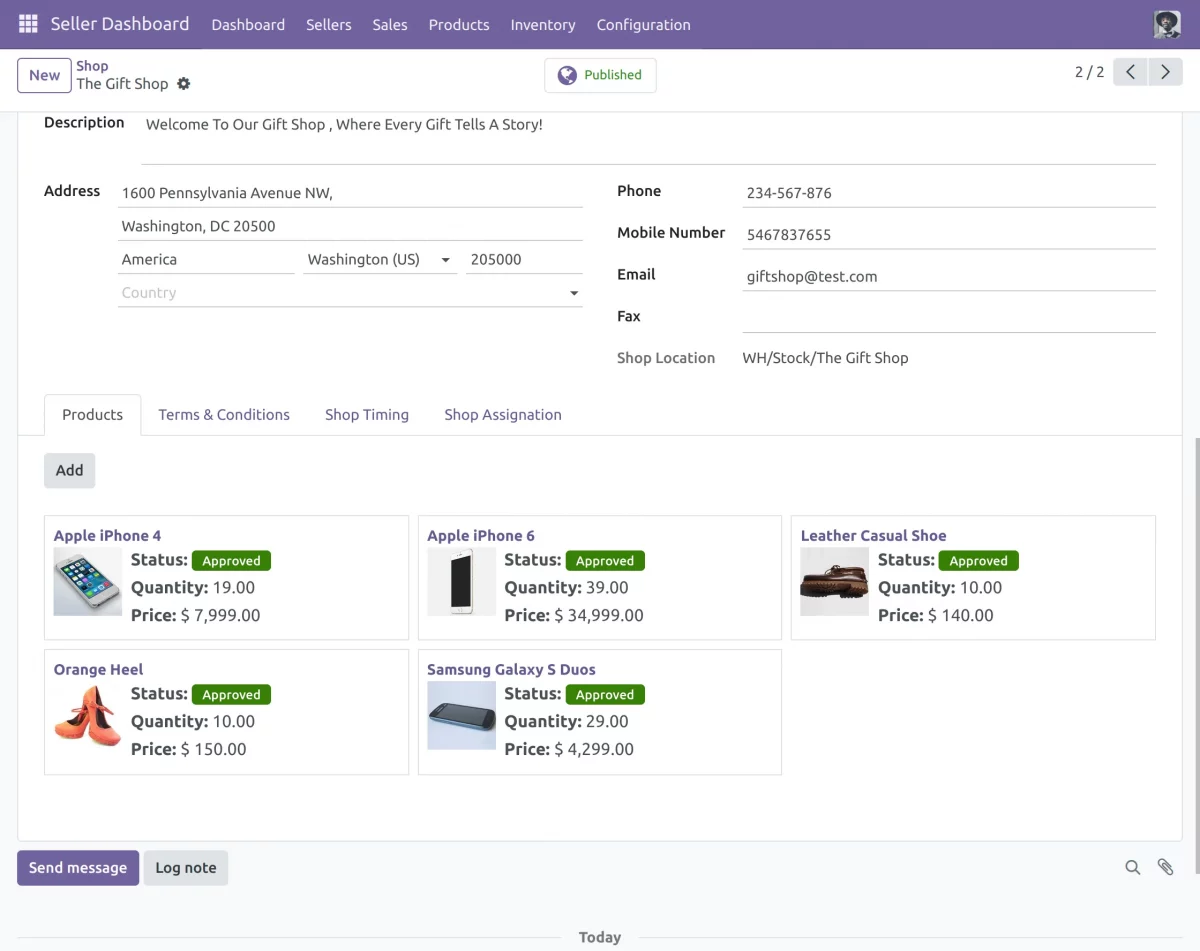
- Afterward, the seller can create multiple locations similar to the above and assign a different stock location for each in the inventory.
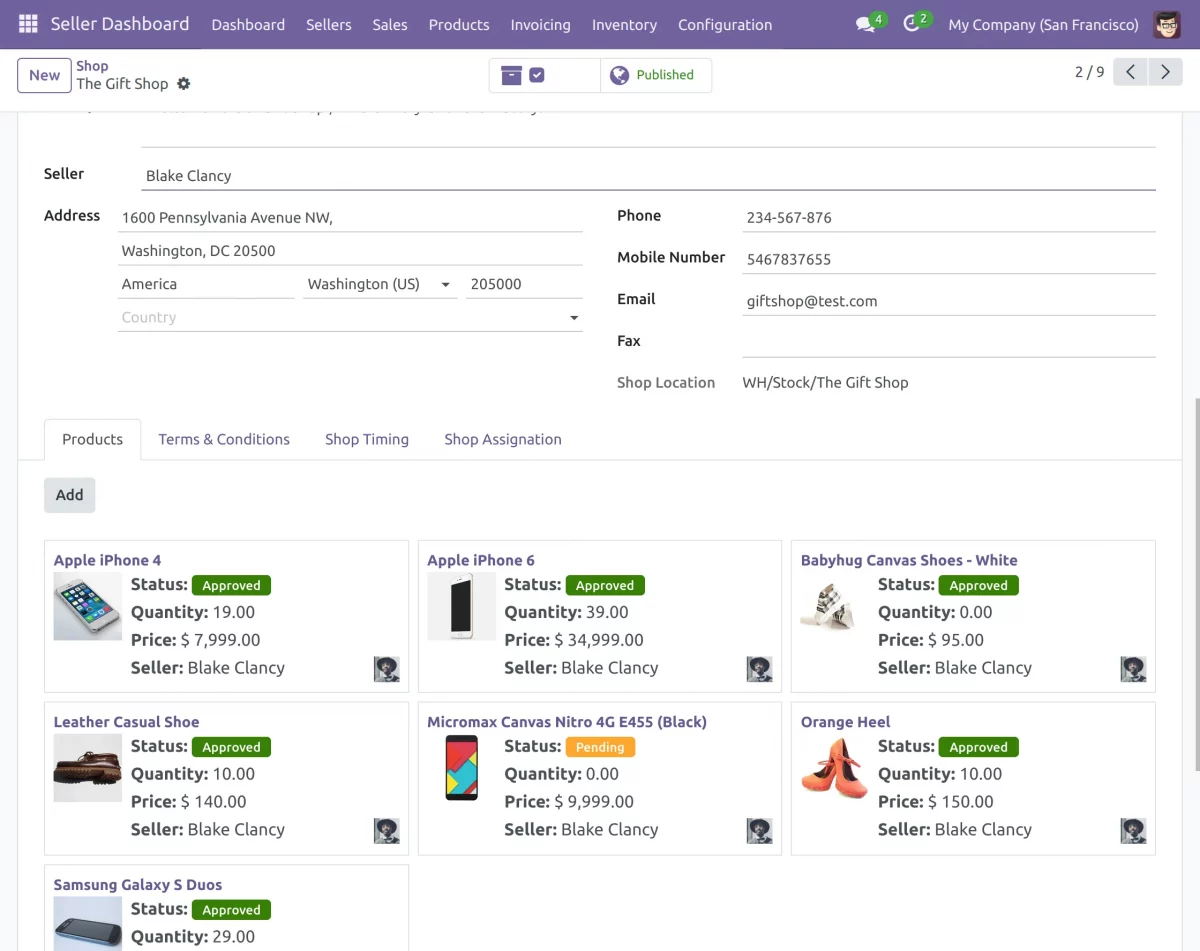
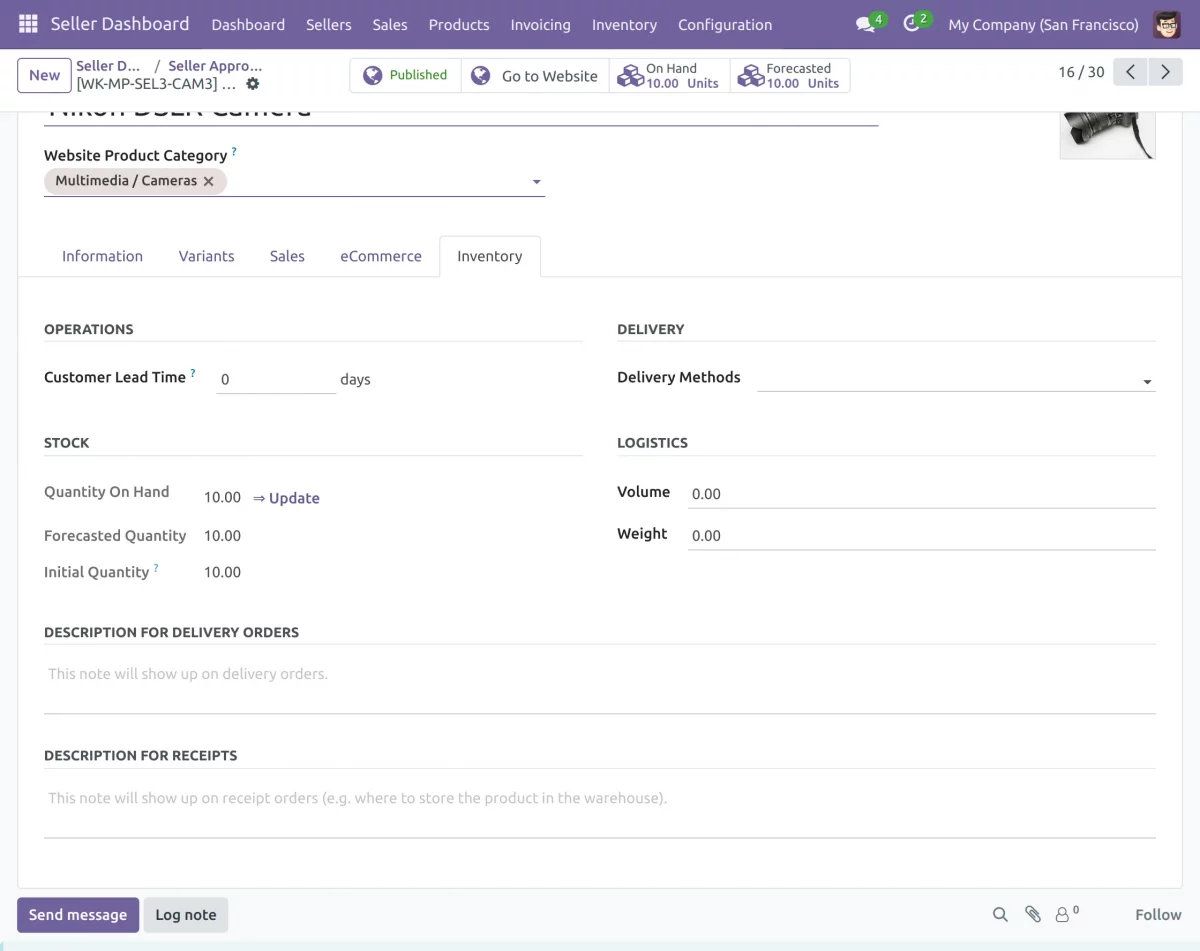
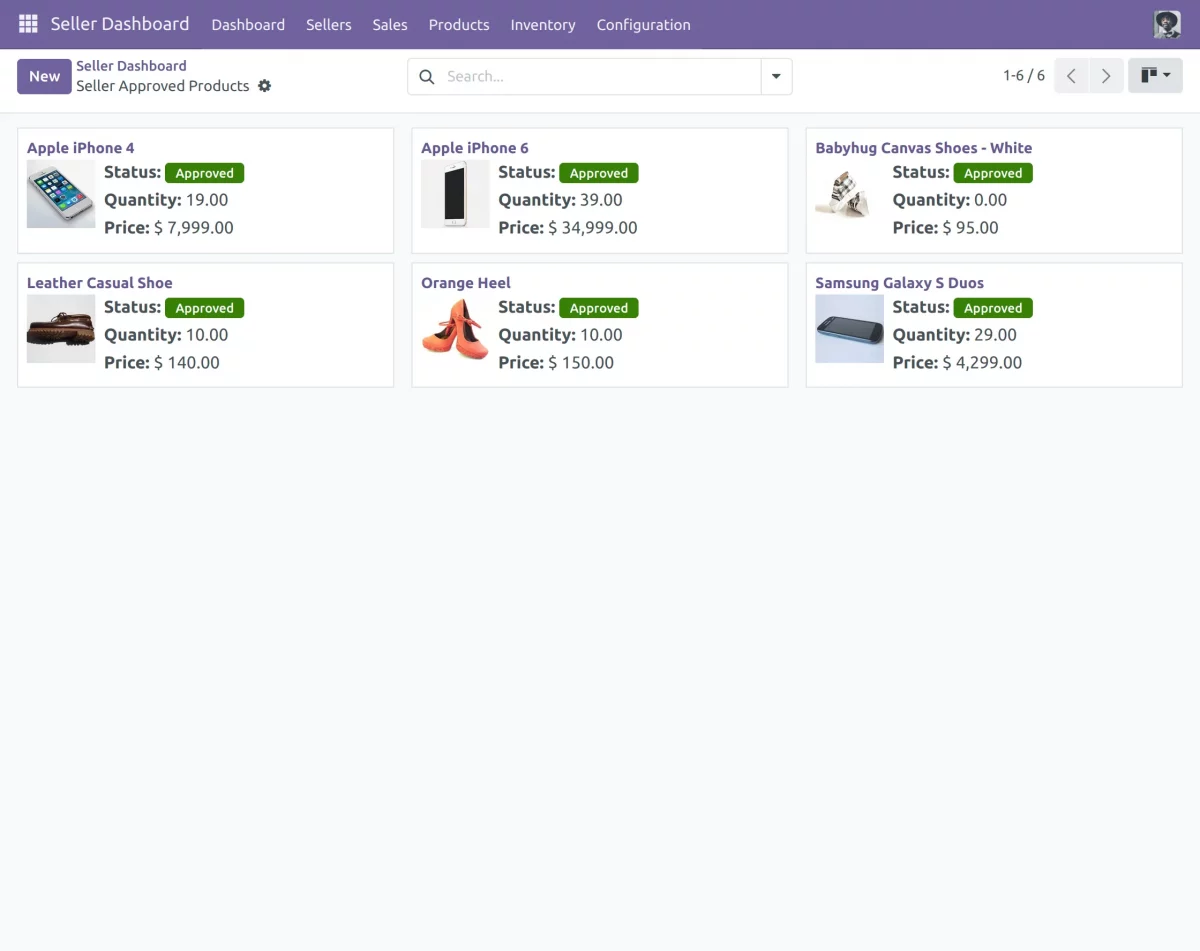
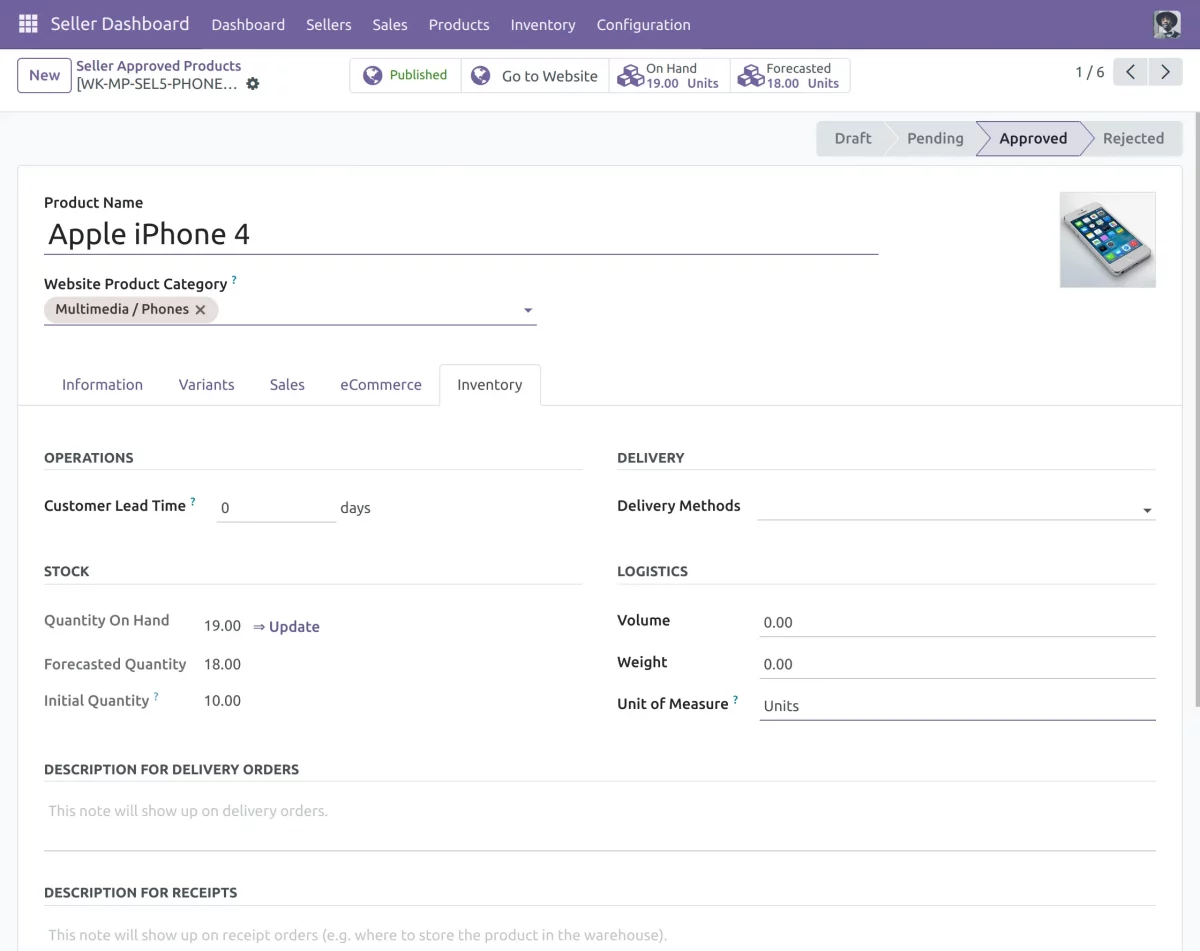
- Next, to update the stock at each store location, click on the Approved Products tab and select the desired product.
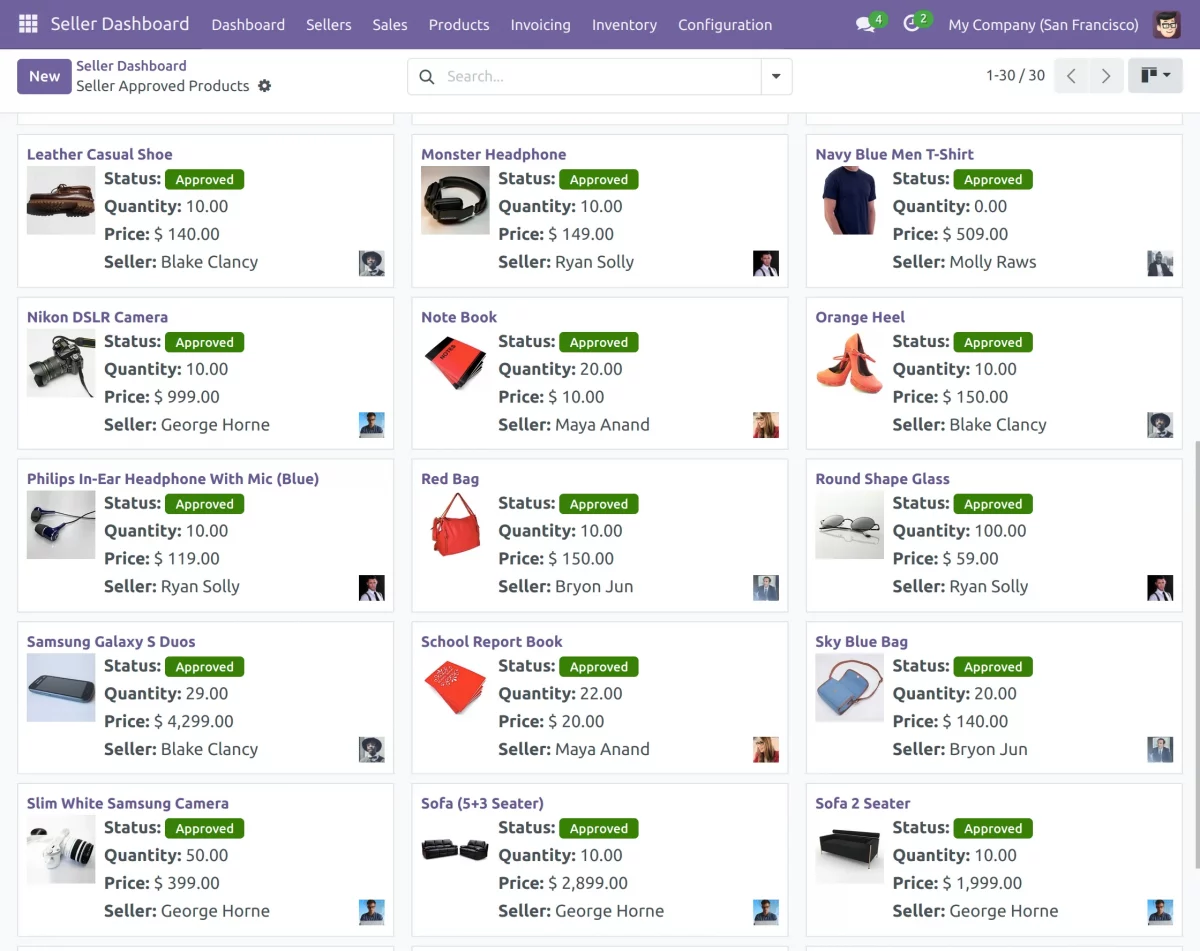
- Click on the inventory tab, and click on update. Navigate through approved products >> desired product >> inventory >> update (quantity in hand ).
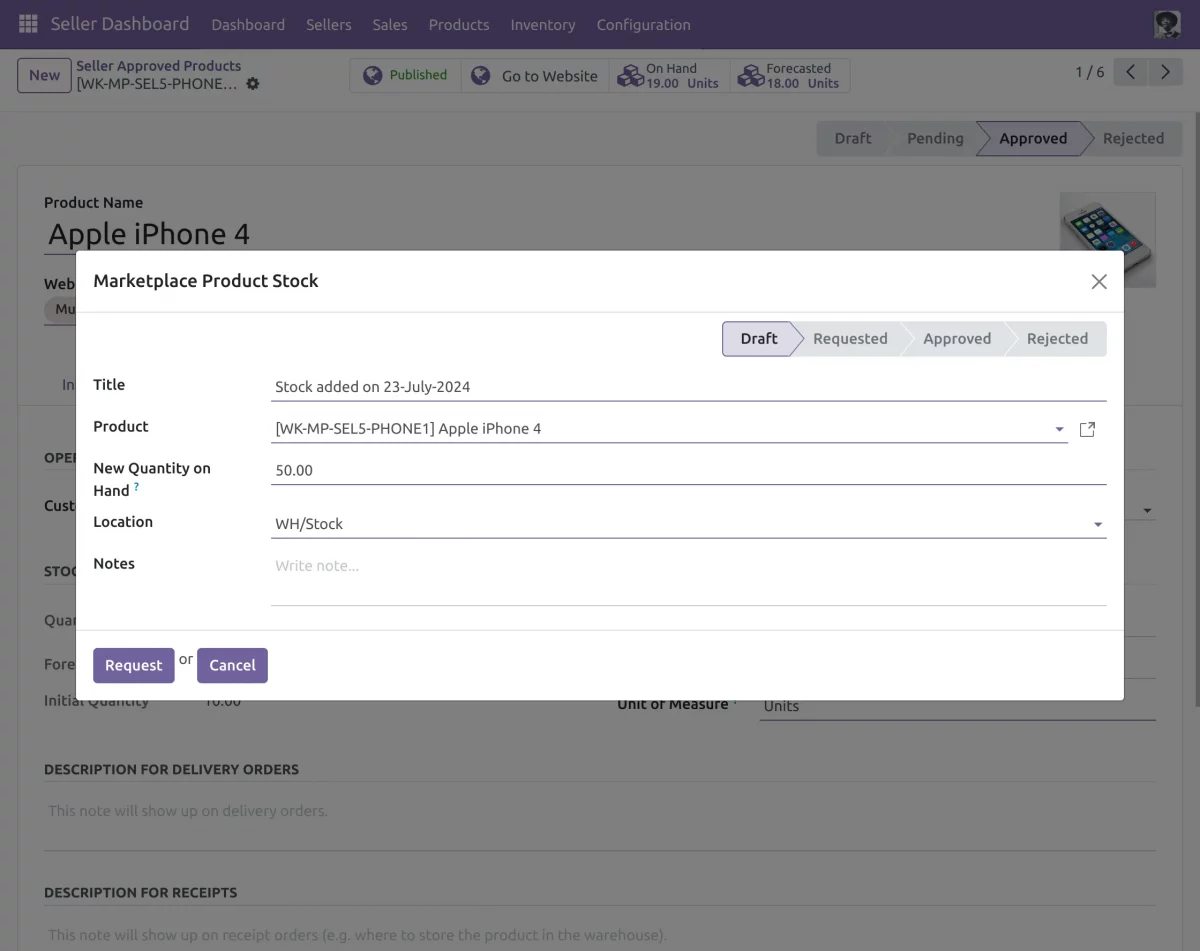
- After clicking on the update option , a pop up will appear , set the new quantity in hand and select the desired location .
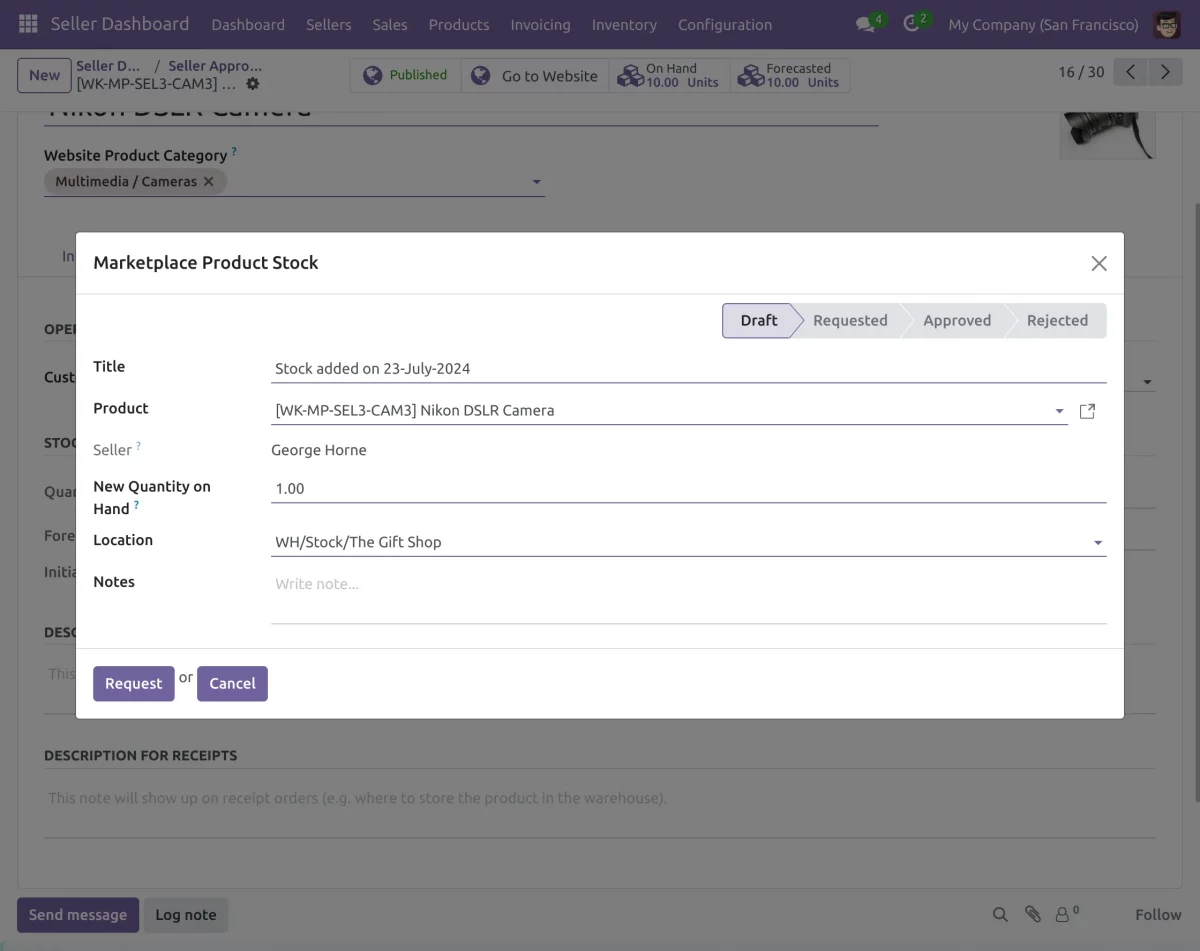
- Click on the Request tab to send a request to admin for approval of the new quantities. Once approved, the quantities will be updated in the stock locations.
Seller View
- The seller can add multiple shop locations to facilitate store pickup for the convenience of the customers. Sign in as admin.
- Once you have logged in as a seller, click on the Seller Dashboard. Then, go to Sellers>>My Shops>> New.
18. Enter the name of the shop. Enter various details like the name of seller , description, mobile number, email address . Add the address of the store location.
19. Each shop can be given its own inventory location.
- Products can be placed in different storage locations for store pickup. Only those assigned to these locations will be available for pickup.
- Now, click on the Shop Timings tab to set the opening and closing timings for the particular shop location.
22. To add the location on the google maps click on Shop Assignation tab. Here you can either enter the coordinates manually or automatically using the Geolocation.
23. Afterward, the seller can create multiple locations similar to the above and assign a different stock location for each in the inventory.
24. Next, to update the stock at each store location, click on the Approved Products tab and select the desired product.
25. After clicking on the desired product,click on the inventory tab, and click on update. Approved products >> desired product >> inventory >> update
26. After clicking on the update option , a pop up will appear , set the new quantity in hand and select the desired location and hit ‘request’
Customer view
27. Go to the Odoo Website. Click on any product, check its description and add it to the cart.

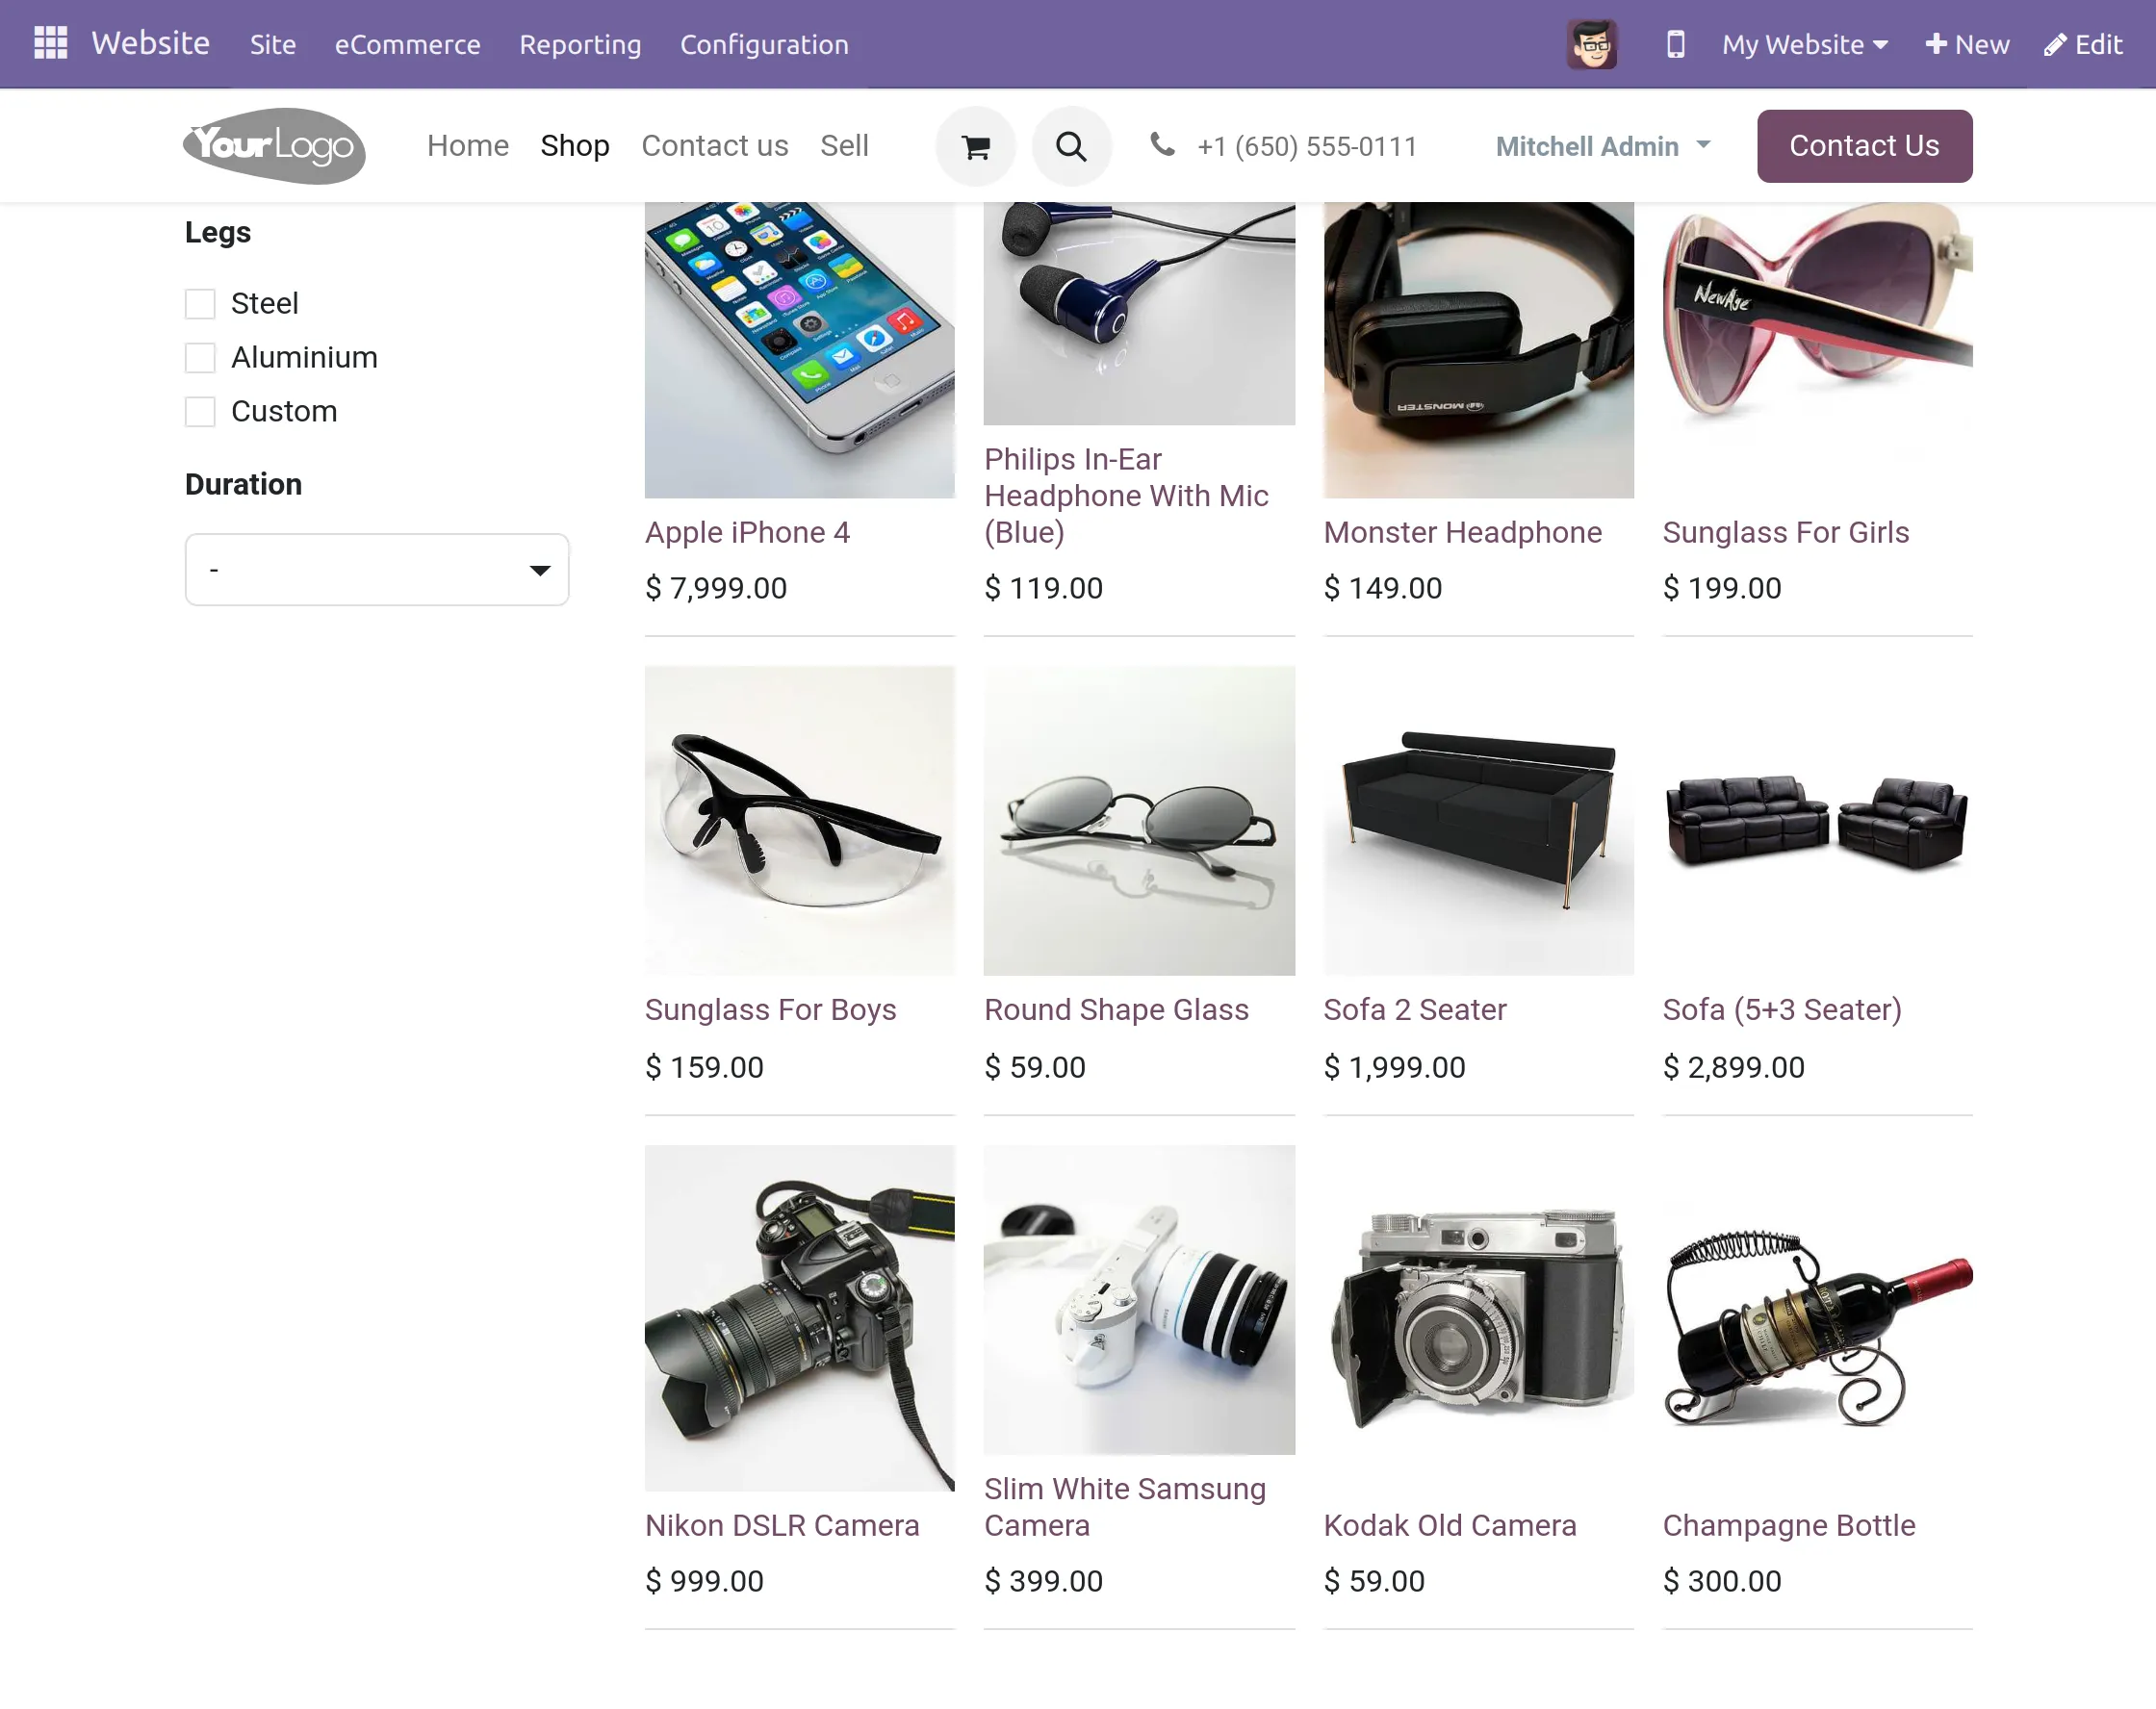
28. Next, continue with the checkout process by choosing a billing and delivery address.
29. Now, on the payment page, if the product is available, select ‘Store Pickup’ from the available delivery options.


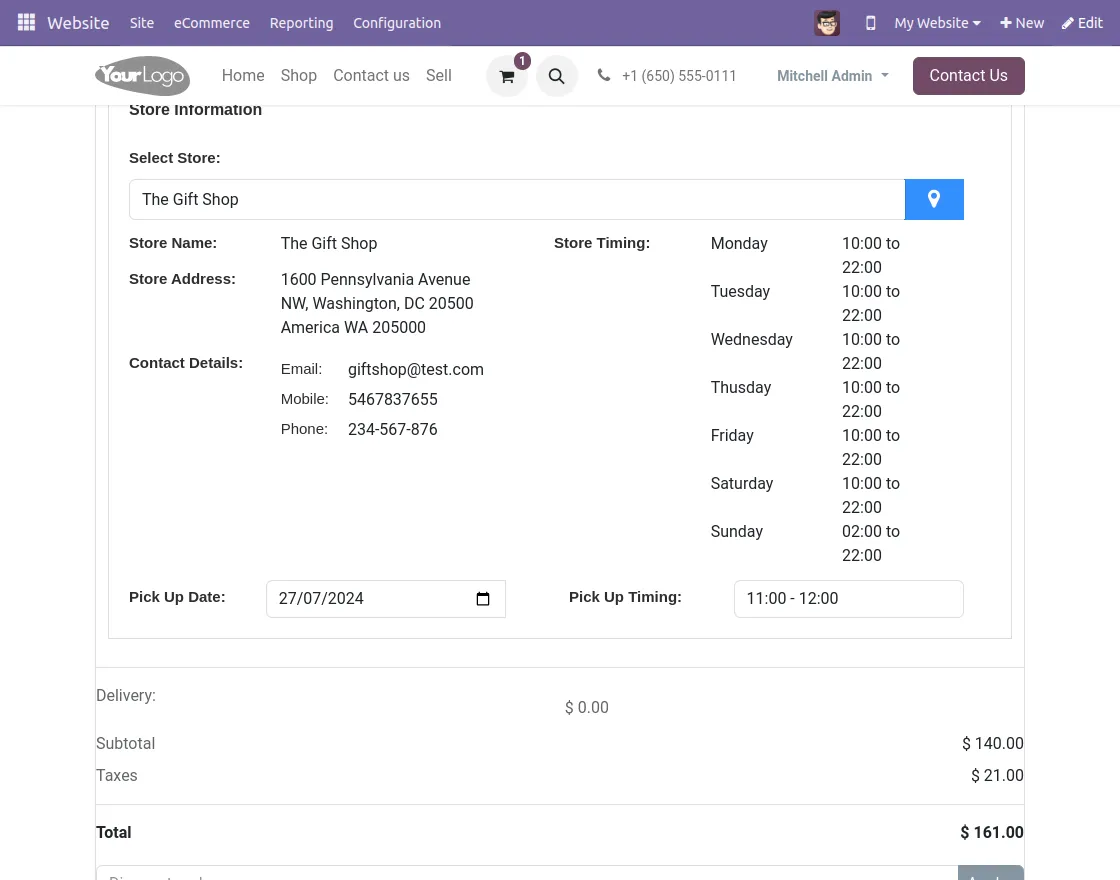
30. After selecting the store pickup option , click on the select store tab to select the nearest store to your location. Click Apply.
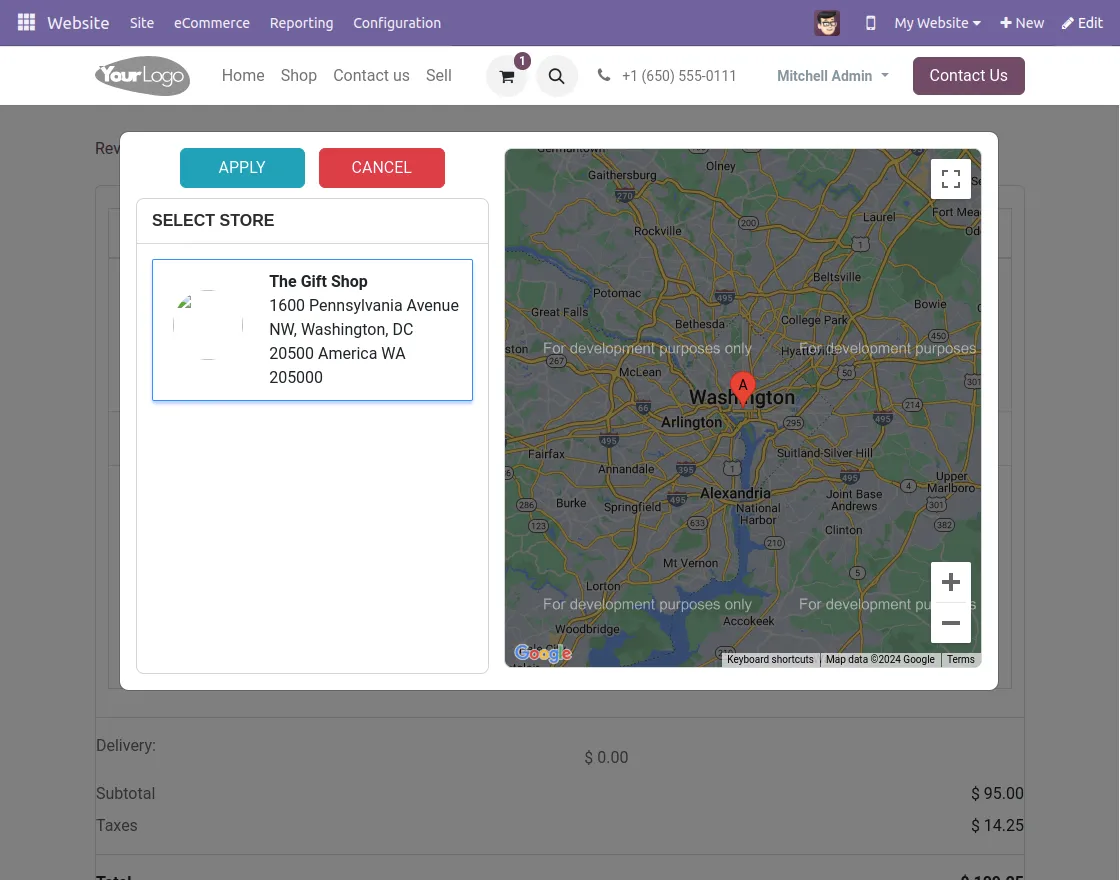
31. Select the pickup date and timings to pick up your order with the store. Continue with the checkout process and place the order.
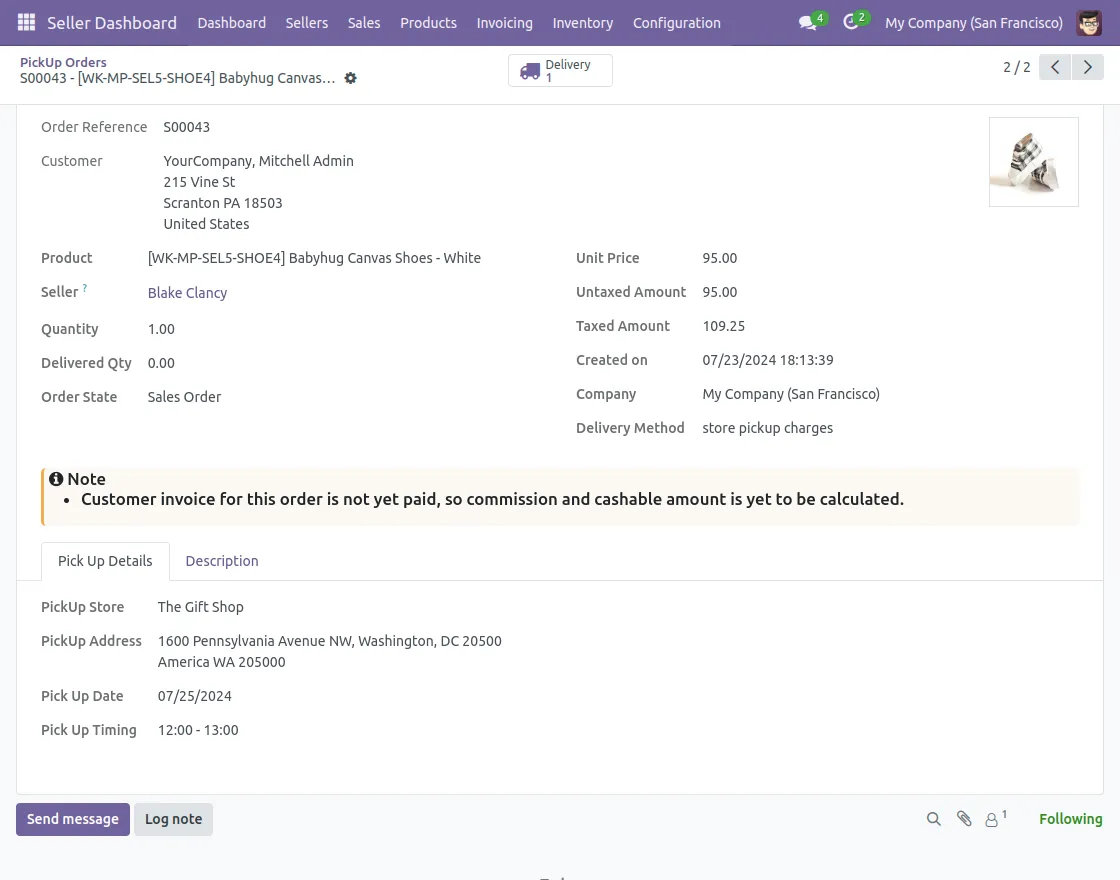
32. Now ,you can see the pickup location selected by the customer by clicking on the respective order line in the Odoo backend.
NEED HELP?
Hope you find the guide helpful! Please feel free to share your feedback in the comments below.
If you still have any issues/queries regarding the same, please raise a ticket at the UV Desk.
I hope this helps. In case of any further queries, contact us at our support mail.
Thanks for paying attention!!