User Guide for Odoo Booking & Reservation Management
Table of Content
INTRODUCTION
Double your bookings with Odoo Booking & Reservation Management!
Odoo Booking & Reservation Management helps manage overcrowded offices, reduce queues, prevent double bookings, and reduce staff workload.
Managing staff overload, mismanagement, and queues can be difficult. You need a solution that makes booking management easier and more organized.
In the Odoo backend, admins can create a product as a Booking Product. They can use this option for any product or service that requires customer bookings.
The module also saves customers time by letting them book appointments directly from the website at their convenience.
It removes the need for admins to manage appointments manually and helps businesses manage their resources better.
FEATURES
- Turn any Odoo service into a bookable product with start and end dates for online reservations.
- Configure open or closed booking days and add multiple time slots with specific start and end times.
- Create booking plans with names, sequences, descriptions, pricing options, and slot quantities.
- Set advance booking limits and closing periods to control when customers can make reservations.
- Show real-time slot availability on the Odoo website and update booking details without reloading the page.
- Let customers select dates, time slots, plans, and guest quantities and view the total amount automatically.
- Set maximum booking quantities and display bookable services with a Book Now option on the website.
- Let customers view their booking orders and status from their Odoo account after placing a reservation.
- Review, process, and confirm customer booking orders while viewing scheduled reservations in the Odoo calendar.
- Track bookable products, today’s, upcoming, total, and past bookings through the dashboard and reports.
INSTALLATION
1.) Once you purchase the App from Webkul store, you will receive the link to download the zip file of the module.
2.) Extract the file on your system after the download finishes. You will be able to see a folder named- ‘website_booking_system’.
3.) Copy and paste this folder inside your Odoo Add-Ons path.
4.) Now, open the Odoo App and click on the Settings menu. Here, click on Activate the Developer Mode.
5.) Then, open on Apps menu and click on ‘Update Modules List’.
6.) In the search bar, remove all the filters and search ‘website_booking_system’.
7.) You will be able to see the module in the search result. Click on ‘Activate’ to install it.
WORKFLOW
BACKEND CONFIGURATION
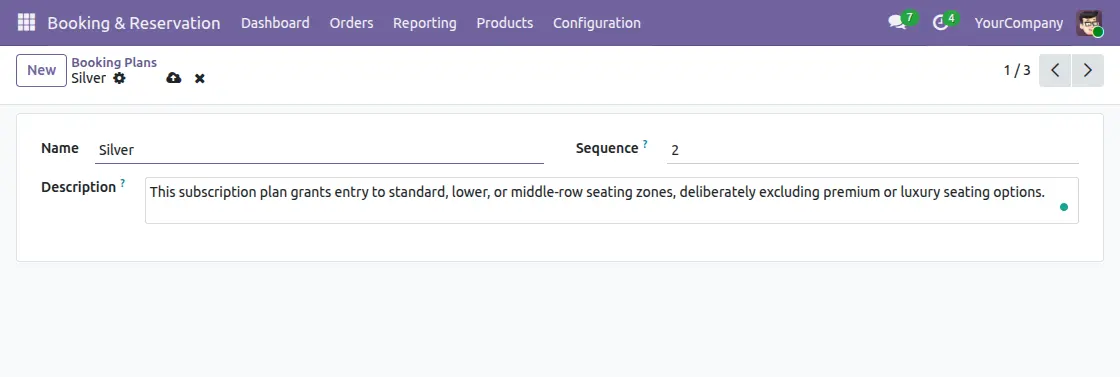
1. After installing Odoo Booking & Reservation Management, Open the Odoo backend, go to ‘Booking & Reservation> Configuration> Plans’ and click the ‘New’ button.

2. Now, enter the ‘Name, Sequence, and Description’ and click the save button.

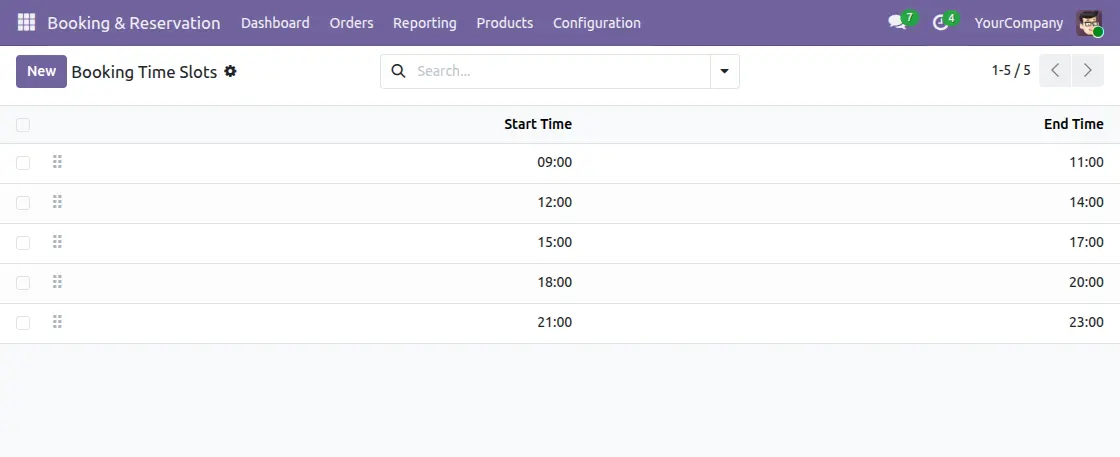
3. Next, go to ‘Configuration> Time Slot’ and click the ‘New’ button to create a time slot on the same page by entering ‘Start Time and End Time.’

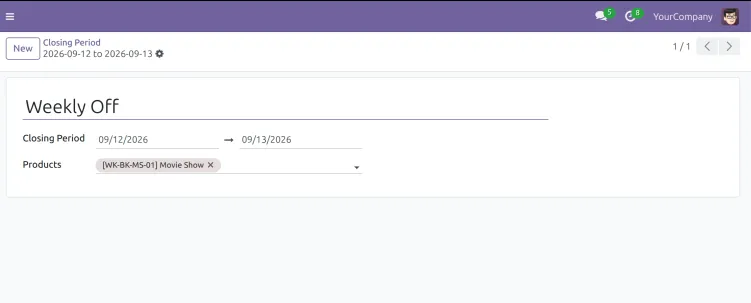
4.Go to Booking & Reservation > Configuration > Closing Periods and click New.
Enter the closing period dates and select the bookable products to block bookings during that period.

5. Go to the product’s Booking & Reservation tab and enable Limit Advance Booking.
- Enter the Allowed Booking Period in Days to set how far ahead customers can book.
- Customers can only select booking dates within the defined advance booking period.

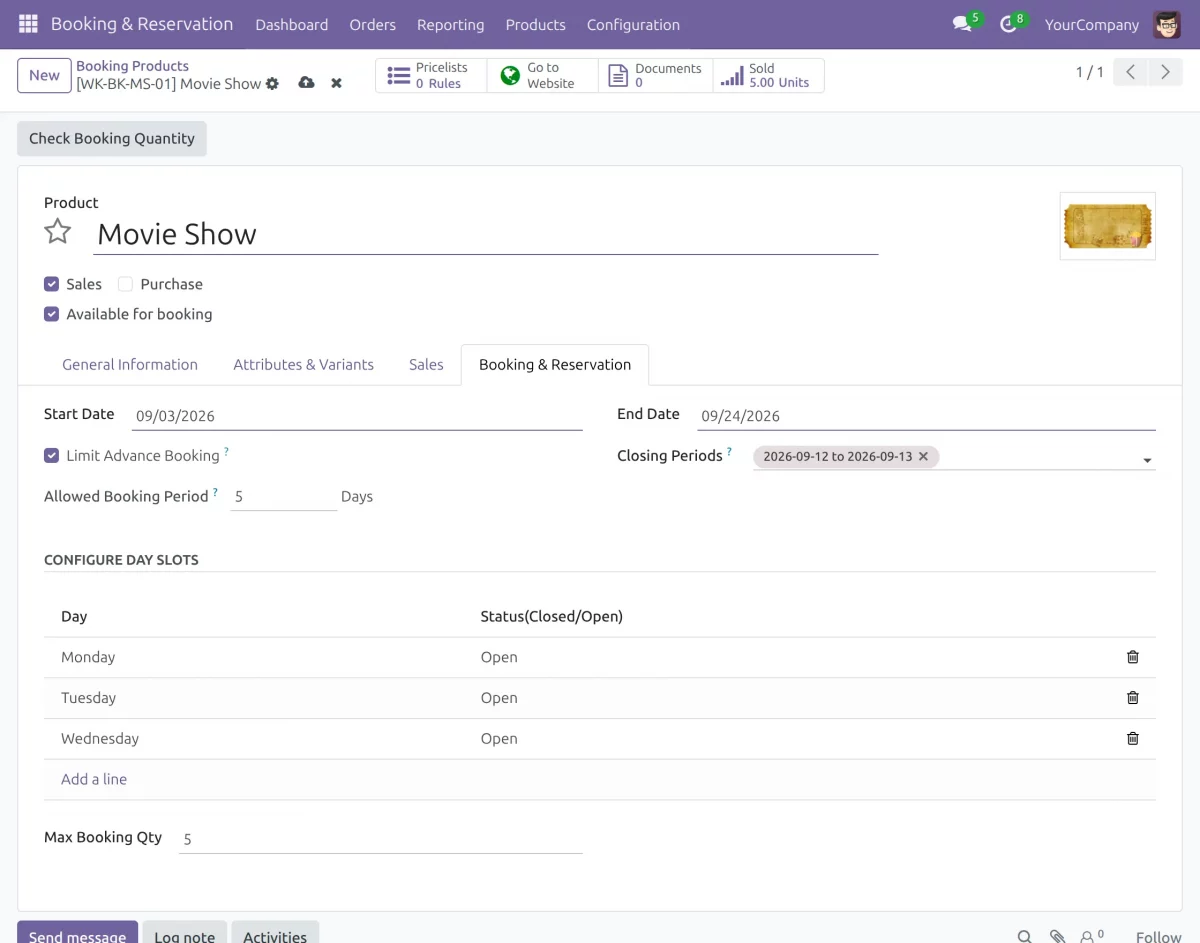
4. After that, go to ‘Products> Products’ and click the ‘New’ button.

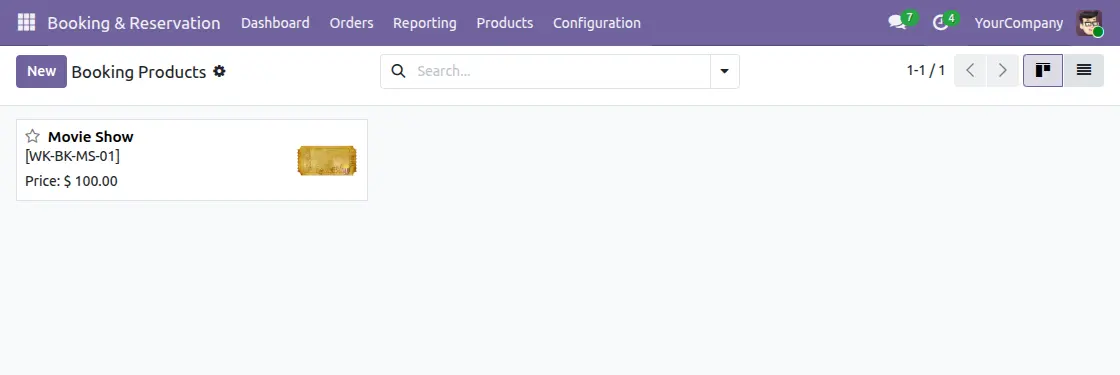
5. Fill in all the details of the products and make sure to tick ‘Can be Sold‘ and‘Available for Booking.’ Once filled, click on the‘Booking & Reservation.’

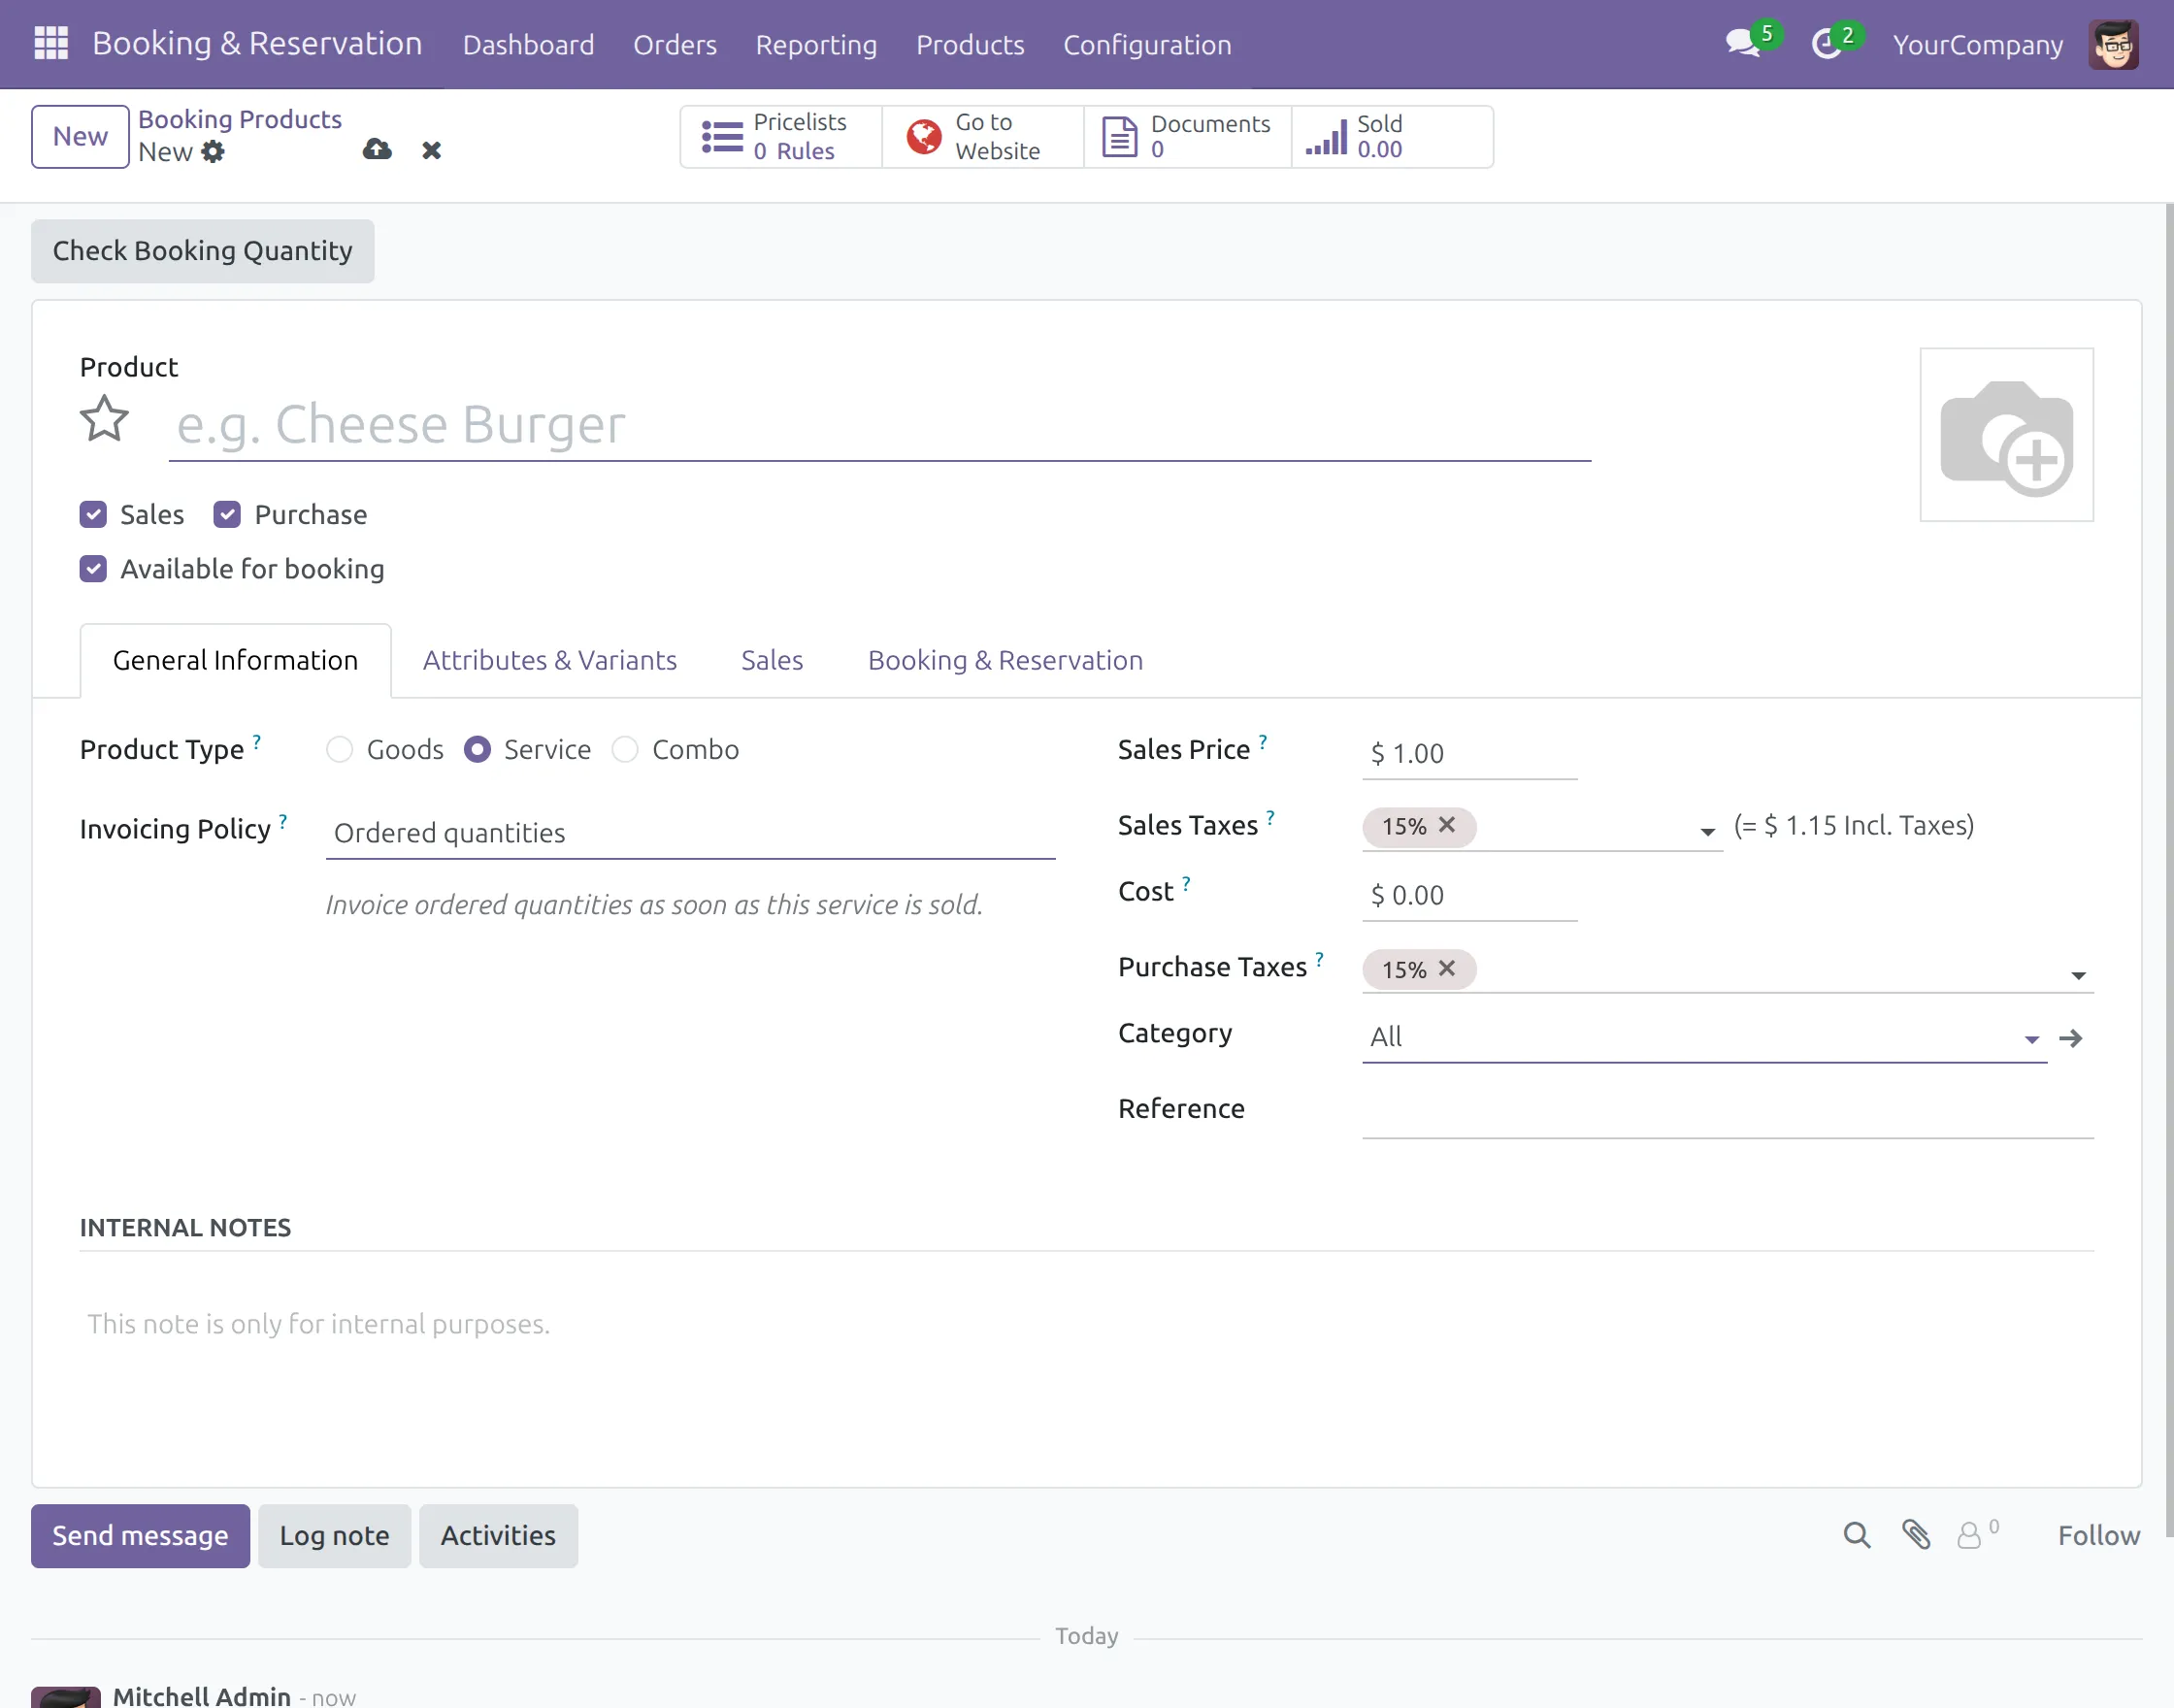
6. Enter the required product details. Enable Sales and Available for Booking. Then open the Booking & Reservation tab.
- Select the Start Date and End Date. Enter the Max Booking Qty and configure the Day Slots.
- Click Add a Line under Configure Day Slots. A pop-up appears where you can select the Day, set its Status as Open or Closed, and add booking slots. Click Save & Close.


7. On clicking ‘Add a Line’ in ‘Configure Day Slots,’ a popup will appear in which you have to enter ‘Day, Status(Closed/Open), and add booking Slots.’ Once done, click ‘Save & Close.’


WEBSITE
8. On the website, go to ‘Shop’ and view the product with the ‘Book Now’ label over it. Open the product page by clicking on it.

9. On the product page, click the ‘Book Now’ button.


10.Click ‘Book Now’ and select the Slot, Time, Plan, and Guest in the popup. The Total amount will then appear automatically at the bottom-right.
A booking pop-up opens. Select the Slot, Time, Plan, and Guest details. The Total amount is updated automatically.
After selecting the required details, click Book Now to place the booking.


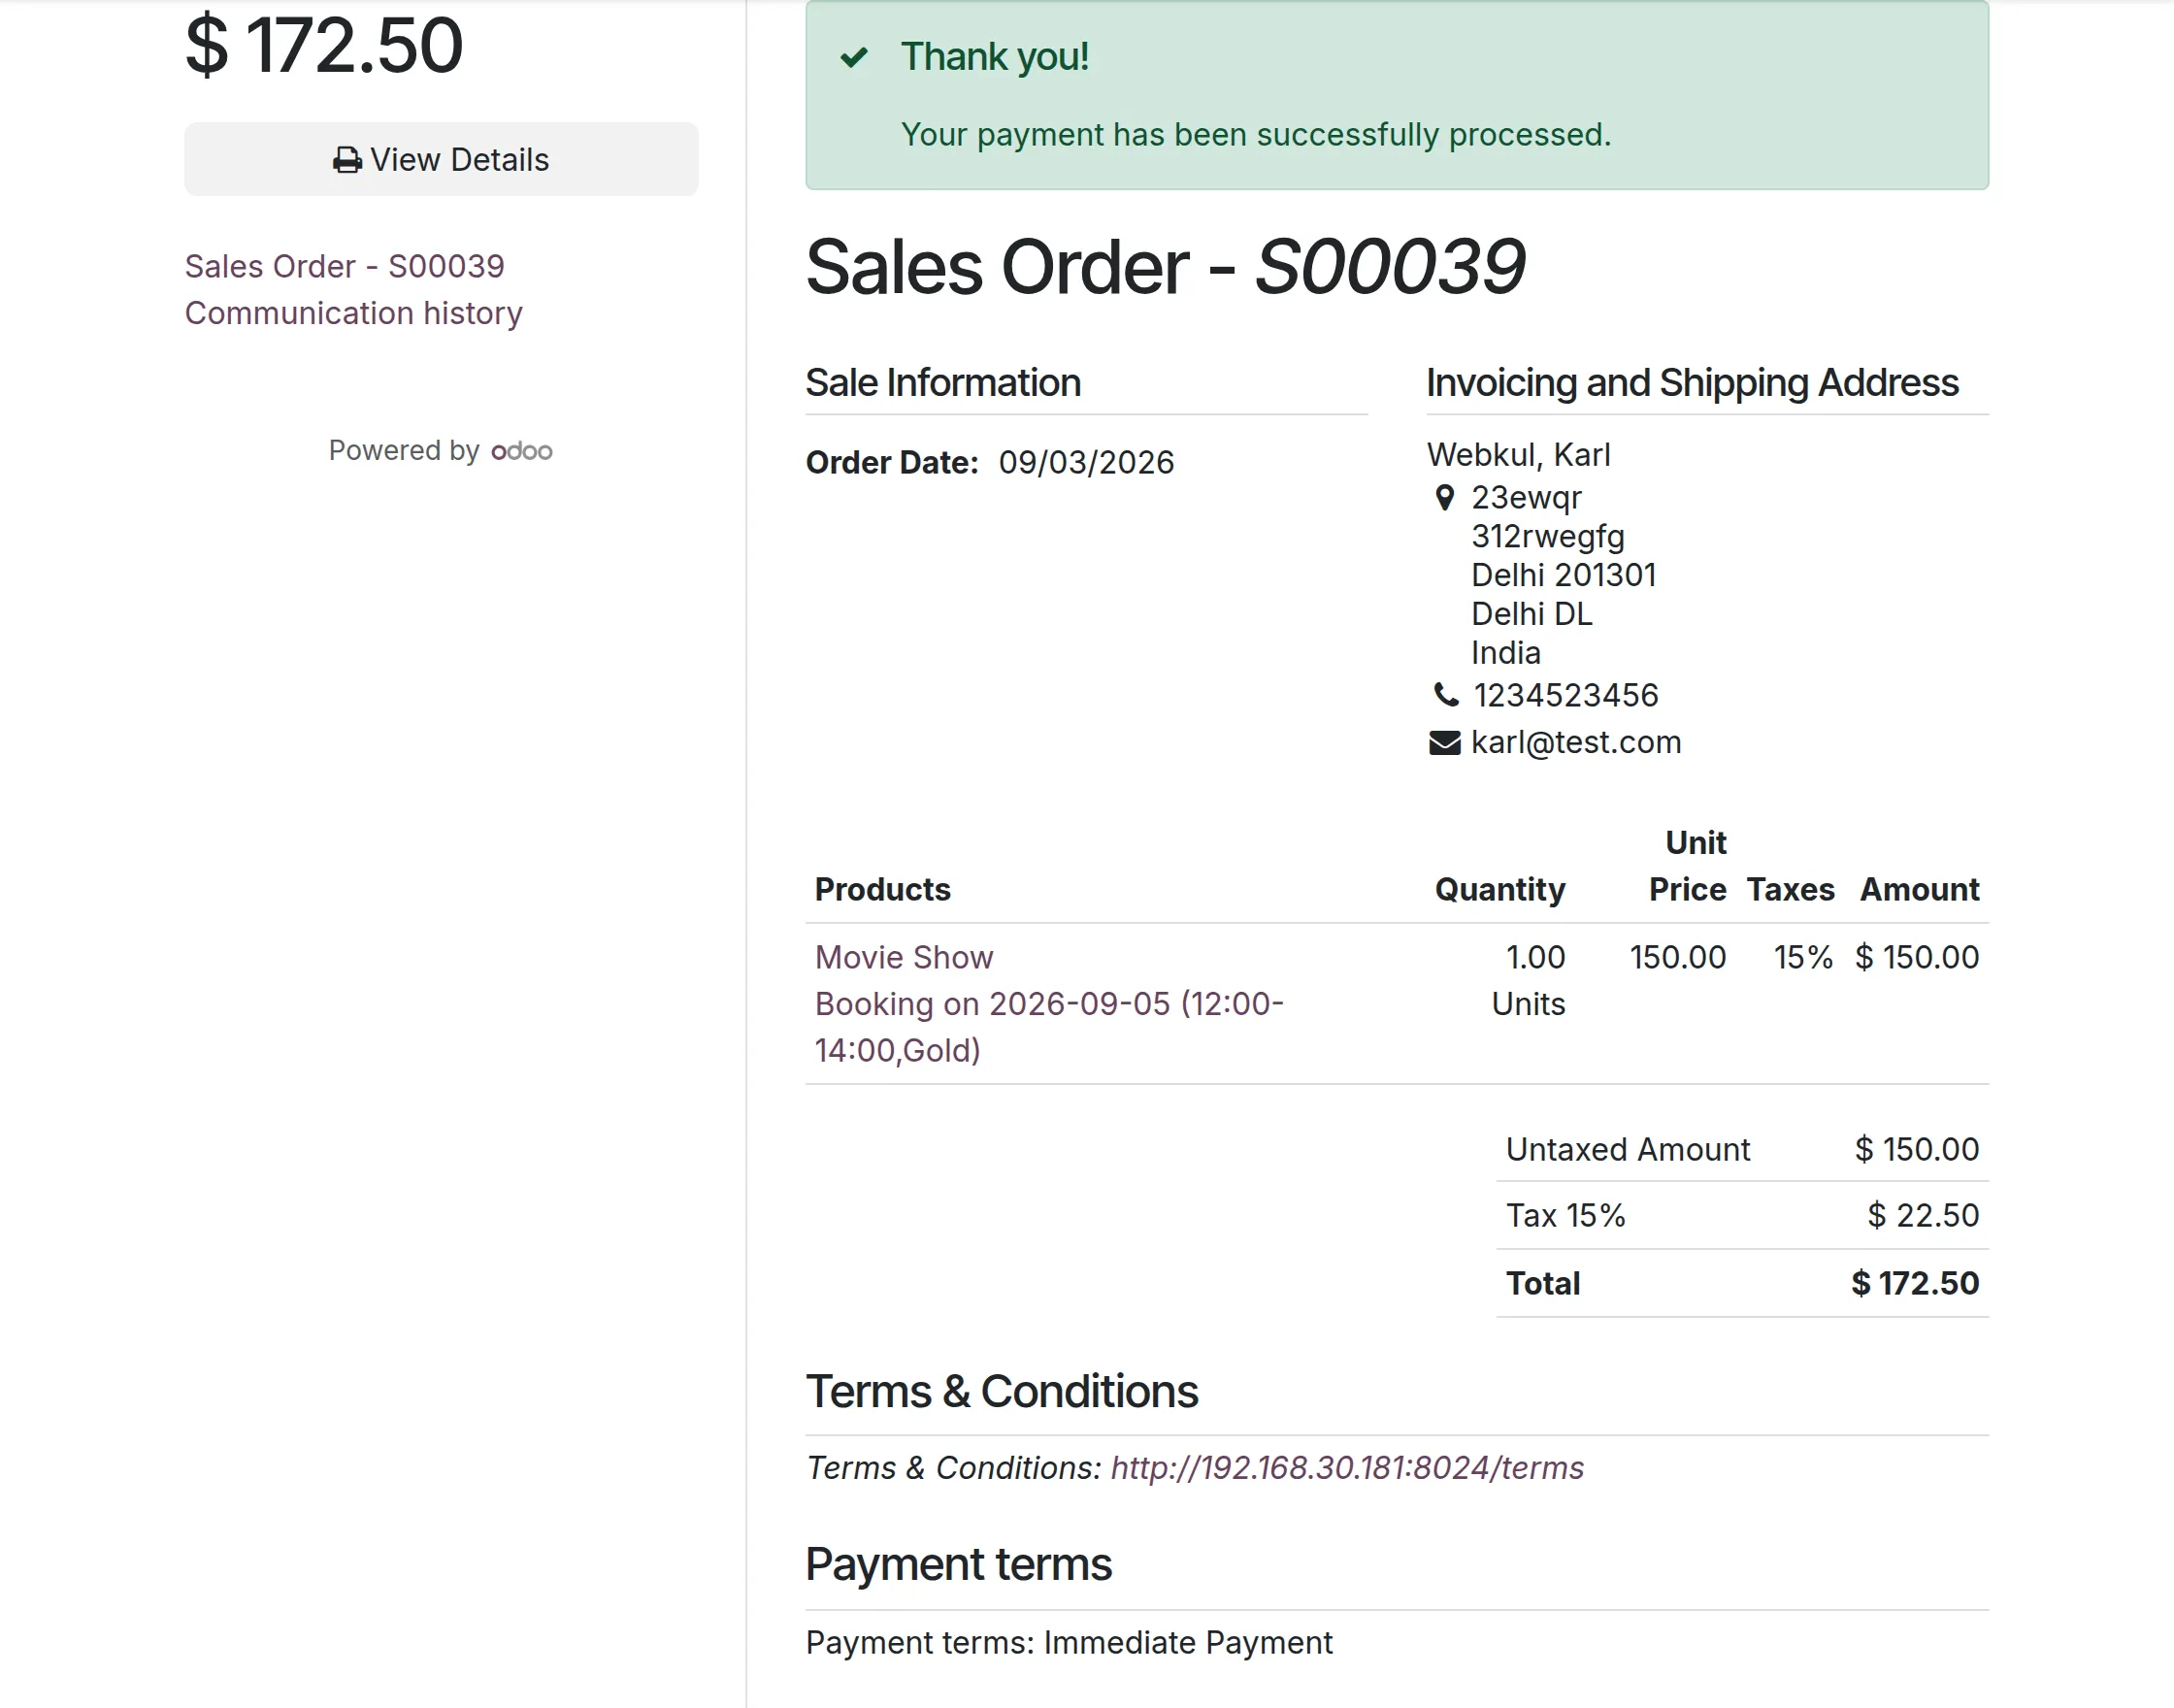
11. You can check your booking status from your account, go to ‘My Account> Sales Orders> Sales Order [number].’
BOOKING ORDERS IN ODOO BACKEND
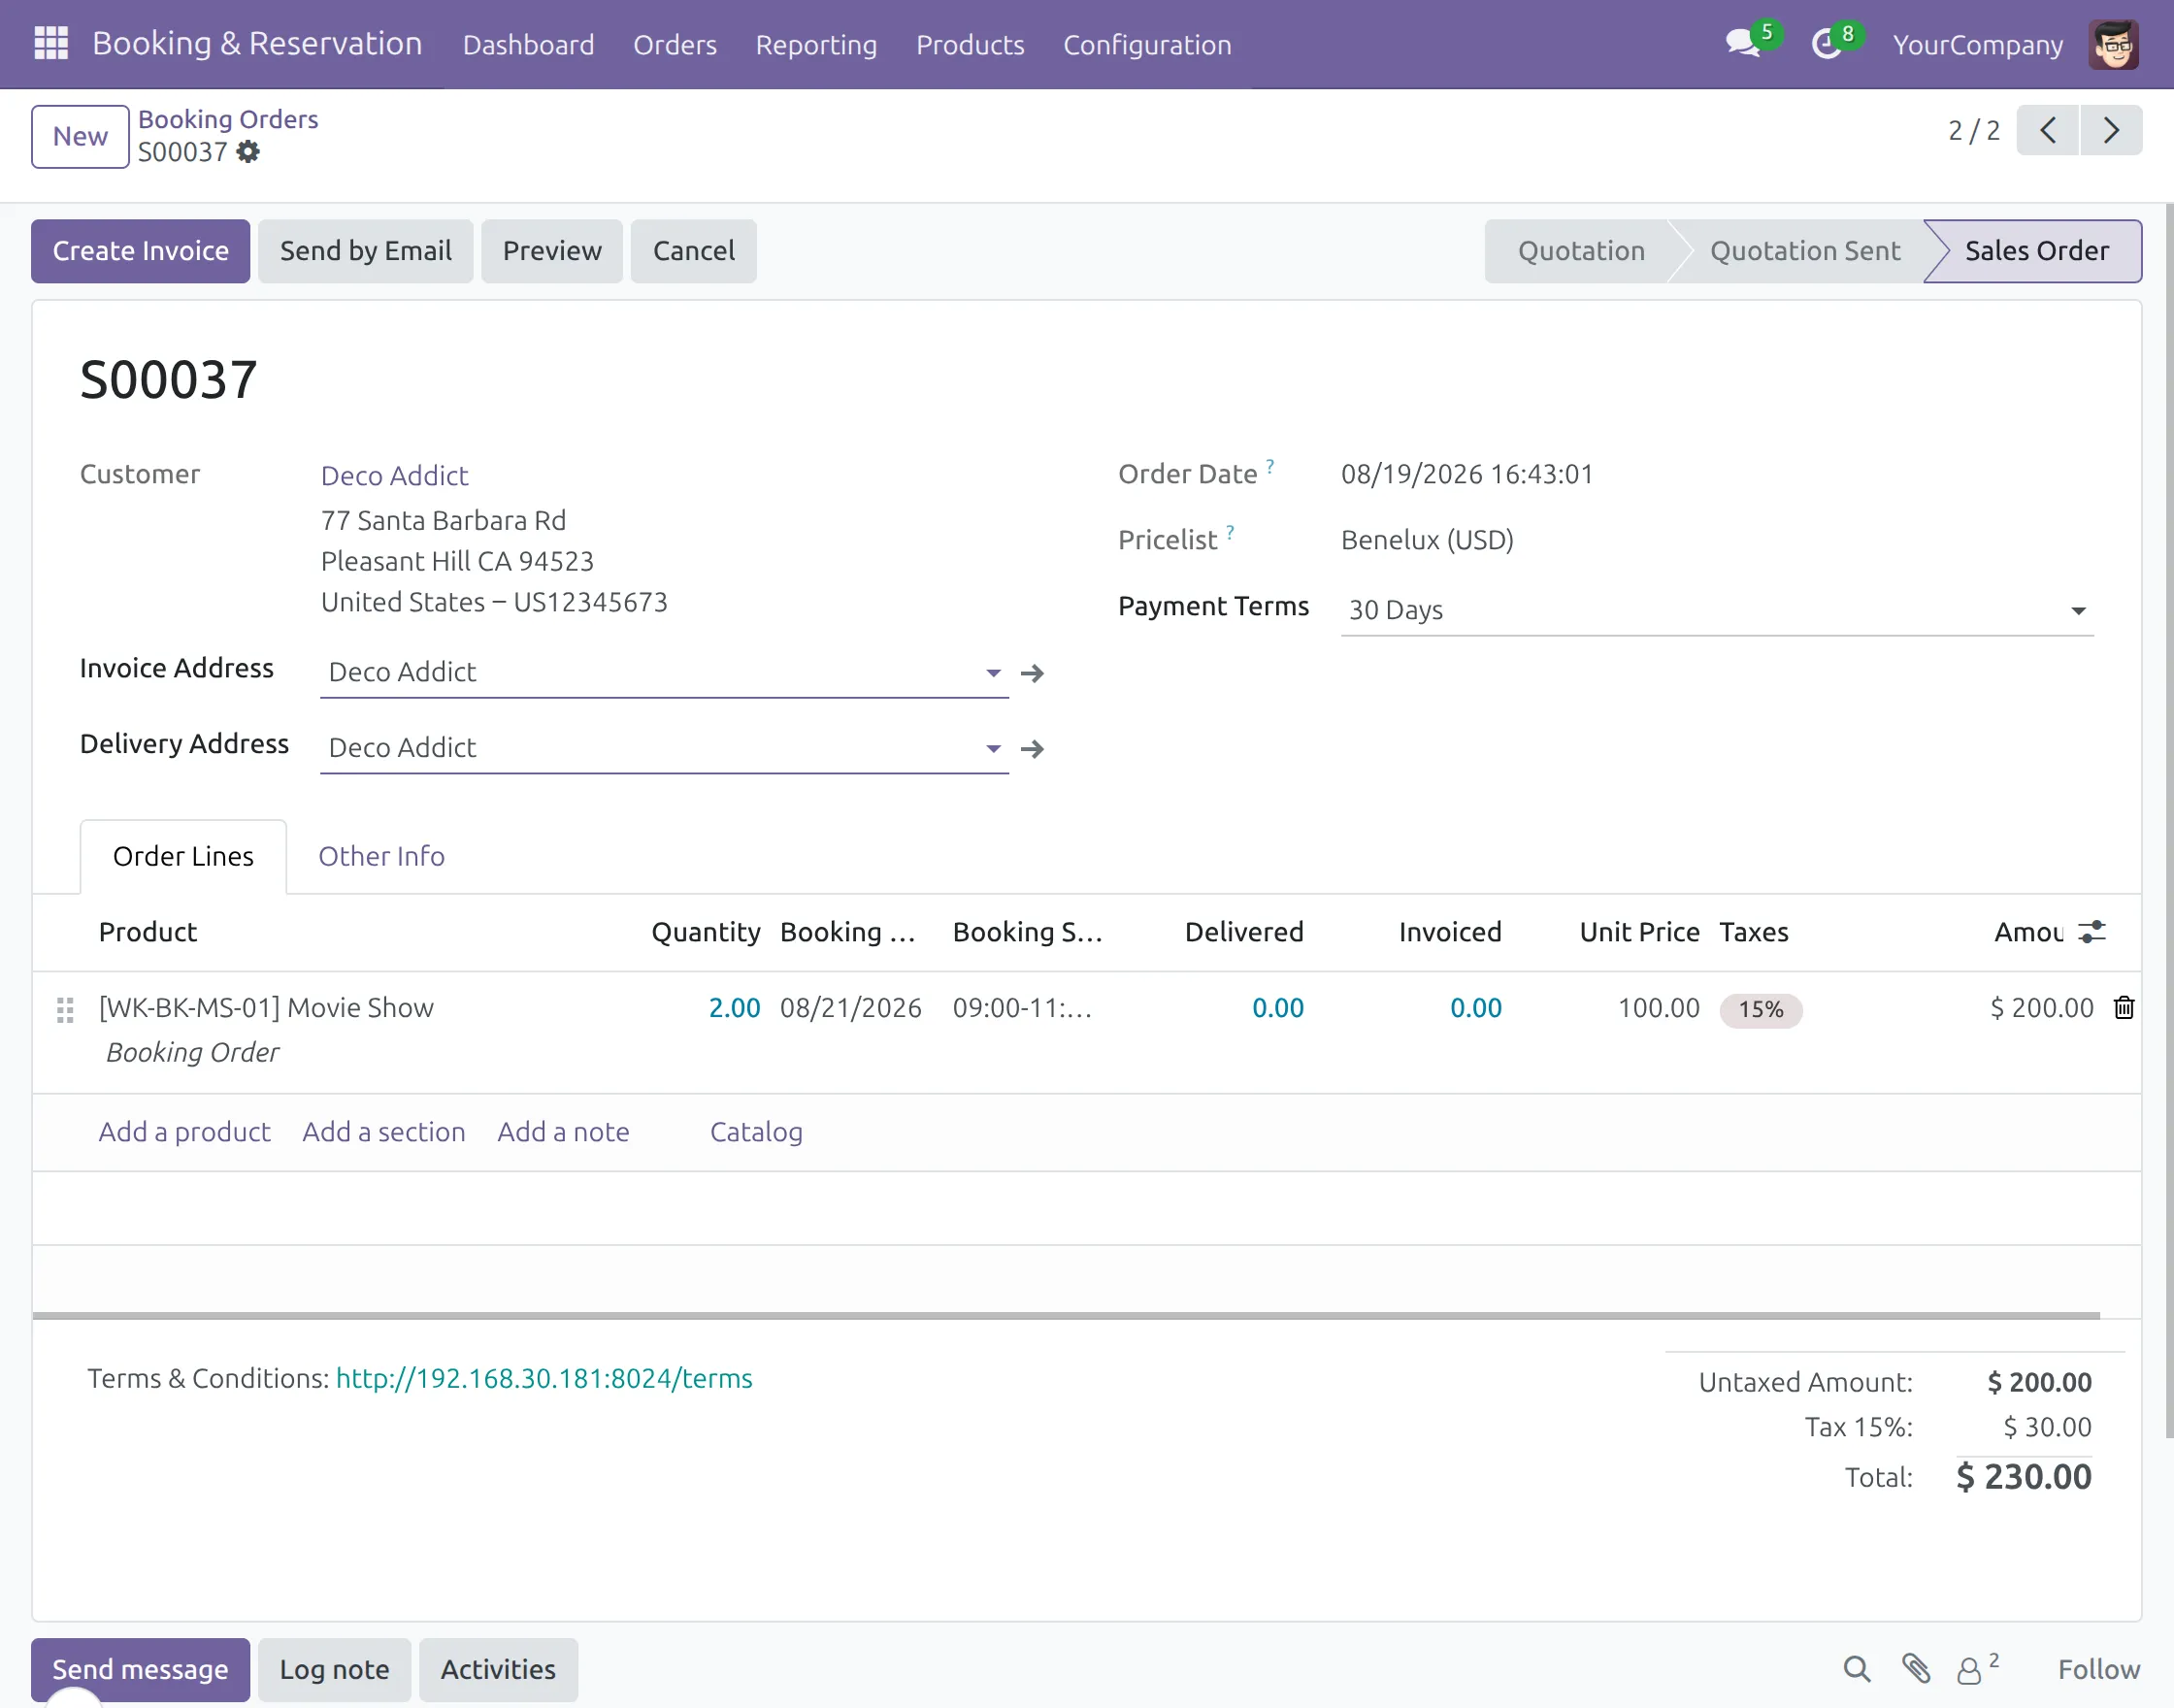
12. Further, to view booking orders in the Odoo backend and confirm them, visit ‘Booking & Reservation> Orders> Orders’ to view all booking or reservation orders.
Click on any order to view every detail of the sales order.
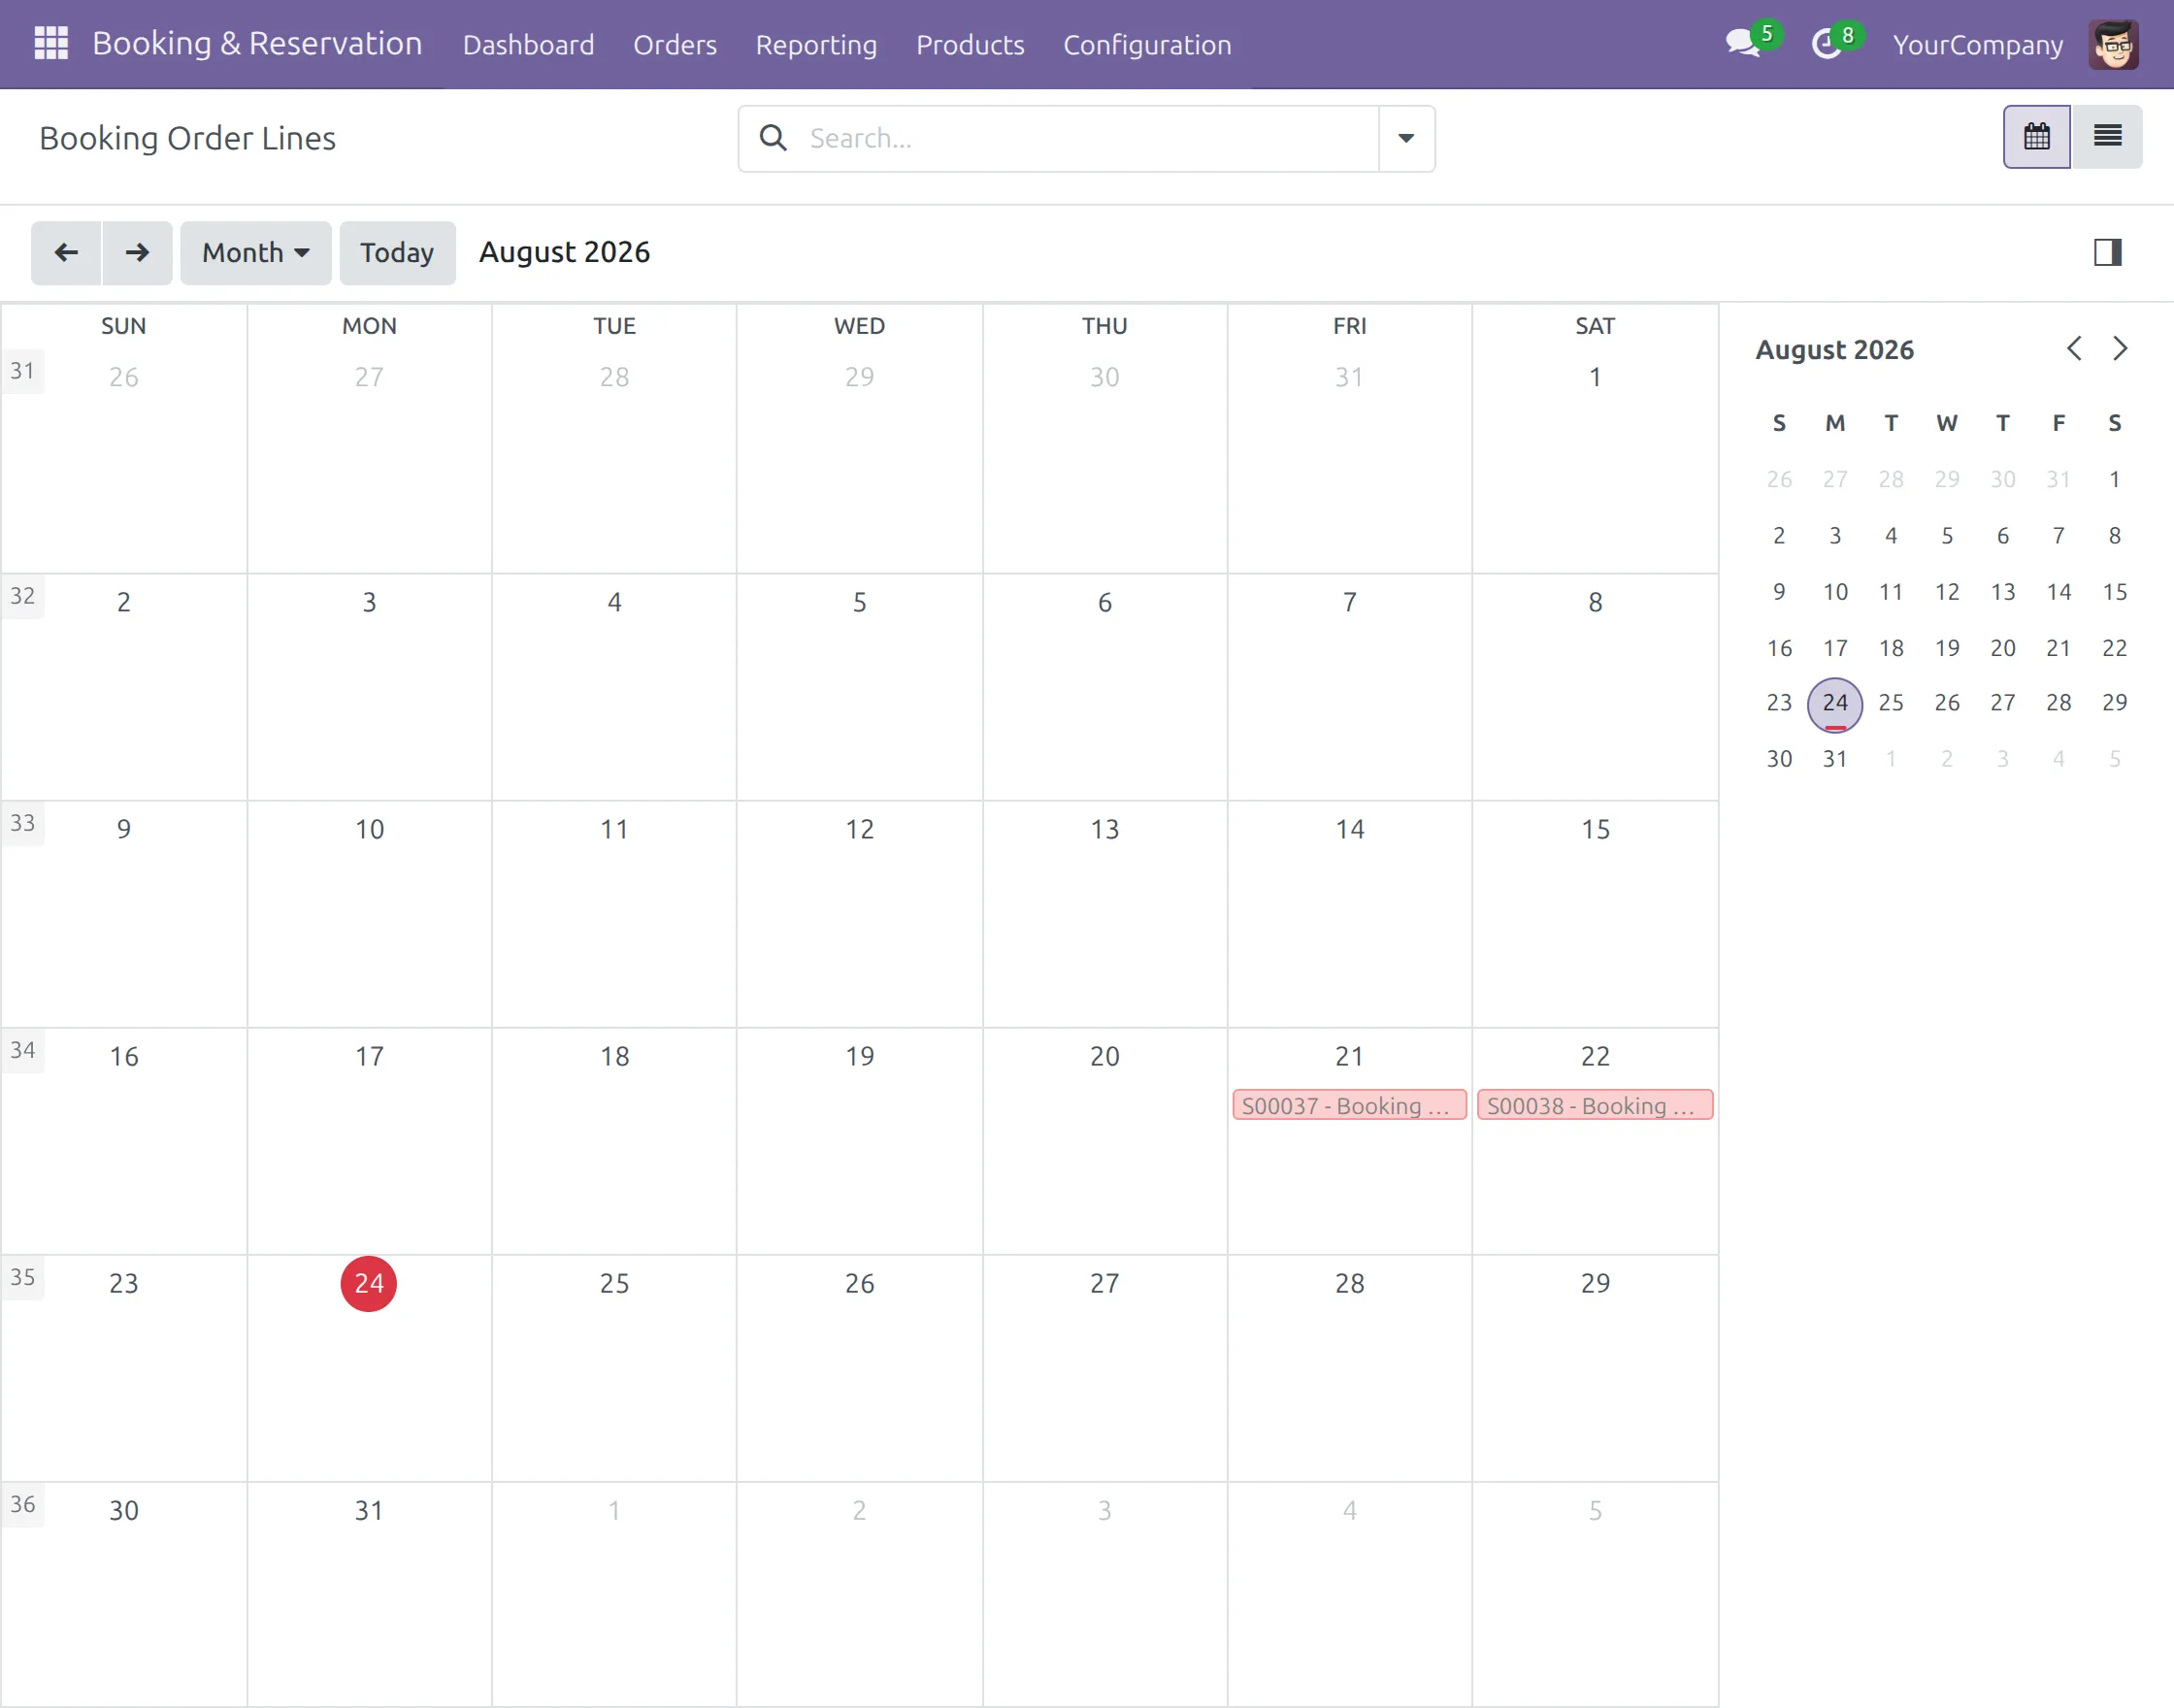
13. Next, go to ‘Order> Order Lines,’ here you can view all the bookings on a calendar.
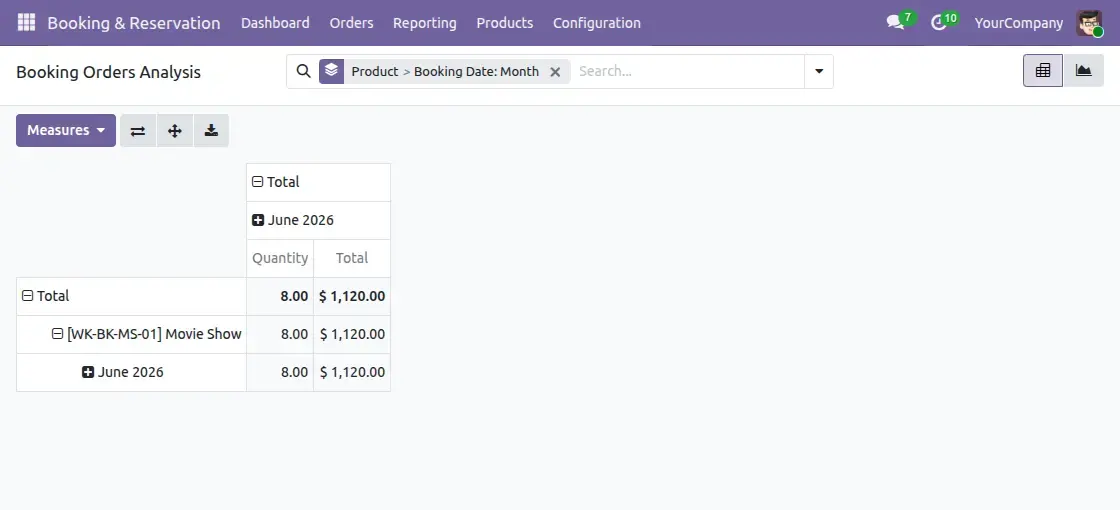
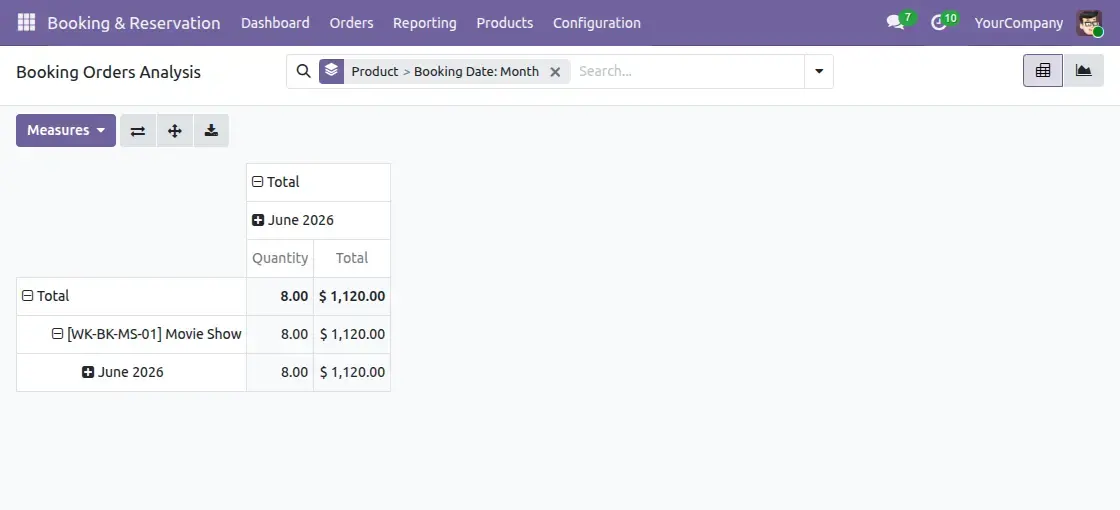
14. After that, visit ‘Booking Analysis’ under ‘Reporting’ to view the data of booking according to the selected filter.
OTHER ODOO MODULES
- Odoo POS Booking Management
- Marketplace Booking & Reservation Management
- Odoo Website Customer Address Book
- Odoo Queue Management
- Appointment Management System
- Odoo Subscription Management
NEED HELP?
Hope you find guide helpful! Please feel free to share your feedback in the comments below.
If you still have any issues/queries, please create a ticket at the UV Desk.
I hope this helps. In case of any further queries, contact us at our support mail.
Thanks for paying attention!!