Laravel Multi Vendor Marketplace Module
Introduction
Laravel Multi Vendor Marketplace Extension converts your Bagisto Store into a complete online marketplace store.
Laravel Marketplace Module allows sellers to manage their Products, Order shipments, Payouts, Shop Profile, and every standard marketplace feature.
The Laravel Multi-vendor Marketplace module also supports all the Bagisto templates and themes and it will be compatible with responsive web designs.
Installation of Laravel Multi-Vendor Marketplace
Customers will get a zip folder after purchasing the extension.
After that, Unzip the respective extension zip and then merge “package” folder into the project root directory.
Goto composer.json file inside the Bagisto root directory and add the following line under ‘psr-4’.
"Webkul\\Marketplace\\": "packages/Webkul/Marketplace/src"
composer dump-autoload
In the bootstrap/providers.php
Webkul\Marketplace\Providers\MarketplaceServiceProvider::class,
Run the following commands to complete the setup:
composer require picqer/php-barcode-generator:^3.2
php artisan marketplace:install
php artisan optimize:clear
After following these steps, the Bagisto Marketplace Extension should be successfully installed and ready for use in your Bagisto v2.5.0 project.
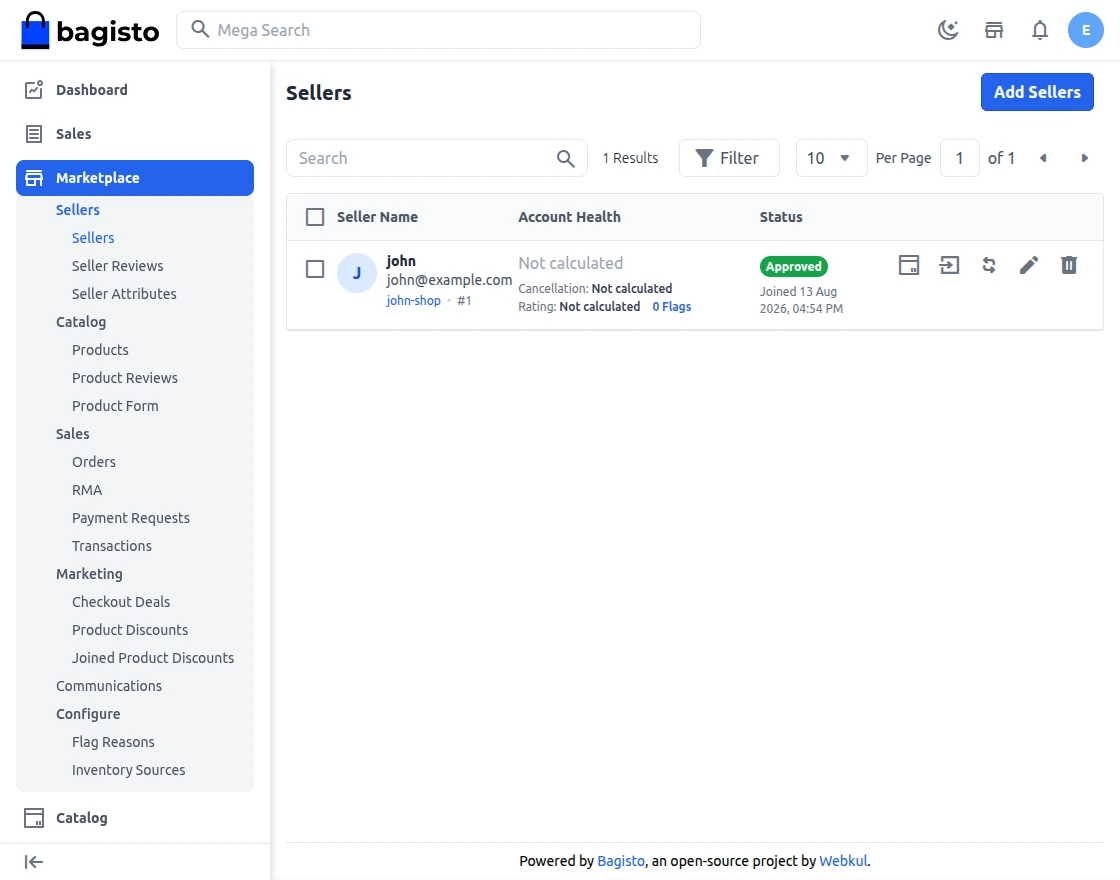
You will also see the Marketplace icon on the left-hand side in the menu bar.

Features
- Individual Seller/Vendor Profiles: Each vendor enjoys a personalized micro site within the marketplace, enhancing their brand identity.
- Customization Options: Sellers can showcase their brand with banners and shop logos on their profiles, adding a professional touch.
- Product Management: Sellers can easily view and manage their product listings, streamlining their operations in Laravel Multi Vendor Marketplace
- Attribute-Based Seller Form Fields: Seller form fields are now attribute-based and fully customizable from the admin panel.
- Data Bulk Upload: Sellers can use CSV, XLS, XLSX or XML files to create/update and delete their products in bulk, for every product type except Downloadable products. Sellers can also bulk-assign existing catalog products to sell under their own price with a separate import.
- Magic AI content generation: Admins control everything from the Magic AI tile under Marketplace configuration — enable the feature, pick the text and vision models, allow sellers to generate content from product images (and cap how many images), let Magic AI auto-create categories, choose whether it overwrites fields the seller already filled in, choose which attributes/fields are in scope, and set the per-seller generation limit and the counting period (daily/monthly).
- Checkout Deals: Sellers can create coupon-driven offers for their own products, including no-coupon deals, specific codes, or up to 1,000 auto-generated codes with configurable length, format, prefix, and suffix. Channels and customer groups are seller-scoped.
- Product Discounts: Discounts are catalog rules that apply automatic price reductions without a coupon. Sellers create, edit, duplicate and delete their own catalog rules, and every change re-indexes the product price so the storefront is instantly up to date.
- Seller Account Health Score: Marketplace quality is easy to measure with the Account Health feature. Every seller receives a composite 0–100 health score built from three live metrics:
- Dedicated Product Collections: Each seller’s products are organized neatly in their individual product collection pages, enhancing the shopping experience.
- Feedback and Rating System: An interactive star rating system allows customers to provide feedback and rate sellers directly from their shop page.
- Seller Support: A direct contact channel is provided for customers to reach out to sellers with queries or concerns.
- Seller Subscription Management – Admins can create customizable subscription plans for sellers, defining access levels and permissions based on business requirements.
- Product Assignment: Admins have the capability to assign products to sellers, facilitating product diversification.
- Seller Autonomy: Sellers can also self-assign products and manage their inventory.
- Interactive Seller Dashboard: A comprehensive dashboard provides sellers with real-time insights into their performance.
- Inventory Management: Sellers can check stock availability directly from their product listings.
- Bulk Pricing: From a single Manage Pricing grid, sellers can update the price, sale price and customer-group tiered prices of all their products at once, instead of opening each product individually.
- Product Barcodes: Sellers can generate barcodes for their products and download a printable barcode sheet, in bulk from the products list or one at a time from the product edit page.
- Booking Calendar: Sellers who sell Booking products get a dedicated Bookings section with a list and a calendar view of every reservation.
- Moderation and Approval: Both vendors and admin benefit from moderation and approval features, maintaining marketplace integrity.
- Module Control: Admins can easily enable or disable the marketplace module as needed.
- Attractive Landing Page: A visually appealing landing page showcases the top four sellers, driving engagement.
Additional Features
- Customizable Shop URLs: Sellers have the flexibility to edit shop URLs for their profile pages, About Shop sections, and policies.
- Bulk Payout Management – Admins can process and pay multiple payment requests from multiple sellers in a single, streamlined workflow.
- Seller Profile Management: Admins can efficiently manage seller profiles, ensuring consistency and quality.
- Multilingual Support: All languages, including right-to-left languages like Hebrew and Arabic, are fully supported.
- Product Management: Sellers can edit and delete their products directly from their panels.
- Earnings Tracking: A dedicated earnings section provides sellers with detailed earning information by date, month, and year.
- Transaction Reporting: Sellers have access to transaction reports, enhancing financial transparency.
- Refund Tracking: Sellers can easily check the status of refunded orders.
- Currency Flexibility: The extension supports all currencies, ensuring global compatibility.
- Rule Support: Cart and catalog rules are seamlessly integrated into the marketplace.
- Fulfilment Carriers: When a seller ships an order, they pick a fulfilment carrier for the parcel. A built-in Manual carrier (enter the carrier name and tracking number yourself) always works out of the box, and the admin can plug in additional carrier integrations that can generate shipping labels, schedule pickups, and track the shipment automatically.
- Rich Media Integration: Product videos can be added to listings, enhancing product presentation in Laravel Multi Vendor Marketplace.
- Inventory Management: Out-of-stock products are clearly indicated for better inventory control.
- Product Diversity: Sellers can create various product types, including bundles and grouped products, offering customers a diverse range of options.
- Product Type Control: Admins have the ability to define which product types sellers are allowed to create or assign, ensuring consistency across the platform.
- Profile Score: A profile score is visible on the seller dashboard, indicating how much of their profile information is completed.
- Custom Seller Attributes: Admins can create custom attributes for sellers and decide where each field should be visible or hidden.
- Additional Seller Information: Custom attributes allow admins to collect additional information during seller sign-up.
- Attribute Visibility Control: Admins can choose to show or hide seller attribute information on the public profile page and toggle visibility on the seller’s profile page.
- Attribute Groups: Admins can create attribute groups and assign attributes to them. The seller edit page is now dynamically prepared based on grouping.
- Locale- and Channel-Based Attributes: Admins can create locale- and channel-based attributes, enabling sellers to provide values specific to different regions and channels.
More Features
- Profile Information: Seller profiles include detailed information such as allowed product types, categories, payment methods, and shipping methods, providing clear guidelines.
- Product Reviews: Sellers can view customer reviews of their products through a dedicated menu, making it easier to monitor feedback.
- Seller Reviews: Sellers can access reviews about their store or services through a dedicated menu.
- User\Roles and Permissions: Sellers can create custom roles with specific permissions (e.g., access control lists) and assign them to sub-sellers, allowing granular management of actions.
- Sub-Sellers Management: Sellers can create sub-sellers, assign roles, and delegate store management tasks effectively.
- Communication Tools: Sellers and admins can communicate directly with each other, share attachments, and manage announcements or issue resolution through the admin panel. Additionally, customers can also communicate directly with sellers for queries, support, and order-related discussions.
- Comprehensive Reporting: Sellers now have access to detailed reports about their store.
- Including sales performance, commissions, top customers, top-selling products, and more, similar to admin-level reporting.
- Flag System: Admins have a dedicated page to view product flags and seller flags.
- Red Flag System: Admins can set limits for specific seller activities. If a seller exceeds these limits, a red flag is displayed on their collection page, alerting the admin team.
- Unapproved Product Preview: Sellers and Admins can preview unapproved products directly from the product edit page on both the Seller and Admin panels.
Multi-Vendor Marketplace Configuration
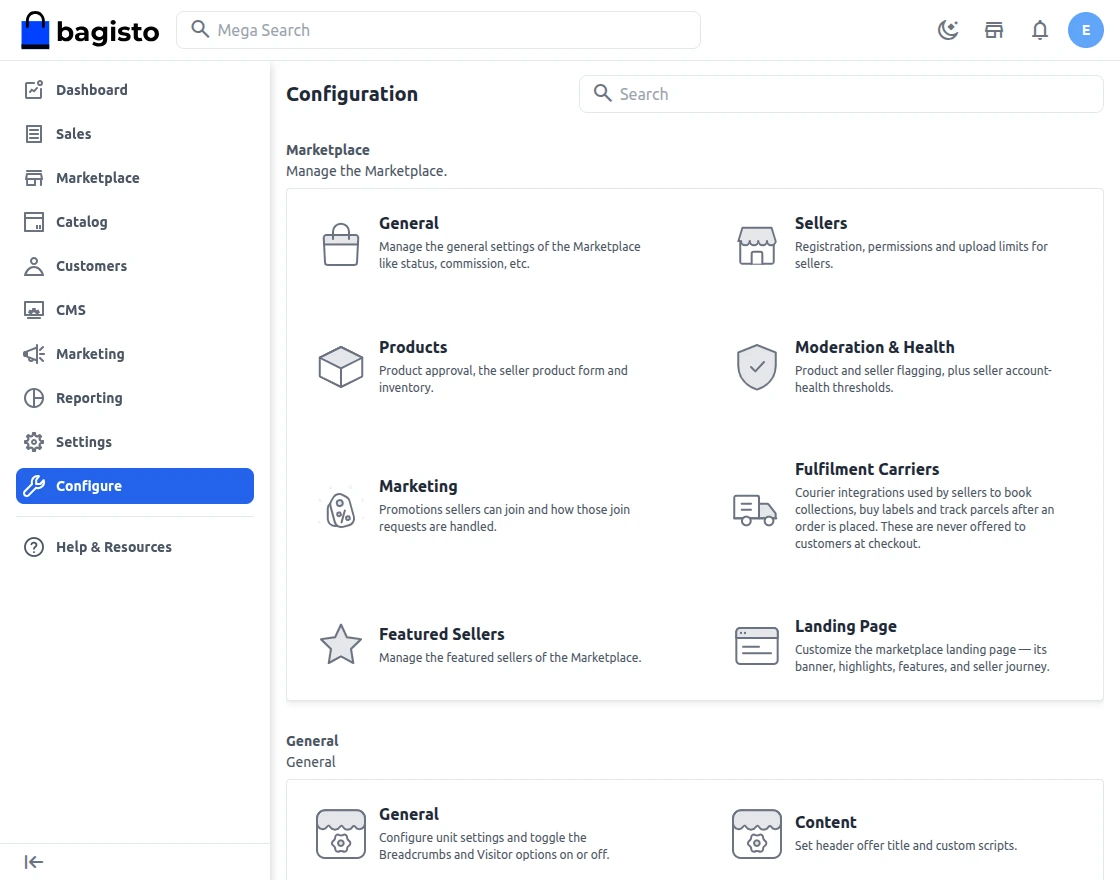
Once you are on the Admin dashboard, click the Configure option on the left-hand side in the menu bar following which you will be redirected to the Marketplace Configuration page.
Here you will be able to see the module version:
General Settings
Above you will get settings to choose channel and locale. Based on that you can also change the configuration of the marketplace.
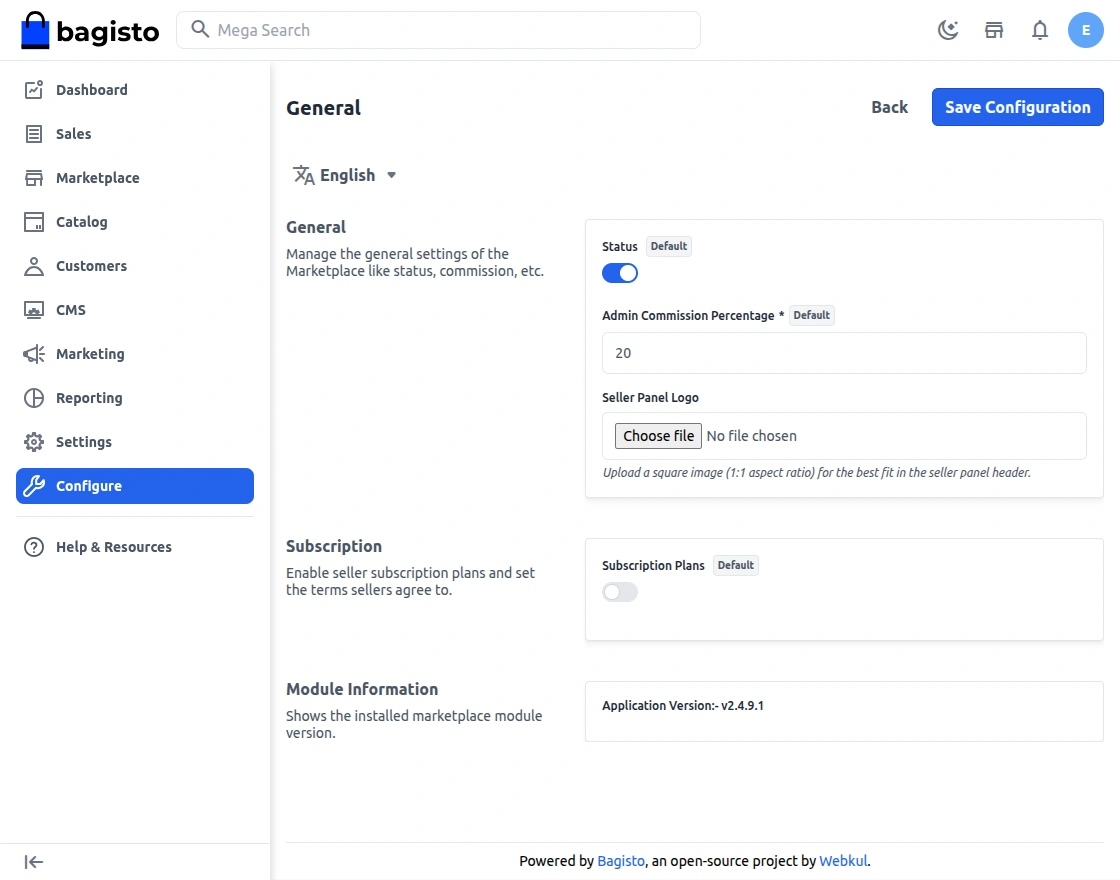
Let’s go through the Configuration Settings one by one.
Status
To enable or disable the complete module functionality.
Subscription Plans
To enable or disable the Subscription Plan functionality.
Design paid plans that control what each seller can do — how many products they can list, how many staff they can add, and what product types they can sell.
Sellers subscribe to a plan, and you approve or reject their subscription.
Admin Commission Percentage
Here the admin defines to set the global commission % for sellers that will apply to all.
If the admin has set a global commission of 10% for every seller in the marketplace.
When a product is purchased admin will be earning 10% of the product cost as commission.
Product
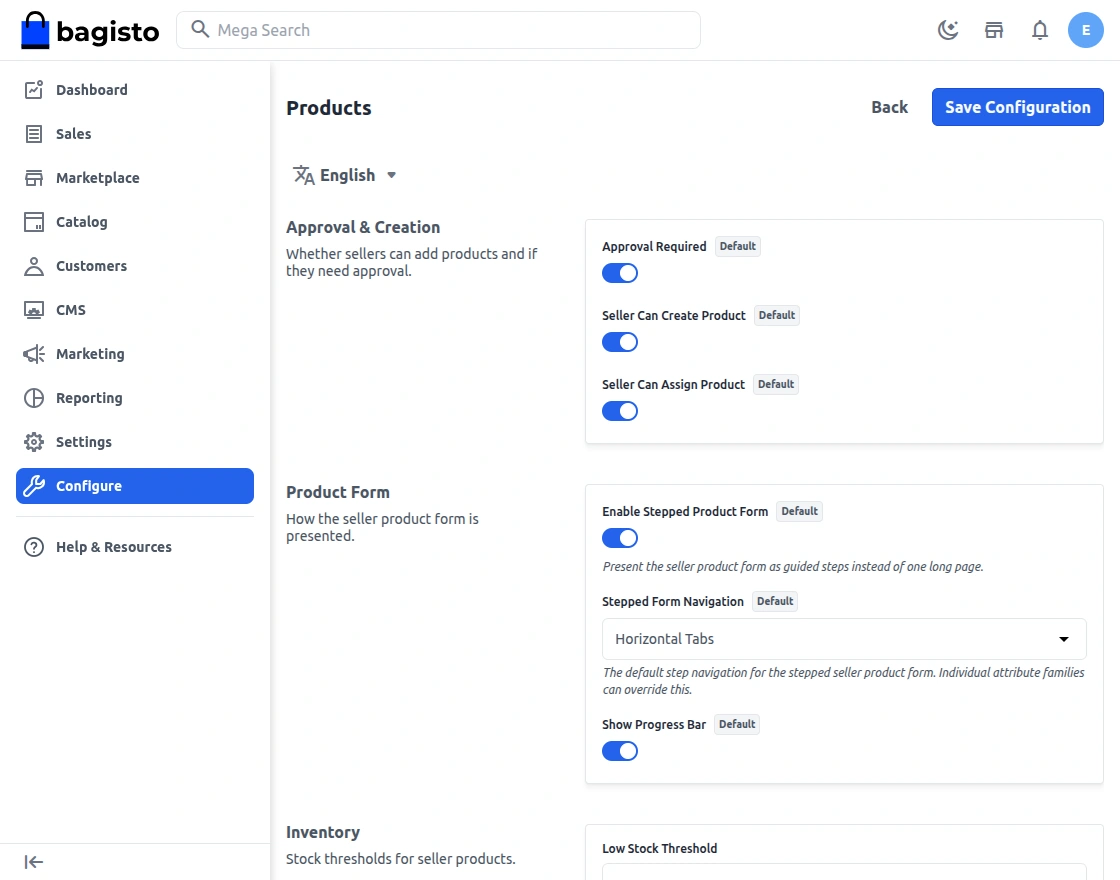
Approval Required
Select Yes in this setting if approval is required whenever a new product has been added by the seller on the marketplace.
Seller can assign product
Seller can assign the products from the seller end.
Seller can create product
Seller can create its own product from the seller end.
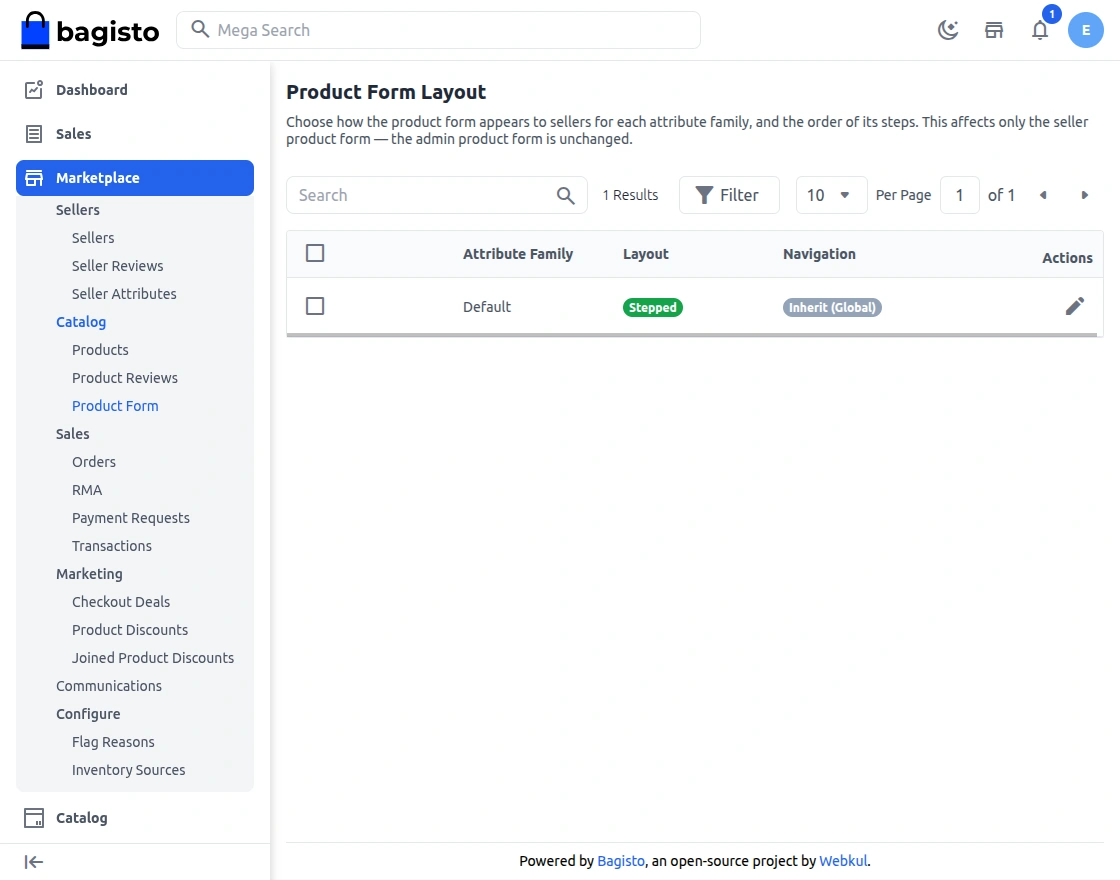
Seller Product Form
Filling in long product forms is tiresome, so the admin can now control how the seller product form is laid out — per attribute family or globally.
Choose between the classic two-column layout or a stepped form that walks the seller through tabs, with the step navigation running horizontally or vertically.
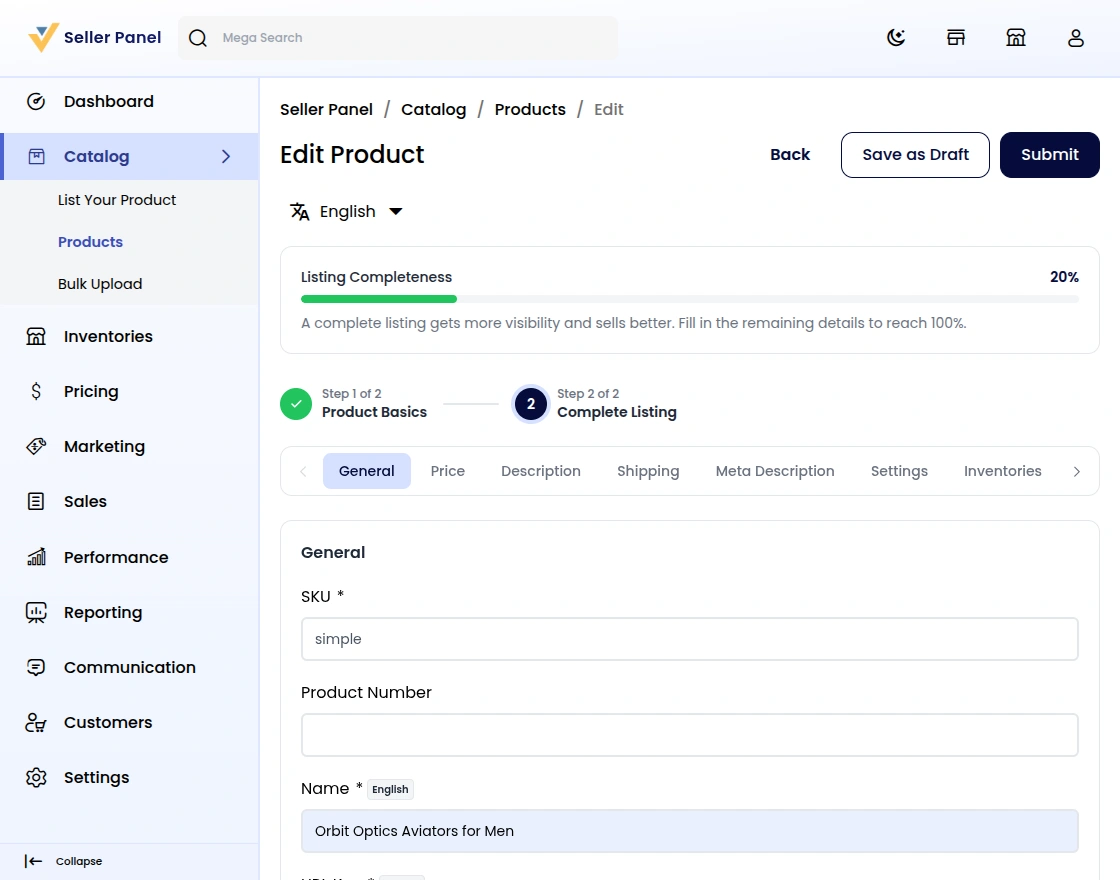
Admins can reorder attribute groups per family and apply layouts or navigation styles across multiple families, making product creation forms match the seller workflow.
Show Progress Bar
The Progress bar will get visible on seller’s product edit page on seller’s end.
Moderation & Health Configuration
Marketplace quality is easy to measure with the Account Health feature. Every seller receives a composite 0–100 health score built from three live metrics:
- Order cancellation rate over the trailing 30 days.
- Average customer rating over the last 90 days.
- Active seller flags raised in the last 90 days.
Health is colour-coded into bands — Critical (0–33), At Risk (34–66) and Good (67–100) — and is visible both on the seller dashboard and in the admin’s seller list.
A guided explainer page walks sellers through exactly what is hurting their score, so they know what to improve.
Admins can refresh any seller’s score on demand, while sellers can refresh theirs (with a 60-minute cooldown).
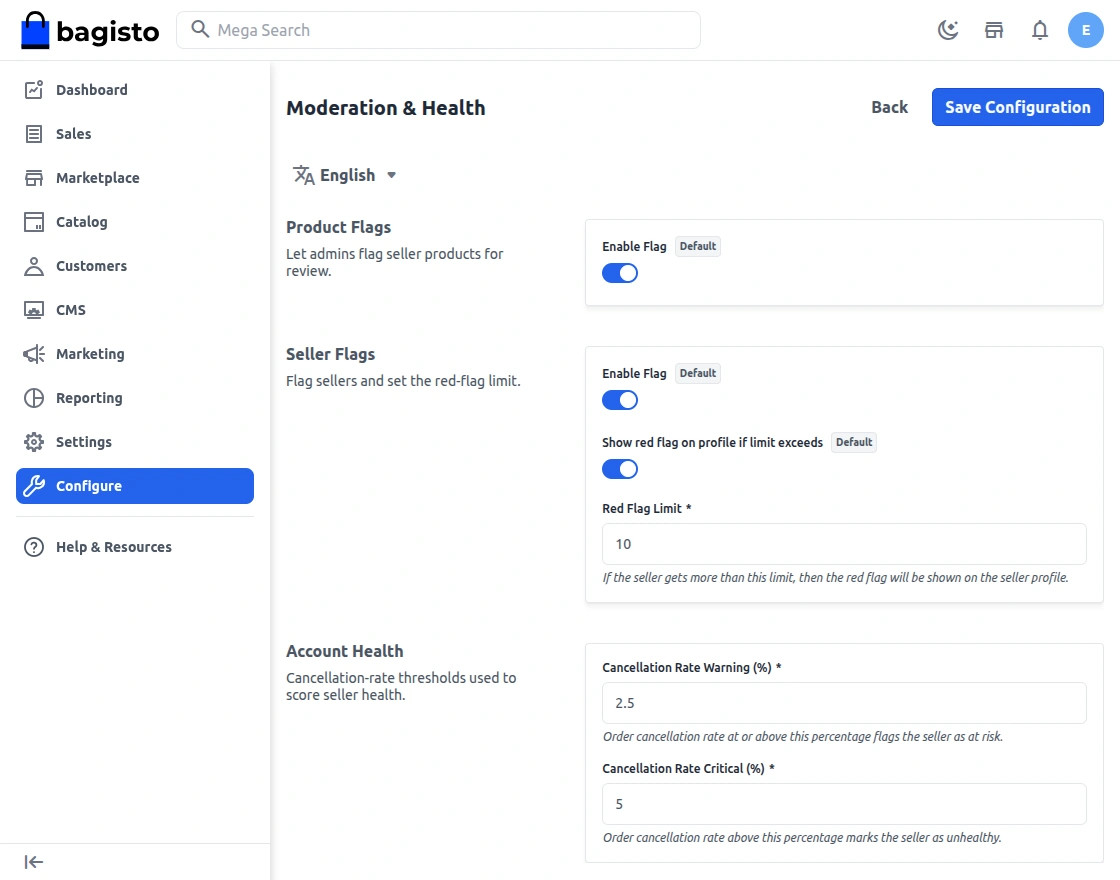
Enable Product Flag
Enable the option if you want to enable the product flag.
Condition:
1) Customer must be logged in
2) When the customer reports the flag on product then the customer needs to place an order
Enable Seller Flag
Enable the option if you want to enable the seller flag.
Condition:
1) Customer must be logged in
2) When the customer reports the flag on seller then the customer needs to place an order
Show Red Flag on Profile if limit exceeds
After setting up the limit and if limit gets increased it will show the red flag on seller profile page.
Sellers
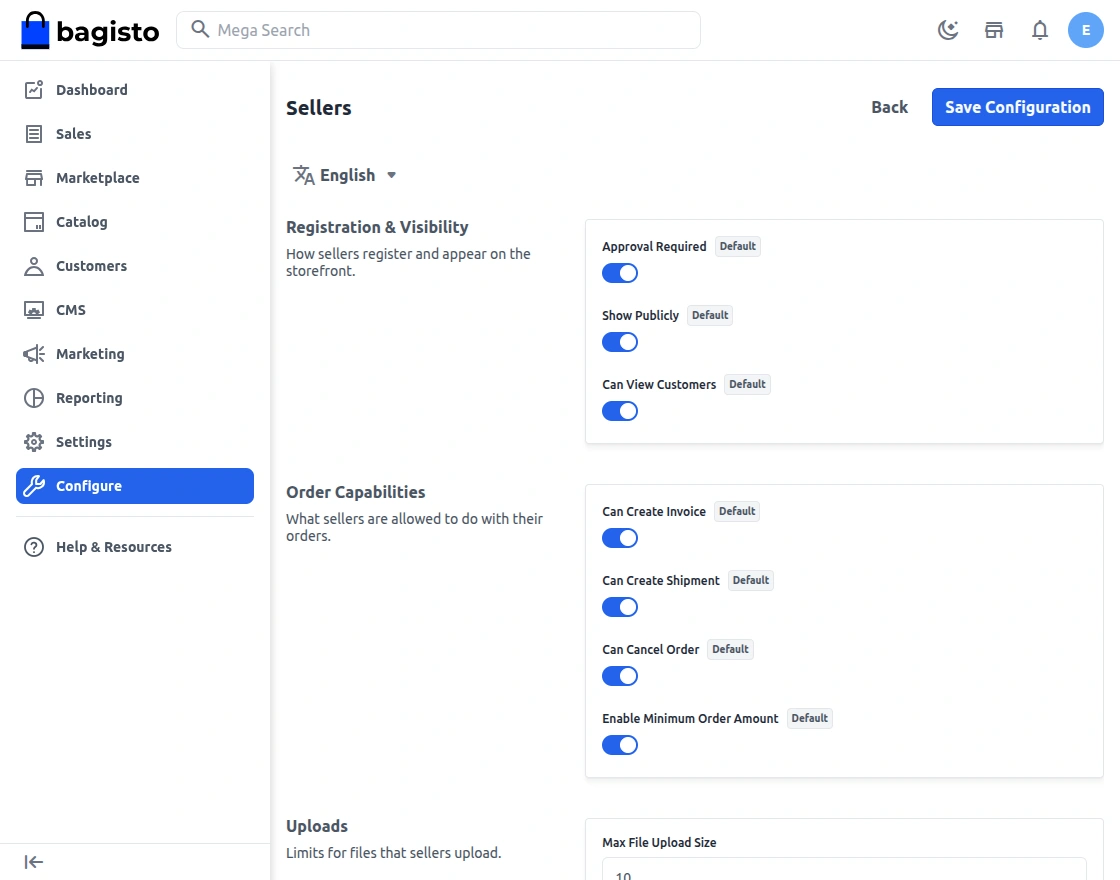
Show Publicly
The admin can enable this configuration to hide the seller’s shop page from being publicly visible on the ShopFront.
Can View Customers
The admin can enable this configuration to hide customer details from the seller panel.
Seller Approval Required
Select Yes in this setting if approval is required whenever a new seller has been registered in the marketplace.
Order Capabilities
Seller Can Create Invoice
Choose Yes in the setting if you also want to give the seller permission to create an invoice.
Seller Can Create Shipment
Choose Yes in the setting if you want to give the seller also permission to ship the product that has been ordered.
Seller Can Cancel Order
Choose Yes in the setting if you want to give the seller permission to cancel order.
Enable Minimum Order Amount
Now, Enable the option if you want to enable minimum order amount for sellers.
Uploads
Maximum size (in MB) for files a seller uploads — including seller profile attributes and the bulk-upload image ZIP. For example, enter 10 for a 10 MB limit. Defaults to 10 when left empty.
Featured Seller
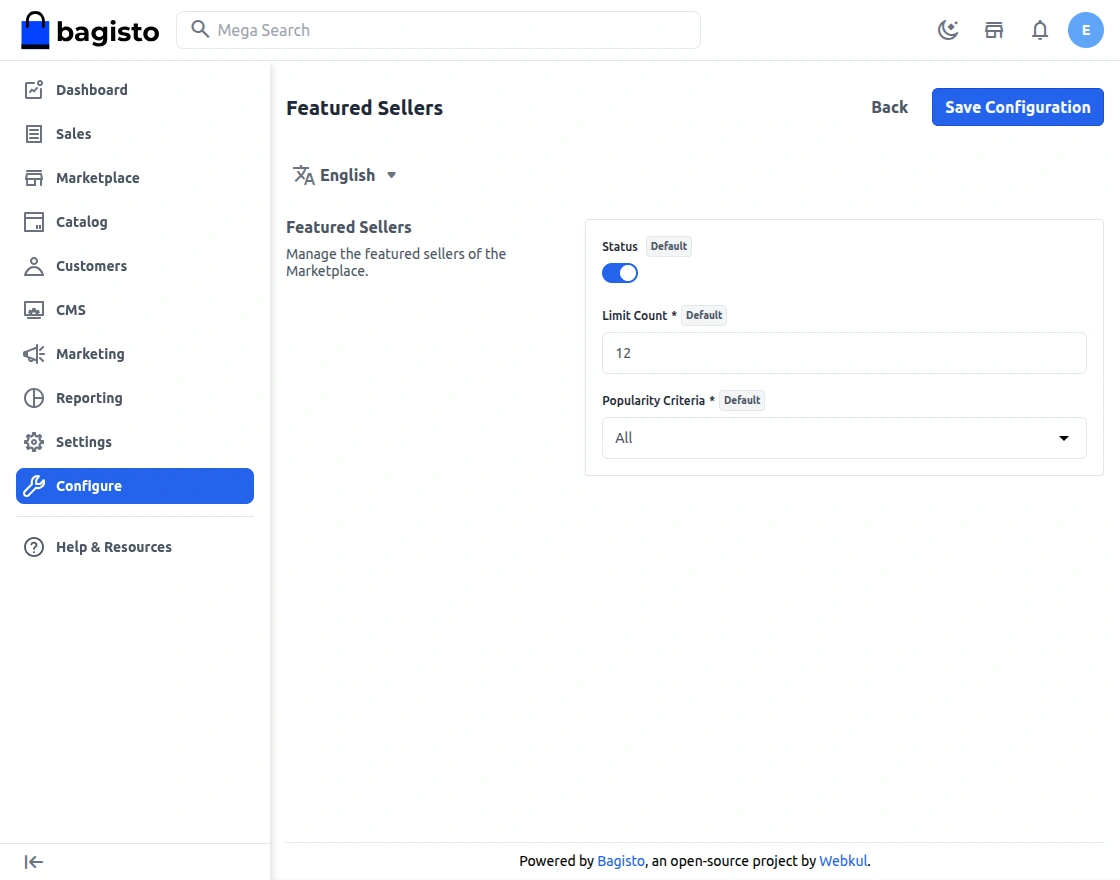
Enable the configuration if you want to show the featured seller on the marketplace landing page.
Limit Count
After adding a certain limit you can set count of how much featured seller will be visible on the storefront.
Popularity Criteria
1) All –This allows the customers to see all other sellers
2) Maximum Orders – Customers can see the seller which have maximum number of orders.
3) Maximum Rating – Customers can see the seller which have maximum ratings.
4) Maximum Products – Customers can see the seller which have maximum products
5) Maximum Sale – Customers can see the seller which have maximum sale
Featured Sellers
The featured seller will gets visible on the marketplace landing page as shown in the image below.
Landing Page
Here are the settings for your Landing Page, where you can provide descriptive information and attract sellers to sell on your marketplace.
The landing page appears when you click Sell on your Frontend.


Let’s move on with each functionality.
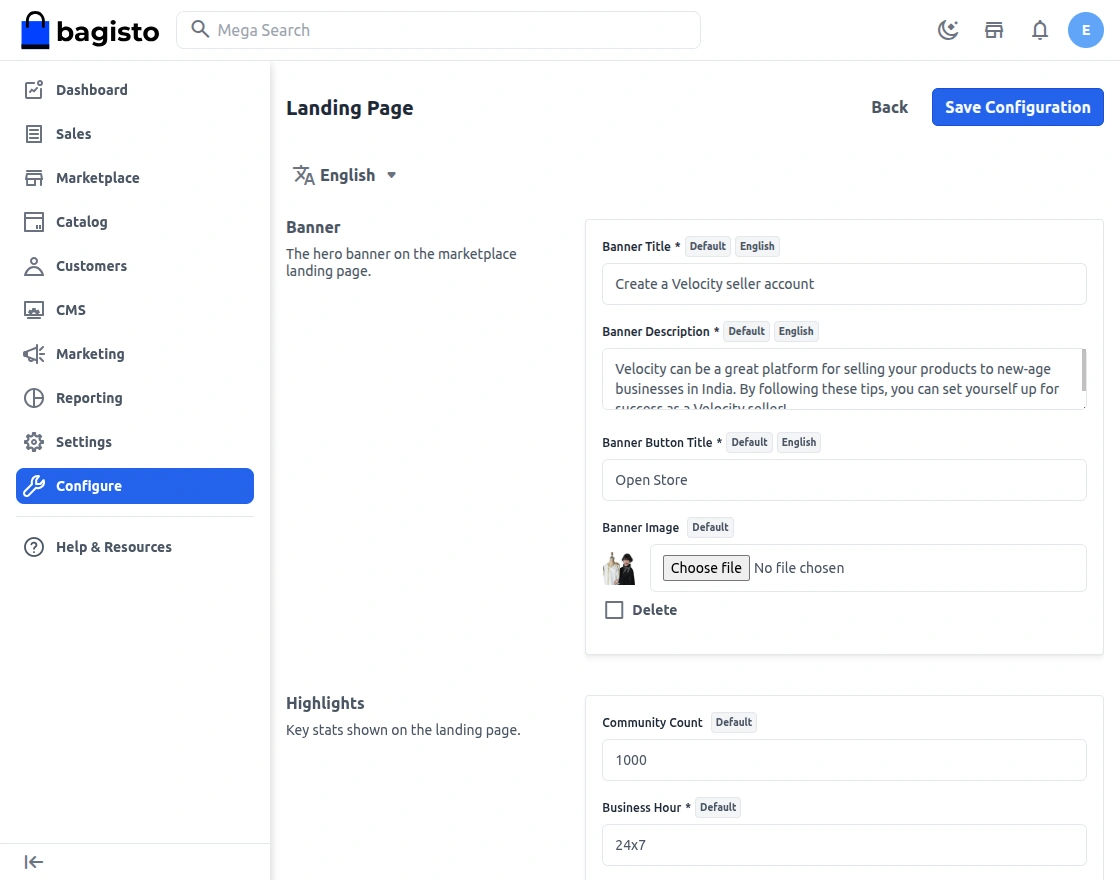
Banner Title
Here you can give the main title to your landing page that will act as the main attraction for your seller.
Banner Description
Here you can provide the banner content that will appear on the banner image as provided.
Banner Button Title
Enter the title for the banner button.
Banner Image
Select the banner image for the front end.
Community Count
Add the community count here.
Business Hour
Enter the operating business hour here.
Payment Duration
Enter the payment duration here.
Serviceable codeSet the pin code for the serviceable area for easy shipments.
Feature Title
Set the feature image title here.
Feature Description
Enter the description for the feature section.
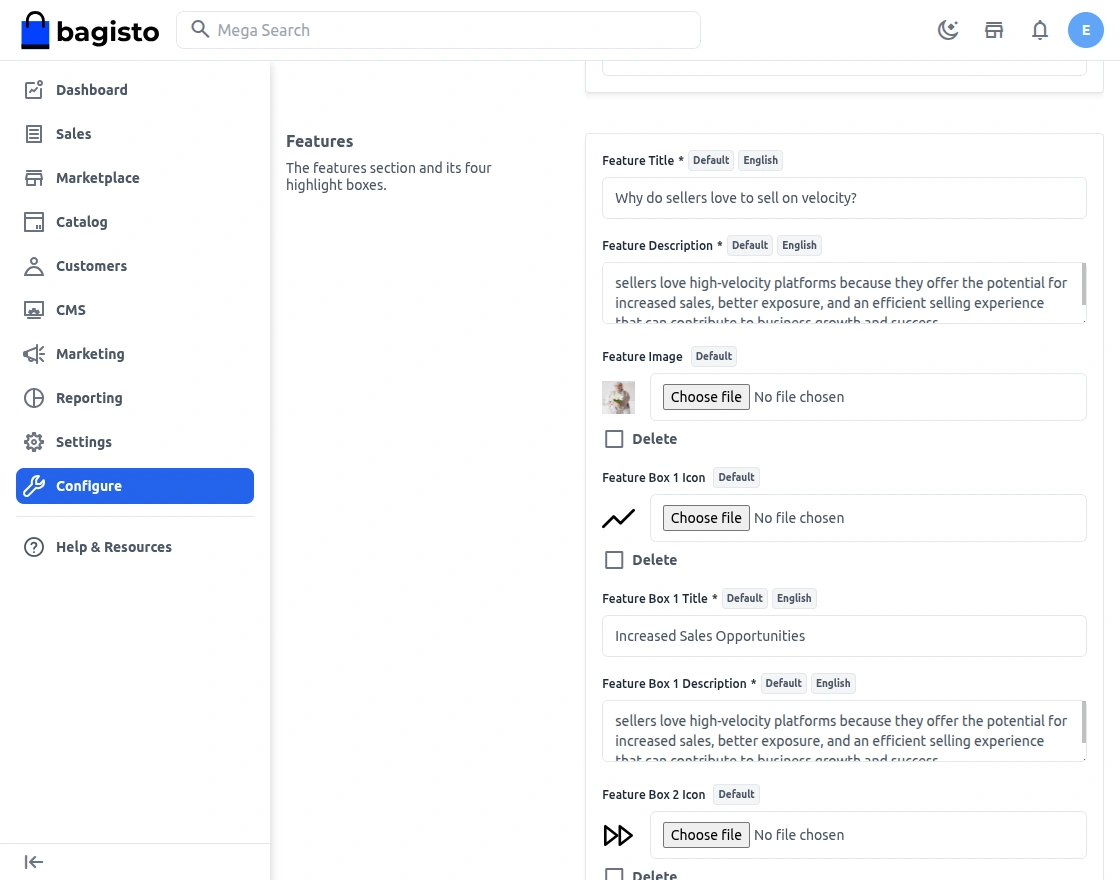
Show Features
You can provide the Feature heading, information, and icons below. Once you enter the details you will be able to see that on the landing page:

In the above-mentioned snapshot, you can see the Attracting Features list and you can check the complete product count in the store.
To set the journey page for the customers so they can go through with the states to become sellers.
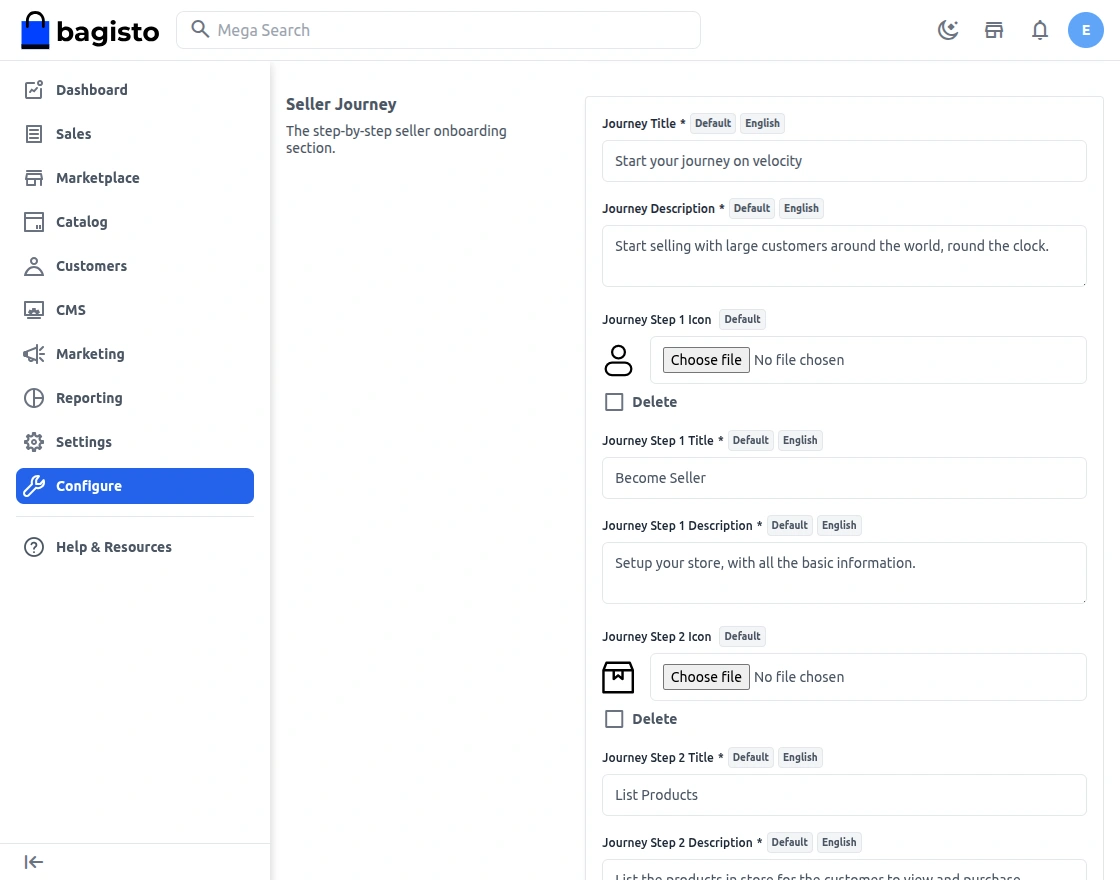
After settings, customers can see the journey banner on the front end.


Multi-Vendor Marketplace Admin View
On the admin dashboard, click the marketplace icon which is there on the left-hand side to check on the features available in the backend for admin.
Sellers
Here you will find the list of sellers that have registered in your marketplace.
Based on the setting that you have done for Seller Approval in configuration, the status of the seller will also be shown here.
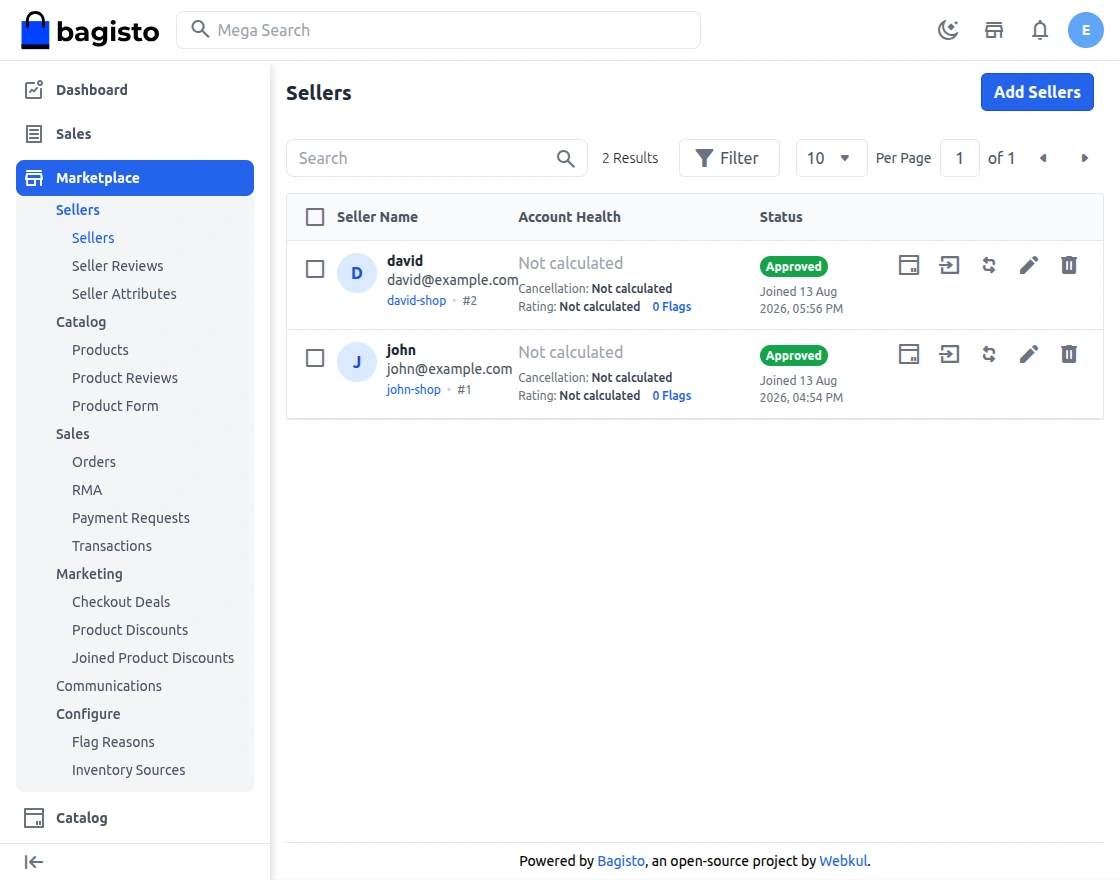
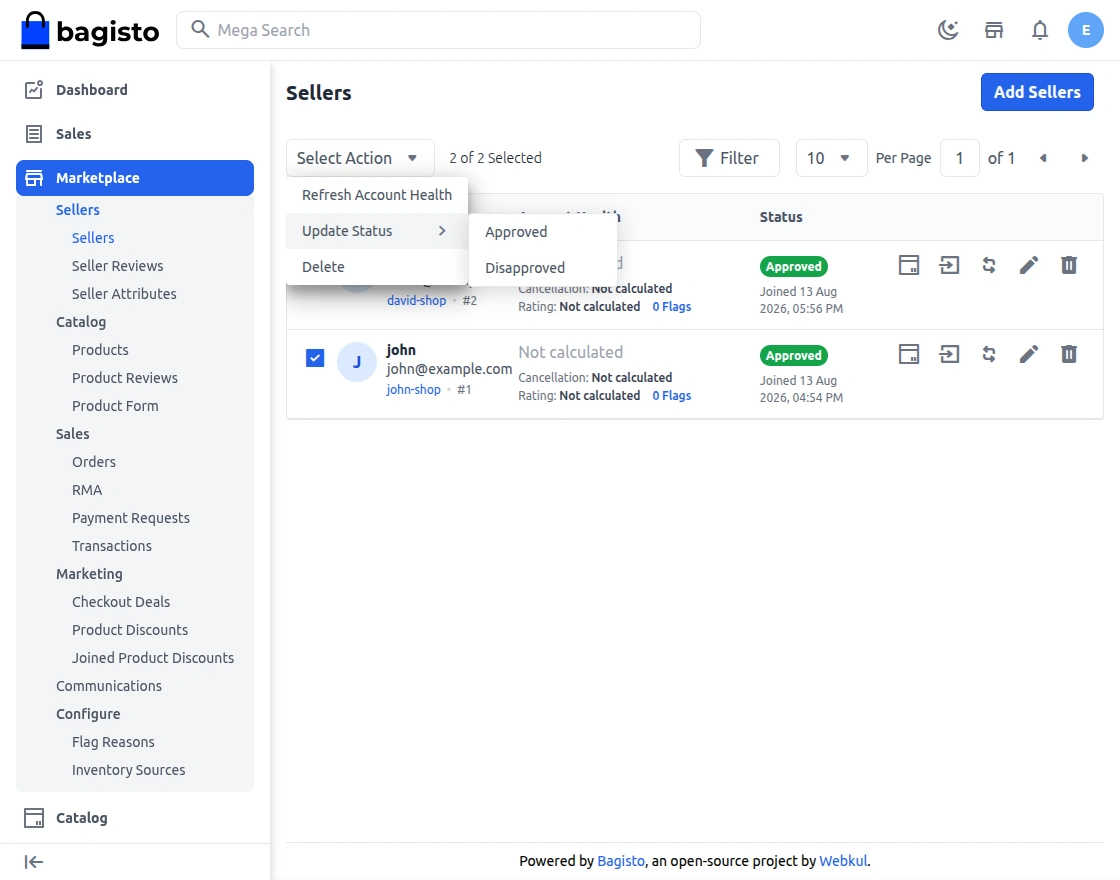
There are two ways to approve or disapprove the seller’s request.
The first option is – Mass update, select the checkbox in front of ID, go to the drop-down option select update then approve or disapprove accordingly.
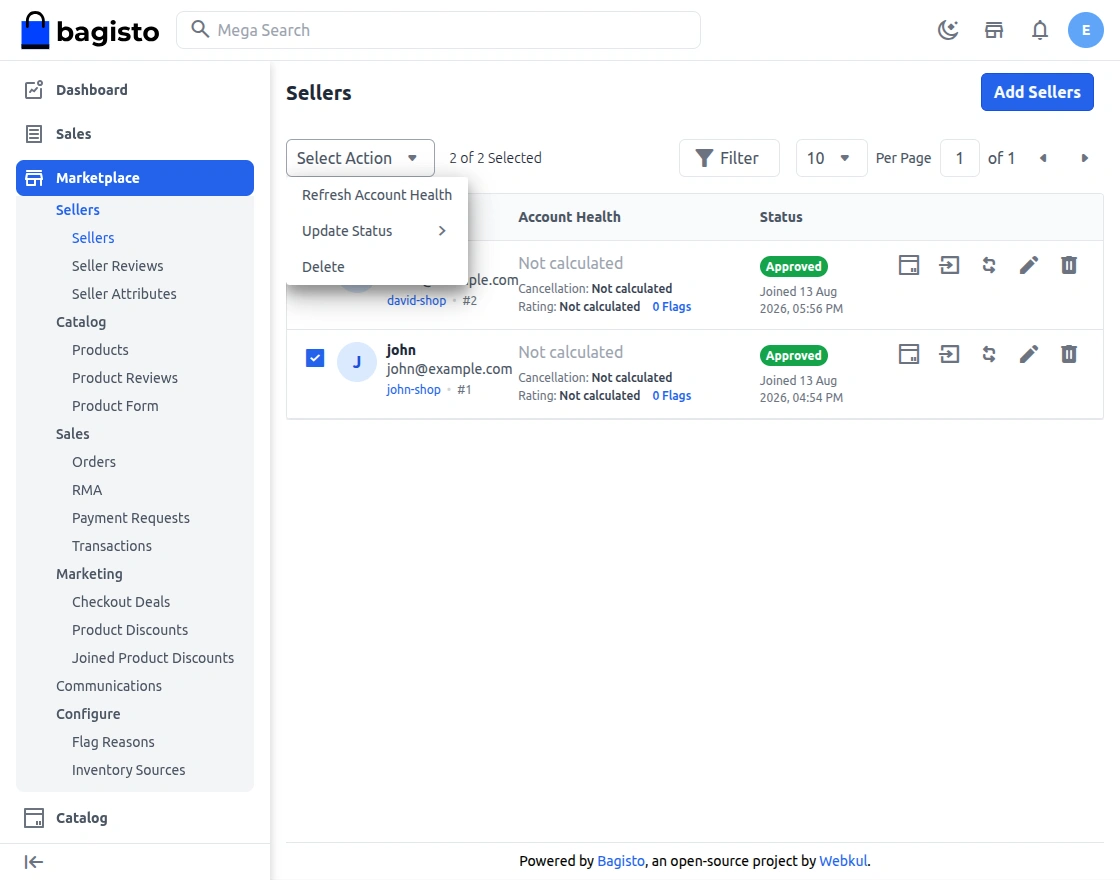
Mass Refresh account health , for that just click on the Refresh account health and click on agree after that the Seller health:
The second option is Individual update, for that just click on the icon of Approve/Disapprove and choose accordingly regarding the update:
Seller Reviews
Here you will find the reviews as shared by the customer for the particular seller. By default, the status of the reviews remains unapproved.
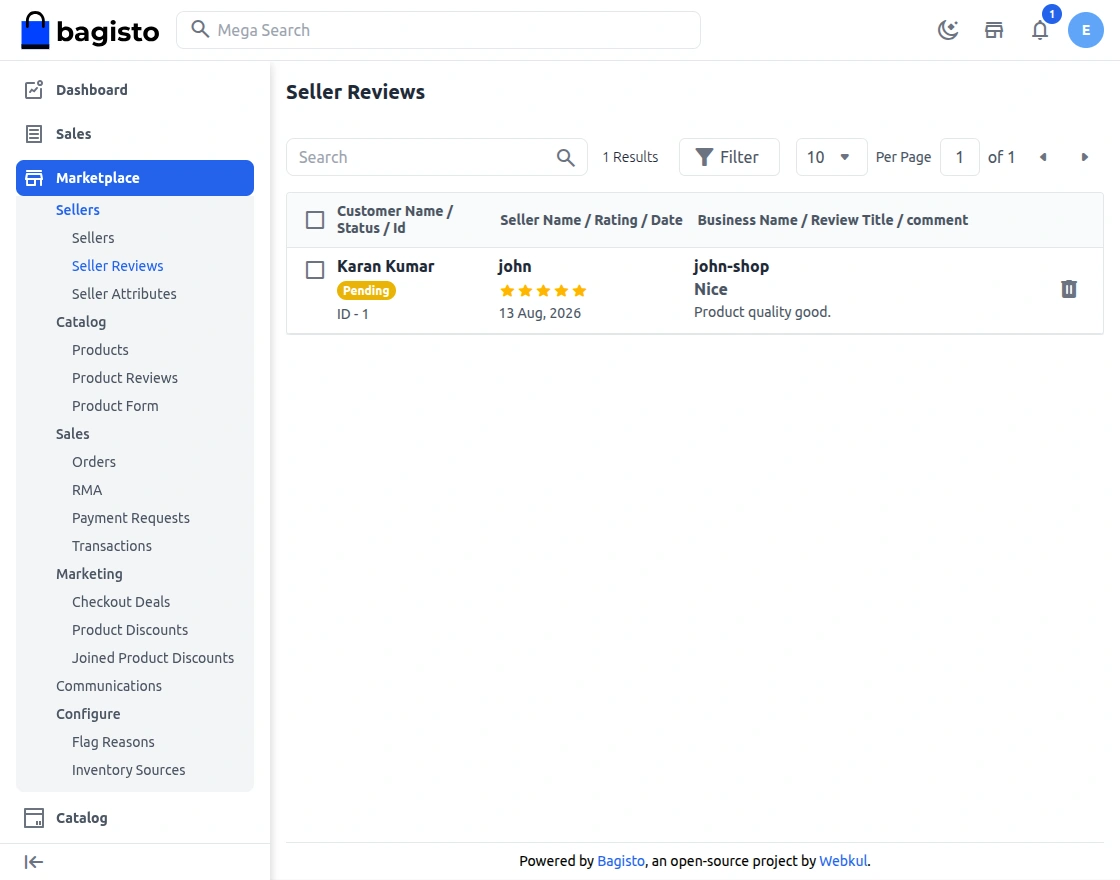
You need to select the review which you want to update and then from the above drop-down, choose Update and then Approve or Disapprove the review.
Seller Attributes:
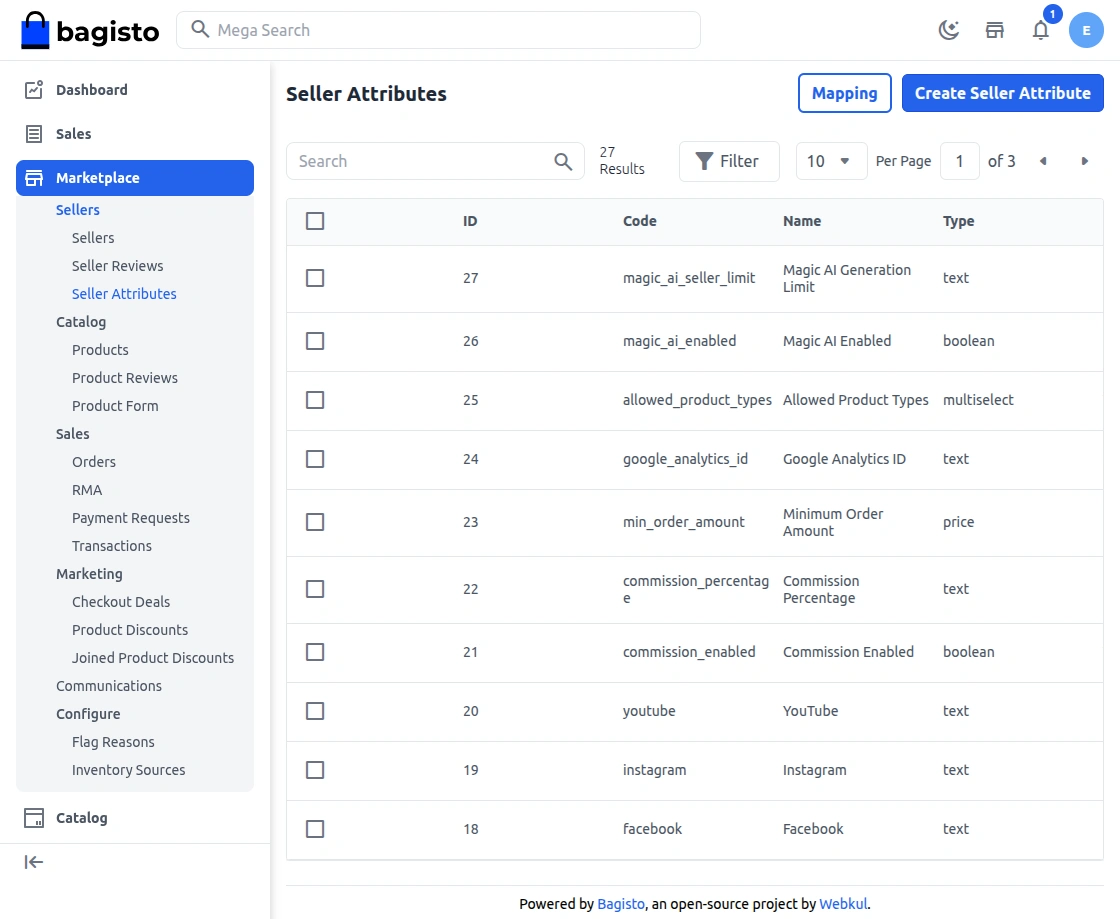

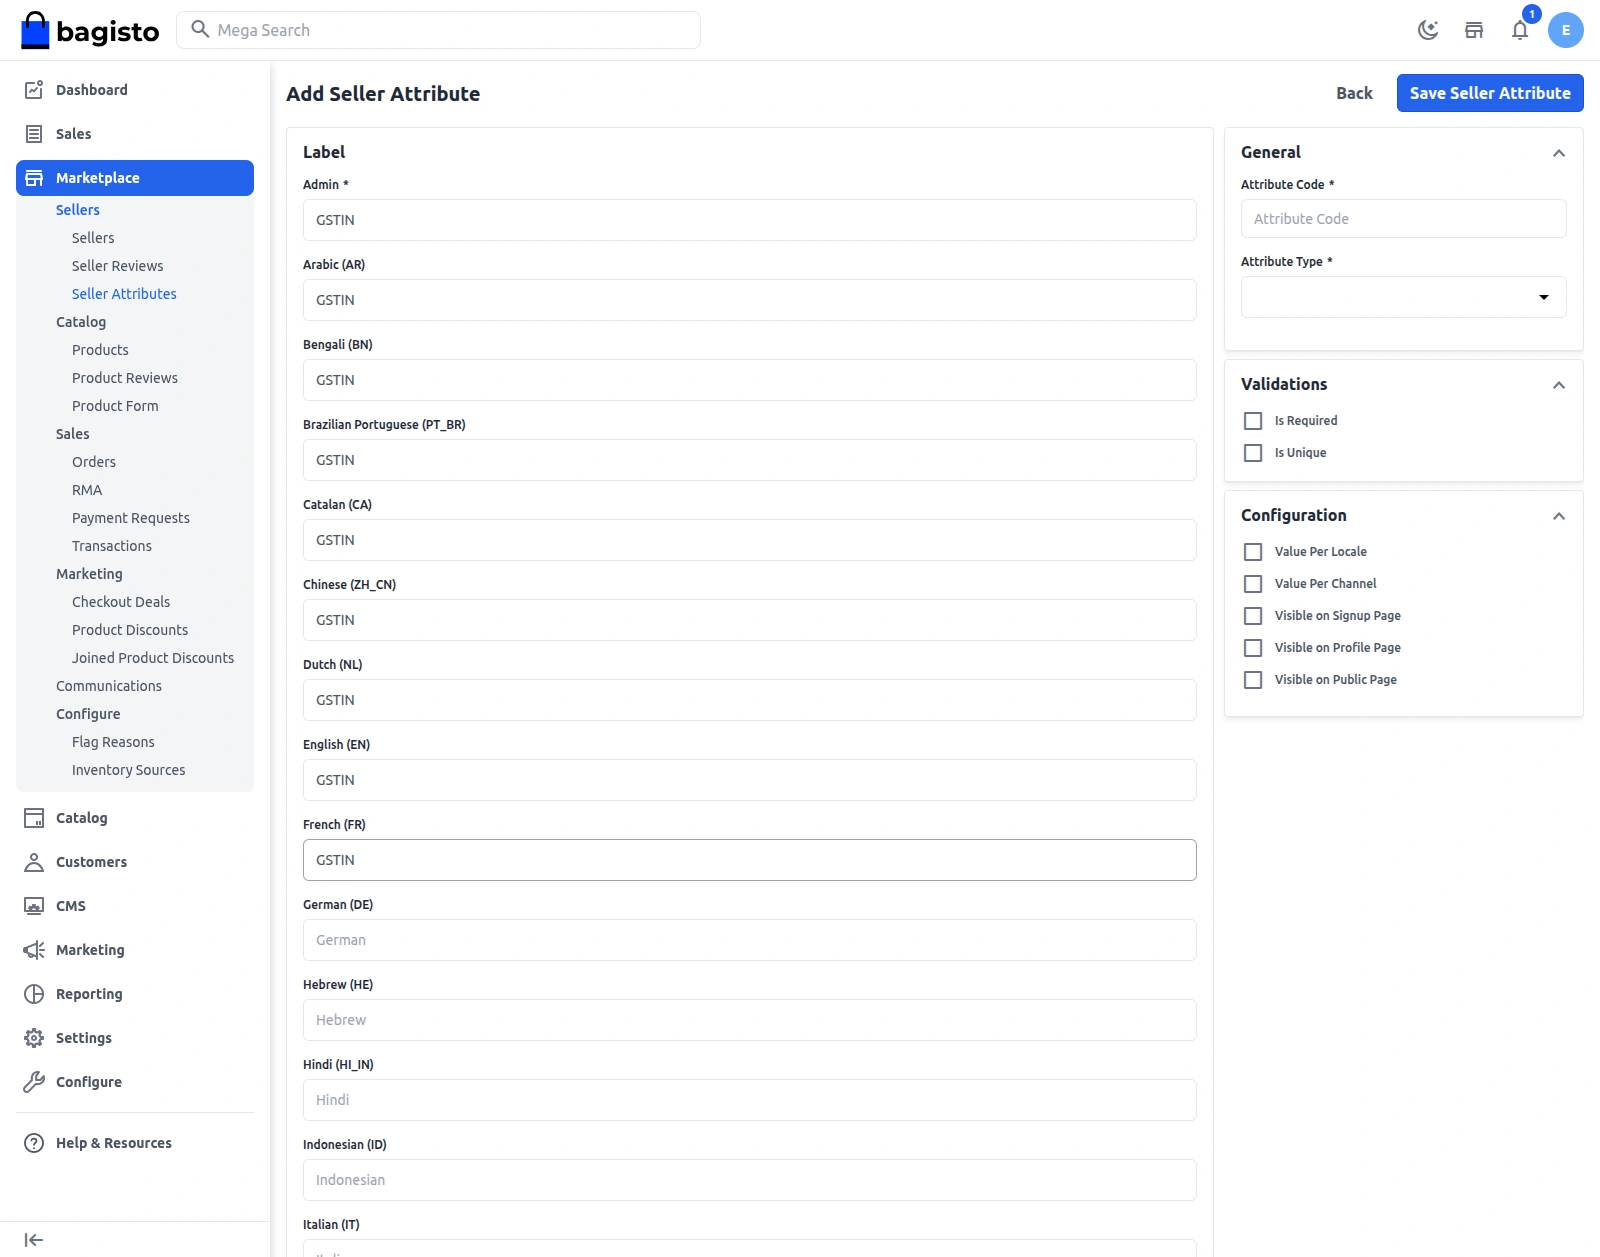

Visible on Signup Page: This attribute appears on the signup page when a seller registers on the website.
Visible on Profile Page: This attribute appears on the profile page when a seller updates their profile.
Visible on Public Page: This Attribute appears on the seller’s public profile page on the shop front.
Mapping the Seller Attributes:
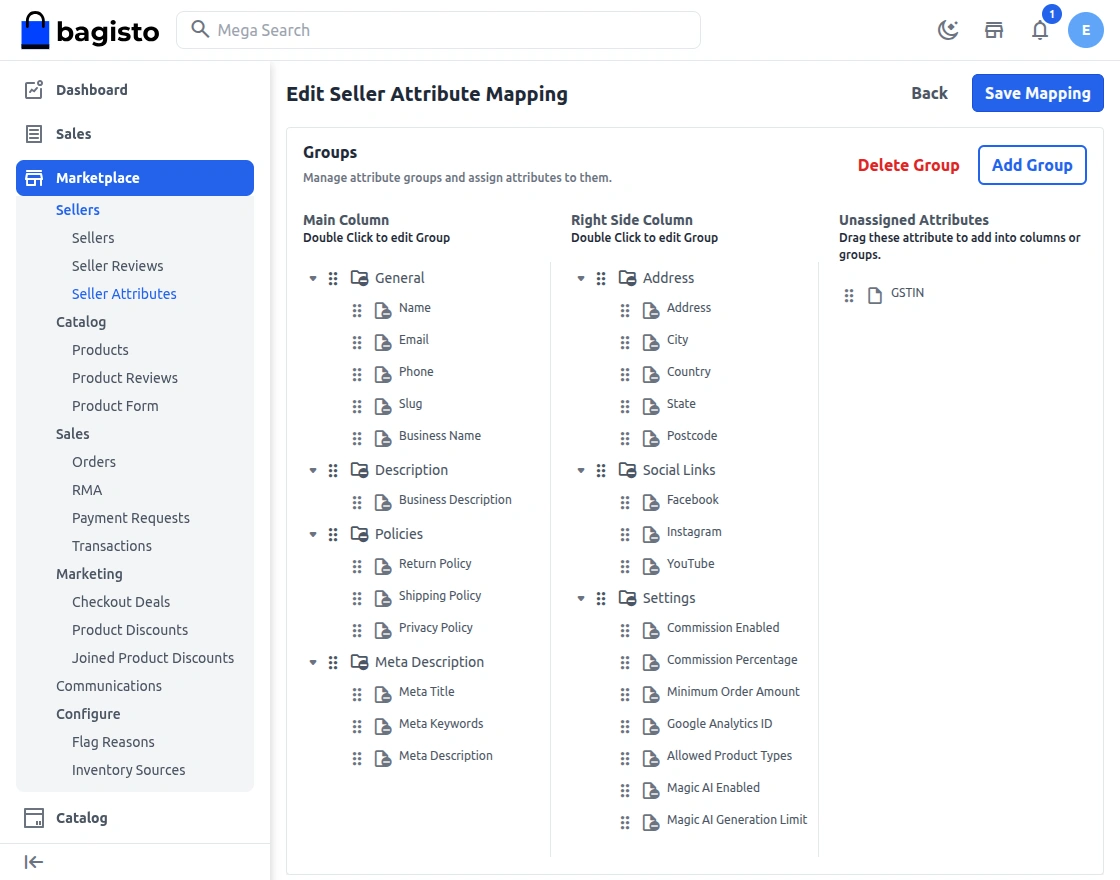
Step 1: Create the Attributes.
Step 2: Next, map the attributes by dragging and dropping the ‘Mapping’ button and placing them in the correct group.
Seller Dashboard
Now the seller can use their separate dashboard to perform various seller actions. They will open the marketplace and click on the open shop button.


It will navigate you to the seller registration page to Sign up as a seller.
Now the customer can directly create their seller account by entering their details, they also need to provide their Shop URL.
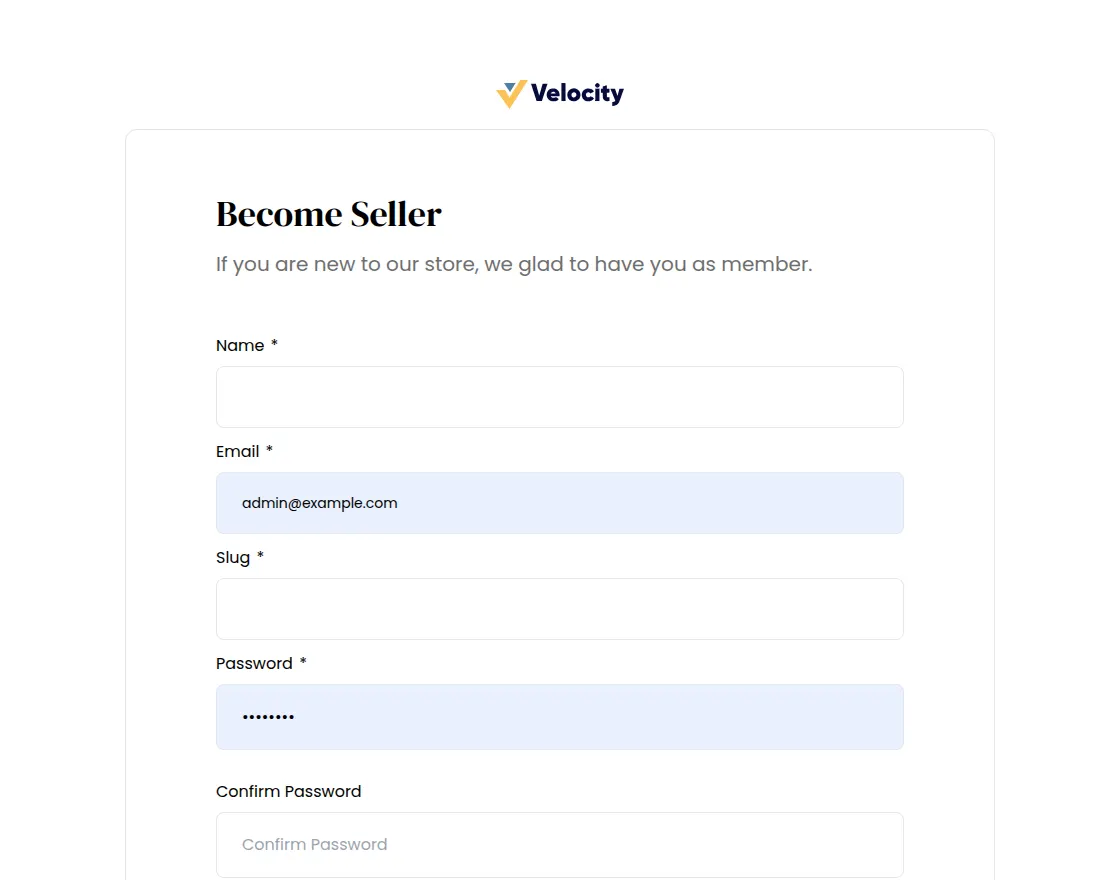
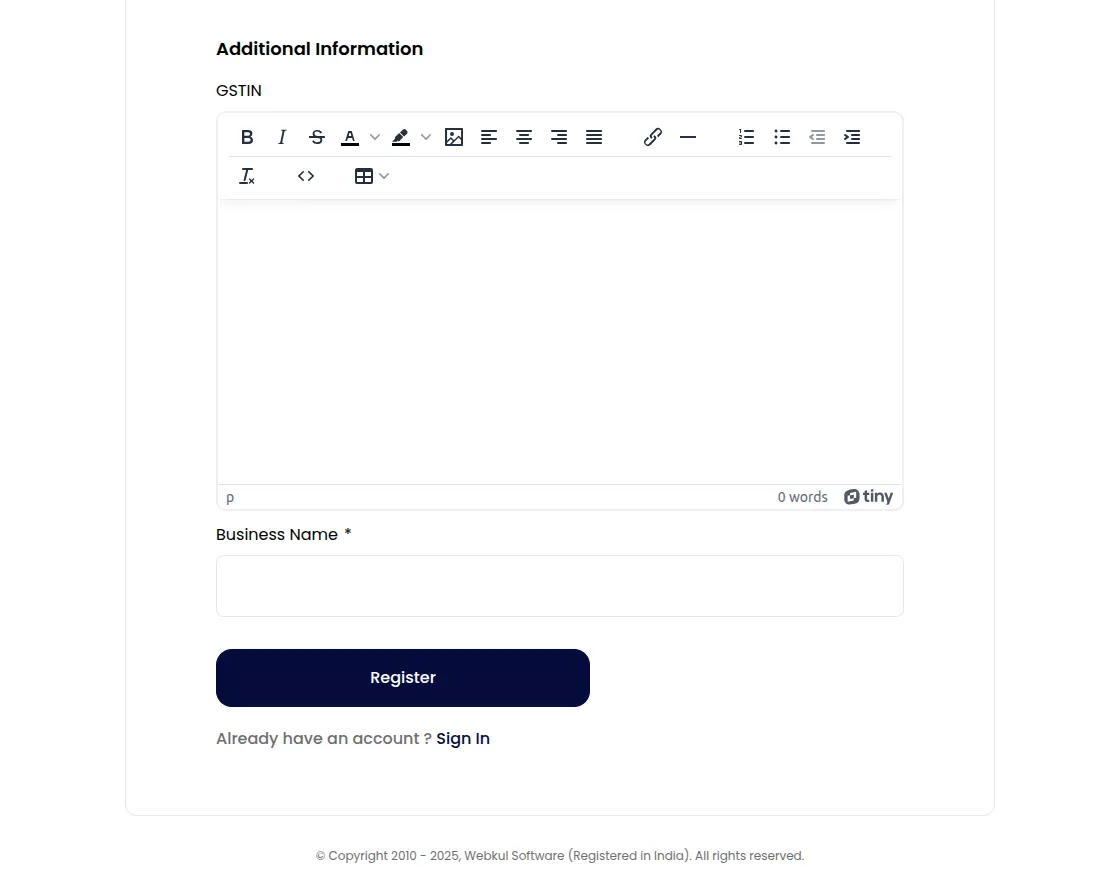
Once you register your seller account will be created and you can log in to the seller dashboard by clicking on the sign-in button.

Allowed Product Type
By default in the seller profile, when creating a new product seller can see 7 products i.e. Simple, configurable, Virtual, Grouped, Downloadable, Booking and Bundle products.
From the admin end in this section, if the admin allows any other product, the seller can sell the same.
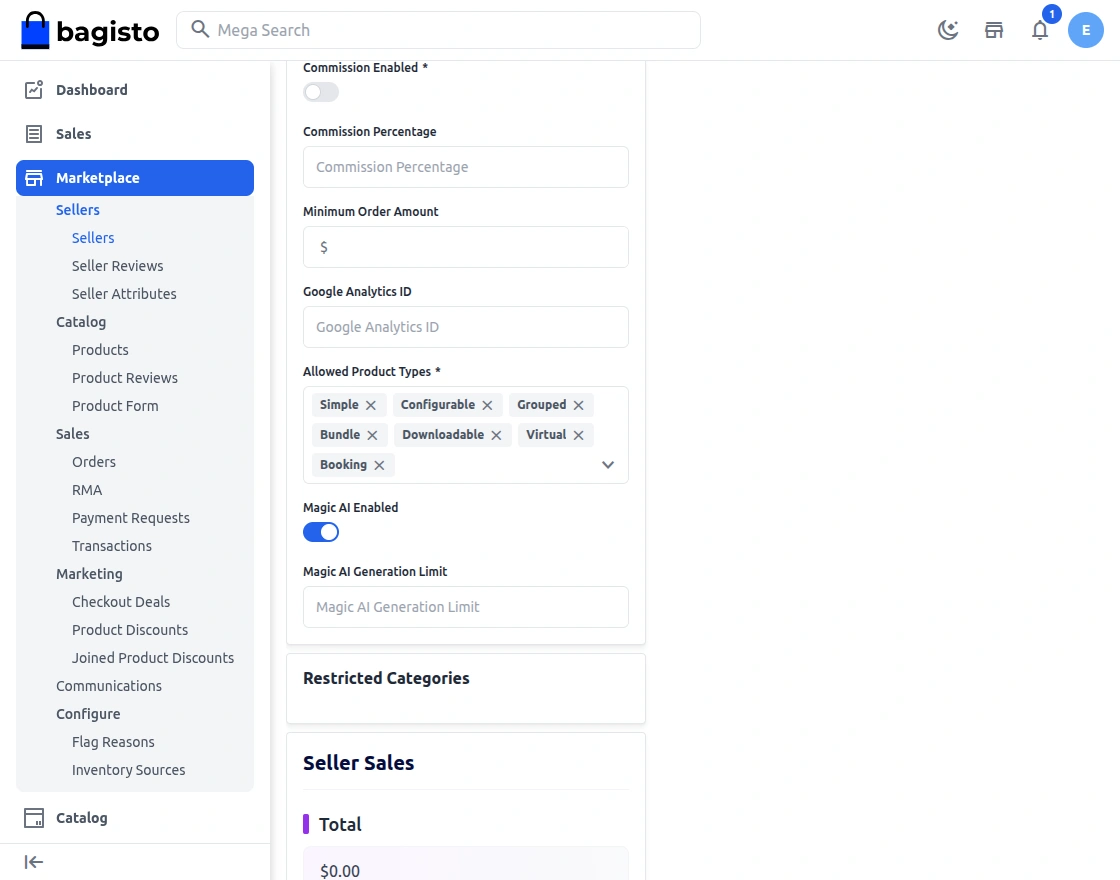
The admin can set separate commission percentages for any particular seller.
Suspended Settings
The Seller Suspended Settings allow administrators to control the behaviour of a seller’s account when it is suspended due to policy violations, non-compliance, or manual action.
Seller Commission
Click on the edit sellers there you will find the commission per unit option enter the amount in percentage and it will be set for that seller.
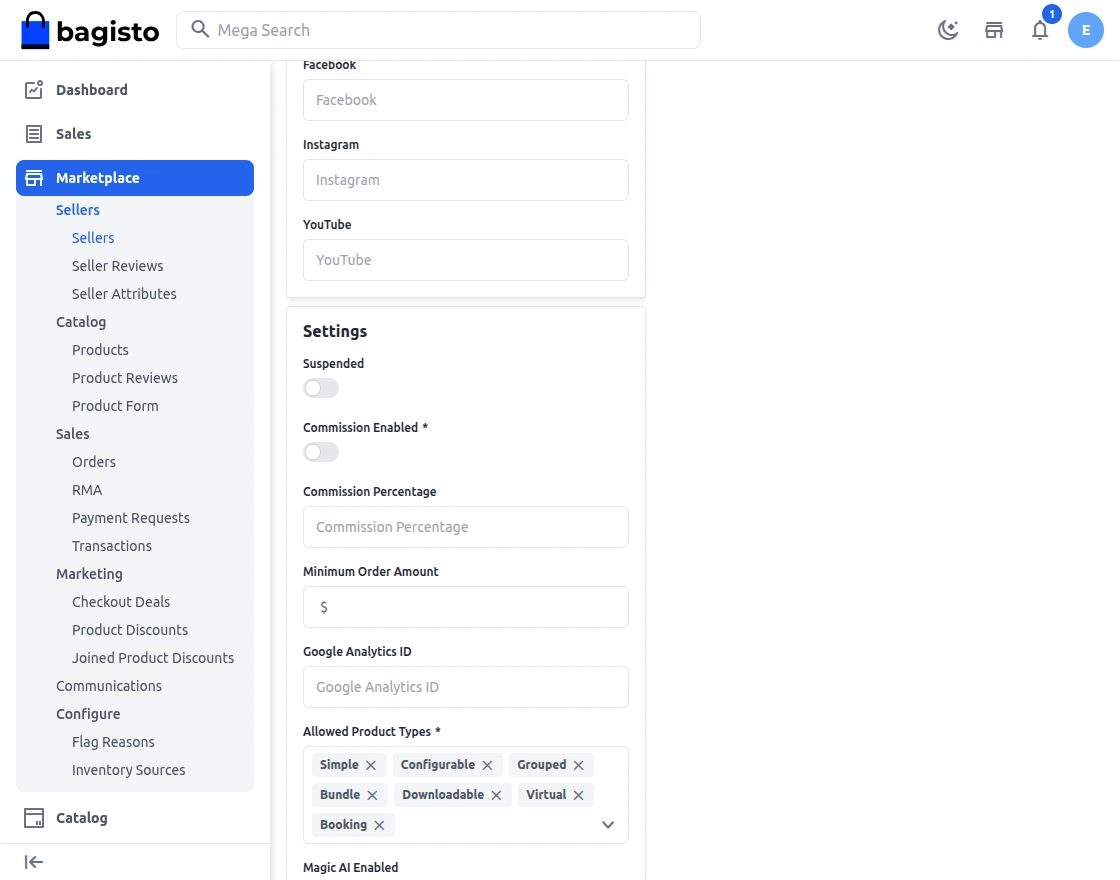
Minimum Order Amount Settings
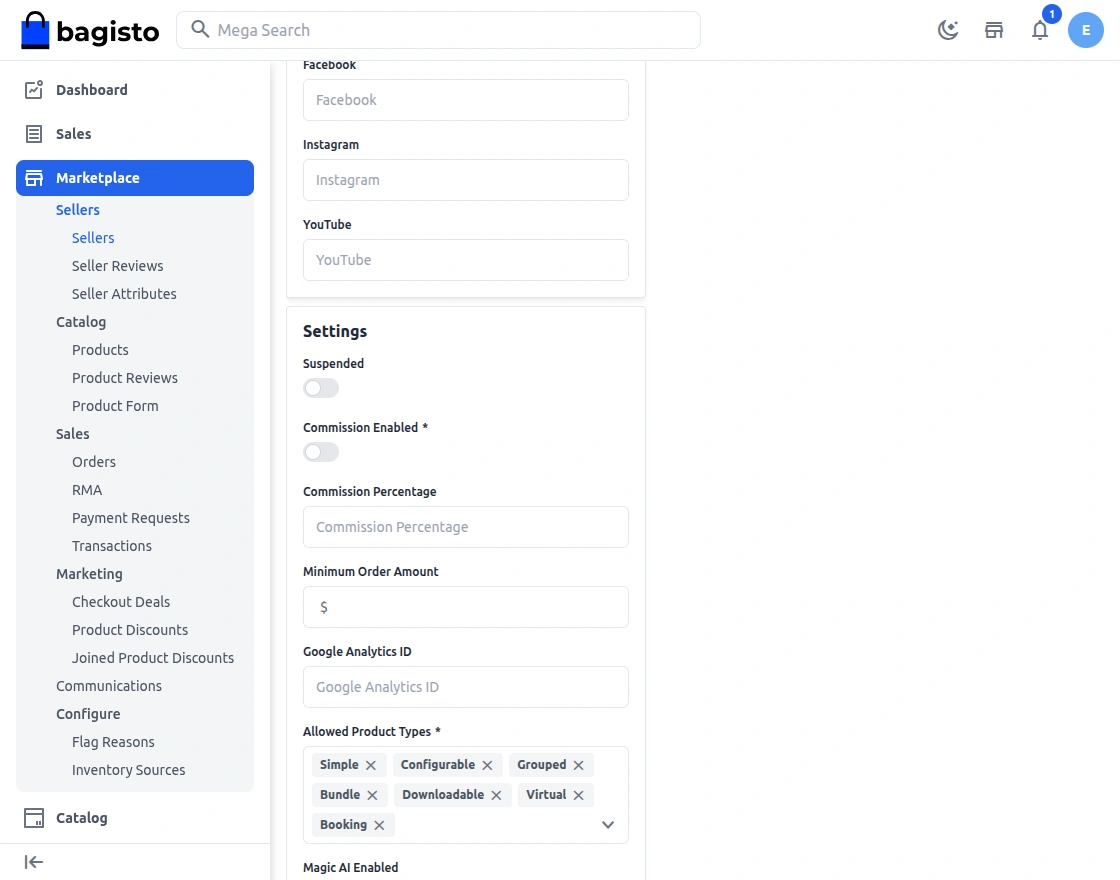
If the admin enabled this feature then the admin and seller both can set the minimum limit of order price to check out from the cart by the customers.
Google Analytics
Sellers can enter their own Google Analytics ID from their Shop Profile. Once set, the tracking tag is automatically embedded on that seller’s public shop page.
Products
Here you can see the list of products as created by the sellers. Based on the setting that you have done for Product Approval in configuration.
the status of the seller will also be shown here.
Seller will be able to sell those products only which are approved by the admin.
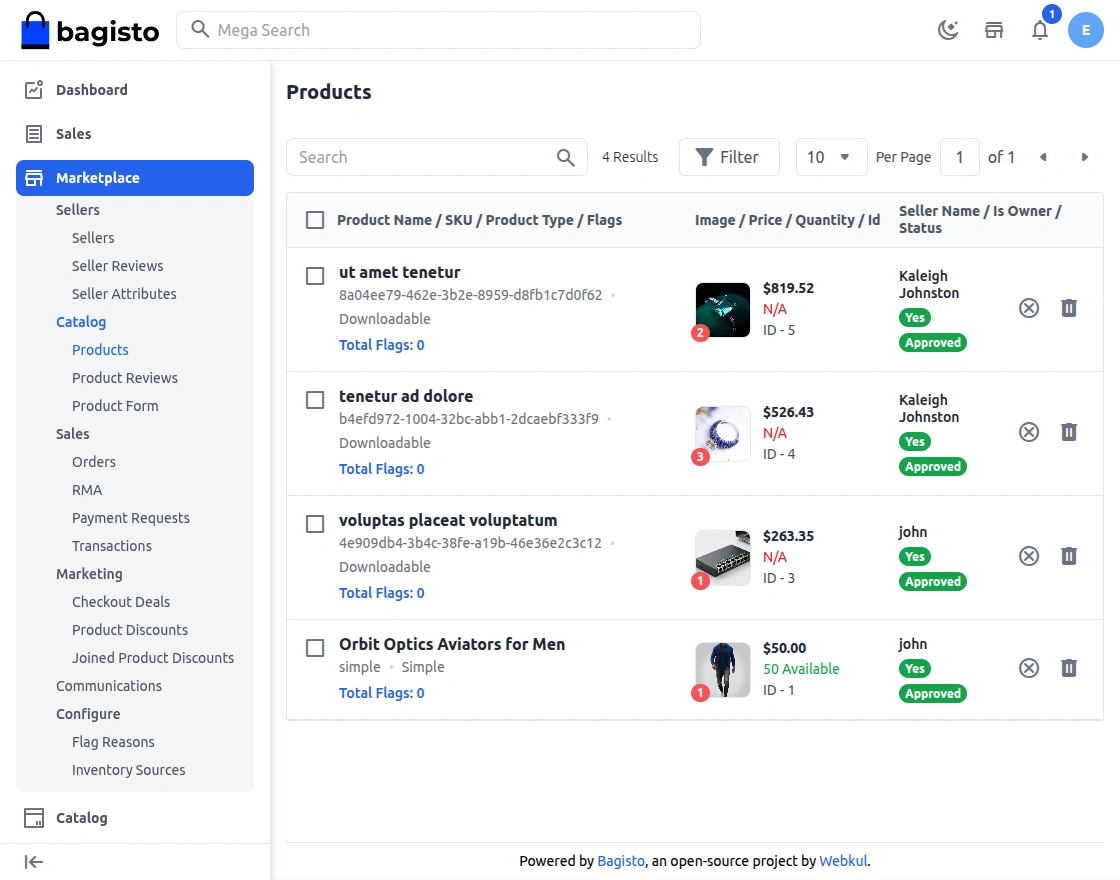
You can check the product for which you want to make any changes in the status and select the option to update or delete from the drop-down.
After selecting Update, you can further choose to Approve or Disapprove the Product.
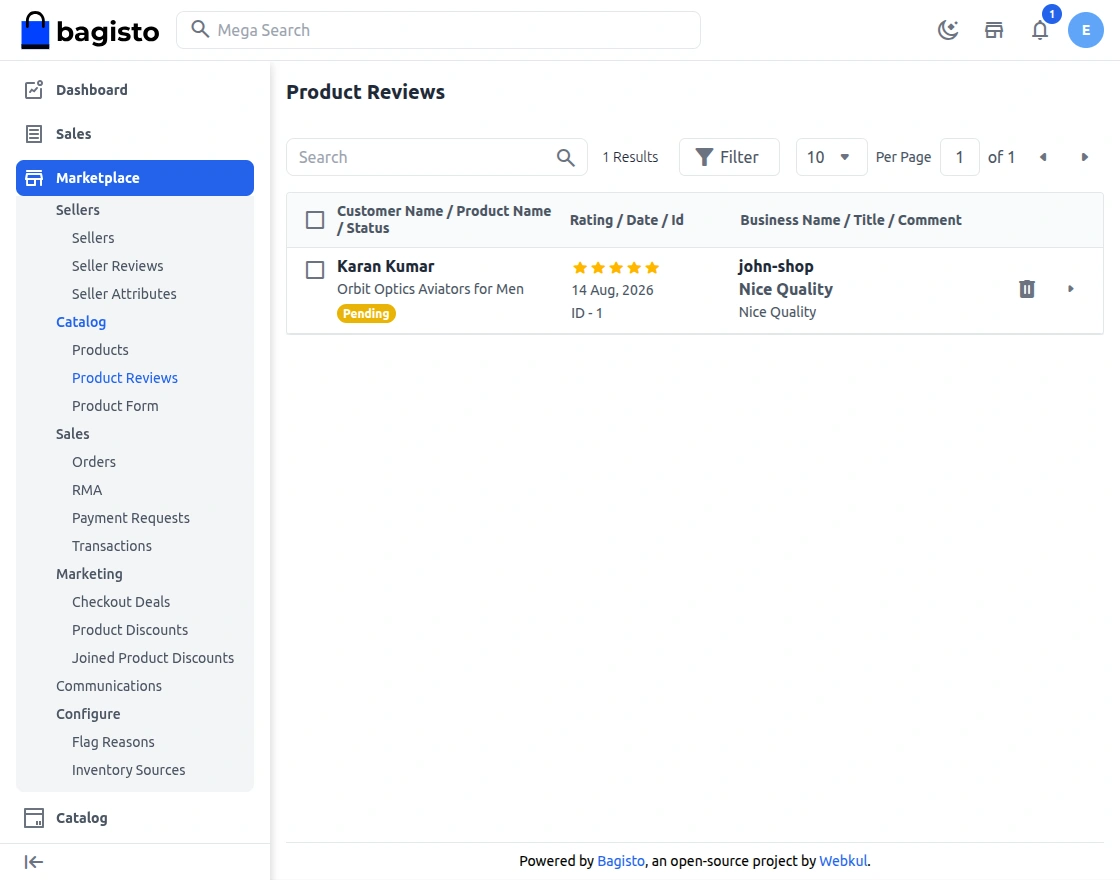
Product Reviews
From here the admin can find the reviews as shared by the customer for the products. By default, the status of the reviews remains unapproved.
Product Form
Choose how the product form appears to sellers for each attribute family, and the order of its steps. This affects only the seller product form — the admin product form is unchanged.
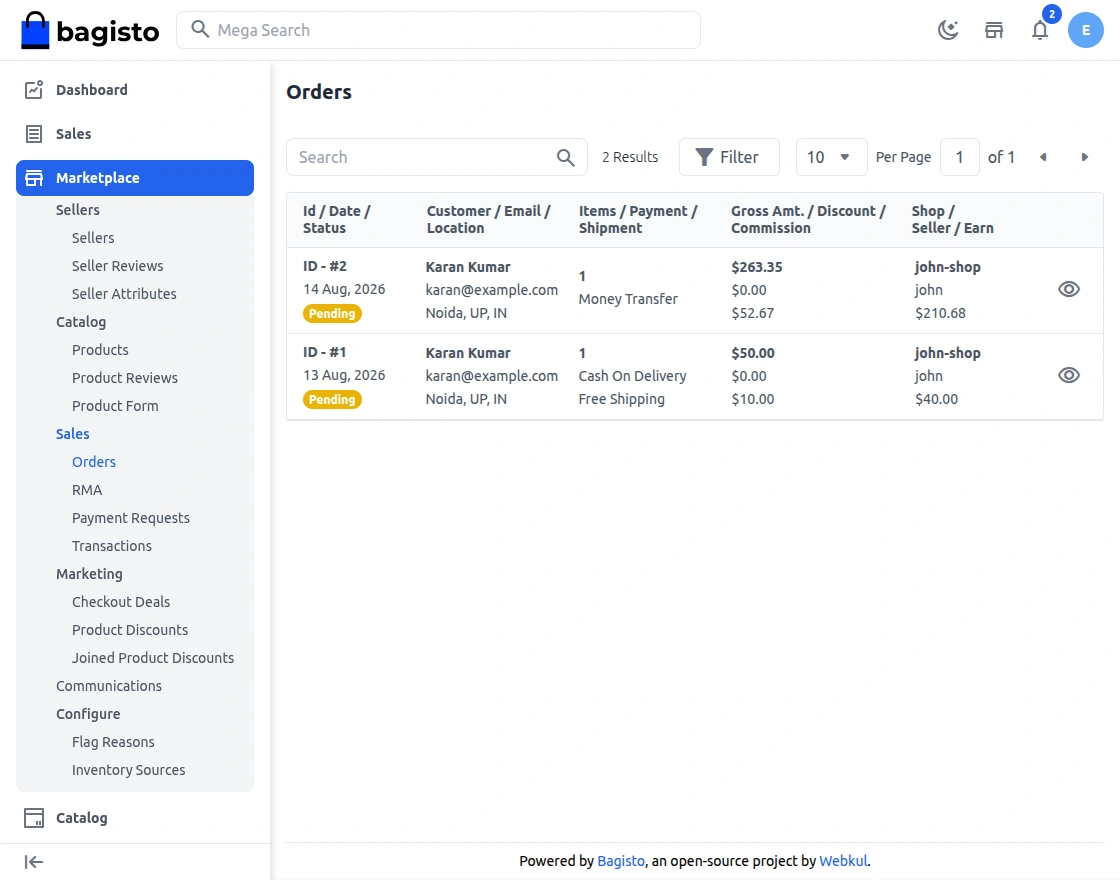
Orders
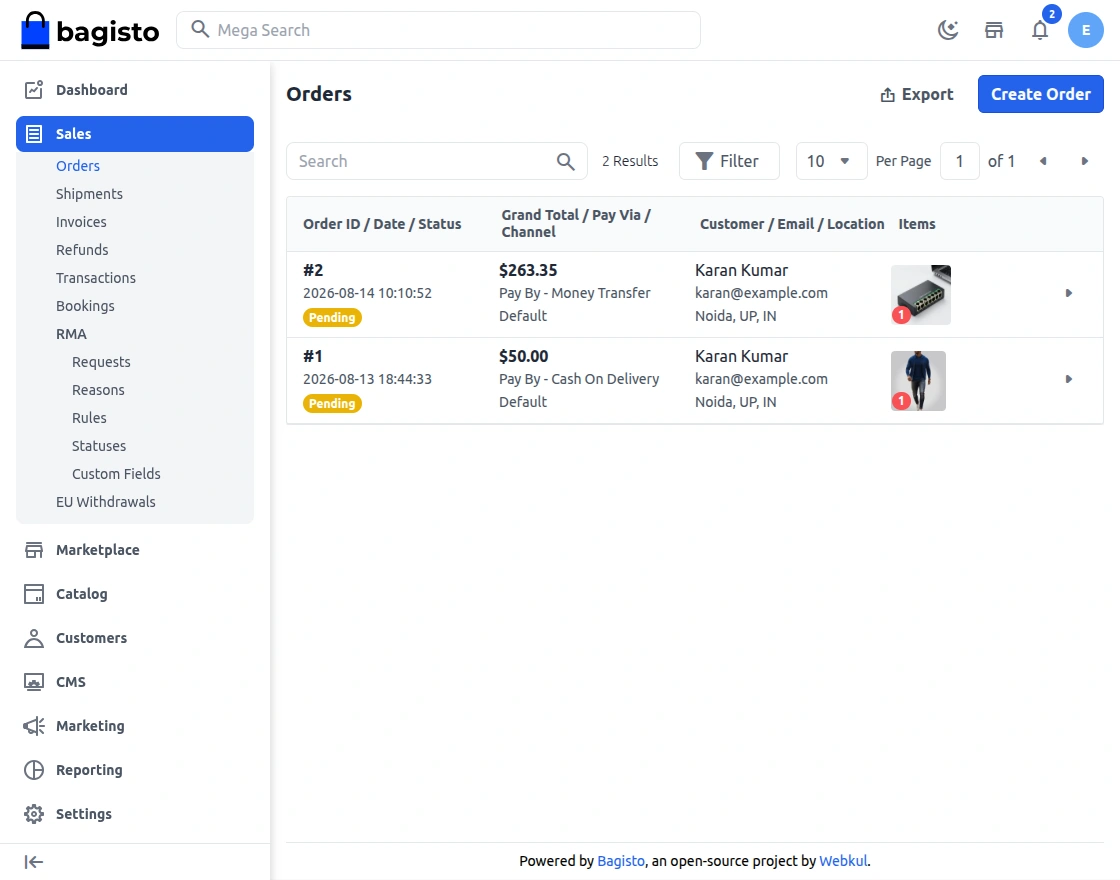
Here you can see the list of orders made by the customers on your website for the products as offered by the sellers with their status as Completed or Pending.
The admin can view the order details by clicking on the eye icon.
Here, you will get the payment details regarding the product. Next, to generate the invoice, click the invoice button.
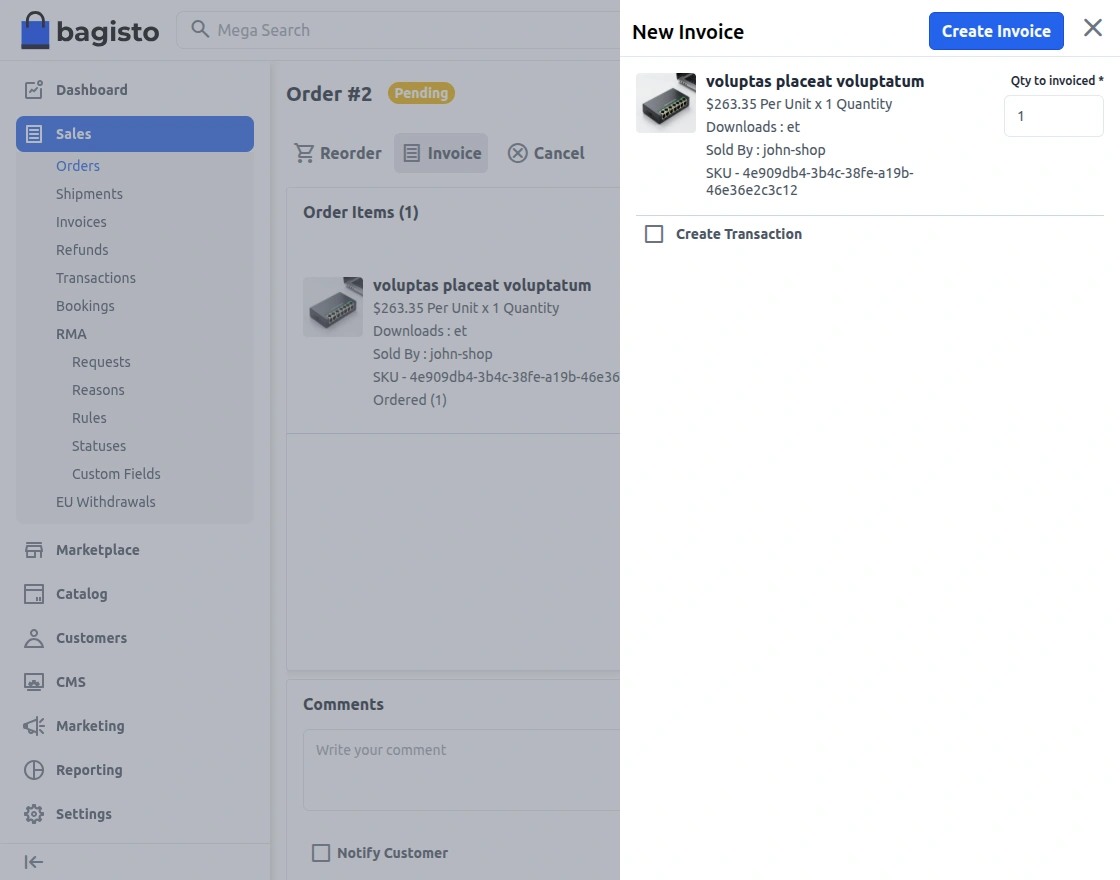
If the order is pending then click on the invoice button and add the quantity of the product for which the invoice needs to be generated.
After entering the quantity to invoice, click on the Create Invoice button at the top to generate the invoice.
Next, click the Ship or Refund button.
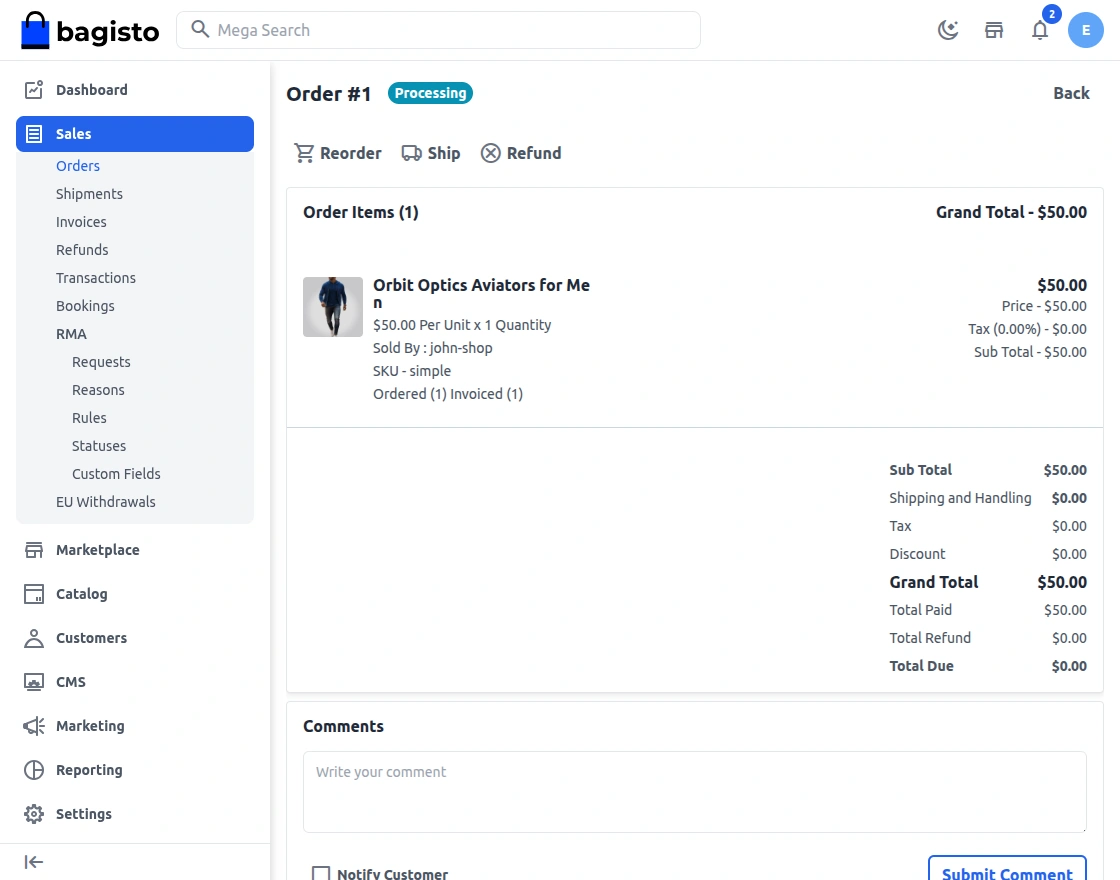
Admin can refund seller products after the invoice is generated for that particular product.
Shipment
On the Shipment page, you will find the details regarding the shipment. Number of the quantity ordered and order information.
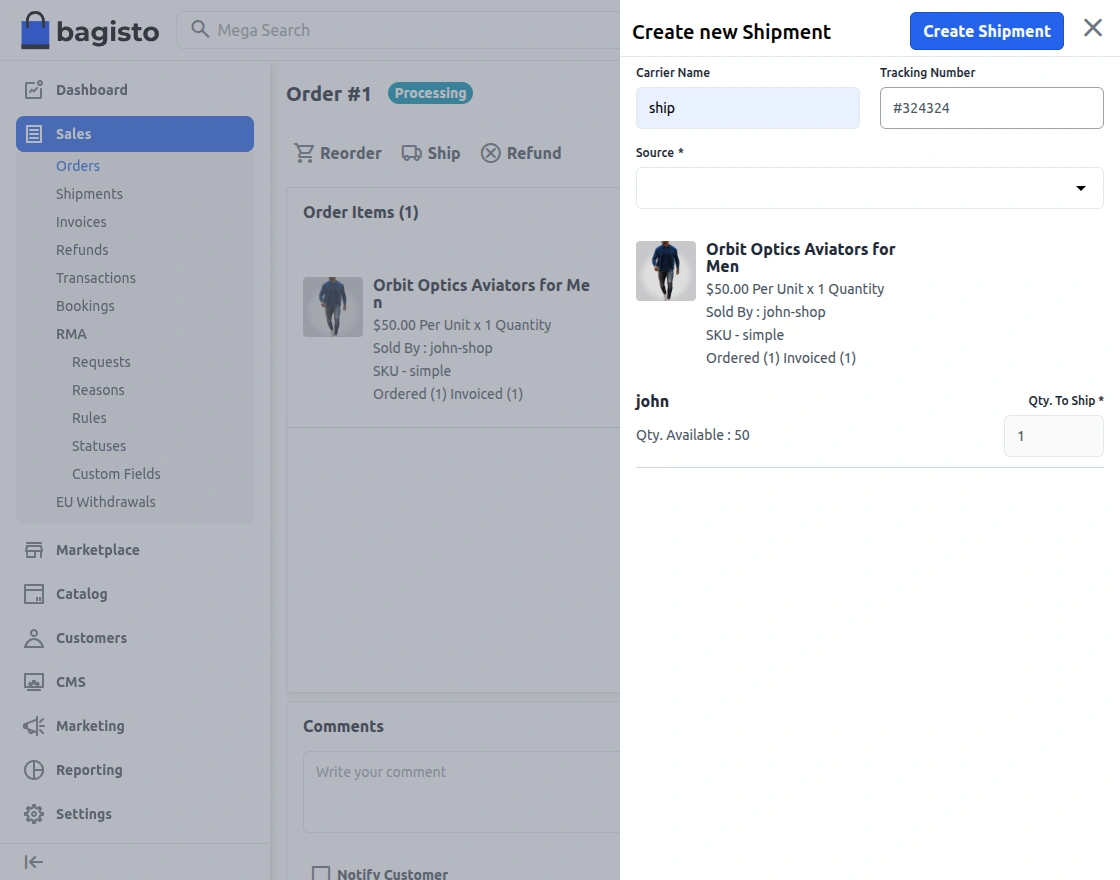
When a seller creates that shipment, they also pick a fulfilment carrier for the parcel. The built-in Manual carrier works out of the box — the seller types the carrier name and tracking number themselves. The admin can enable additional carrier integrations from Marketplace >> Configuration >> Fulfilment Carriers; a carrier with more capabilities can also generate shipping labels, offer pickup scheduling, and report tracking status automatically. This is separate from the shipping methods customers see at checkout.
Invoices
From this option, the admin can see the list of invoices created up til now for the products by the seller.
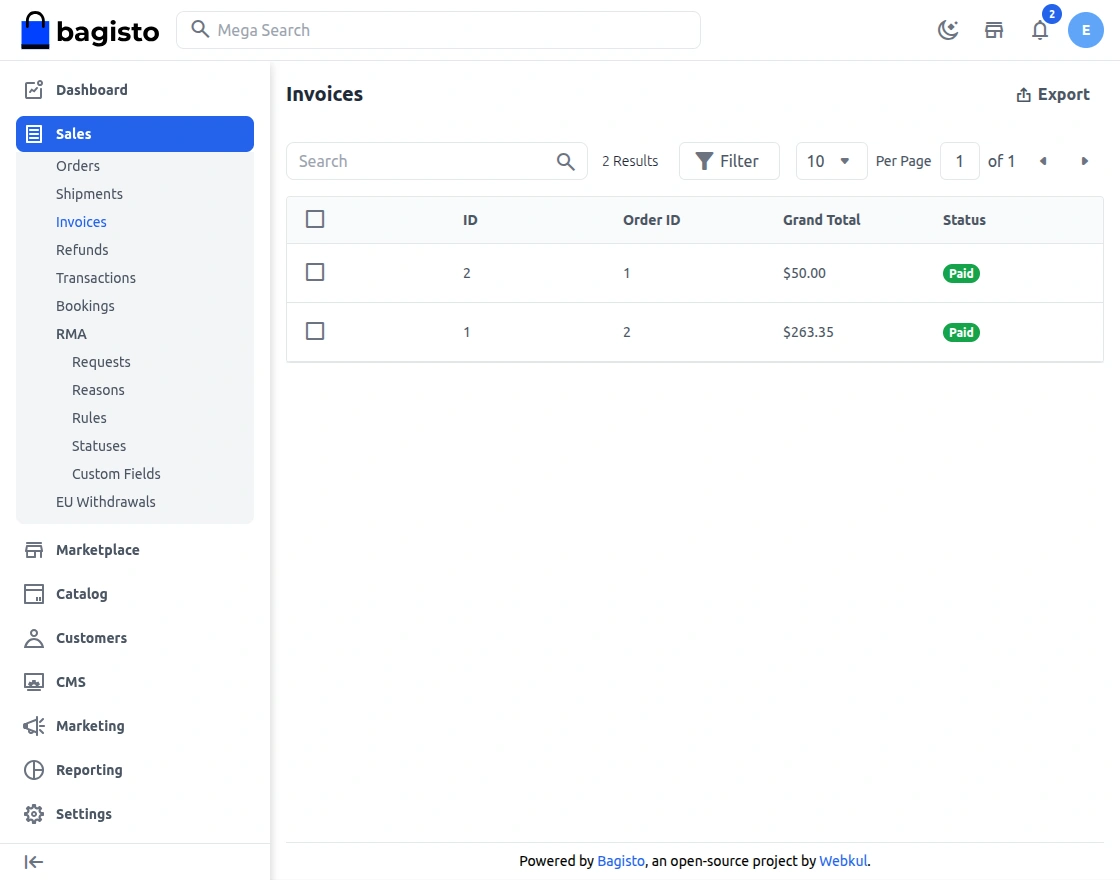
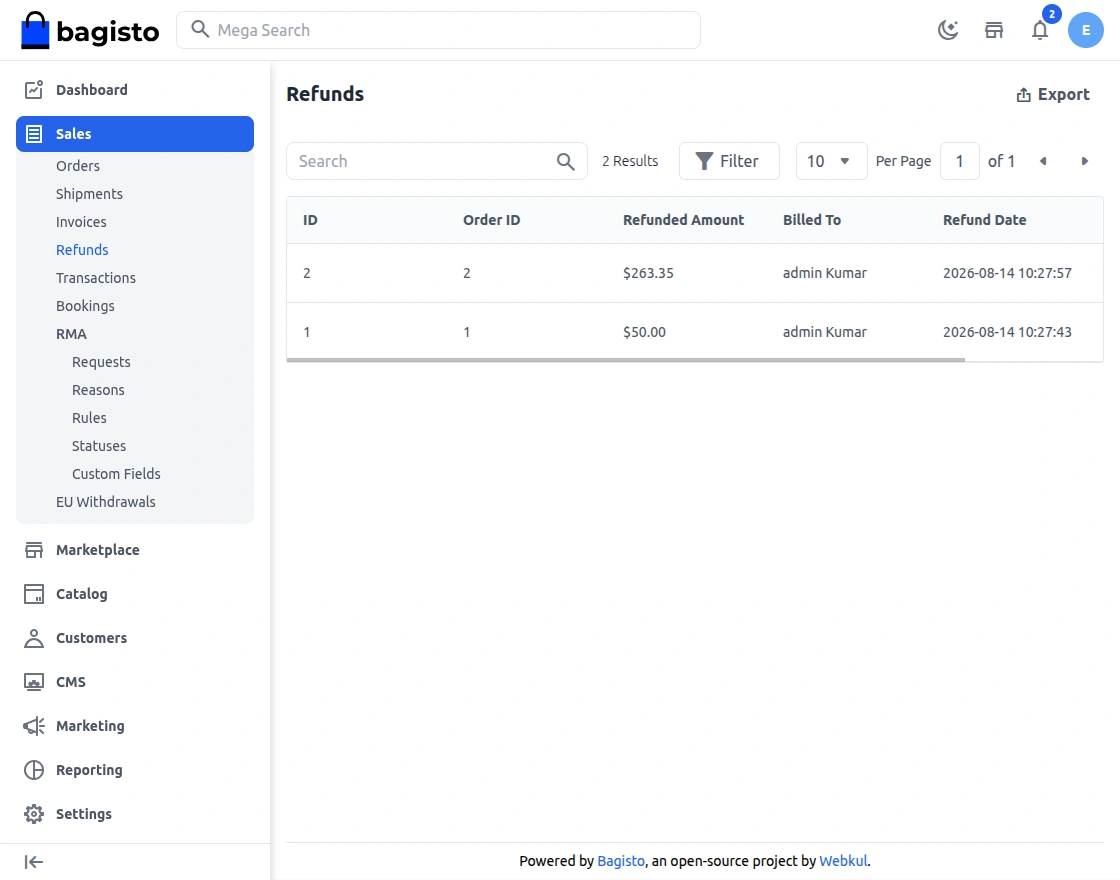
Refunds
A list of refunds that are initiated by the seller or by the admin is mentioned here:
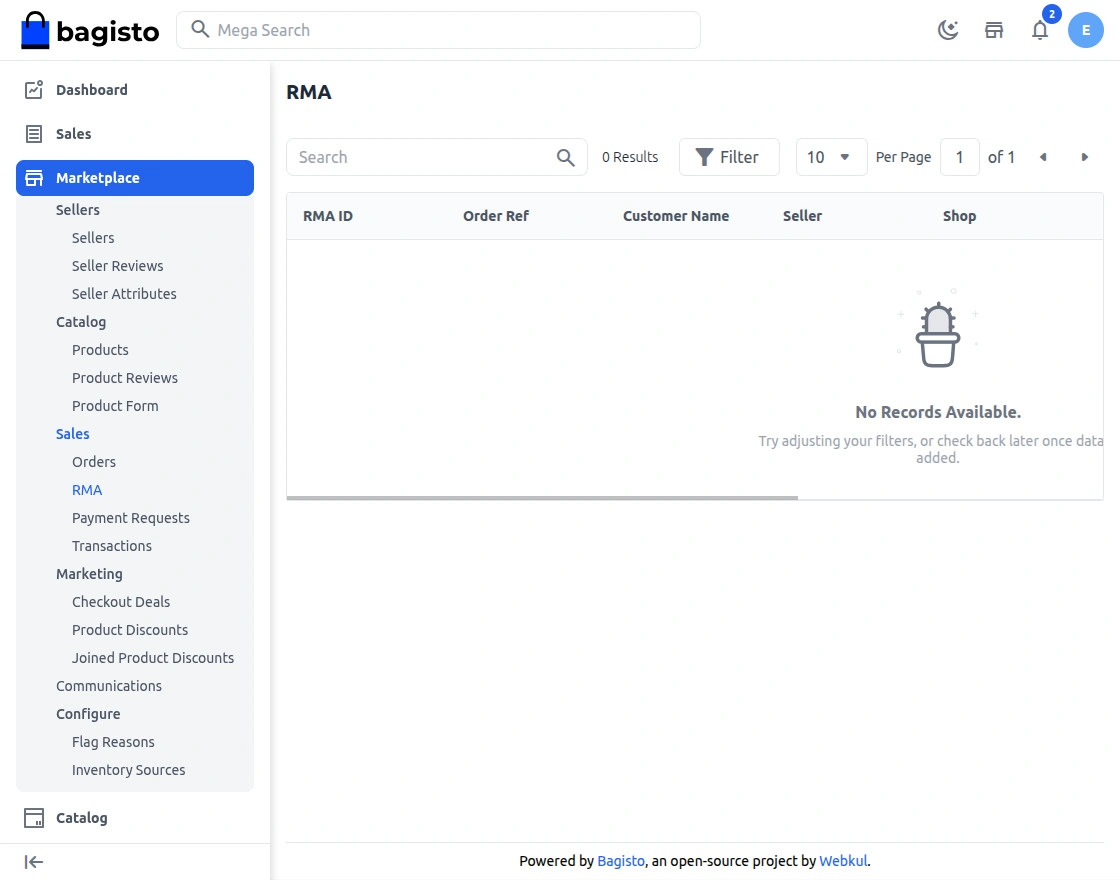
RMA
Now, the Admin can navigate to RMA in the Marketplace section. After clicking on RMA there are some RMA request lists.
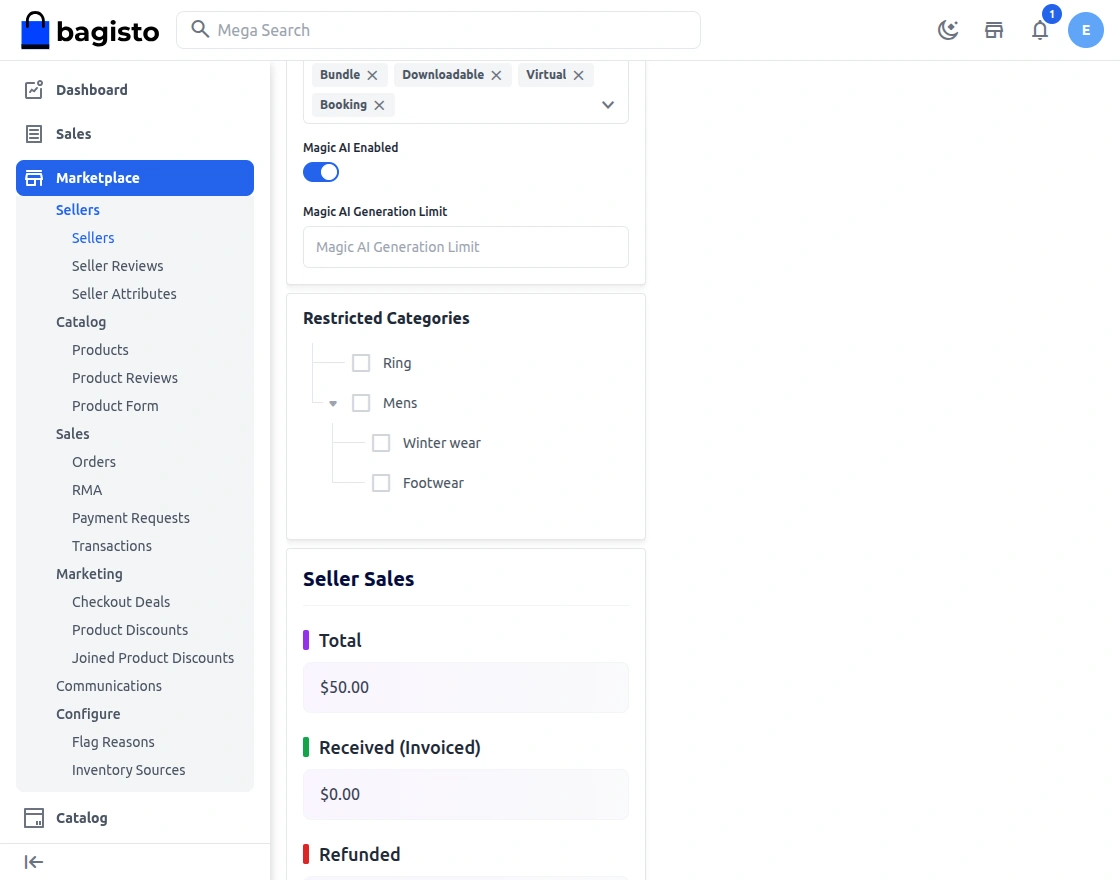
Restricted Category
The admin can restrict sellers from adding products to categories in which they are not allowed to sell.
Payment Request
Payment requests initiated by the seller are listed here. The admin can check all the payment requests here:
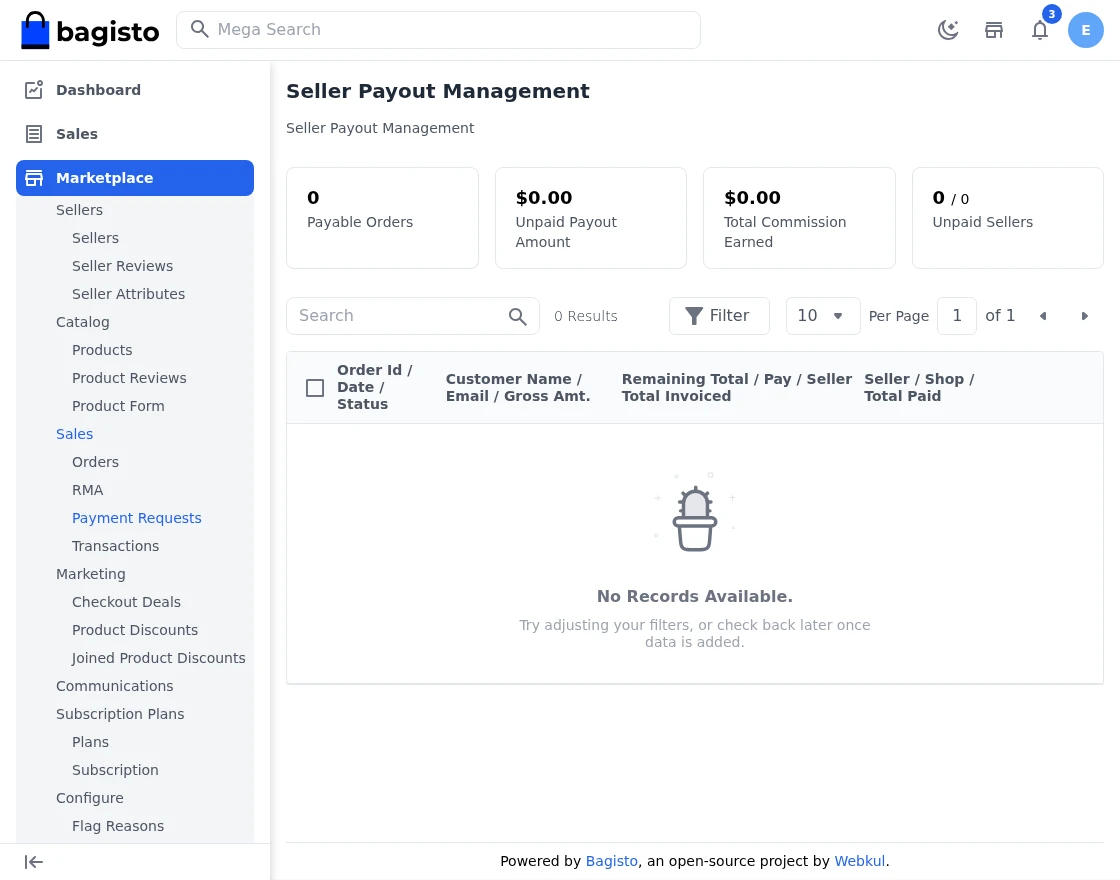
Step-by-Step: Release a Payment Request
- Go to Marketplace >> Sales >> Payment Requests.
- Payment requests initiated by the sellers are listed here with their status.
- Select the request and approve it to mark the payout as due for the seller.
- Use the Bulk Payout Management section to review, approve, and release payments for multiple sellers at once.
Bulk Payout Management
The system allows admins to review, approve, and release payments for multiple sellers at once, ensuring faster and more efficient transaction management.
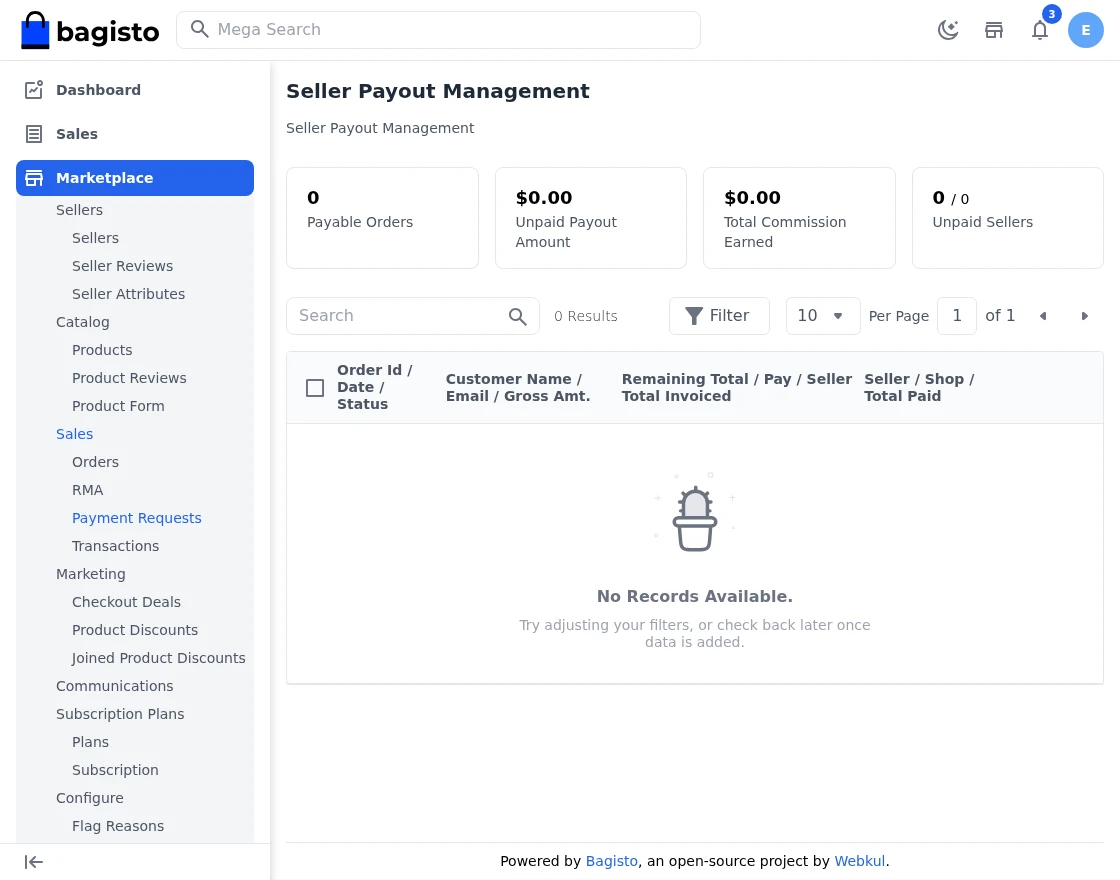
Step-by-Step: Manage Bulk Payouts
- Open Marketplace >> Sales >> Payment Requests >> Bulk Payout Management.
- Select the sellers whose payment requests you want to settle in one go.
- Review the amounts, then approve the selected requests.
- Release the payments; the payout transactions are recorded in Sales >> Transactions.
Transactions
Here you will find the list of payout transactions as done by the Admin to the Sellers, also with the amount paid.
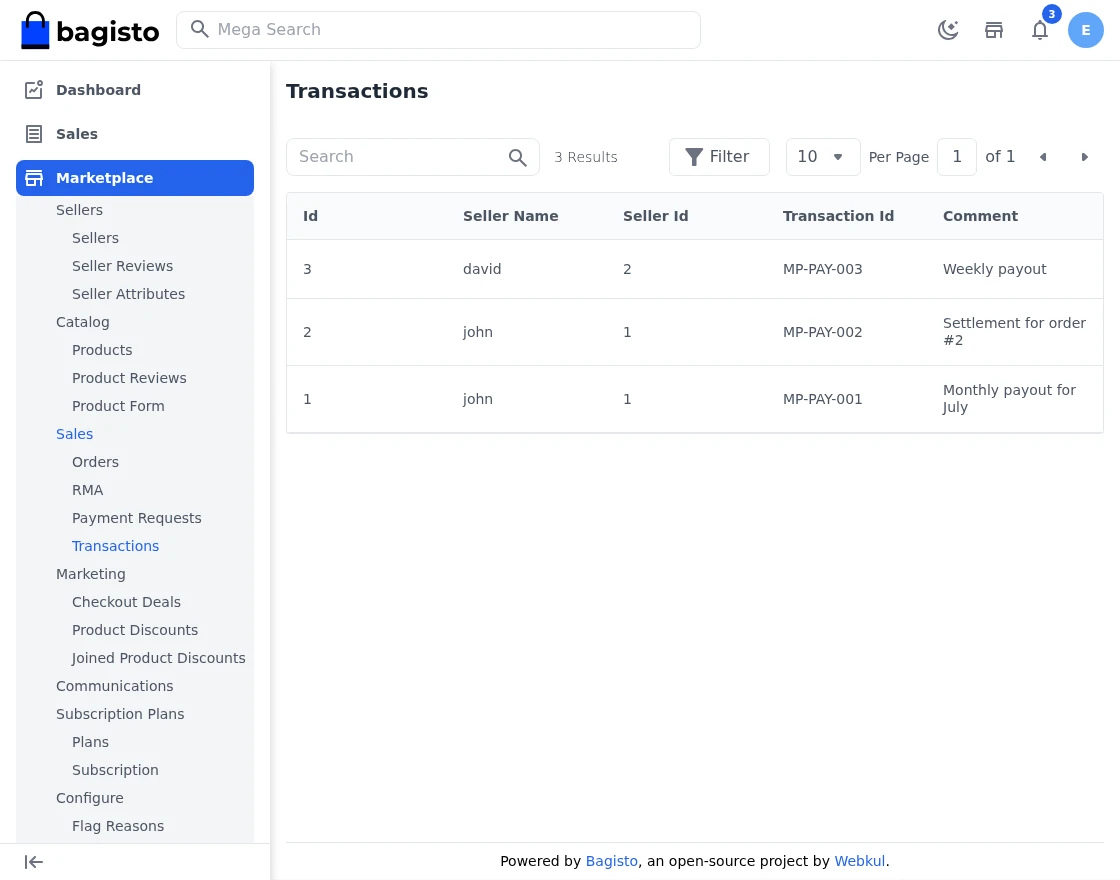
Step-by-Step: View Payout Transactions
- Navigate to Marketplace >> Sales >> Transactions.
- Here you will find the list of payout transactions made by the Admin to the Sellers, including the amount paid to each seller.
- Search and filter transactions by seller, amount, or date as needed.
Marketing
Under the Marketing group, the admin can manage the promotional campaigns created by sellers — checkout deals, product discounts, and the product discounts that sellers have joined. This group is further divided into three sections: Checkout Deals, Product Discounts, and Joined Product Discounts.
Checkout Deals
Here you will find all the checkout deals (cart rules) that have been created by the sellers on the marketplace. Each deal lists its name, the seller who created it, its status (active or inactive), the priority (sort order) and the validity period (starts from / ends till).
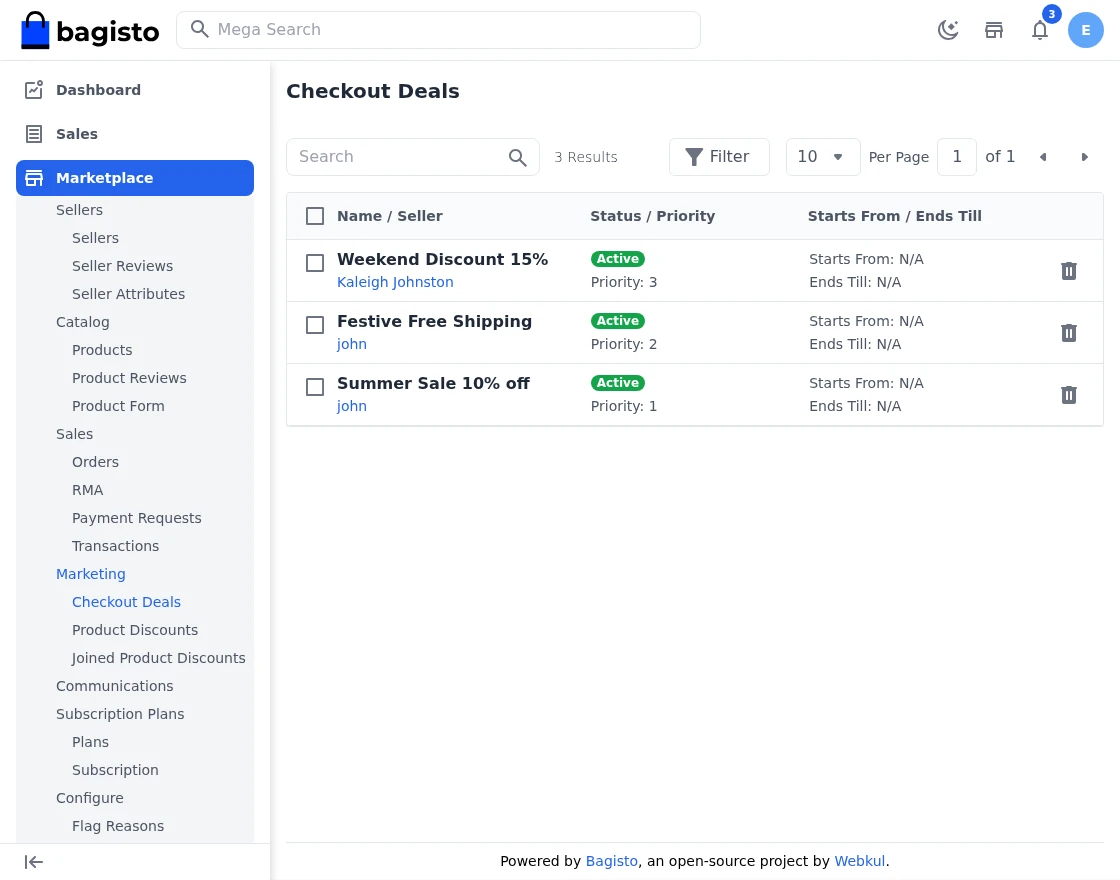
From here the admin can directly navigate to a seller’s profile by clicking the seller name, and can delete a checkout deal or use the mass delete action to remove multiple deals at once.
Step-by-Step: Moderate Seller Checkout Deals
- Go to Marketplace >> Marketing >> Checkout Deals.
- All checkout deals (cart rules) created by sellers are listed with name, seller, status, priority, and validity period.
- Click the seller name to jump directly to that seller’s profile.
- Delete a deal with the delete action, or use Mass Delete to remove several deals at once.
Product Discounts
All the product discounts (catalog rules) that have been created by the sellers are listed here. Similar to checkout deals, each record shows the name, seller, status, priority, and the validity period.
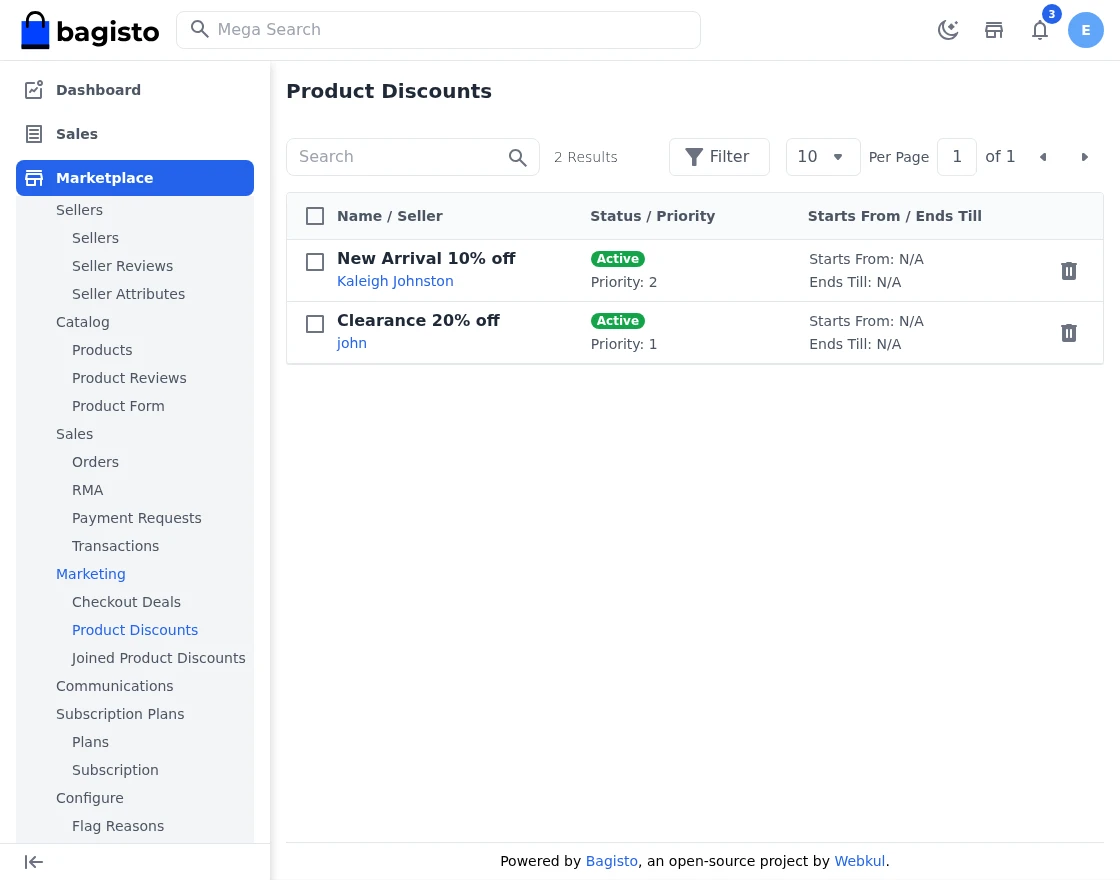
The admin can delete an individual product discount or use the mass delete option to remove several discounts in a single action.
Step-by-Step: Moderate Seller Product Discounts
- Navigate to Marketplace >> Marketing >> Product Discounts.
- All product discounts (catalog rules) created by sellers are listed here.
- Delete a single discount or use Mass Delete to remove multiple discounts at once.
Joined Product Discounts
When the admin creates a product discount and sellers join it, the enrollment is tracked here. For every record, you can see the name of the discount, the participant seller, the join status (approved, pending, or disapproved), the discount status, priority, and the validity period.
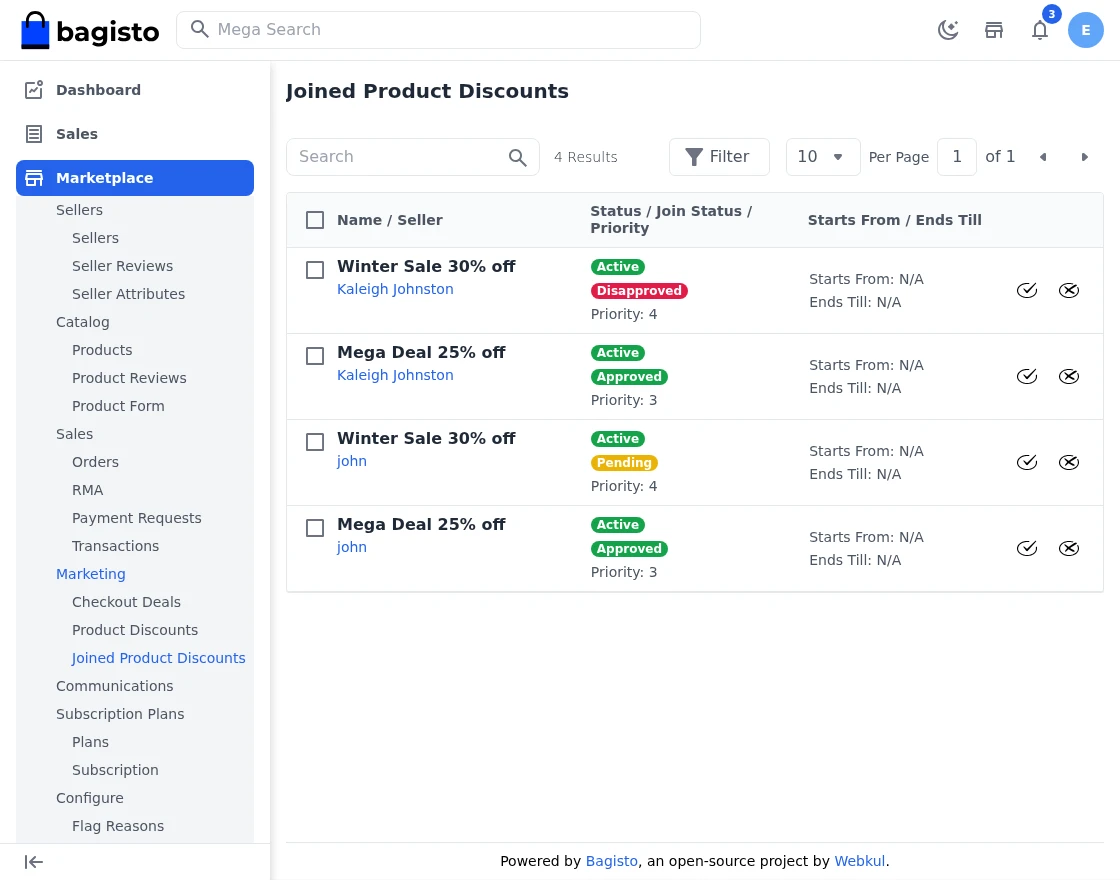
From here the admin can approve or disapprove a seller’s request to join the discount, either individually or in bulk with the mass update action.
Whether sellers can join admin product discounts at all, and whether a join request needs this manual approval or is approved automatically, is controlled from Marketplace >> Configuration >> Marketing.
Step-by-Step: Approve Joined Product Discounts
- Go to Marketplace >> Marketing >> Joined Product Discounts.
- Enrollments of sellers into admin-created product discounts are listed with their Join Status (approved, pending, or disapproved).
- Approve or disapprove a seller’s request individually with the action icons.
- Use the Mass Update action to approve/disapprove multiple enrollments at once.
Flag Reasons
Check the list of created flag reasons for seller profiles.
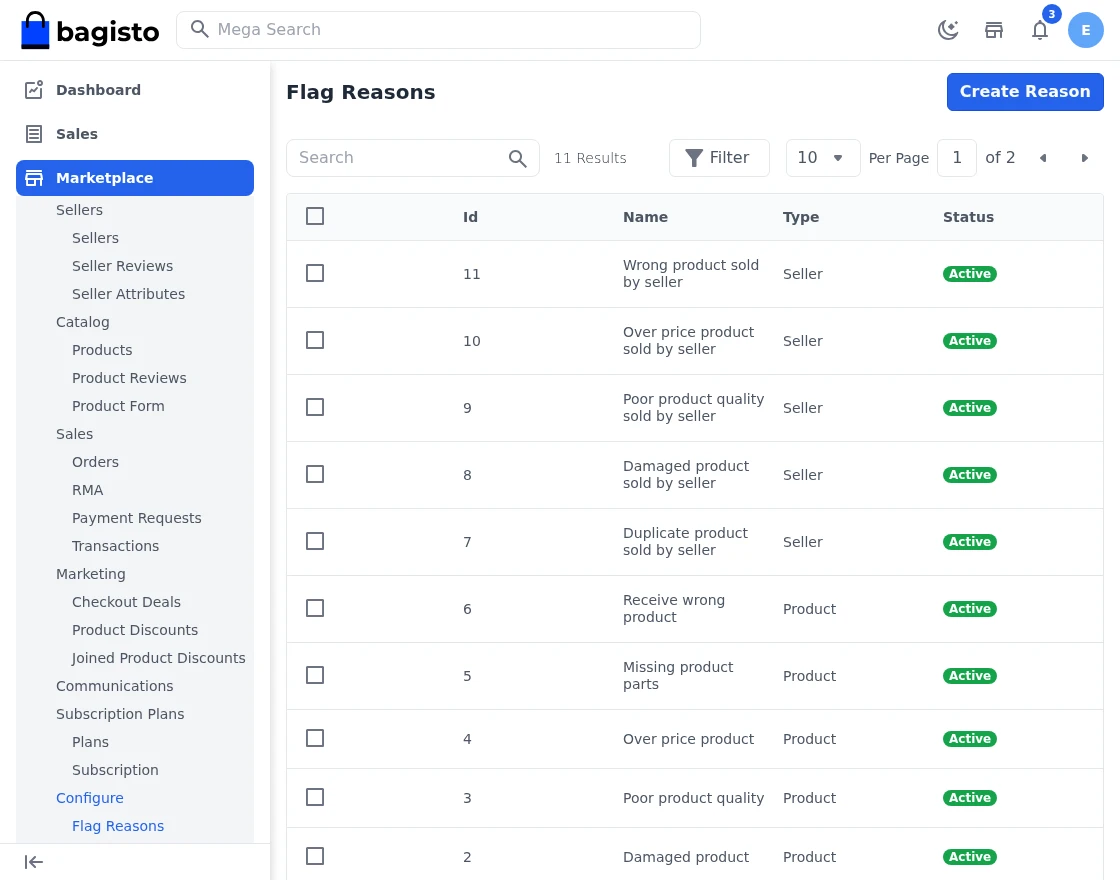
Select a Seller from the dropdown for which you need to raise the flag.
Enable: Here you can enable or disable the flag reasons features for Marketplace by selecting it Yes or No.
Reasons: Enter the reason for raising the seller flag.
Once you click on Reason you will be able to see the reasons and select accordingly.
Step-by-Step: Create a Flag Reason
- Navigate to Marketplace >> Configuration >> Flag Reasons.
- Click Create Flag Reason.
- Select the flag Type (Product or Seller).
- Enter the Admin Name (reason text) and set Enable to Yes/No.
- Save the reason. It now appears in the flag drop-down on the storefront.
Product Flag Reason
Enter the reason for raising the product flag. Once you click on Reason you will be able to see the reasons and select accordingly.
Step-by-Step: Flag a Product on the Storefront
- Open any product page on the storefront and click the Flag option.
- Click on the Reason drop-down to see all the flag reasons configured by the admin in Marketplace Configuration >> Flag Reasons.
- Select the most appropriate reason (Counterfeit, Damaged Product, Wrong Description, etc.).
- Submit the flag; the flagged product and its reason are reported to the admin for review.
Communications
Now Admin can directly have a communication with their sellers in Laravel Multi Vendor Marketplace as shown in the image below.
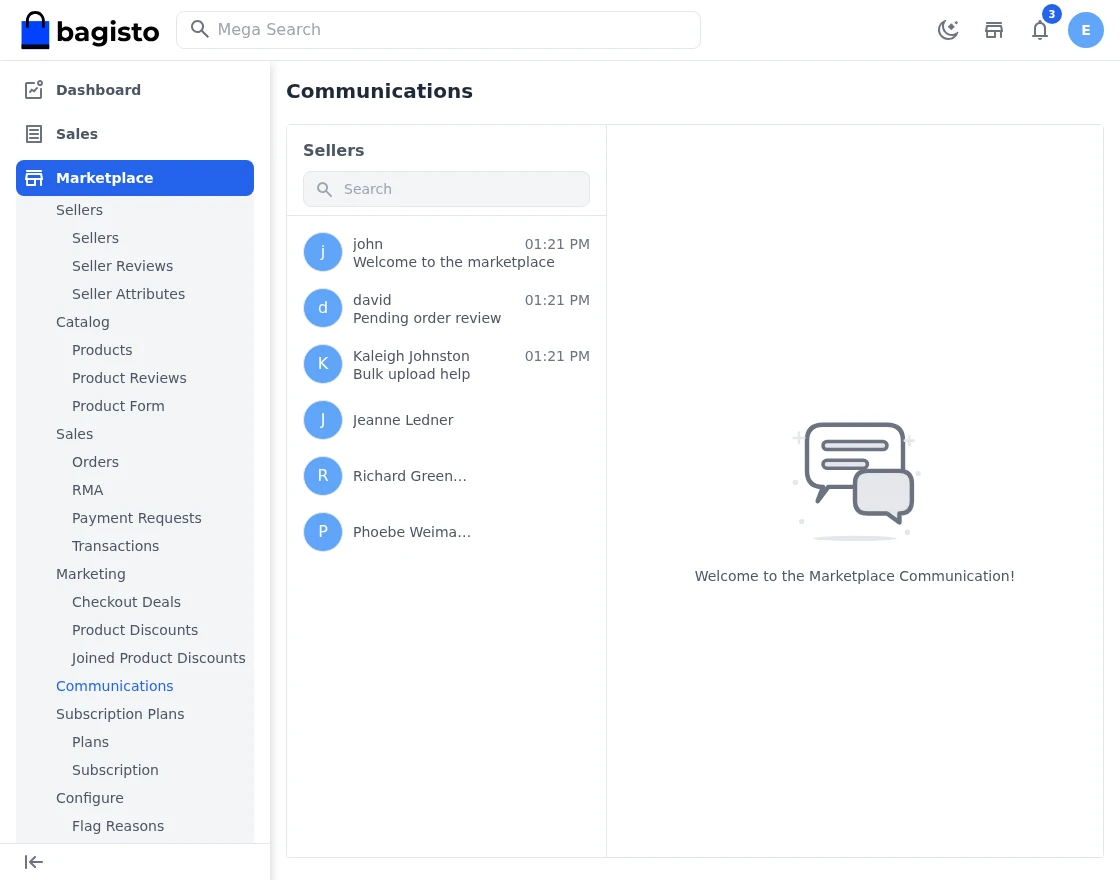
1) Admin can send files and sort out the chat history as shown in the image below.
2) The Admin can Block the Seller; after blocking, the seller can also see this in the Seller Communication section.
3) Admin can also Clear Chat History and Exit the Chat as well.
4) The Admin can also use the Search Bar to Search Messages; the text will get highlighted accordingly.
5. Enable direct customer-seller communication for product inquiries, order updates, support, and faster issue resolution.
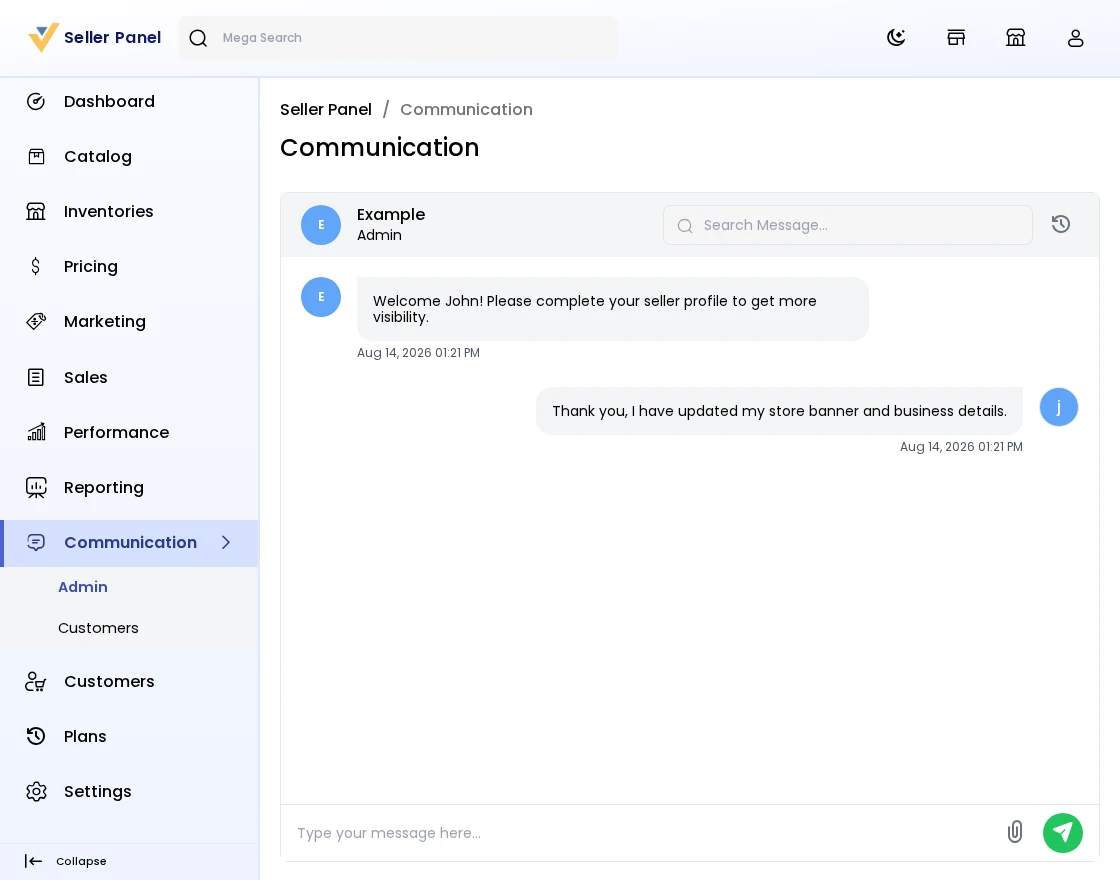
6. Sellers can directly reply to customer queries and share media files such as images or documents within the conversation for better clarity and communication.
Step-by-Step: Chat with a Seller
- Go to Marketplace >> Communications.
- Open the conversation thread for the seller you want to contact.
- Type your message and send it; you can also attach files.
- Use the Search Bar to search messages; matching text gets highlighted.
- Block a seller, Clear Chat History, or Exit the chat as needed.
Plans
Under Marketplace >> Plans, the admin creates the subscription plans that sellers choose from, and reviews the subscriptions sellers request.
Each plan has a name, a billing price (or is marked as the free/default plan), a duration in days, a Max Products and Max Staff limit, a commission percentage, the product types the plan allows the seller to sell, and either full permissions or a custom set of seller-panel menu permissions.
Under Subscriptions, every subscription a seller has requested is listed with its plan, seller, status, and validity period. The admin activates a pending subscription to approve it, or cancels it to reject or end it — individually or for several subscriptions at once with the mass-update action.
Step-by-Step: Create a Plan and Approve Subscriptions
- Go to Marketplace >> Plans and click Create Plan.
- Set the plan’s name, price (or mark it as the default/free plan), billing cycle, duration, Max Products, Max Staff, and commission percentage.
- Choose the product types this plan allows the seller to sell, and either All permissions or a Custom set of seller-panel permissions.
- Save the plan; it now appears as a card for sellers under Plans in the seller panel.
- Go to Marketplace >> Plans >> Subscriptions to review seller requests.
- Open a pending subscription and click Activate to approve it, or Cancel to reject it — or select several and use the mass-update action.
Inventory Sources
Admin can easily view the complete list of inventory sources created by sellers.
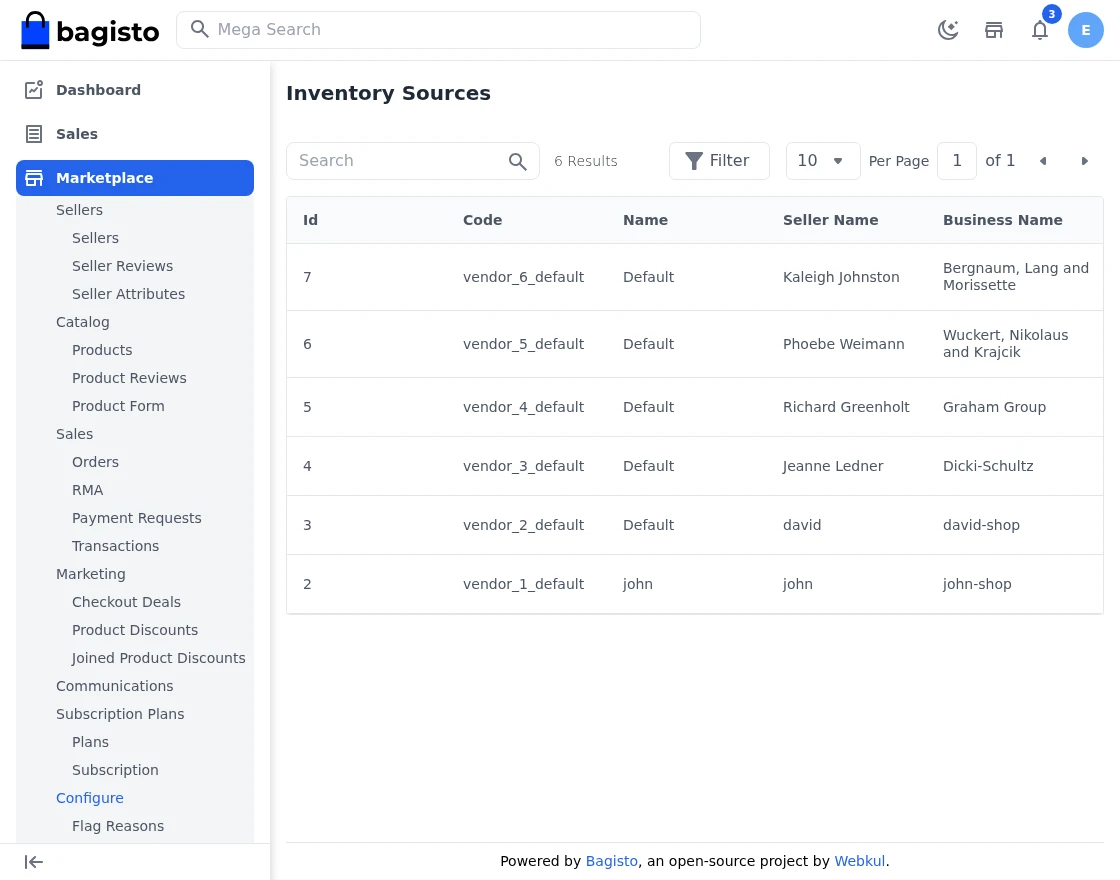
Step-by-Step: View Seller Inventory Sources
- Navigate to Marketplace >> Configuration >> Inventory Sources.
- Here the admin can view the complete list of inventory sources created by the sellers.
- Check the source code, name, and status of each seller-owned inventory source.
Seller Dashboard
Now the seller can use their separate dashboard to perform various seller actions. They will open the marketplace and click on the open shop button.
It will navigate you to the seller registration page to Sign up as a seller. Now the customer can directly create their seller account by entering their details; they also need to provide their Shop URL.
Once you register, your seller account will be created and you can log in to the seller dashboard by clicking on the sign-in button.
Dashboard
Here you can see complete details of your sales report with an intuitive bar graph. Also, with top-selling products and customers.
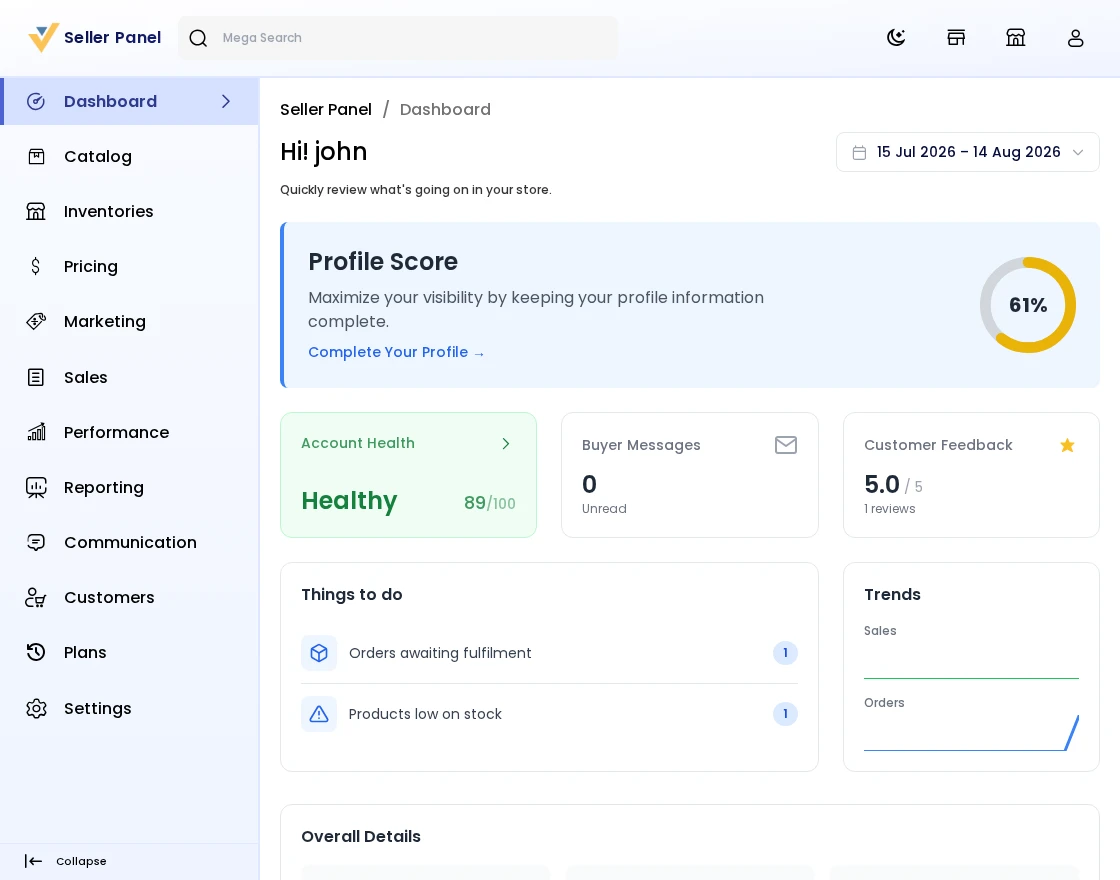
Stock Threshold: Seller products and their stock-related information.
Products on Top: Shows the list of products that are on top sales.
Top Customers: Shows the list of customers who purchased the product the most.
Top Category: It shows the top category list which is top on sales.
Step-by-Step: Read the Seller Dashboard
- Log in to the seller panel from the storefront Open Shop / Sign In button.
- The dashboard shows your sales report as an intuitive bar graph, plus Top Selling Products, Top Customers, Top Category, and stock threshold information.
Manage Profile
Here you can manage your shop profile. Under this section, you need to provide a logo and banner for the shop to be displayed at the front end.
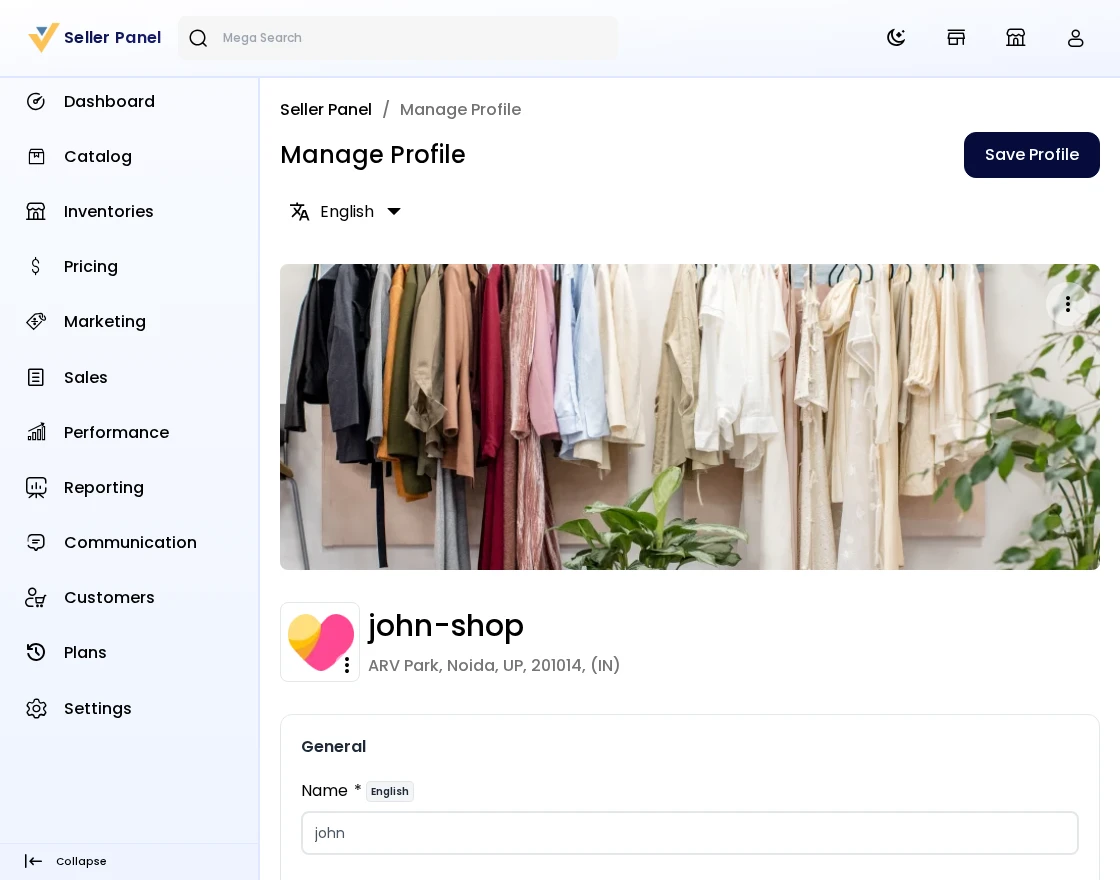
Shop Title: Here you need to provide the title or name of your Shop. It’s a mandatory field.
Shop URL: Here you need to provide the URL for your shop by which your shop will be accessible to your customers.
Store Address: Provide your shop address in this field with full address, city, postcode, country, and state.
Phone Number: Provide a phone number of your shop by which customers can connect with you. It must be unique for all the sellers.
Business Description: Under this section, you can describe your shop to inform customers about the products you sell, and other stuff to make it more informative.
Social Links: In this section, you can provide links to your shop’s social channels like Facebook, Twitter, Pinterest, and LinkedIn.
Meta Description: To improve your shop search ranking on search engines, you can enrich that by providing meta titles and descriptions.
Google Analytics ID: Enter your own Google Analytics tracking ID here to automatically track visits to your public shop page.
Policies: To keep the purchase transparent between you and your customers, you can provide a Shipping, Return, and also Privacy policy.
Step-by-Step: Update the Shop Profile
- From the seller panel, go to Profile.
- Upload the Logo and Banner for the shop.
- Fill in the Shop Title and Shop URL (mandatory).
- Provide the Store Address, Phone Number (unique), and Business Description.
- Add Social Links, Meta Title, Meta Description, your Google Analytics ID, and the Shipping, Return, and Privacy Policies.
- Save the profile; changes appear on the shop page and seller public profile.
Account Health
The seller dashboard exposes the composite 0–100 Account Health score together with the three metrics that feed it, and a guided explainer that tells the seller exactly what is hurting their score and what to improve. Sellers can refresh their own score with a 60-minute cooldown.
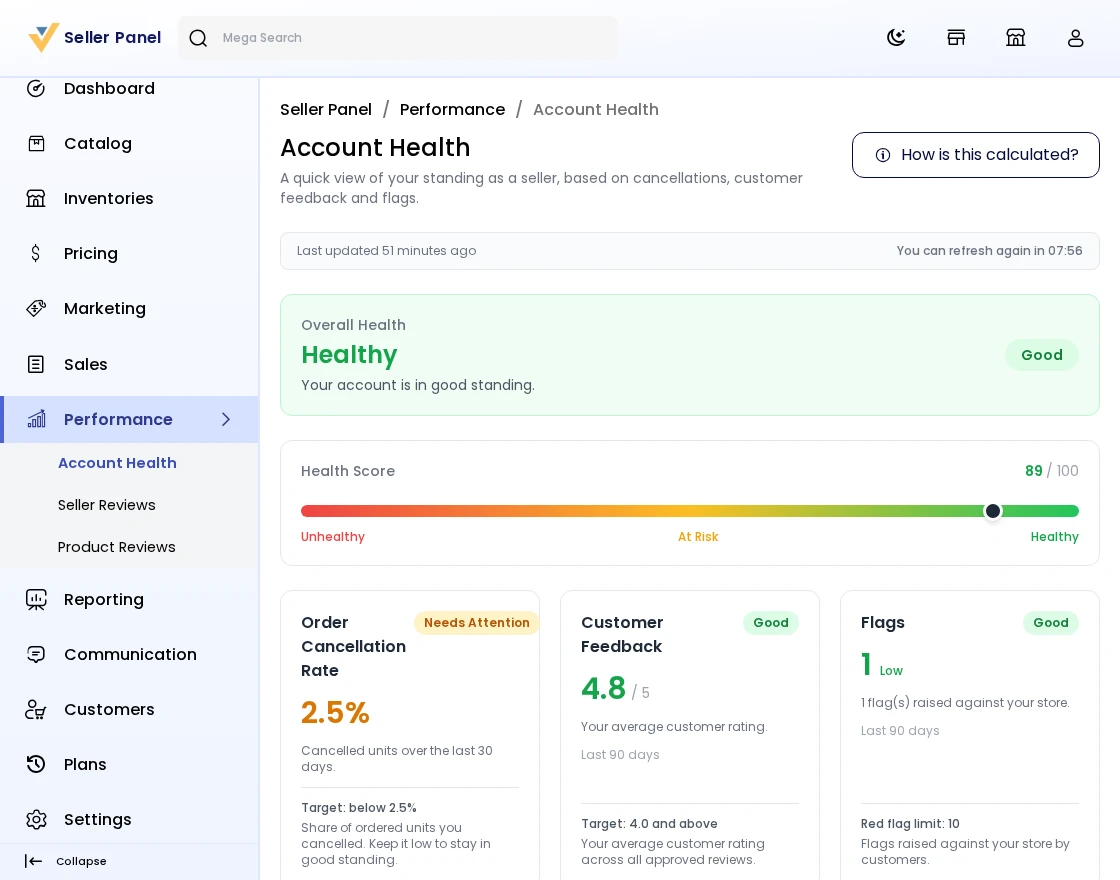
Step-by-Step: Improve Your Account Health
- Go to Performance >> Account Health in the seller panel.
- Review your composite 0-100 Account Health score and the three metrics that feed it: cancellation rate, average rating, and flags count.
- Open the guided explainer to see exactly what is hurting your score and what to improve.
- Click Refresh to recompute your score (one refresh per 60-minute cooldown).
Products
Here you will find the list of products as created by the seller.
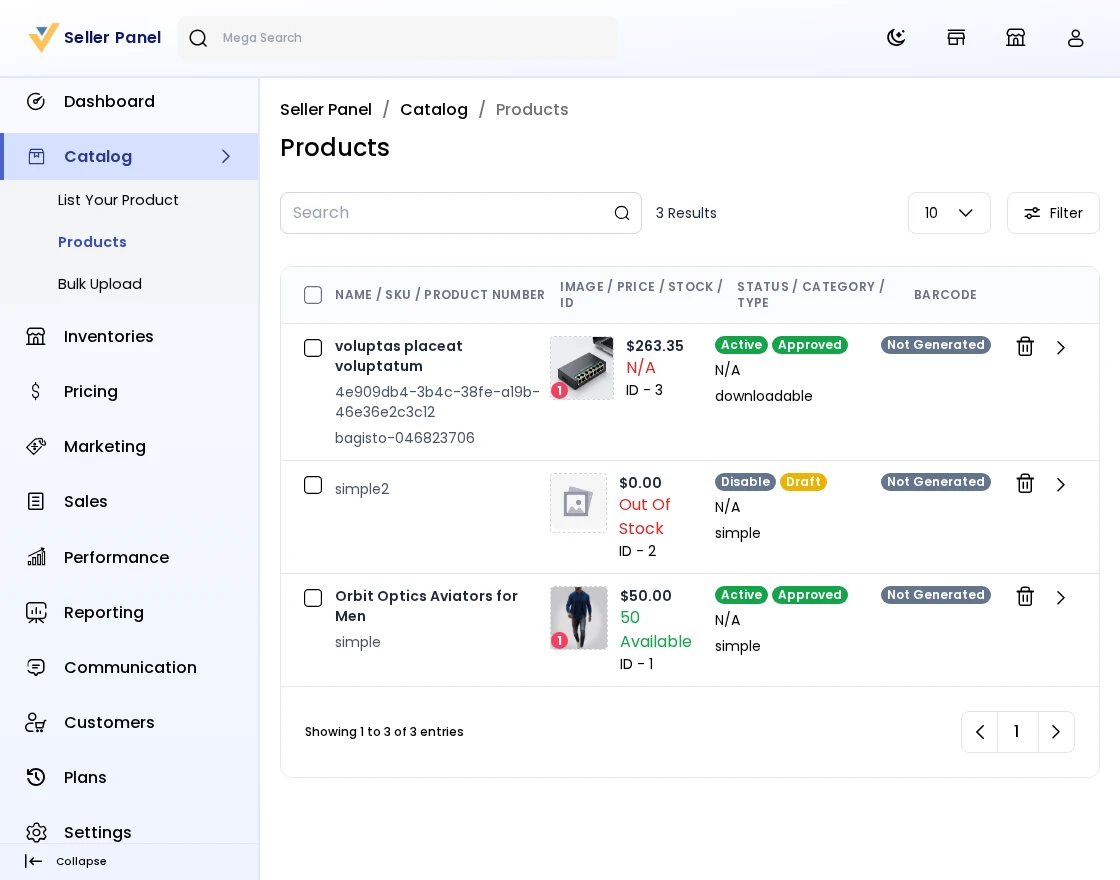
Create a New Product: If the product is new, you can also click the Add New Product option and create a new product.
- You can create a simple product that doesn’t have any variations in it.
- For the products which have variations in their size, and color then you can create configurable products.
- If you want to sell some membership or any service then you can create the virtual products.
- The products that need to be downloaded in the form of files go with the downloadable products.
- You can create Booking Products, Grouped Products & Bundled Products also. So you can assign seller products only.
From the products list, sellers can also generate barcodes for selected products in bulk and download a printable barcode sheet (PDF). A single product’s barcode can also be generated and downloaded from its product edit page.
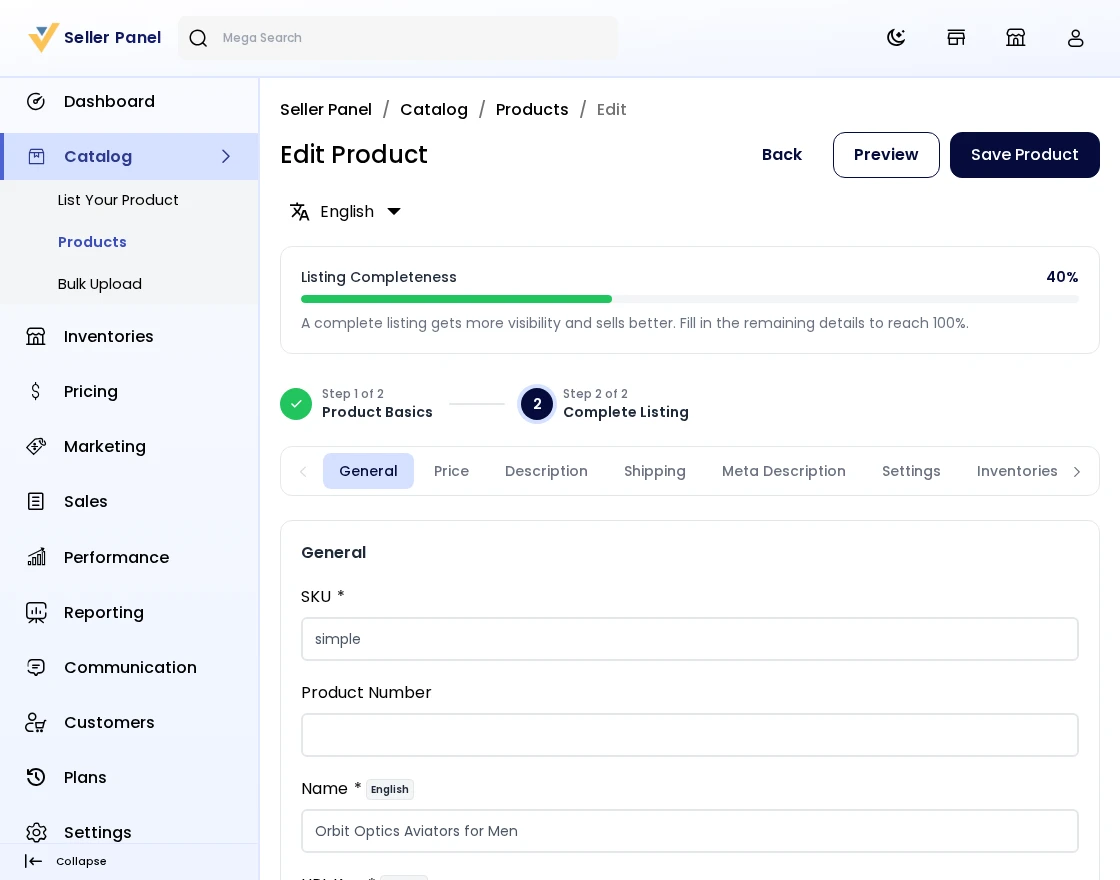
Step-by-Step: Create / Assign a Product
- Go to Catalog >> Products in the seller panel.
- Click List Your Product to create a new product (Simple, Configurable, Virtual, Downloadable, Booking, Grouped, or Bundled).
- Or use Assign Existing Product: type the first three letters of an existing product, select it, and click Sell Yours to sell your own version with your own price and product condition.
- Fill the required product fields and save. If Product Approval is enabled, the admin must approve the product before it goes live.
Assign an Existing Product
If there is an already existing product on the website and you want to sell the same product of yours but with different prices, just type the first three letters of the product. If the product is already there on the website, you will get that in the search results. Click on Sell Yours to create your version of the existing product. You need to provide the following description of the existing product: Product Condition.
Step-by-Step: Assign an Existing Product
- Go to Catalog >> Products in the seller panel.
- Click Assign Existing Product.
- Type at least the first three letters of the product name in the search field.
- Select the matching product from the suggestion list.
- Click Sell Yours to create your own listing of the same product.
- Set your own selling price and product condition, then save.
Products Review
Here, the seller can check the reviews given by the customer for particular products. The seller can also approve/disapprove the product Review.
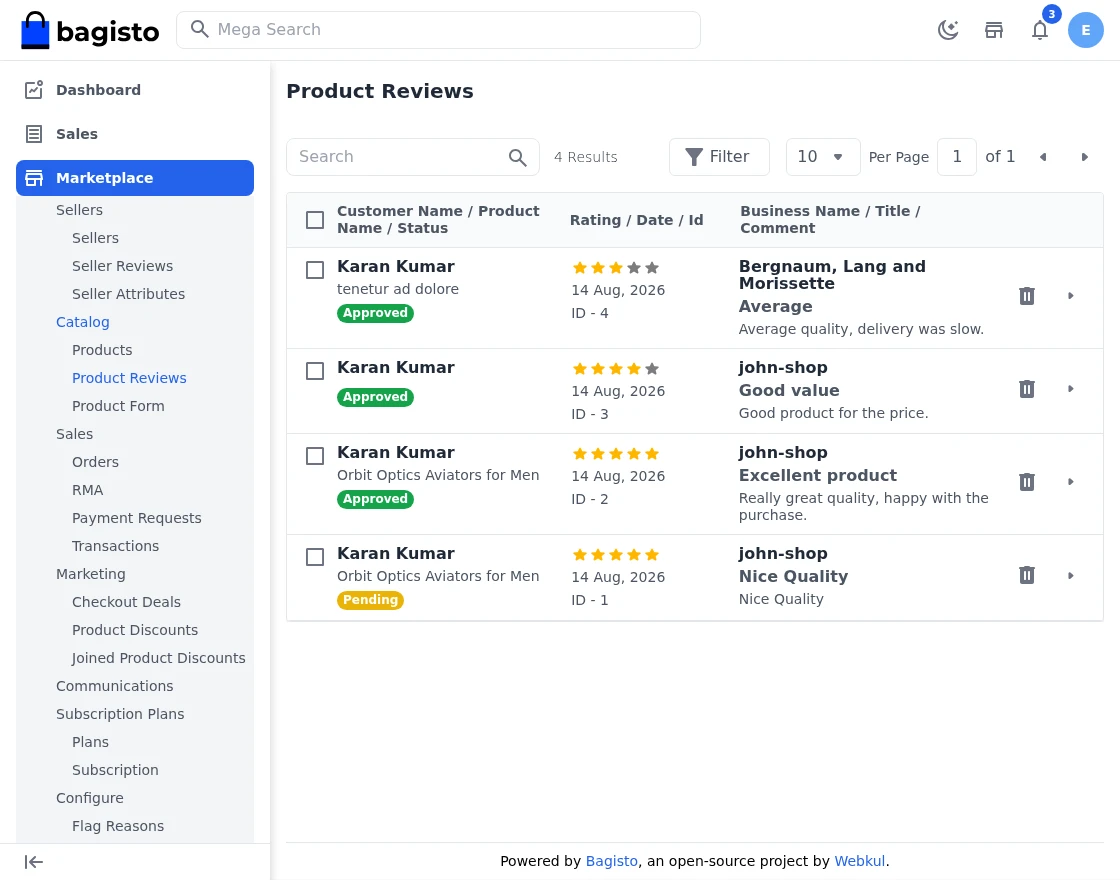
Step-by-Step: Manage Product Reviews
- Go to Performance >> Product Reviews in the seller panel.
- Check the reviews given by customers for your products.
- Approve or disapprove each review from the list.
Orders
Here you will find the list of orders as made by the customers for your products.
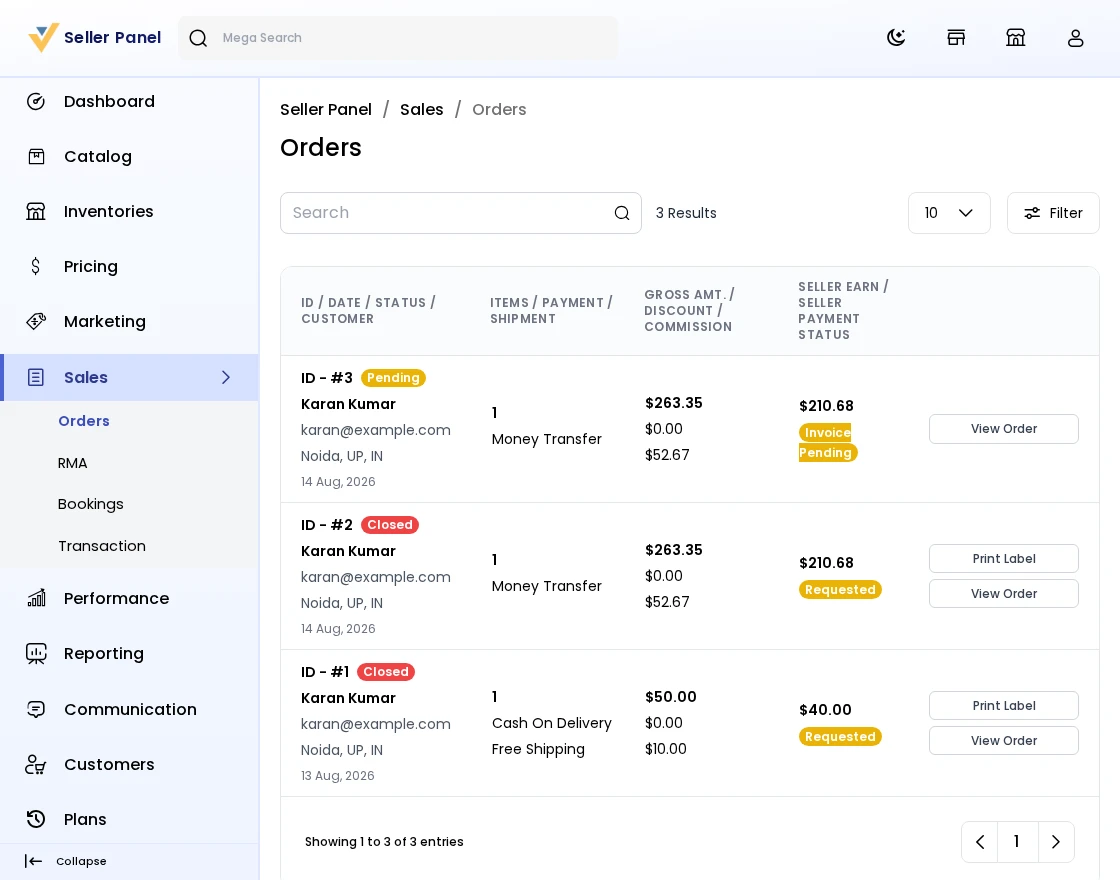
Clicking the arrow icon, you will find more information on the order along with the invoice and also shipment details.
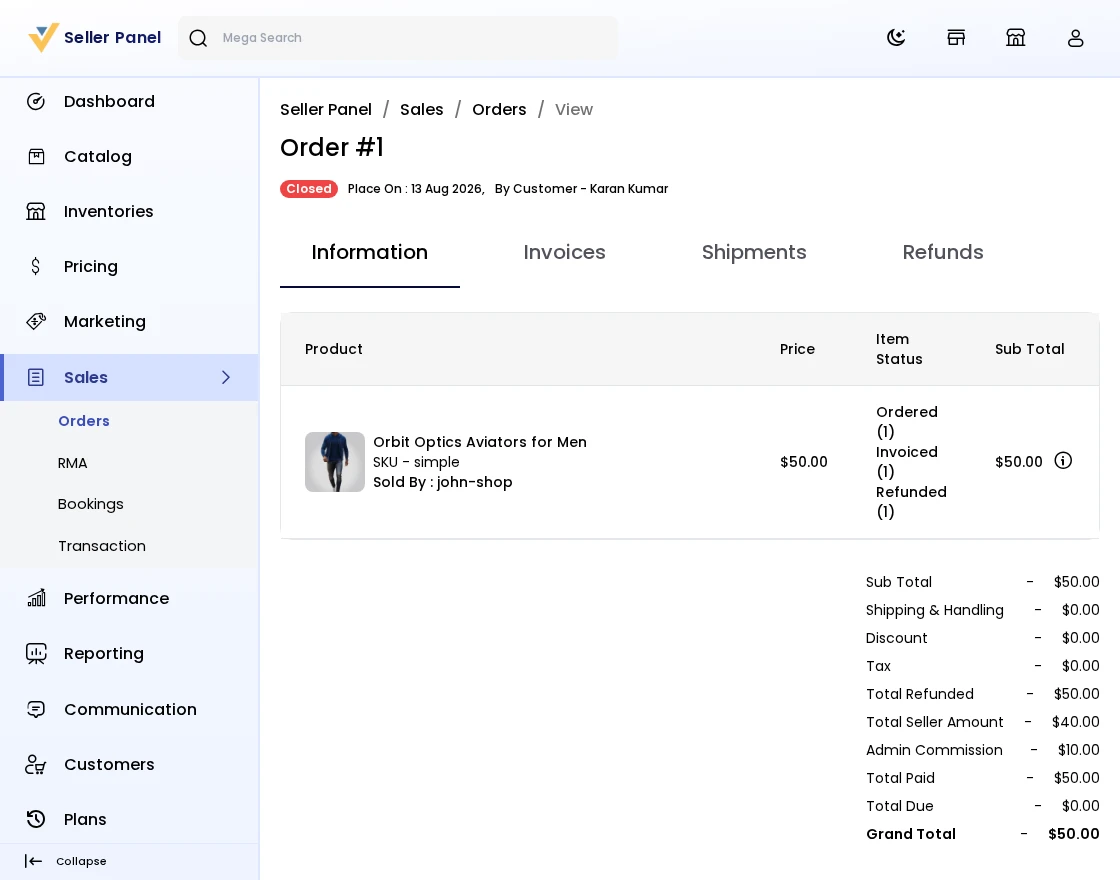
The seller can also do the following things once he receives the order from the customer.
Invoice: The seller can create an invoice, ship, and cancel the product as mentioned in the snapshot. By clicking on the invoice, it will show a popup with invoice details. The seller can create the invoice.
Once the invoice is created, the seller can also do the shipment by clicking on the ship button. After clicking on create shipment the shipment will generate.
The seller can also cancel the order by clicking on the cancel option.
The seller can also check the refund details of any order. But the refund will be initiated by the admin only.
Step-by-Step: Process an Order
- Go to Sales >> Orders in the seller panel.
- Click the arrow icon on an order to open its full details, invoice, and shipment info.
- Click Invoice to create the invoice in a popup.
- After invoicing, click Ship to create the shipment.
- Cancel the order with the Cancel option if required.
- Refunds are initiated only by the admin; sellers can view the refund details of an order.
RMA Section
Sellers can see the RMA request that has been generated by the Customers/Guests under the RMA section.
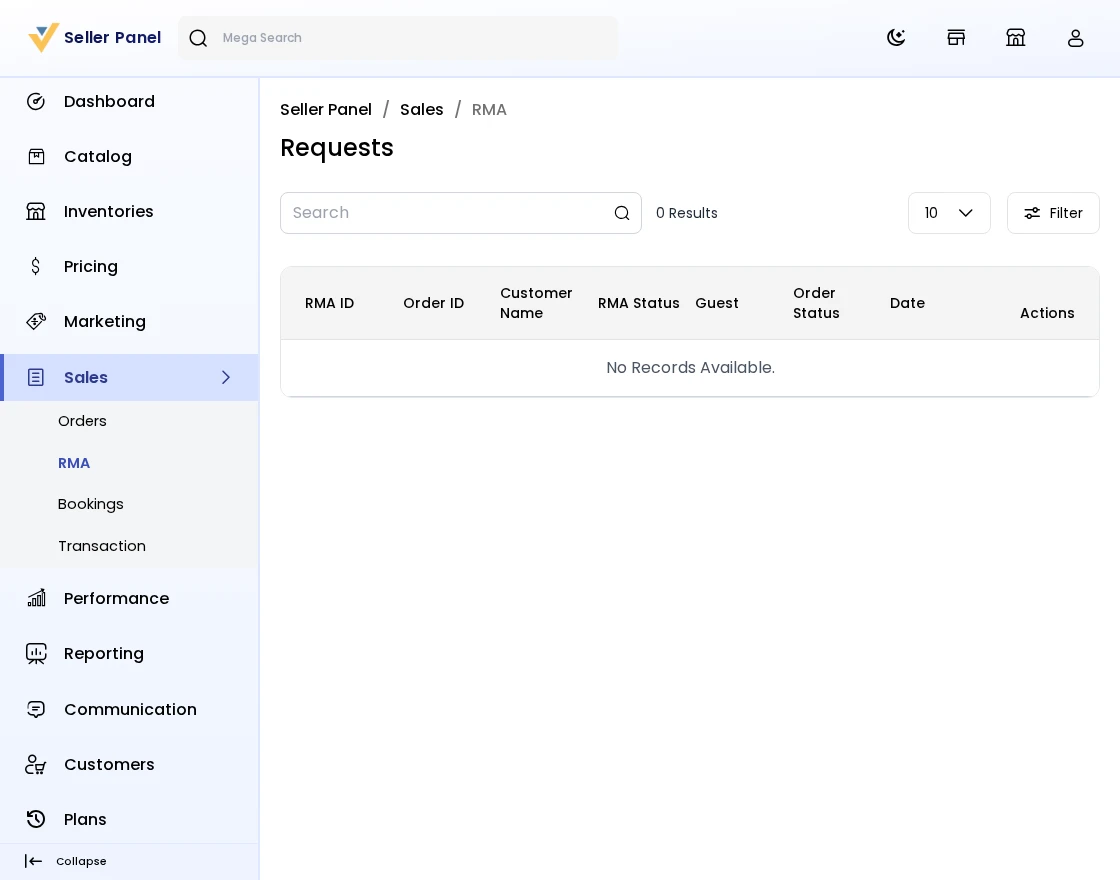
Sellers can view all RMA requests with their RMA IDs and click the eye icon to access complete RMA details.
Change RMA status: In this field sellers can select the RMA status as Pending, Declined or Item cancelled. Under the Status Details seller can also see the status regarding the RMA such as RMA Status and Order Status.
Step-by-Step: Handle an RMA Request
- Go to Sales >> RMA in the seller panel.
- View all RMA requests with their RMA ID and click the eye icon to open the complete details.
- Select the RMA status (Pending, Declined, Item Canceled, or resolution-specific statuses) under Change RMA Status.
- Check RMA Status and Order Status under Status Details.
- Click Save Changes; the order is cancelled automatically when you select Item Canceled.
RMA Status
Product Return RMA: When the customer/guest creates a new RMA request, its status will be pending. After viewing the RMA requests, the seller can select the RMA status according to the resolution type selected by the customers/guests.
Refund
When the customer/guest selects the resolution type as Refund for completed order, the seller can select the following RMA status:
- RMA Request Accepted: If the admin has accepted the RMA request of the customer/guest, the seller can change the status to RMA Approved.
- Package Received: From here the refund will be initiated and if the seller has received the product from the customer/guest, the seller can change the status to Received Package.
- Declined: If the seller rejects the request submitted by the customer/guest, the seller can select this status.
- Solved: When the customer/guest receives the refund, the seller can use this status.
Cancel Items
When the customer/guest selects the resolution type as Cancel for the pending orders, the seller can select the following RMA status:
- RMA Request Approved: If the seller has accepted the RMA request of the customer/guest, the seller can change the status to RMA Approved.
- Declined: If the seller rejects the request submitted by the customer/guest, the seller can select this status.
- Item Canceled: From here the seller can cancel item by accepting the RMA request of the customer/guest for canceling the ordered items, it can use this status.
After selecting the “Item Canceled” option and clicking the “Save Changes” button, the order gets canceled automatically.
Exchange
When the customer/guest selects the resolution type as Exchange for the pending orders, the seller can select the following RMA status:
- RMA Request Accepted: If the seller accepts the RMA request of the customer/guest, the seller can change the status to RMA Approved.
- Package Dispatched: If the seller ships the new exchange product to the customer/guest, the seller can use this status.
- Declined: If the seller rejects the request submitted by the customer/guest, the seller can select this status.
- Solved: When the customer/guest receives the exchanged product, the seller can use this status.
Note: The Same process is followed by the admin in the Admin -> Marketplace -> RMA section.
Step-by-Step: Update an RMA Status
- Open an RMA request and scroll to Change RMA Status.
- Select the status according to the resolution type the customer chose (Refund, Cancel Items, or Exchange).
- Review the Status Details – RMA Status and Order Status – before confirming.
- Click Save Changes; the order is cancelled automatically when you pick Item Canceled.
Bookings
Sellers who sell Booking products get a dedicated Bookings section listing every reservation, with a calendar view to see bookings laid out by day and week.
Step-by-Step: Review Bookings
- Go to Sales >> Bookings in the seller panel.
- Switch between the list view and the calendar view to see reservations for your Booking products.
Transactions
Here you will also find the payment request as done by the Admin to the seller. The dashboard here provides details of the total payout done and the amount left unpaid.
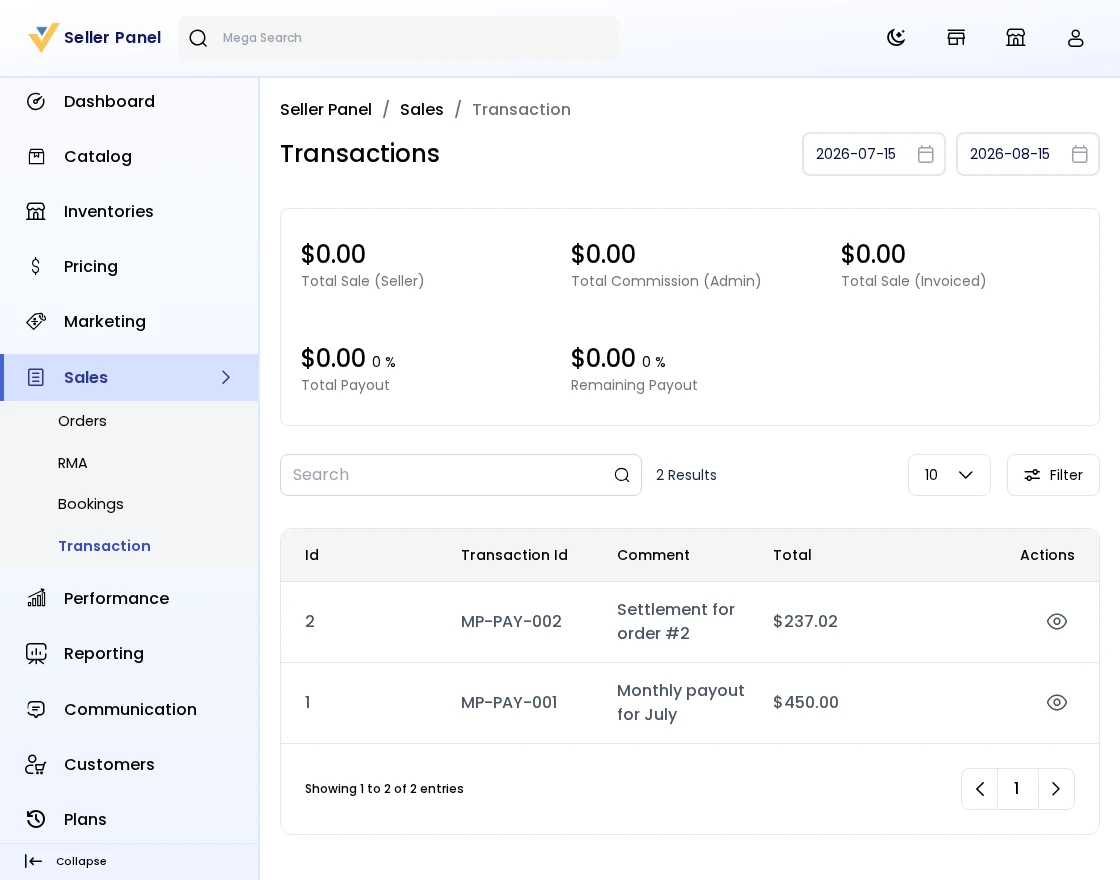
Total Sale: Here the Total sales made by the seller appear.
Total Payout: The Amount received by the seller from Admin.
Remaining Payout: Amount that is pending from the Admin and needs to be collected.
You will also get a list of payout transactions.
Step-by-Step: Track Payouts
- Go to Sales >> Transactions in the seller panel.
- Check Total Sale, Total Payout (amount received from Admin), and Remaining Payout (pending amount).
- Review the list of payout transactions received from the admin.
Customers
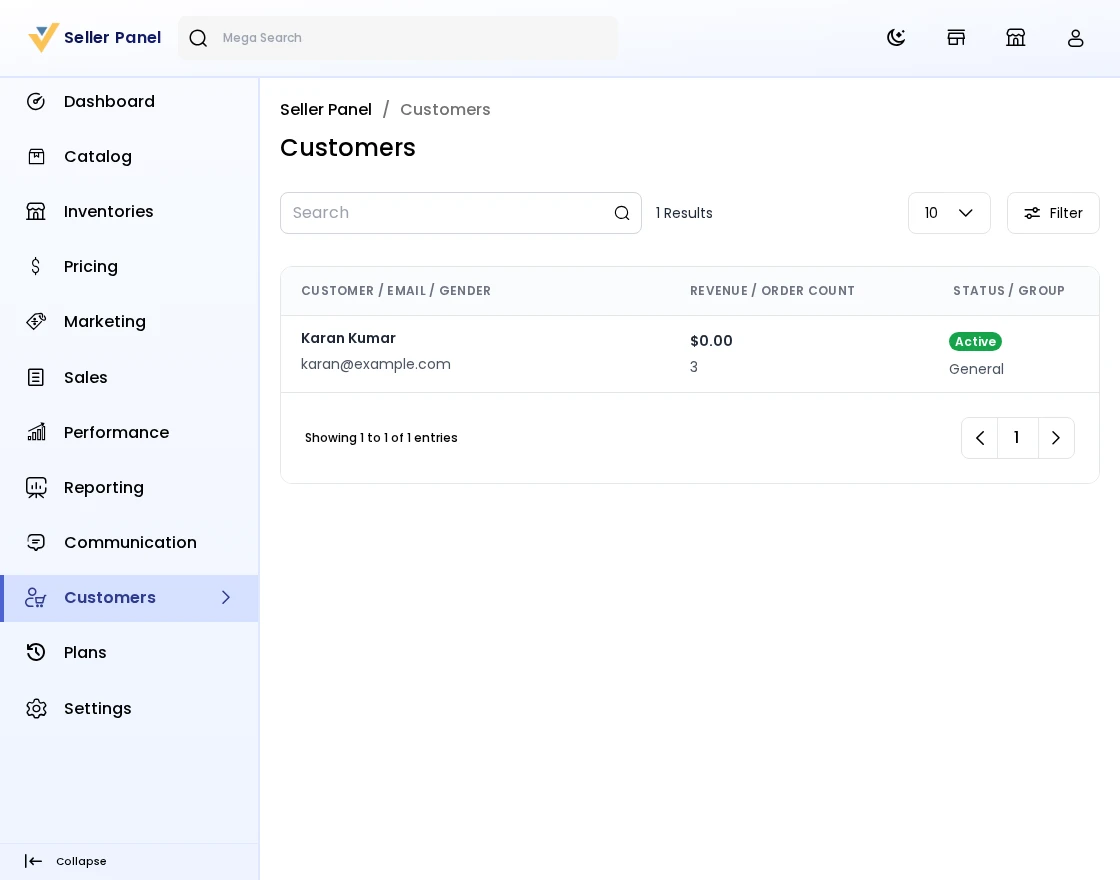
Here the sellers can also see their customer details who have purchased the products from the sellers. Also, the seller can see the Order count; on clicking the order count the seller can see the details of the Ordered product.
Step-by-Step: View Your Customers
- Go to Customers in the seller panel.
- View the customers who purchased products from your store along with their order count.
- Click an order count to see the details of the ordered products.
Seller Reviews
Here you will also get the list of reviews as given by the customer to the particular seller. The seller has access to view and respond to reviews.
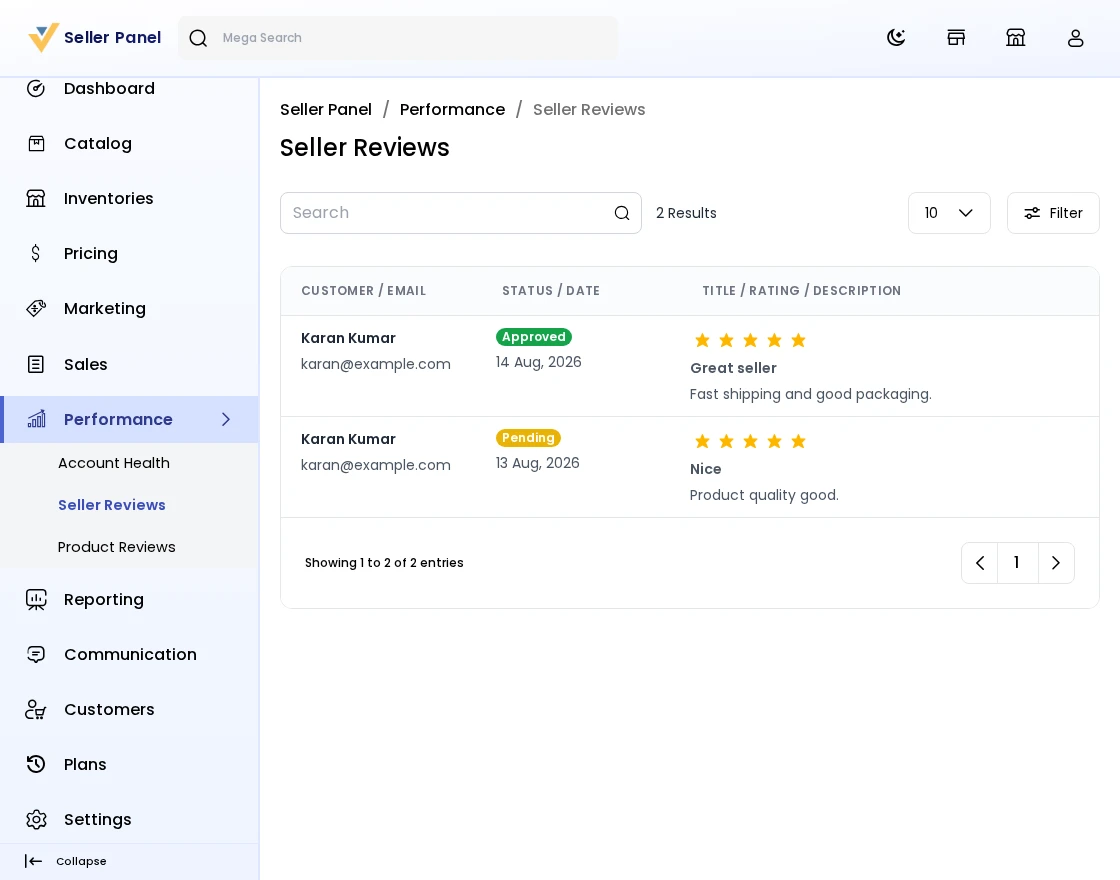
Step-by-Step: Respond to Seller Reviews
- Go to Performance >> Seller Reviews in the seller panel.
- View the reviews customers have given to your shop along with the rating and feedback.
- Read the feedback and respond to the customer directly from the review.
Settings
In the General Section the seller can change the password; additionally the seller can easily manage the locales & currency. The seller can manage only the Locales but currency is the same as the admin panel.
Users
Sellers can also create Sub-sellers. Under the Users Option on the left side, the seller can view all the sub-sellers.
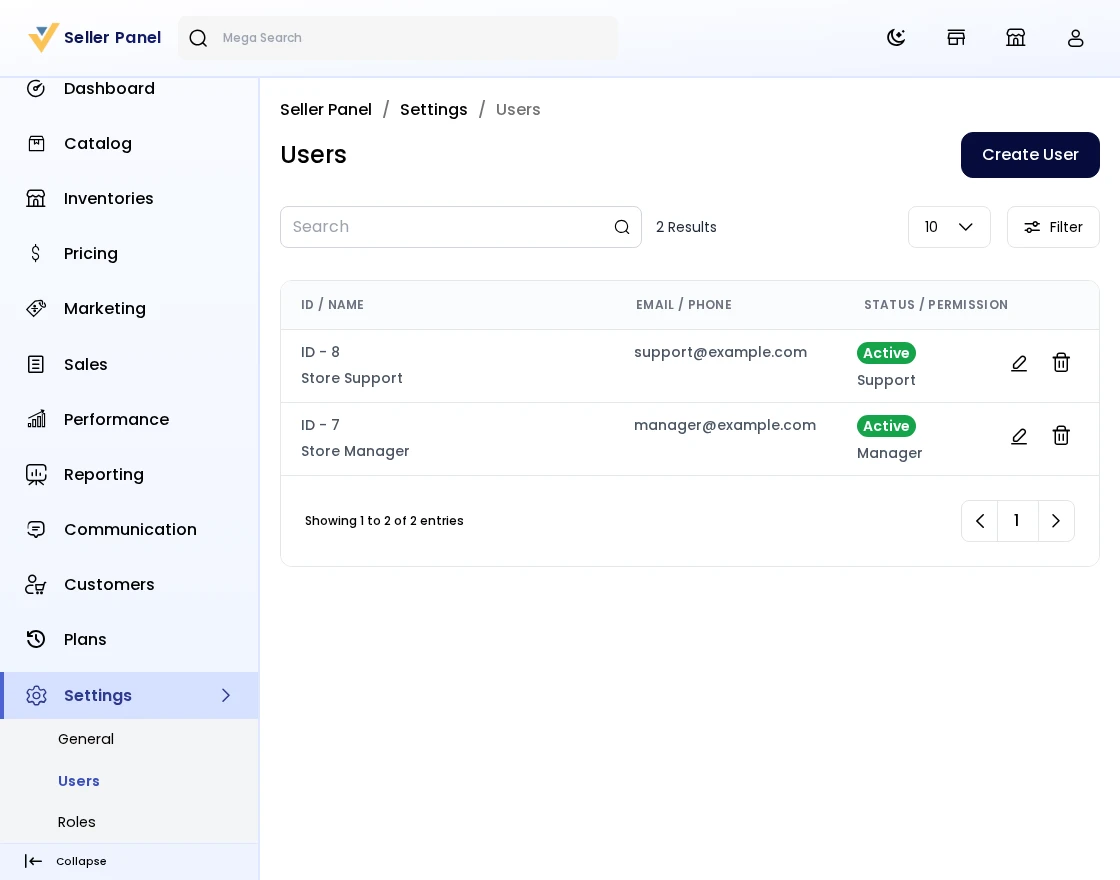
To create a new Sub-seller click on the Create User Button. Now, enter all the details of the new user or sub-seller.
Name: Enter the Name of the user.
Email: Enter the Email of the user.
Phone Number: Enter the user’s Phone number. Phone numbers must be unique for all users.
Role: Select the role of the user.
Status: To Enable the status to be user.
Password: Enter the password.
Role
Sellers can create a custom role for creating the sub-seller and view all the roles in the Role section.
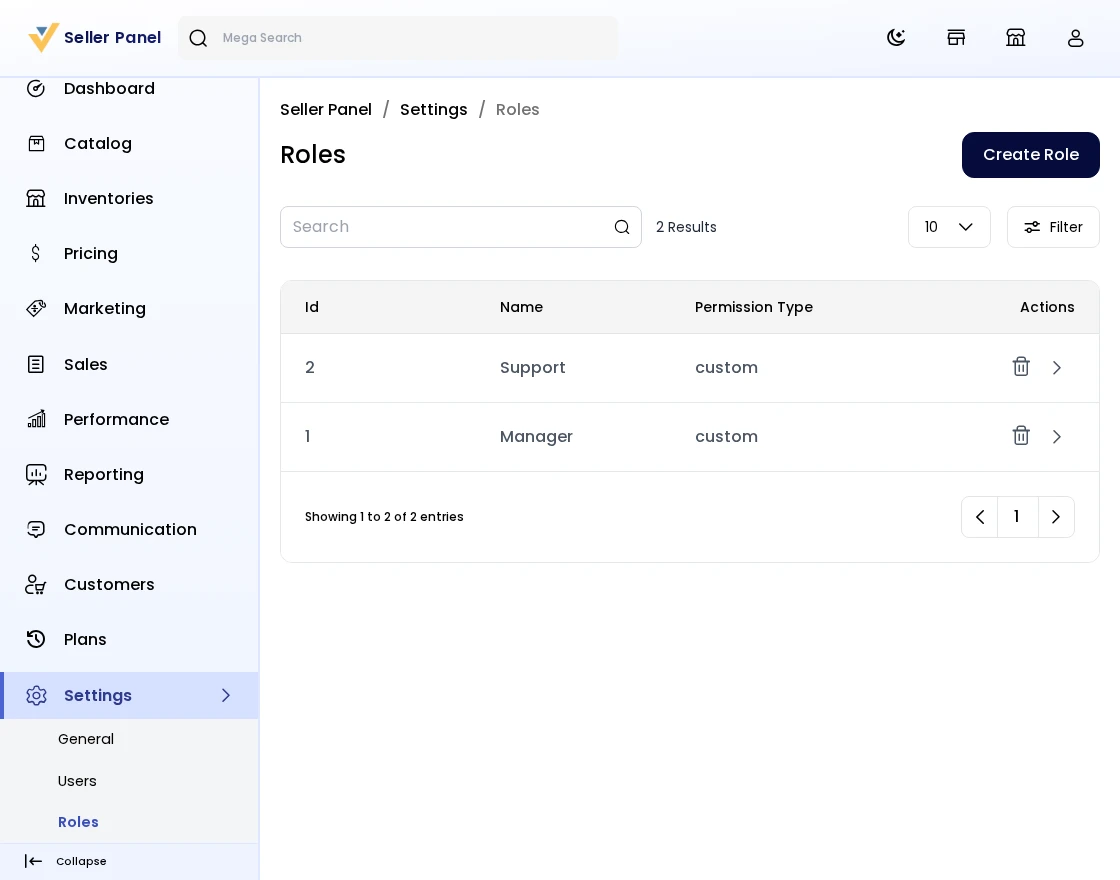
To create a new role click on the Create Role Button and select the fields that you want to give access to the users or sub-sellers.
Step-by-Step: Manage Settings, Users & Roles
- Open Settings in the seller panel.
- Under General, change your password and manage the locales (the currency list is the same as the admin panel).
- Under Users, add your staff / team members so they can log in to the seller panel. The number of users is limited by your plan’s Max Staff.
- Under Role, create roles and tick the permissions each user gets.
- Save your changes.
Inventory
The Seller can create their inventory sources for the products and manage stock from the Manage Inventory screen.
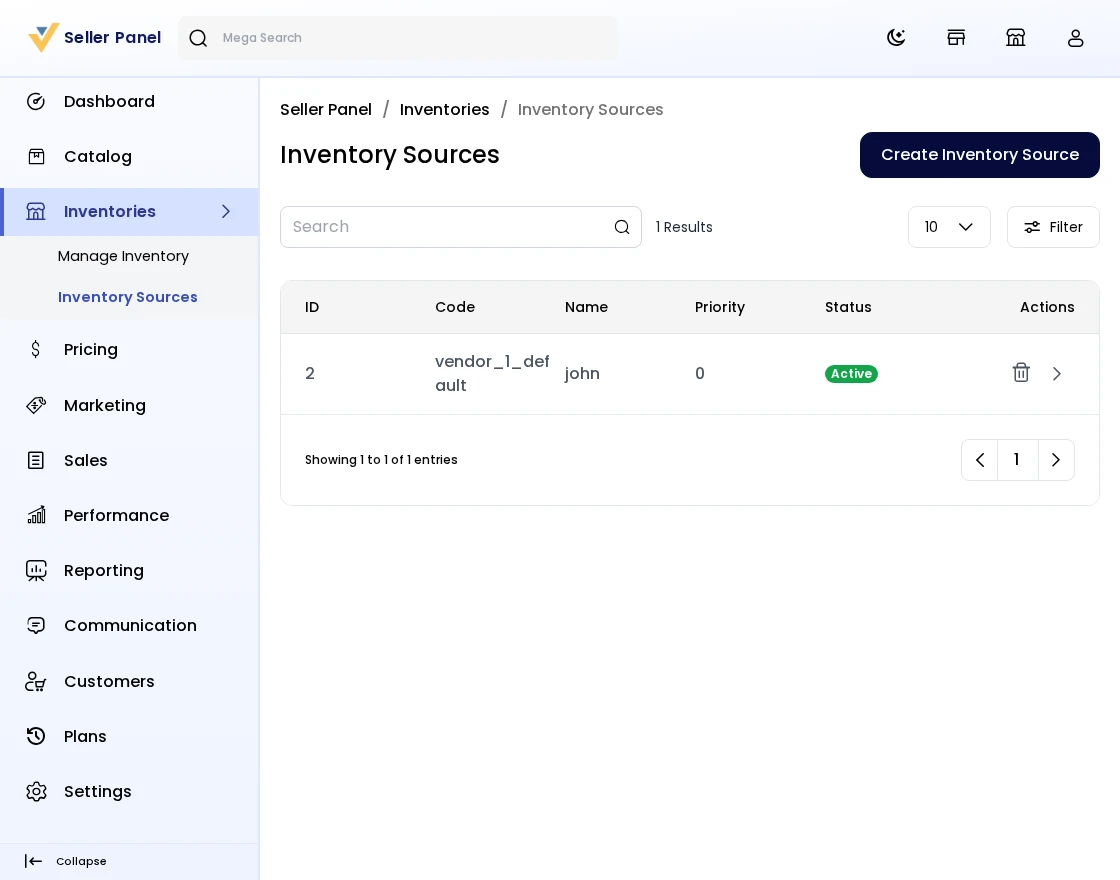
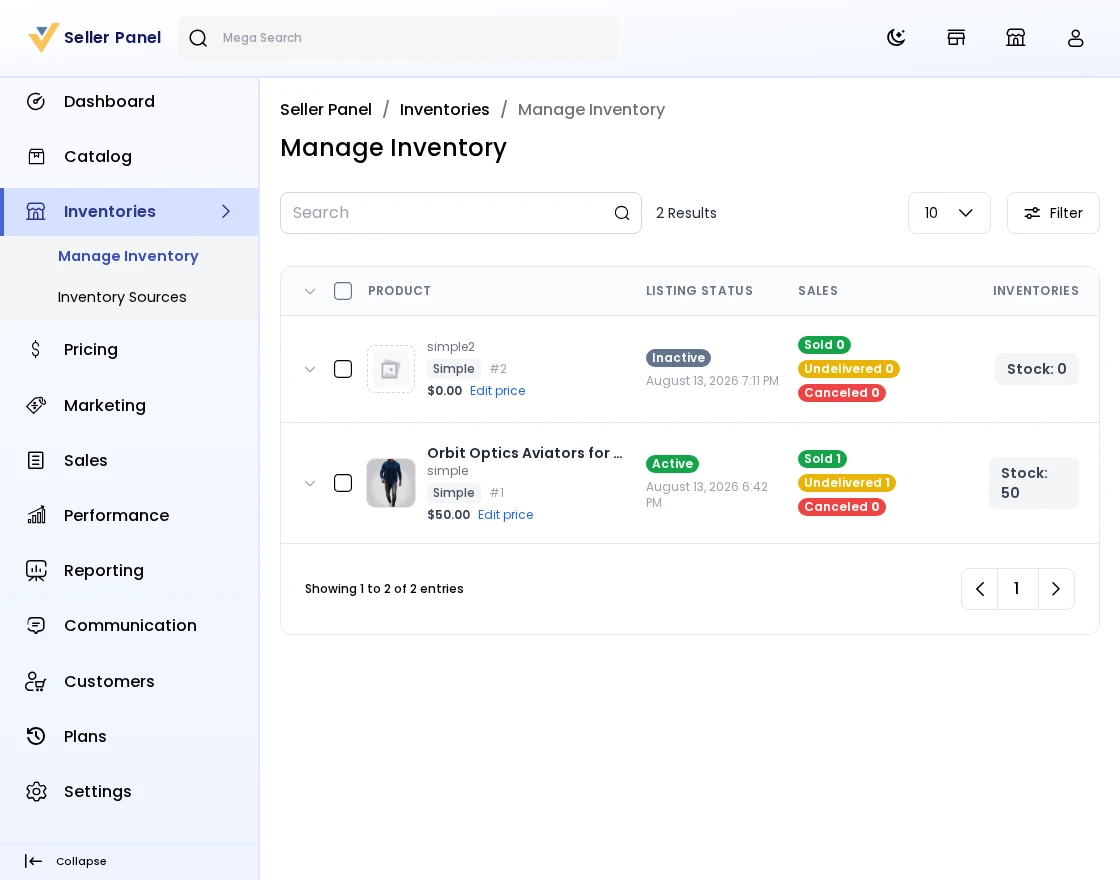
Step-by-Step: Manage Inventory
- Go to Inventories >> Inventory Sources in the seller panel and create your inventory sources.
- Open Inventories >> Manage Inventory to manage stock levels for your products.
- Update stock quantities and status directly from the grid.
Pricing
The Manage Pricing screen lists every product the seller sells — owned or resold — with its price in one grid, so prices can be updated in bulk instead of opening each product individually.
For a seller’s own product, the grid also edits the sale price (with its start and end dates) and any customer-group price tiers. For a resold product (one assigned from another seller’s catalog), only the seller’s own resale price can be changed.
Step-by-Step: Bulk-Edit Prices
- Go to Pricing >> Manage Pricing in the seller panel.
- Edit the price for any of your products directly in the grid; for your own products you can also set a sale price, its validity dates, and customer-group tiered prices.
- Save to update the prices for all the edited products in a single action.
Bulk Upload
Sellers can use CSV, XLS, XLSX or XML files to upload their products in bulk, or to bulk-assign existing catalog products to sell under their own price. Sellers can bulk upload products, saving time by adding multiple products in one go instead of one by one.
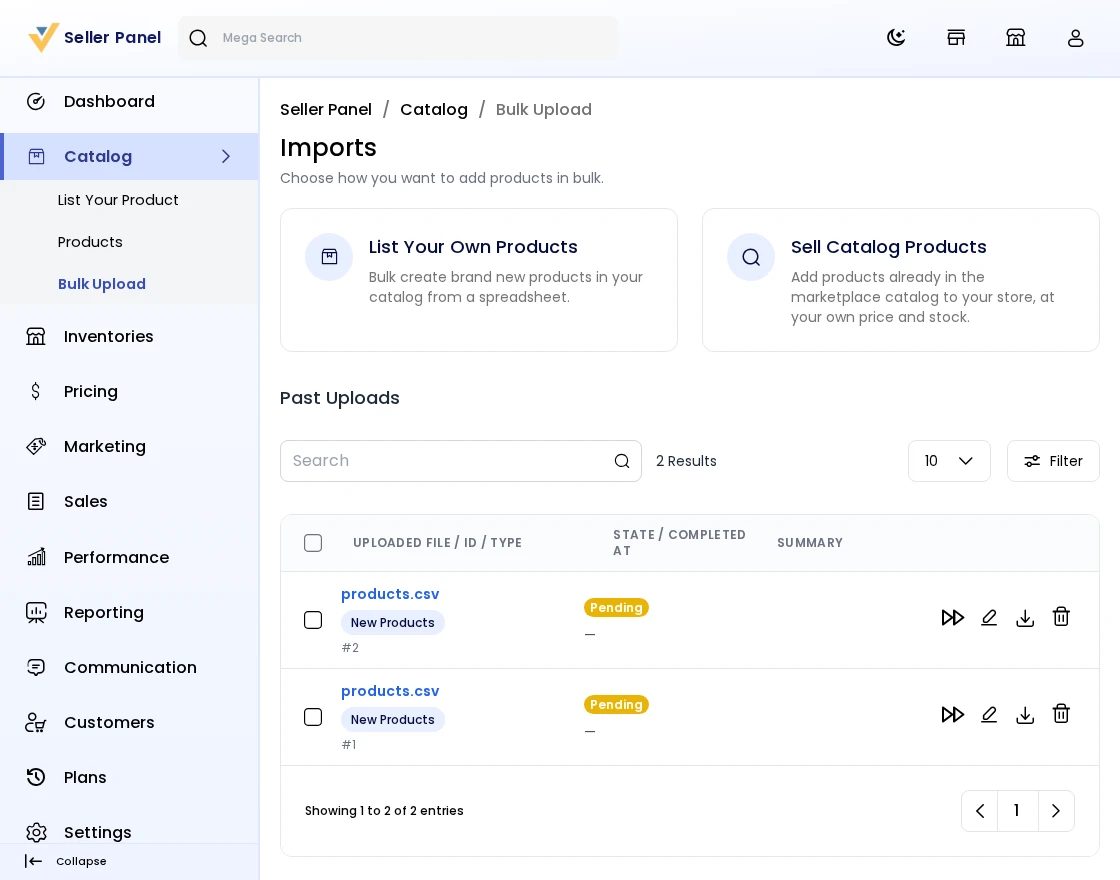
Step-by-Step: Bulk Upload Products
- Go to Catalog >> Bulk Upload in the seller panel.
- Click Create Import.
- Choose the import Type — Products to create/update/delete your own products, or Assign Products to bulk-sell existing catalog products under your own price — and select your CSV / XLS / XLSX / XML file, or download the sample file first.
- Make sure the file contains all the required fields for the product types you are importing.
- Save to import all the products in bulk at once.
How to import products in Bulk?
Step 1: Go to the seller panel -> click on Catalog >> Bulk Upload and click on Create Import button.
Step 2: Under general configurations select the below fields:
- Type: Choose Products to create, update or delete your own product listings in bulk, or Assign Products to bulk-sell existing catalog products under your own price.
- File: Choose the file in your desired format (CSV, XLS, XLSX, or XML) and kindly make sure you have all the required fields in the file. Note: The Products import supports every product type except Downloadable products.
- Download Sample: You can also download the sample Product file. Kindly make sure the file you are uploading is similar to this sample file. Note: You need to fill in all the required attributes in the sample file provided for product creation.
- Image Directory Path: Use relative path to /project-root/storage/import/app to store images.
- Upload Images(zip): Upload all the product images through a zip file.
- Action: Kindly select from the settings configuration that you want to Create/Update or Delete the records.
- Validation Strategy: This unique feature allows you to Skip the Errors or to Stop on Errors while importing the data.
- Allowed Errors: This feature allows you how much quantity of errors will get neglected while importing the data.
- Field Separator: This feature allows you to set the fields.
- Process in Queue: This feature allows you to run your import process in a queue.
So now click on the Save Import Button.
Step 3: The import process will begin automatically. Once it is complete, all selected products will be successfully imported.
Step 4: Click on the Validate button to validate the imported file.
Step 5: Once the seller’s product is successfully imported, some details will be displayed:
- Total Records Created: The number of products created successfully.
- Total Records Updated: The number of products updated.
- Total Records Deleted: The number of products deleted.
Congratulations! Your import was successful.
Communications
Now sellers can directly communicate with the admin of Laravel Multi Vendor Marketplace as shown in the image below.
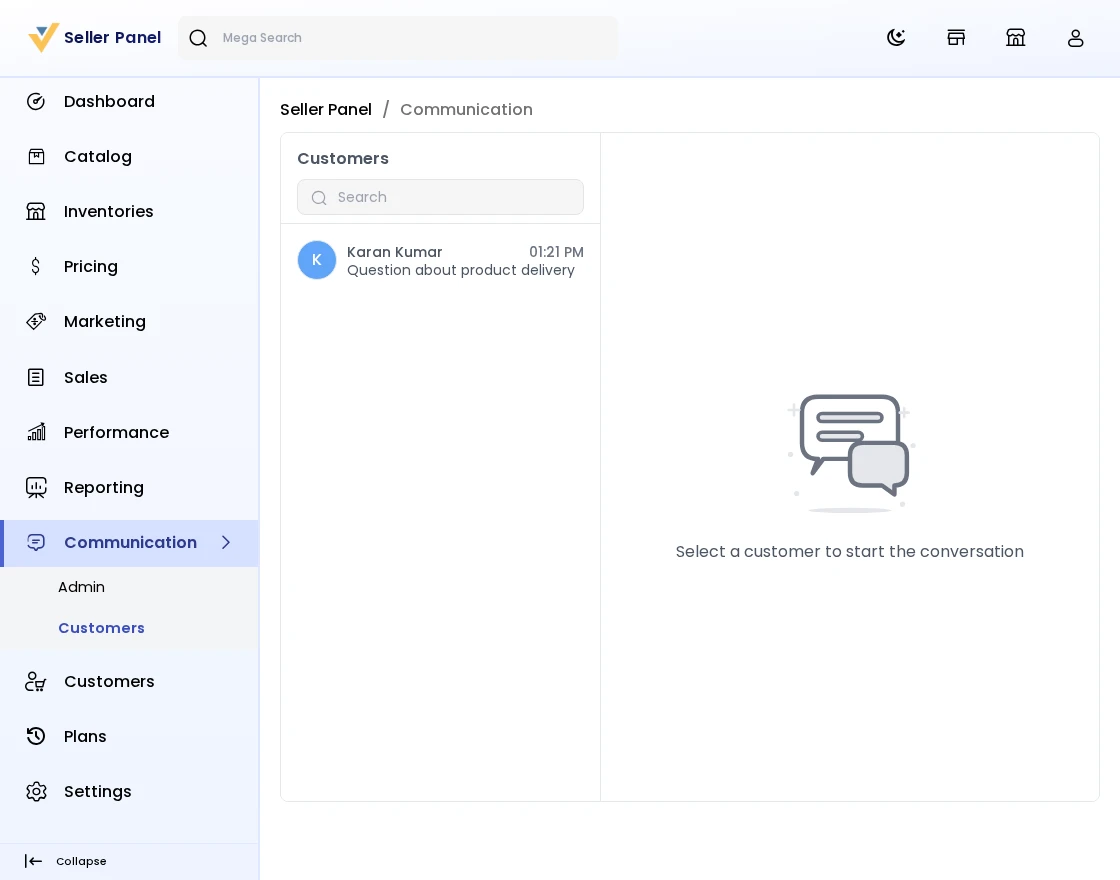
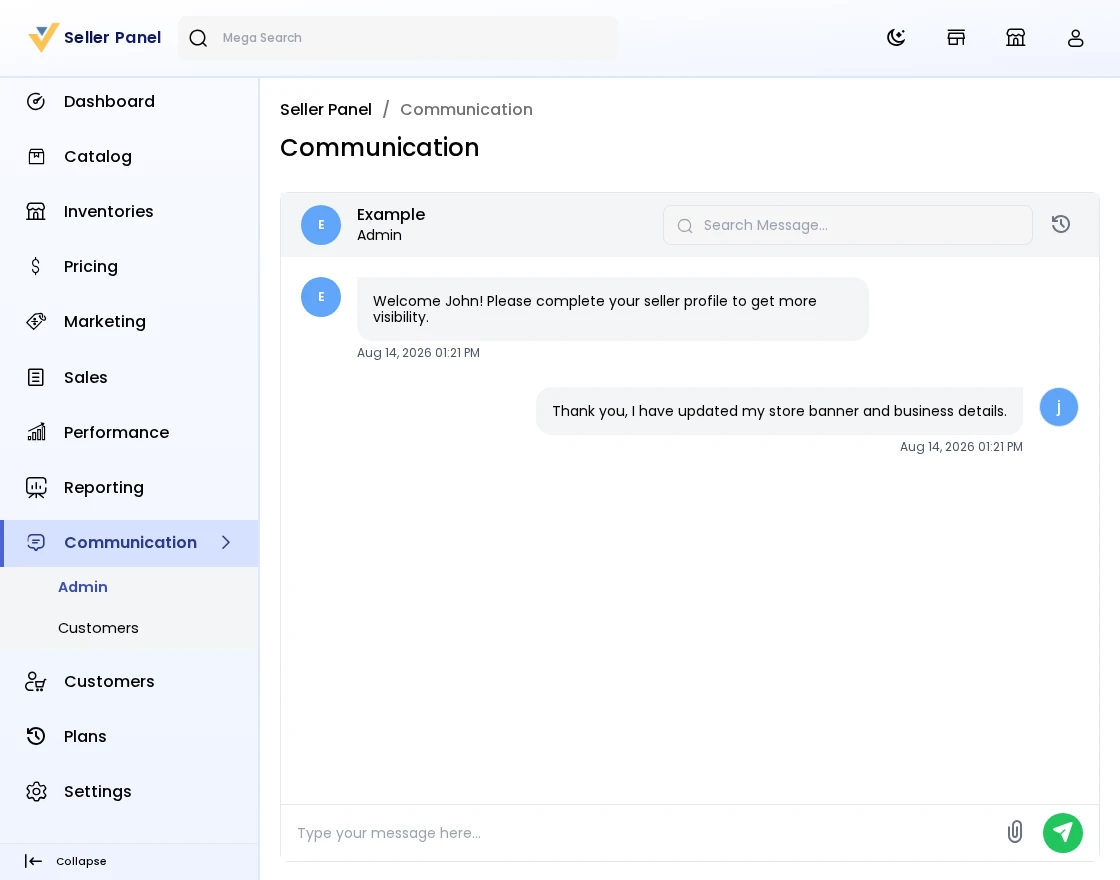
1) Sellers can send files and sort out the chat history as well as shown in the image below.
2) The Seller can also use the Search Bar to Search Messages; the text will get highlighted accordingly.
Step-by-Step: Chat with the Admin & Customers
- Go to Communications in the seller panel.
- Open the thread with the Admin (or the Customers tab to chat with buyers).
- Type a message and send it; you can attach files to the conversation.
- Use the Search Bar to search messages – matching text gets highlighted.
- If the admin has blocked you, the block status is shown here in your communication section.
Marketing
Under the seller’s Marketing group, sellers can create their own promotions and also join the product discounts created by the admin.
Product Discounts
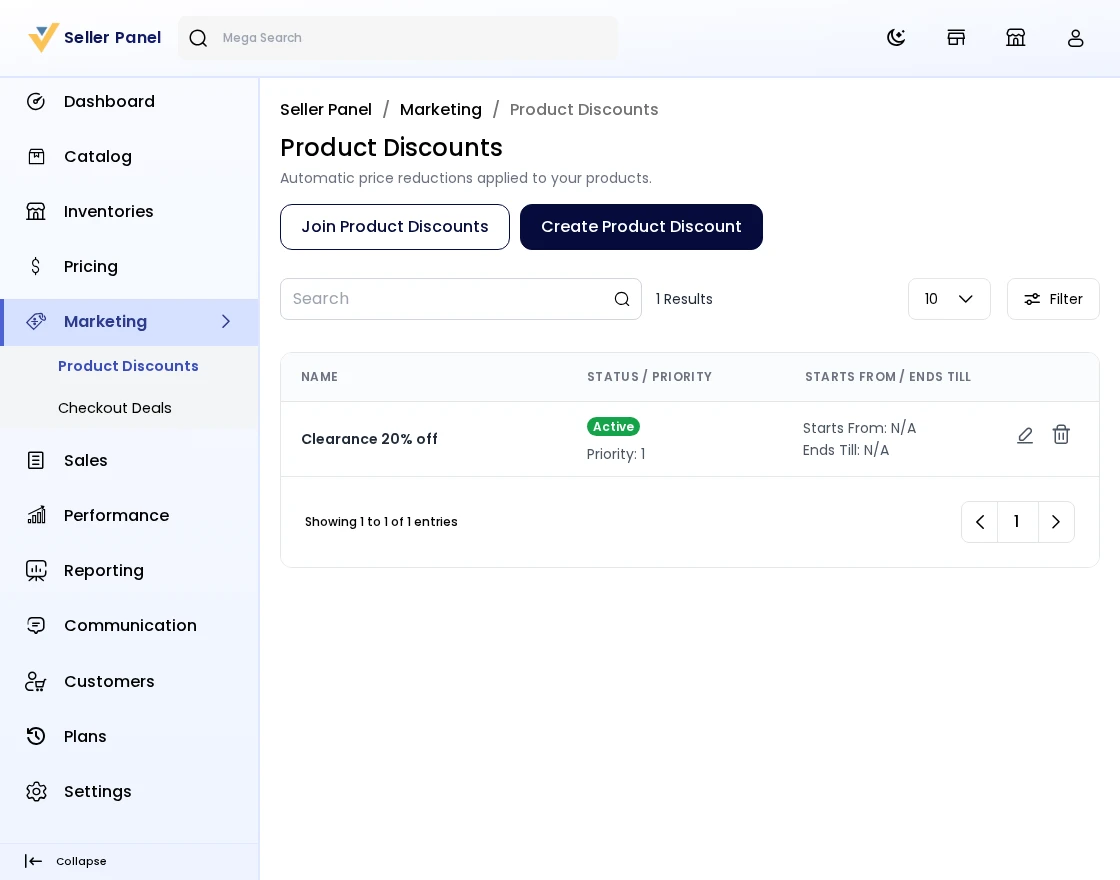
Step-by-Step: Create a Product Discount
- Go to Marketing >> Product Discounts in the seller panel.
- Click Create Product Discount and set the name, conditions, discount amount, validity period, and status.
- Save the discount. It appears in the admin’s Marketing >> Product Discounts list for moderation.
Checkout Deals
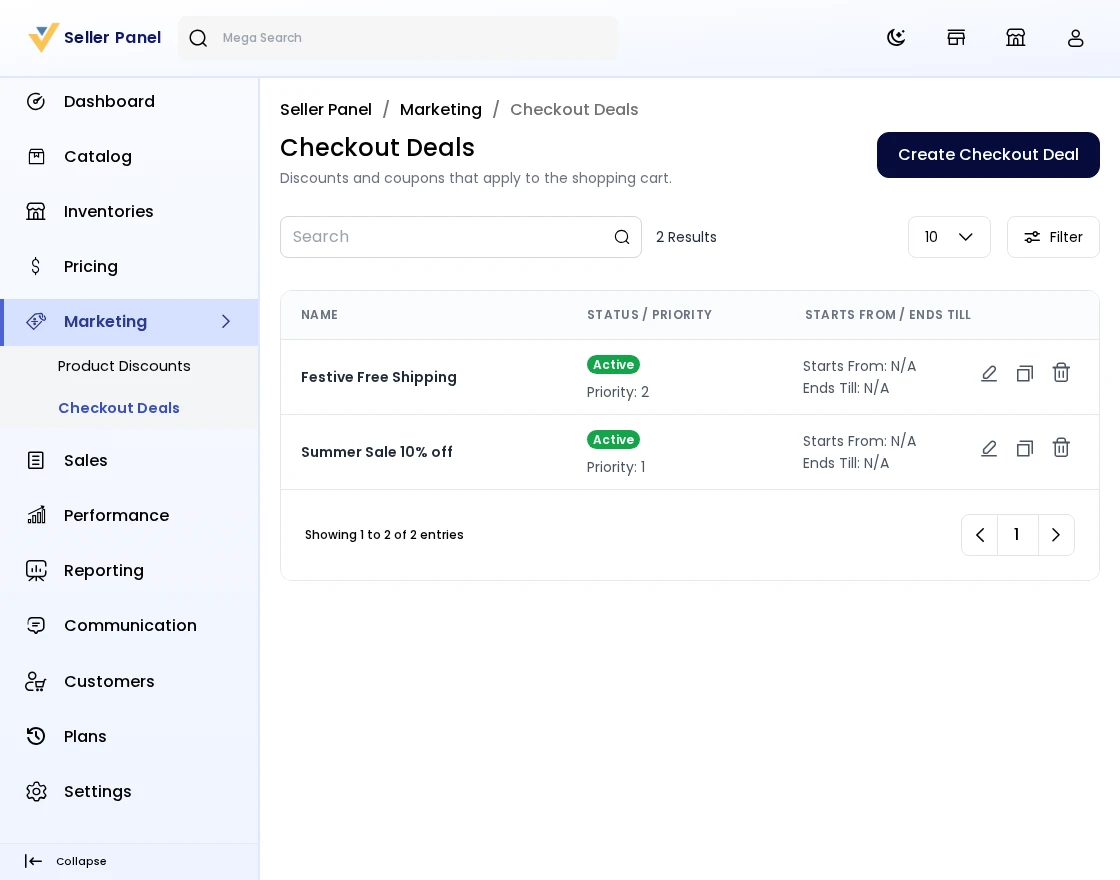
Step-by-Step: Create a Checkout Deal
- Go to Marketing >> Checkout Deals in the seller panel.
- Click Create Checkout Deal and configure the coupon type, action (percent or fixed), discount amount, usage limits, and validity period.
- Save the deal; you can generate Coupons for it from the coupons tab.
Join Product Discounts
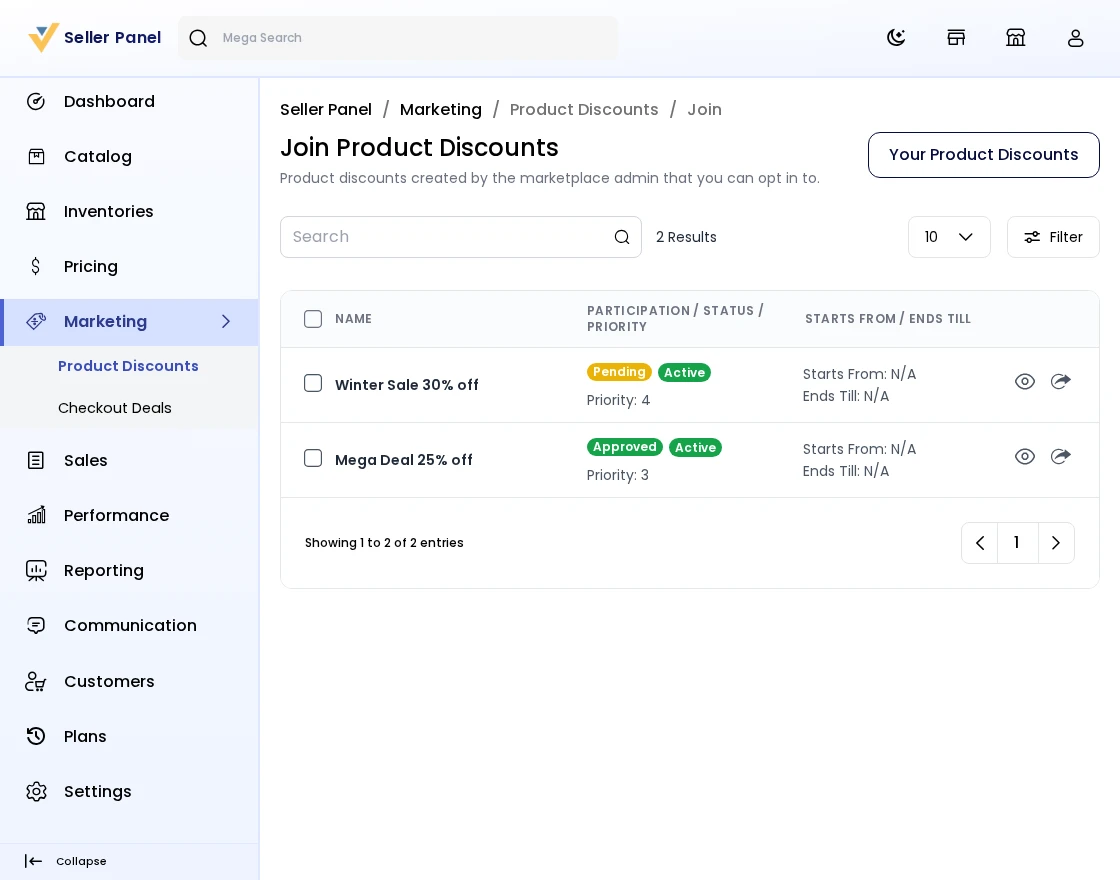
Step-by-Step: Join an Admin Product Discount
- Go to Marketing >> Product Discounts >> Join in the seller panel.
- Browse the product discounts created by the admin that allow seller participation.
- Click Enroll to join a discount, or Withdraw if you no longer want to participate.
- The admin approves or disapproves your enrollment from Marketplace >> Marketing >> Joined Product Discounts.
Sales Reporting
In the sales report the seller can easily track:
- Total Commission Paid
- Total Sales
- Purchase Funnels, Abandoned Carts
- Total Orders
- Average Order Value
- Tax Collected
- Refunds
- Top Payment Methods
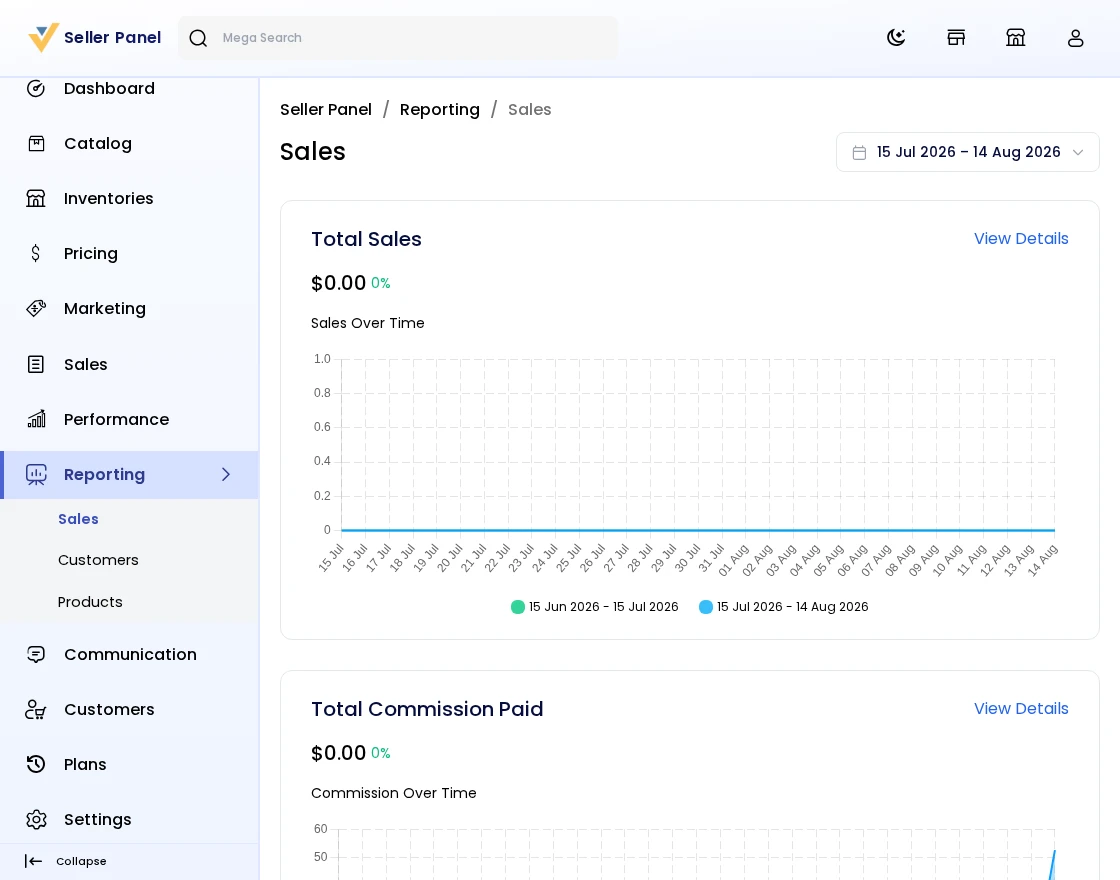
Step-by-Step: Read the Sales Report
- Go to Reporting >> Sales in the seller panel.
- Review the key figures: Total Commission Paid, Total Sales, Purchase Funnels / Abandoned Carts, Total Orders, and Average Order Value.
- Check Tax Collected, Refunds, and Top Payment Methods.
Customers
In the customers report the seller can easily track:
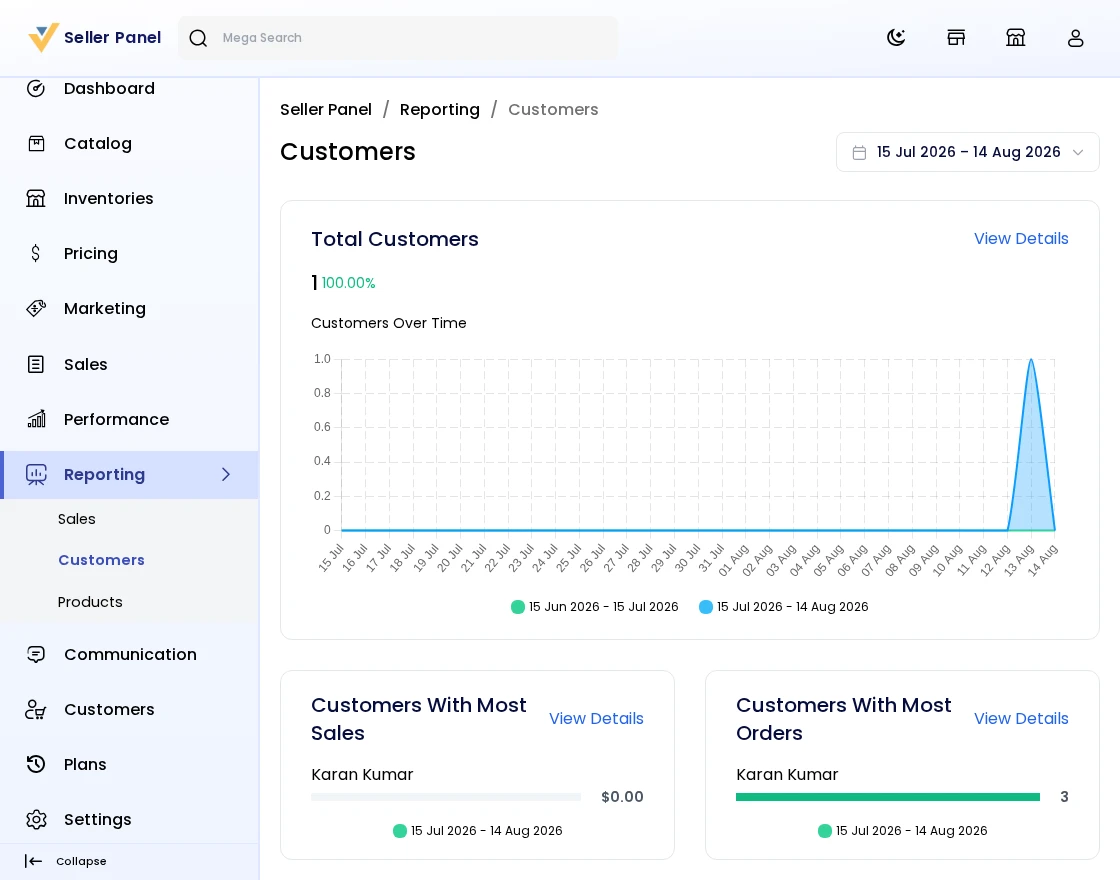
- Total Customers
- Customers With Most Sales
- Customers With Most Orders
- Customers Traffic
- Top Customer Groups
- Customers With the Most Reviews
Step-by-Step: Read the Customers Report
- Go to Reporting >> Customers in the seller panel.
- Track Total Customers, Customers With Most Sales, and Customers With Most Orders.
- Check Customers Traffic, Top Customer Groups, and Customers With the Most Reviews.
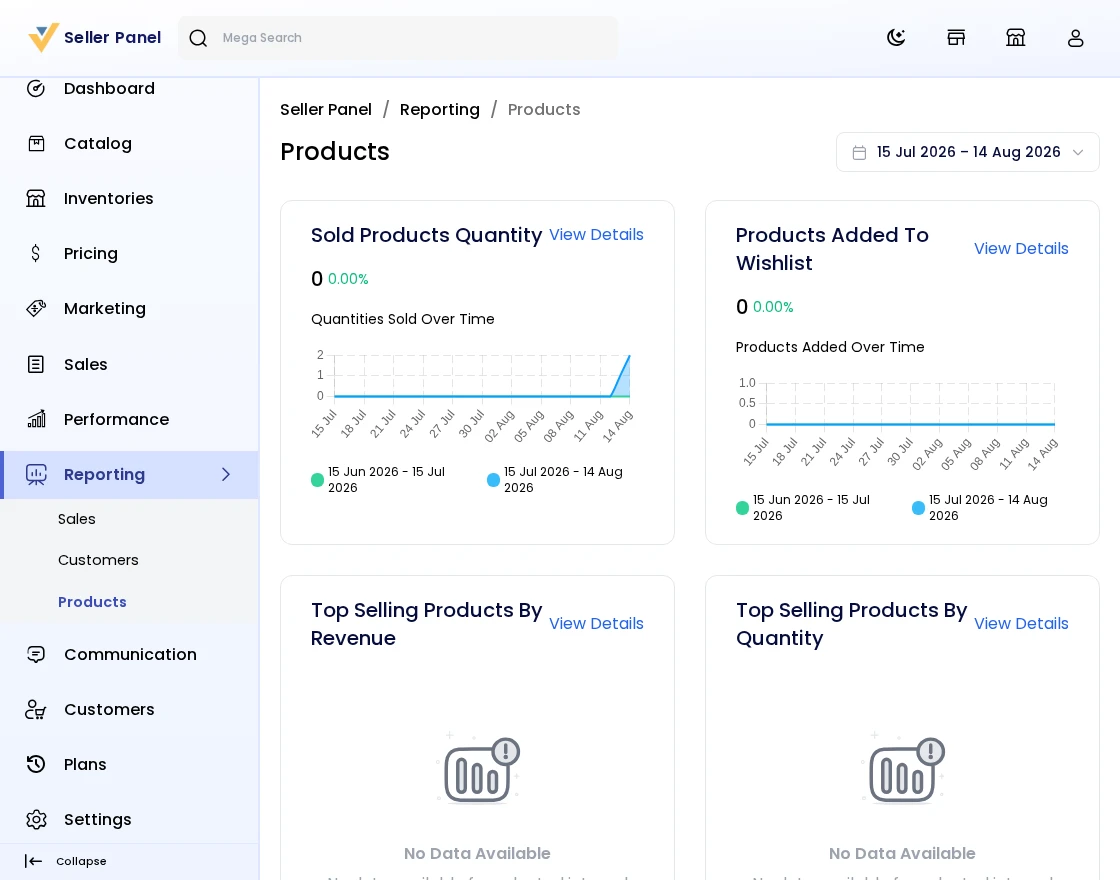
Products
In the products report the seller can easily track:
- Sold Products Quantity
- Products Added To Wishlist
- Top Selling Products By Revenue
- Top Selling Products By Quantity
- Products With Most Reviews
- Products With Most Visits
Step-by-Step: Read the Products Report
- Go to Reporting >> Products in the seller panel.
- Track Sold Products Quantity and Products Added To Wishlist.
- Review Top Selling Products By Revenue and By Quantity, plus Products With Most Reviews and Most Visits.
Plans (Seller Subscription)
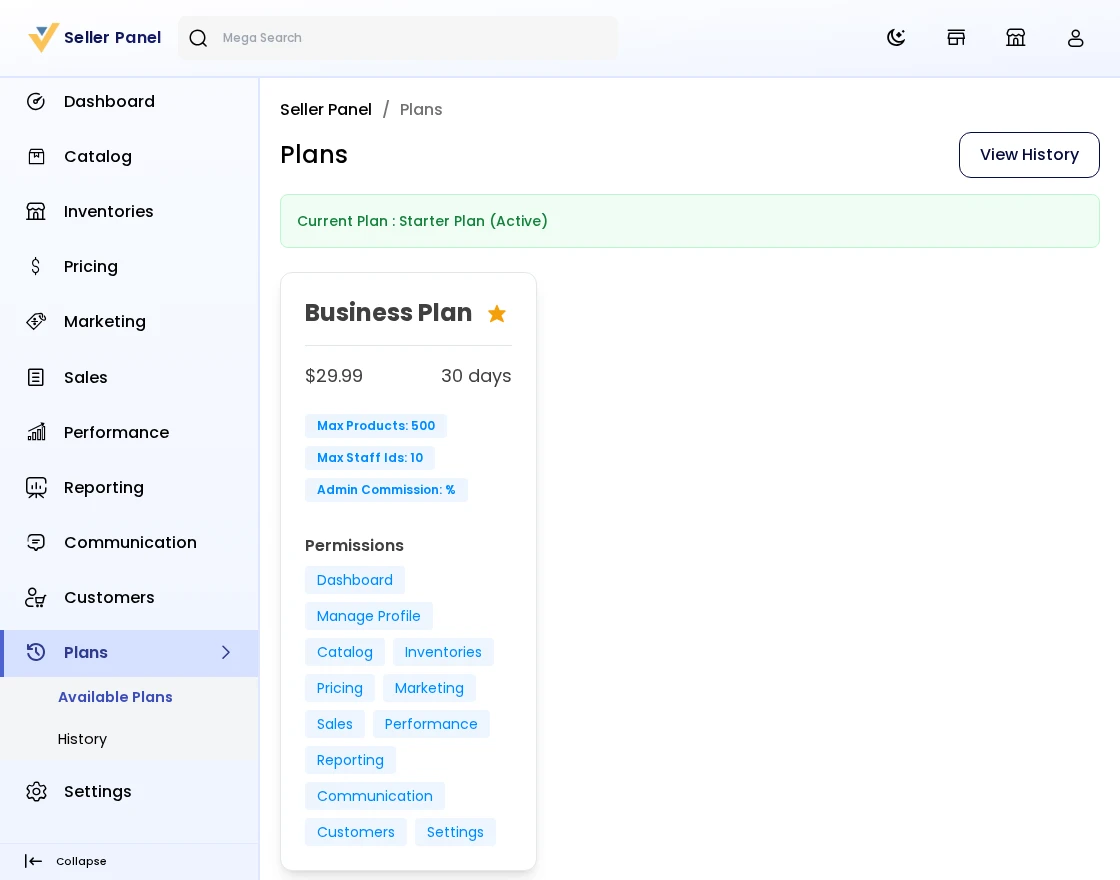
Sellers subscribe to a plan to use the marketplace. The plan decides which product types the seller can list, the maximum number of products and staff users, the commission deducted from sales, and the menu permissions available in the seller panel.
Step-by-Step: Subscribe to a Plan
- Go to Plans in the seller panel (a new seller is taken here automatically until an active subscription exists).
- The available plans are displayed as cards showing the name, price, duration in days, Max Products, Max Staff, Commission, and the menu permissions that are included (ticked) or not (crossed).
- If you already have an active subscription, a green banner shows your current plan name and status.
- Click a plan card to open the plan popup with the full description, price, duration, product types, and permission tree.
- Tick the Terms & Conditions checkbox (read the terms if needed) and click Submit.
- Complete the payment (free plans are activated instantly; paid plans complete via the gateway the admin has enabled — such as PayPal, PayU, Razorpay, Stripe, PhonePe, or PayGlocal).
- Your new subscription becomes active; previous pending subscriptions are cancelled automatically.
Plan History
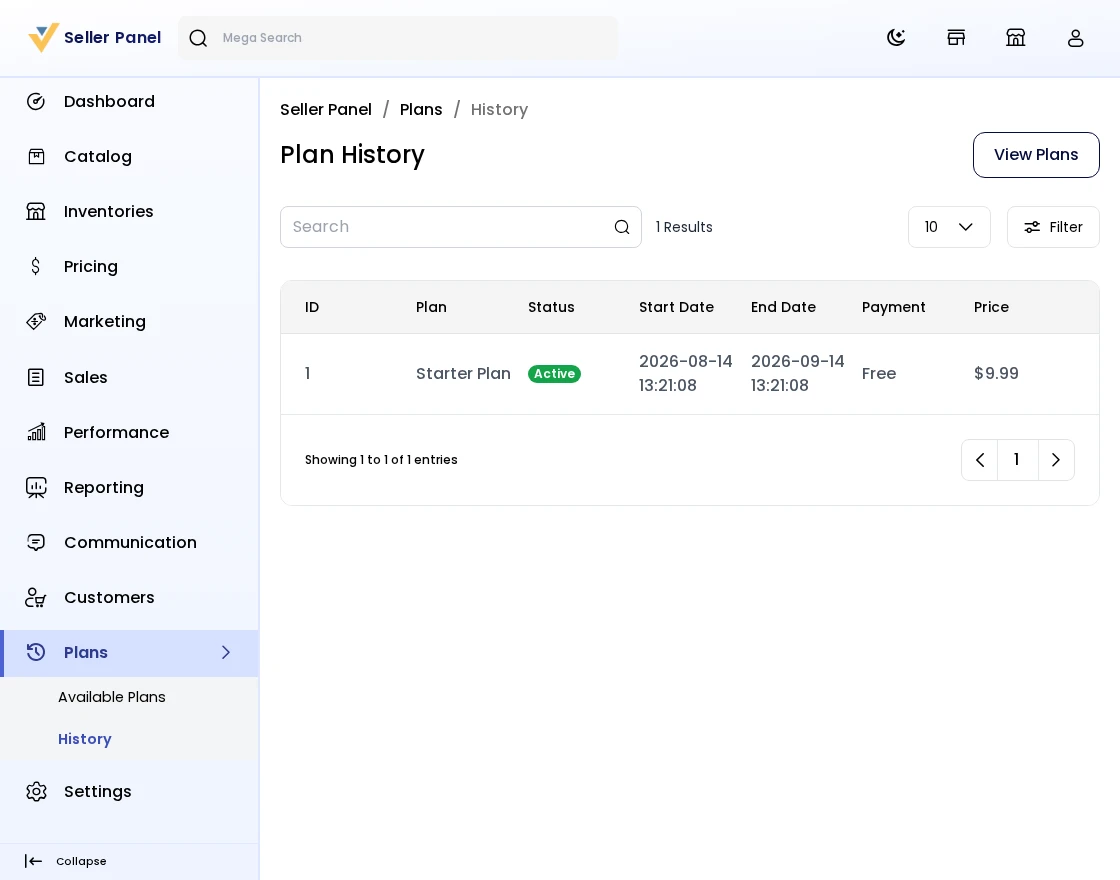
The seller can view the complete history of purchased subscription plans along with their status and validity period.
Step-by-Step: View Plan History
- Open Plans and click the History button (or go to Plans >> History).
- All your current and past subscriptions are listed in the datagrid with the plan name, price, status (active / expired / cancelled / pending), and the validity period.
- Use the Available Plans button to go back and subscribe to a new plan anytime.
That’s all for Laravel Multi-Vendor Marketplace. If you still have any issues feel free to add a ticket and also let us know your views to make the module better https://bagisto.uvdesk.com/en/