Laravel eCommerce Restaurant POS System
The Laravel eCommerce Restaurant POS System lets your agents book tables, take orders and print invoices from one POS screen on Bagisto v2.4.11.
It talks to the Bagisto API, so agents keep selling offline and sync every order, customer and booking once the connection returns.
Features of the Laravel eCommerce Restaurant Point of Sale System
- Create and manage multiple outlets from the admin panel with the Laravel eCommerce Restaurant POS System.
- Assign an inventory source to each outlet to keep product stock separate.
- Apply a percentage discount to cart items from the front end.
- Manage customers both online and offline.
- Hold and resume carts from the front end.
- Generate and print barcodes from the back end, then search products by barcode at the POS with the Laravel eCommerce Restaurant POS System.
- Accept Cash, Card and Split payments at the front end.
- Sync customers and orders after working offline, and place orders with custom products.
- Sell Simple, Configurable, Downloadable, Virtual, Bundle, Grouped and Booking products.
- Customize POS sales invoices from Point Of Sale (POS) > Receipts.
- View sales reports and filter them by date, order id, outlet, payment method, bank and status in the Laravel eCommerce Restaurant POS System.
- Enable or disable restaurant table features from the POS settings.
- Define the table shapes an agent can pick: circle, square or curved square.
- Let POS agents create and manage restaurant tables directly from the Laravel eCommerce Restaurant POS System.
- Define the number of seats for each table.
- Assign tables to registered or guest customers.
- Search restaurant tables by name.
- Let admins create and manage restaurant tables for POS agents with the Laravel eCommerce Restaurant POS System.
- Send booking confirmation emails to the customer and to the POS agent.
- Review every booking in the table booking history.
Bagisto v2.4.11 Compatibility of the Restaurant POS System
The Restaurant POS extension v2.4.11 matches Bagisto v2.4.11, so the POS works with the latest storefront, admin and API.
- The POS front end now calls the Bagisto API at
/api/graphql, with the same screens and features as before. - Admin deactivates an agent or outlet, and the POS signs that agent out on the next request with a clear message.
- Outlet and customer forms check that the selected state belongs to the selected country, as Bagisto v2.4.11 does.
- Admin grids now filter amounts such as order totals and product prices by their exact decimal value.
- Receipt switches, barcode printing and admin order notes work as intended in the admin panel.
Installation of the Laravel eCommerce Restaurant Point of Sale Extension
Before you start, install Bagisto v2.4.11 with the Bagisto API v2.4.4 and JWT Auth v2.9.3 packages, then add extension v2.4.11.
composer require bagisto/bagisto-api:2.4.4 php-open-source-saver/jwt-auth:2.9.3
Unzip the extension zip, then merge the packages folder into your project root directory.
Open bootstrap/providers.php and add the following line under providers.
Webkul\PosRestaurant\Providers\PosRestaurantServiceProvider::class,
Add the following line under the psr-4 section in composer.json.
"Webkul\\PosRestaurant\\": "packages/Webkul/PosRestaurant/src"
Next, run these commands from the root directory in the terminal.
composer dump-autoload
php artisan pos-restaurant:install
php artisan jwt:secret
The install command runs the migrations and seeders, then publishes the POS assets. The last command adds JWT_SECRET to your .env file.
The POS stays off after installation, so switch it on under Status in the settings below.
Laravel eCommerce Restaurant Point of Sale Configuration
After a successful installation, the admin configures the extension from the admin panel.
Go to Configuration > Point Of Sale. It has two sections: Settings and Restaurant.
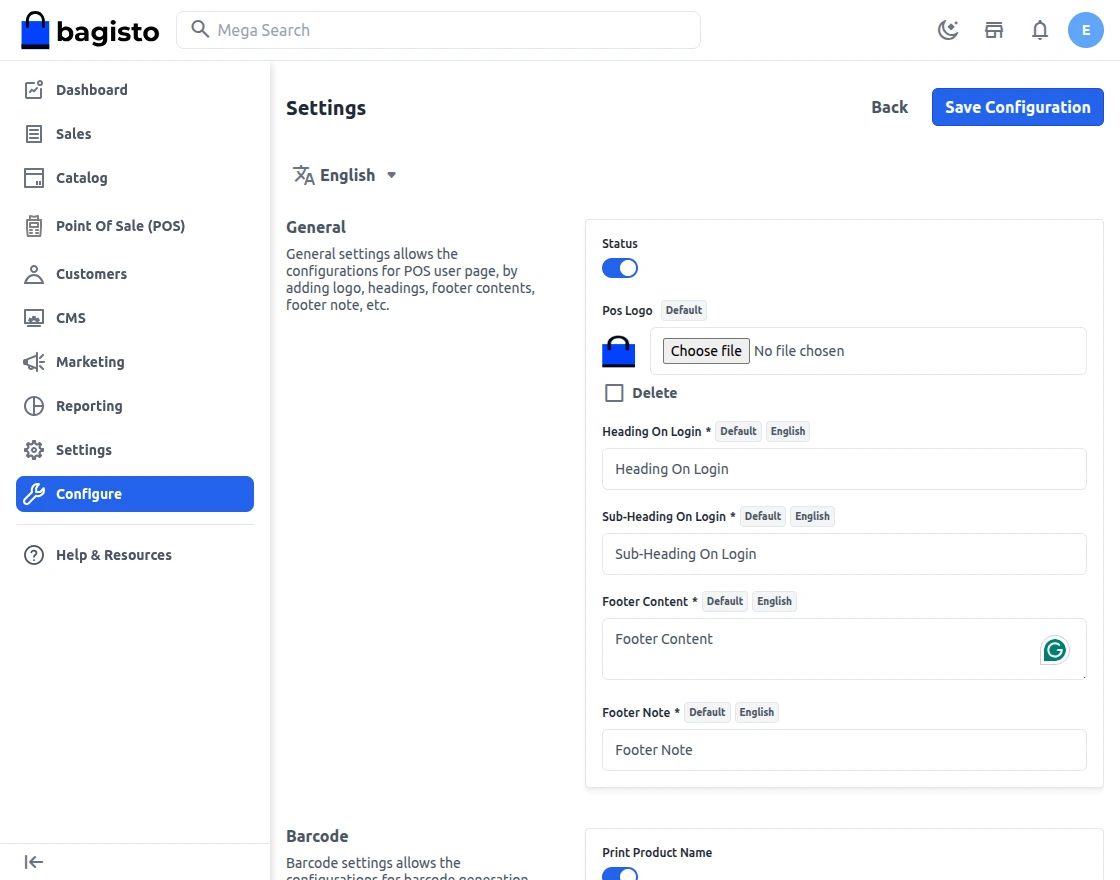
Under Configuration > Point Of Sale > Settings > General, the admin fills the fields below.
Status
The admin activates or deactivates the POS from here.
Heading On Login
Enter the heading that appears on the POS login panel.
Sub-Heading On Login
Enter the sub-heading that appears on the POS login panel.
Footer Content
Enter the text for the footer of the POS login panel.
Footer Note
Enter the footer note.
POS Logo
Upload the logo for the POS landing page. The bill receipt shows it too.

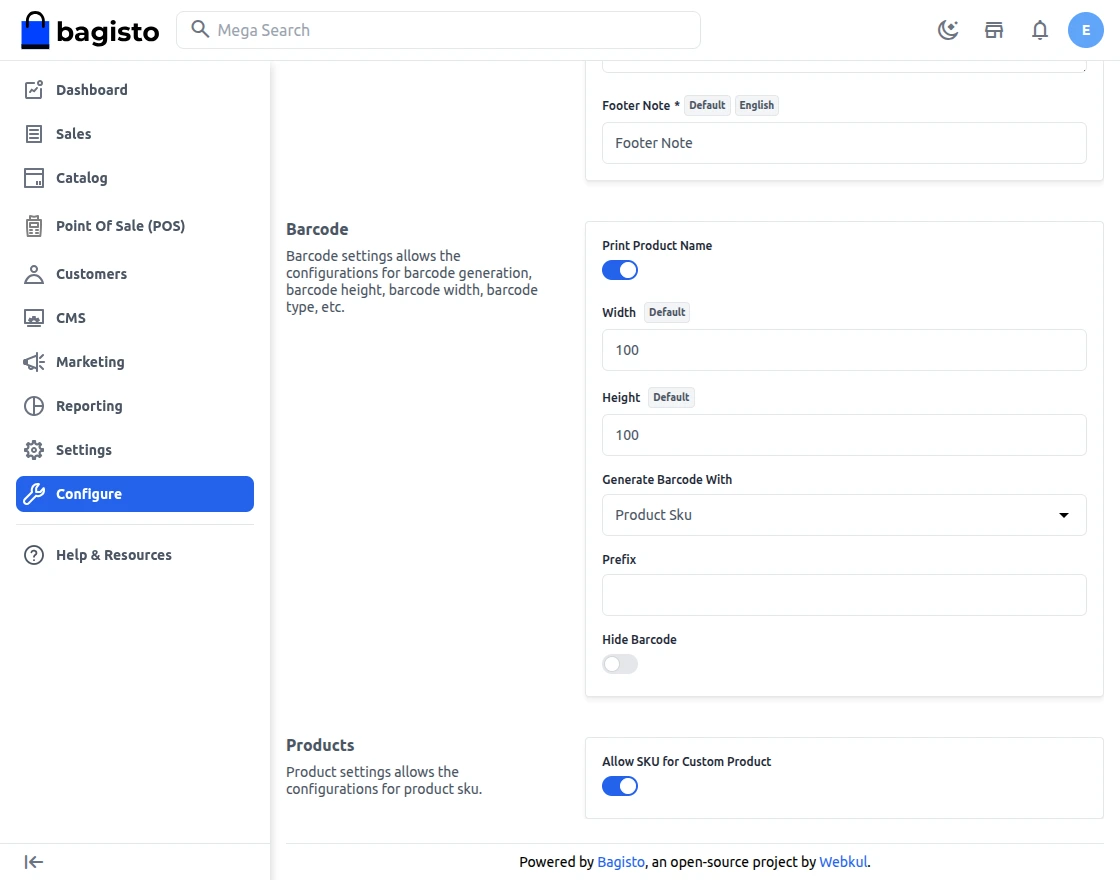
Under Configuration > Point Of Sale > Settings > Barcode, the admin sets up barcode generation.
Width and Height
Enter the size of the barcode image.
Print Product Name
Choose Yes to print the product name together with the barcode.
Generate Barcode With
Generate the barcode from the Product Id or from the Product Sku.
Prefix
Add a prefix to every barcode, or leave the field blank for none.
Hide Barcode
Hide the barcode icon on the POS screen when you do not need scanning.
POS Products
Allow SKU for Custom Product
Once the admin turns this on, agents can enter a SKU when they add a custom product to the cart.
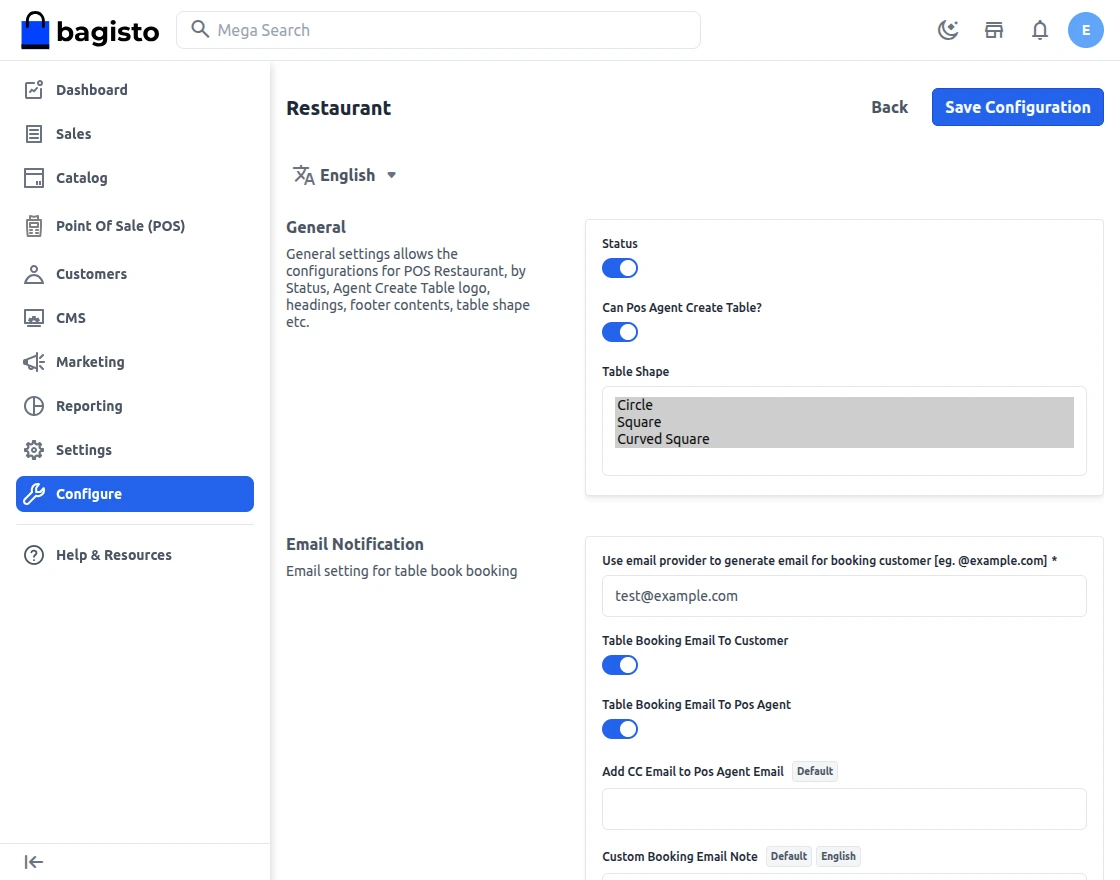
Under Configuration > Point Of Sale > Restaurant, the admin fills the fields below.
Status
The admin activates the POS restaurant feature for agents here.
Can Pos Agent Create Table?
Switch this on to let agents create their own tables.
Table Shape
Multi-select the shapes agents can use: circle, square and curved square.
Table Booking Email To Customer
Set it to Yes or No.
Table Booking Email To Pos Agent
Set it to Yes or No.
Add CC Email to Pos Agent Email
Add one more address that gets a copy of every table booking email.
Custom Booking Email Note
Add a custom note that appears in the booking emails to customers and agents.
On the admin dashboard, click Point Of Sale (POS) in the left menu to reach the back end features.
Agents
Here the admin finds the list of POS agents under Point Of Sale (POS) > Agents > Agents.
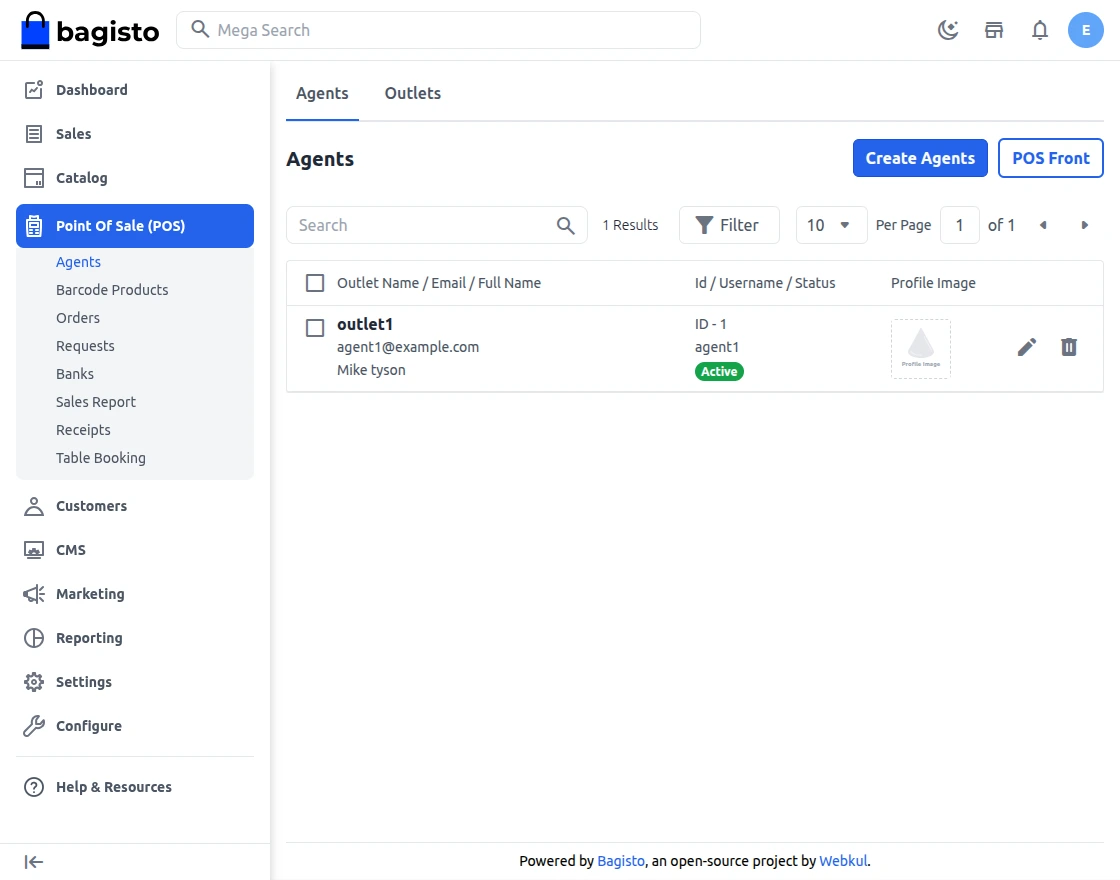
To add an agent, click Create Agents.
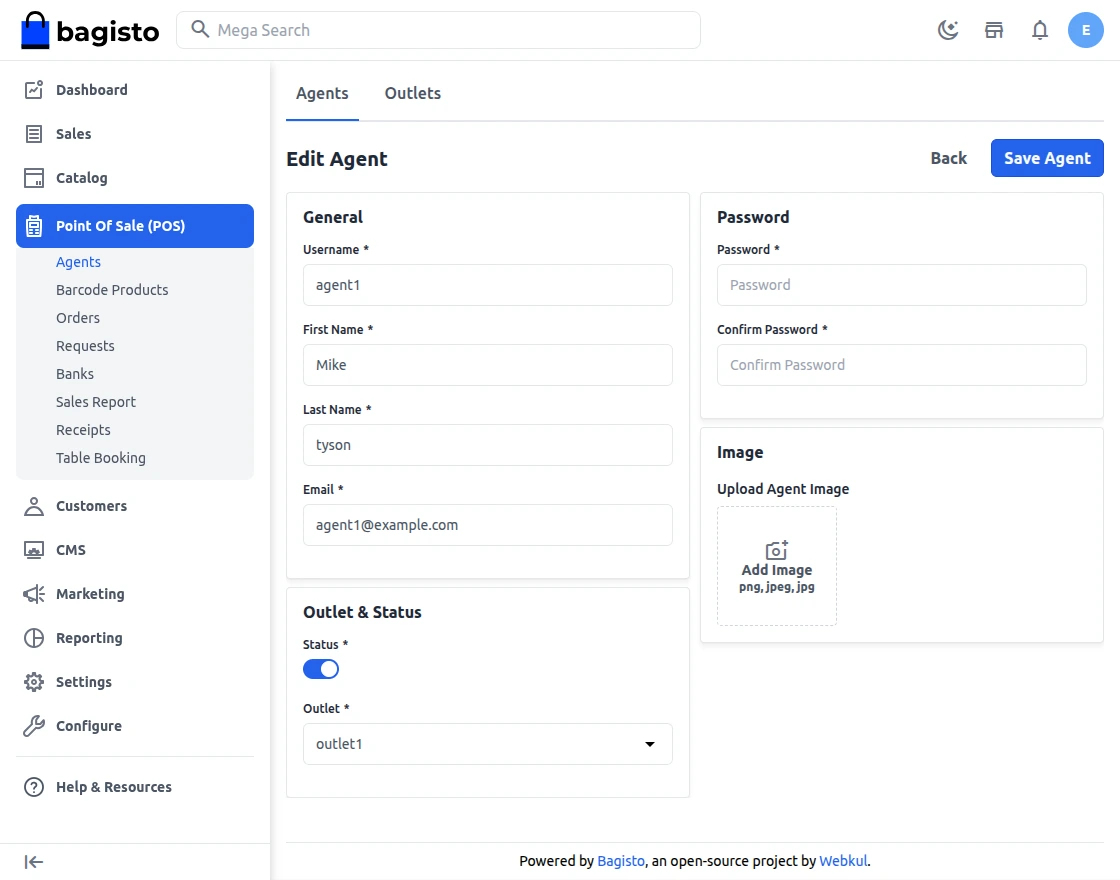
Username
Enter the username the agent uses to log in.
First Name
Enter the first name of the agent.
Last Name
Enter the last name of the agent.
Enter the email address of the agent.
Add Image
Upload an image that represents the agent.
Password
Set the password for the agent.
Outlet
Select the outlet from the drop-down.
Status
Activate or deactivate the agent from the drop-down.
Lastly, click Save Agent to store the agent.
Outlets
Open Point Of Sale (POS) > Agents > Outlets to see every POS outlet.
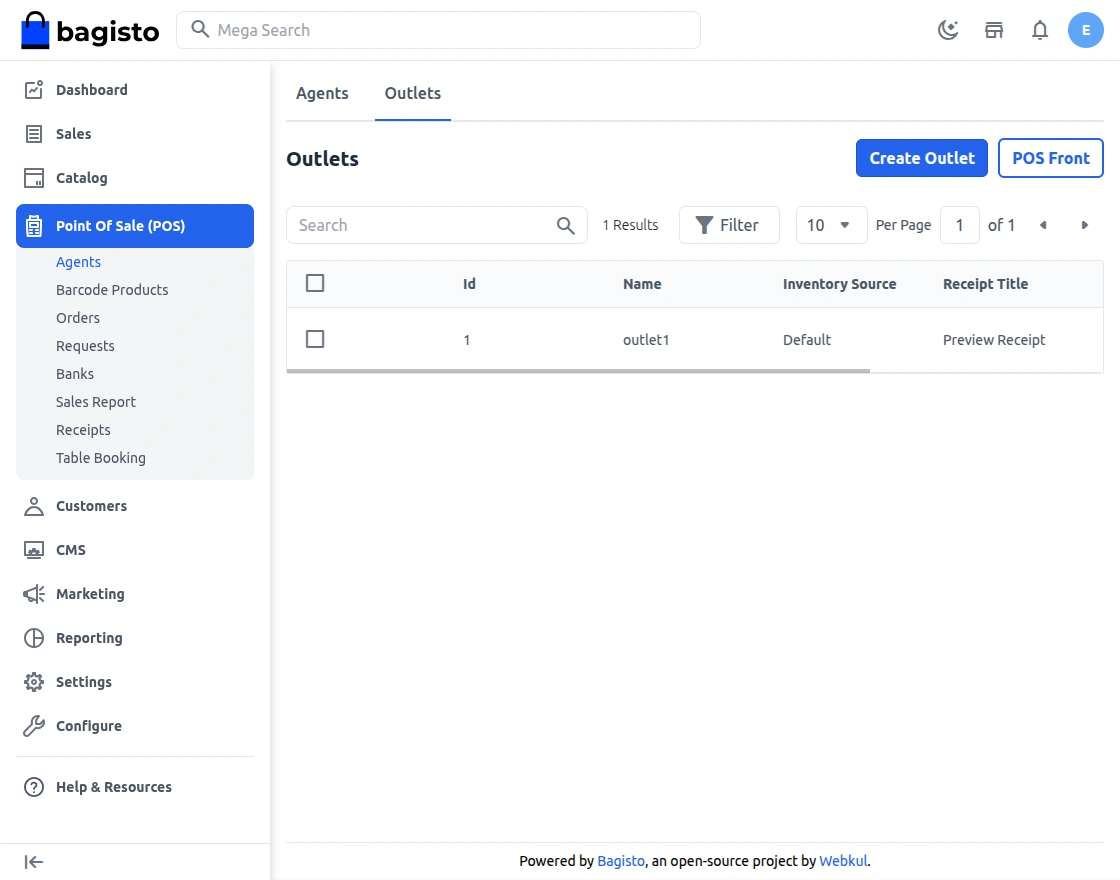
To add an outlet, click Create Outlet.
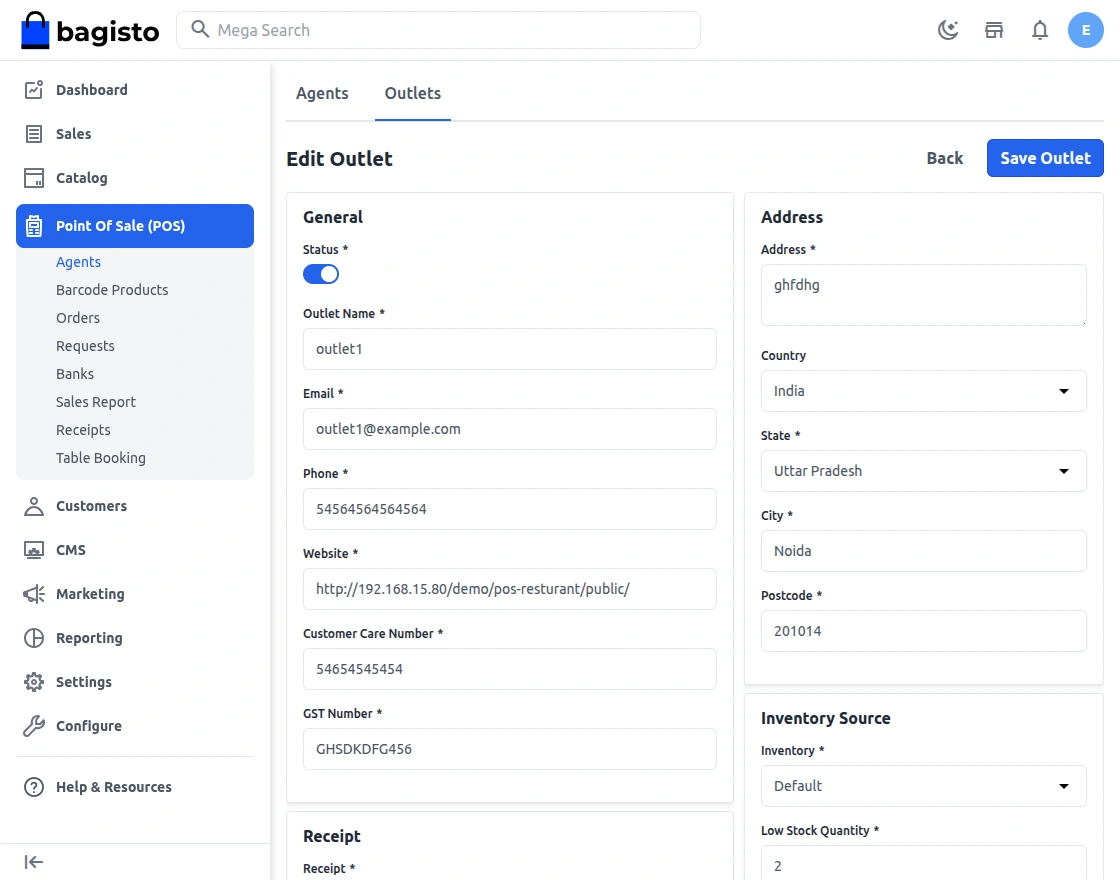
Outlet Name
Enter the name of the outlet.
Status
Activate or deactivate the outlet from the drop-down.
Outlet Address
Enter the street address of the outlet.
Outlet Country and State
Select the country, then pick a state that belongs to it.
Outlet City
Enter the city of the outlet.
Outlet PostCode
Enter the postcode of the outlet.
Receipt
Select the receipt layout the outlet uses for printed invoices.
Inventory Source
Choose a separate inventory source for each outlet from the drop-down.
Lastly, click Save Outlet to store the outlet.
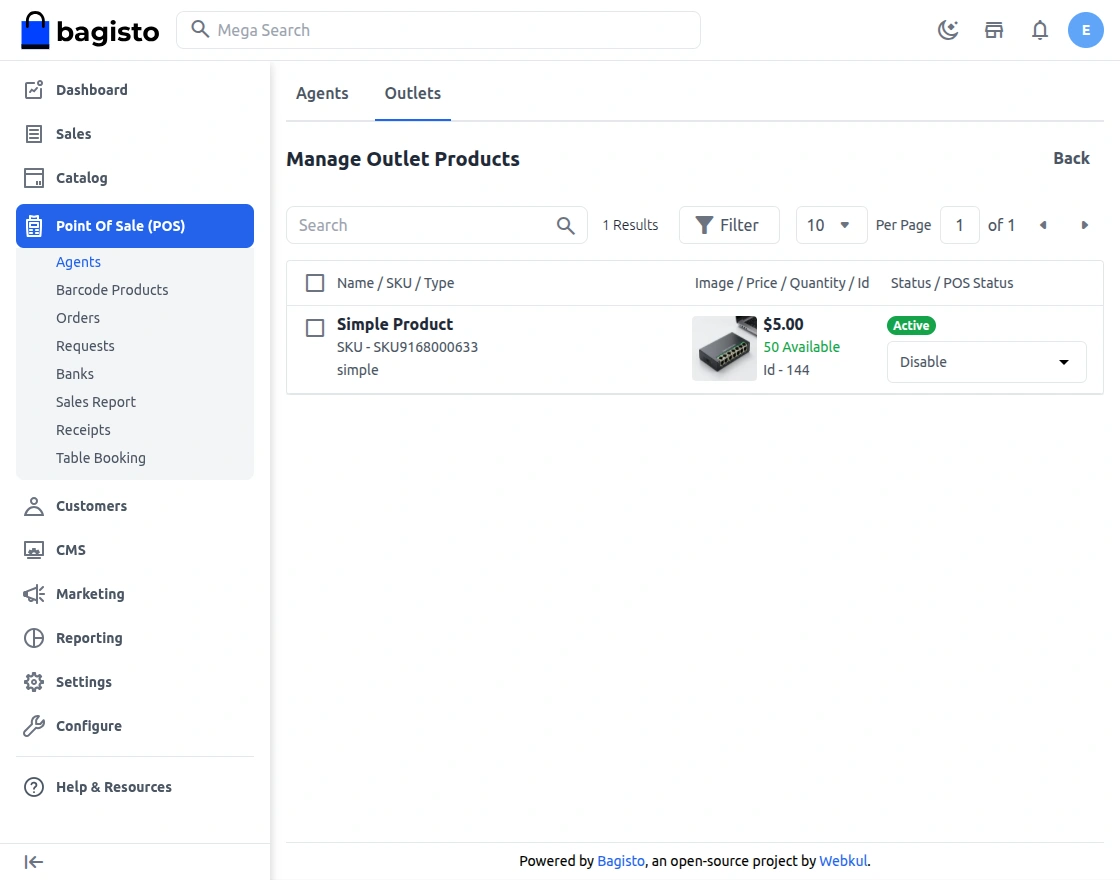
After that, the admin manages the outlet products with the icon shown below.
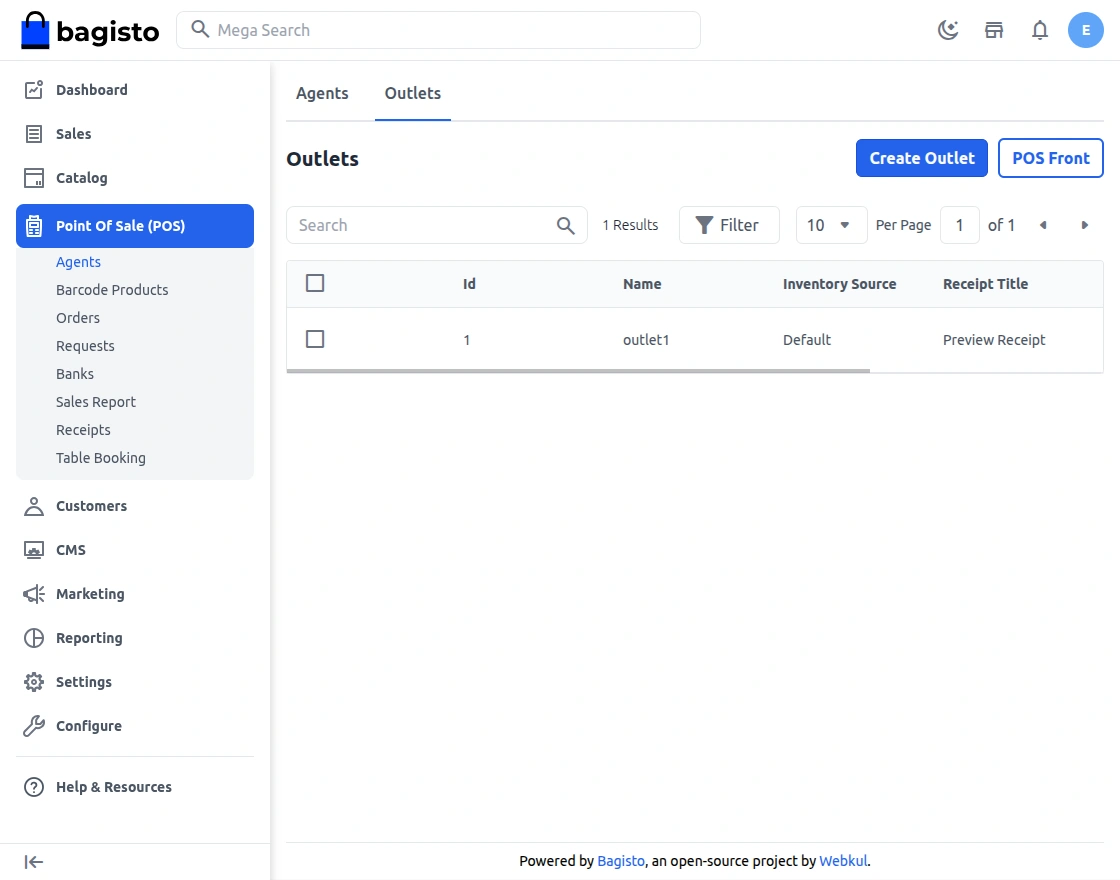
Manage Outlets Products
On this page, the admin enables the products for the outlet. Assigned products appear on the POS front end.
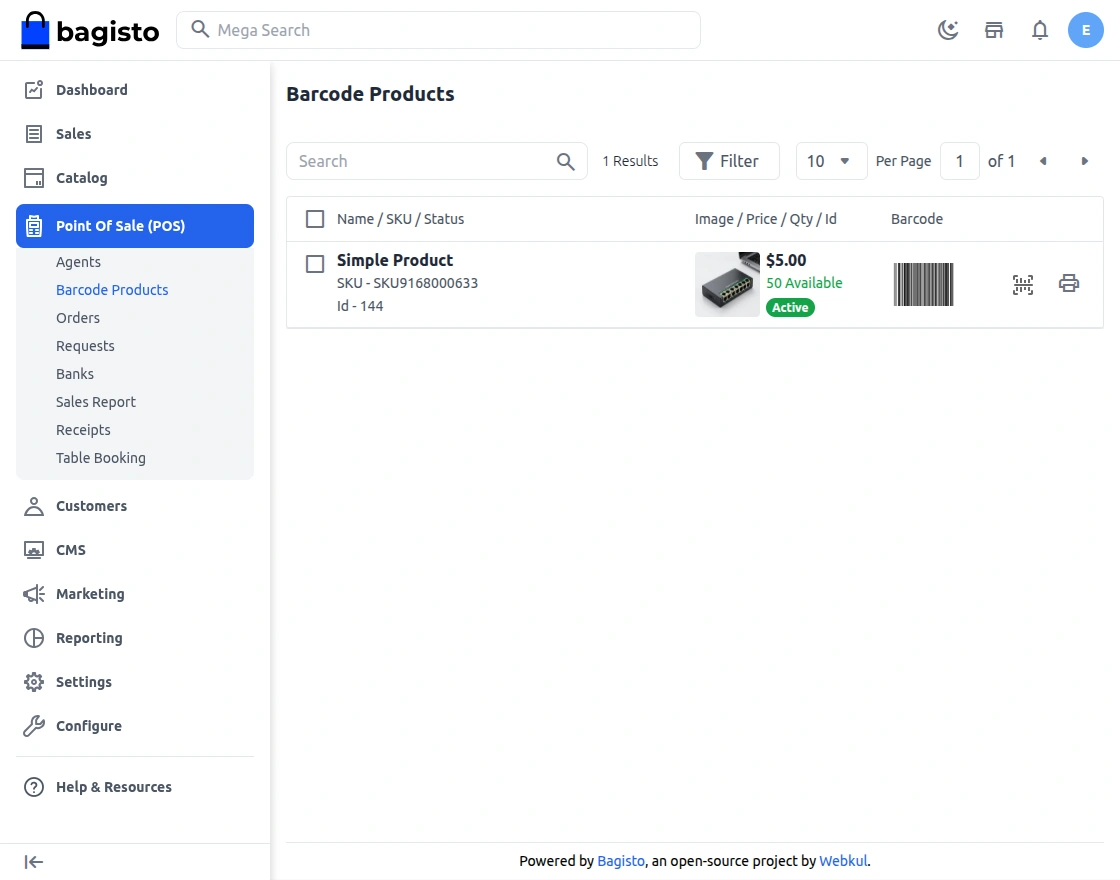
Barcode Products
The admin views store products and generates barcodes, so agents can scan items and add them to the cart during checkout.
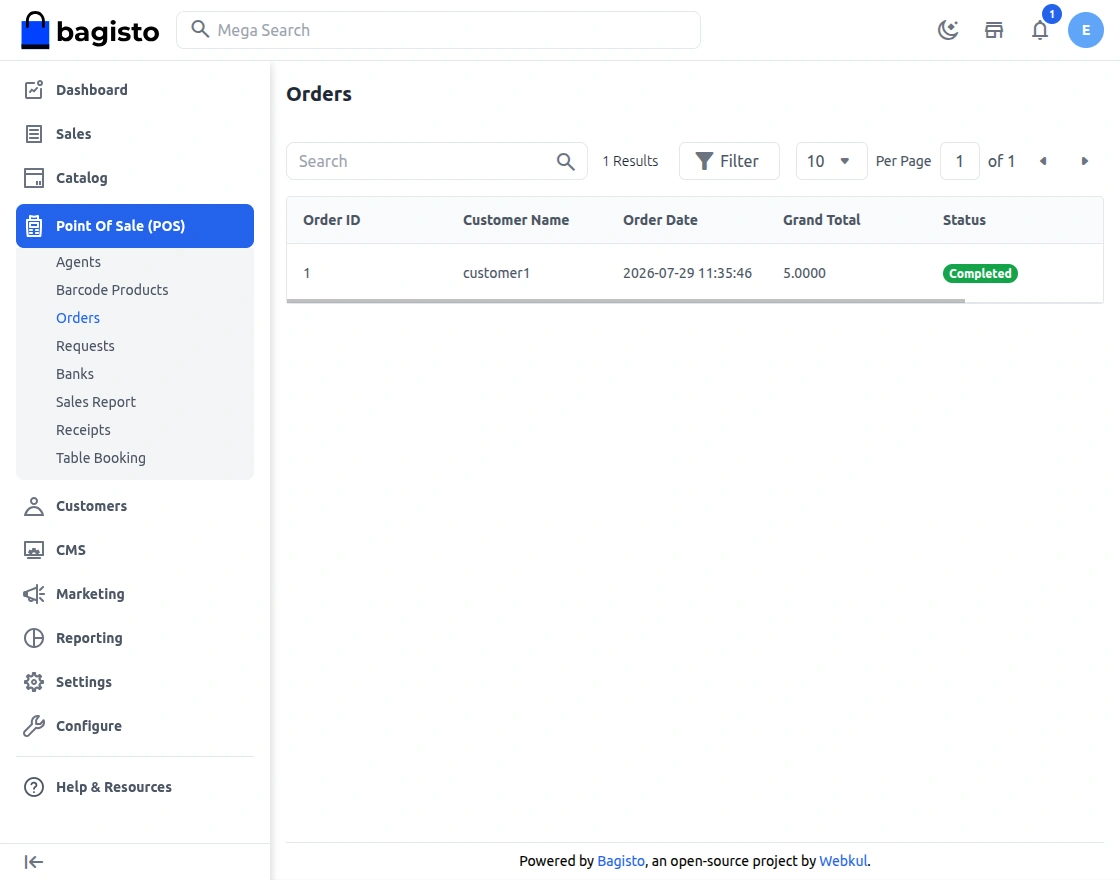
Orders
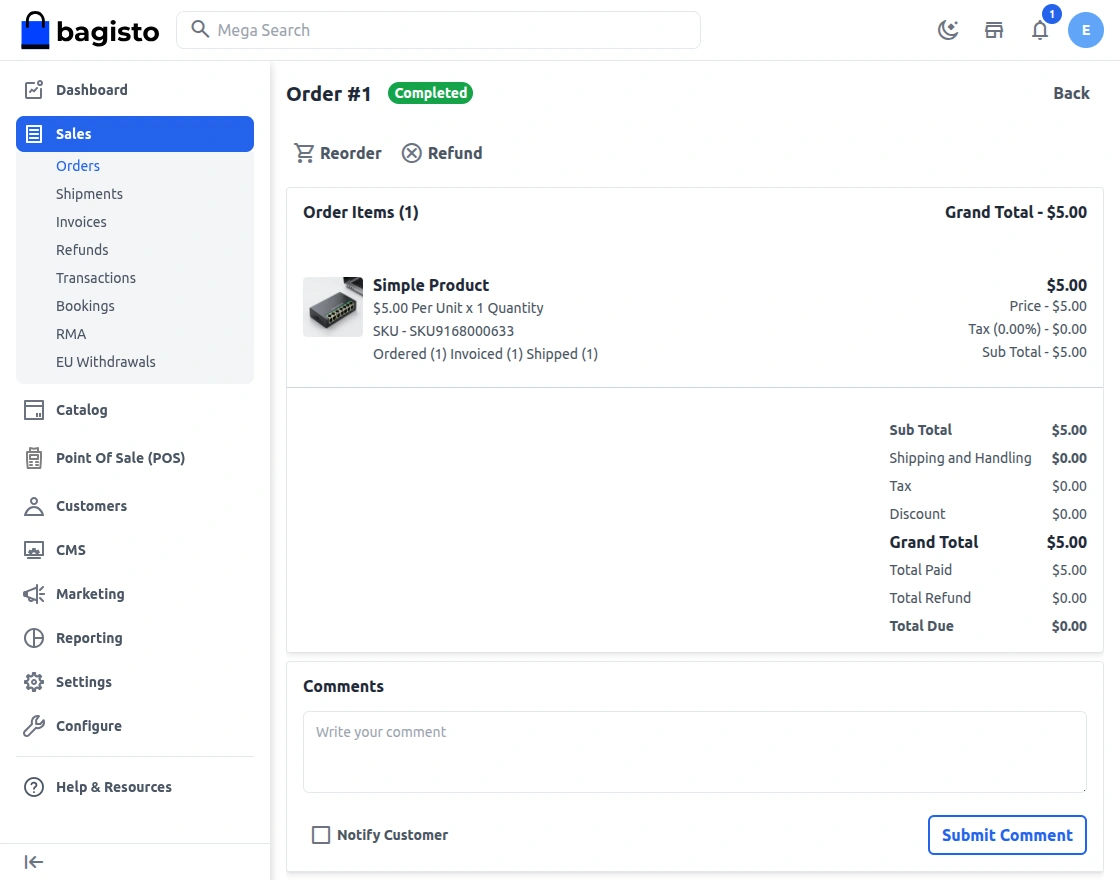
Here the admin sees every POS restaurant order in a list and opens any order for its details.
Click the eye icon in the list to check the order information.
Request Product
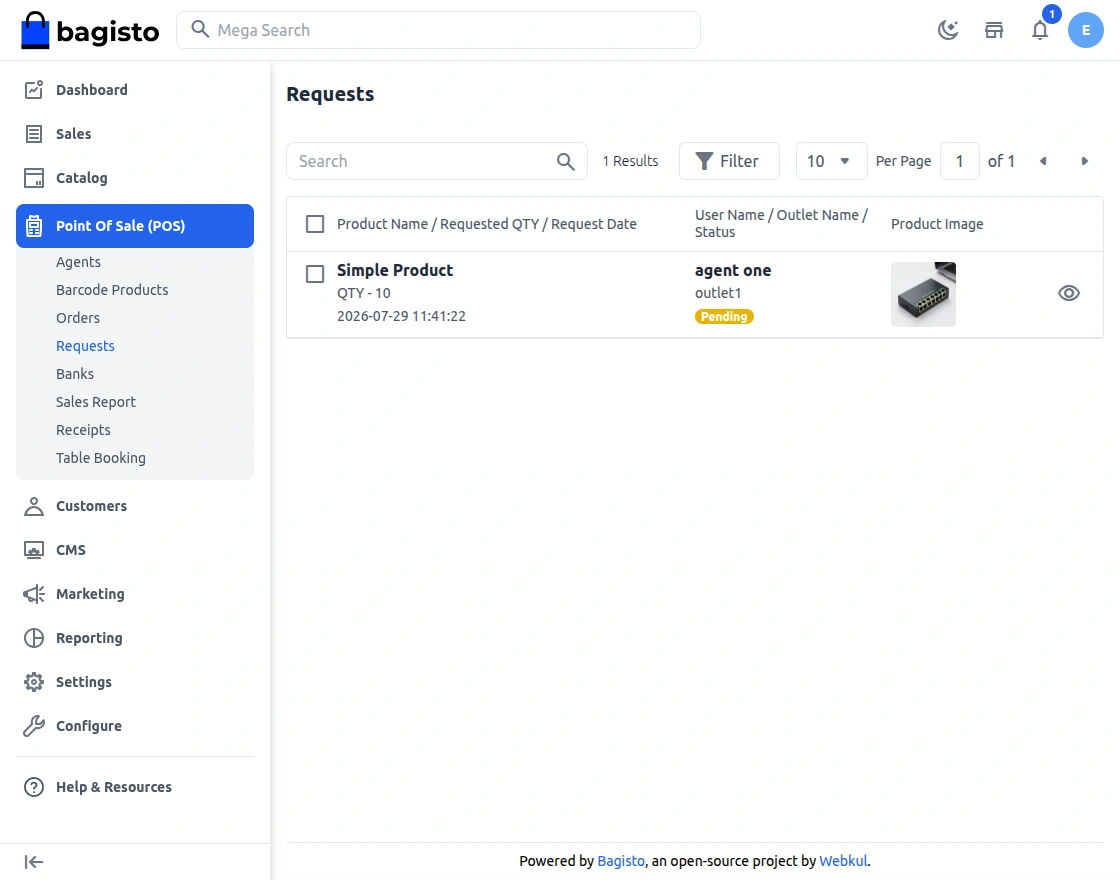
Under Point Of Sale (POS) > Requests, the admin checks the low stock product requests that POS agents send.
Bank Details
Under Point Of Sale (POS) > Banks, the admin sees the list of banks, as shown below.
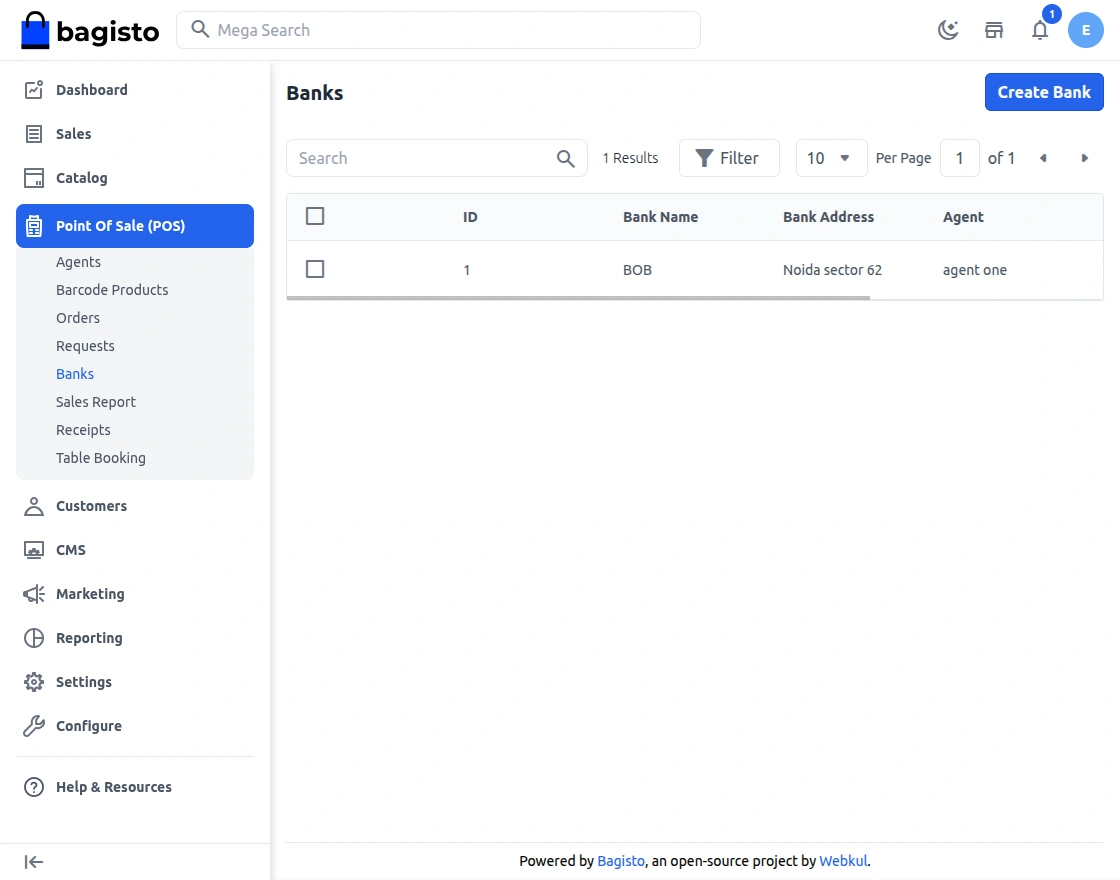
Click Create Bank to add another bank, as shown below.
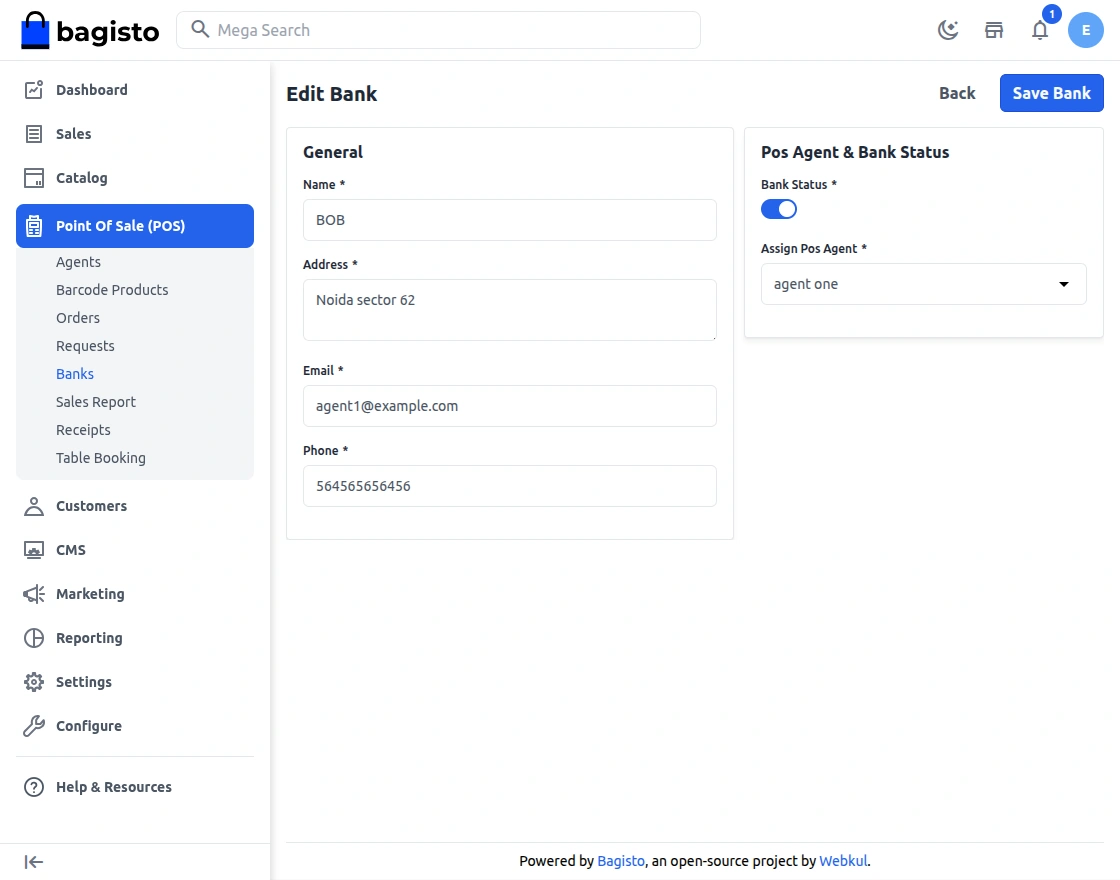
The General section has four fields.
Bank Name
Enter the bank name.
Bank Address
Enter the bank address.
Enter the bank email address.
Phone
Enter the bank phone number.
The Pos agent and bank status section has two fields.
Assign Pos Agent
Select a POS agent from the drop-down.
Status
Activate or deactivate the bank.
Note: When a customer pays by card, the agent can select only the banks assigned to that agent.
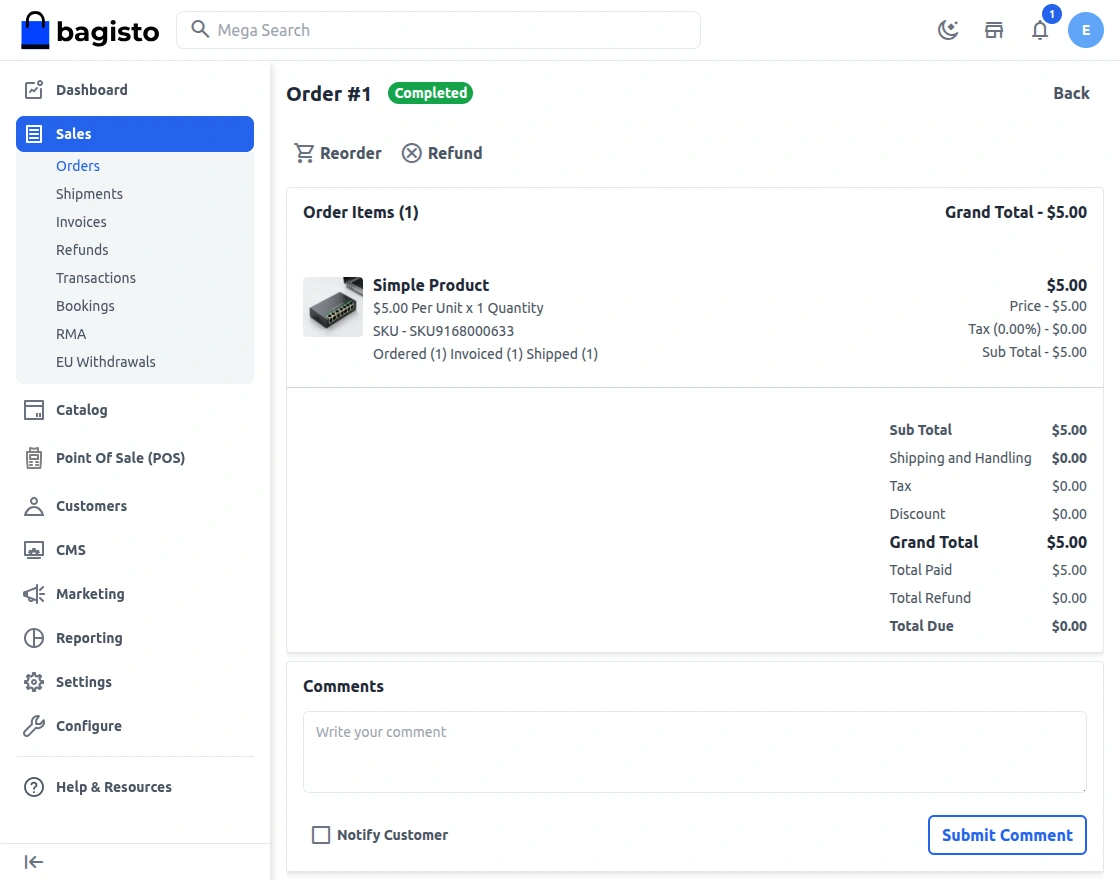
Sales Report
The admin views all sales reports and filters them by date, order id, outlet, payment method, bank and status.
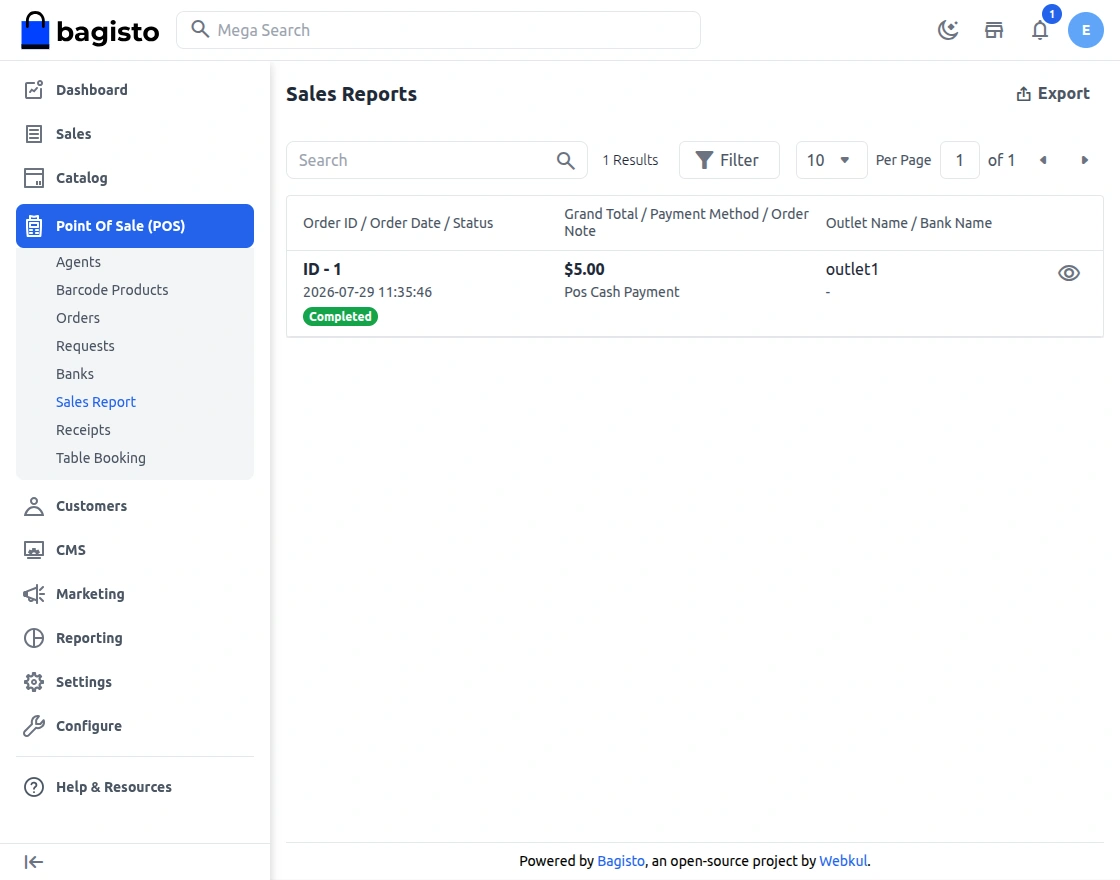
Click the eye icon to see the full details of an order.
Receipts
Under Point Of Sale (POS) > Receipts, the admin designs the invoice that agents print after a sale.
Click Create Receipt to set the labels, logo, header and footer, then assign the receipt to an outlet.
Restaurant Tables
Under Point Of Sale (POS) > Table Booking > Restaurant Tables, the admin sees every table that admins and agents created.
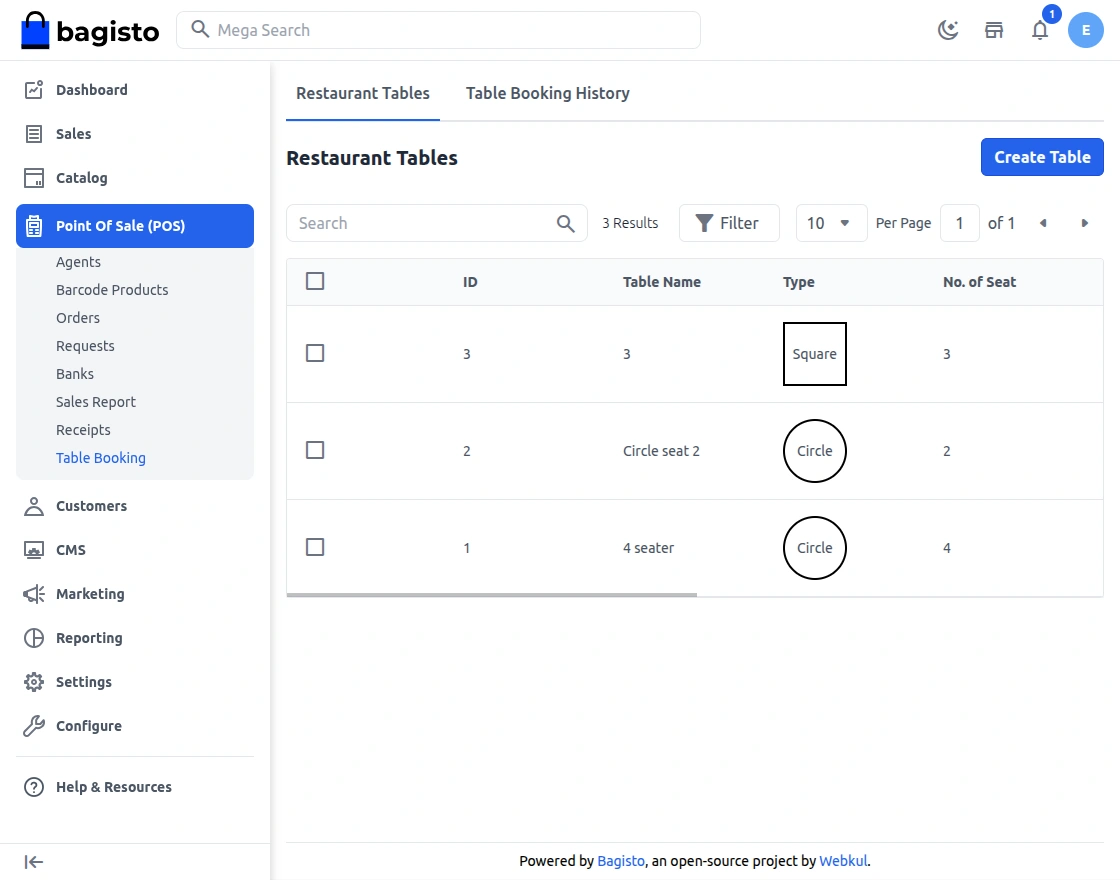
Click Create Table to add a new table. A page with several fields opens, as shown below.
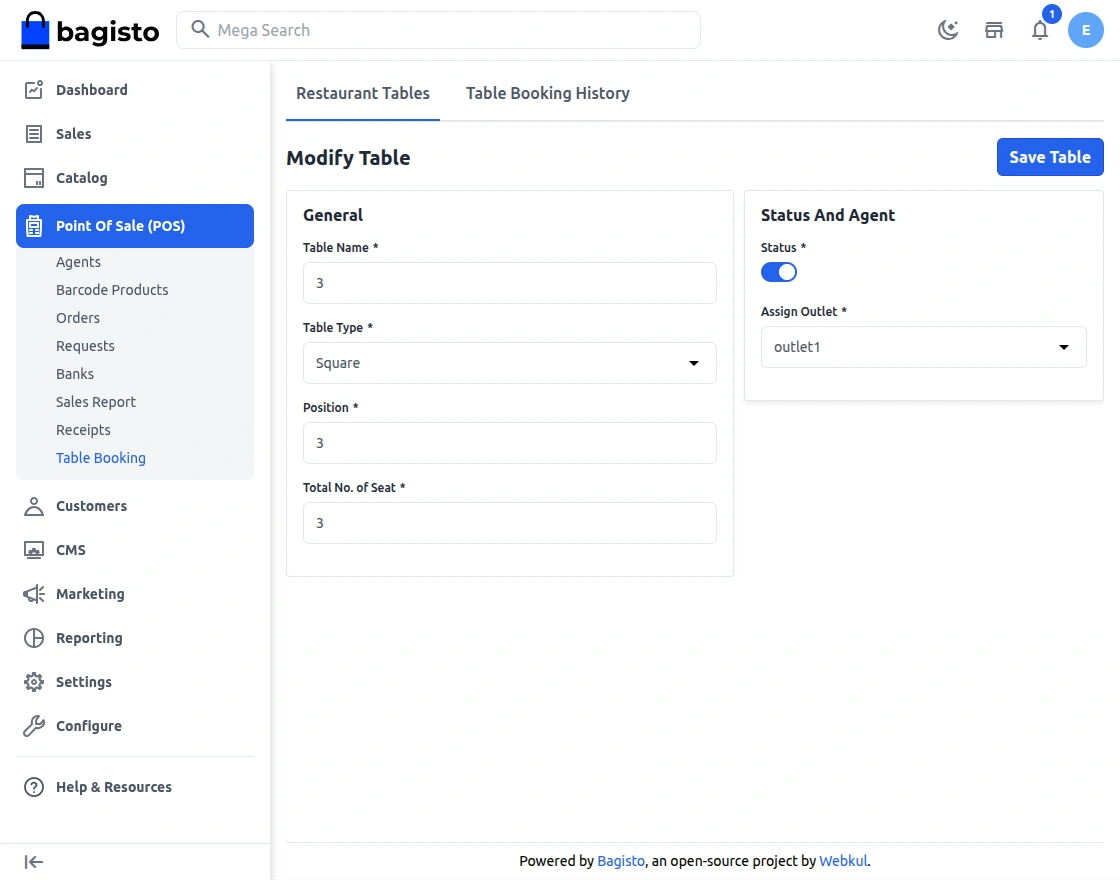
The General section has four fields.
Table Name
Enter the table name.
Table Type
Select the table type, for example Square, Circle or Semi Square.
Status
Activate or deactivate the table.
Position
Set the position of the table.
The Seat and Agent section has two fields.
Total No. of Seat
Set the total number of seats for the table.
Agent
Select the POS agent from the drop-down.
After you fill in all the fields, click Save Table.
Table Booking History
Under Point Of Sale (POS) > Table Booking > Table Booking History, the admin finds every earlier booking.
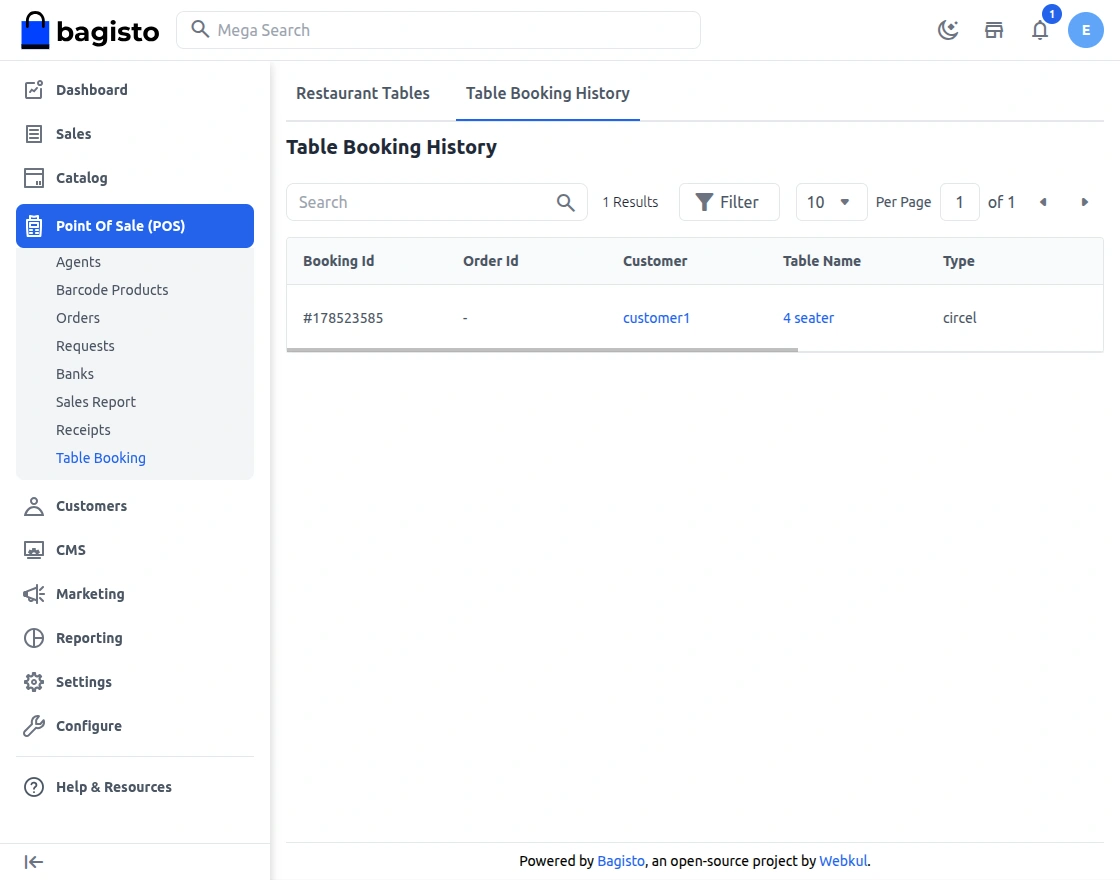
Click the eye icon to see the full details of a booking.
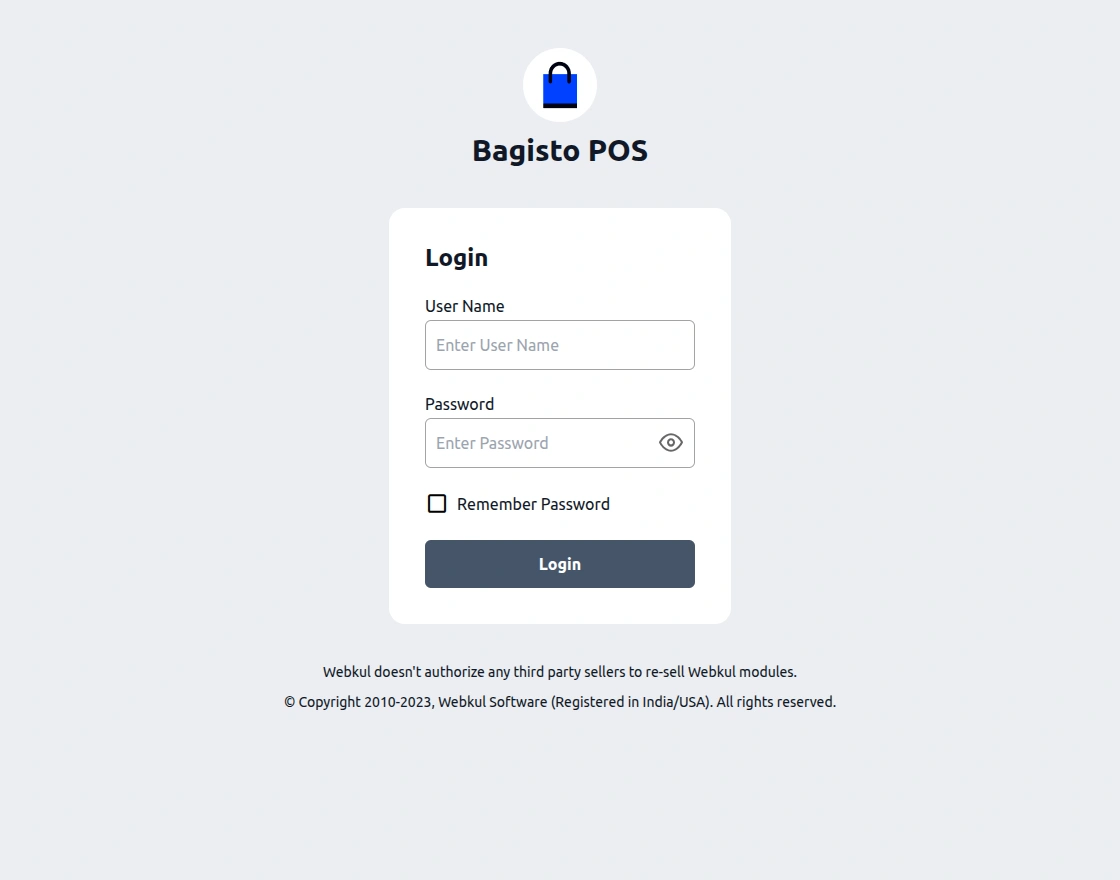
Agents log in to the POS with their Username and Password.
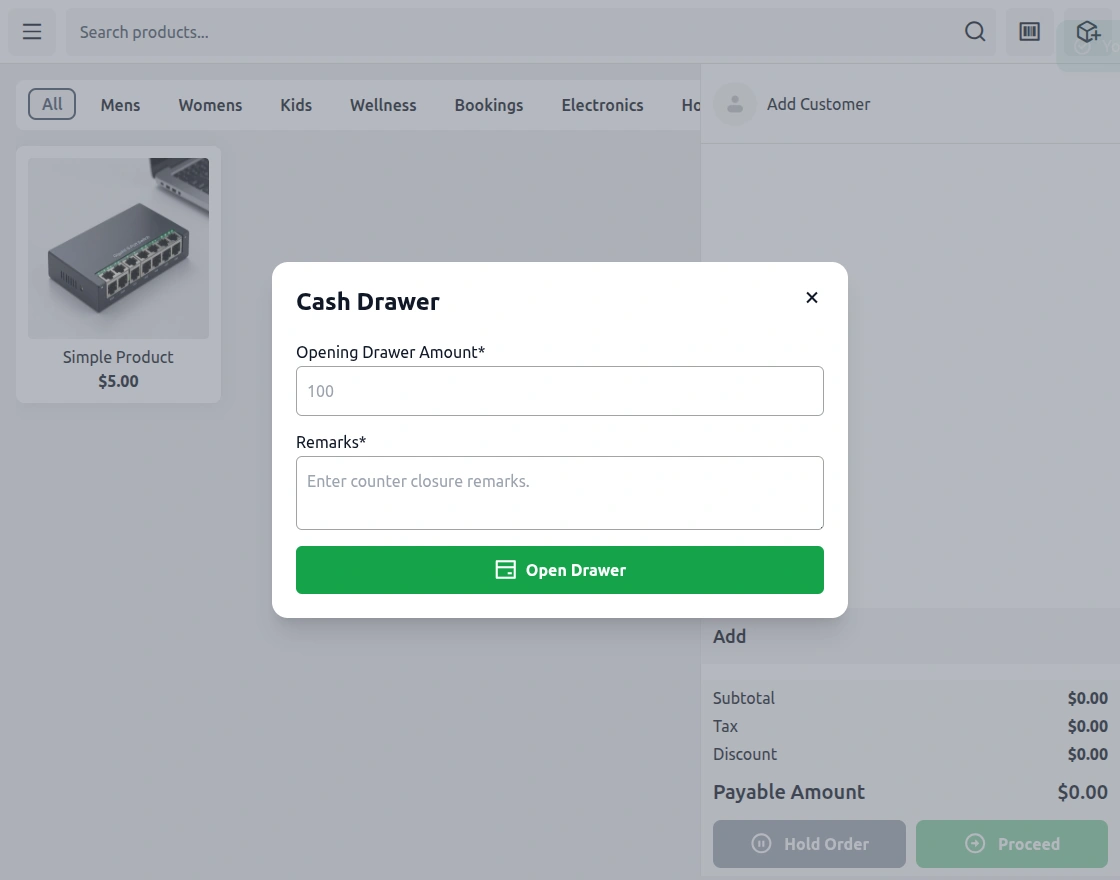
After signing in, the agent enters the opening drawer amount, as shown below.
The POS then opens the main panel, as shown below.
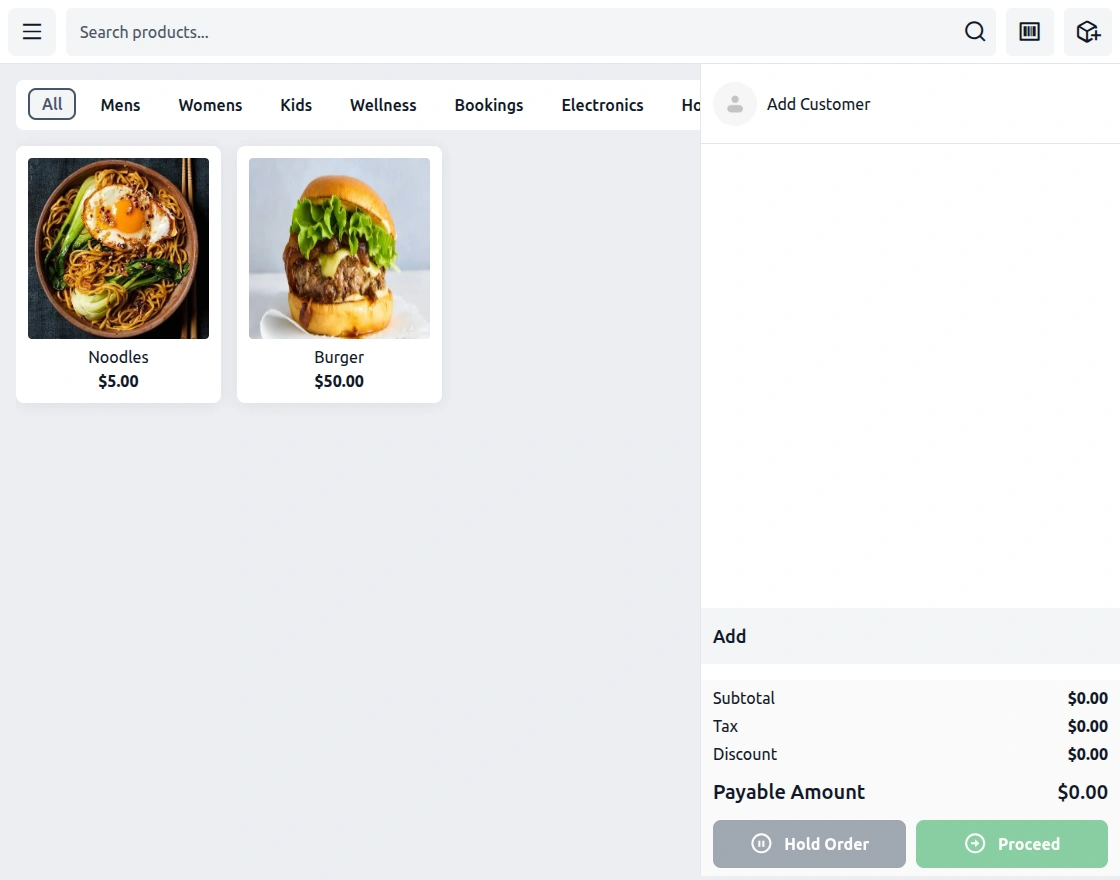
In the left menu, the agent finds Restaurant next to Home, Customers, Cashier, Orders, Products and Reports.
Agents can also hold orders, resume them later, apply item discounts and scan barcodes while they sell.
Table List
The agent sees every table with its seats on the Tables tab, as shown below.
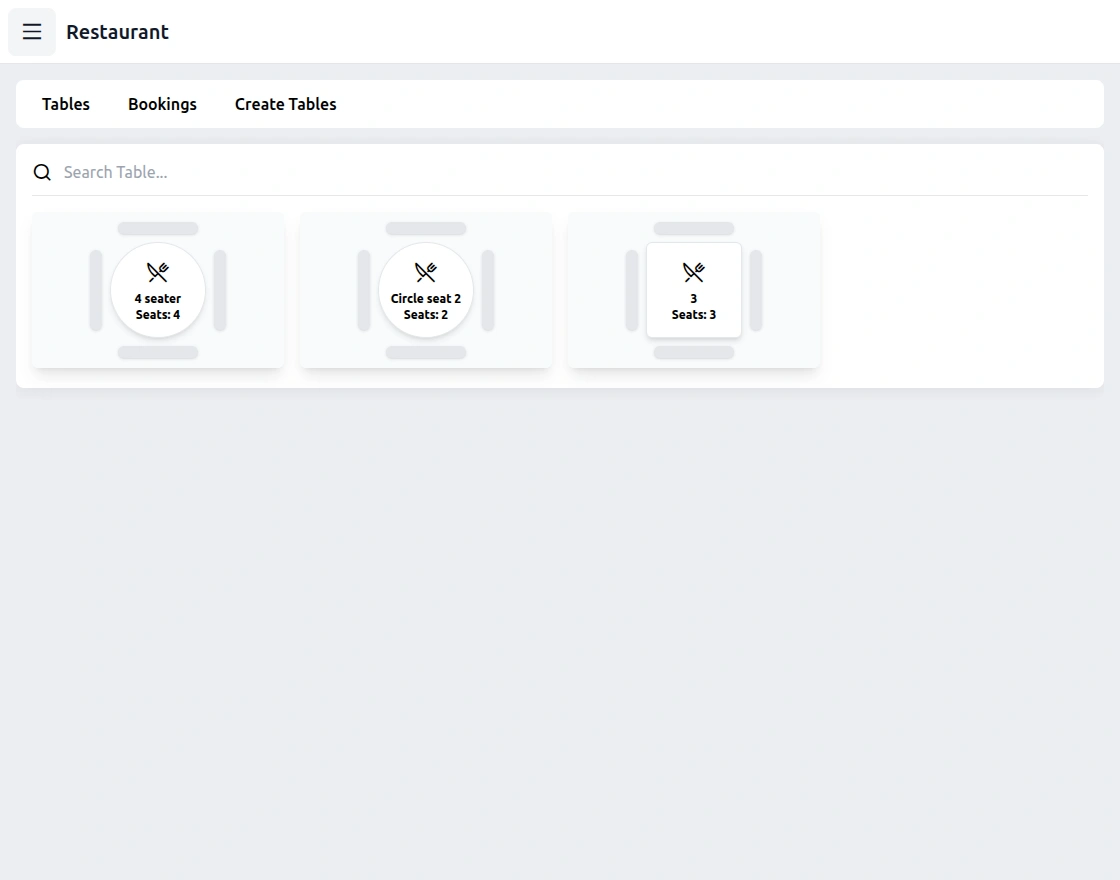
To book a table, click Book under the table.
A pop-up opens, and the agent enters the customer details, as shown below.
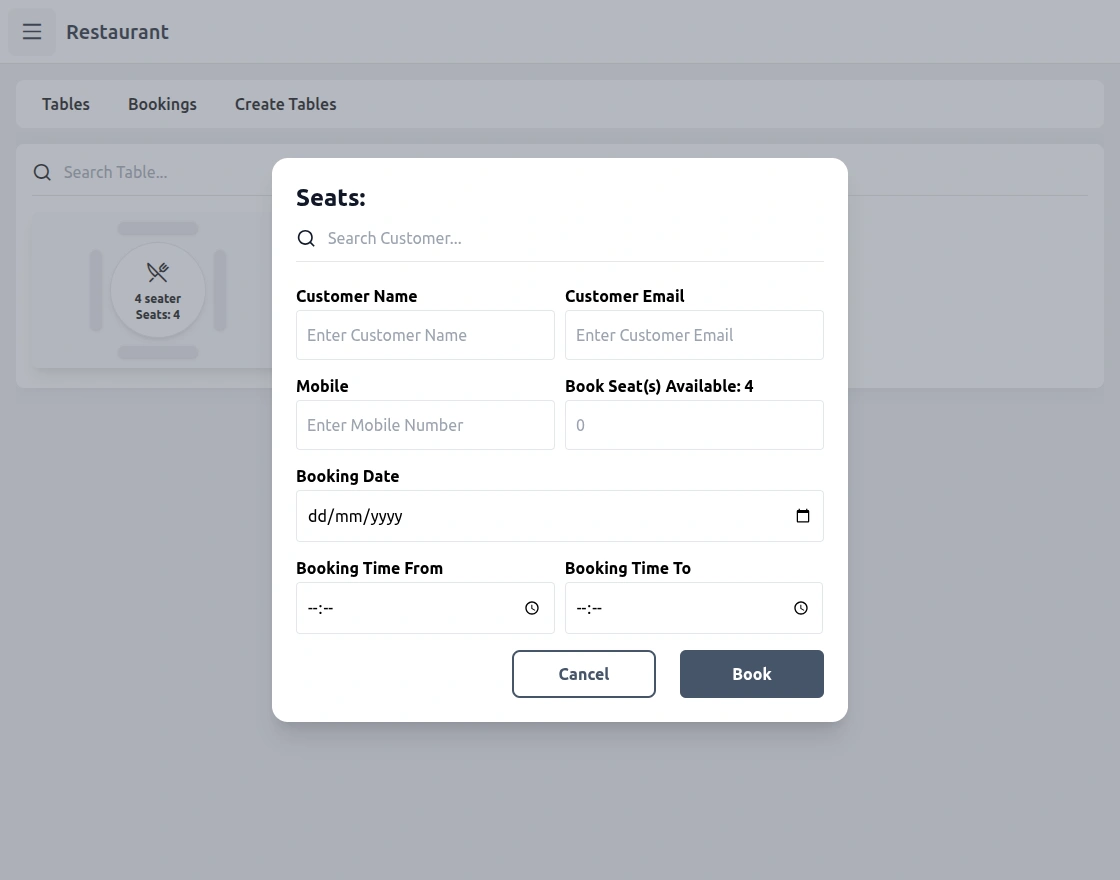
The pop-up has the following fields.
Search Customer
Pick an existing customer for the booking.
OR
Customer Name
Enter the name of a new customer.
Customer Email
Enter the email address of the customer.
Mobile
Enter the mobile number of the customer.
Book Seat(s)
Enter the number of seats to book.
Booking Date
Enter the booking date. It must be today or a later date.
Booking Time From
Select the start time of the booking.
Booking Time To
Select the end time. It must come after the start time.
The POS blocks a booking when the free seats for that time slot are fewer than the seats requested.
Table Booking History
Here the agent finds every booking with its details, as shown below.
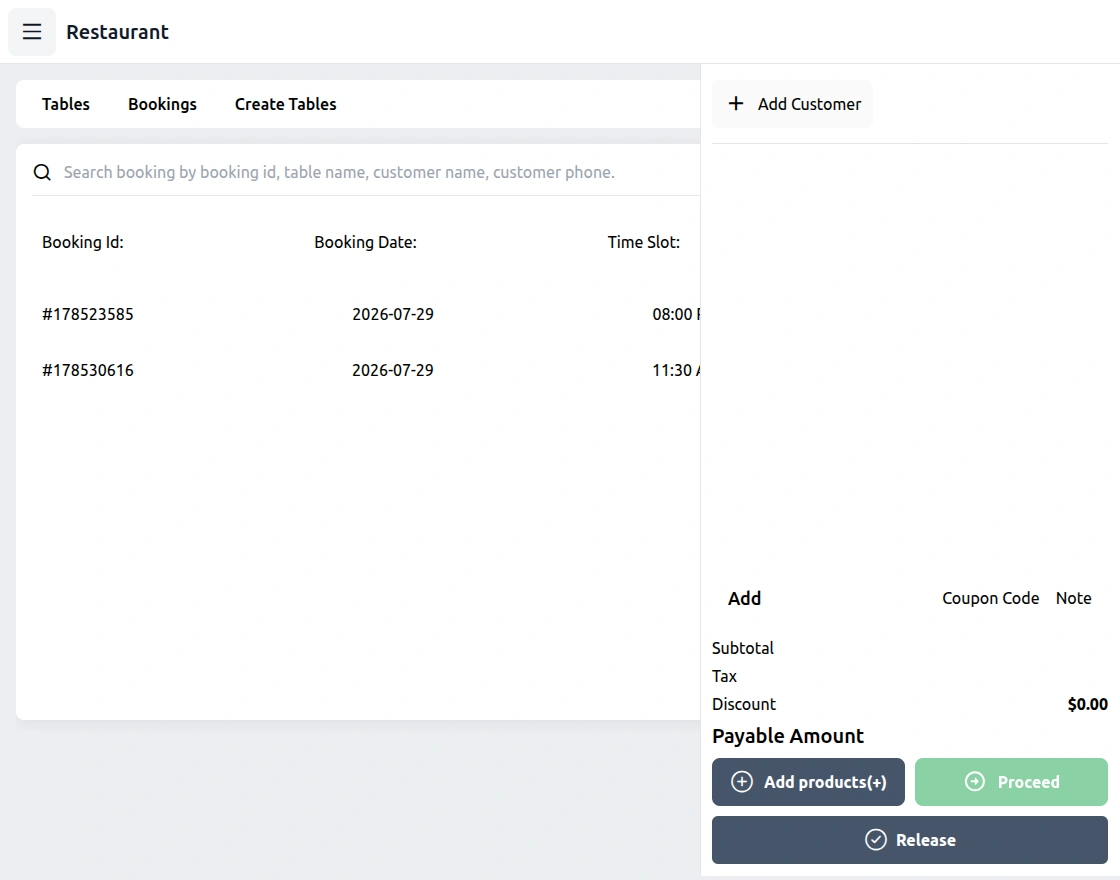
The agent can search bookings by booking id, customer name and table name.
After selecting a booking, the agent adds products and the customer to that table, as shown below.
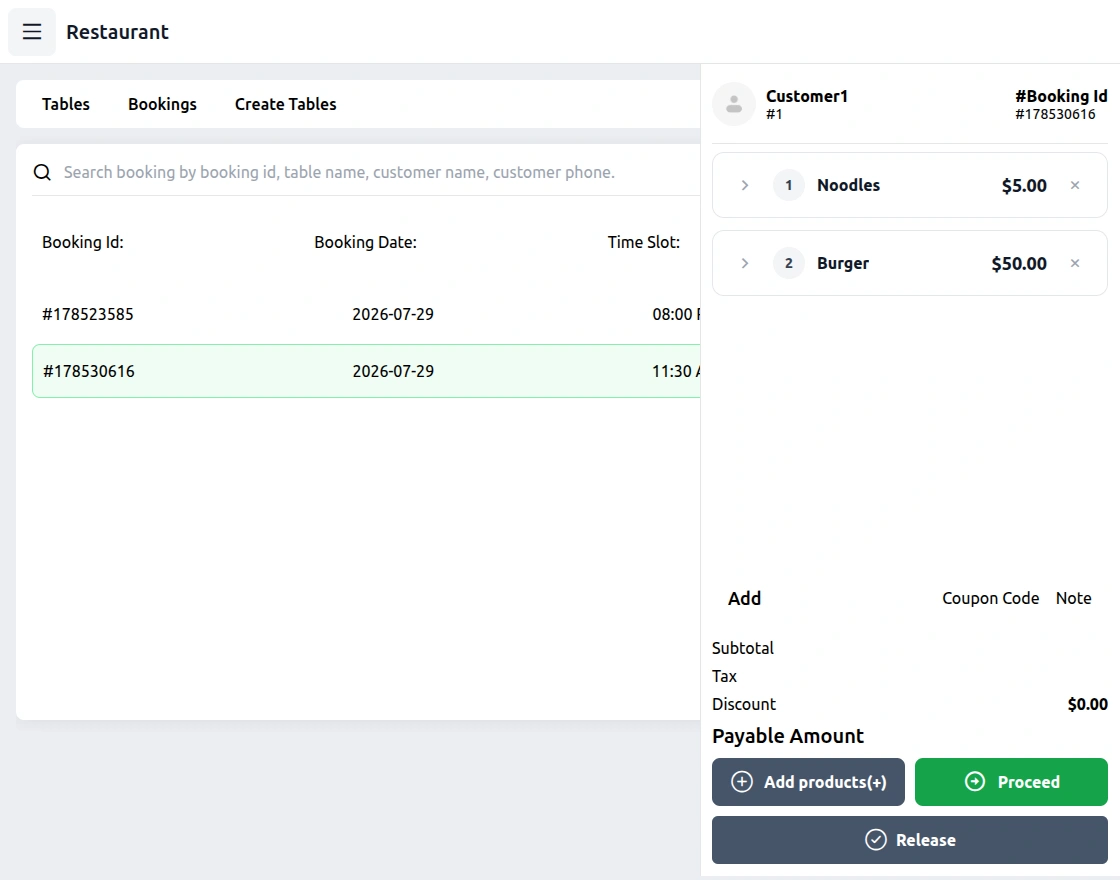
Click Release to delete the table booking.
Click Add products to add the restaurant products, as shown below.
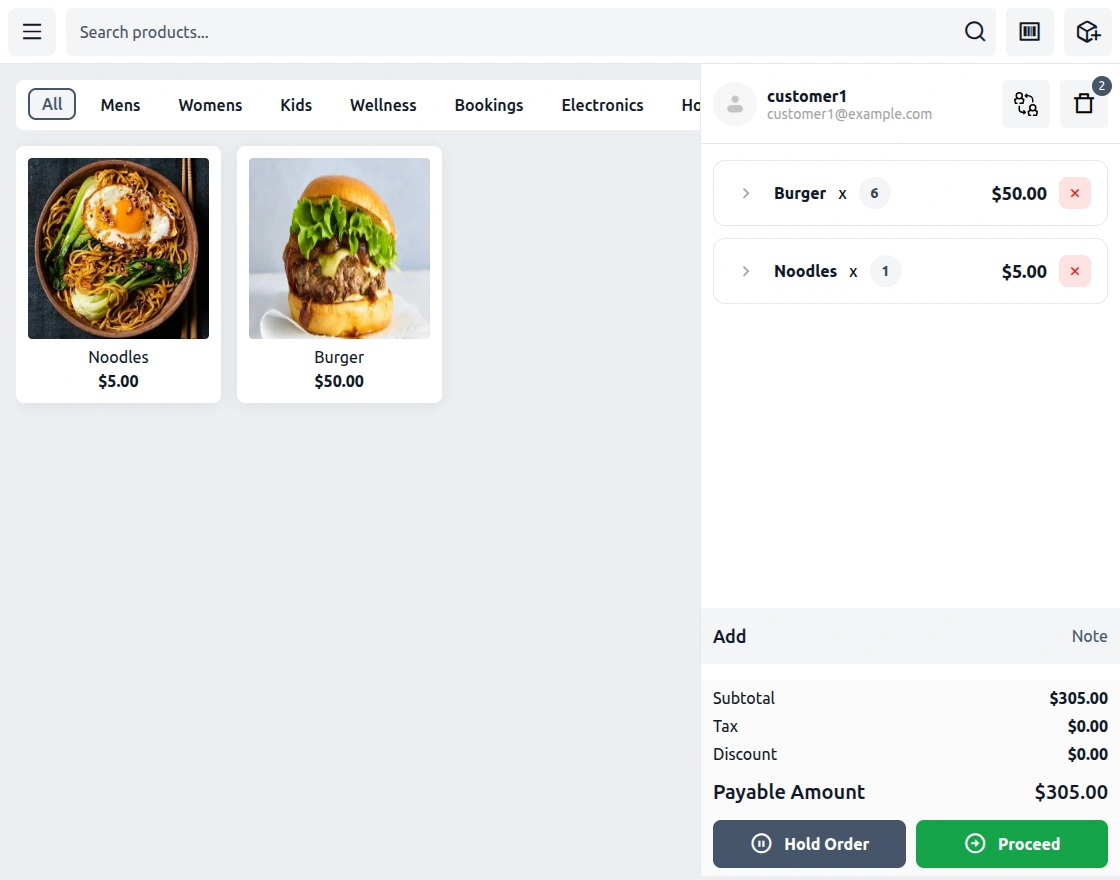
Once the customer is selected, the agent starts checkout with Proceed.
The payment page then offers Cash, Card and Split payments.
For a cash payment, the payment page looks like this.
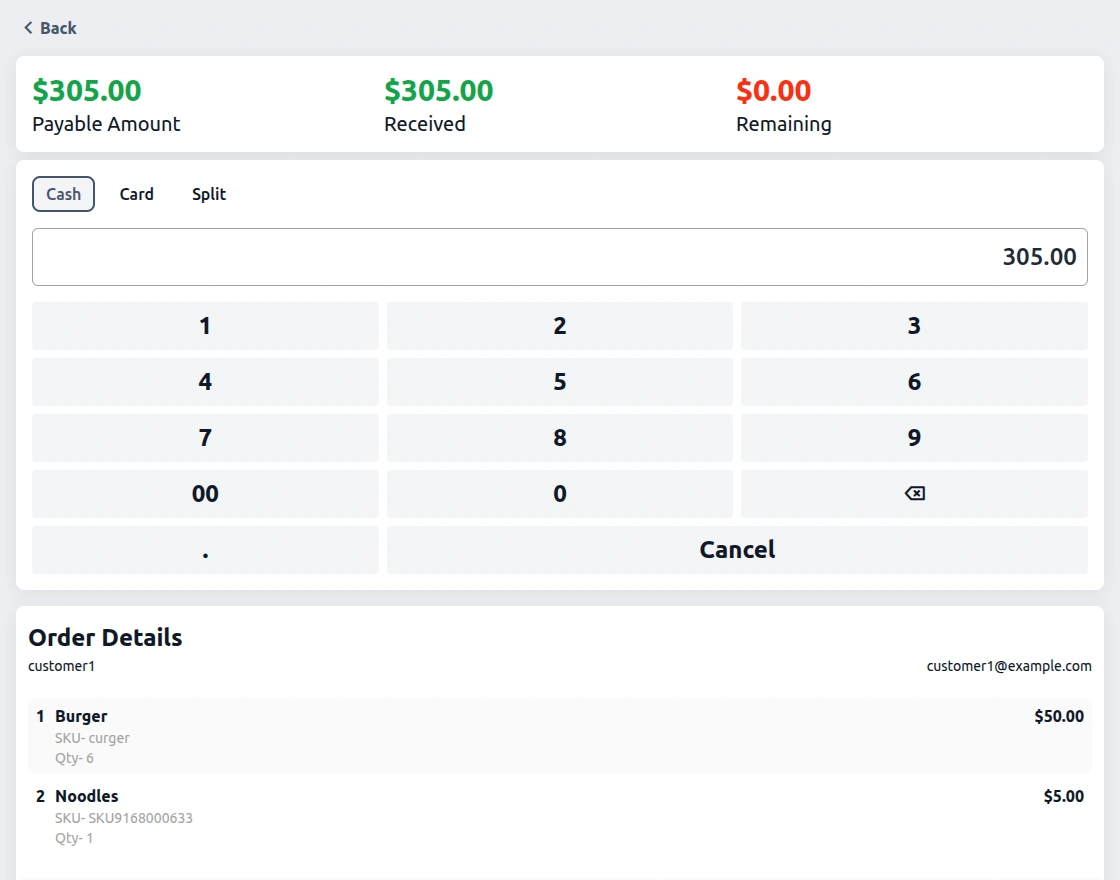
For a card payment, the page looks like this.
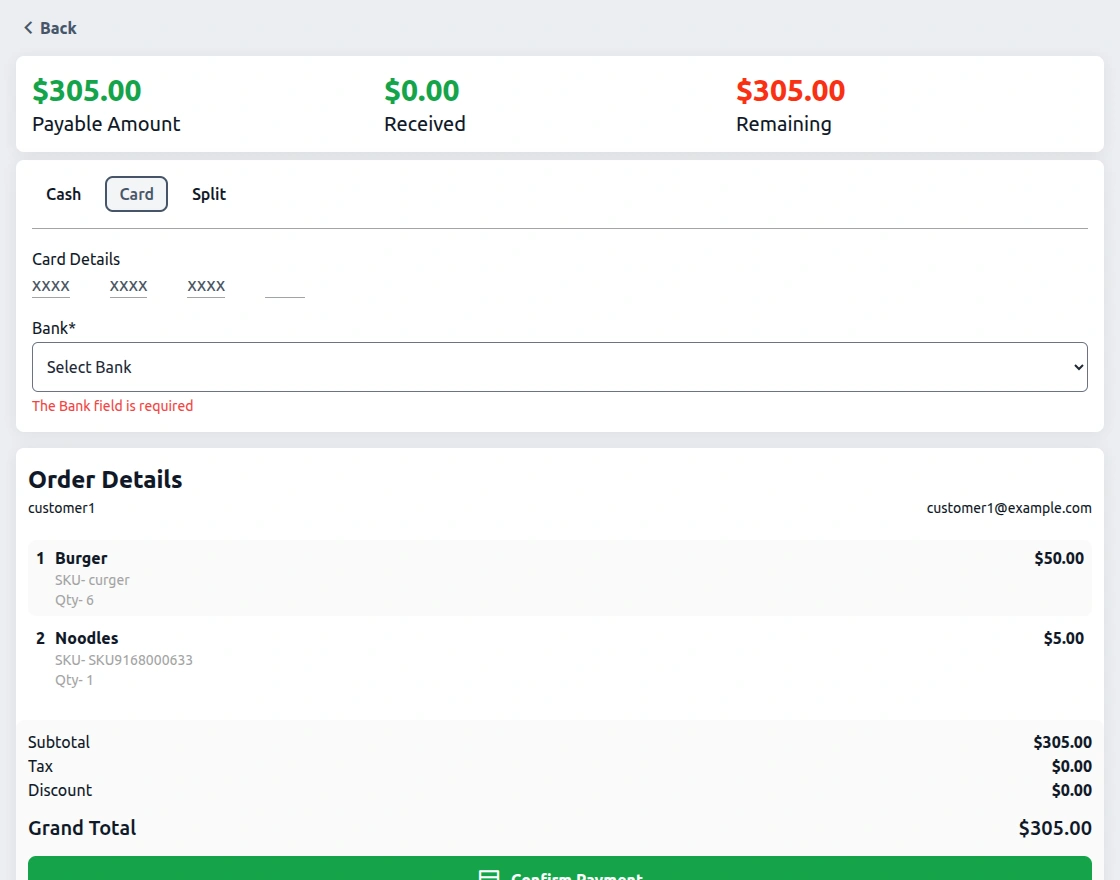
The agent selects the bank, enters the card details and can add an order note.
For a split payment, the page looks like this.
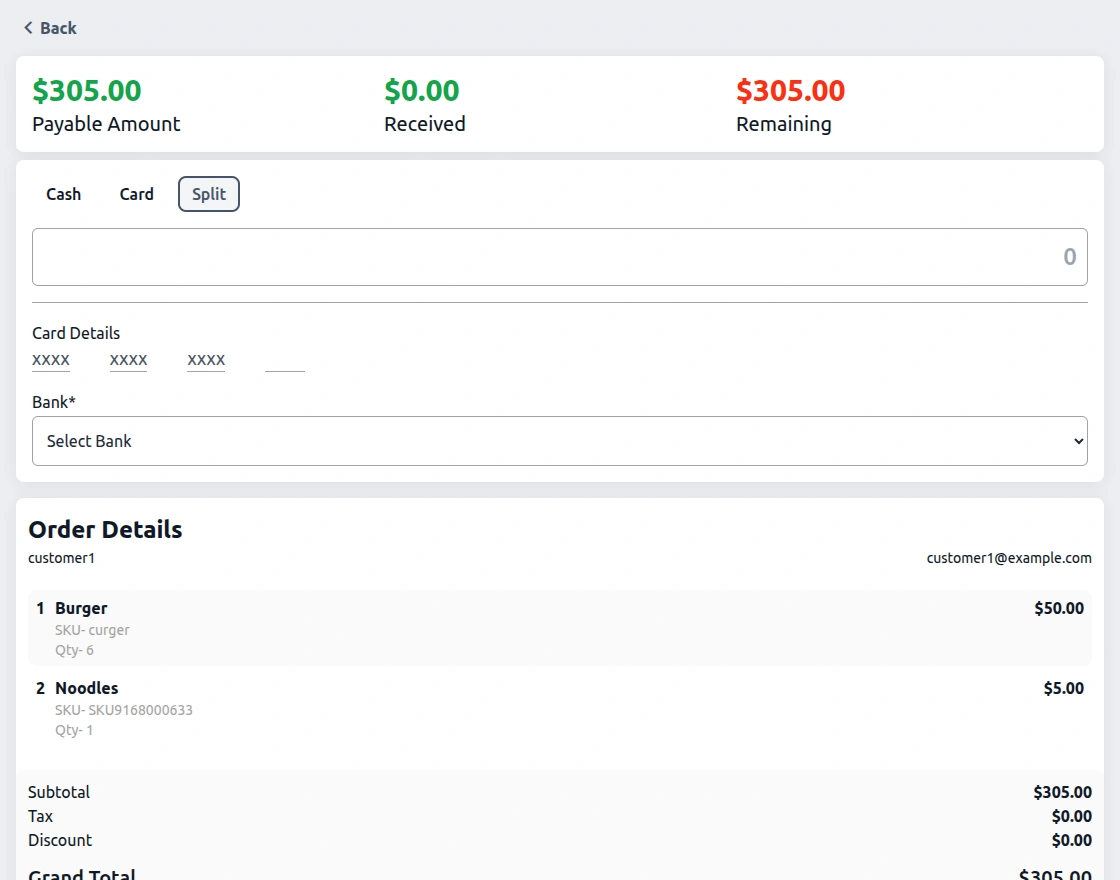
Finally, the agent clicks Confirm Payment and prints the invoice.
Create Table
Agents can create a table when the admin allows it, and they fill in the fields shown below.
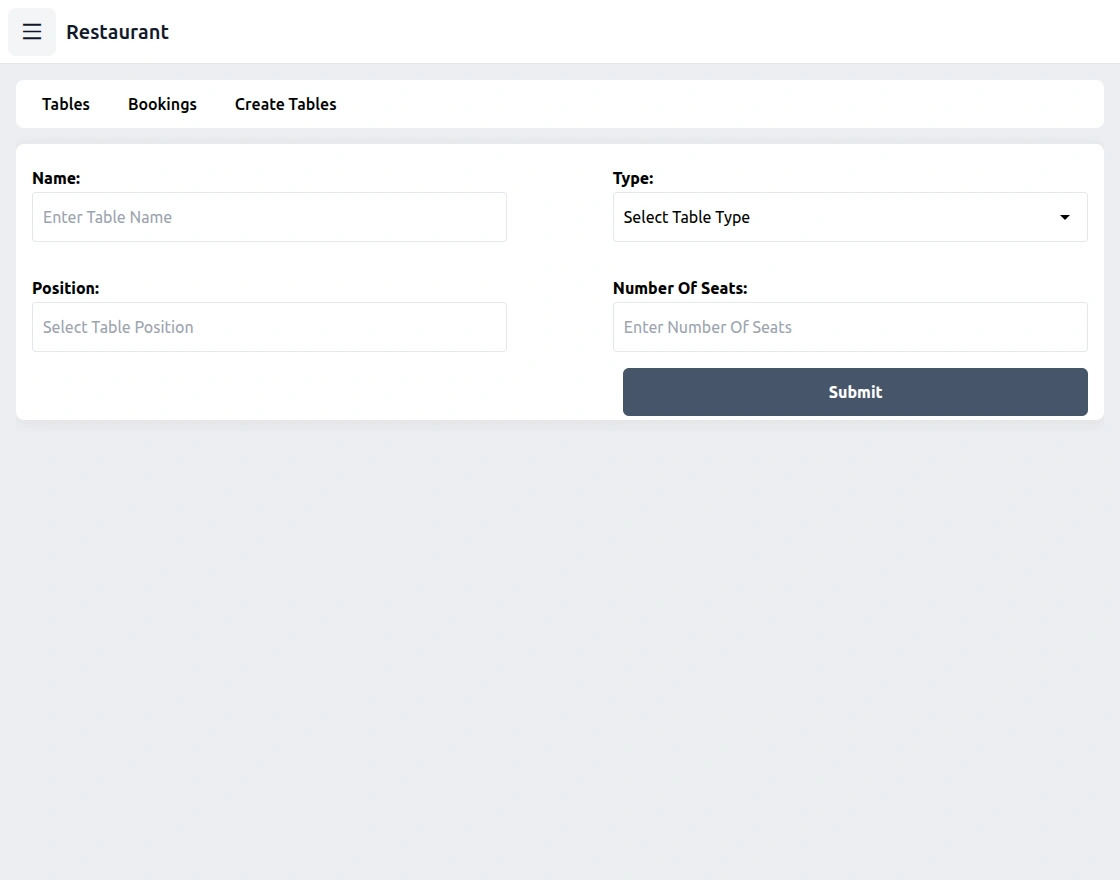
Table Name
Enter the name of the table.
Table Type
Select one of the table shapes the admin allowed.
Status
Select active or inactive.
Position
Select the table position.
Total No. of Seat
Enter the number of seats for the table.
The POS agent can also use the extension in offline mode, which is one of its best features.
Offline, the agent can book the table, add products to the booked table and complete the checkout.
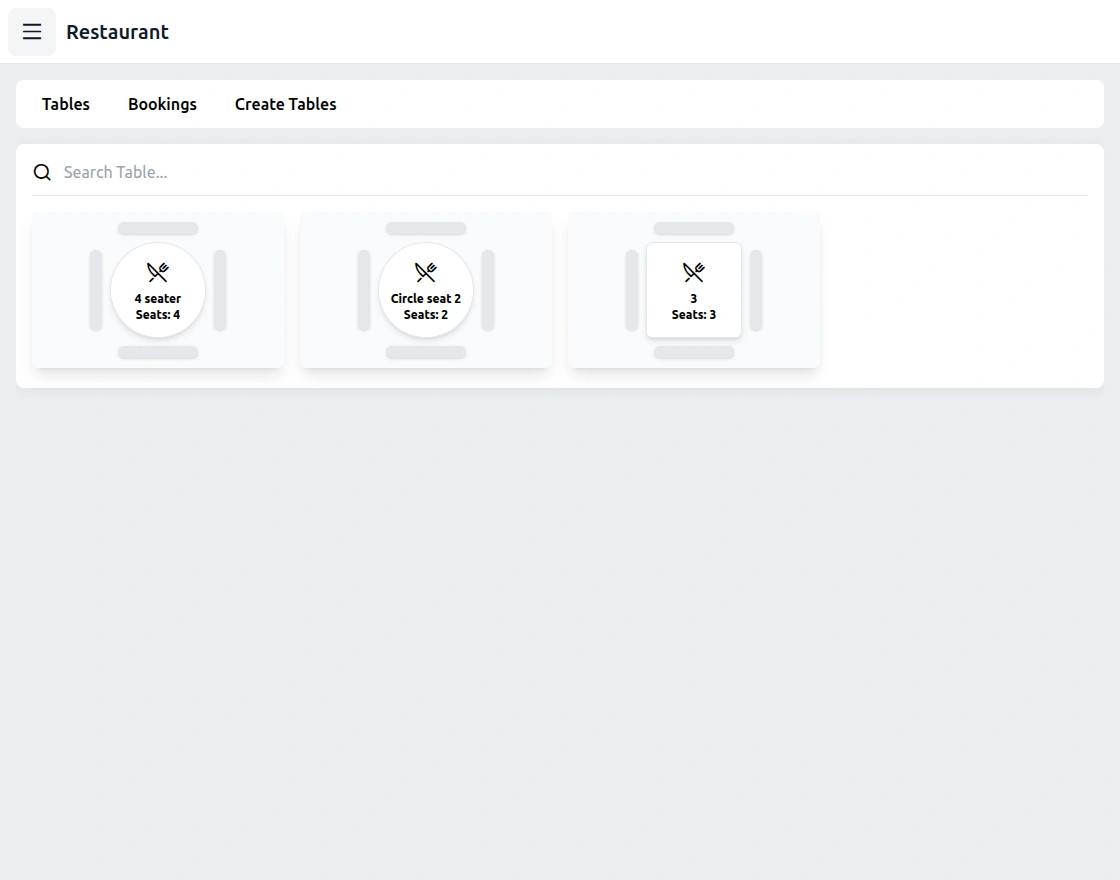
From the booked tables list, the agent can also release the table or add products to it.
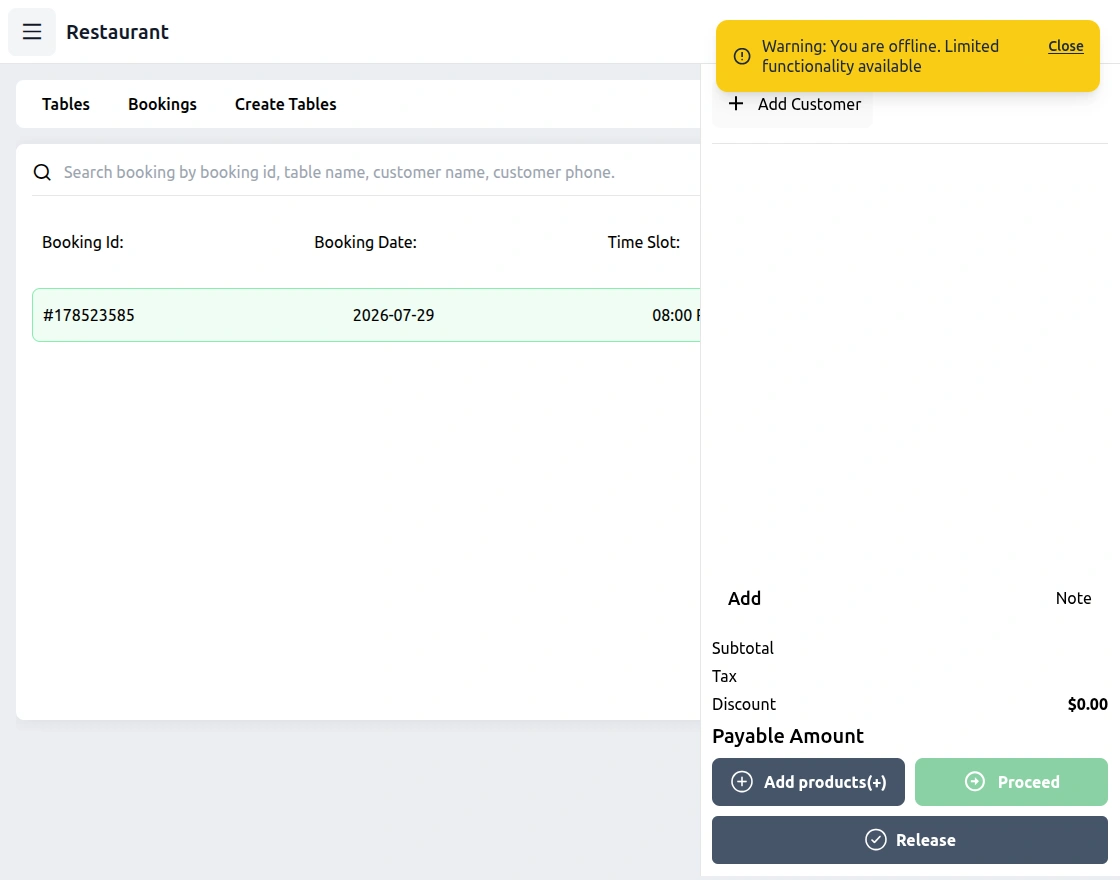
The agent adds the products to the reserved table and goes to checkout.
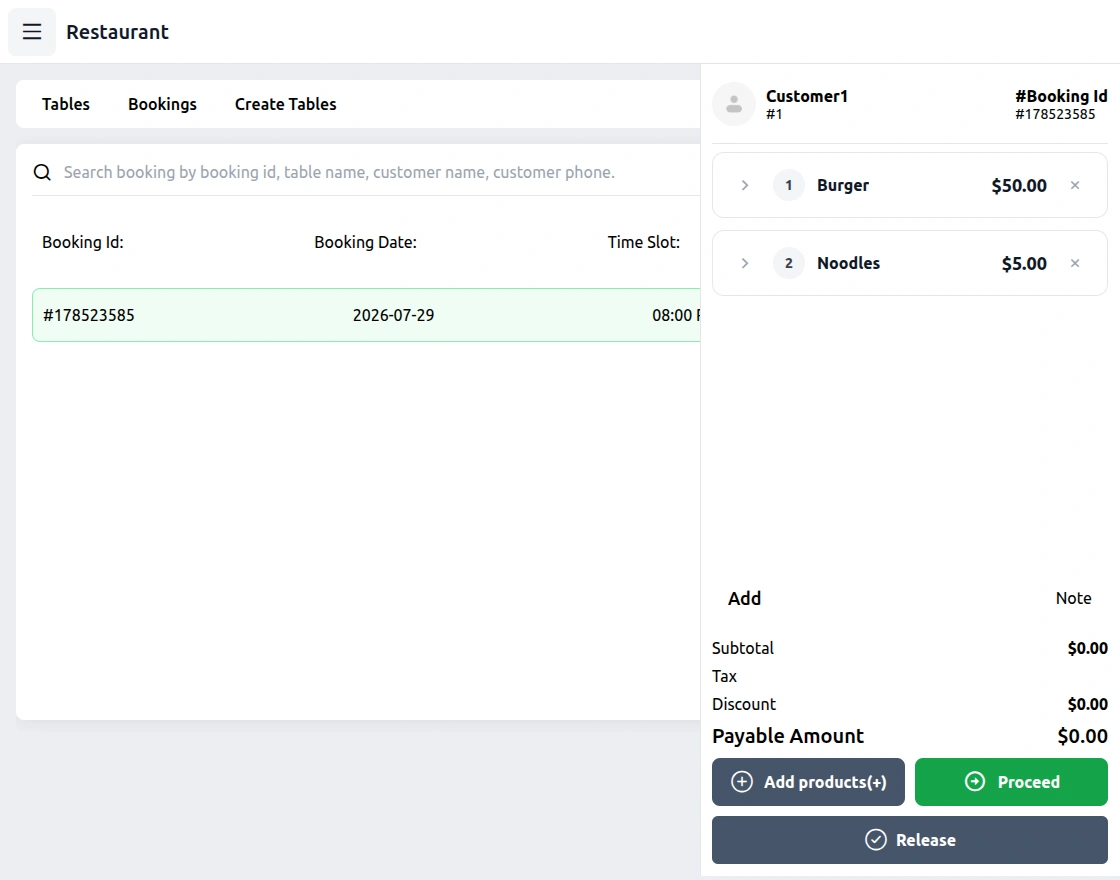
The agent completes the checkout by accepting the payment.
NOTE: Offline, only Cash payment is available. Card and Split payments need an internet connection.
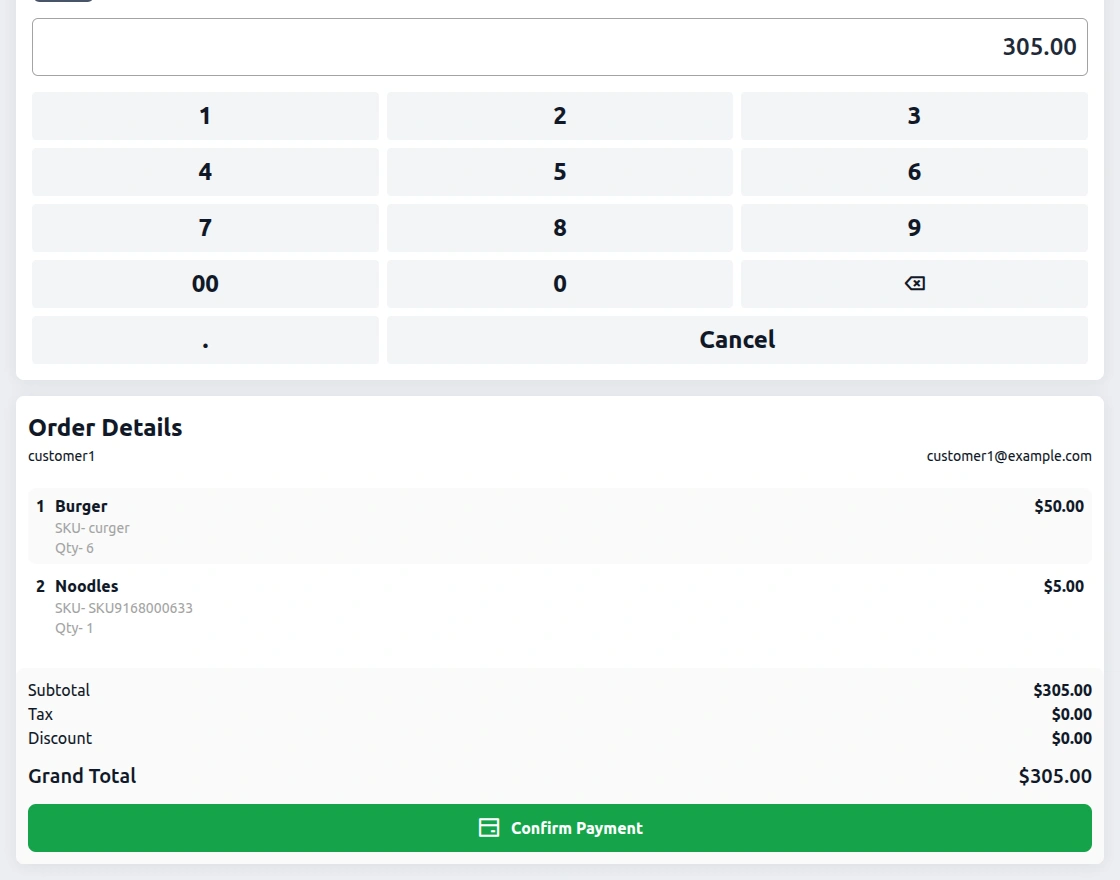
After placing the order, the agent prints the invoice of the booked table.
The agent also views every offline order in the Orders section.
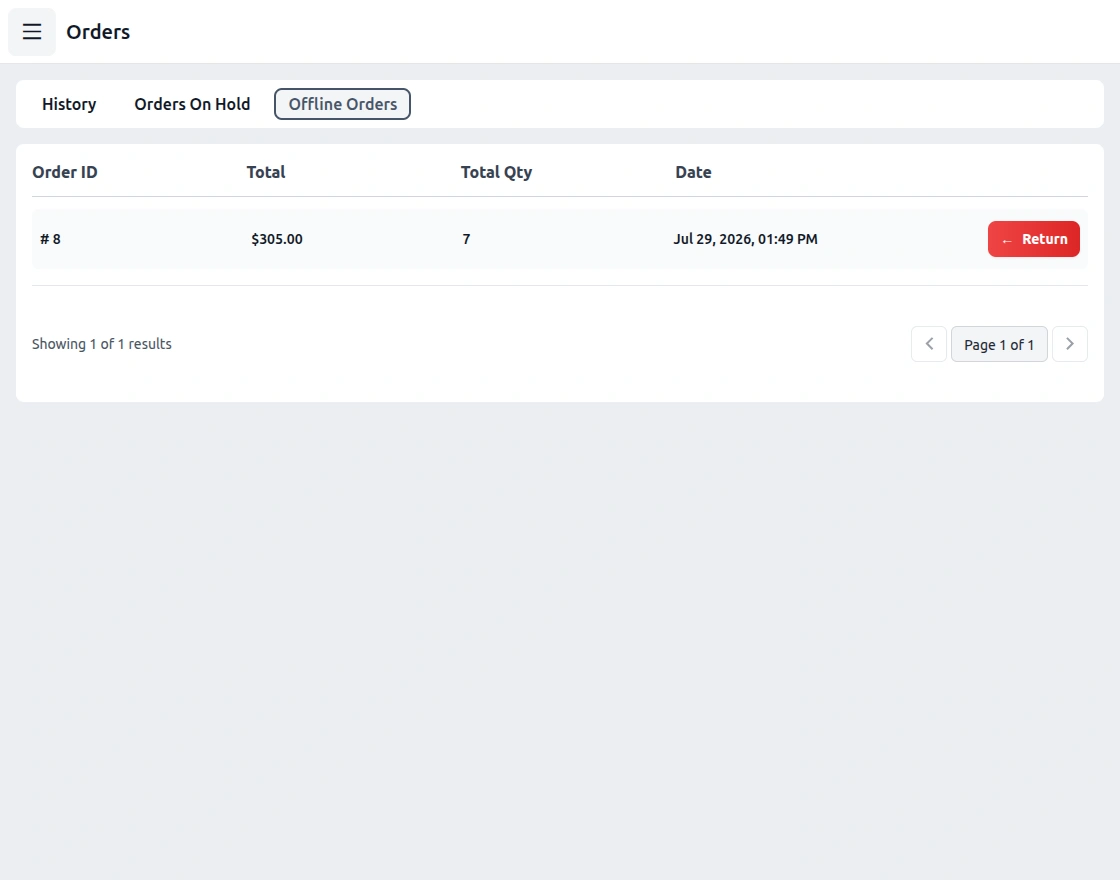
Then the agent clicks Sync All Orders once the POS is back online.
After the sync, the orders also appear on the Orders page, in the Sale History tab.
Note: A table the agent creates offline is saved on the device and syncs when the connection returns.
That is all for the Laravel eCommerce Restaurant Point of Sale extension. If you face any issue, feel free to add a ticket.
Also, tell us how we can improve the extension at https://bagisto.uvdesk.com/en/.