How to Host Site and Customize Site URL in Salesforce
Table of Content
Implementation
1.From Setup, enter Sites in the Quick Find box, then select Sites.
2. Register a custom Force.com domain for your organization.

3. Create site.

4. Configuration your site.

5. Enable a customer portal for login or self-registration, then associate it with your site.
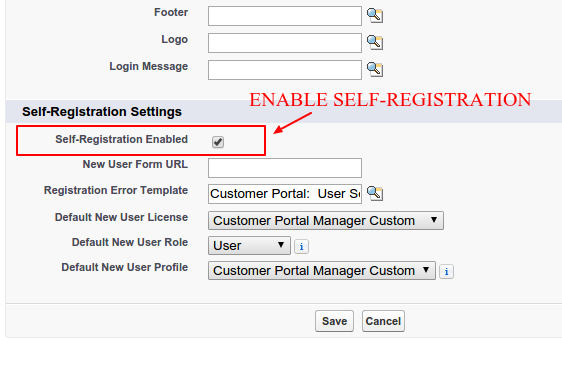
6. Enable self registration in customer portal.
7. Enable login settings in sites.

8. Edit details in login settings.

9.Now Modify Page Access Settings.
Note:- All object should be enable for customer portal.
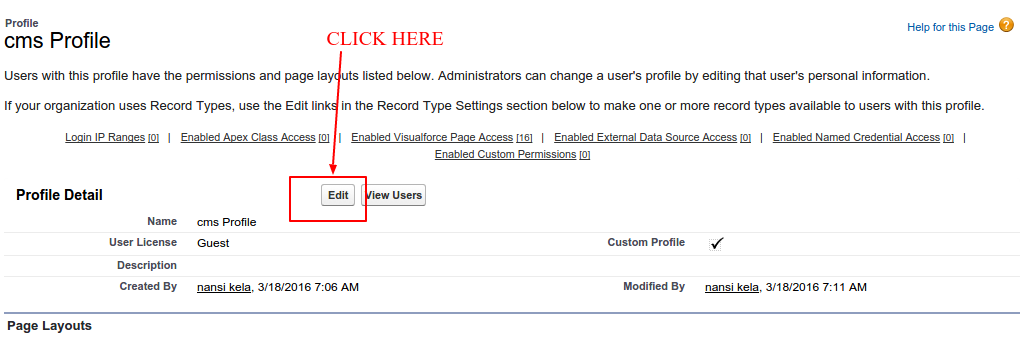
10.Edit Field level security . Click on the View link next to this and edit it.

11.Change all error page .

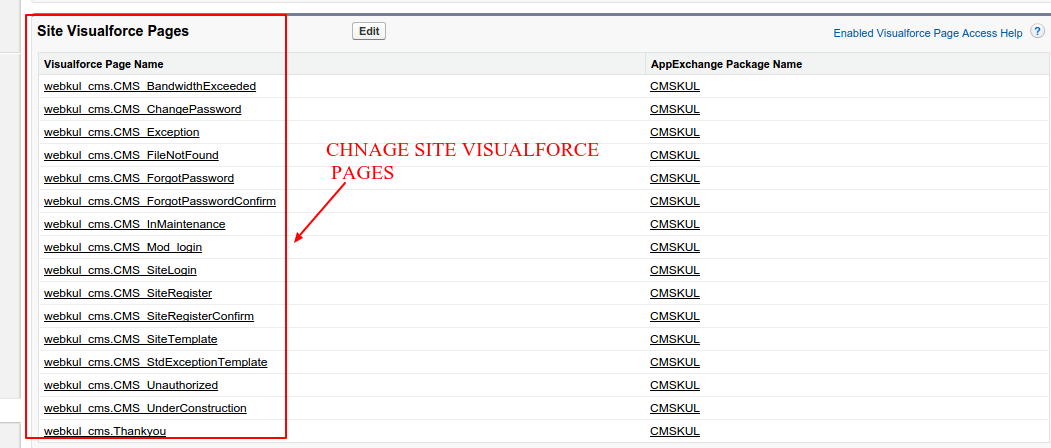
12.Change Site Visualforce Pages.
13.Now You can Active your site. Click Activate on the Site Details page.

Customize Site URL
Create a branded, custom Web address, such as http://www.myname.com, by registering through a domain name registrar such as “name.com”. Create CNAME records to redirect your branded domain and subdomains to your Force.com domain without exposing the force.com name in the URL.
1. Adding the Custom Domain information in Salesforce.
2.Setup, enter Domains in the Quick Find box, then Add Domain.

3. Creating a CNAME entry in your DNS.

Support
That’s all for How to Host Site In salesforce, still have any issue feel free to add a ticket and let us know your views to make the product better http://webkul.com/ticket/index.php