User Guide for CS-Cart ChatBot
It is an assistant that communicates through text messages, a virtual companion that integrates into websites, applications, or instant messengers, and helps entrepreneurs to get closer to customers.
A chatbot is often described as one of the most advanced and promising expressions of interaction between humans and machines.
In order to do interactive conversations with the end users of your site. “CS-Cart Chatbot” add-on is developed.
CS-Cart Chatbot add-on allows businesses to do automated communication with their customers. Chatbots can send and receive messages from users.
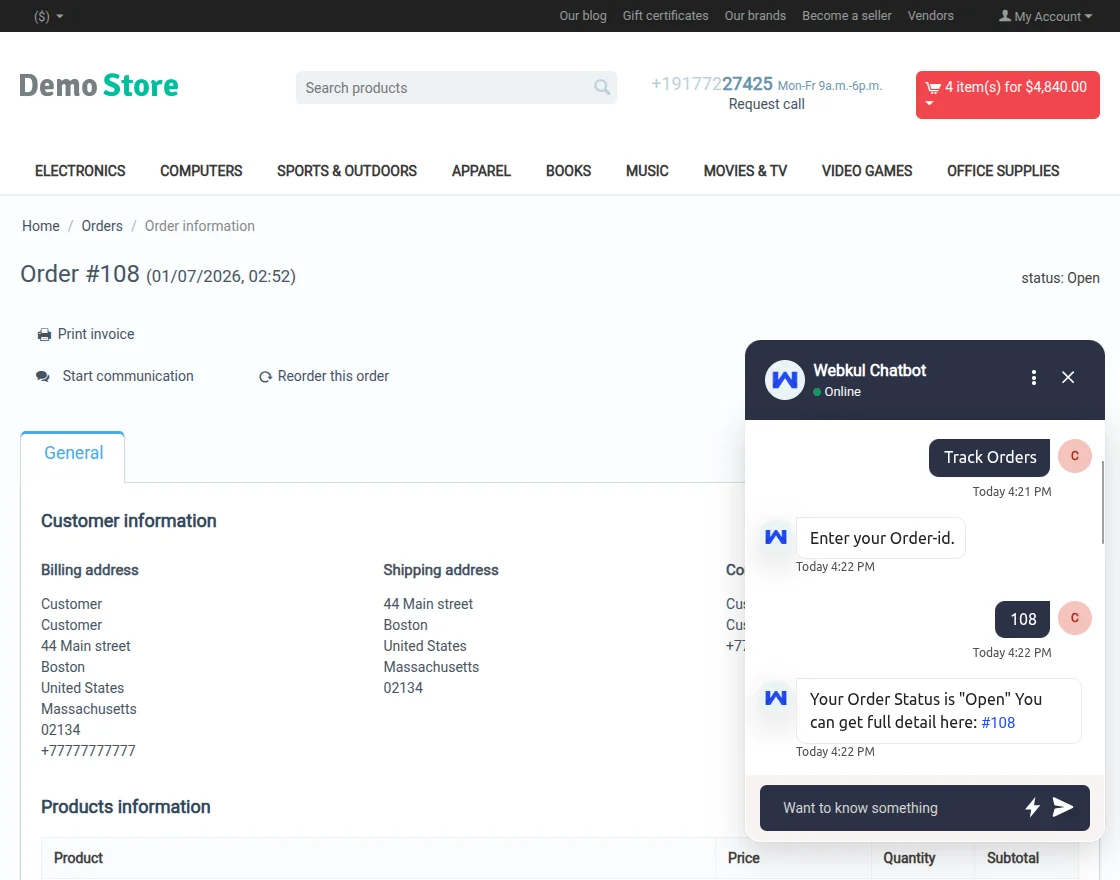
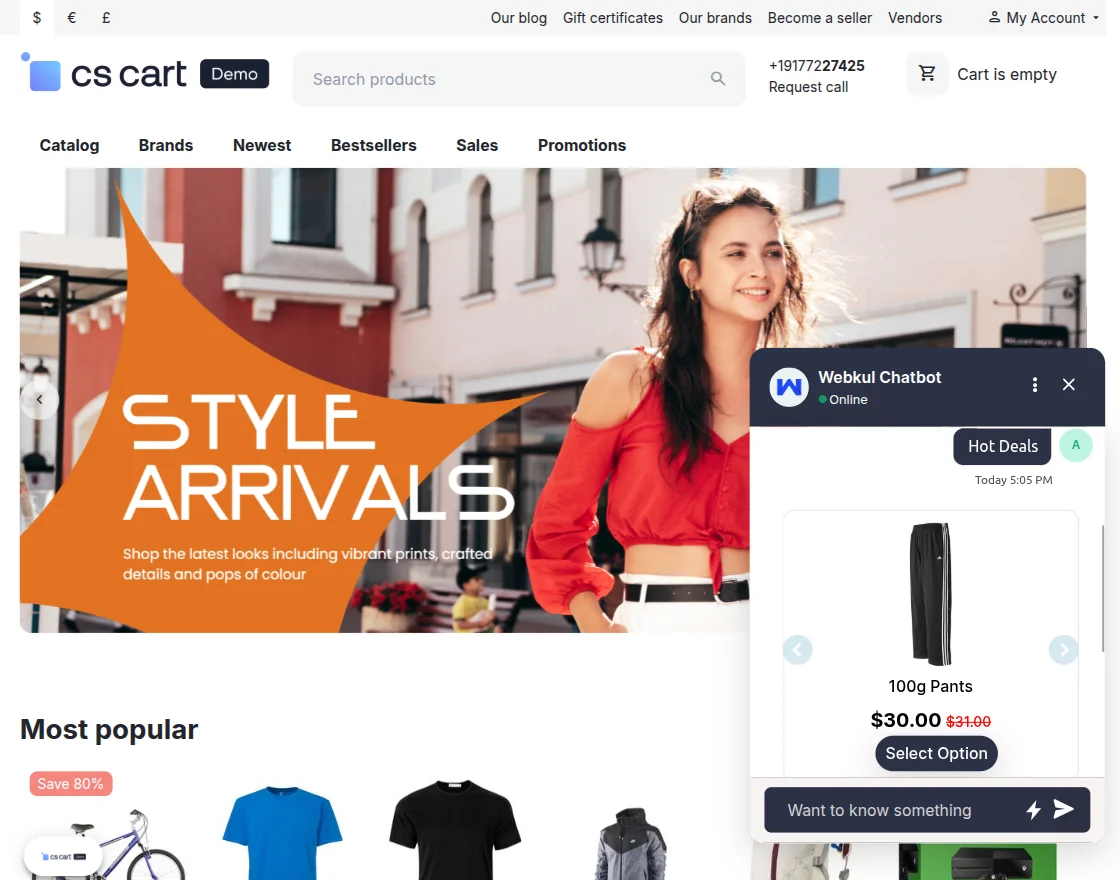
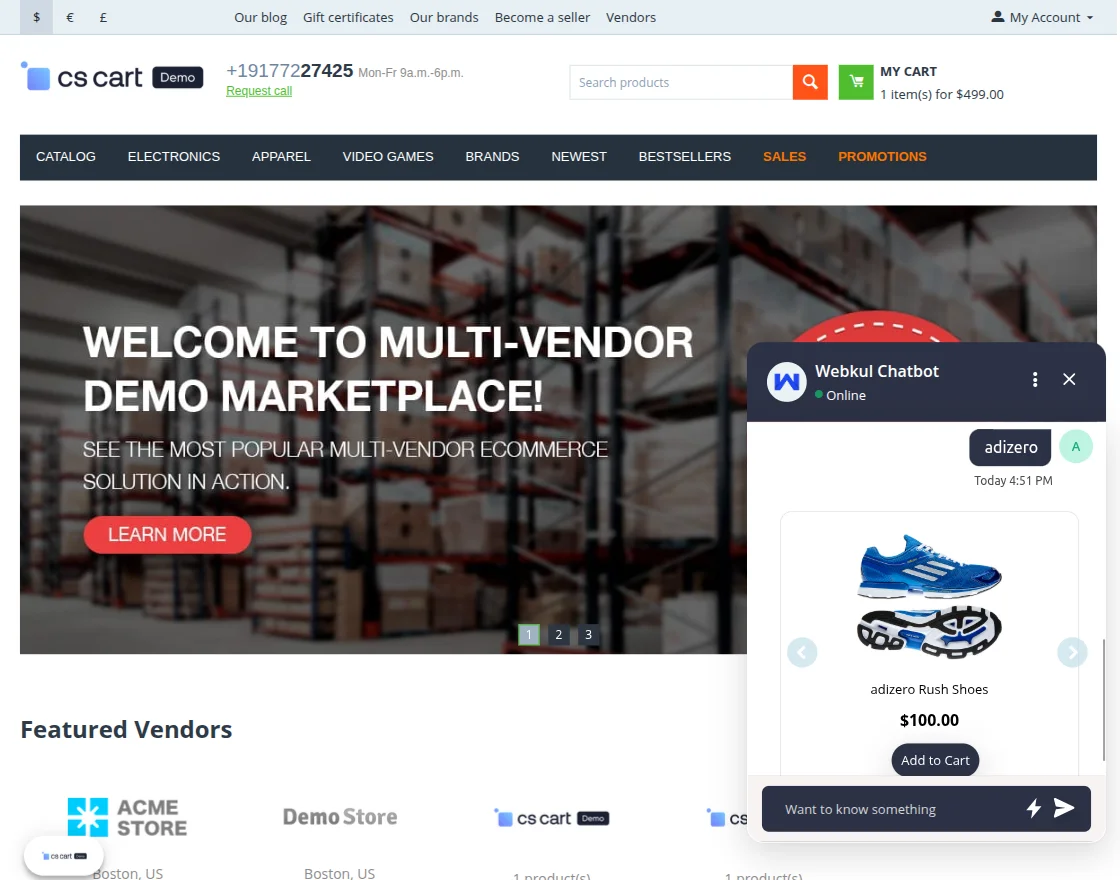
Customers can search for products, and hot deals and can track their orders from the Chat area.
Furthermore, you take advantage of large language models to build a custom CS-Cart ChatGPT Chatbot.
Features
-
Admin can enable or disable chatbot services such as Hot Deals, Product Search, and Track Order from the backend configuration.
-
Admin can upload and manage the User Icon, Chatbot Icon, Header Icon, and other UI icons.
-
Option to customize the chatbot header background color, chatbot body background color, and overall UI appearance.
-
Option to configure and customize the fallback message displayed when no relevant response is found.
-
Customers can search for products directly from the chat interface.
-
Customers can view configured Hot Deals within the chatbot in a sliding format.
-
Customers can track their orders directly from the chat area using order details.
-
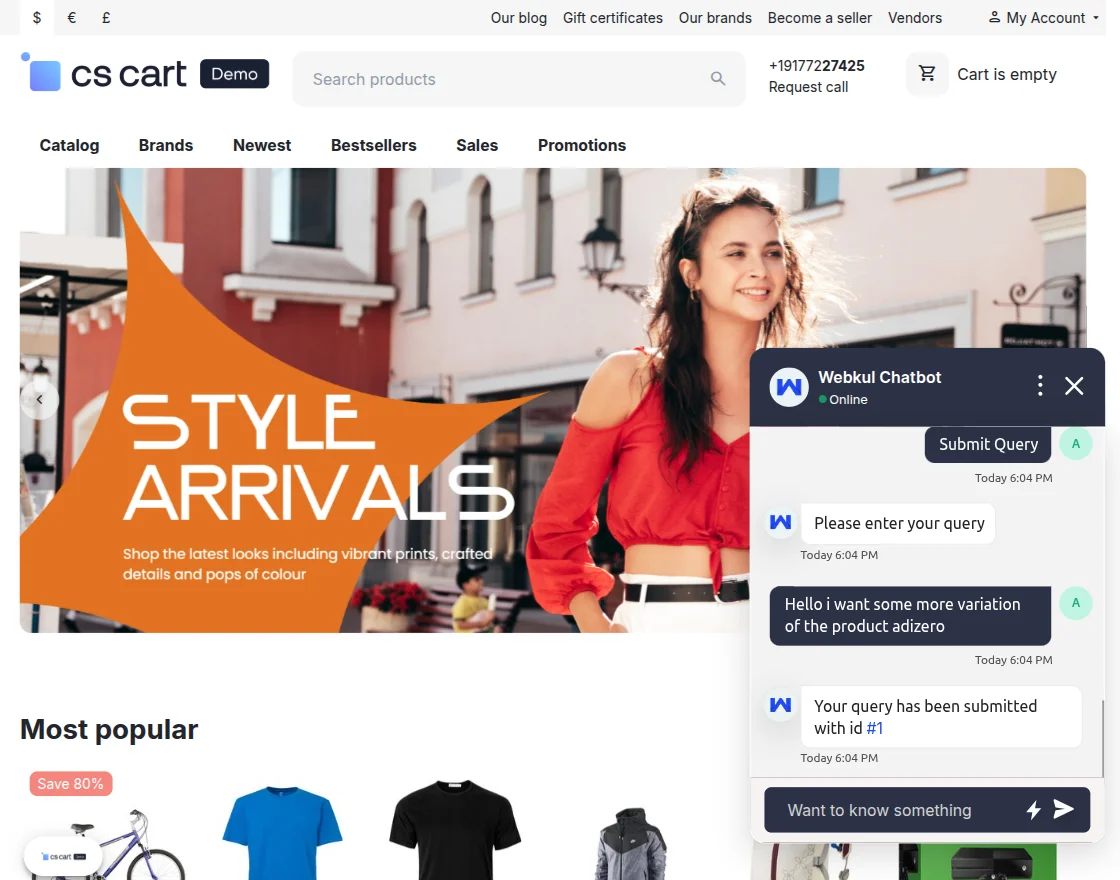
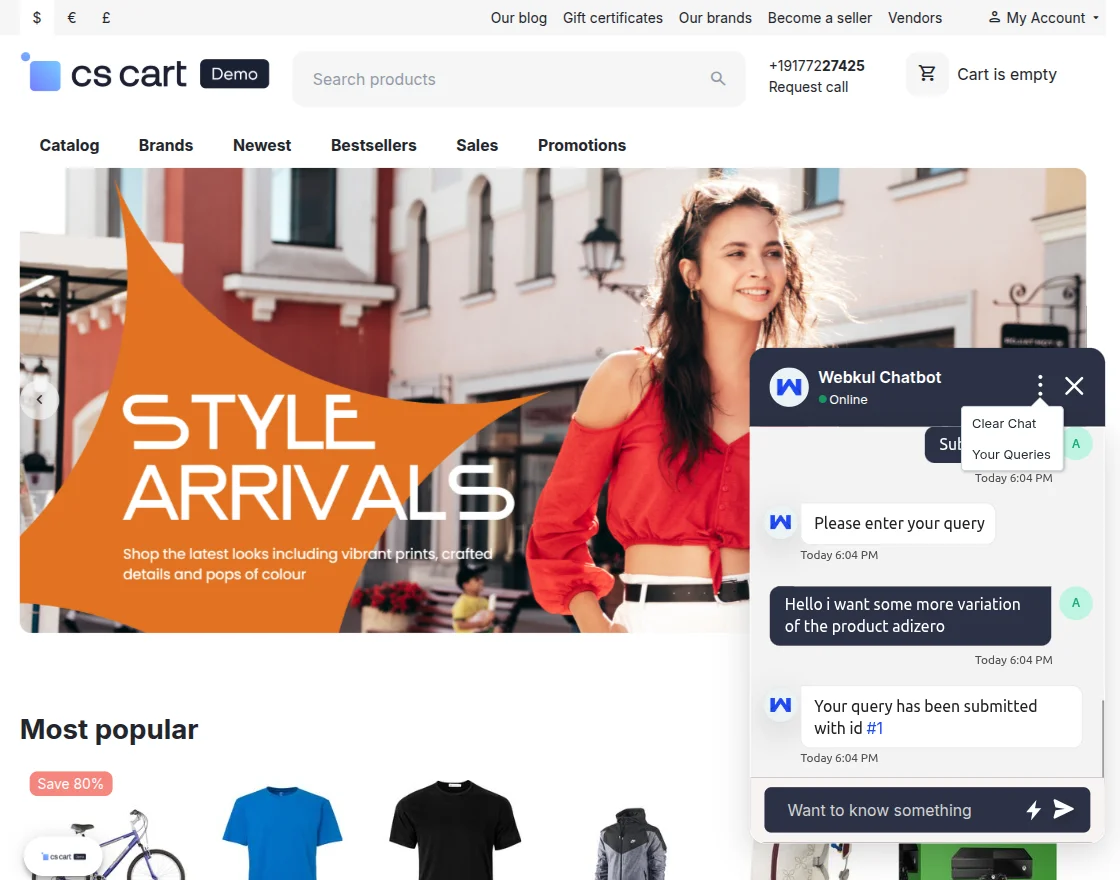
Customers can submit queries to the admin through the chatbot and receive a reference ID for tracking.
-
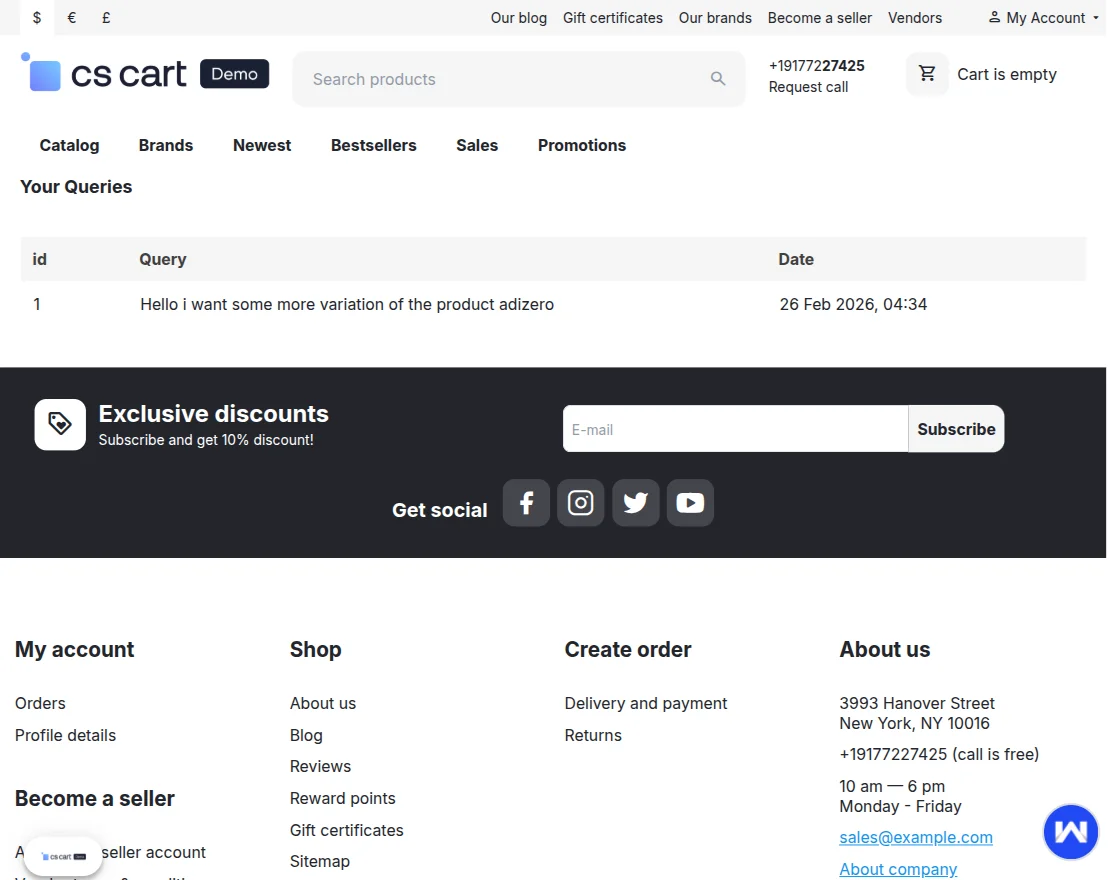
A “Your Queries” section is available for customers to view their previously submitted queries.
-
A “Clear Chat” option is provided to reset the conversation.
-
Chatbot supports multilingual functionality, including English and Russian.
Note: It will work only in https (SSL enabled) site.
Video Tutorial->

Installation And Configuration
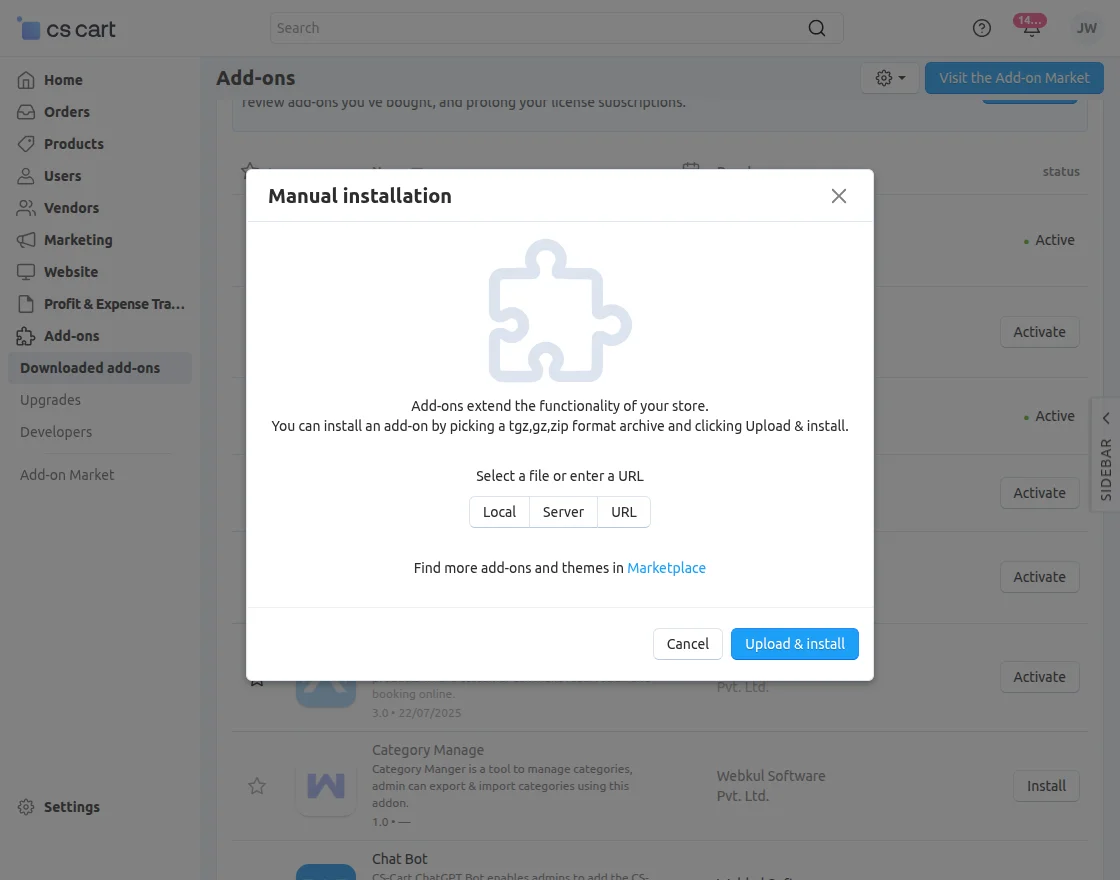
When you’ll download the “CS-Cart Chatbot”, you’ll get one zip file and the install.txt file. Read it carefully and follow it.
Firstly click on the Manual installation icon to upload the zip file.
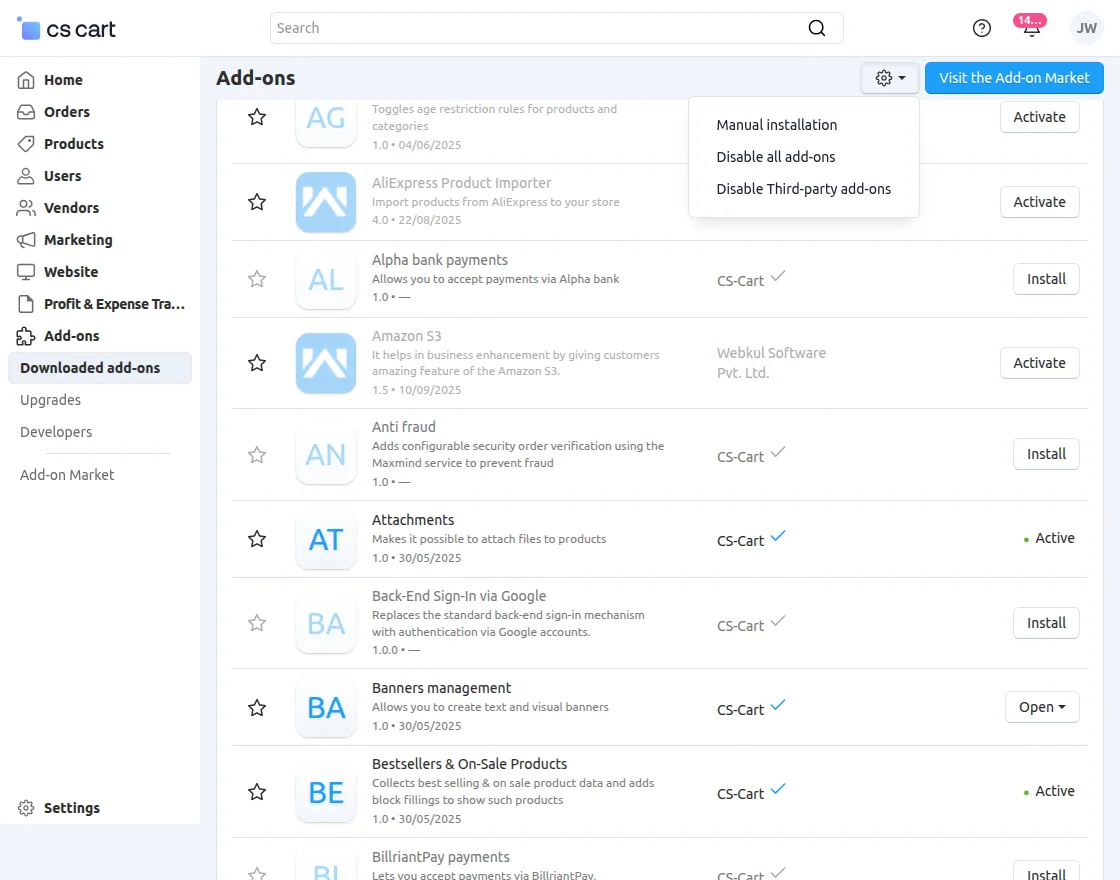

After that select the zip file and Click on Local and Click on Upload & install.
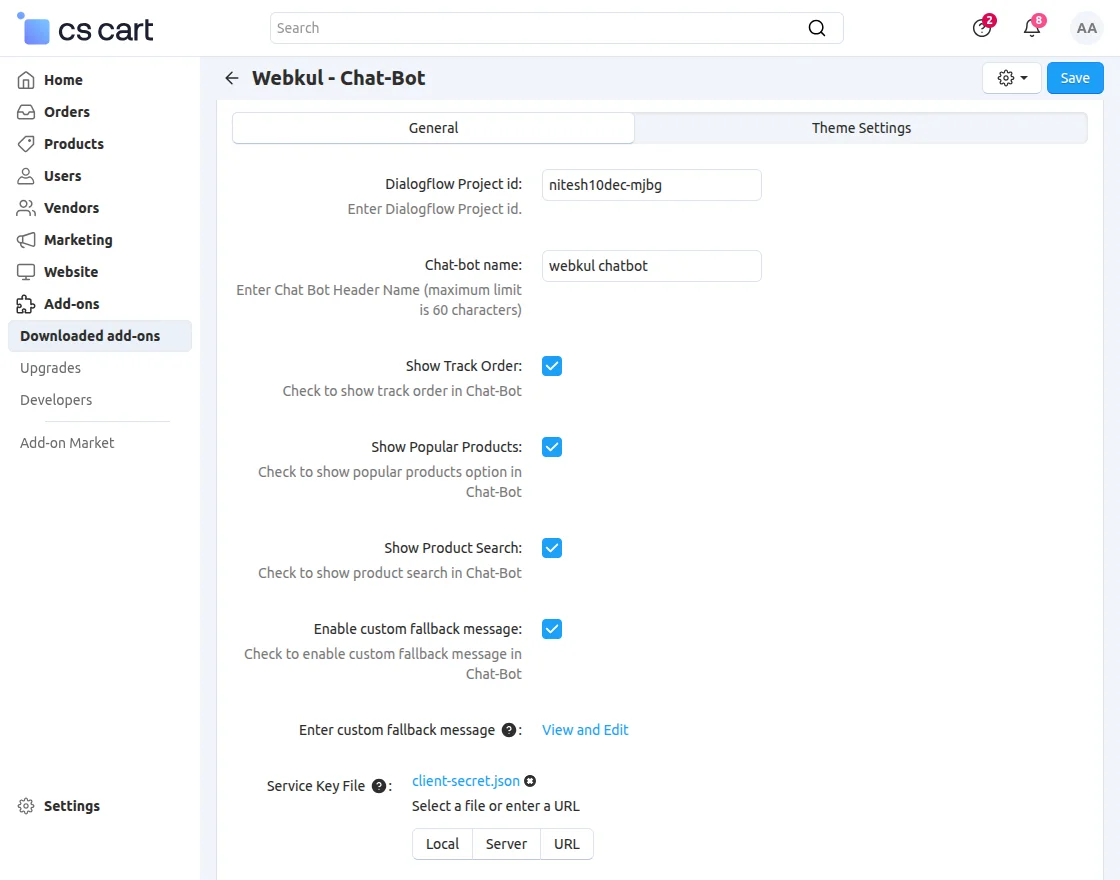
Chatbot Configuration
-
Dialogflow Project ID:
Enter the Dialogflow project ID used to connect the chatbot with the Dialogflow agent. -
Chatbot Name:
Enter the header name for the chatbot (maximum 60 characters). This name will be displayed at the top of the chatbot (e.g., Webkul Chatbot). -
Show Track Order:
Enable this option to display the Track Order service in the chatbot. -
Show Popular Products:
Enable this option to display the Popular Products / Hot Deals option in the chatbot. -
Show Product Search:
Enable this option to allow users to search for products directly through the chatbot. -
Enable Custom Fallback Message:
Enable this setting to use a custom message when the chatbot does not understand the user’s input. -
Custom Fallback Message:
Enter the fallback message that will be shown when no matching response is found. -
Service Key File:
Upload the Dialogflow service account key file (e.g., client-secret.json) to authenticate and establish a secure connection between the store and Dialogflow.
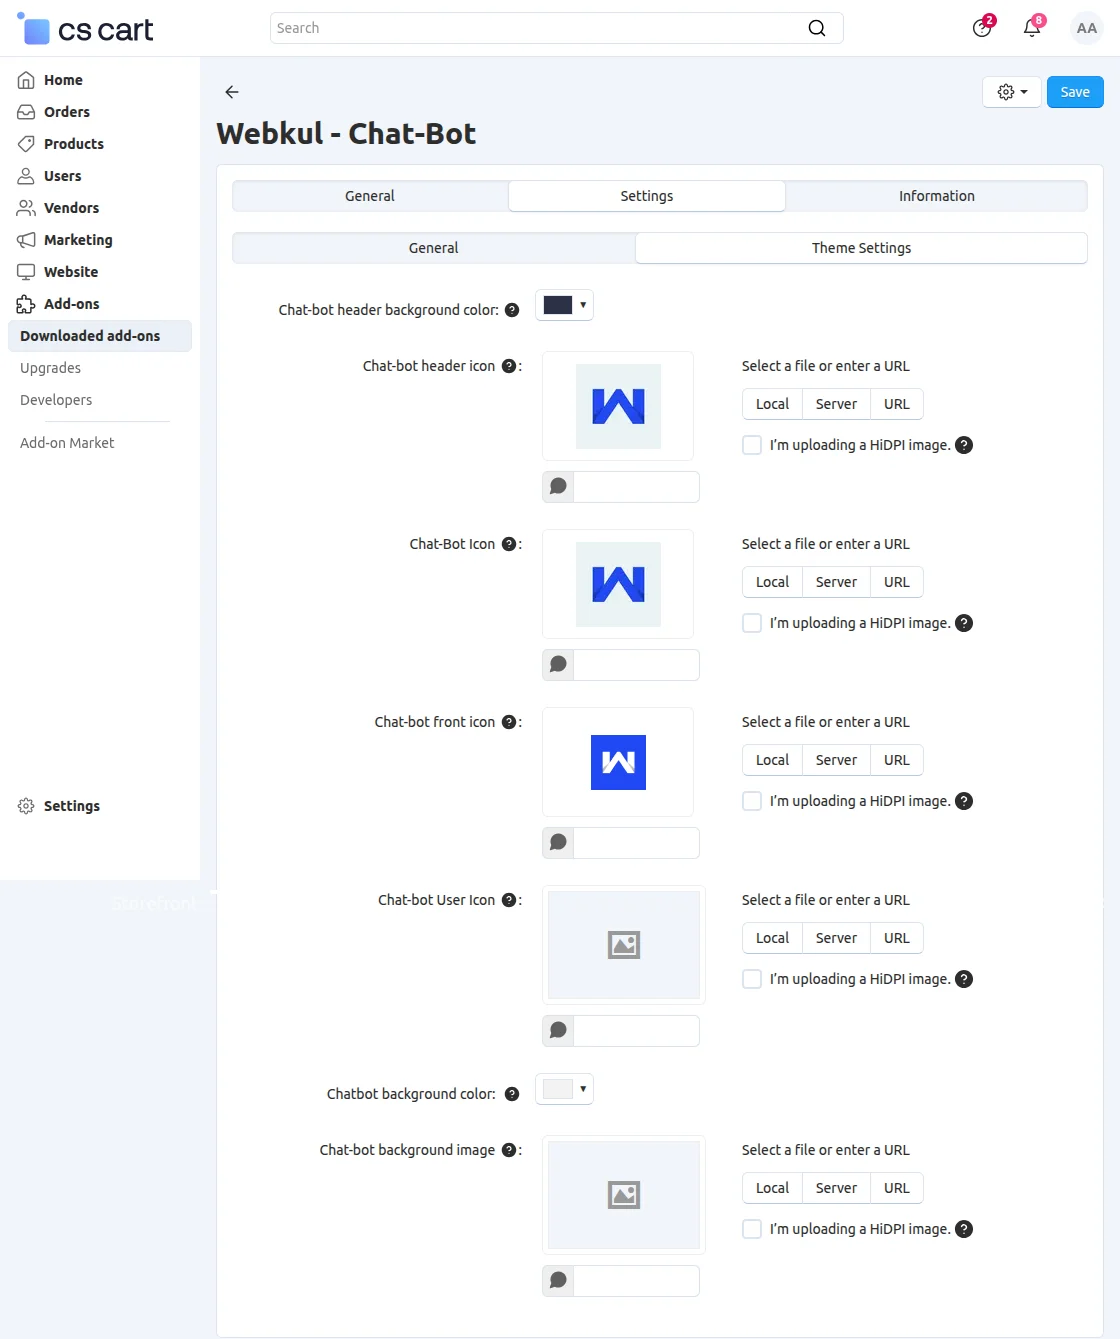
Theme settings
In Theme settings, the admin can customize the color of the Chatbot header background and icon.

How To Get Dialogflow Project Id
Firstly log in to your Dialogflow account. Hereafter login you need to create an “Agent”.


After the agent is created, click on the settings to get the Dialog flow project Id. Now click on the “Service Account” URL to create the key.


It will redirect you to the “Google Cloud Platform”, where under Service Accounts for test agent you will find “Create key”.


After clicking, a new popup will get open. Now choose the recommended file and click Create.


Once you have clicked Create, a service key file will be created, which you can upload in the settings of the add-on.
The next step is to import the “Dialogflow File” which is provided with an add-on zip file to your Dialog flow account. And click “Done”.


Now, under the “Fulfillment” Tab, enter your store URL in order to respond to the user query.


An admin can add and create a user expression that an admin expects from the customer, after creating intent, and is able to add a response to send to the customer as given in the below snapshot.


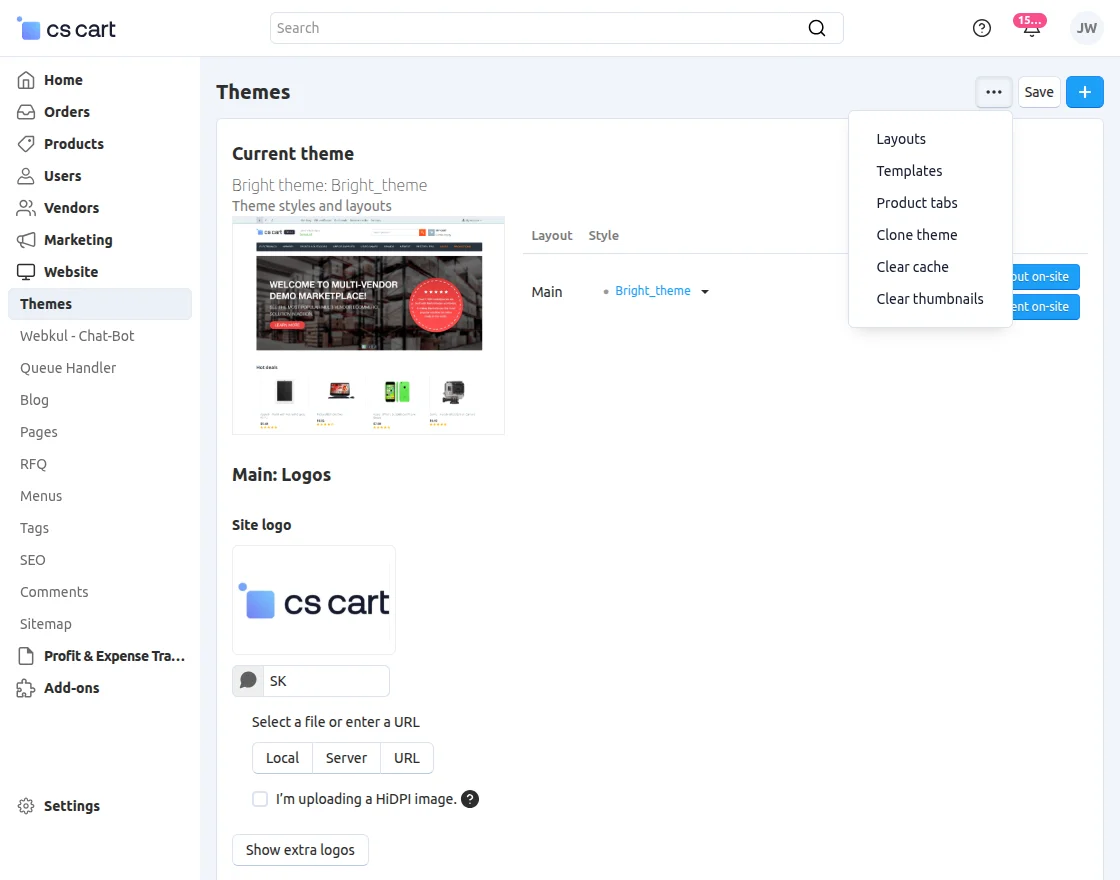
When you have done all these settings, Click on the Layouts in Themes section for Chatbot to display at the storefront.
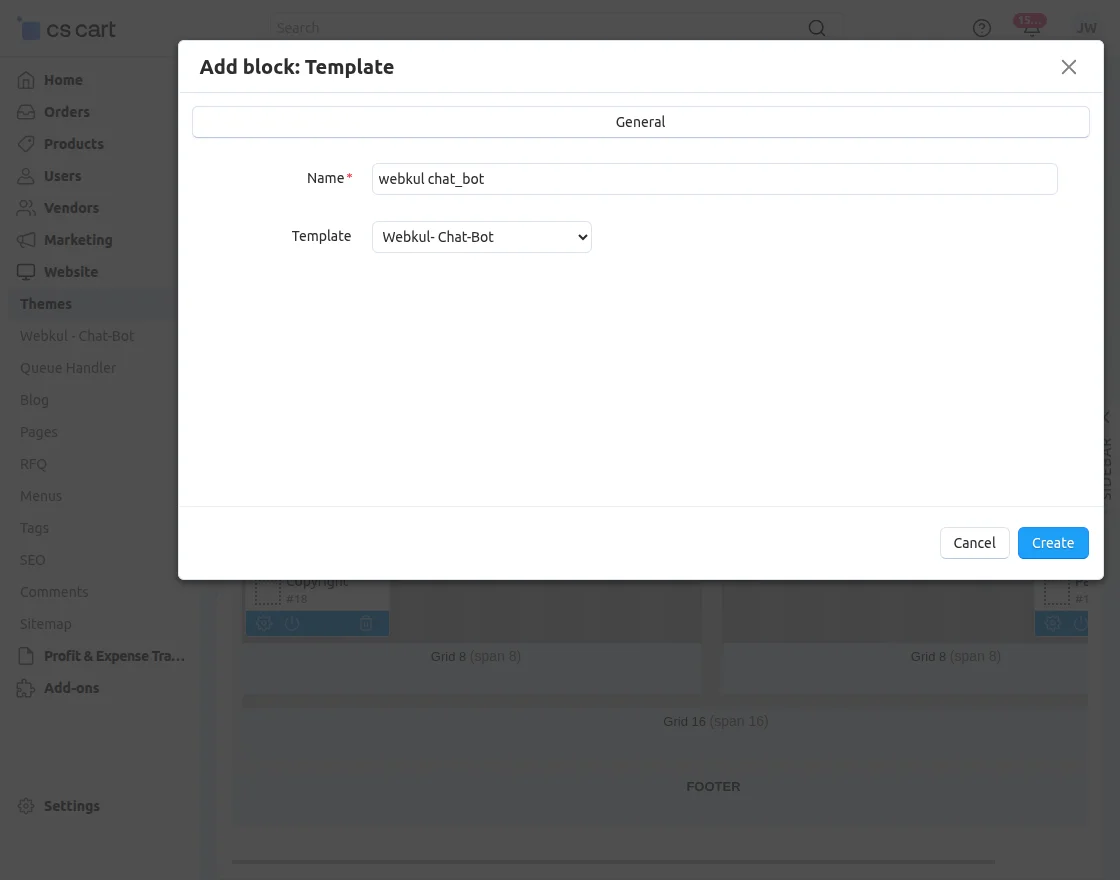
Select the Default page and add a block. Now create a Template to block. Then enter the name and template as given in the screenshot:
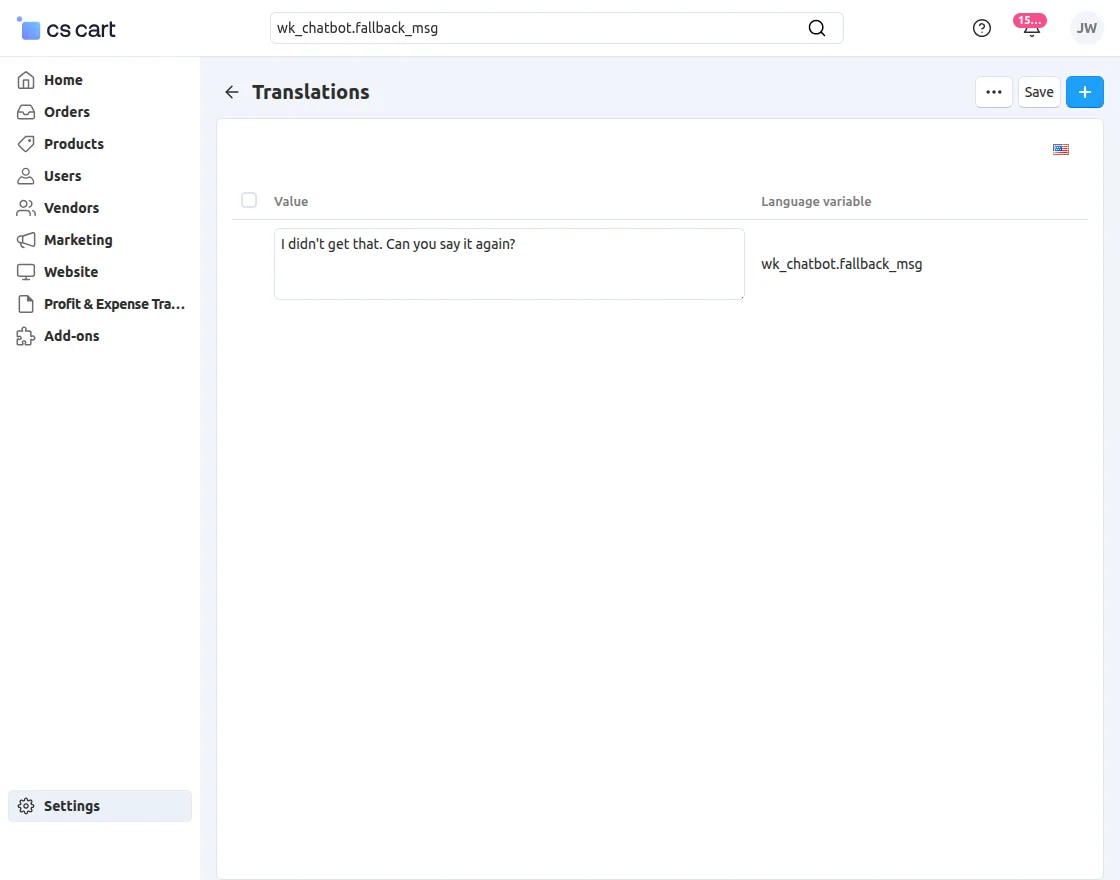
An admin can also customize the custom Fallback message from his backend.
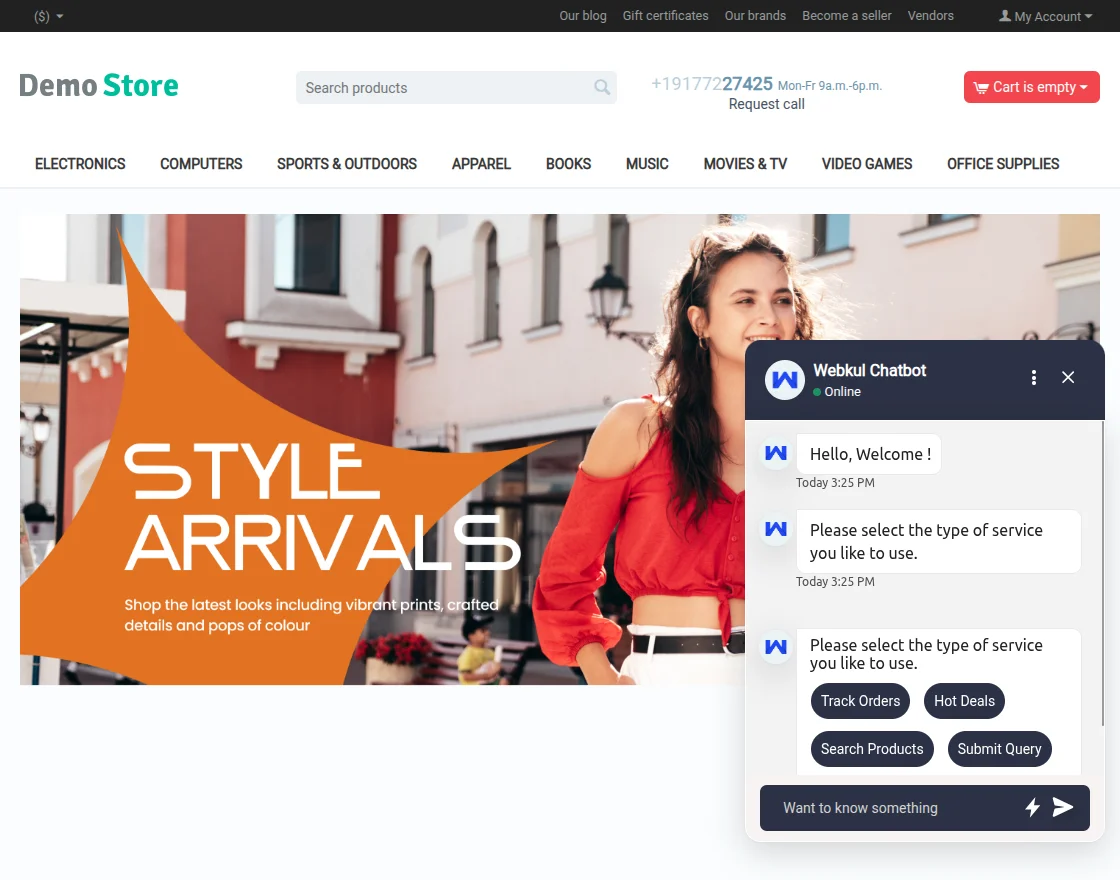
Front End View
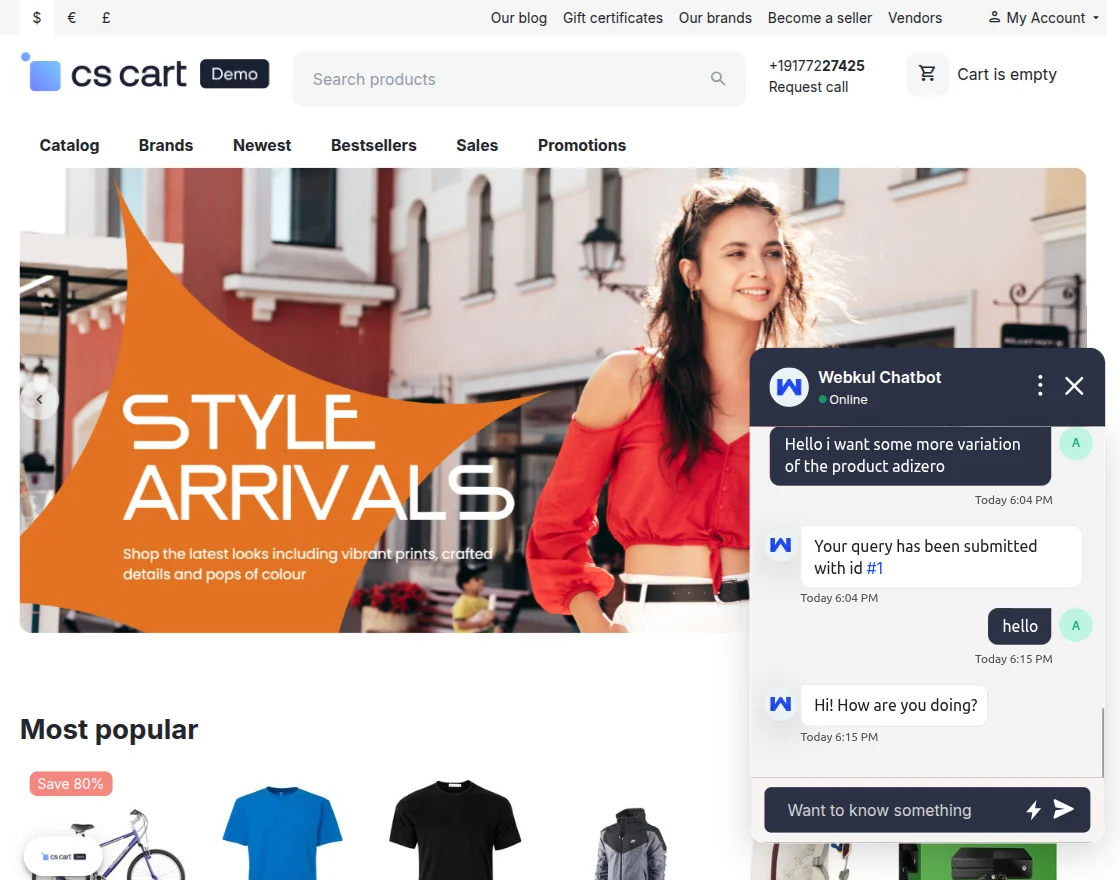
On the storefront, customers can view and access the chatbot for assistance and support.
View of the user’s expression and response to the customer.
Support
For assistance with CS-Cart ChatBot setup or customization, contact support@webkul.com or Webkul Support.
Discover more powerful CS-Cart extensions to enhance your store’s functionality!