Configure Salesforce Wedgecommerce Store Administration And Payment Processors
Salesforce Wedgecommerce is a platform which allows Salesforce users to centralise commerce and CRM with backend/frontend functionalities.
Before installation of application make sure that you have enabled the Customer Portal of your site. To allow person/self registration in your site enable the “self registration” field. After installation of Wedgecommerce application, go to “Sales” tab. Click on Wedgecommerce to view the admin end.
CONFIGURE STORE ADMINISTRATION
To configure the admin end please go through the snapshot displayed below.


- 1. Set the “store manager” from the dropdown provided.
- 2. Select a “store pricebook” from which admin would like to pick the prices for products.
- 3. Portal Account is an account on which contact will be created on and then enabled as user. Accordingly admin needs to select “store portal account” from the dropdown.
- 4. In “registered user account”, select any account where admin wants to list the orders created by registered user id.
- 5. In “guest user account”, select any account where admin wants to list the orders created by guest user id.
- 6. Set a duration for the frontend notification to appear on screen.
- 7. Set a currency symbol for default org currency. Admin needs to add the symbol of default Salesforce currency set at backend, so that the currency symbol is not missed at store end.
- 8. Select and set the “terms and conditions” from the articles listed in the dropdown.
CONFIGURE PAYMENT PROCESSORS
Payment methods used include Paypal, Stripe, Cheque, COD and multiple standard offline methods.
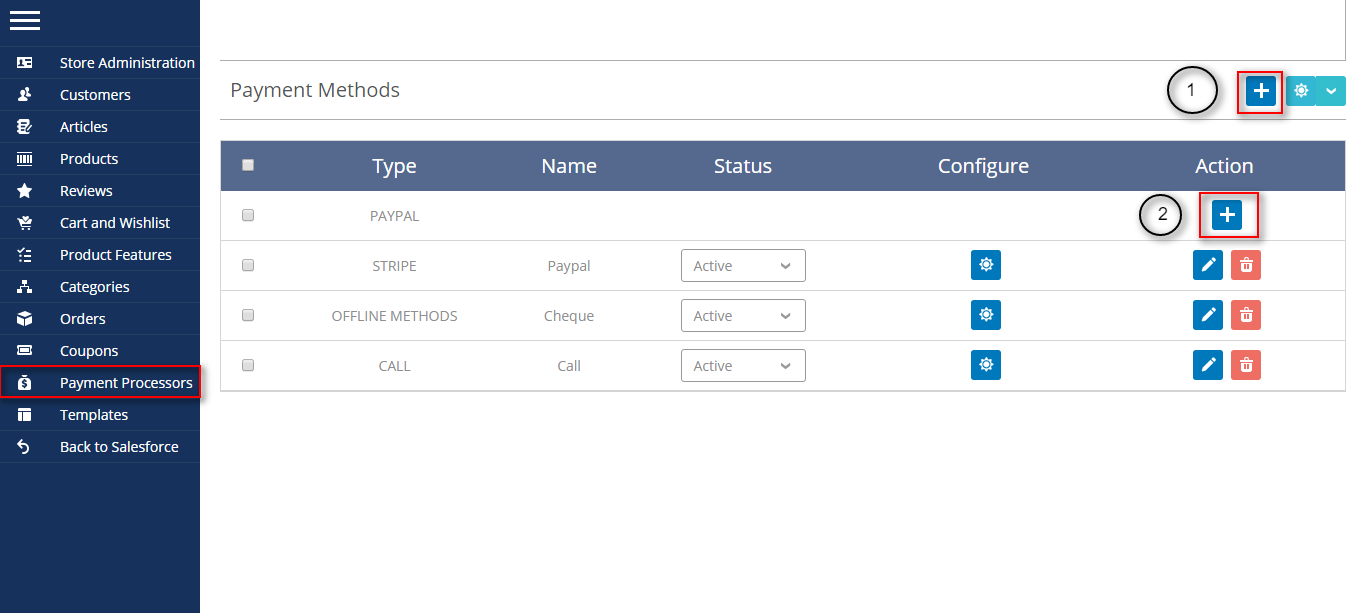

- 1. Click “+” to create a offline payment method.
- 2. Click to add and configure Paypal at store end.

- 1. Set the name of the payment.
- 2. For Paypal, select type as “Paypal”.
- 3. Click on “status” to publish the payment.

- 1. Click “configure” to manage the settings of Paypal.
- 2. Option of edit/delete is available.
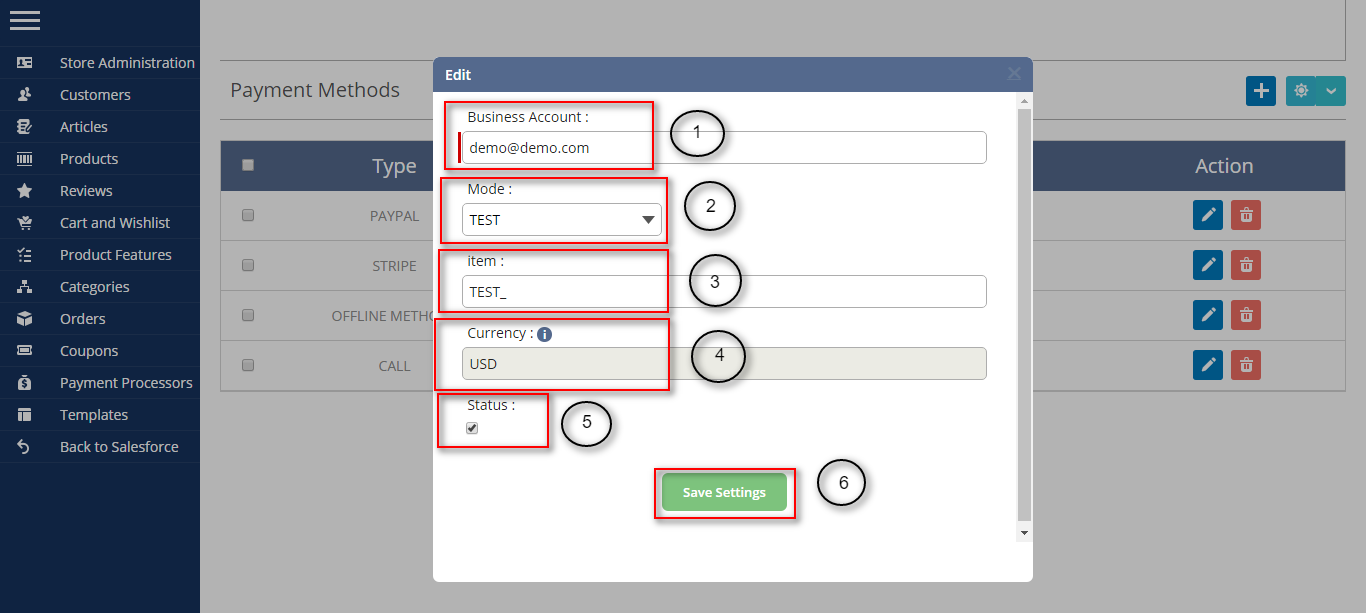
- 1. Enter the detail of business account.
- 2. Select the mode of payment.
- 3. Enter the detail of item.
- 4. Select checkbox to active the payment method.
- 5. Click to save the settings.
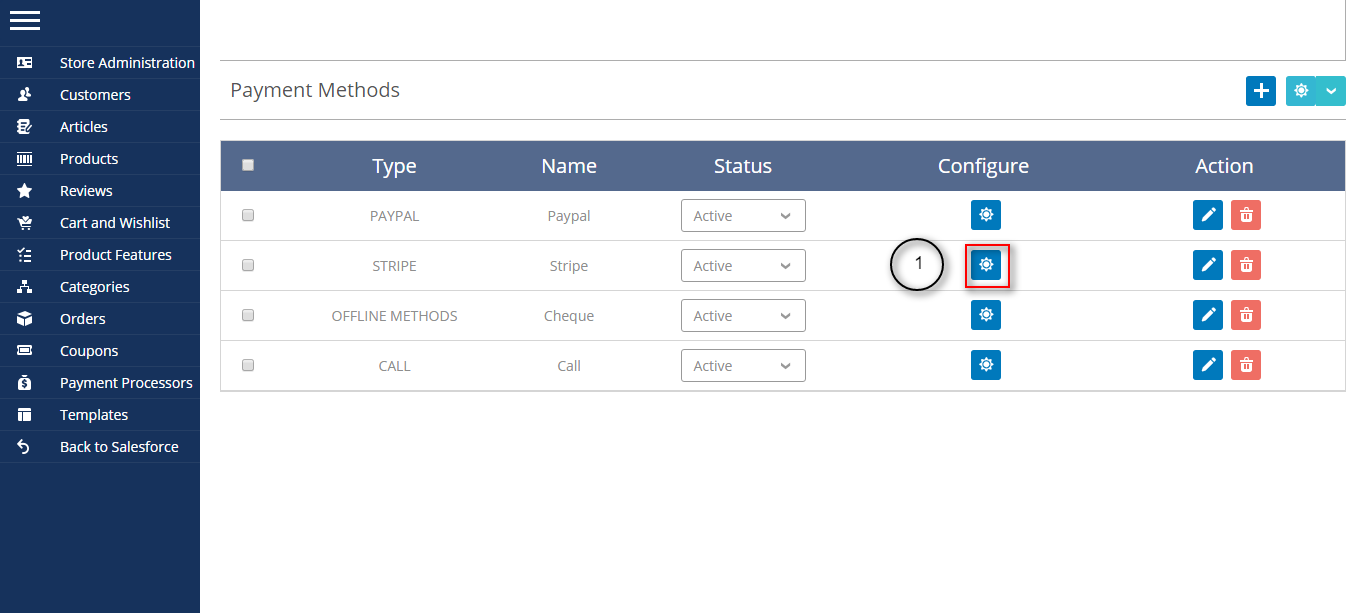
- 1. Click to configure Stripe.
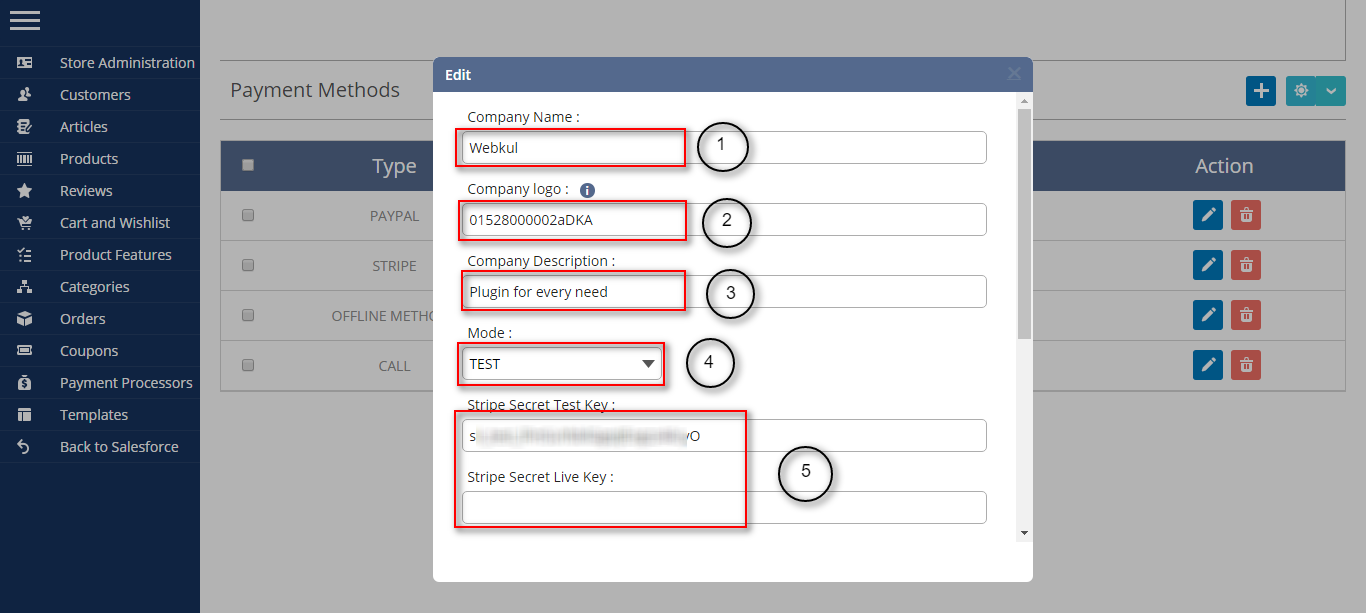
- 1. Enter the company name.
- 2. Enter the image id to be used as logo.
- 3. Enter the description of the company which will get displayed in Stripe checkout form.
- 4. Select the mode of payment.
- 5. Enter the Secret Key as per the mode selected.


- 1. Enter the Publishable Key as per the mode selected.
- 2. Set the currency as per the user default currency.
- 3. Click to publish the method.
To know more about Salesforce Wedgecommerce please view the site http://wedgecommerce.com/. For further any query please create a ticket at http://webkul.uvdesk.com