Purchase Order for WooCommerce
Table of Content
Purchase Order for WooCommerce helps the store owner to manage the inventory of the products. Purchase management is the activity of sourcing products from different suppliers.
Using this module, the admin can perform purchase management functions to create the orders, purchase orders, request quotes, manage incoming shipments, and update incoming product information easily.
The admin can manage the product inventory using this module either manually or automatically as per the configuration. The admin can create an automatic purchase order when the stock goes low.
Note: Purchase Order for WooCommerce is compatible with multisite.
We provide a production version of the plugin. If you want a development version then you can get it at an additional cost. Please contact support@webkul.com for it.
If you require expert assistance or want to develop custom unique functionality, hire WooCommerce Developers for your project.
Check the plugin workflow in the video mentioned below –
NOTE:
For Auto Procurement, an automatic Quotation will generate, whenever the product goes low stock.
Features of Purchase Order for WooCommerce-
- Set the procurement method – auto or manual.
- The admin can set the default prefix for the purchase order number.
- Send quotation and purchase order emails to the suppliers.
- Add any comments to the purchase order, and incoming shipment, and notify the suppliers.
- Add suppliers to a product by specifying – cost price, quantity, and priority.
- Manage incoming shipments and products from the suppliers.
- The admin can update the information about the partial shipments.
- The admin can update the details for the complete payment.
- The quotation is drafted automatically when a product goes low stock.
- A draft quotation generates for the supplier based on the highest priority.
- If a separate quotation is enabled, then a quotation will be created for every purchase after the stock is low
- Lead time(in days) defines the days of shipment that must be arrived at the store by the supplier.
- A message will appear for managing stock that enables stock for each product to update the stock quantity on fulfillment of shipments.
- By using the received shipment date the admin can set the date and approx time on the current date for the shipment of the previous order date.
Note: This plugin is now compatible with WooCommerce’s latest feature Cart and Checkout Blocks and High – Performance Order Storage (HPOS).
Installation of Purchase Order for WooCommerce-
The user will get a zip file which he has to upload in the “Add New” menu option in the WordPress admin panel.
For this, login to WordPress Admin Panel and Under the Dashboard hover your mouse over the “Plugins” menu option which brings out a Sub-Menu and then select the “Add New” option.


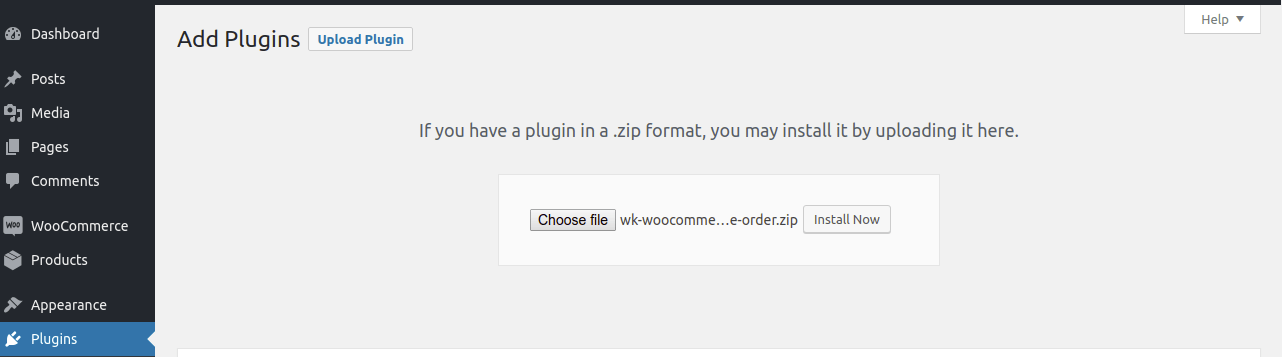
After this, you will see an option on the top of your page that is “Upload Plugin”, click the option to upload the zip file.

By clicking on the “Upload Plugin” option, below that you will see a button “Choose File” click on the button to browse for the zip file as per the snapshot below.

After browsing the file, click the “Install Now” button to install the plugin as per the snapshot.

Now when the plugin is installed correctly, you will see the success message and an option to activate the plugin. Henceforth now, click on “Activate Plugin” to activate the installed plugin.


Module Activation
Check how to activate your WooCoomerce plugin through the purchase code.
Configuration Purchase Order for WooCommerce
Now the admin can easily manage the module from the WooCommerce admin panel.
To manage the module, the admin can click on Purchase Management and then click on the configuration to configure the module.


Procurement method: The admin can select the Procurement method as Automatic or Manual.
Default Prefix: Using the Purchase Order for WooCommerce, the admin can also select the Default Prefix for the use of quotation increment number generation.
Separate Quotation: If a separate quotation is enabled, then a quotation will be created for every purchase after the stock is low.
But if the separate quotation is disabled, then the quotation will be created automatically after the quantity is low and will be created only once.
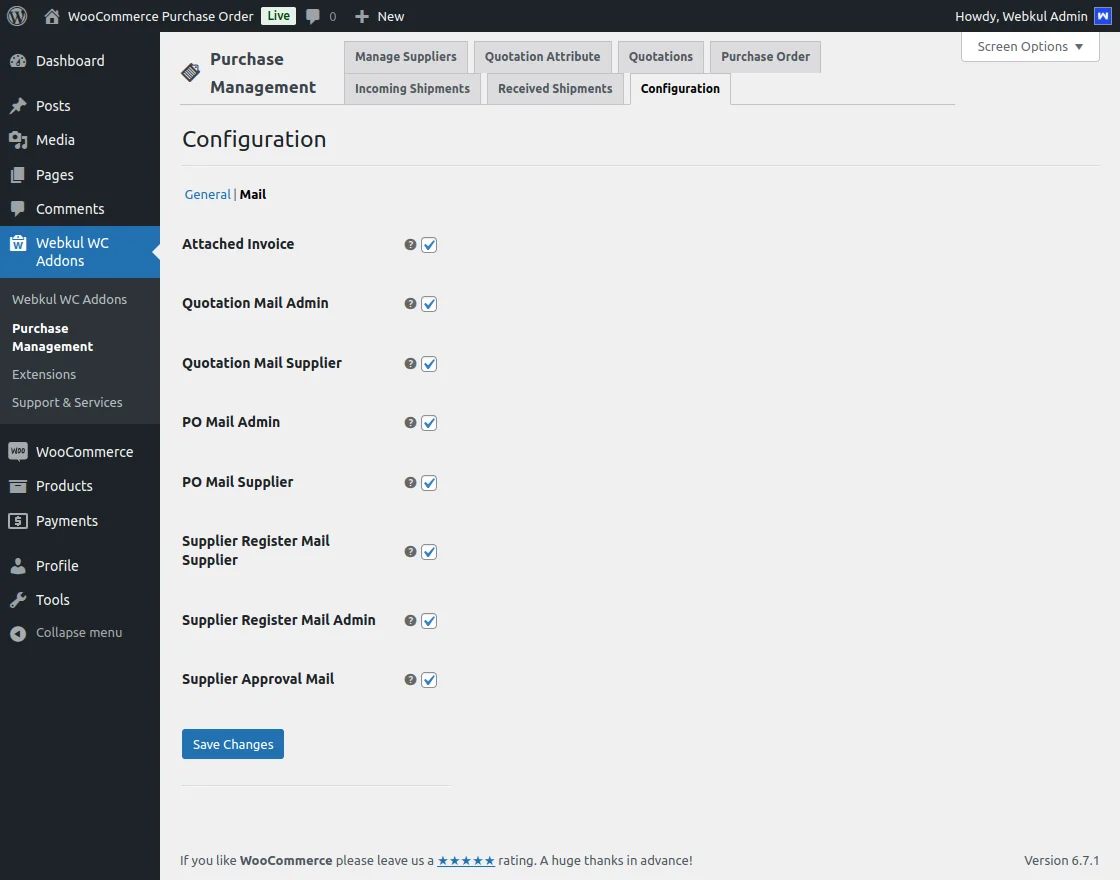
Under the configuration section for Purchase Order module, the admin can click on the Mail tab as shown above and select the option to include in the email.
The options are namely:
- Attached Invoice
- Quotation Mail Admin
- Quotation Mail Supplier
- PO Mail Admin
- PO mail Supplier
- Supplier Register Mail
- Supplier Register Mail Admin
- Supplier Approval Mail
Manage Quotation Attribute
The admin can manage the quotation attributes accordingly. Here, the admin can add new attributes, and manage the existing attributes.
To add new attributes just click on the Add New button to add a new quotation attribute.

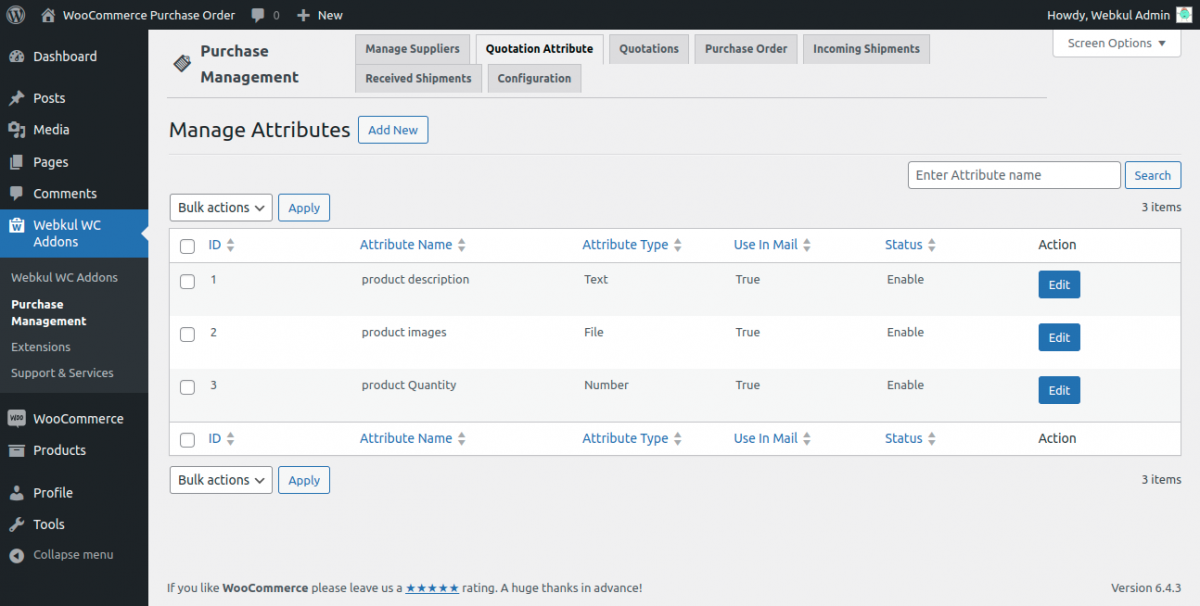
Here the admin can create a new attribute by clicking on Add New button.

Manage the Suppliers
The admin can easily manage the existing supplier and can create a new supplier by clicking on Add New button.
To manage the existing supplier, the admin can click on the Manage button as shown in the image below, and then manage the details of the existing supplier accordingly.
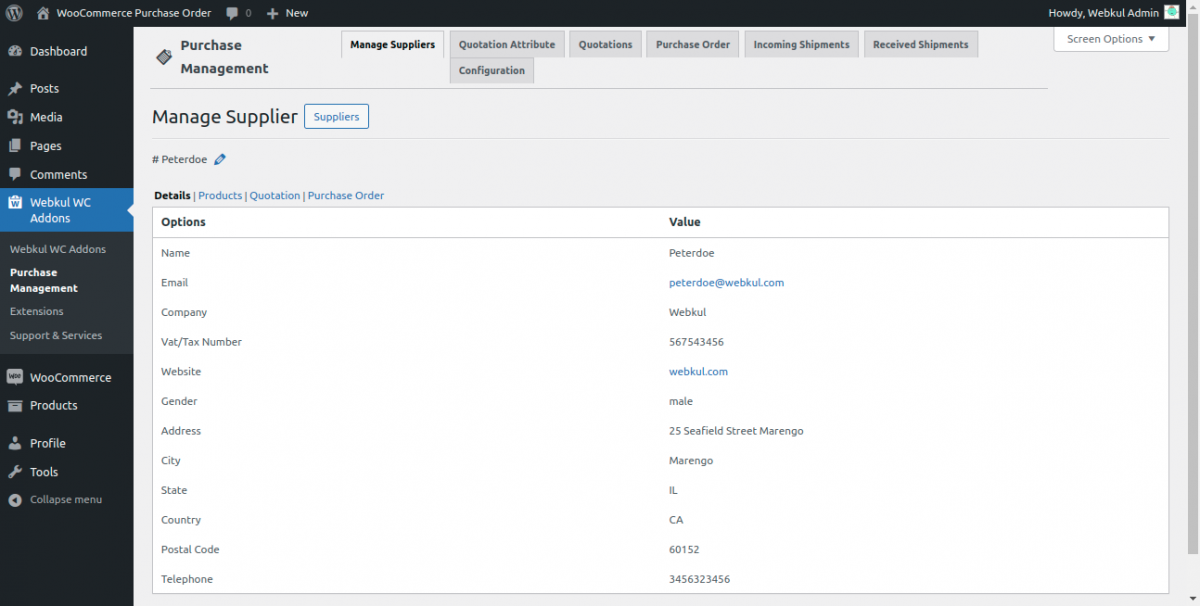
Here, the admin can manage and edit the details of the supplier, and can also trash the existing supplier by hovering the mouse over the supplier name.

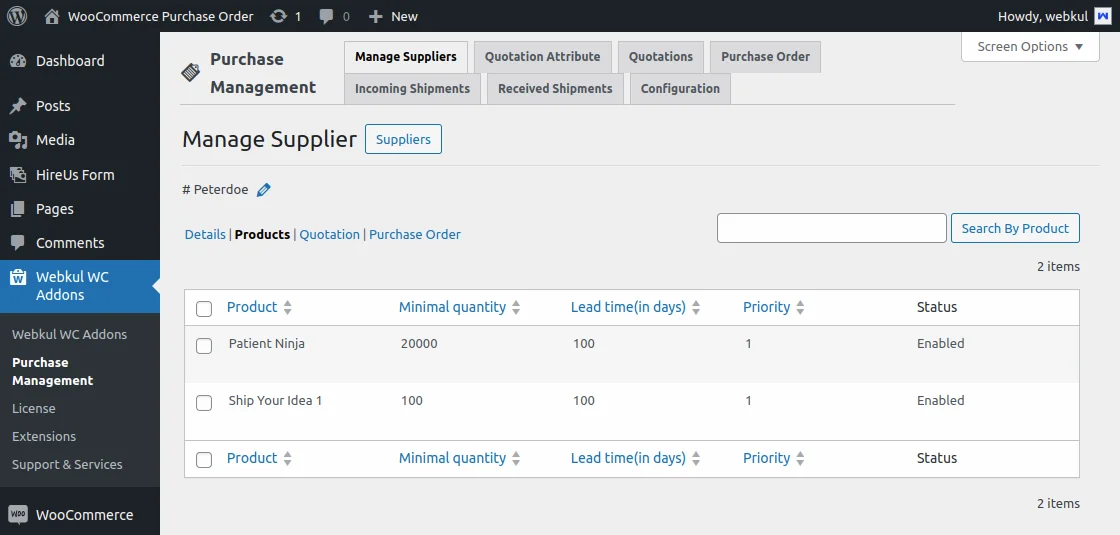
After clicking on the manage button, the admin can view the details about the supplier as shown in the image below –
The admin can also view the products that are assigned to that supplier. And then manage them accordingly –

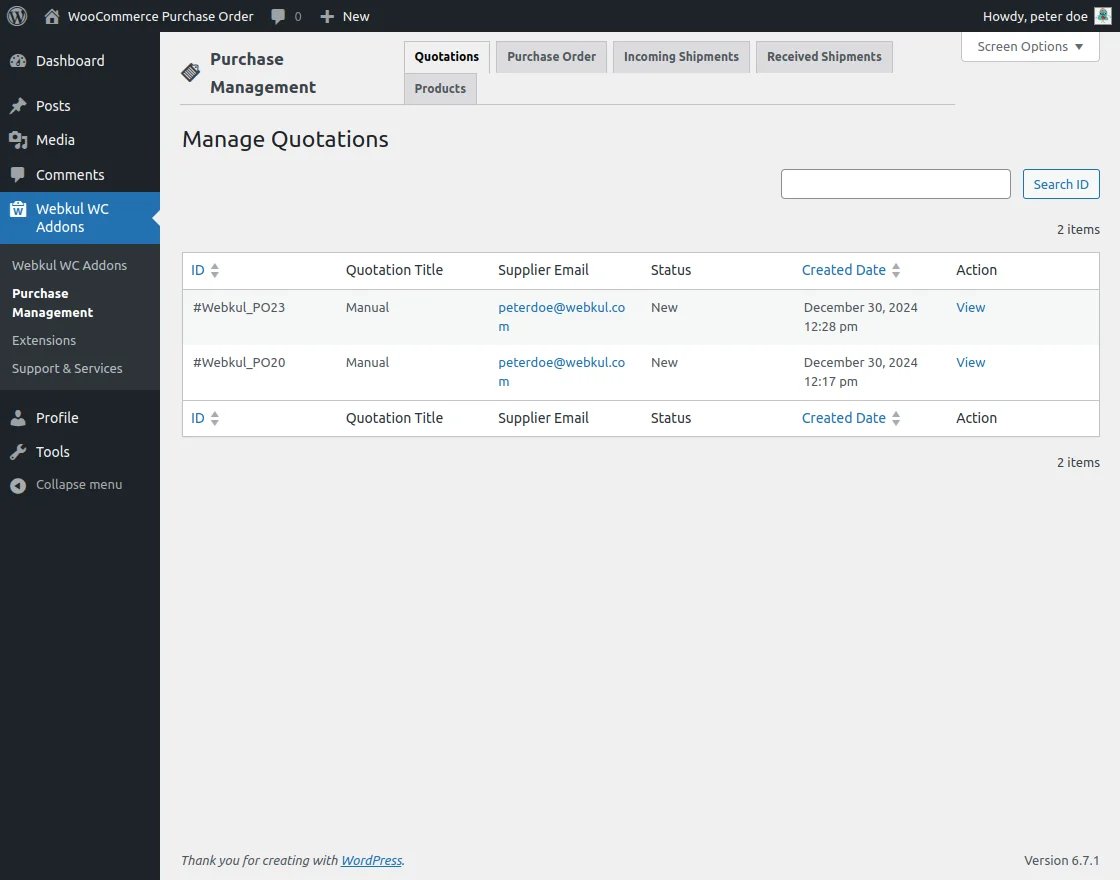
From the Quotation tab, the admin can view the details of the quote with the supplier.
Here, the admin can view the ID of the quote along with the source document, supplier email, status of the quote, and date created of the order. Also, click on the action button to take any action.

From the Purchase Order tab, the admin can view the ID of the purchase order, the source of the document i.e automatic or manual, the supplier email ID, and the status of the purchase order.

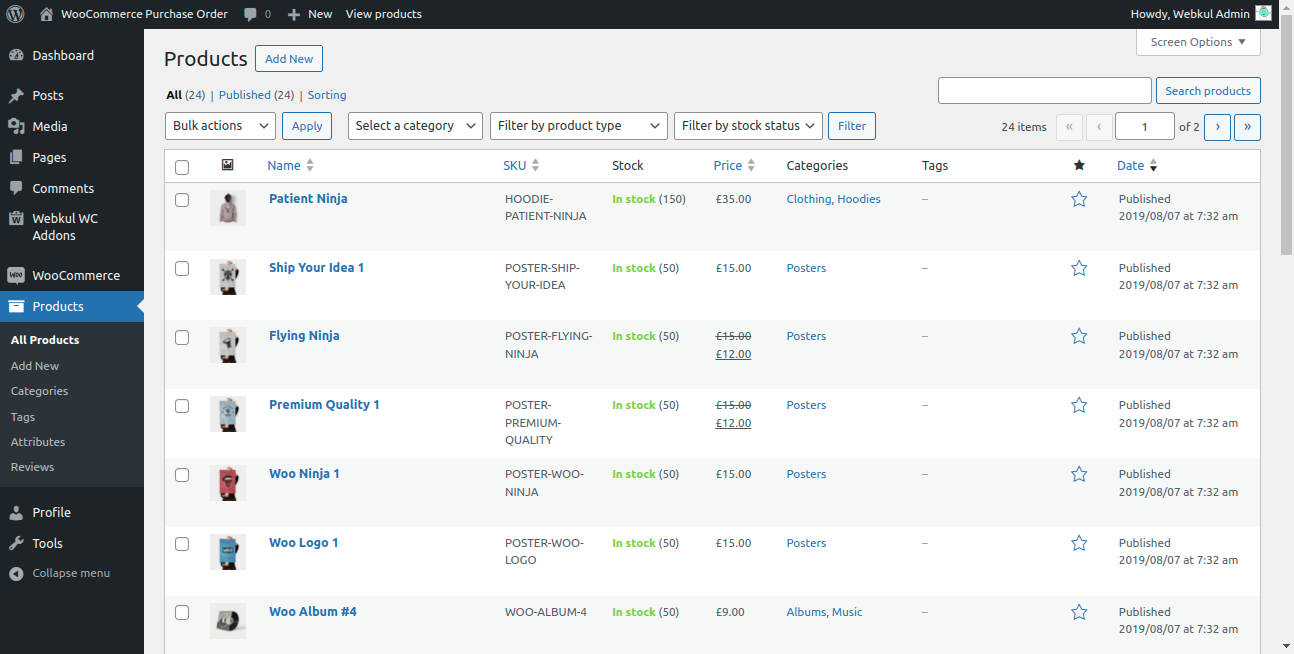
Assign Supplier to a Product
The admin can assign a supplier to a product from the product page. To assign a product the admin can navigate to the product page.
Note: On the product page, a message will appear that enables stock for each product to update the stock quantity on fulfillment of shipments.

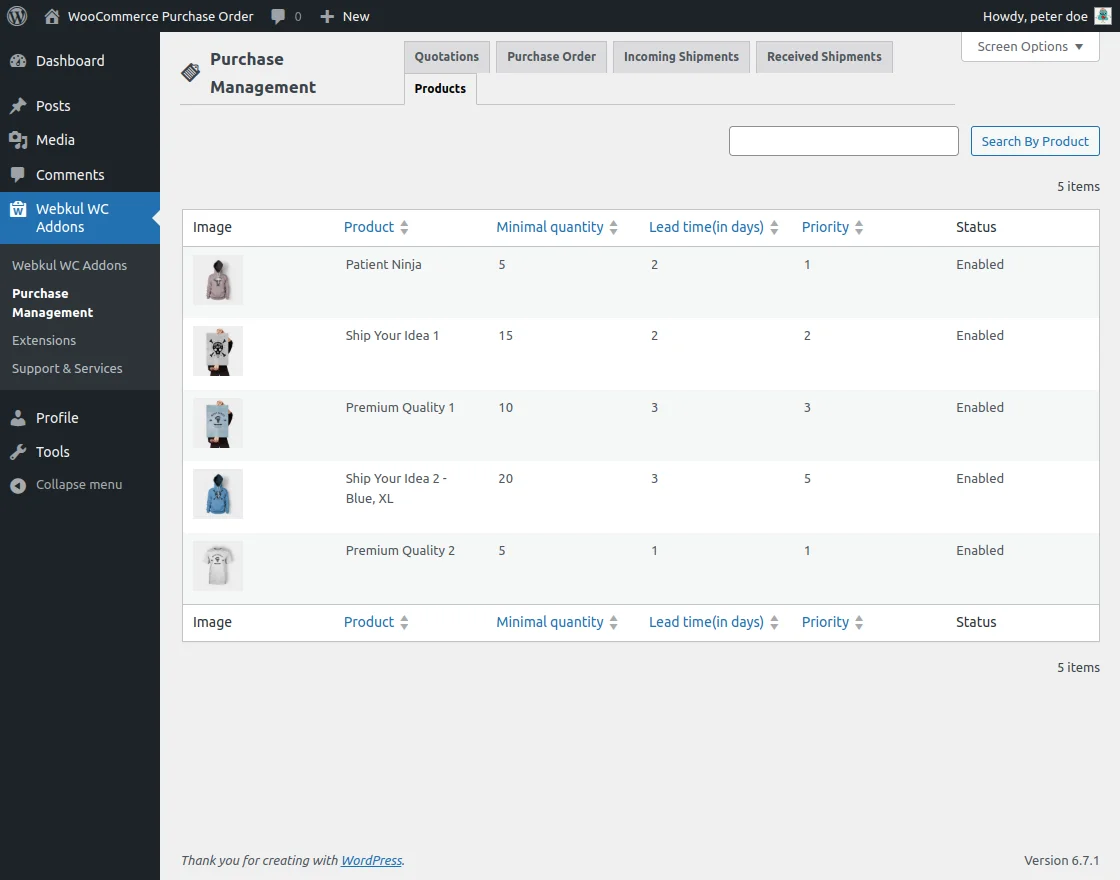
Here, the admin can select the supplier for the product, enter the minimal quantity of the product, lead time, and priority for the supplier, and select the status.
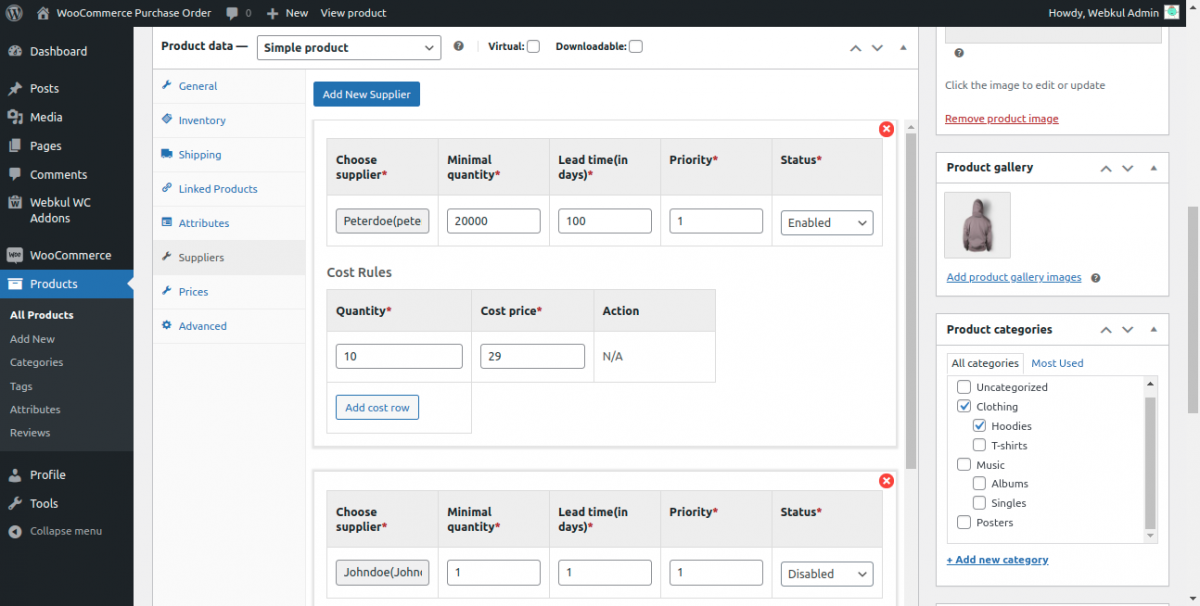
Manage Price For The Manual Procurement –
The admin will have to set the price of the product first for the manual procurement. The admin can manage the price from the product page in the admin panel.
Here, the admin can set the price of the products for manual procurement as shown in the image below –

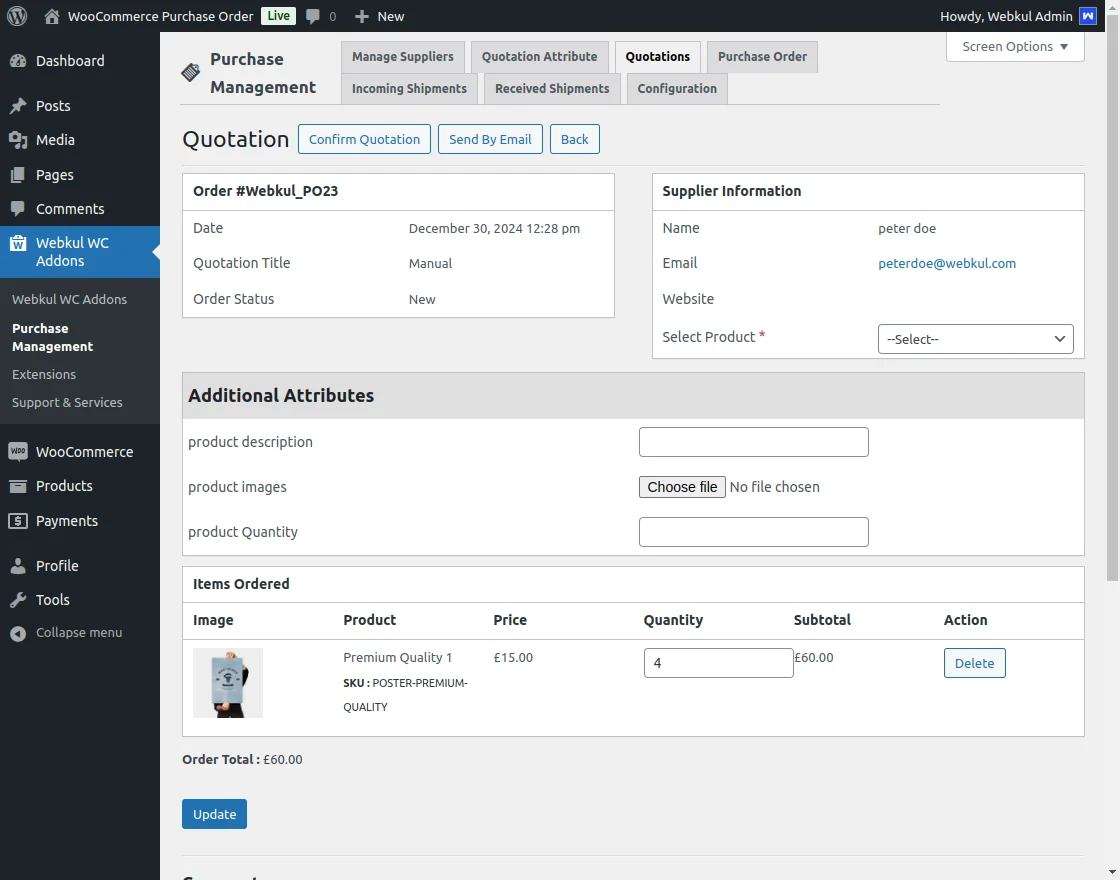
Manage Quotations –
The admin can manually request the quotes from the suppliers by navigating to the Quotations.
Here, the admin can click on the Add New button to add a quote. Now, the admin can select the source document, supplier, and then select the supplier product.

The admin will have to enter the quantity of the product to request a quote from the supplier.
If the admin didn’t enter the name of the Source Document then it will be named “MANUAL” automatically. Now, click on the Save button.

After making a quote, the admin can click on the Send By Email button to send the quote request to the supplier. The admin can also comment on that quote and notify the supplier by email as well.
The supplier will receive the email and then respond to the admin regarding their quote and comments only via email.


When a comment is made by the admin and the option to notify the supplier is also checked then the supplier will also receive the email. Then the supplier can contact the admin manually via email.
Once the quotation is placed and confirmed, the supplier receive an email notification containing information related to the order.
The email includes an attached PDF Send purchase order (PO) invoices document that provides a detailed overview of the product and order confirmation.


Now when the admin and the supplier both are agreed with the quote, the admin can mark the quote confirms.

Now after confirming the quote, the quote will convert into a purchase order.
Manage Purchase Order –
Now the admin can view the details of the purchase order by clicking on the view action button.

The admin can also see the purchase order id along with the store document, supplier email, the status of the purchase order, and created date.
After clicking on the View button, the admin can view the order Id, date, source document, order status, and supplier information along with the item order detail.

The admin can print the order here, send the purchase order via email to the supplier, and go back to the purchase order.
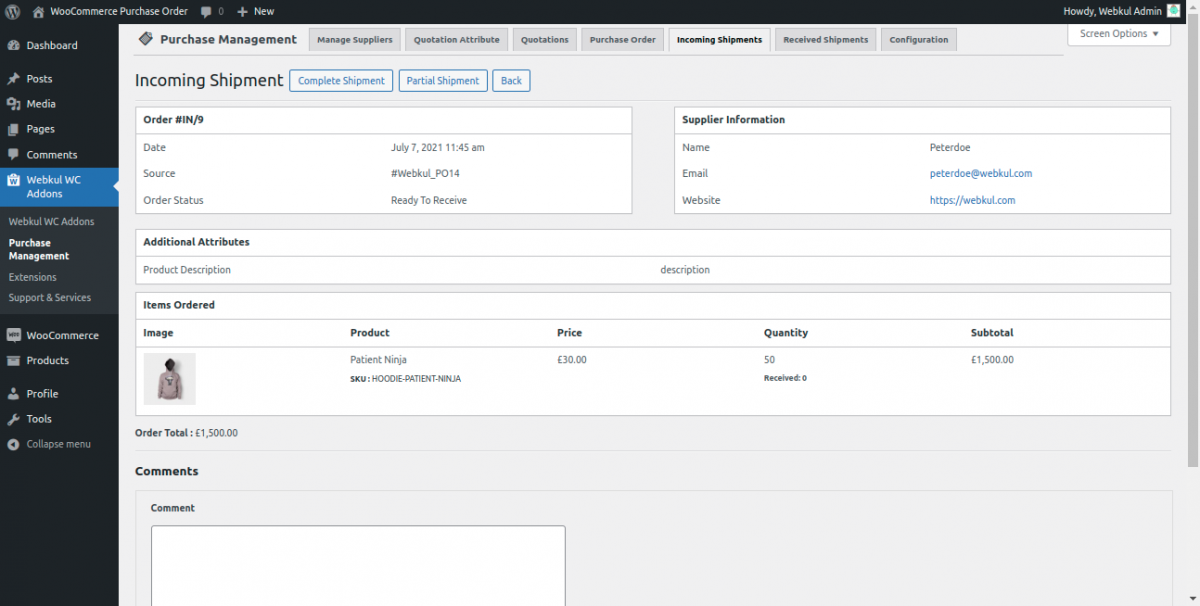
Incoming Shipments
The admin can view the incoming shipments along with the order Id, source Id, supplier Id, date, and the status of the incoming shipment.
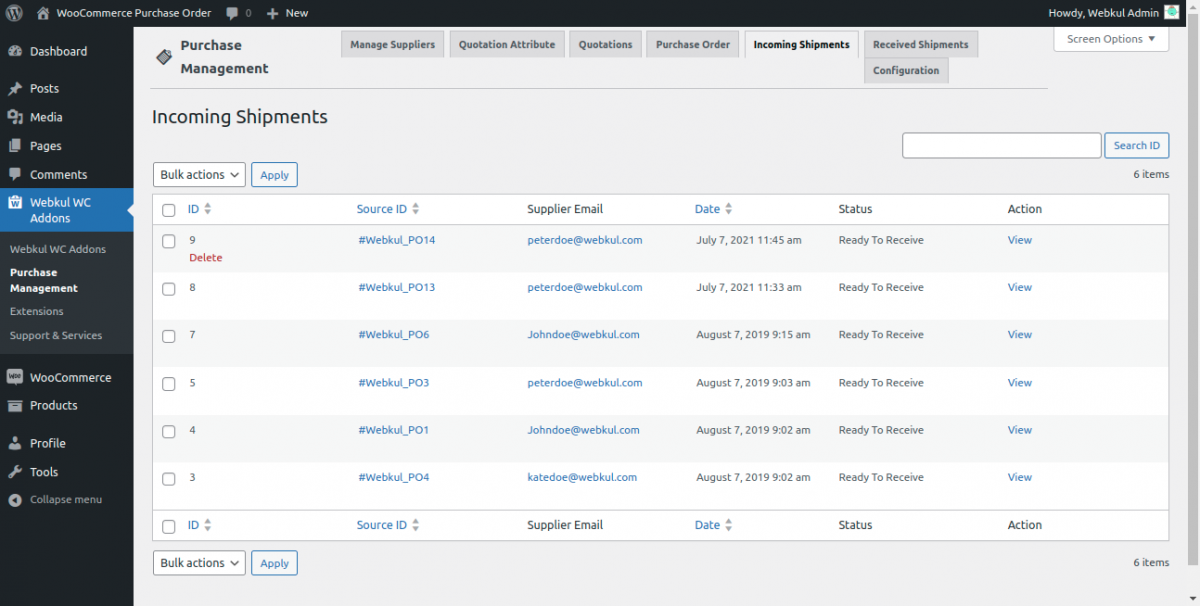
The admin can click on the view button to view the details of the order. Here, the admin can notify the seller by commenting on the order.
The admin can select the order as complete or partial shipment.
A new shipment will be created for the complete received order.

Also, the shipment can be created for the partially received order.
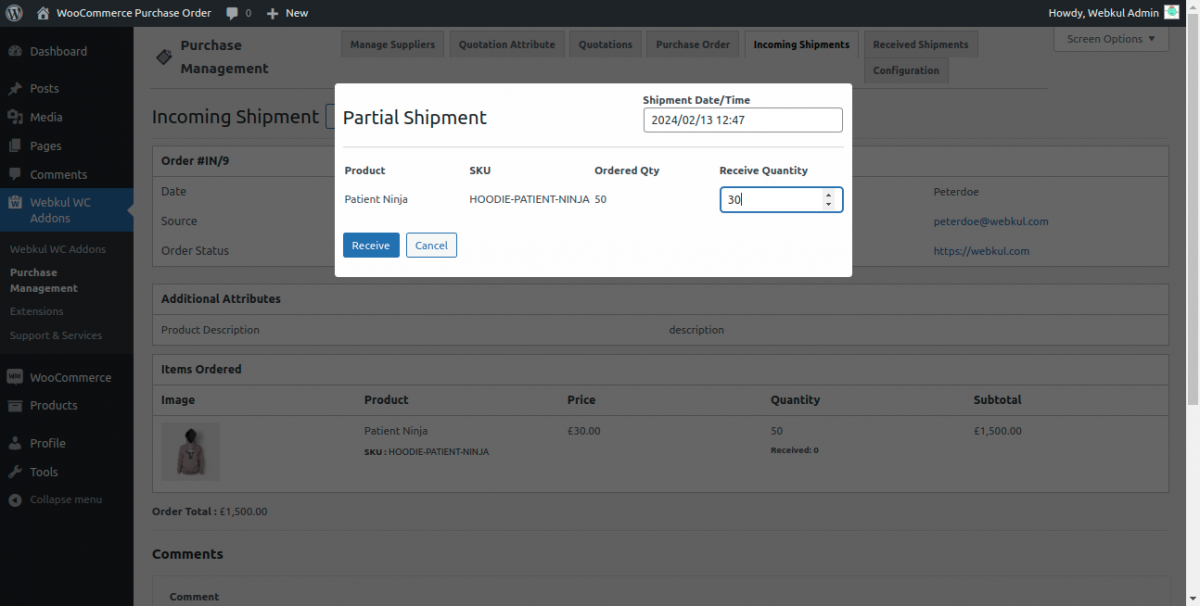
Now, the admin can view the remaining shipment order in incoming shipments.
Received Shipment
When the partial shipment is created it will be converted into the received shipment and the admin can find the details of the shipment.
Where admin can check the received and remaining items quantity of the product.

Automatic Procurement –
When automatic procurement is selected then the quote will be created on the basis of the priority of the supplier.
From the pricing tab, the admin can set the price of the product and also decide the Procurement Method for the product.
here, the admin can select from the –
- Manual
- Automatic
- Use config settings

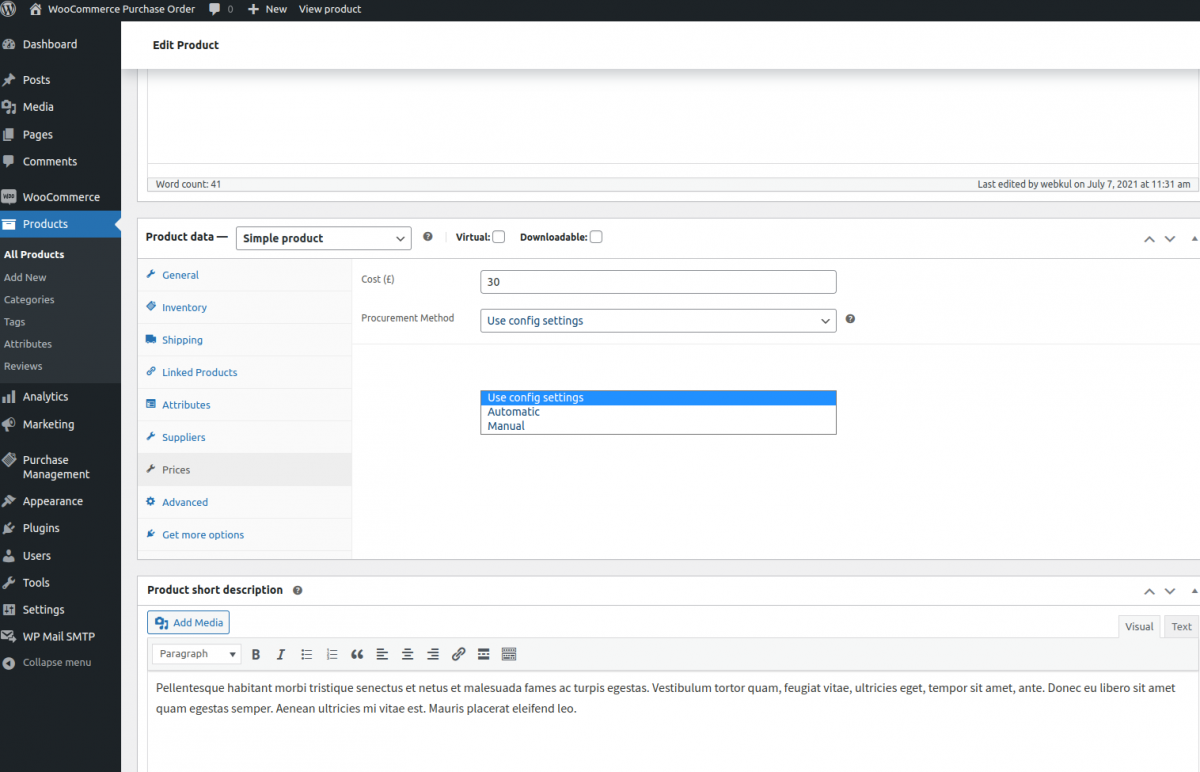
When selected Automatic the drafts quotation will be prepared for the low stock products as configured by the admin.
Now, when Procurement Method is selected as Manual the purchase order will be prepared manually by the admin.
The admin can also select the Config Settings to use the module config settings for the Procurement Method.
Purchase Managment Supplier End –
After Login with Supplier End User need to Navigate through side bar of Woo Commerce purchase order.
And Now user need to click the Webkul WC Addons then choose Purchase Managment where Options appears with different purchase management options.
Quotations: It allows user to view and have a detailed information of products which are fulfilled by supplier to the admin. Here all products are listed with title and statues.
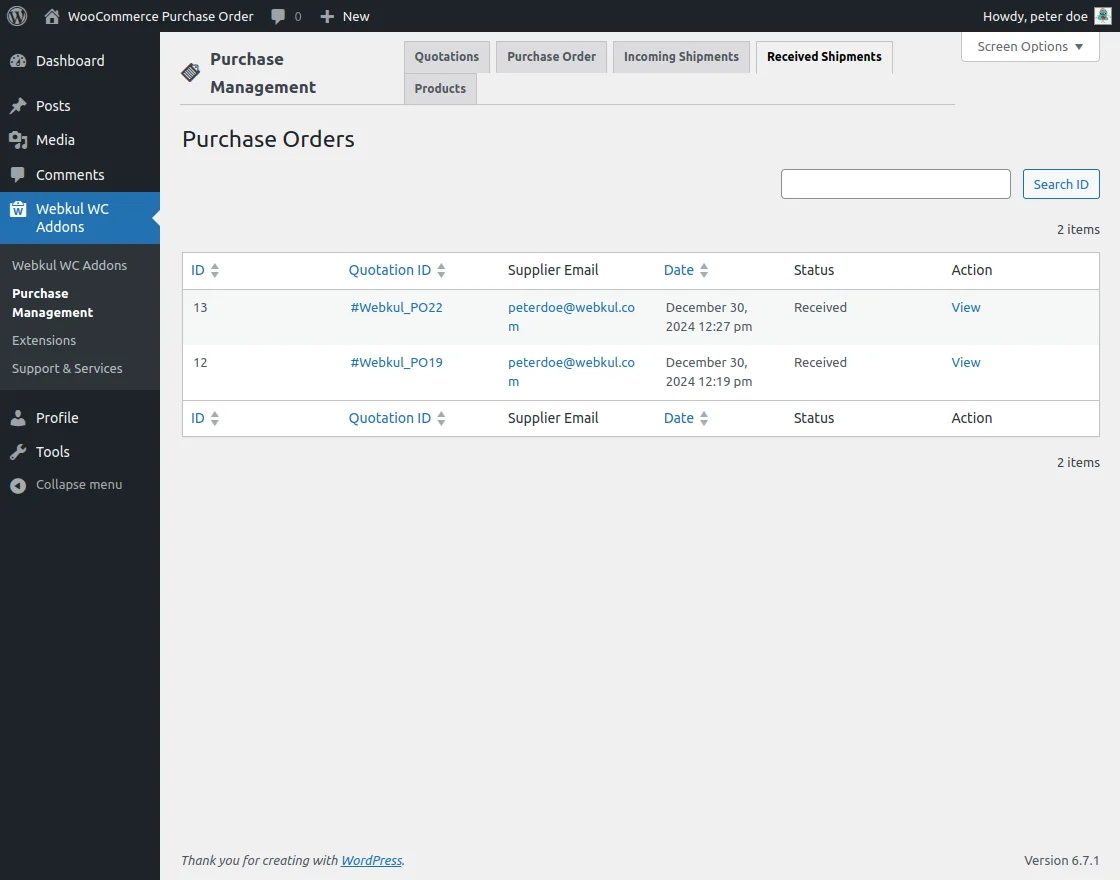
Purchase Orders: Once the Quotation is confirmed between Admin and the Supplier the status of the products are converted to Confirmed. Also it provides user to view detailed summary of the orders.

Incoming Shipments: Incoming shipments allows tracking which are coming from suppliers where you can view and track status also.

Received Shipments: Once the supplier fulfills the incoming shipments, the system updates the product status to ‘received’ in the product status summary.
Products: Product allows supplier to manage and customize the product orders.Here, the supplier can view the history of orders fulfilled between the supplier and the admin.
That was all about the Purchase Order for WooCommerce.
Support
For any technical assistance kindly raise a ticket or reach us by email at support@webkul.com. Thanks for Your Time! Have a Good Day!
Also, discover various solutions to add more features and enhance your online store by visiting the WooCommerce plugins.