User Guide for WooCommerce Agora Live Stream
WooCommerce Agora Live Stream plugin enables real-time live video sessions within your WooCommerce store using Agora’s low-latency streaming technology.
Engage customers, showcase products, and boost sales through interactive live commerce.
Showcase products live, interact with customers in real time, and answer queries instantly to boost engagement and sales.
Customers, including guest users, can join live streaming sessions without any additional login requirements, making the experience seamless and accessible.
By integrating live video streaming into WooCommerce, store owners can build trust, create urgency, and offer an interactive shopping experience right inside their store.
Features
- Admin can create, schedule, edit, and delete multiple live streaming events.
- Host live sessions directly from the WooCommerce store using Agora.
- Display featured WooCommerce products in a slider during live streaming.
- Real-time two-way chat between host/admin and viewers.
- Customers and guest users can join live streams instantly.
- Lightweight and optimized for smooth performance.
- Secure and scalable live streaming powered by Agora cloud infrastructure.
- Works seamlessly with WooCommerce products.
- No video hosting load on the store server.
Additionally, if you want to provide quick responses to customer queries through AI-driven conversations, explore WooCommerce AI Chatbot.
WooCommerce Agora Live Stream Installation
The user will get a zip file which he has to upload to the “Add New” menu option in the WordPress admin panel.
For this, login to WordPress Admin Panel and, under the Dashboard, hover your mouse over the “Plugins” menu option.
This brings out a sub-menu, and then select the “Add New” option.


After that, you will see an option at the top of your page that is “Upload Plugin”; click the option to upload the zip file.


Then click on the “Upload Plugin” option; below that, you will see a button “Choose File”. Click on the button to browse for the zip file as per the snapshot below.


After browsing for the file, click the “Install Now” button to install the plugin as per the snapshot.
Now, when the plugin is installed correctly, you will see the success message. Additionally, an option to activate the plugin.
Click on “Activate Plugin” to activate the installed plugin.
After successful activation, the plugin will be listed under the Installed Plugins section.


WooCommerce Agora Live Stream | Admin Configuration
To enable live streaming in WooCommerce Agora Live Stream, you must first configure your Agora project. Follow the steps below to complete the setup.
First, visit the Agora login page and log in using your Agora account credentials.


After logging in, open Agora Console from the dashboard and click on the New Project button to create a new project.

Once the project is created, locate it in the project list and click on the Configure option available on the right side of the project name.

On the configuration page, you will find your Agora App ID. Scroll down to the Primary Certificate section and click on Enable.

The primary certificate is required to generate temporary tokens for secure live streaming.

We ned to enable the chat. In order to start using the chat, we need to disable unauthorised access.

Next, navigate to All Features → Signaling from the left sidebar. Under Basic Information, select the appropriate Data Center based on your region.
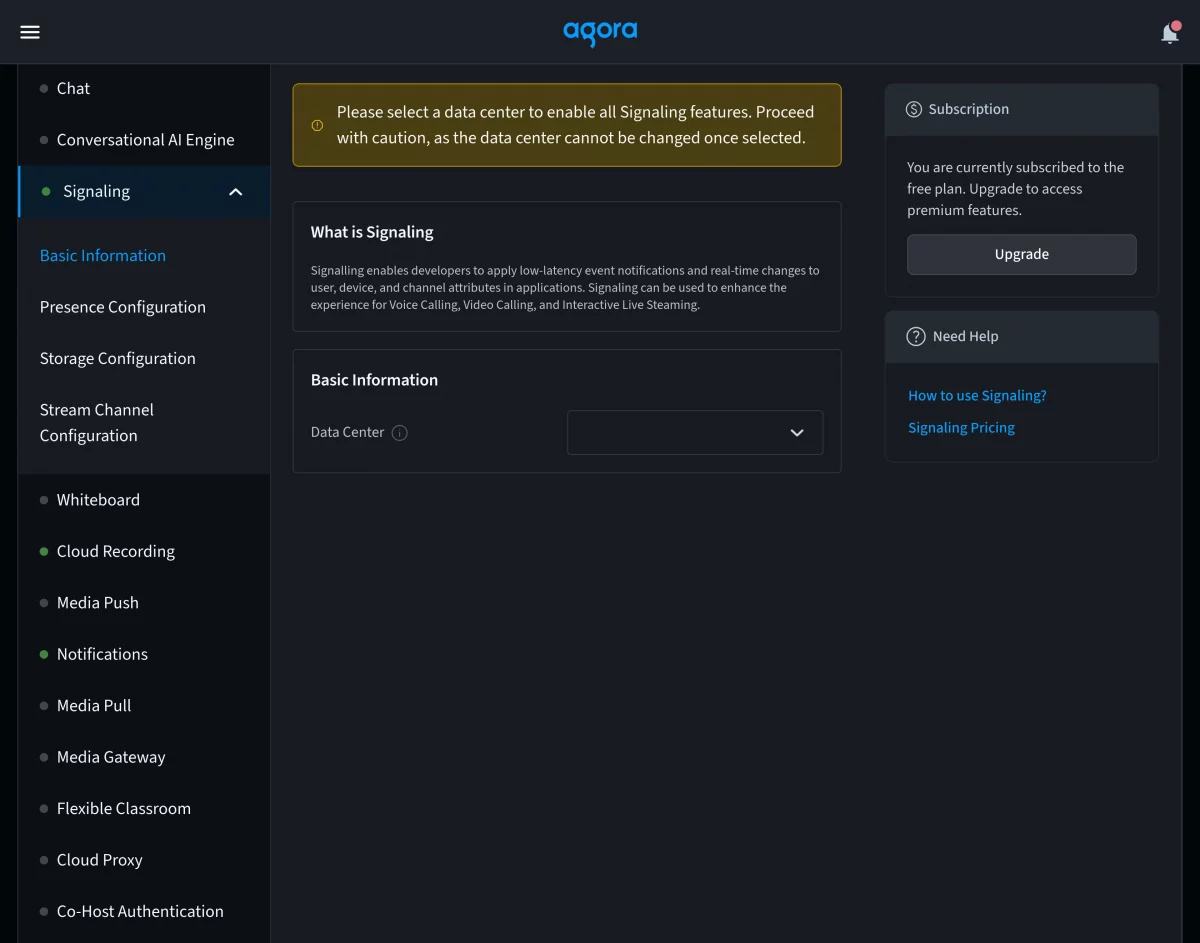
After selecting the data center, move to the Storage Config section and enable all the available Storage Parameters, including:
- Storage
- User Attribute Callback
- Channel Attribute Callback
- Distributed Lock

Finally, go to Stream Channel Config, enable the stream channel option, and save the changes.

Once the above steps are completed, copy the Agora App ID and Primary Certificate. Then navigate to
Webkul WC Addons → Agora Live Stream → Configuration
in your WordPress admin panel and paste the credentials to complete the setup.

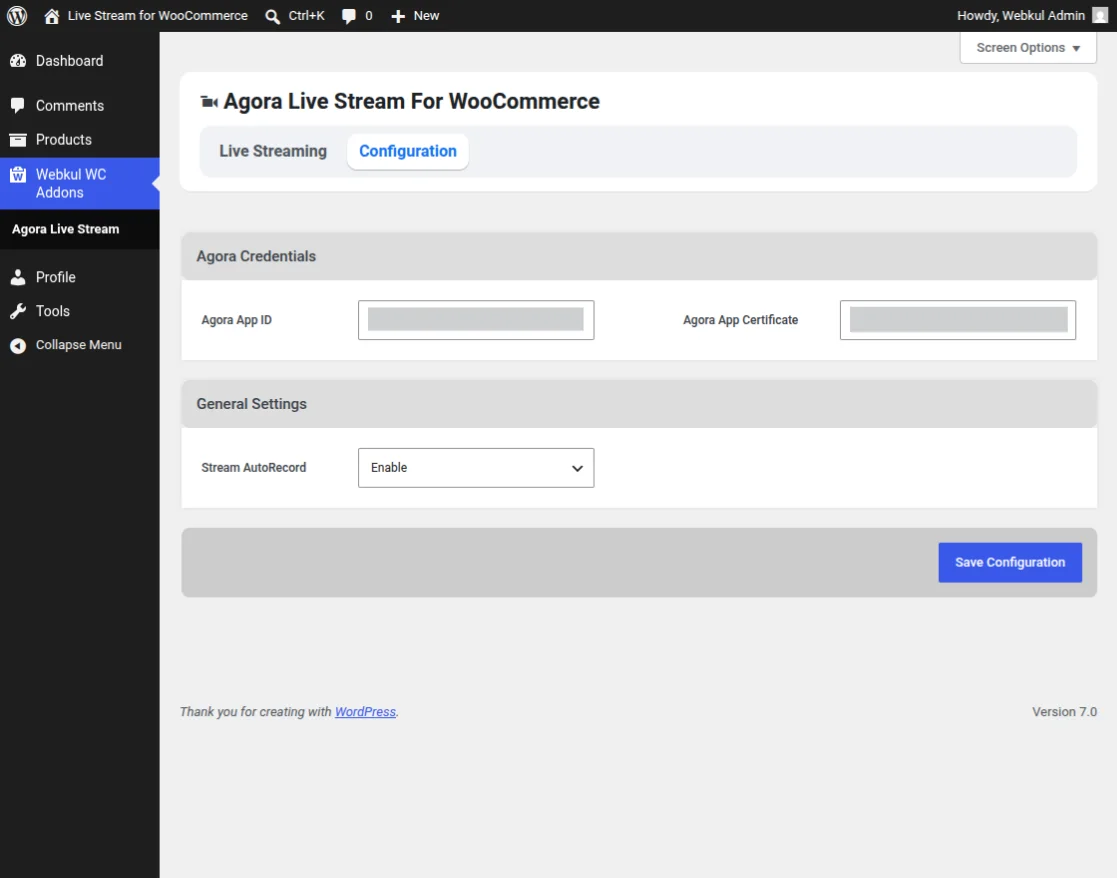
Configuration Options
Under the configuration section, the following options are available:
Agora App ID
Enter the App ID obtained from your Agora account.
Agora App Certificate
Enter the App Certificate required for secure token generation.
General Settings
Configure the general streaming options as per your requirements:
- Stream Auto Record – Enable or disable automatic recording of live streams.
After configuring all the settings, click on Save Configuration to apply the changes.
Creating a Live Stream
After successfully configuring the Agora credentials, the admin can create and manage live streaming events directly from the WooCommerce admin panel.
Navigate to Webkul WC Addons → Agora Live Stream → Live Streaming to create a new stream.

On this page, the admin needs to provide the following details:
- Stream Title: Enter a unique and descriptive title for the live streaming session. This title will be displayed to viewers on the storefront.
- Description: Provide a detailed description of the live event.
- Stream Title Color: The admin can customize the color of the stream title using the color picker
- Thumbnail – Upload a thumbnail image for the live stream.
- Featured Products – Select WooCommerce products to showcase during the live session.
After entering all the required details, click on Save Stream.
Managing Live Streams
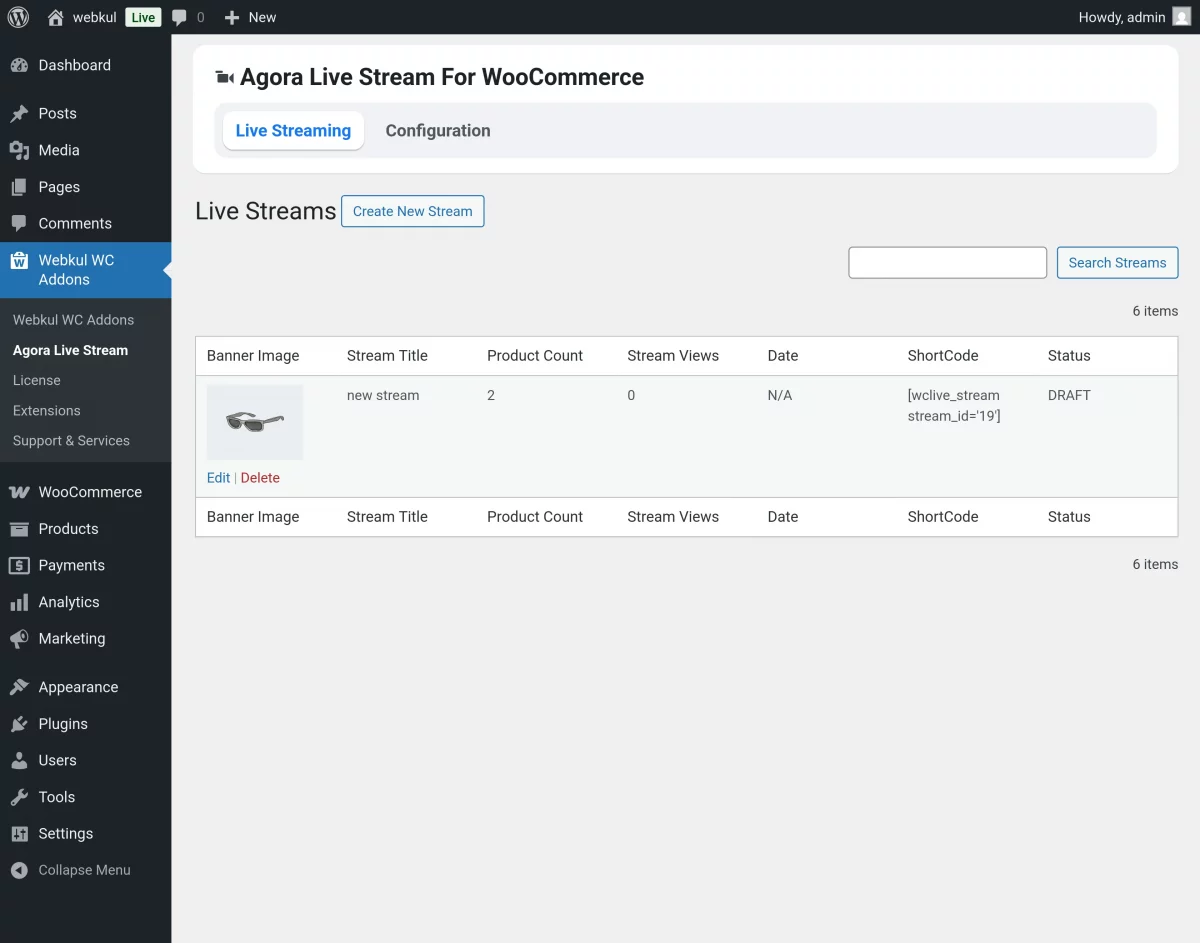
After creating a live stream, the admin can view and manage all streaming events from Webkul WC Addons → Agora Live Stream → Live Streaming.

The Live Streams grid provides a centralized overview of all created streams along with important details and management options.
Stream Listing Information
Each stream entry displays the following information:
- Banner Image – Displays the thumbnail image uploaded for the stream.
- Stream Title – Shows the name of the live streaming event.
- Product Count – Displays the total number of featured products assigned to the stream.
- Stream Views – Shows the number of viewers who have joined the stream.
- Date – Displays the scheduled streaming date, if configured.
- Shortcode – Provides a unique shortcode that can be copied and added to any WordPress page to display the live stream.
- Status – Indicates the current status of the stream, such as Draft or Published.
- Created Date – Shows the date and time when the stream was created.
How to Create a New Stream
After saving the live stream, a shortcode will be generated automatically.
Copy the generated shortcode, then:
- Create a new page in WordPress.
- Paste the shortcode into the page content.
- Publish the page.
Once published, visit the page to view the live stream on the storefront.
WooCommerce Agora Live Stream | Frontend
Customers can visit the WooCommerce storefront to view upcoming and live streams anytime.
They can join interactive shopping sessions and engage with hosts in real time, & customers can explore products and make purchases quickly.

This helps increase customer engagement, improve product discovery, and create interactive purchasing experiences.
Stream Recording
WooCommerce Agora Live Stream plugin supports automatic stream recording, allowing admins to save live sessions for future viewing.
When the Stream Auto Record option is enabled from the configuration settings, the live stream is automatically recorded during broadcasting.
Once a live stream ends, the recorded session becomes available in the Recommended Streams section on the storefront.
Customers can watch previously recorded live streams anytime from the Recommended Streams section.
Support
That’s all about WooCommerce Agora Live Stream plugin.
If you have any questions, suggestions, or customization requests, feel free to contact us at support@webkul.com or submit a ticket at webkul.uvdesk.com.
Explore our premium-quality WooCommerce plugins to enhance your store functionality.