WebAR Product for Magento 2
Magento 2 Augmented Reality (WebAR) Extension module allows you to show all sides of a product to your customers.
It enables your customers to see your products in a more magnificent and appealing light.
It gives the buyer a realistic view of the product and allows them to make an informed decision. The admin should allow customers to see items in the actual world.
These products are a revolution in the e-commerce industry because the customer can now feel the product that the admin is selling in real life.
It gives items that aren’t truly there a sensation of presence.
Check a brief overview of the plugin –
Check how the plugin works on the android device to display the product in real-life space –
Features
- The admin can enable or disable WebAR ( Augmented Reality ) Product for the products page.
- With the help of the Adobe Commerce WebAR ( Augmented Reality ) Product, you can add products image to your online store.
- The admin must add the .glb and .usdz file formats for the 3D models.
- Allows admin to add 3-D models to the product.
- Allows admin to add the background of the 3-D image.
- Allow customers to shop for products based on 3-D view.
- Allow customers to Zoom in and out with the mouse wheel.
- The module is accessible for all types of products.
- Choose to show product image gallery with 3D models.
- Set model viewer attributes values from the configuration section.
- Show custom AR button in 3D Model from configuration section.
- Allows the admin to manage the AR model position (Floor | Top) based on product configuration.
Note- For the Enterprise Edition, the gift product type also works with AR model.
Installation – WebAR Product for Adobe Commerce Cloud
Please note that the uploaded file size of simple as well as configurable products should be maxed upto 66M.


After getting the zip folder and you have to extract the contents of this zip folder on their system.
The extracted folder has an src folder, inside the src folder you have the app folder.
Hereafter you need to transfer this app folder into the Adobe Commerce root directory.


After uploading the module folder, you need to run the following commands in the Magento 2 root directory:
php bin/magento setup: upgrade
php bin/magento setup:di: compile
php bin/magento setup:static-content: deploy
php bin/magento indexer:reindex
php bin/magento cache:flush
Multi-Lingual Configuration
For the Multilingual support navigate through Store>Configuration>General >Locale Options. Thereafter, select your desired language from the Locale option as required.


Translation
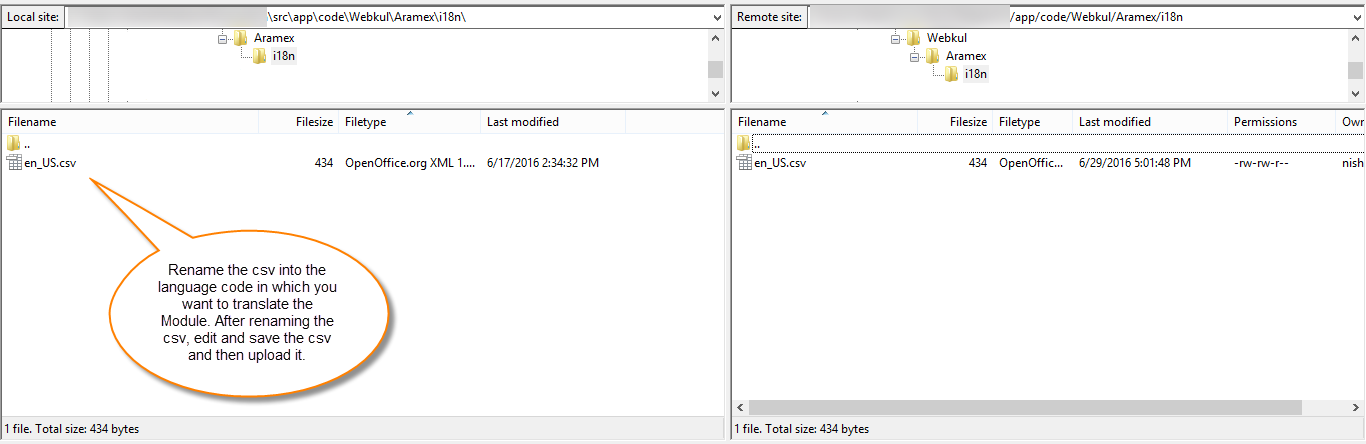
If a user wants to translate their module from English to German. Henceforth, they need to follow the path app/code/Webkul/WebAr/i18n in their unzipped Magento2 SMSA folder.
Therein one can get a CSV file with the name “en_US.csv”.
Now they will rename that CSV as “de_DE.csv” and translate all right side content after the comma in the German language.
So, after editing the CSV, save it and then upload it to the path app/code/Webkul/WebAr/i18n where they have installed Adobe Commerce on the server.
So, the module will get translated into the German Language. It supports both RTL and LTR languages.

Thus, the user can edit the CSV like the image below.


Module Configuration – WebAR Product for Adobe Commerce Cloud
Thus, after the accomplishment of the installation steps, the admin can configure the module by navigating to Store->Configuration->WebAR Configuration.

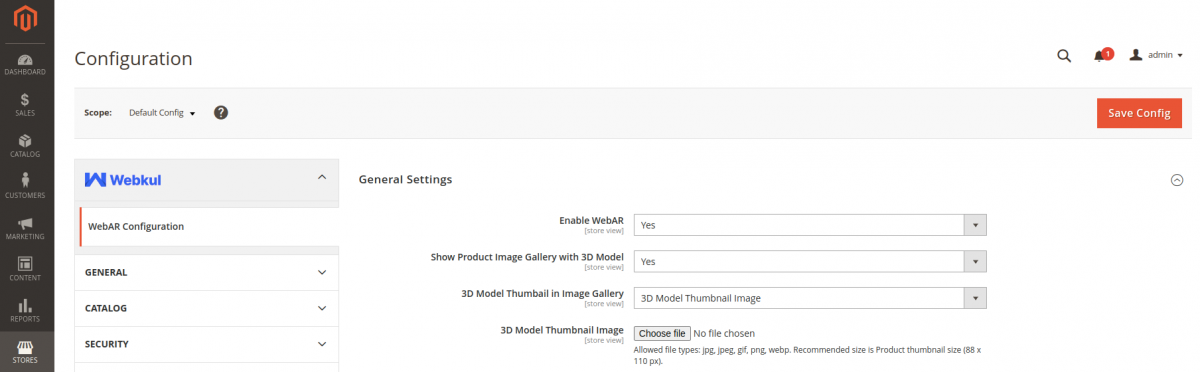
Now, the admin will have to configure the plugin settings which include the –
- Enable WebAR– Choose Yes to enable the plugin functionality for your website or select it as No to disable it.
- Show Product Image Gallery with 3D Model – Choose this option as a Yes to display the 3d model along with the product images under the respective section.

- 3D Model Thumbnail in Image Gallery – Here, you can choose a 3D model thumbnail image as – Product Main Image or a custom 3D model thumbnail image.
- 3D model thumbnail Image – If you have chosen the option in the previous one as a 3D model image then here you can upload the 3D model thumbnail image.
- The file types supported are – jpg, jpeg, gif, png, WebP, and the recommended size is Product thumbnail size (88 x 110 px).


Model-Viewer Staging and Camera Attribute Settings:
- Auto Rotate – The admin can allow the auto-rotation of the 3D model by choosing a yes else selecting it as No will disable it.
- Auto Rotate Delay – The admin can set the delay before the auto-rotation of the 3D model begins.
- Disable Zoom – The admin can disable user zoom for the 3D model.
Note: This feature is supported only on the desktop version of the site. - Disable Tap – The admin can enable or disable the tap/click behavior of users for the 3D model.
Model-Viewer Loading Attributes Settings
Here, the admin can set the 3D model poster image as required by choosing the respective file. The chosen file displays as an image or poster until the 3D Model is loaded on the product page.
Allowed file types: jpg, jpeg, gif, png, WebP.

Model-Viewer Lighting and Skybox Attribute Settings
- Apply Skybox Configuration – if enabled then the admin can choose the background image for the 3D model.
- After enabling this option the default nature_HDR.hdr image is added to the backdrop of the 3D model. You can also delete this and add an image as per your requirements.

- Apply Environment Image Configuration – Choose Yes or No. Selecting Yes brings up the option to add an Environment image of type Neutral, Legacy, or a URL to a .hdr or .jpeg file.
- This setting is used to configure environmental lighting without changing the background.
- Shadow Intensity – Allows to control the opacity of the shadow, use 0 to completely turn off the shadow of the 3D model else use the different values as required.
- Shadow Softness – Allows to control the blurriness of the shadow. Use 0 for soft shadows.
- Exposure – Allows to control the exposure of both the 3D model and skybox, for use primarily with HDR environments.
AR Button Settings
The admin can choose the button type for AR – Default AR or Custom AR button. In the case of a custom AR button for mobile devices, the admin can set the title for the AR button.

Admin End Management – WebAR Product for Magento 2
For Simple Product
The admin will set webAR for simple products. to do so, the admin will navigate through Catalog -> Products, as seen in the screenshot given below.

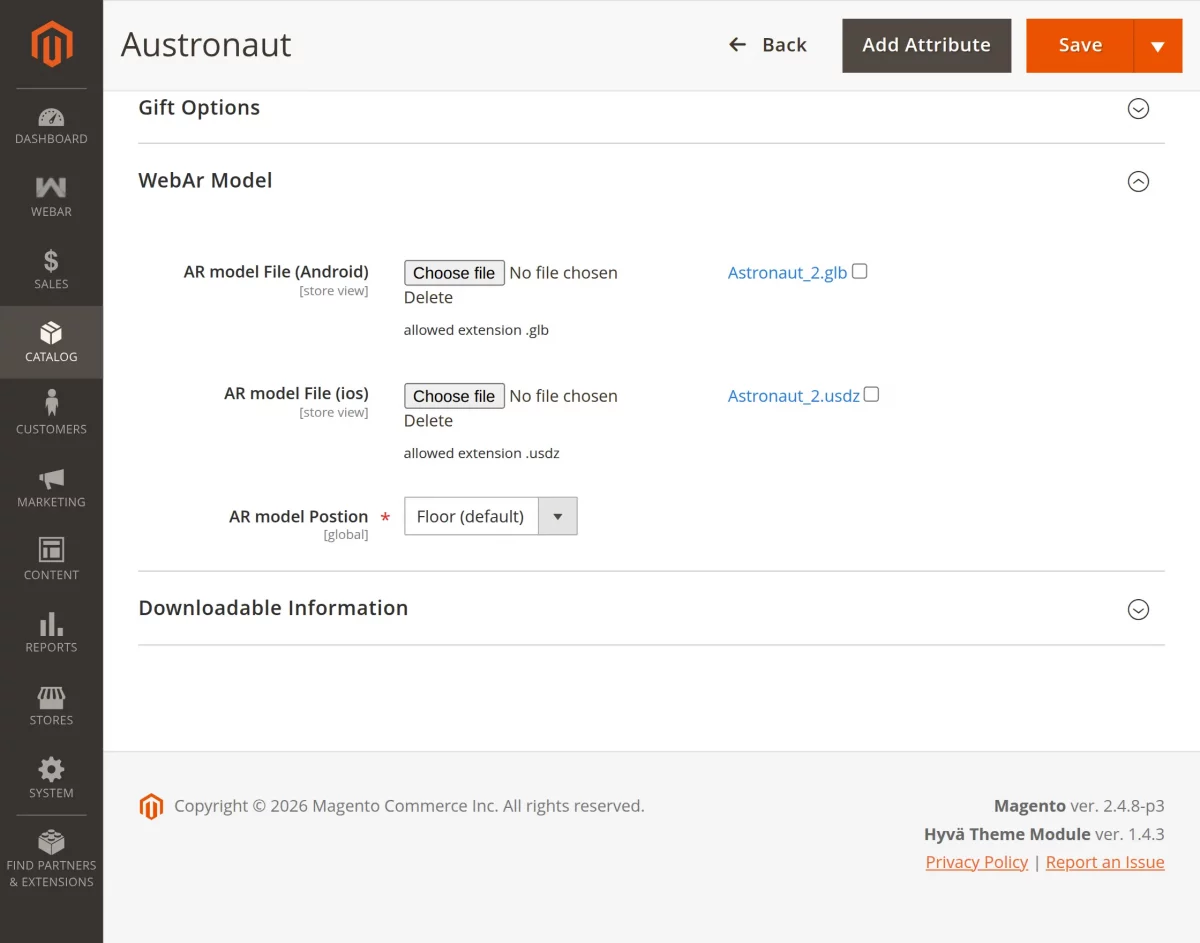
- Ar Model File (Android) – Android File section is used to upload a media file (Image) for android and the format of the image for android is GLB.
GLB is a 3D file format that allows motion and animation and is used in virtual reality (VR), augmented reality (AR), games, and online applications. The format’s modest size and quick loading times are further advantages. - Ar model File (ios) – The iOS File section is used to upload a media file (Image) for iOS (Apple) and the format of the image for iOS is USDZ.
Apple created their own AR Viewer (AR Quick Look) and integrated it into IOS apps including Safari, Messages, News, and even Notes. It has the ability to immediately show USDZ files in 3D or AR. In both 3D and AR modes, it can see models with realistic materials, reflections, lighting, movements, and even real-life size. - AR Model Position – The admin controls whether the AR model appears on the Floor or Ceiling according to the product configuration.
For Configurable Product
The admin will set web AR for configurable products. to do so, the admin will navigate through Catalog -> Products, as seen in the screenshot given below.
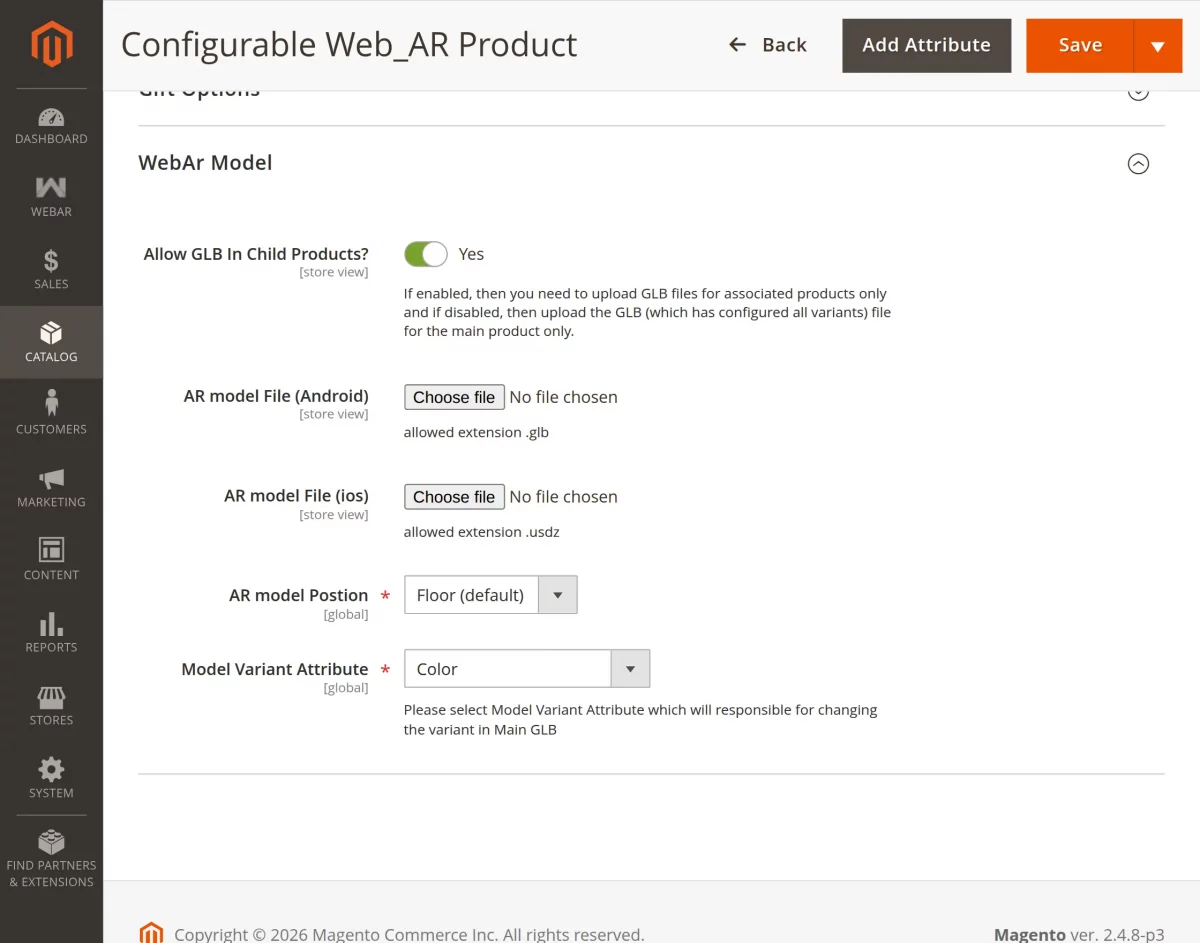
- Allow GLB In Child Products: If enabled, then you need to upload GLB files for associated products only and if disabled, then upload the GLB (which has configured all variants) file for the main product only.
- AR Model File (Android) – The admin uploads a media file (GLB format) for Android in this section.
- AR Model File (iOS) – The admin uploads a media file (USDZ format) for iOS (Apple) in this section.
- Allow GLB in Child products – Enable it to use the GLB file in the child products.
- AR Model Position – The admin sets the AR model’s position to Floor or Ceiling based on the product configuration.
- Model Variant Attribute – If the configurable product has more than one super attribute then based on selected attributes, the variant will be changed.
*Note:
For Android-The admin needs to upload a glb file on the main product.
In glb file admin needs to configure attribute type.
and
For iOS- The usdz file will be uploaded for each associate product of the main configurable product.
No need to upload on the main product.
In iOS, if you haven’t uploaded the USDZ file and there is only GLB uploaded, model-viewer can auto-generate a USDZ on the fly.
And you don’t need to upload the USDZ file. But if a proper view of the model is not being displayed then you can upload the usdz file at the appropriate place.
Storefront working – WebAR Product for Adobe Commerce
For Simple Products
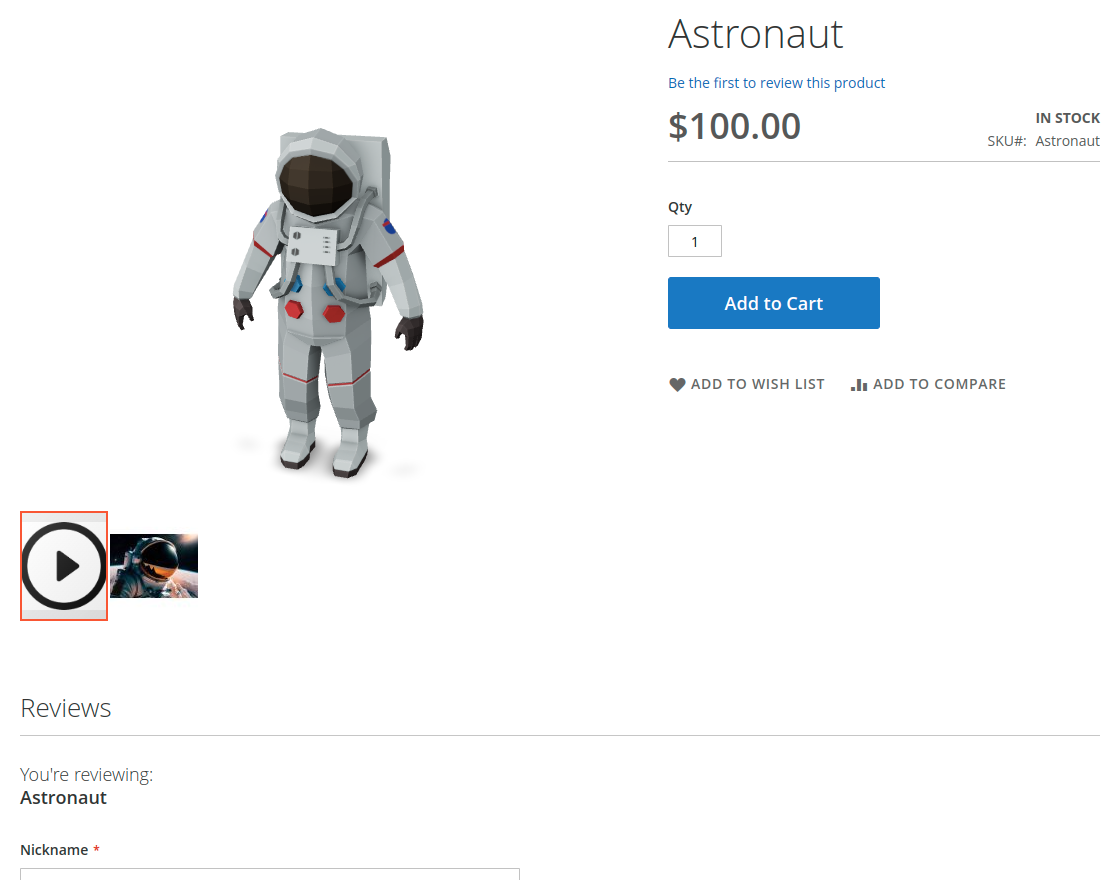
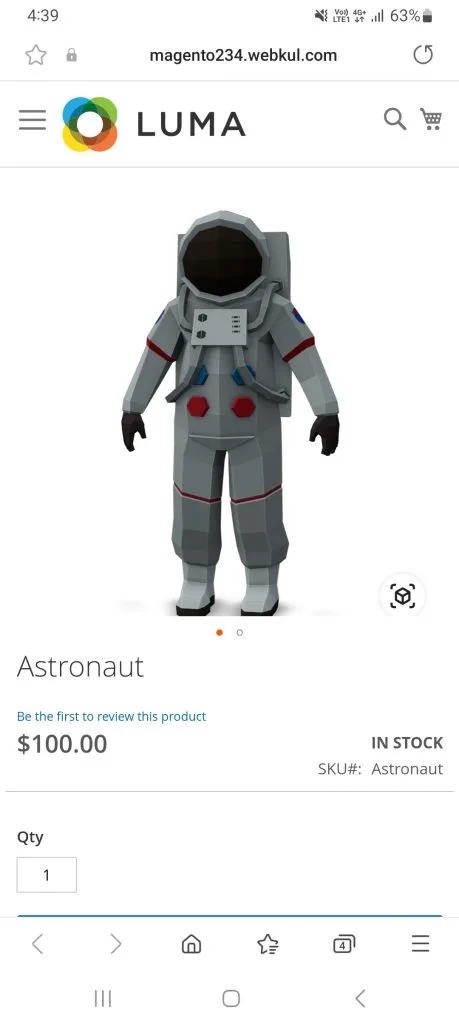
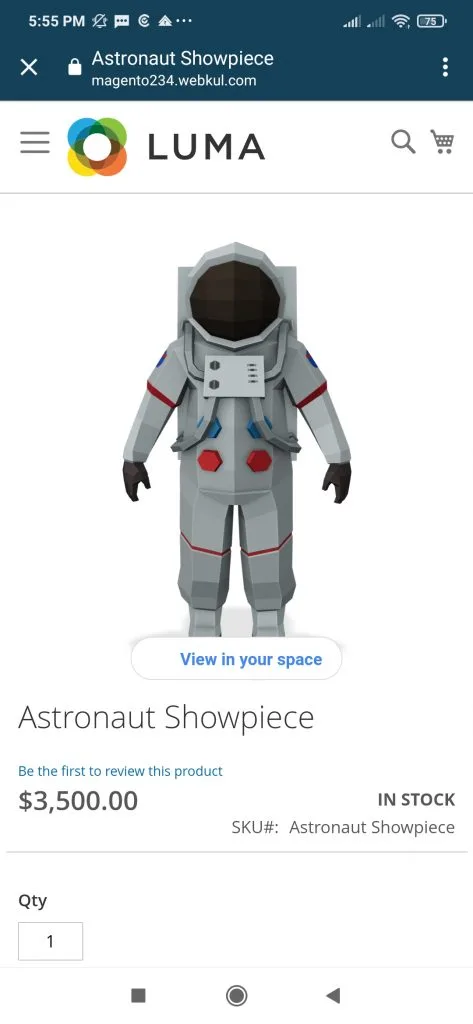
The module allows customers to shop simple products based on a 3-D view as seen in the screenshot given below.


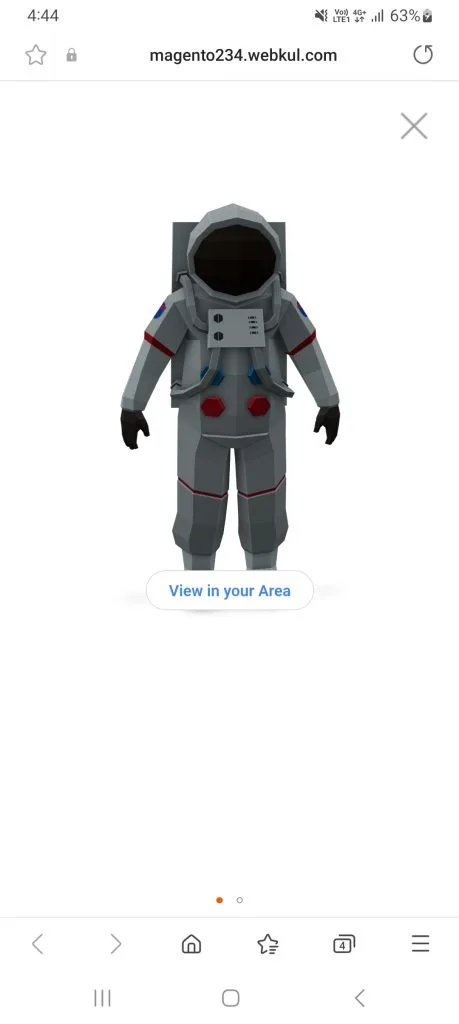
For Android and iOS – To view the product in your own space you need to click on View in your space on your android and iOS device.
View in Your Space
Click to visualize the product in your real environment.

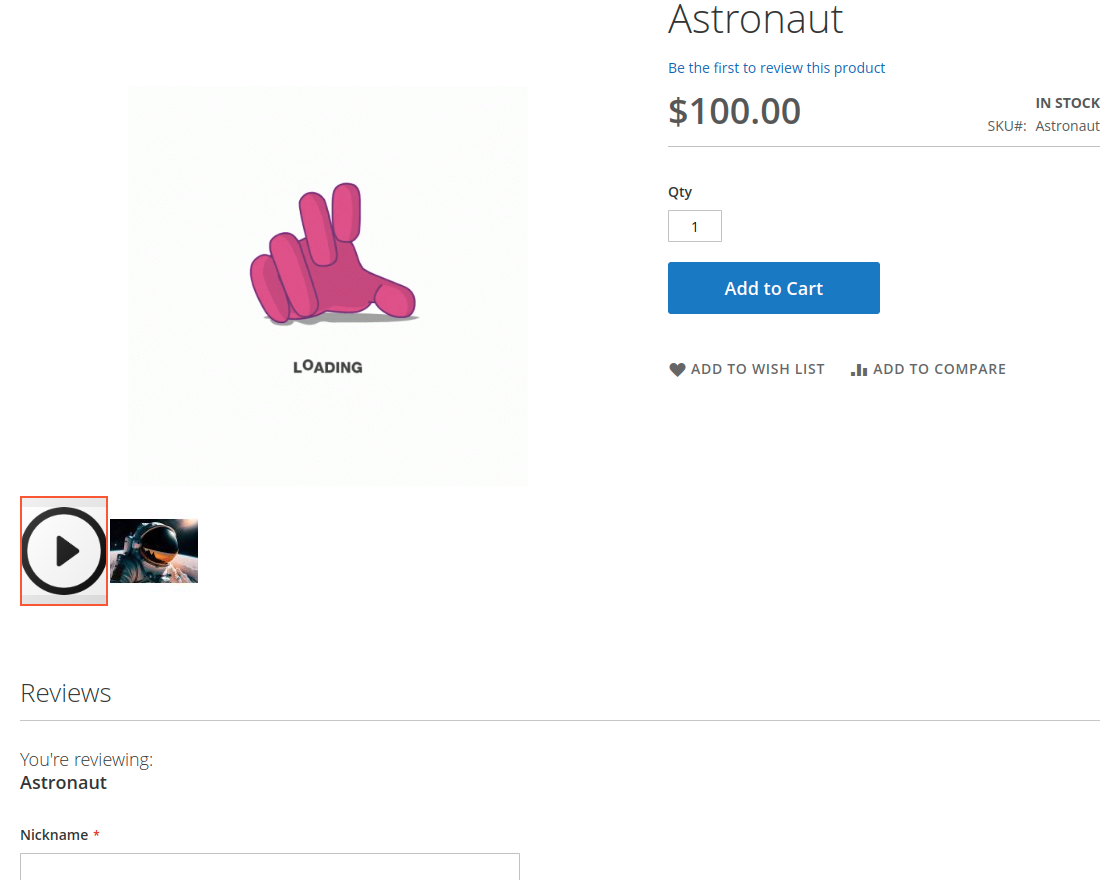
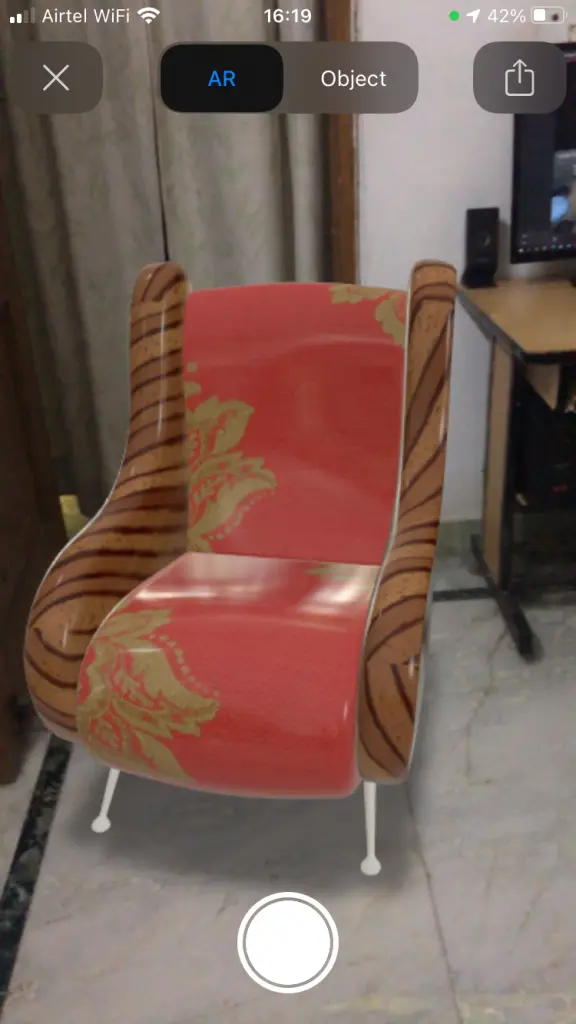
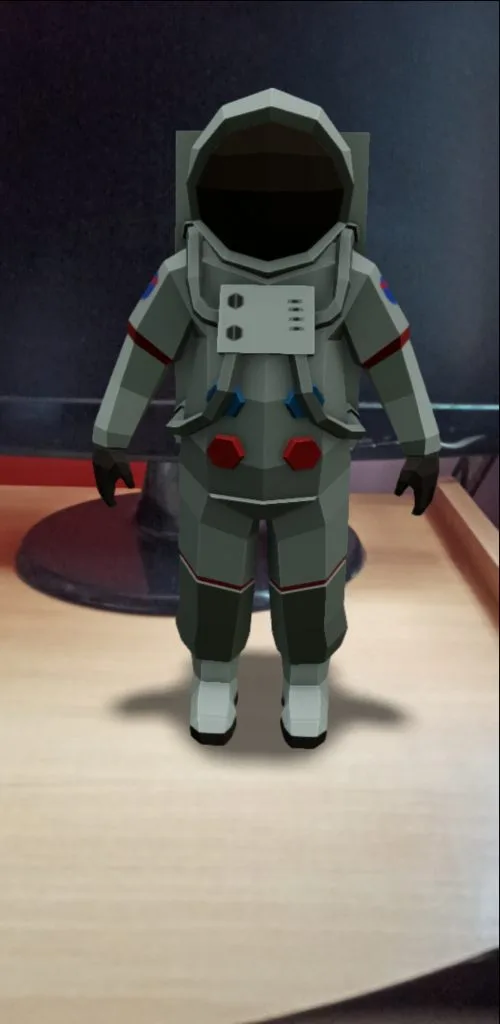
The customer needs to permit this module to access your mobile camera to view the AR images on their device.
Afterward, the customers can see the product in your real space by the help your mobile camera like this.
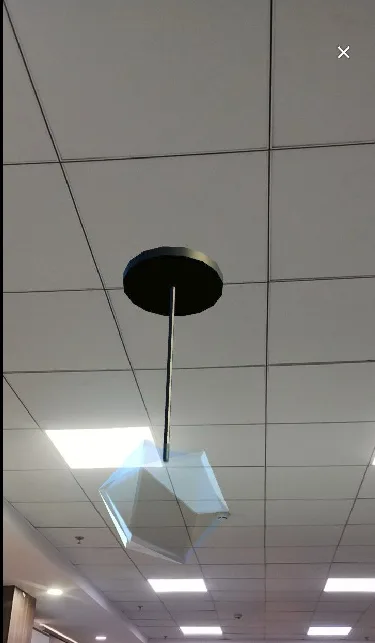
Products in Real-Life Environment
Explore examples of our top and flooring products placed in real-life settings to see how they look and fit naturally within different spaces.


For Configurable Products
On choosing to buy a configurable product, the customer has to select the given attributes. It helps customers choose relevant variants for that product as seen in the screenshot given below.
Admin can choose to show product image gallery with 3D models for configurable products.


The customer can view each and every side of the product as seen in the screenshots given below.


The customers can also see the associated products in their real space with the help of their mobile camera like this.


Conclusion
At last, I conclude that WebAR Product for Adobe Commerce is a powerful tool for merchants in this age of social distancing.
It allows customers to interact with products in a similar way that they would in a physical store. It increased engagement leads to increased sales.
However, It makes it easier to represent merchandise and giving the consumer a better sense of what they are purchasing.
Web AR Products for Adobe Commerce Cloud can help bridge the gap between shopping in a physical location and shopping online.
Support
So, that was much about the WebAR ( Augmented Reality ) Product for Adobe Commerce plugin. For any queries or doubts reach out to us at support@webkul.com.
You can also raise a ticket at our HelpDesk system webkul.uvdesk.com