User Guide for Website Advance Product Sorting
Introduction
Website Advance Product Sorting adds category-wise product sorting to the ERPNext Webshop.
By default, Webshop lists products by a ranking number on each Website Item. This app gives you one simple screen per category instead.
You pick an item group, load its products, and drag and drop them into place.
This guide is for store admins. By the end, you will be able to set a sort order for any category page and check it on the website.
Prerequisites for using Website Advance Product Sorting
Website Advance Product Sorting works in conjunction with the following module:
Webshop
You must install the above-mentioned module to use the Website Advance Product Sorting.
Features
- Set a separate sort order for each item group.
- Load all published products of a category with one click.
- Drag and drop products into the order you want.
- Show the saved sort order on the category page at once.
- Keep new products at the end until you place them.
- Turn product sorting on or off for a category with one tick box.
- Update each product’s ranking to match your order.
- Limit access to the System Manager and Website Manager roles.
Installation
- After purchasing the app from Webkul Store, you will receive a link to download the module ZIP file.
- Extract the ZIP file. You will see a folder named ‘website_advance_product_sorting’.
- Set up the module in your git repository, then fetch it using:
bench get-app --branch main https://git.webkul.com/erpnext-apps/erpnext-website-advance-product-sorting.git
(Replace “main” with your branch name and replace the “HTTPS URL” with your HTTPS clone URL.)
- Install the app on your site:
bench --site <your-site-name> install-app website_advance_product_sorting
- Run bench migrate to complete the setup.
Workflow
Opening Webshop Product Sorting
- Open the Webshop workspace.
- Click Webshop Product Sorting in the sidebar. It sits just below Website Item.
- The list shows one record for each category page that has a sort order.

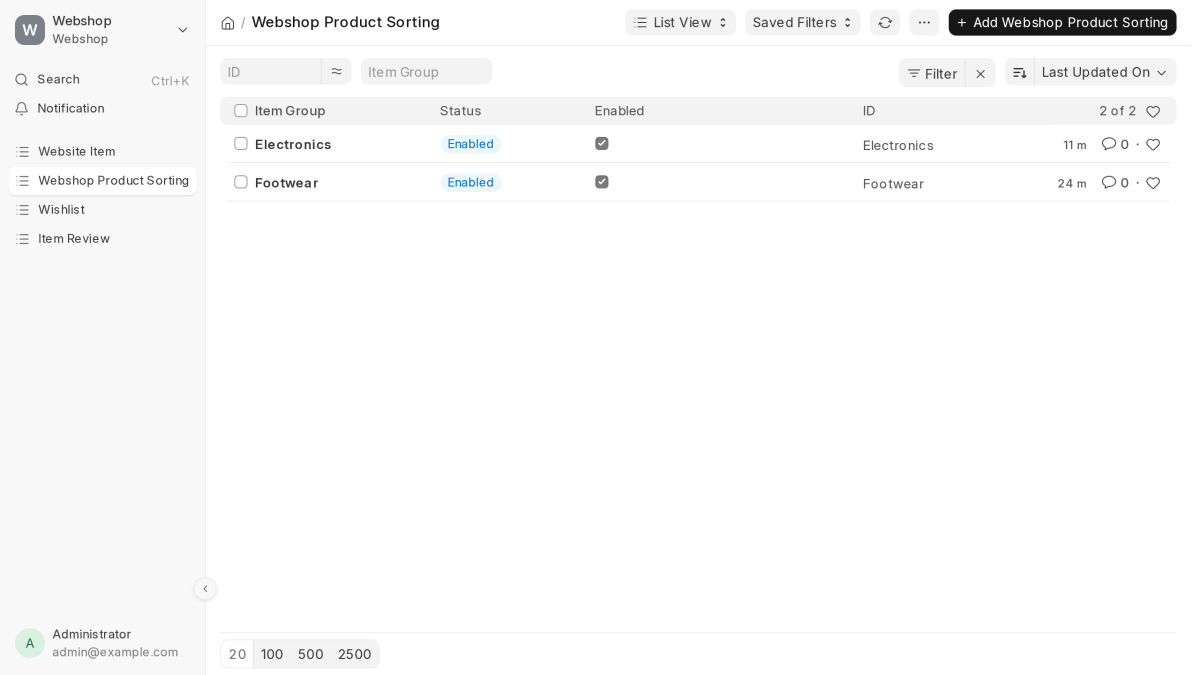
Creating a Sort Order for a Category
- Click Add Webshop Product Sorting.
- Pick a category in the Item Group field.
- Keep Enabled ticked. The page now shows a hint to save and then sync.
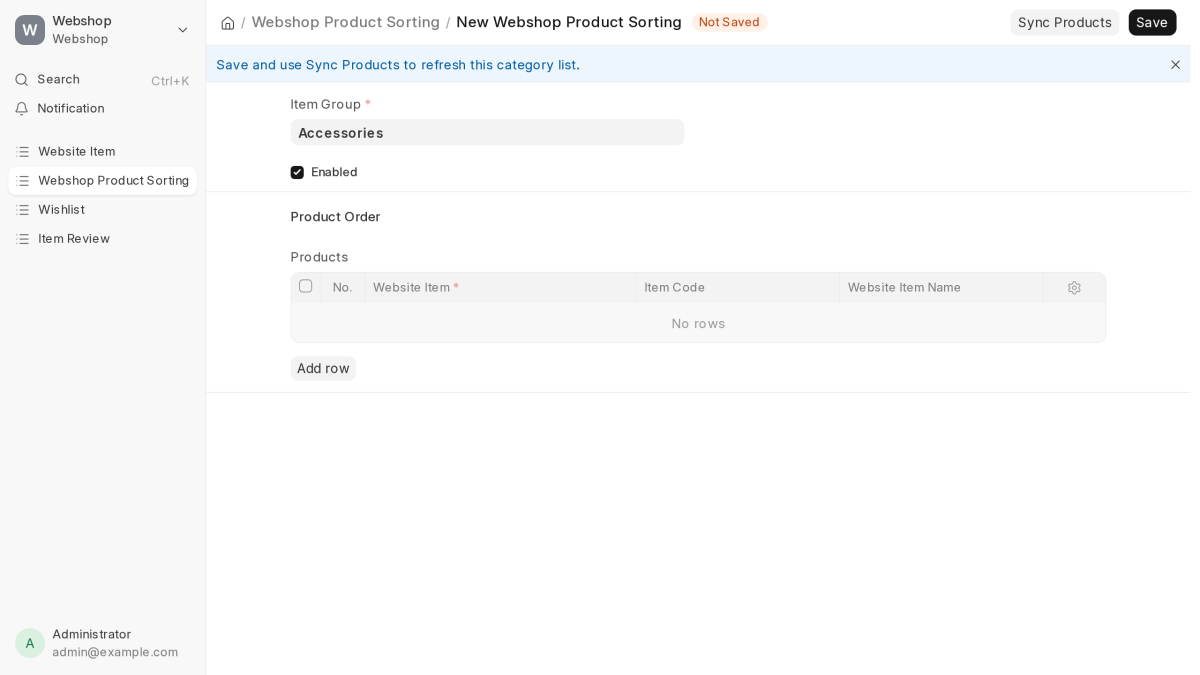
- Click Save.
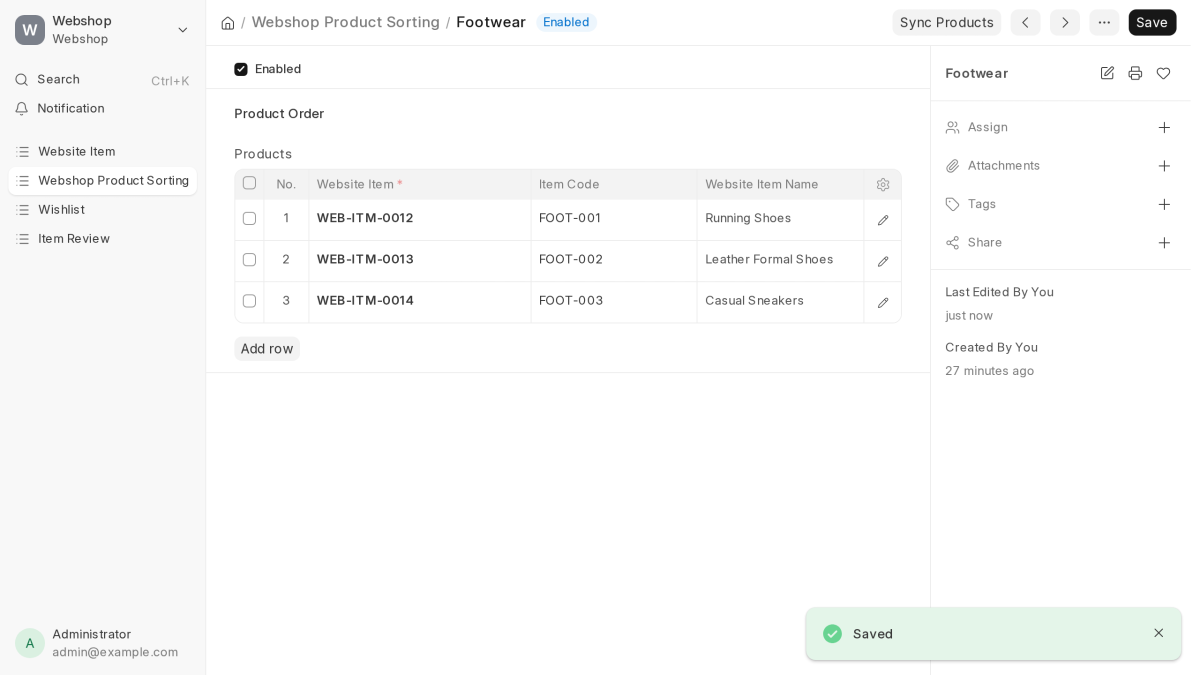
- Click Sync Products. The app loads every published product in that item group into the Products table. A message tells you how many products it found. The example below uses the Footwear category.
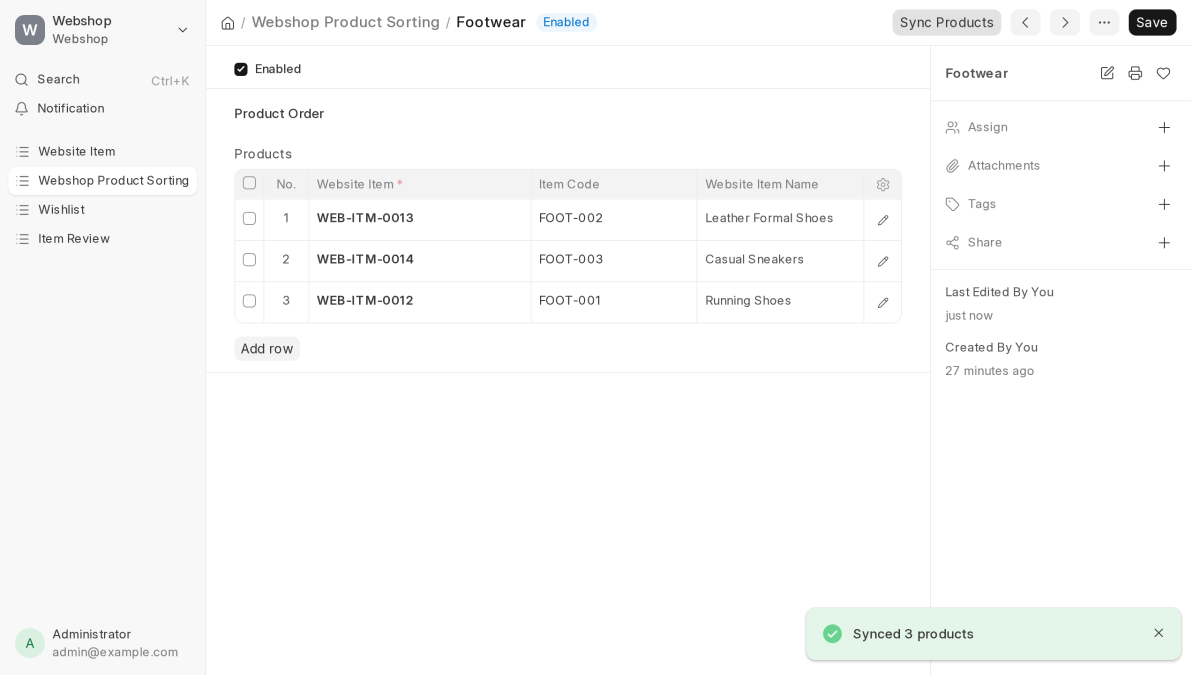
Note: Click Sync Products again whenever you publish a new product in the category. Sync adds new products at the end of the table. It also removes products that are no longer published.
Changing the Sort Order
- Drag and drop a row up or down the Products table. Here, Running Shoes moves to the first row.
- The form shows Not Saved until you save it.
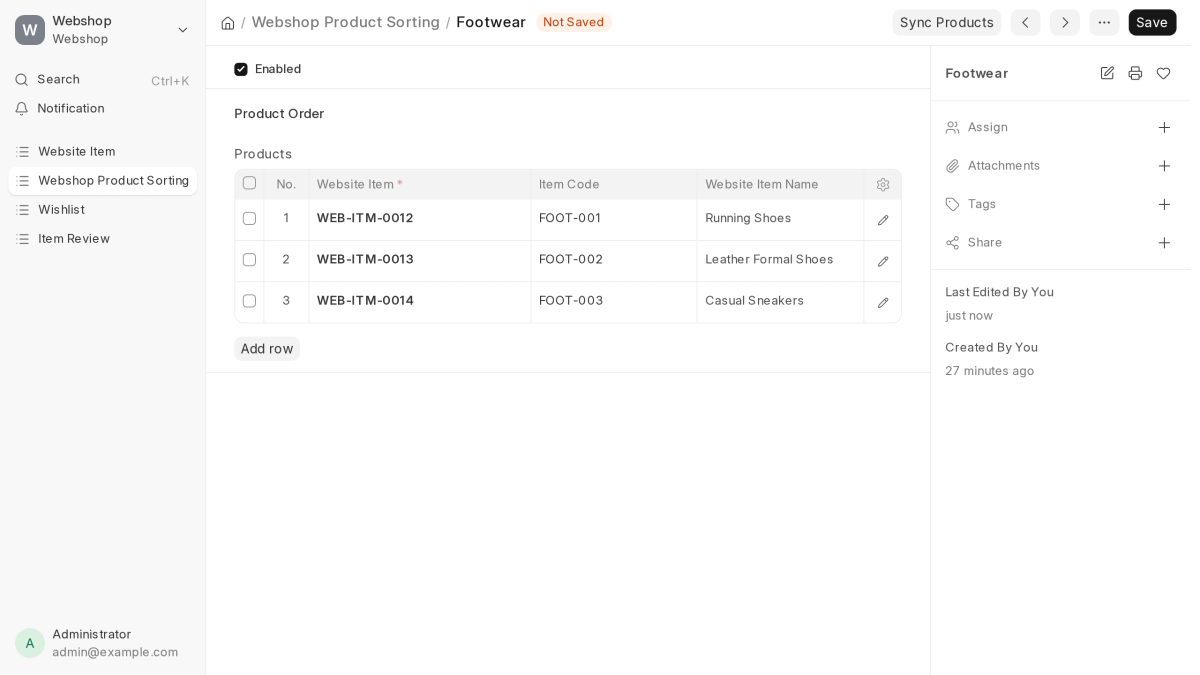
- Click Save. The app stores the new sort order. It also updates the ranking of each Website Item to match.
Viewing the Sort Order on the Website
- Open the category page on your website, for example /footwear.
- The products now appear in the order you saved. Running Shoes is first.

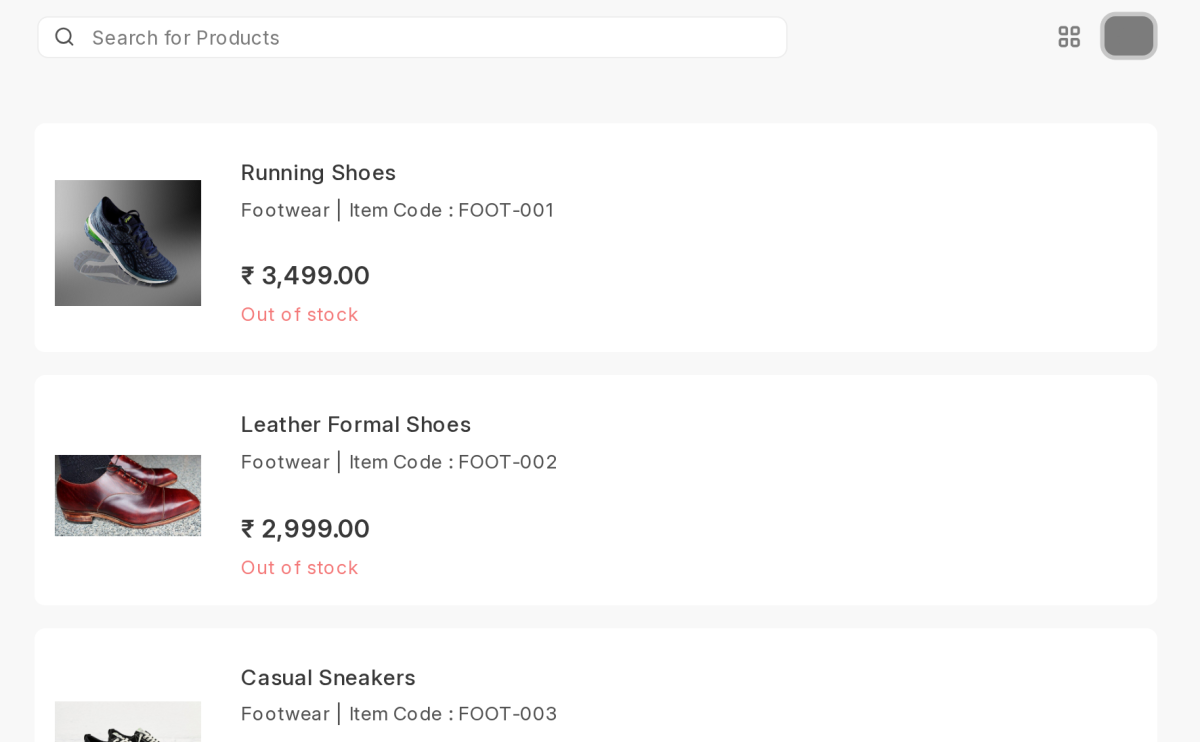
Note: Products that are not in the table appear after the sorted ones. To turn off product sorting for a category, clear the Enabled box and click Save.
Webshop then sorts that category page by each product’s ranking.
Need Help?
Hope you find this guide helpful! Please feel free to share your feedback in the comments below.
If you still have any issues/queries, please create a ticket at the UV Desk.
I hope this helps. In case of any further queries, contact us at our support mail.
Thanks for paying attention!!
Current Version – 0.0.1
Supported Framework Version – ERPNext v16