User Guide for UnoPim Icecat Connector
UnoPim Icecat Connector helps enrich your product catalog using data from the Icecat database.
It enables you to import specifications, descriptions, images, and other product details to maintain accurate and consistent product information.
You can perform bulk enrichment using the Icecat product enrichment job .
You can update individual products directly from the product edit page via More → Icecat Fetch, ensuring flexibility and efficiency in managing your catalog.
It integrates seamlessly with the Icecat Open Catalog. This connector is designed to work with simple products, ensuring accurate and efficient data enrichment based on unique identifiers like EAN, brand, or product codes.
Basic Requirement
- For UnoPim installation, make sure your server meets these system requirements.
- This module works with UnoPim version v1.0.0
Feature
UnoPim Icecat Connector simplifies product data enrichment by integrating Icecat data into your UnoPim catalog with structured mapping and flexible import options.
- Product Matching via Identifiers : Match products using EAN, Product Code, and Brand for accurate data enrichment.
- Support for Simple Products: Supports simple products for focused and reliable enrichment.
- Common Attribute Mapping: Map key Icecat fields like EAN, Product Code, Vendor (Brand), Name, Title, Description, Short Description, Summary Description, Short Summary Description, and Pictures with UnoPim attributes.
- Bulk Icecat Feature Mapping import: Import a large set of Icecat feature attributes using the Icecat Feature Mapping import job.
- Feature Mapping & Attribute Setup: Select required feature attributes and assign UnoPim attribute types to the structure specification data.
- Attribute Import & Mapping: Create attributes via the Icecat Attribute Import job and map them for proper data synchronization.
- Product Enrichment Options: Enrich products in bulk (Icecat Import Enrich Product import job) or individually via More → Icecat Fetch.
- Locale Mapping Support: Map Icecat and UnoPim locales to manage multilingual product data. Select Locate as needed while enrichment.
Installation
Follow the steps below to install the Icecat Connector in UnoPim.
Step 1: Extract the Extension
Unzip the extension package and merge the packages folder into the project root directory.
Example structure:
/your-unopim-project
└── packages/
Step 2: Register Service Provider
Open the file: config/app.php
Add the following line under the providers array:
Webkul\Icecat\Providers\IcecatServiceProvider::class,
Step 3: Register PSR-4 Autoload
Open the project-level composer.json and add the following entry under the psr-4 section:
This ensures Laravel/PHP can autoload the connector classes.
"Webkul\\Icecat\\": "packages/Webkul/Icecat/src"
Step 4: Run Setup Commands
Run the following commands from the project root directory.
- Dump Composer Autoload
composer dump-autoload
- Install Icecat Package (installer command provided by the package)
php artisan icecat:install
- Restart Queue Worker
php artisan queue:restart
After running the installer, the package will publish migrations, config files and seeders (if any) required by the connector.
How to Use UnoPim Icecat Connector
After installing the connector, follow the steps below to configure and use it for product data enrichment.
Setup Credential
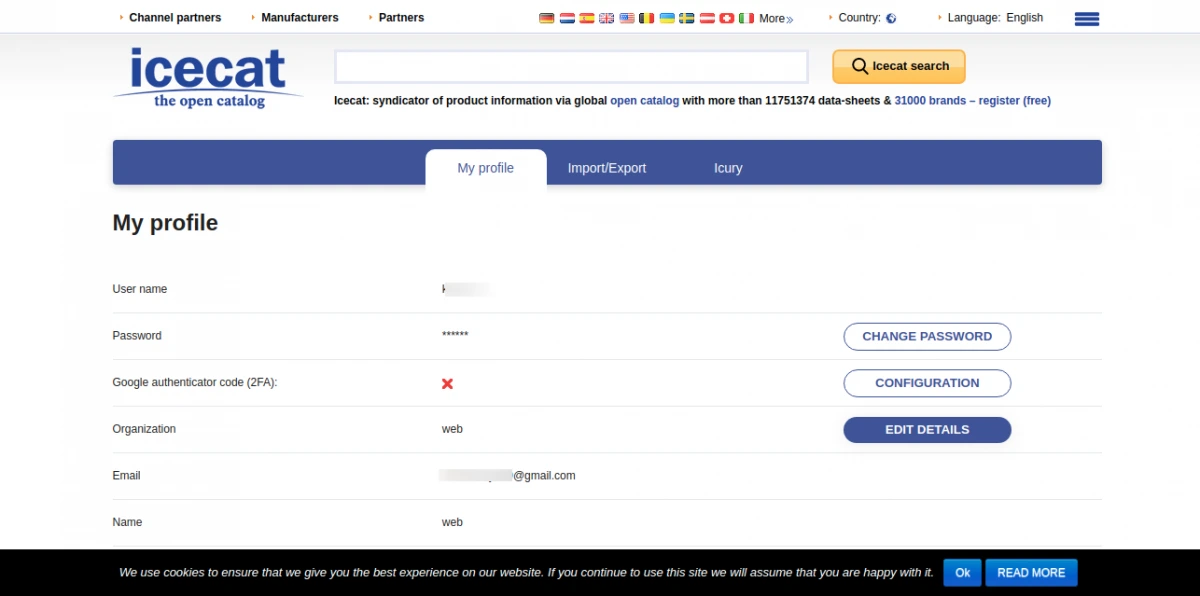
Note: You must first create a profile on Icecat’s end, where you must provide all of your information, including your username, password, and email address.

Step1 : Add Icecat Credentials
After installing the connector, follow the steps below to configure and use it for product data enrichment.
- Navigate to Icecat → Credentials
- Click on Add Credential
- Enter your Icecat account details
- Save the credentials

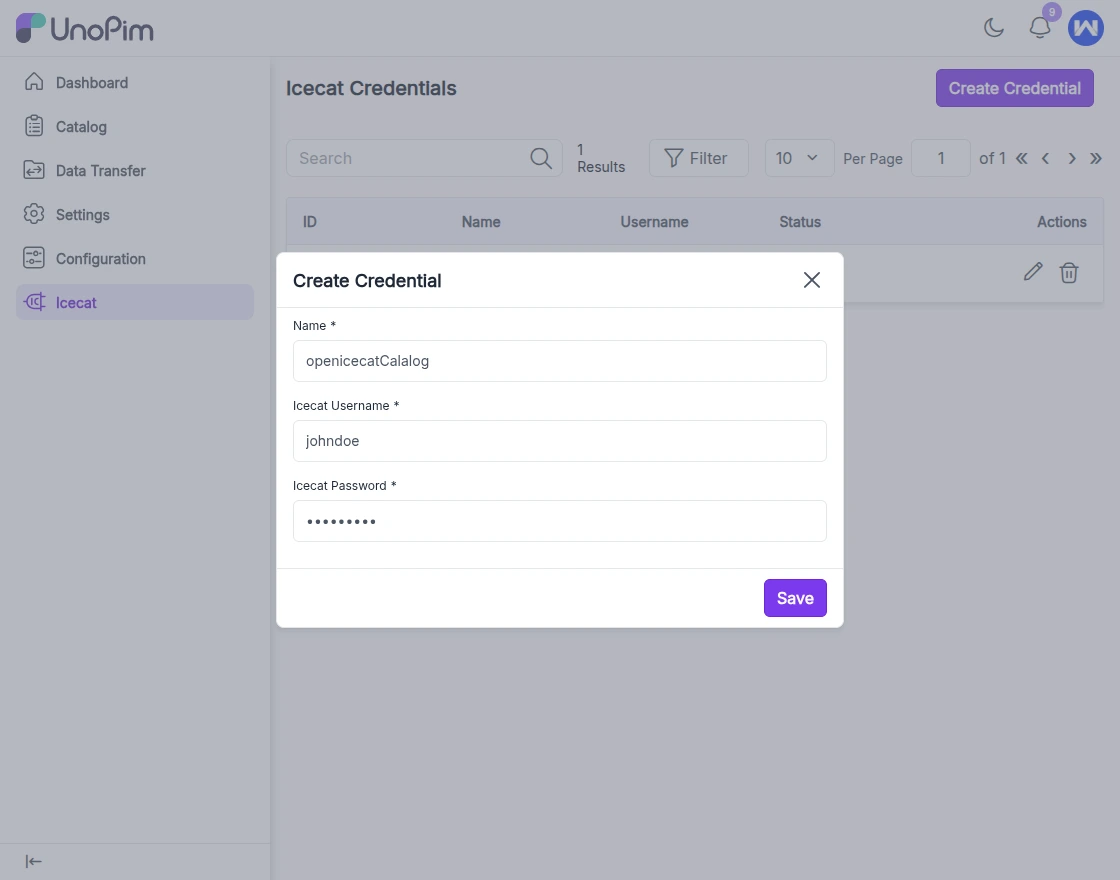
This will establish the connection between UnoPim and Icecat.
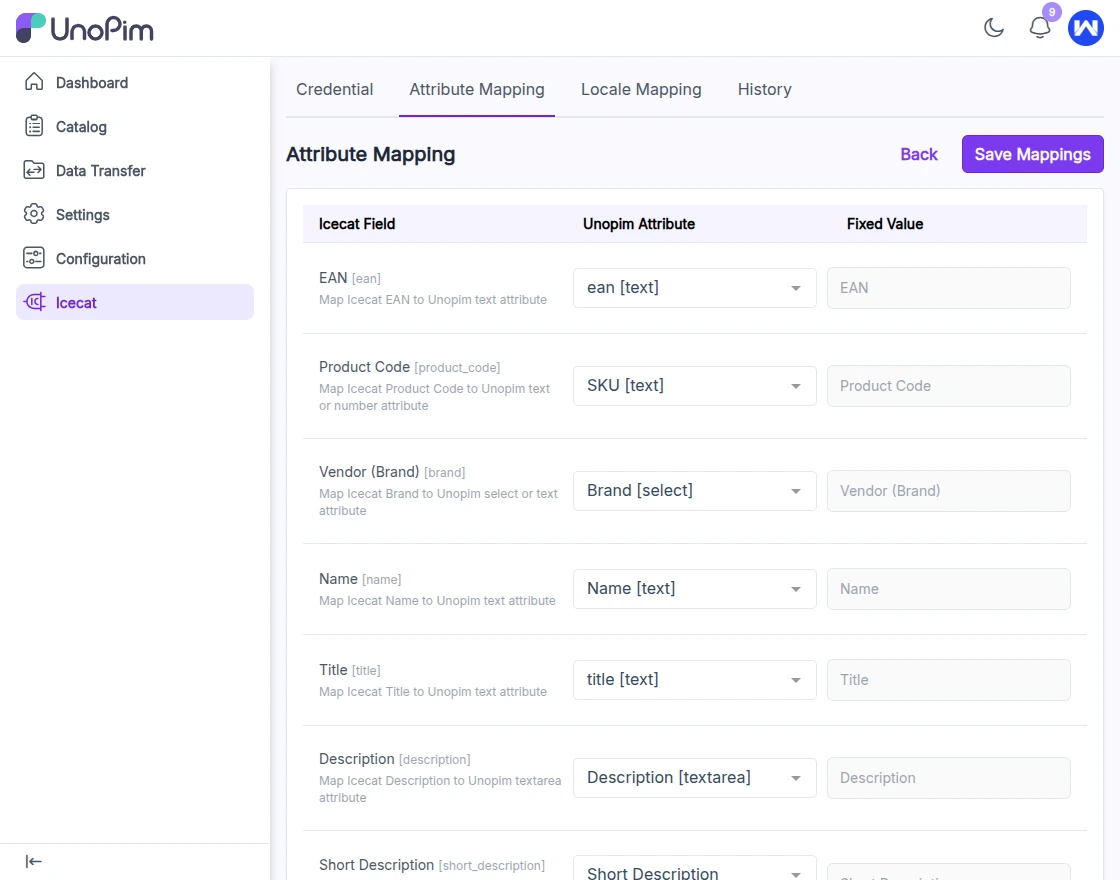
Step 2: Configure Common Attribute Mapping
- Go to Attribute Mapping
- Map Icecat fields with UnoPim attributes such as:
- EAN
- Product Code
- Brand
- Name
- Description
- Images
- Save the Attribute mapping page
This step ensures correct product identification during enrichment.
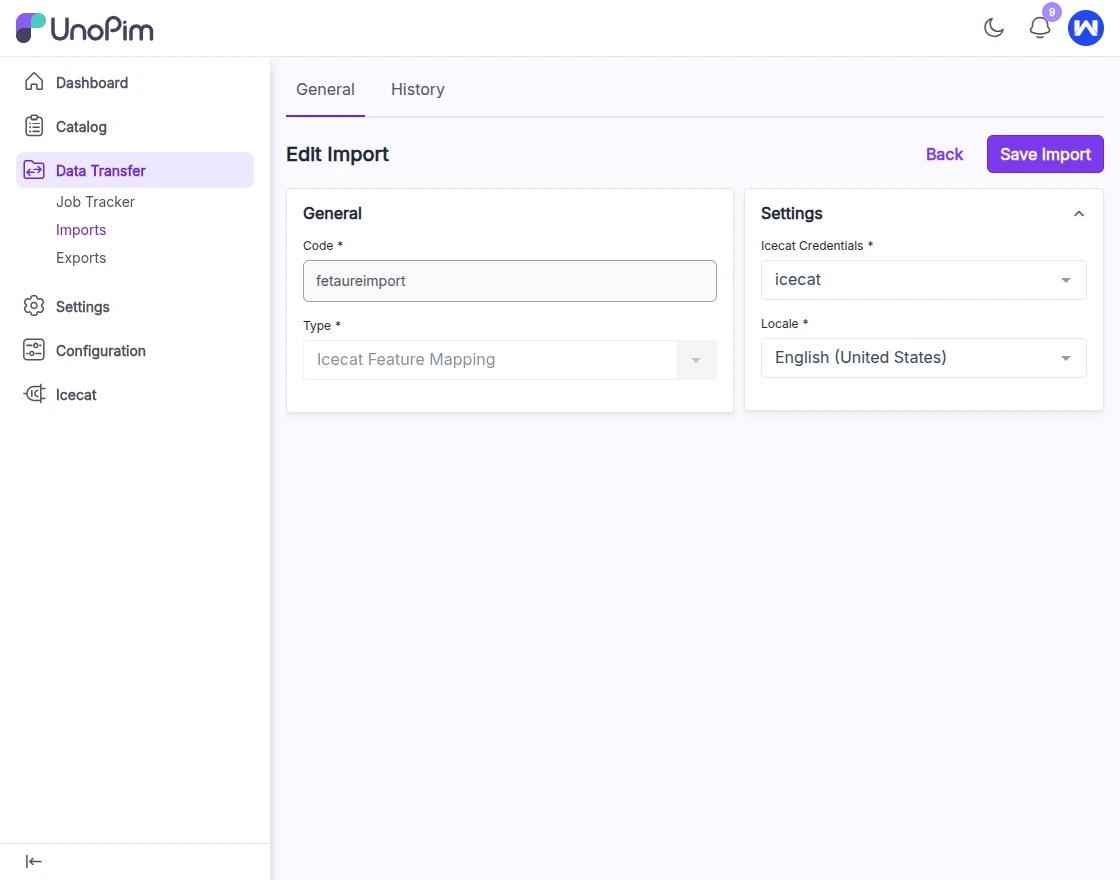
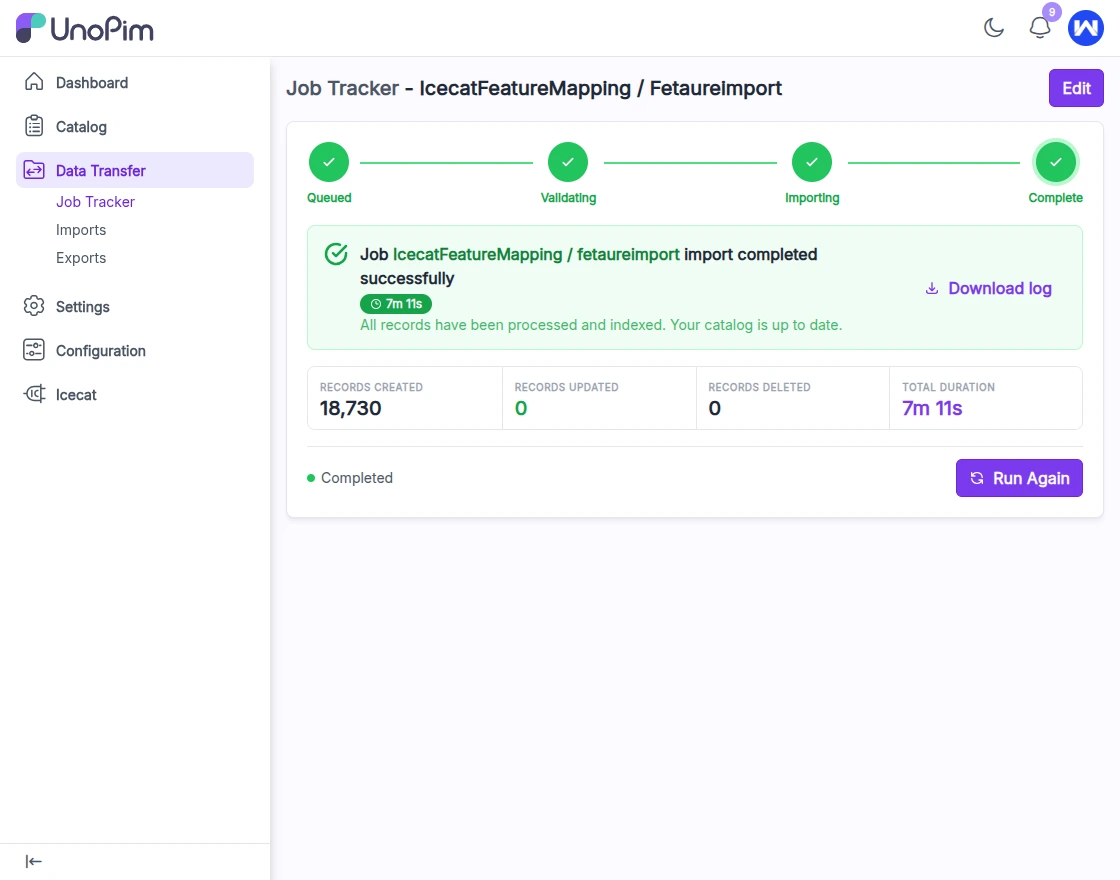
Step 3: Run Icecat Feature Mapping Import job
- Navigate to Import Jobs
- Run the Icecat Feature Mapping Import job
This will import a large set of Icecat feature attributes (specifications), which will be available in the Feature Mapping section.
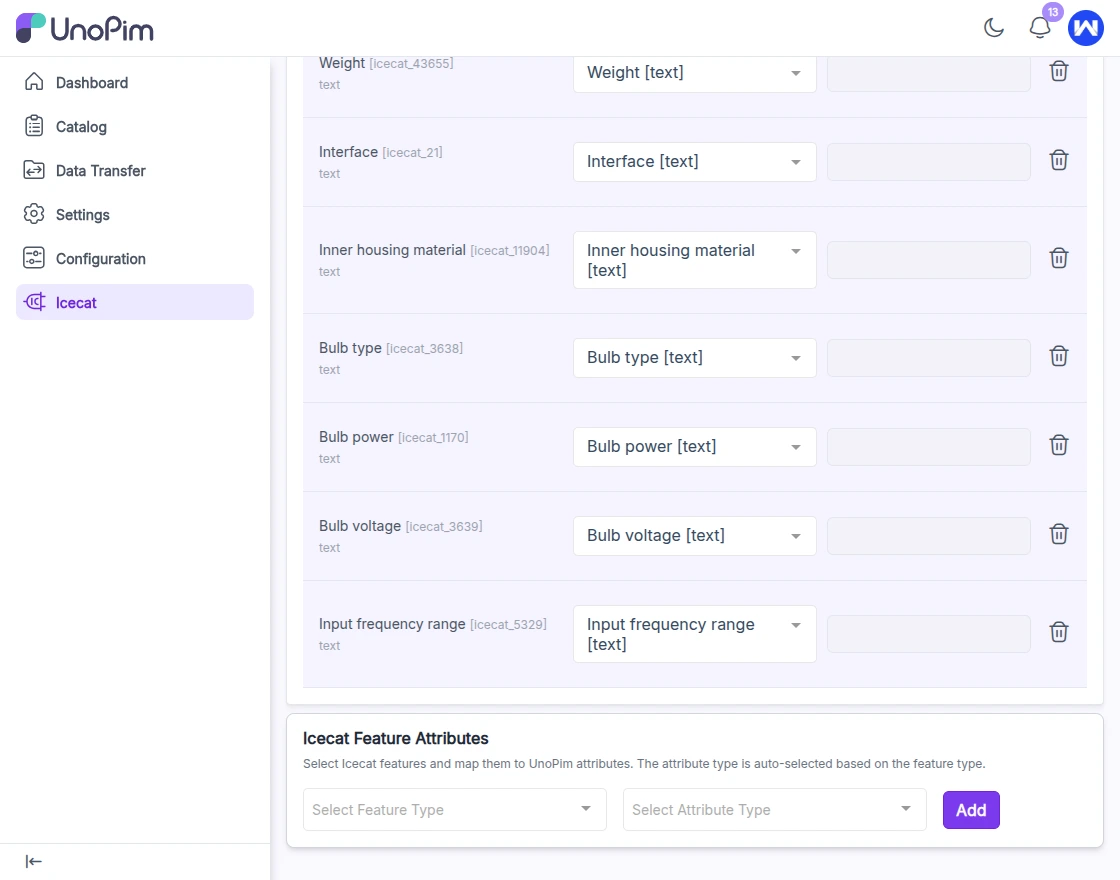
Step 4: Configure Feature Mapping & Attribute Types
- Go to Feature Mapping
- Select the required Icecat feature attributes
- Assign appropriate UnoPim attribute types (text, select, textarea, etc.)
This defines how specification data will be structured in UnoPim.
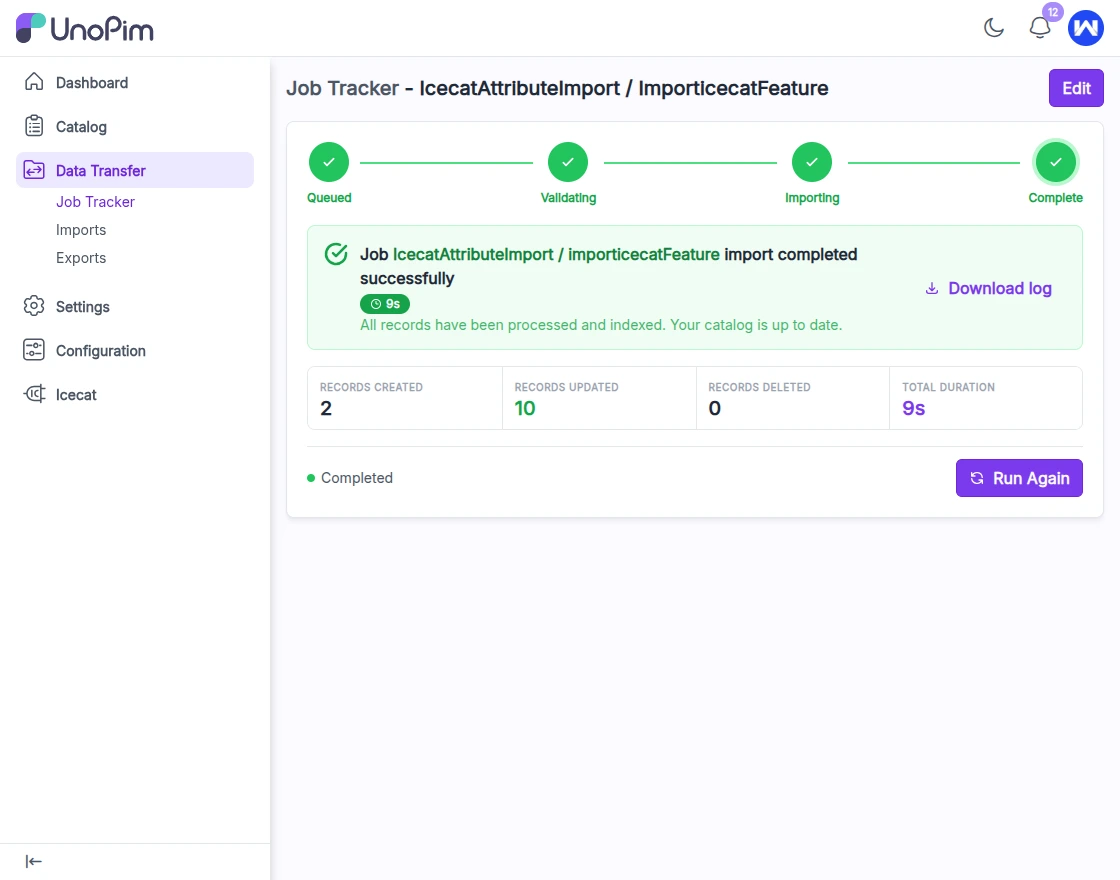
- Run the Icecat Attribute Import job
This will create UnoPim attributes based on the selected Icecat features and assigned types.
Step 6: Map Imported Attributes
- Return to Attribute Mapping
- Map newly created attributes with corresponding Icecat features
- Save the configuration
This ensures proper data synchronization.
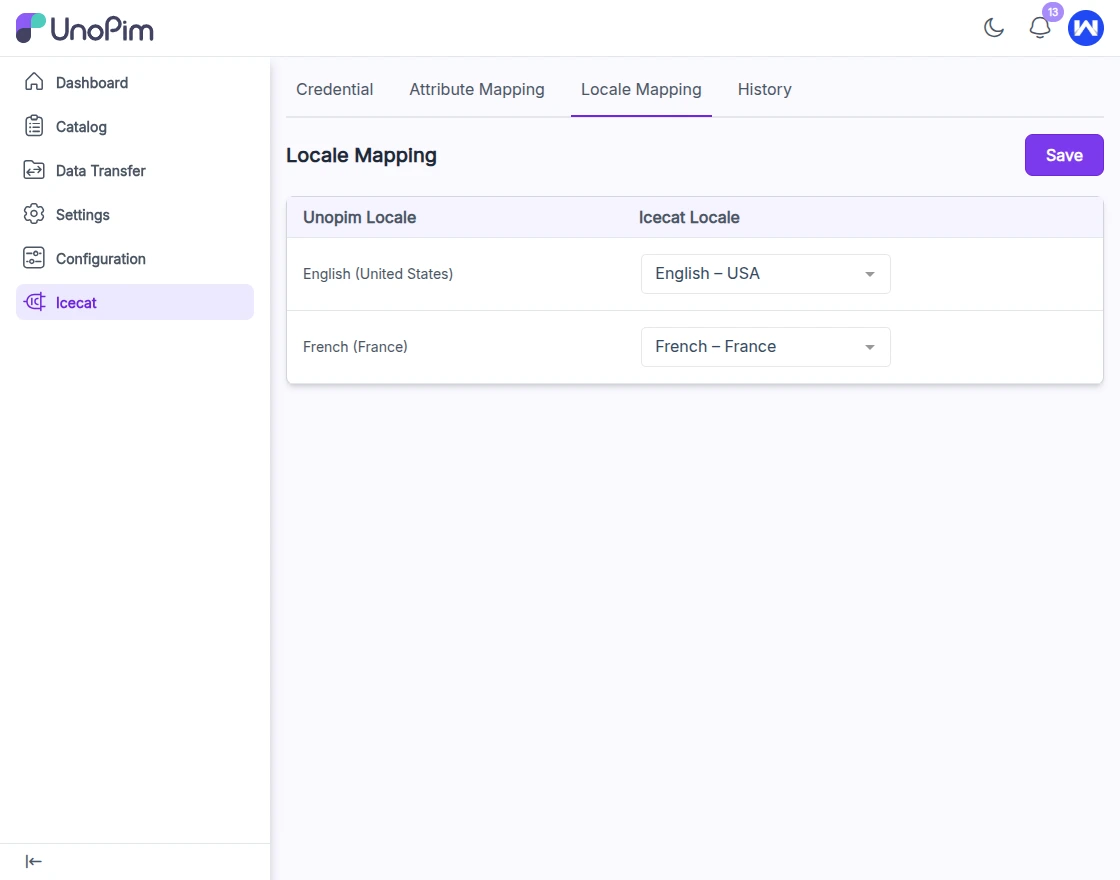
Step 7: Configure Locale Mapping (Optional)
- Navigate to Locale Mapping
- Map Icecat locales with UnoPim locales
This enables multilingual product data enrichment.
Step 8: Create a Simple Product
- Navigate to Catalog → Products
- Click on Create Product
- Choose Simple Product type
- Select the Attribute Family (where all Icecat attributes are assigned)
- Enter the SKU based on your mapping (e.g., Icecat Product Code if mapped as SKU)
- click save and update the mandatory fields like Brand on Edit page.
- Select the Brand
- Enter the EAN (if available)
- Click Save
Step 9: Enrich Products
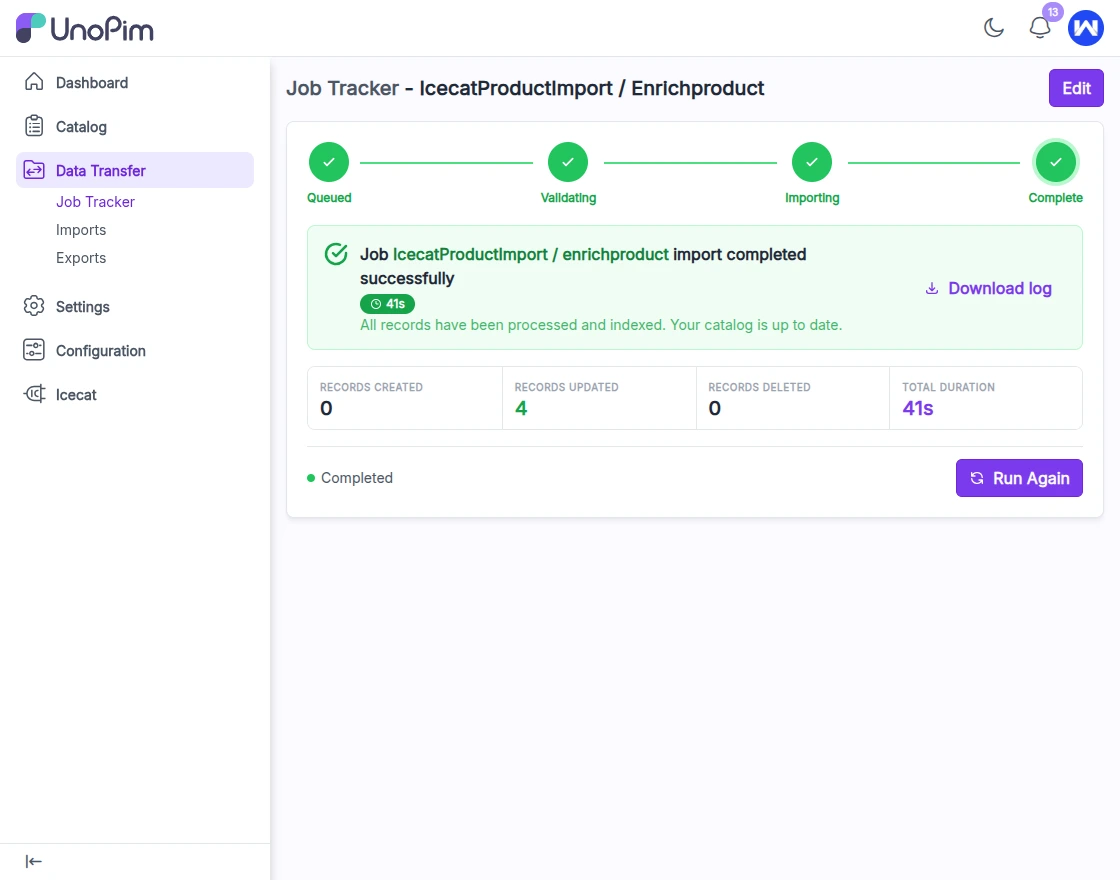
For Bulk Icecat catalog Enrichment:
- Go to the Import Section
- Run Icecat Import Enrich Product Import job
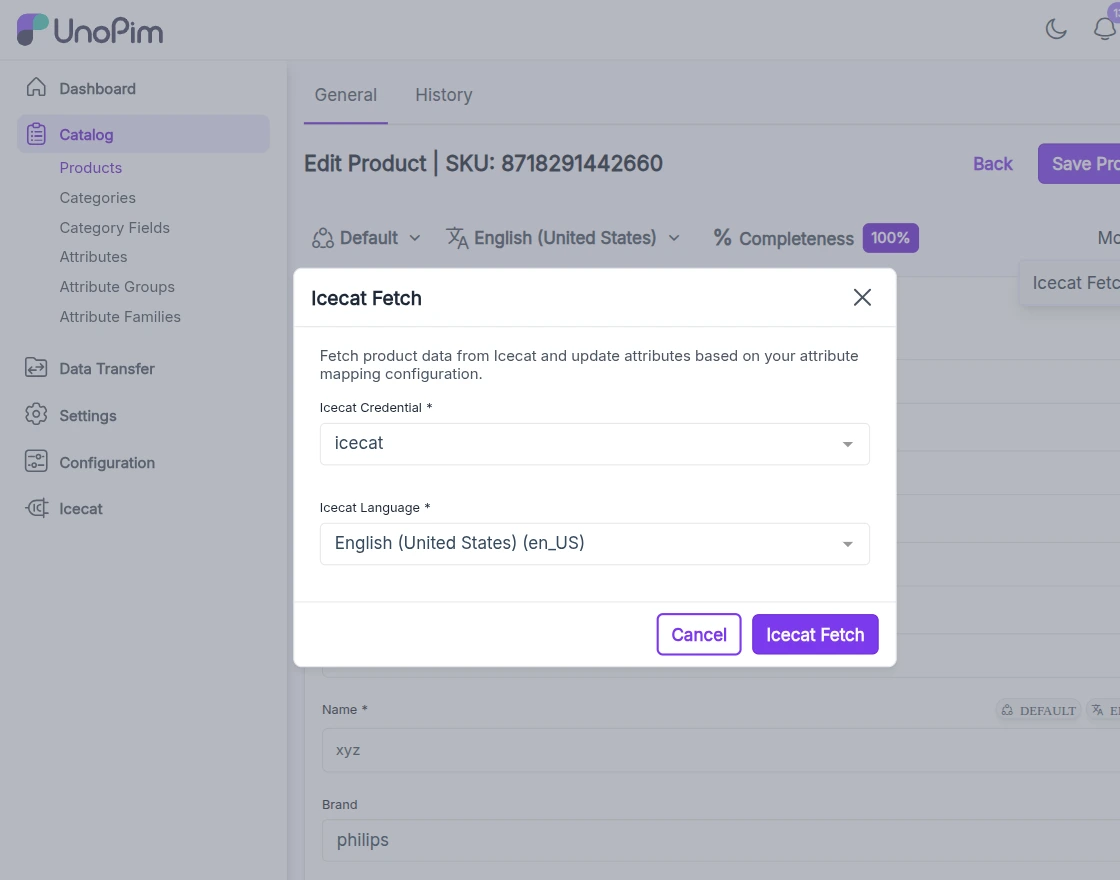
For Single Product Enrichment:
- Open product edit page
- Click More → Icecat Fetch
Product data such as descriptions, specifications, and images will be fetched from Icecat.
Support
This was all about UnoPim Icecat Connector. I hope you have got the idea of our module. Thanks for taking the time to read this blog.
And also, please don’t forget to share your feedback and suggestions in the comment box given below.
Moreover, If you have any queries or suggestions, then feel free to add a ticket at our HelpDesk system or reach out to us at support@webkul.com.