User Guide for Odoo POS Paywizard Payment Terminal
Table of Content
Introduction
Odoo POS Paywizard Payment Terminal helps you connect Paywizard payment machines with Odoo POS. It allows staff to take card and digital payments directly from the POS screen.
Odoo POS Paywizard Payment Terminal sends payment requests automatically and updates payment status in real time. This helps reduce manual work and speeds up checkout.
It also automatically saves payment details, such as the receipt number and payment method. Businesses can manage multiple Paywizard payment machines from one Odoo system easily.
Features
- Connect Paywizard payment machines with Odoo POS easily.
- Take card and digital payments directly from the POS screen.
- Update payment status automatically after payment completion.
- Manage multiple Paywizard payment terminals from one system.
- Save payment details automatically in Odoo.
- Verify payment responses before updating payment status.
- Show payment success or retry alerts automatically.
- Reduce manual work during checkout.
- Improve payment accuracy and checkout speed.
Installation
- Once you purchase the App from Webkul store, you will receive a link to download module’s zip file.
- Extract the file on your system after download finishes. As a result, you will be able to see a folder named- ‘pos_paywizard_payment_terminal.’
- Copy and paste this folder inside your Odoo Add-Ons path.
- Now, open Odoo App and click on the Settings menu. Here, click on Activate Developer Mode.
- Then, open Apps menu and click on ‘Update Modules List.’
- In the search bar, remove all the filters and search ‘pos_paywizard_payment_terminal.’
- You will be able to see module in the search results. Click on ‘Activate’ to install it.
Workflow
- After installing Odoo POS Paywizard Payment Terminal, configure Paywizard API details like Client ID, Merchant ID, and webhook URL for payment communication.

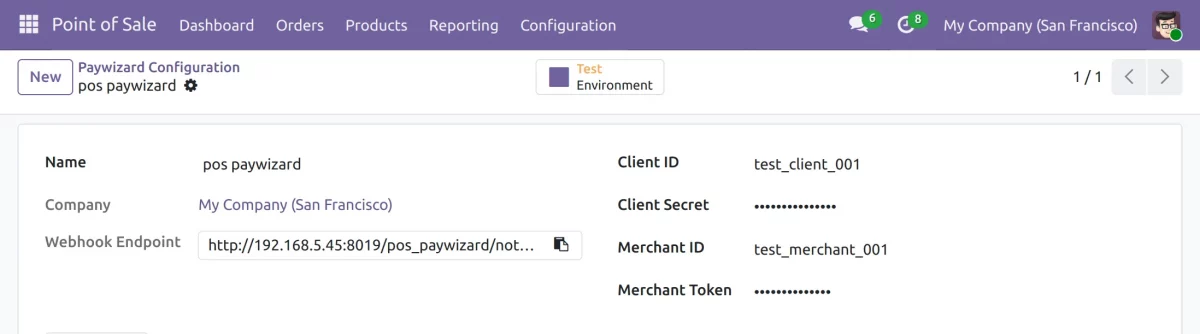
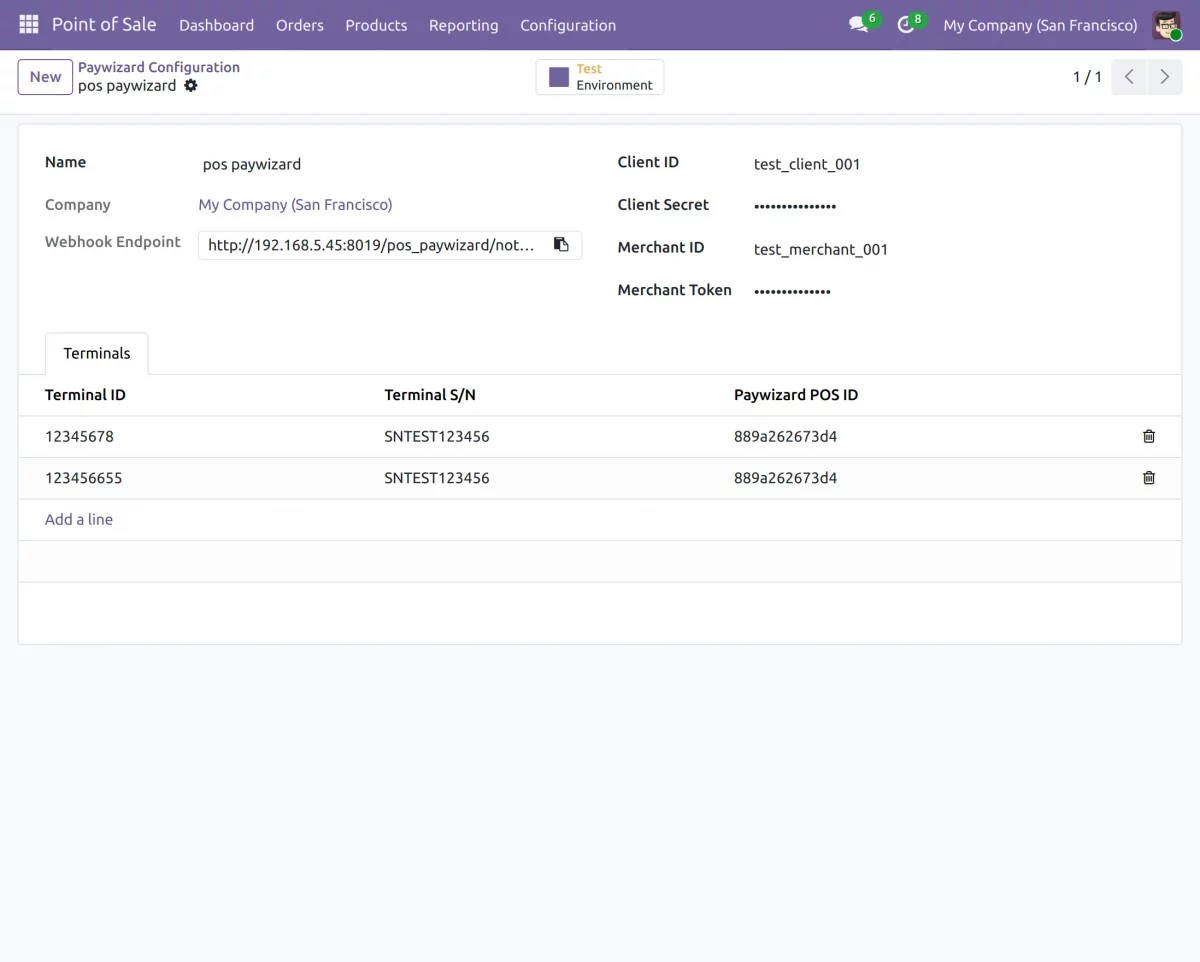
2. After configuring the API details, you can add and manage multiple Paywizard payment terminals from the same Odoo setup easily.

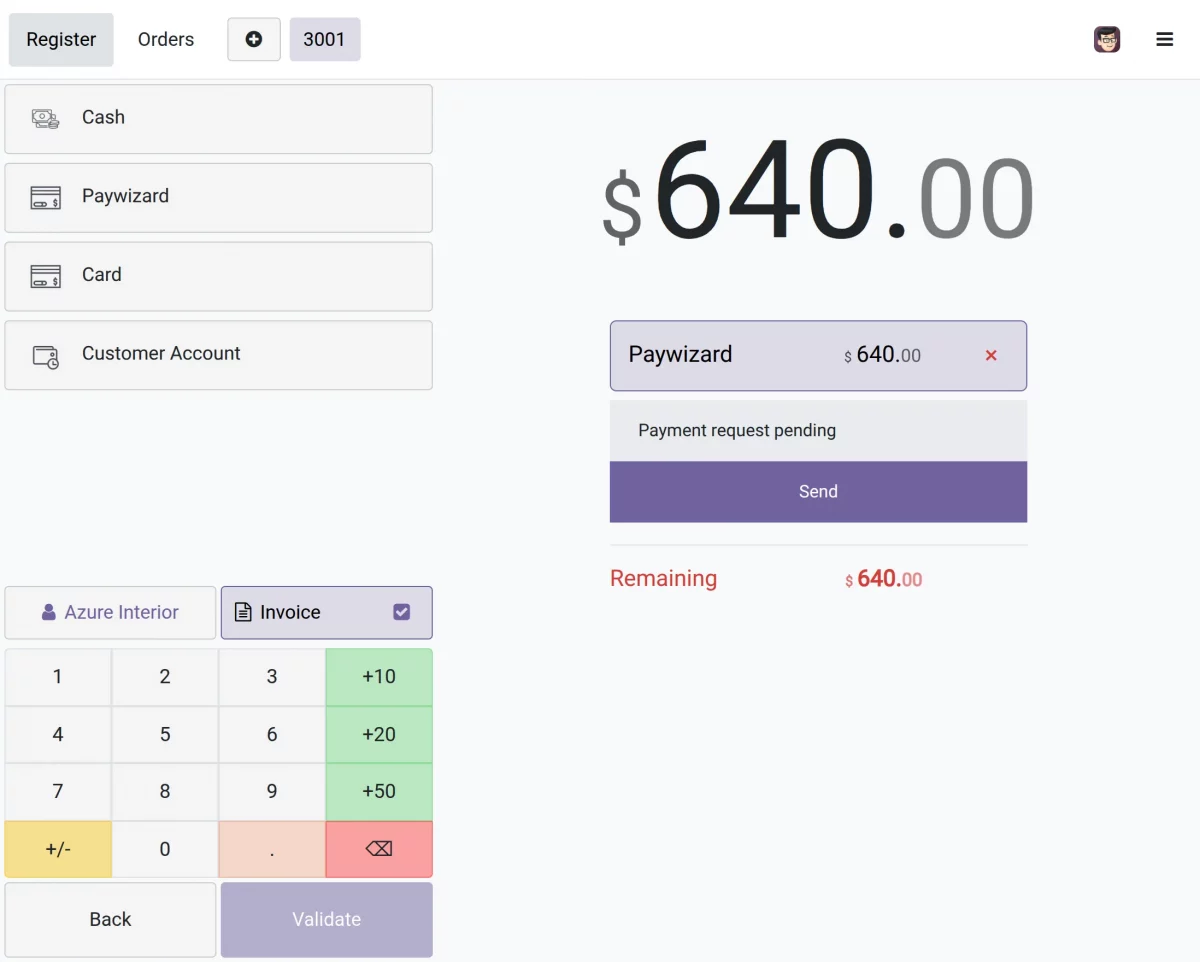
3. After selecting the Paywizard payment method, cashiers can send payment requests directly from the Odoo POS payment screen.
4. After payment completion, receive payment response automatically and update the payment status in Odoo POS instantly.
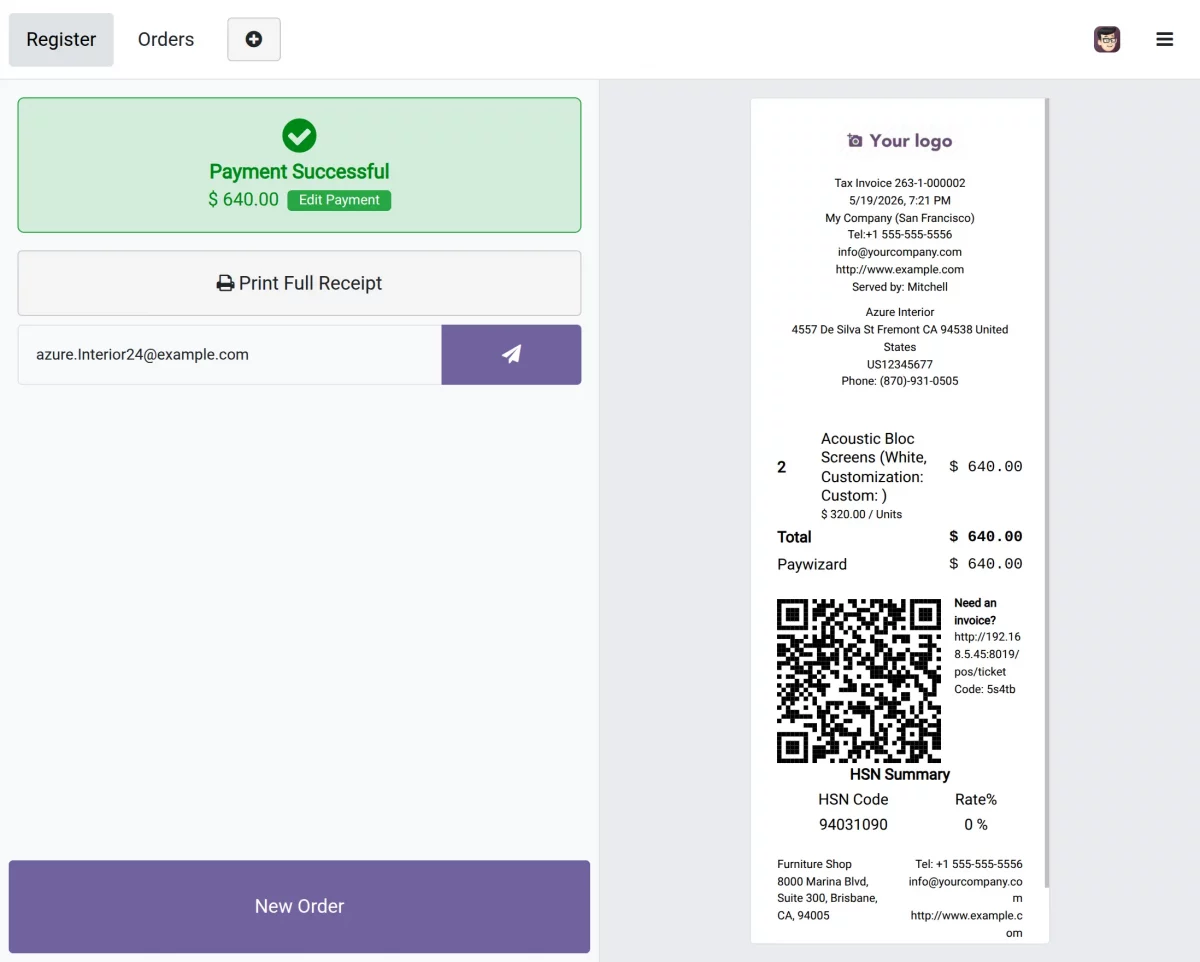
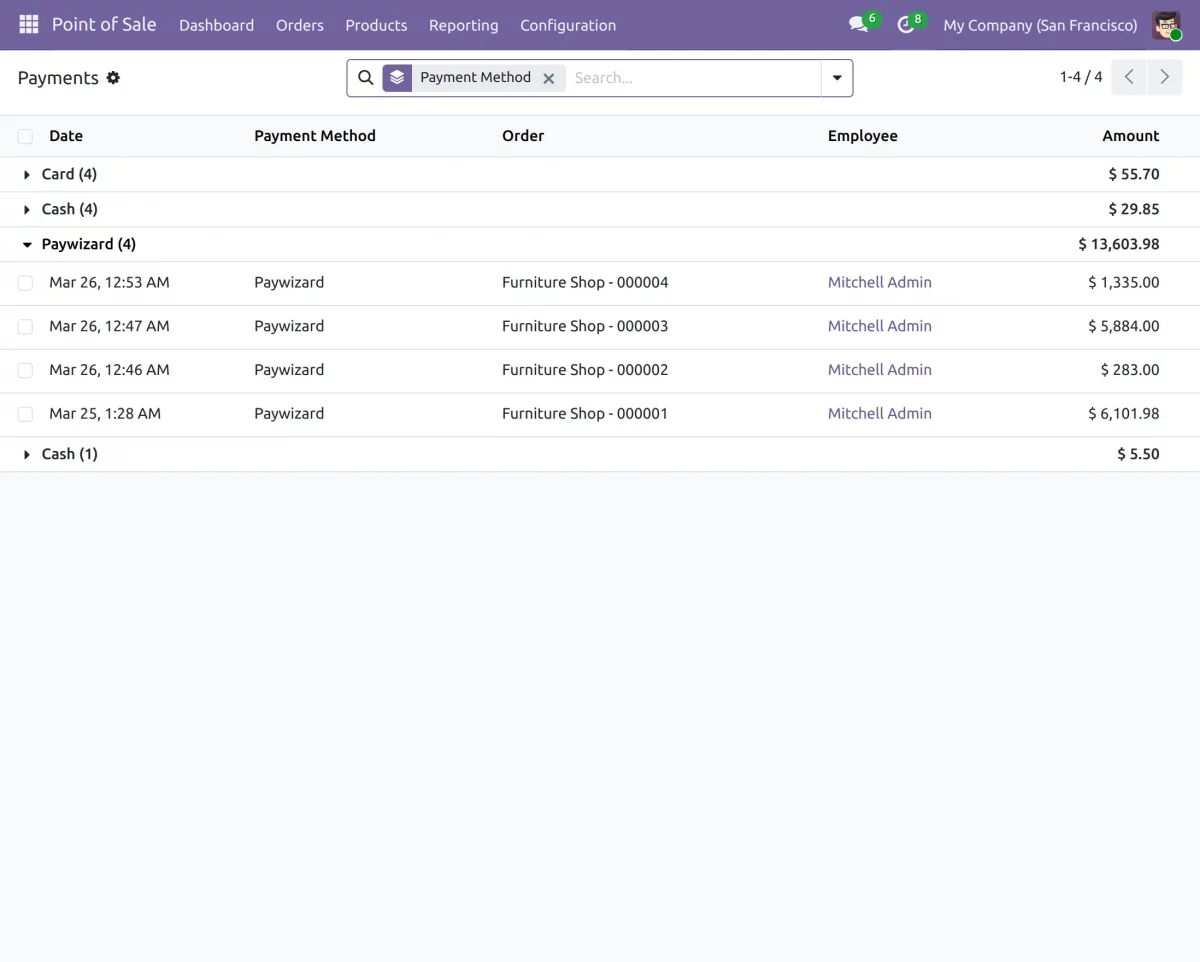
5. After payment completion, all Paywizard payment details are captured and recorded automatically in the Odoo backend.
Need Help?
Hope you find guide helpful! Please feel free to share your feedback in the comments below.
If you still have any issues/queries, please create a ticket at the UV Desk.
I hope this helps. In case of any further queries, contact us at our support mail.
Thanks for paying attention!!