User Guide for ERPNext Website Pre Order
Introduction
ERPNext Website Pre Order lets stores manage pre-order sales through ERPNext Webshop.
The Website Pre Order app adds pre-order settings to Items and Website Items, then uses those settings on product listings, product pages, carts, and orders.
When enabled items are ordered, the app creates linked Pre-Order records from the Sales Order flow and tracks their payment and fulfillment status.
Prerequisites for using ERPNext Website Pre-Order
ERPNext Website Pre Order works in conjunction with the following apps:
1. ERPNext
2. Webshop
3. Payments
You must install the above-mentioned apps to use ERPNext Website Pre Order.
Features
1. Enable or disable pre-orders globally from Pre-Order Settings.
2. Configure default full or partial payment rules.
3. Set default minimum and maximum pre-order quantities.
4. Enable item-level pre-order settings on Item records.
5. Show pre-order badges and ribbon labels on Website Item listings.
6. Replace website cart actions with Pre-Order when the item qualifies.
7. Apply pre-order pricing and quantity rules during checkout.
8. Create linked Pre-Order records from submitted Sales Orders.
9. Track pre-order status, payments, remaining amount, and linked invoices.
Installation
1. After purchasing the app from the Webkul store, you will receive a link to download the module ZIP file.
2. Extract the downloaded ZIP file, and you will see a folder named ‘erpnext_website_pre_order’.
3. Set up the module in your Git repository.
4. If the app is hosted on GitHub, fetch it using the command:
bench get-app --branch main

https://github.com/your_account/erpnext_website_pre_order.git
(Replace “main” with your branch name and replace the “HTTPs URL” with your HTTPS clone URL.)
5. Install the app on your site using the command:
bench --site <your-site_name> install-app erpnext_website_pre_order
6. Finally, run the “bench migrate” command to complete the installation.
Workflow
Backend Configuration
1. Open Selling from the ERPNext backend.
The app adds a Pre Order section with links for Pre Order Received and Pre Order Settings.

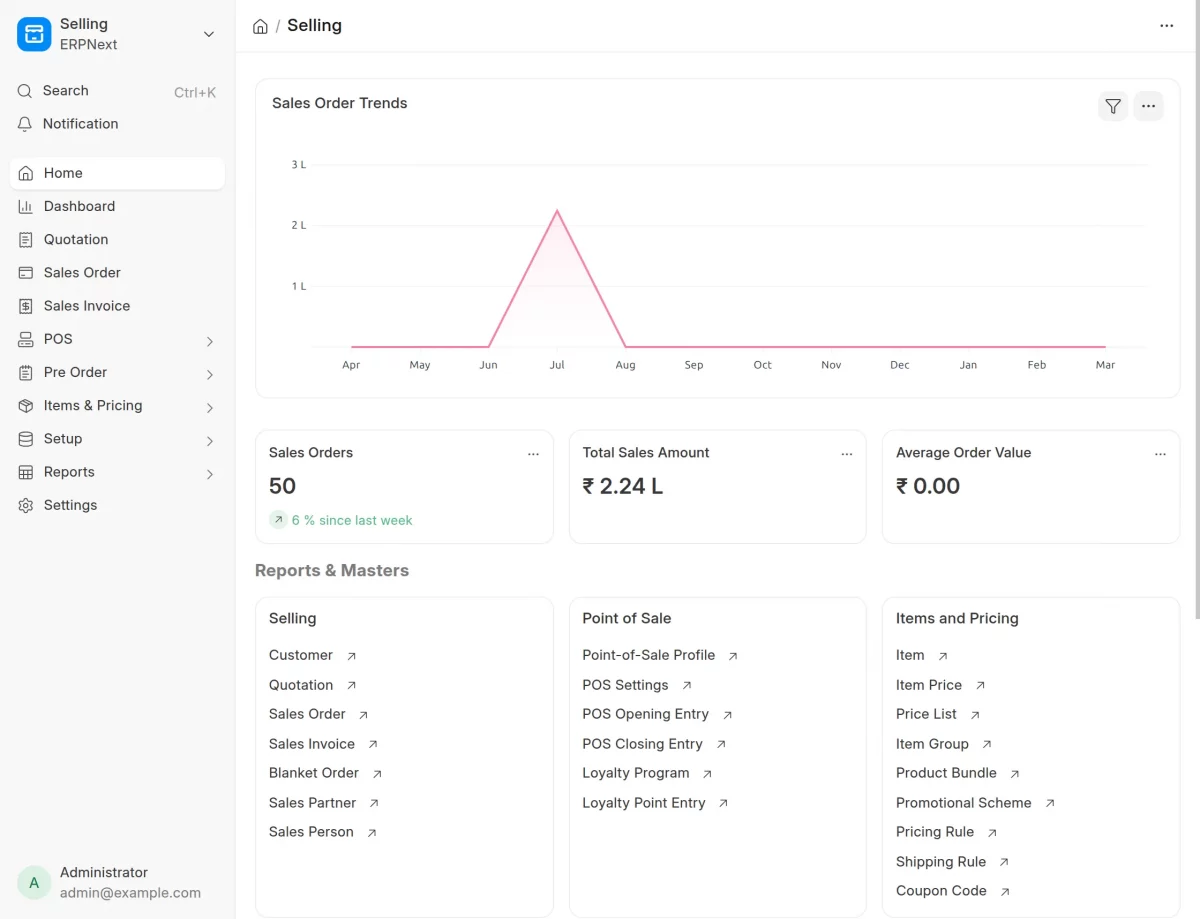
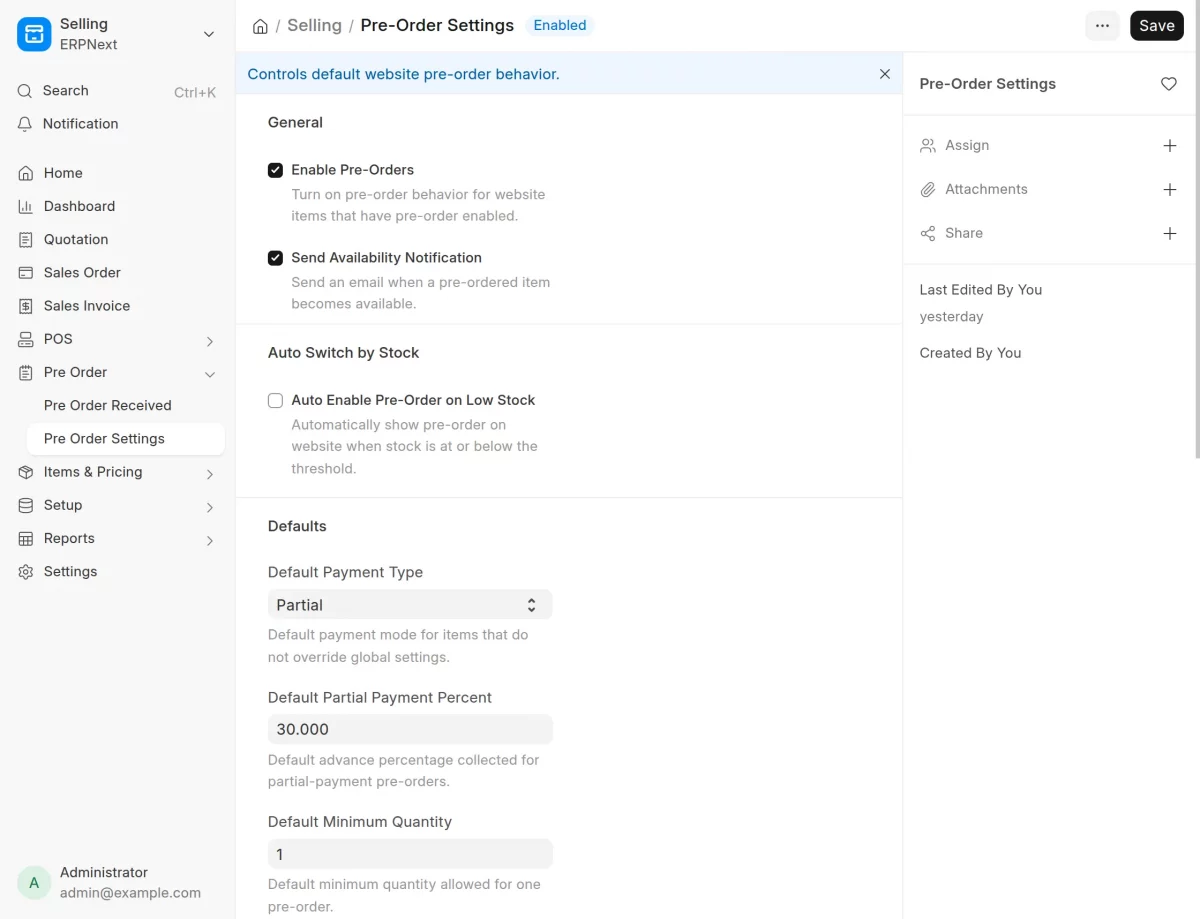
2. Open Pre Order Settings to configure global pre-order behavior.
Enable Pre-Orders to turn on website pre-order behavior for items that have pre-order enabled.
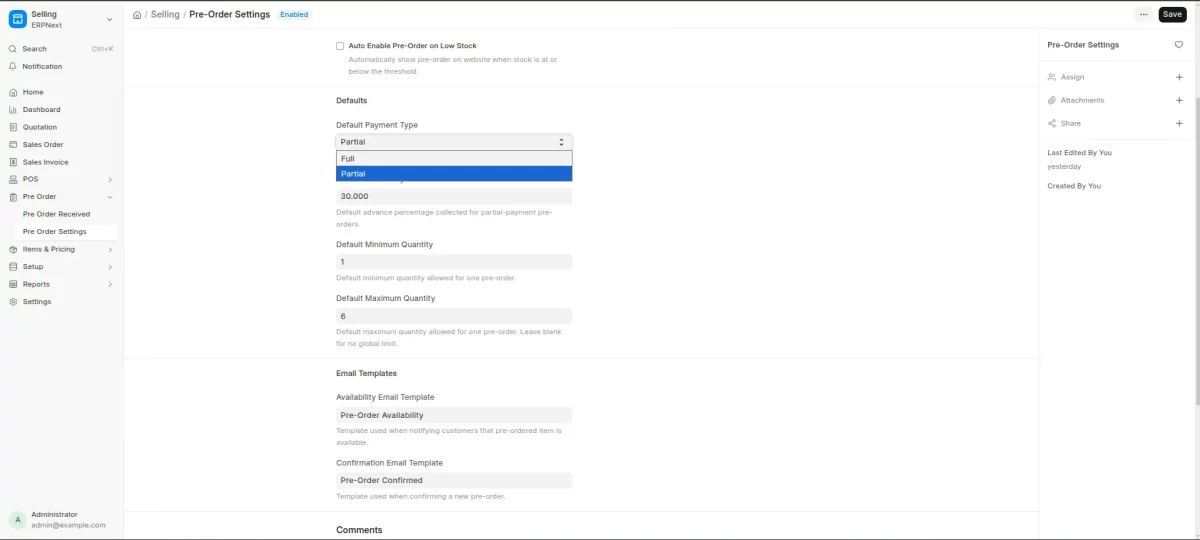
3. In Pre Order Settings, configure the default payment and quantity values.
You can choose the Default Payment Type as Full or Partial, set the Default Partial Payment Percent, and define default minimum and maximum quantities.

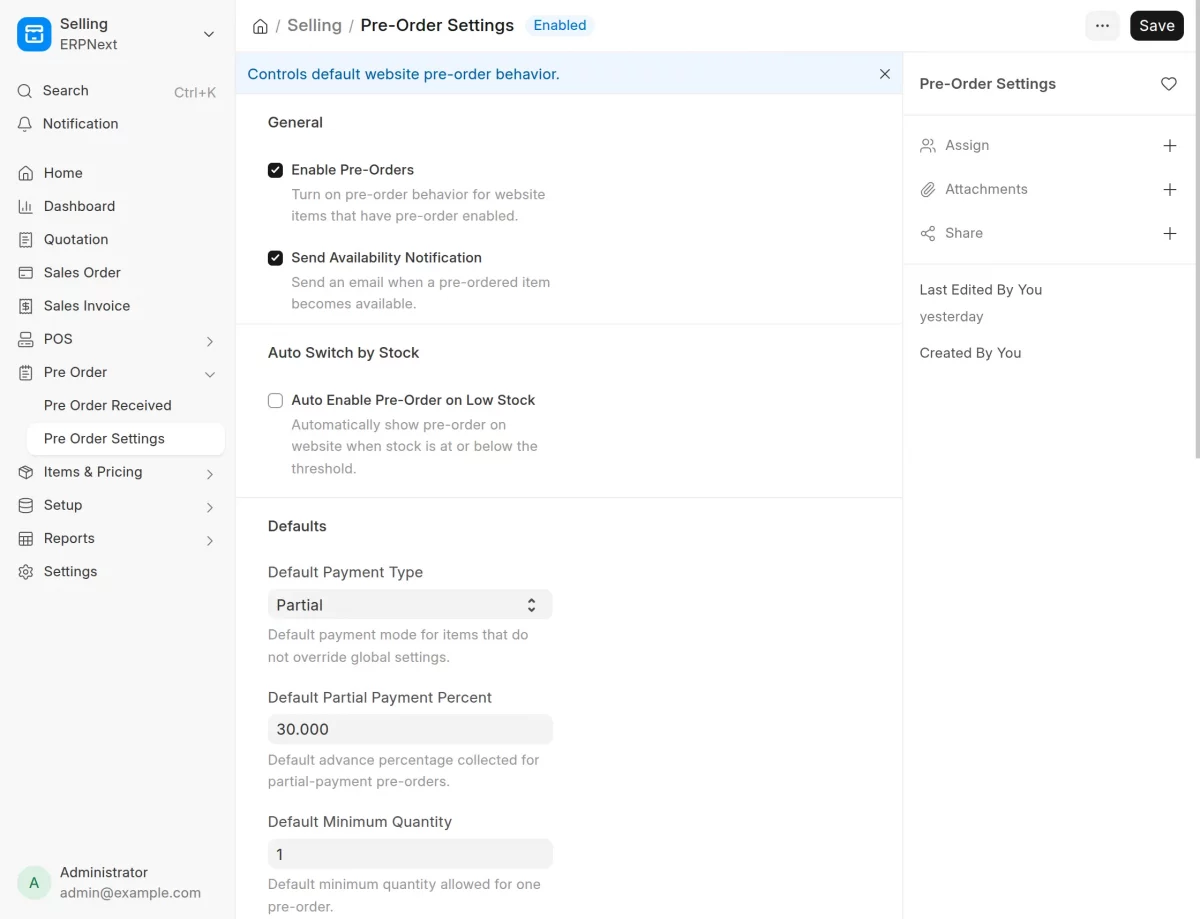
4. In Pre Order Settings, configure stock-based pre-order switching if required.
Enable Auto Enable Pre-Order on Low Stock and set the stock quantity at or below which enabled items switch to pre-order.
5. Open an Item and go to the Pre-Order tab.
Enable Pre-Order to allow the item to use the pre-order flow on the website.

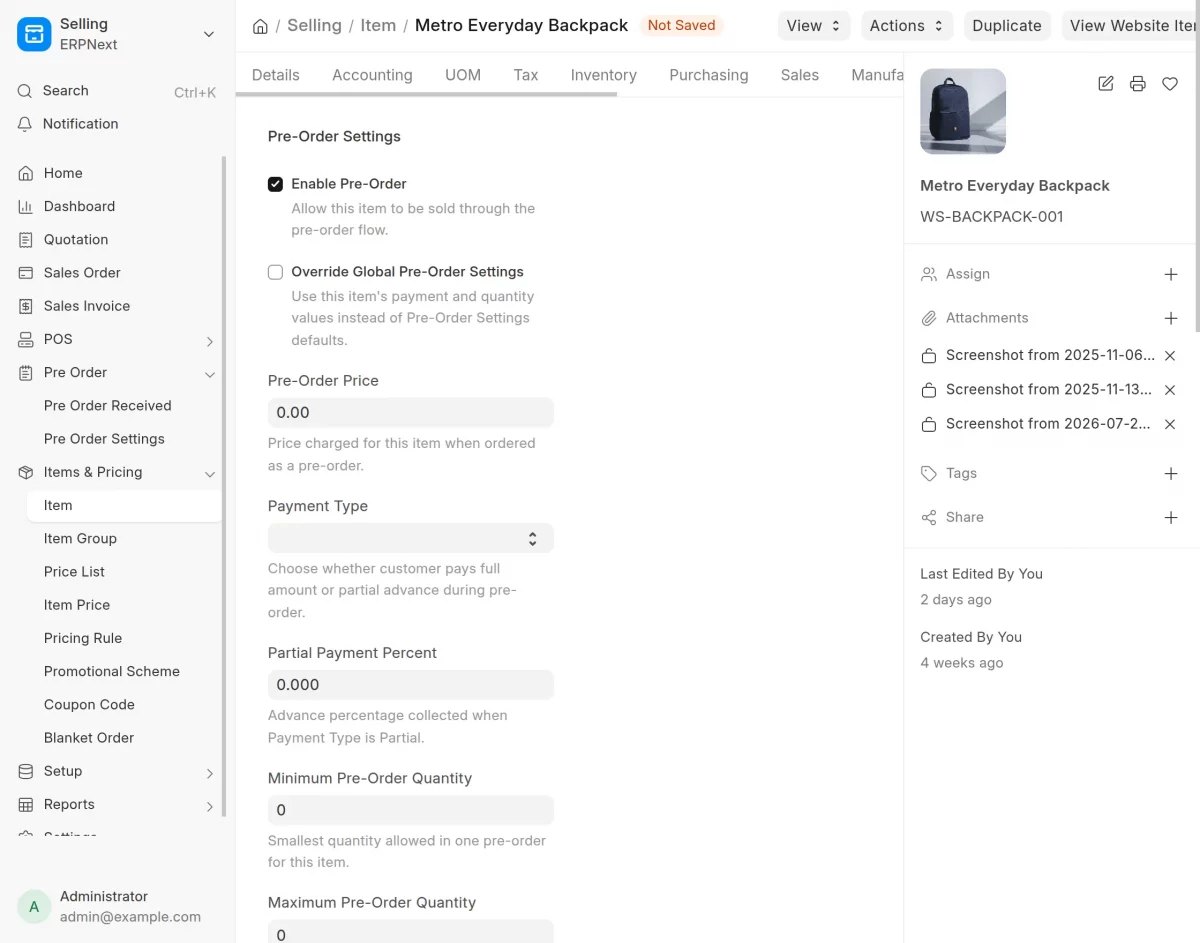
6. On the Item, enter the Pre-Order Price.
This price is used when the item is handled as a pre-order item.
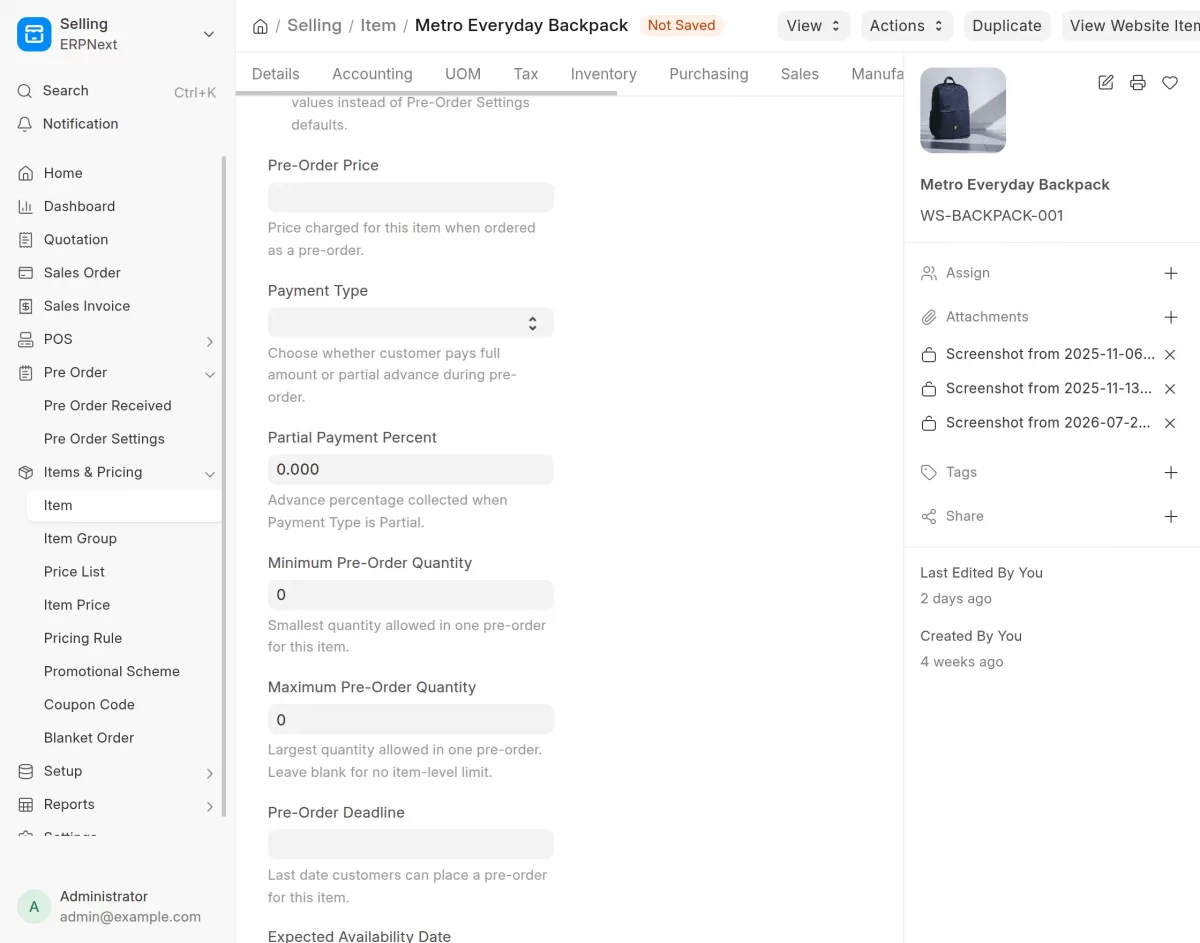
7. On the Item, use Override Global Pre-Order Settings when this item needs its own payment and quantity rules.
The item can then use Payment Type, Partial Payment Percent, Minimum Pre-Order Quantity, and Maximum Pre-Order Quantity.
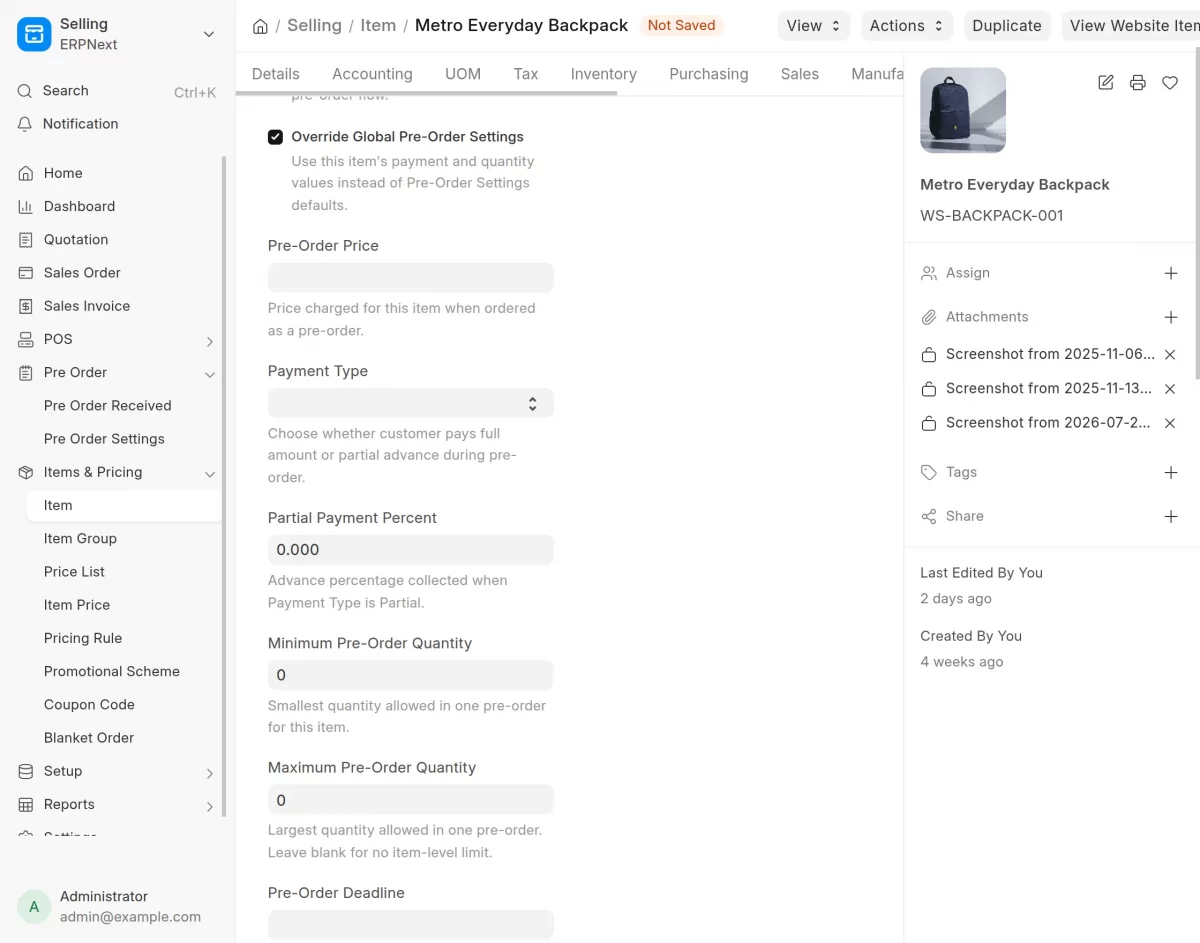
8. On the Item, add Pre-Order Deadline and Expected Availability Date if required.
The pre-order deadline must be today or later, and expired deadlines stop the item from being treated as an active pre-order.
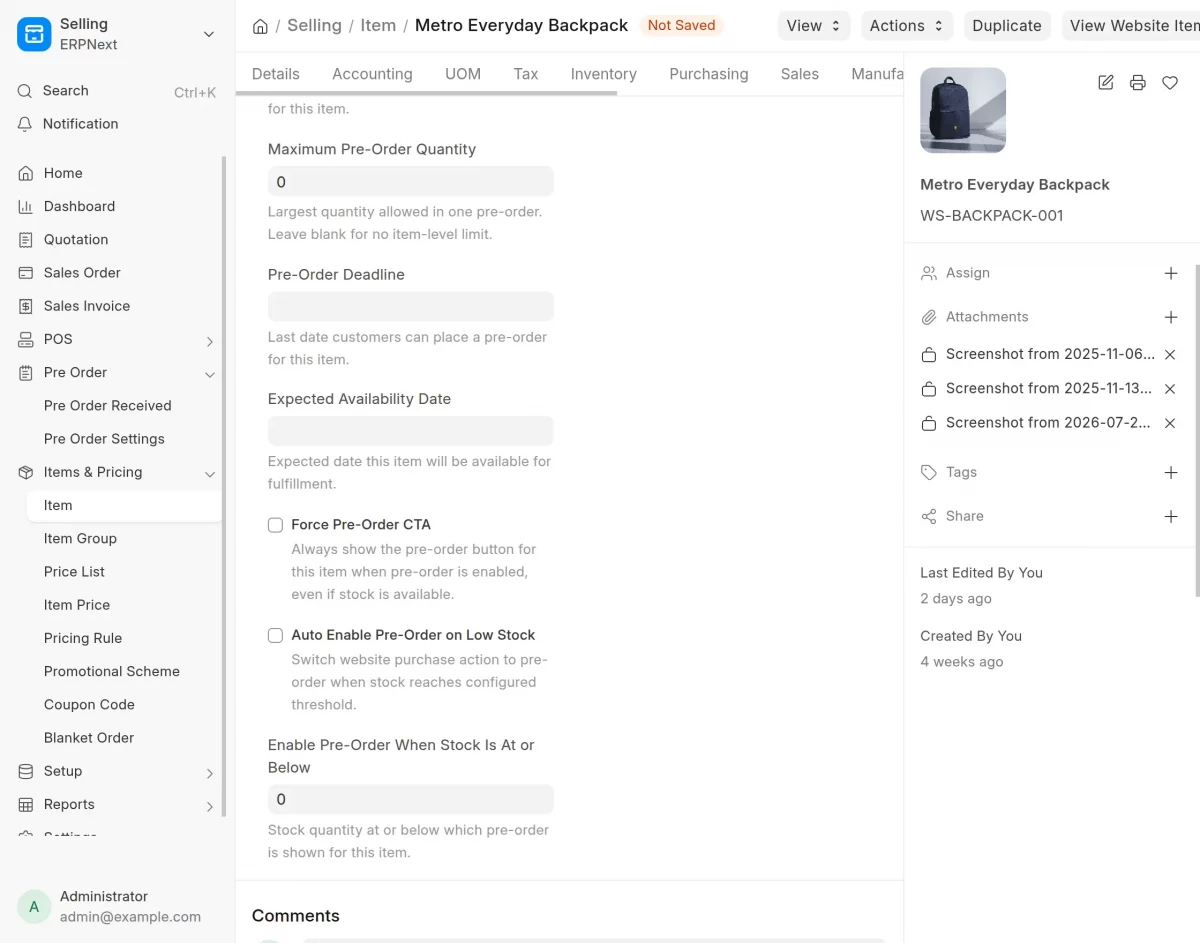
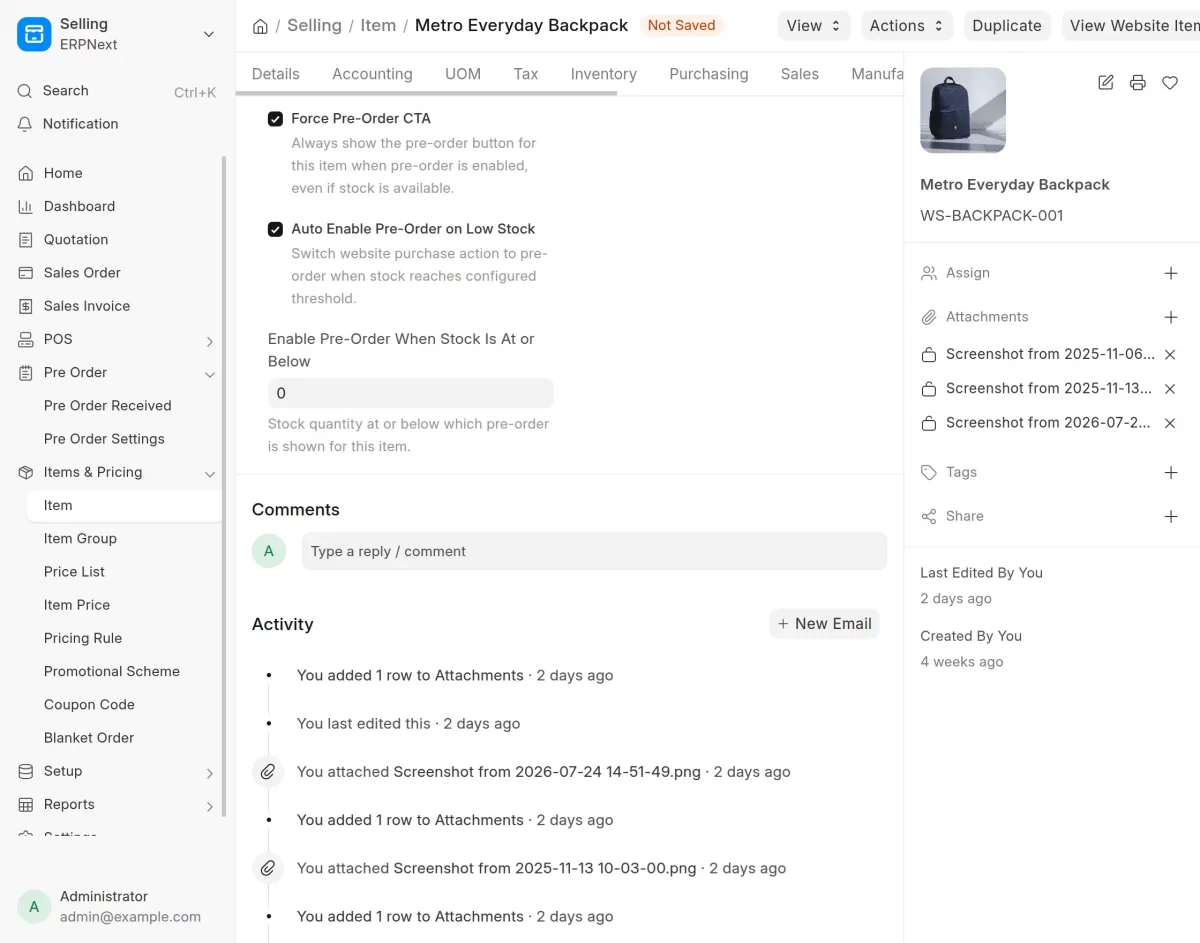
9. On the Item, enable Force Pre-Order CTA if the website should show the pre-order action even when stock is available.
You can also enable item-level Auto Enable Pre-Order on Low Stock and set the item stock threshold.
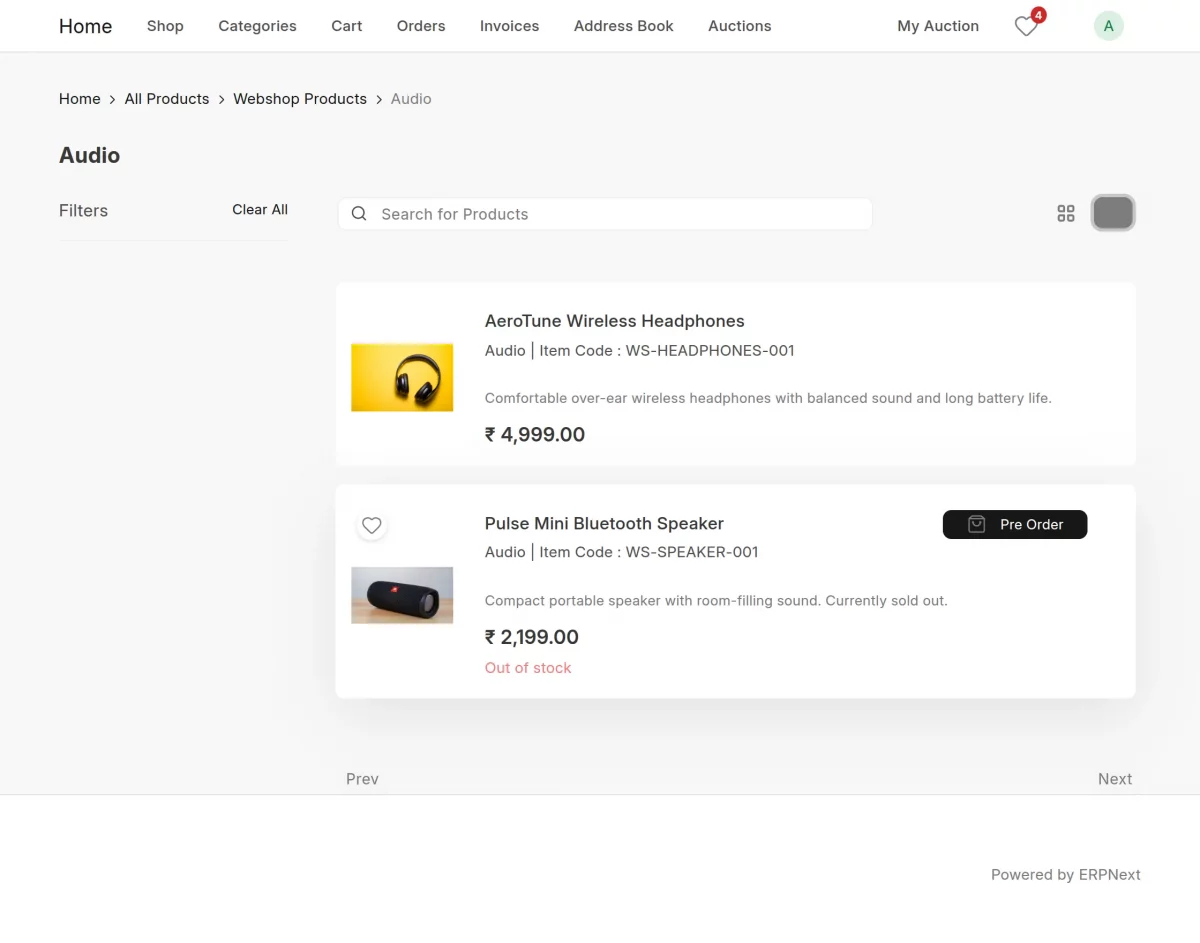
10. Open the linked Website Item and go to the Pre-Order section.
Enable Show Pre-Order Badge to show a ribbon on website product listings.
Need Help?
Hope you find guide helpful! Please feel free to share your feedback in the comments below.
If you still have any issues/queries, please create a ticket at the UV Desk.
I hope this helps. In case of any further queries, contact us at our support mail.
Thanks for paying attention!!