User Guide for ERPNext Return Merchandise Authorization
Introduction
ERPNext Return Merchandise Authorization (RMA) helps businesses manage product returns and exchanges through a simple and organized process. Customers can submit return requests directly from the website for products they have purchased.
The module allows customers to select return reasons, specify product quantities, and add remarks while creating a request. This helps businesses collect all the required information before reviewing the request.
ERPNext Return Merchandise Authorization (RMA) also helps administrators manage return requests, create custom return stages and reasons, track request progress, and keep customers informed throughout the return process.
Features
- Allow customers to submit product return and exchange requests directly from the website.
- Create return requests for single or multiple products in one submission.
- Let customers select return reasons and add remarks for better request details.
- Generate a unique RMA reference number for every return request.
- Manage return requests directly from the ERPNext Return Merchandise Authorization (RMA) backend.
- Create and manage custom return stages based on business requirements.
- Create custom return reasons for a structured return process.
- Track return requests through stages such as Pending, Approved, and Rejected.
- Maintain a centralized system for managing all return and exchange activities.
- Support structured return and exchange workflows for better request handling
Installation
- After purchasing the app from the Webkul store, you will receive a link to download the module ZIP file.
- Extract the downloaded ZIP file, and you will see a folder named ‘rma’.
- Set up the module in your Git repository.
- If the app is hosted on GitHub, fetch it using the command:
bench get-app –branch dev
https://git.webkul.com/erpnext-apps/webkul-rma.git rma
(Replace “main” with your branch name and replace the “HTTPs URL” with your HTTPS clone URL.)
- Install the app on your site using the command:
bench –site <your-site_name> install-app rma
- Finally, run the “bench migrate” command to complete the installation.
Workflow
1. Access ERPNext Return Merchandise Authorization (RMA) dashboard to manage returns and perform the required operations.


2. To review existing product return requests, click Review RMA Requests from the menu on the left side.
After clicking it, you can view all return requests that are pending review by the administrator.

3. To create an inspection for an RMA request, click RMA Inspection from the menu on the left side.
After clicking it, a new page will open where you can create an inspection by filling in the required details related to the RMA request. This allows you to inspect the product before approving or rejecting the request.

Return Request Creation (Admin End)
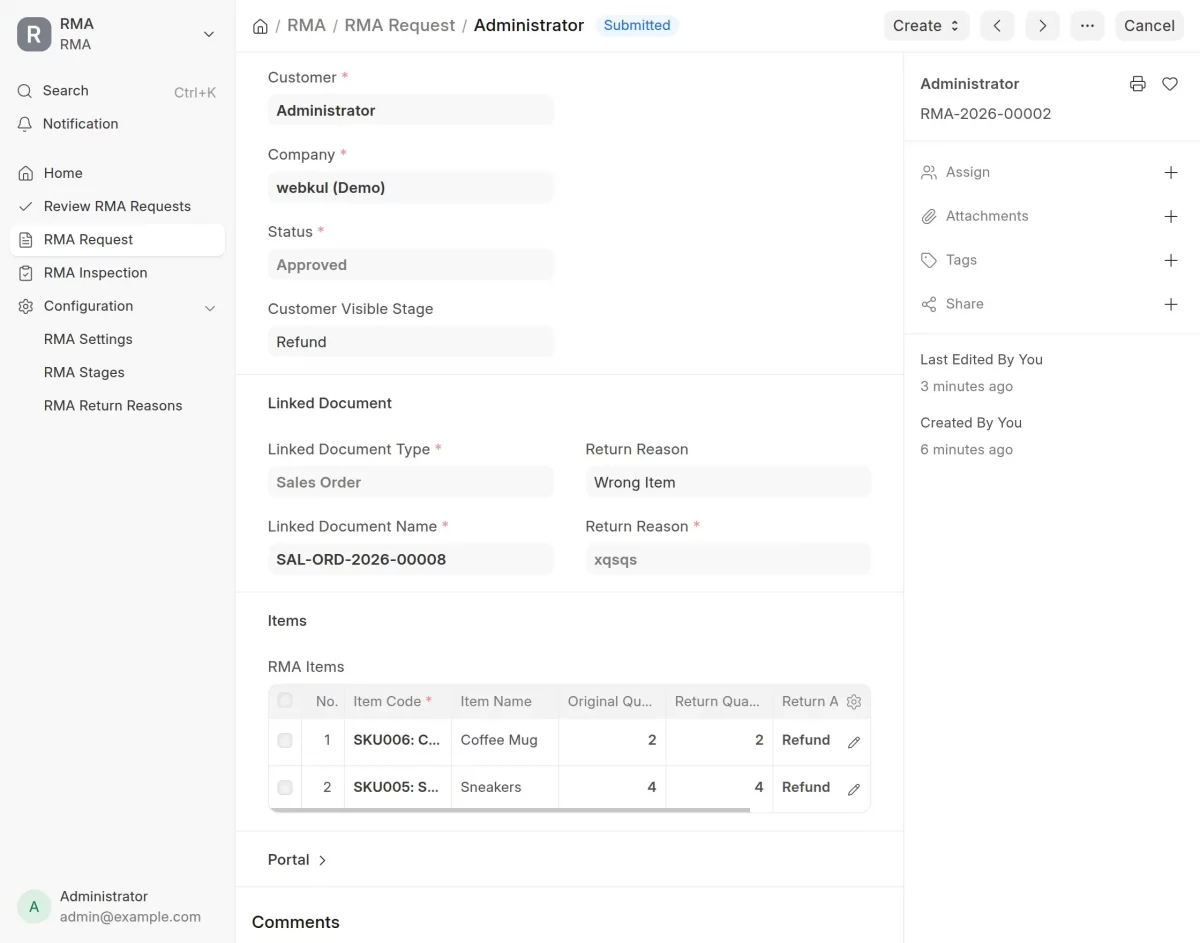
4. First, click RMA Request from the menu on the left side. A new page will open displaying all existing return requests, including approved and pending requests. From this page, click the Add RMA Request button to create a new return request.

5. To create a new return request, click the Add RMA Request button. A new request form will open where you need to fill in the required details to create a return request from the Admin end.
Return Request Creation (Customer End)
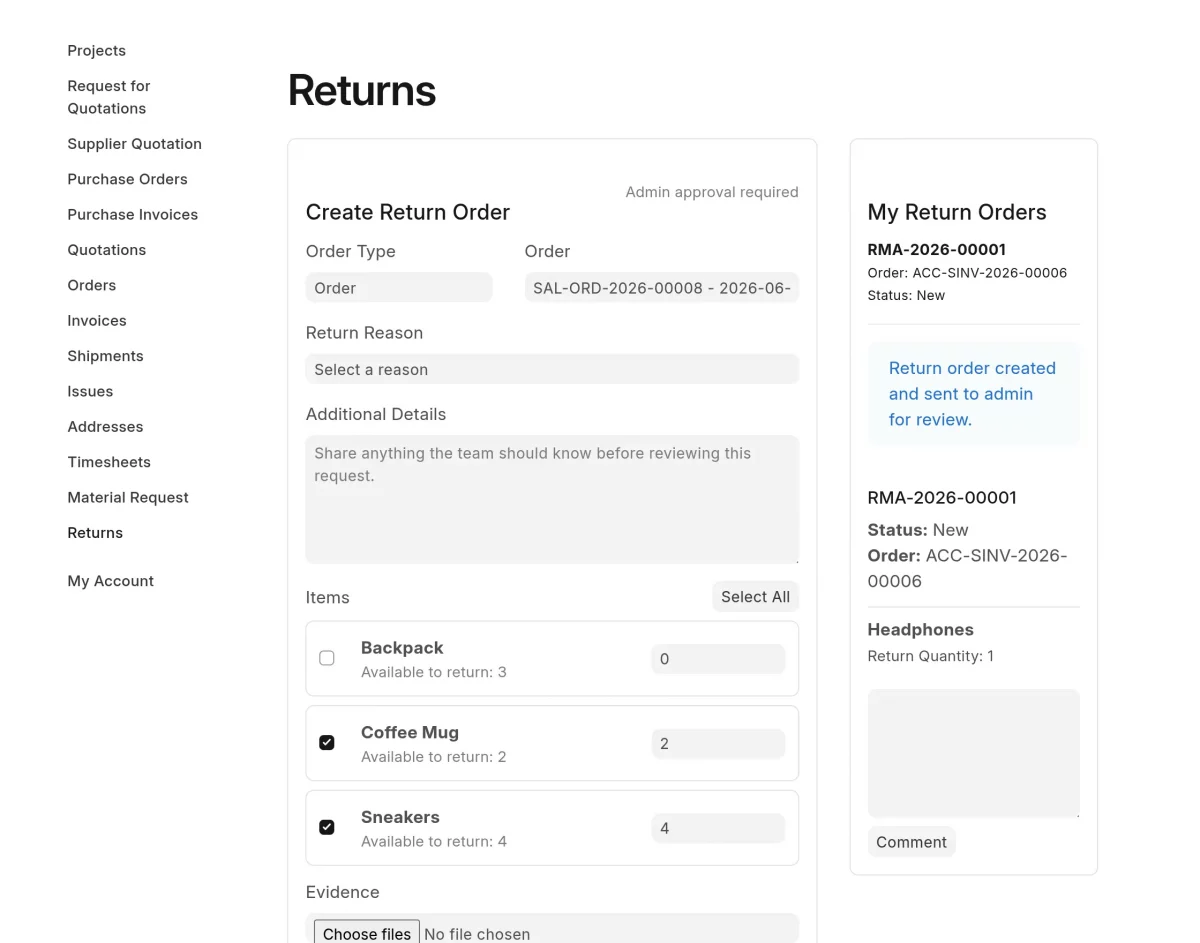
6. To create a return request from the customer end, navigate to the Return Page or the Order Page on the webshop. From there, you can create a return request for your product.
Next, fill in the required details in the request form, including Order Type, Order, Return Reason, Additional Details, and the Products you want to return. Once all the information is entered, submit the form to create the return request.
You can return any number of items or multiple products from your original order as you need.
7. After creating a return request, you can view it on the same Return Page where the request was submitted.
The Return Page displays all the return requests you have created, along with their current status and updates.

8. To view all the stages of a return request, click RMA Stages from the menu on the left side.
This will open a page where you can see all the created stages along with their related details and information.

9. To add a new stage, click Add RMA Stage in the top-right corner of the RMA Stages page.
A new page will open where you need to fill in details such as Stage Name, Sequence, Related Status, and Portal Message.
You can also use the Customer Visible checkbox to control whether the stage is visible to customers or remains hidden.

10. To view all return reasons, click RMA Return Reasons from the menu. This will open a page displaying the complete list of return reasons along with their related information.
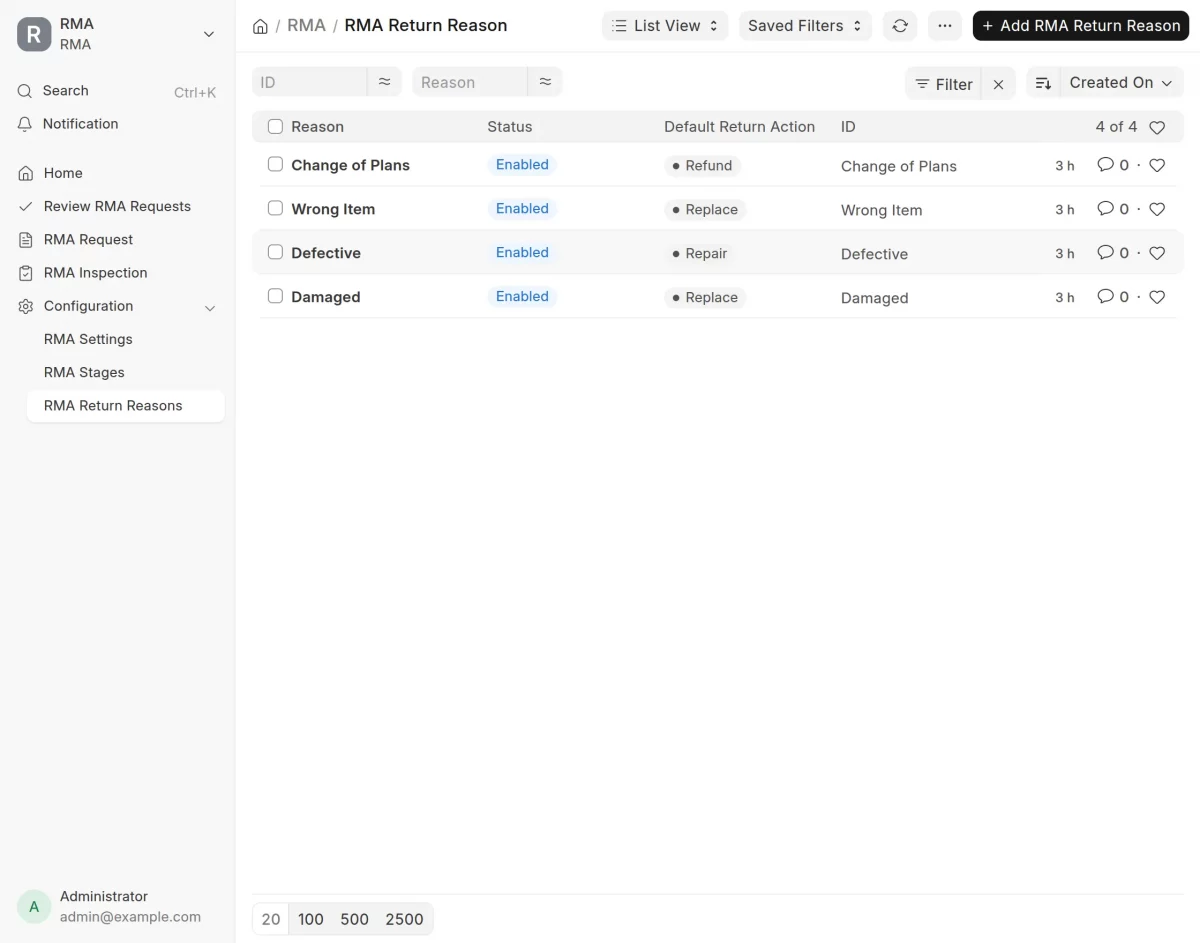
11. By clicking the Add RMA Return Reason button, a new page will open where you need to fill in details such as Default Return Action.
You can also use the Disable checkbox to activate or deactivate the return reason and the Require Inspection checkbox to enable or disable inspection for that specific return reason.

RMA Configuration
You can set up the ERPNext Return Merchandise Authorization (RMA) module according to your needs from the Settings page.
To open the settings, go to the main dashboard, find the menu on the left side, and click Settings to open the configuration page.
Here you will find the following sections:
1. RMA Number Configuration: –
Here you can configure the RMA Naming Series.
- Custom RMA Number prefix (optional; leave blank to use the default prefix).
- Portal and Return Policy checkboxes.
- Auto Approve Return Below amount(auto approve request below the amount you set)
- Default Return Window.

2. Warehouse Configuration: –
You can set the following different warehouses for different operations.
- Default Return Warehouse.
- Quarantine Warehouse.
- Restock Warehouse.
- Scrap Warehouse.
3. Quality Inspection
Here, you can set the Default Inspection Warehouse (where items will be held during inspection), Auto-Reject threshold (%), and Internal Notification Email.

4. Return Policy
You can set the return policy for the eligibility to return a product according to the need.

Need Help?
Hope you find guide helpful! Please feel free to share your feedback in the comments below.
If you still have any issues/queries, please create a ticket at the UV Desk.
I hope this helps. In case of any further queries, contact us at our support mail.
Thanks for paying attention!!