User Guide for ERPNext Hubspot CRM Connector
Introduction
The ERPNext HubSpot CRM Connector helps businesses synchronize Contacts, Leads, Opportunities (Deals), and Products between ERPNext and HubSpot CRM.
You can purchase the ERPNext HubSpot CRM Connector directly from the Webkul Store. The connector eliminates manual data entry and keeps customer and sales data synchronized across both platforms.
With this ERPNext HubSpot CRM Integration, businesses can manage CRM operations from ERPNext while maintaining accurate records in HubSpot CRM.
The connector supports bidirectional synchronization, duplicate prevention, record mapping, and multiple HubSpot CRM account management.
Prerequisites for using ERPNext HubSpot CRM Connector
ERPNext HubSpot CRM Connector works in conjunction with the following module:
You must install the above-mentioned module to use ERPNext HubSpot CRM Connector.
Features
- Synchronize Contacts between ERPNext and HubSpot CRM.
- Synchronize Leads between ERPNext and HubSpot CRM.
- Synchronize Opportunities (Deals) between ERPNext and HubSpot CRM.
- Synchronize Products and Items between ERPNext and HubSpot CRM.
- Prevent duplicate Contacts using email matching.
- Prevent duplicate Products using SKU matching.
- Manage multiple HubSpot CRM accounts from ERPNext.
- Maintain CRM entity mapping for synchronized records.
- Automatically update synchronized records.
- Secure OAuth2 authentication with HubSpot CRM.
Installation
- After purchasing the app from the Webkul store, you will receive a link to download the module ZIP file.
- Extract the downloaded ZIP file, and you will see a folder named ‘erpnext_hubspot_crm_connector’.
- Set up the module in your Git repository.
- If the app is hosted on GitHub, fetch it using the command:
bench get-app --branch main
https://github.com/your-account/erpnext_hubspot_crm_connector.git
● (Replace “main” with your branch name and replace the “HTTPs URL” with your HTTPS clone
URL.)
5. Install the app on your site using the command:
bench --site <your-site_name> install-app erpnext_hubspot_crm_connector
6. Finally, run the “bench migrate” command to complete the installation.
Workflow
Configure Connector Type
Navigate to Multi CRM → Connector Types.
Create a new Connector Type for HubSpot CRM and enter the required API details.


Create Connector Account
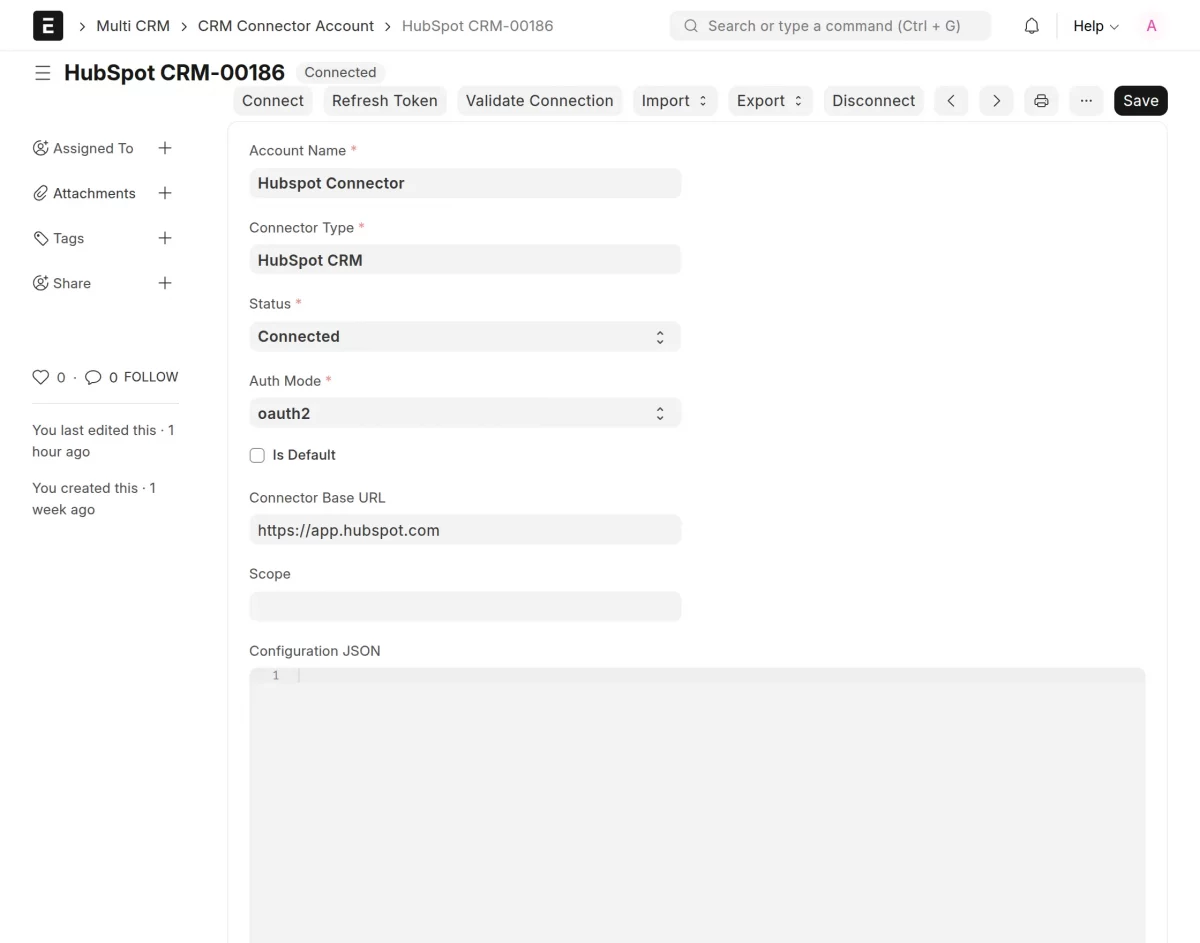
Navigate to Connector Accounts.
Create a new HubSpot CRM account by entering the details.
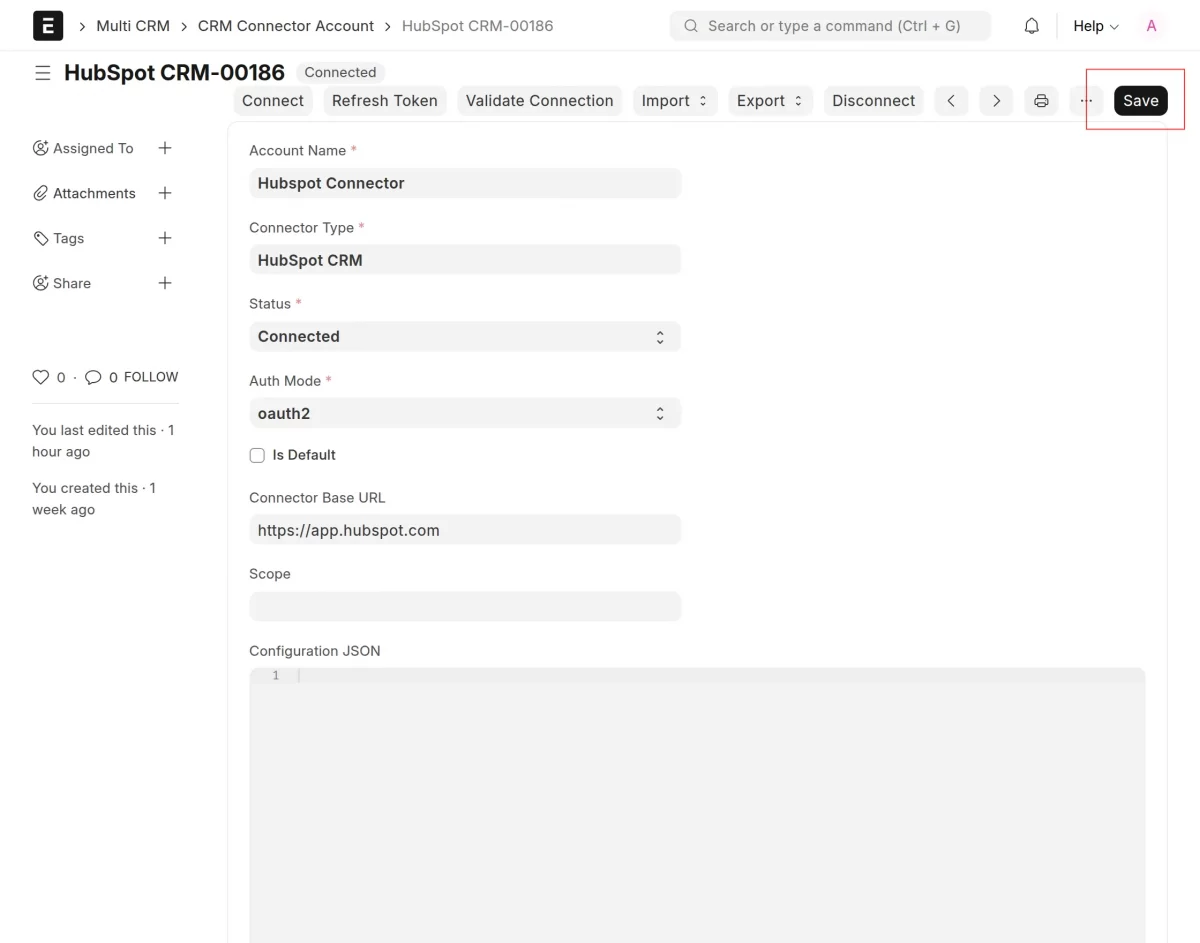
Connect HubSpot CRM
Click Save and Connect.
Authenticate your HubSpot CRM account and validate the connection.
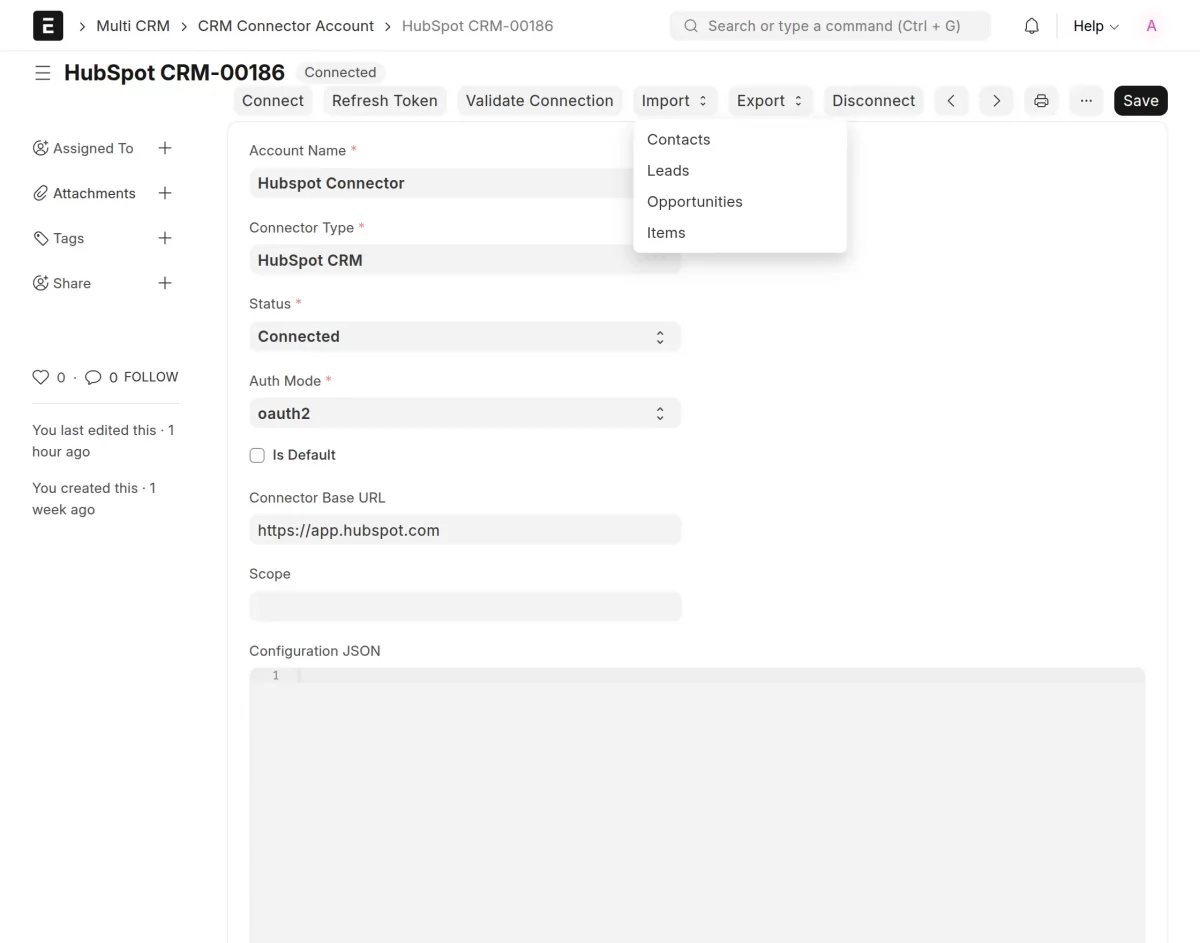
Import Records from HubSpot CRM
Import Contacts, Leads, Opportunities, and Products from HubSpot CRM into ERPNext.
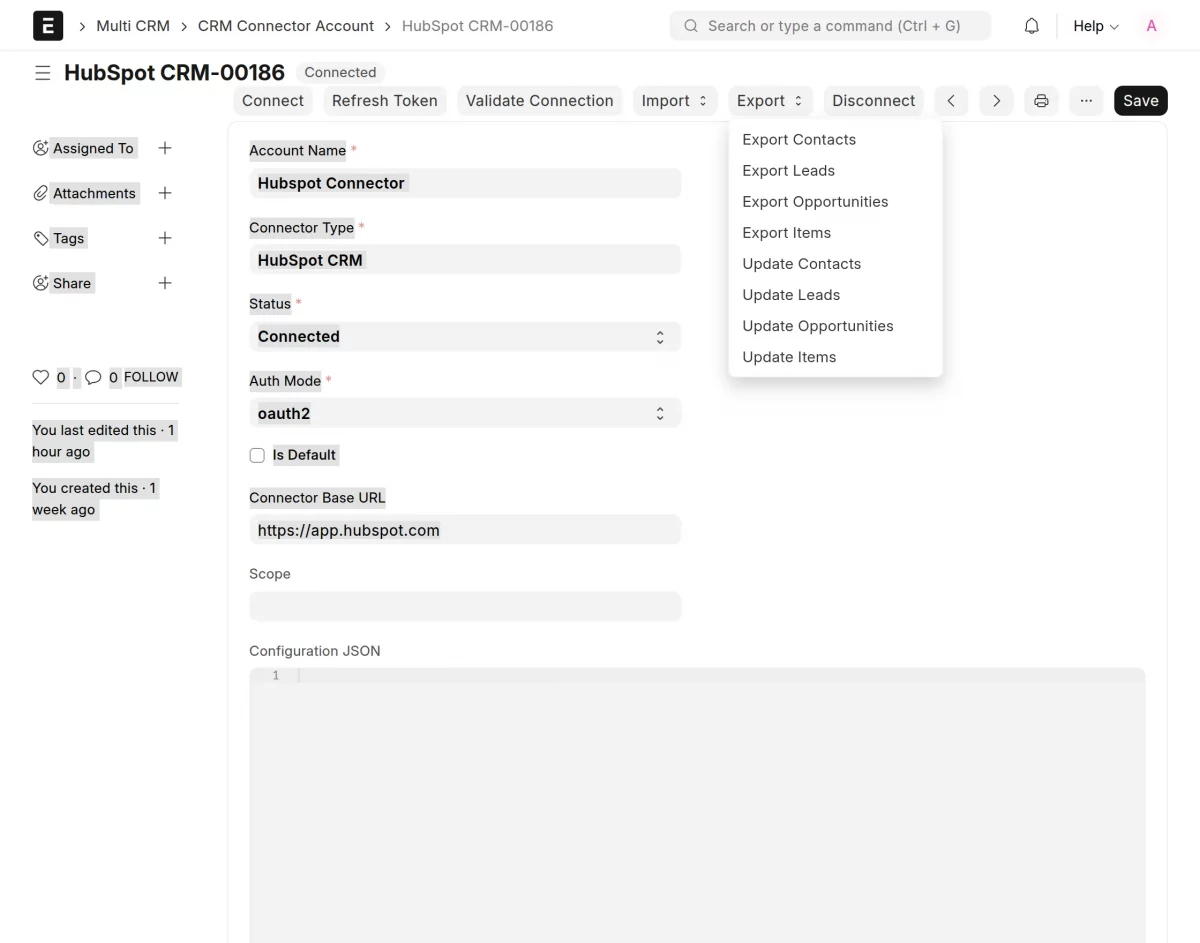
Export Records to HubSpot CRM
Export Contacts, Leads, Opportunities, and Products from ERPNext to HubSpot CRM.
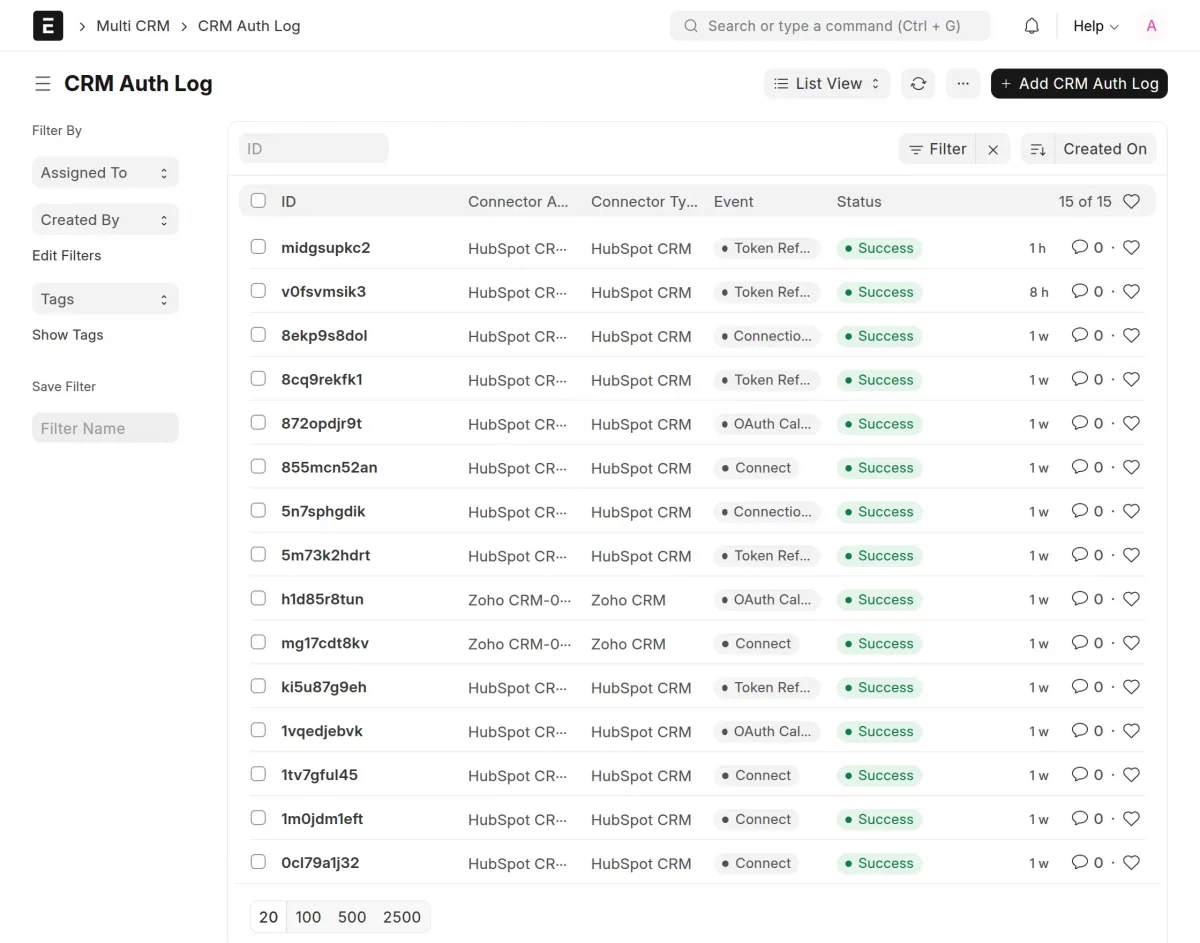
View Authentication Logs
Navigate to Authentication Logs.
Review authentication events and connection status.
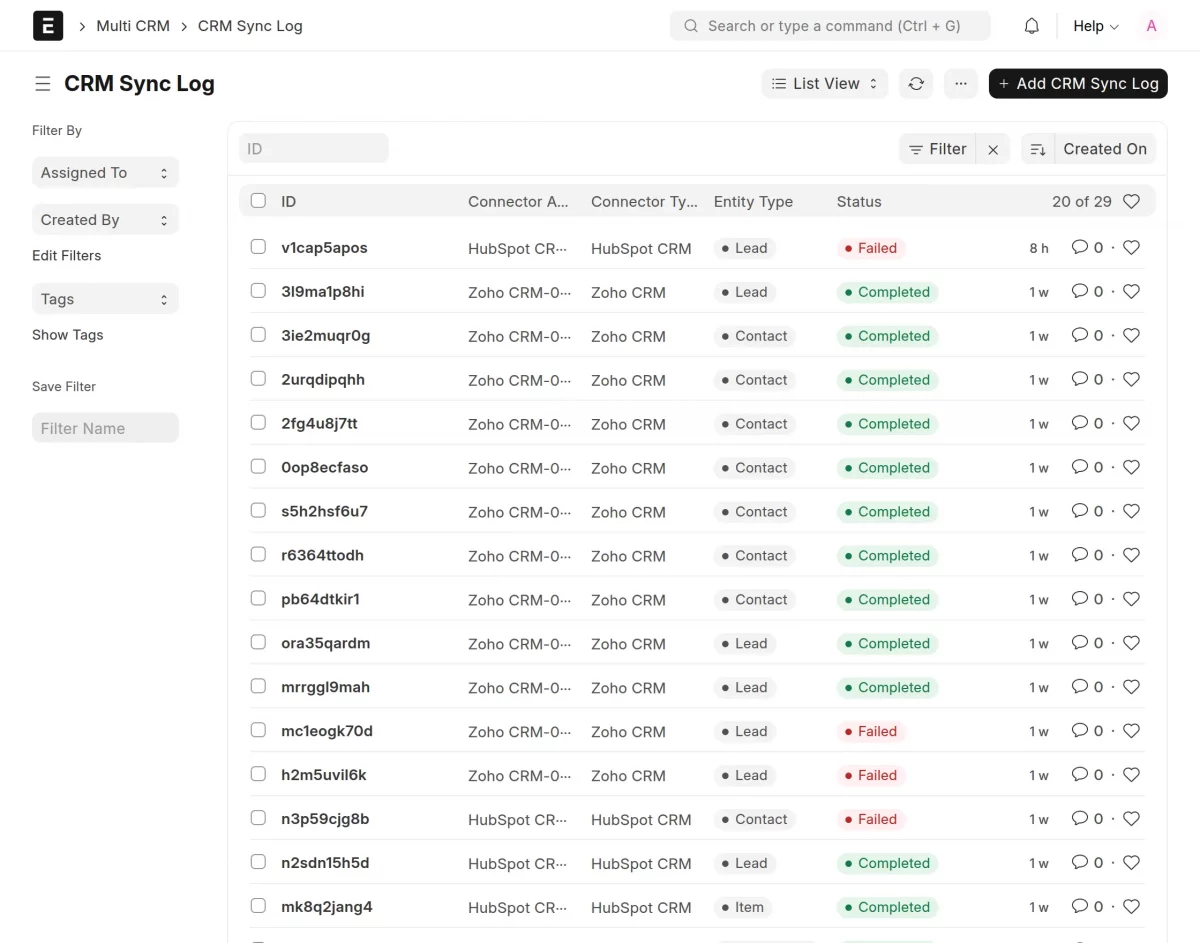
View Synchronization Logs
Navigate to Sync Logs.
Review synchronized records between ERPNext and HubSpot CRM.
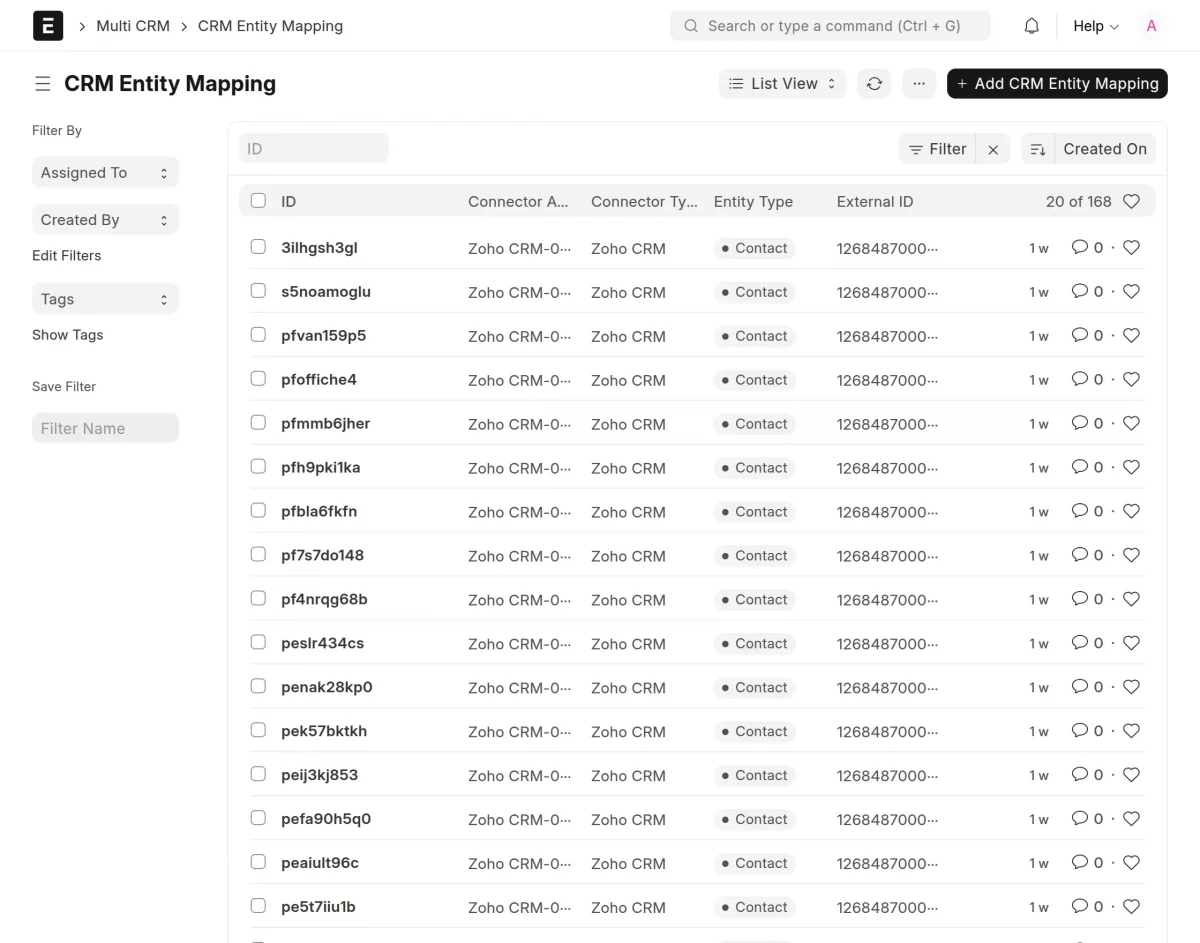
Manage Entity Mapping
Navigate to Entity Types.
View CRM entity mappings created between ERPNext and HubSpot CRM.
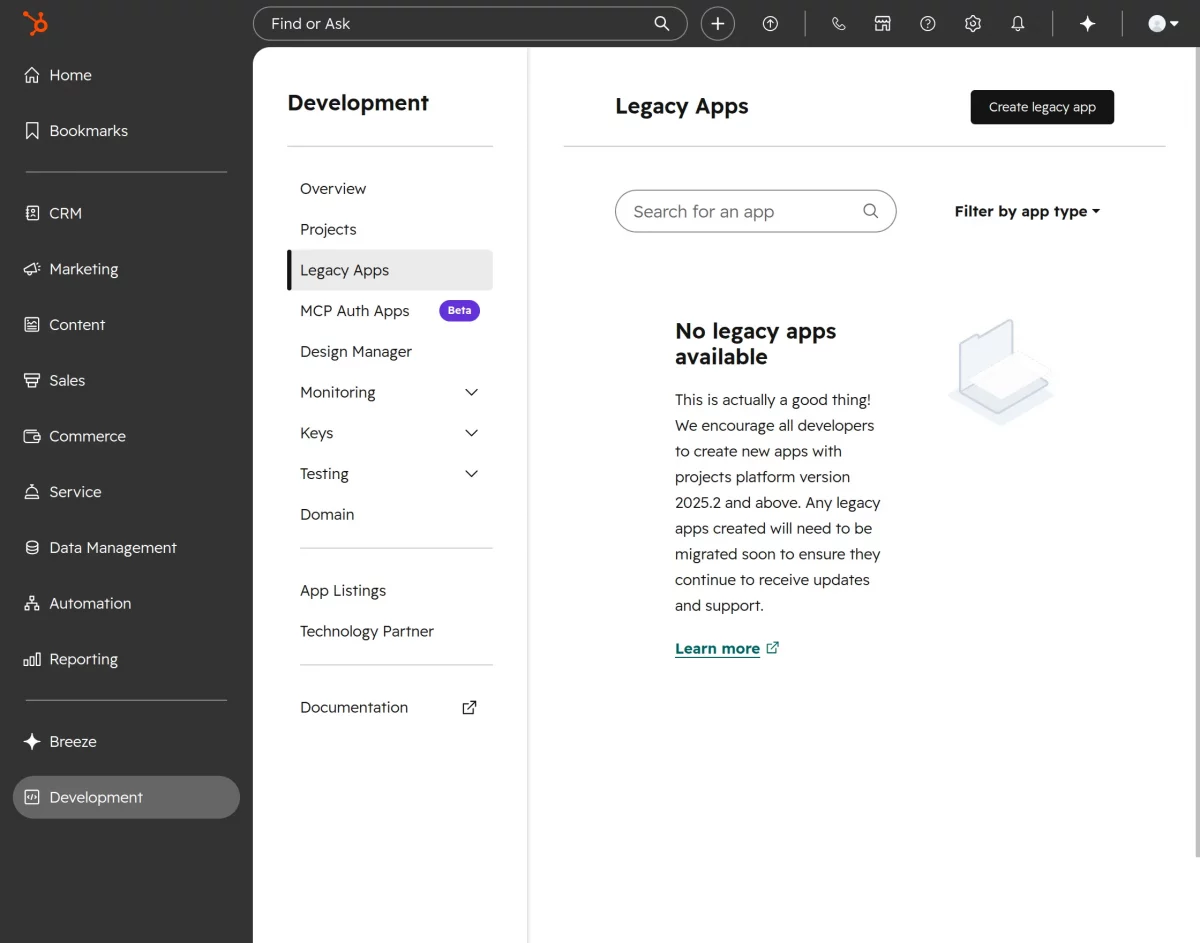
Generate HubSpot Client ID and Client Secret
Step 1
Log in to your HubSpot Developer Account.
Click Create legacy App.
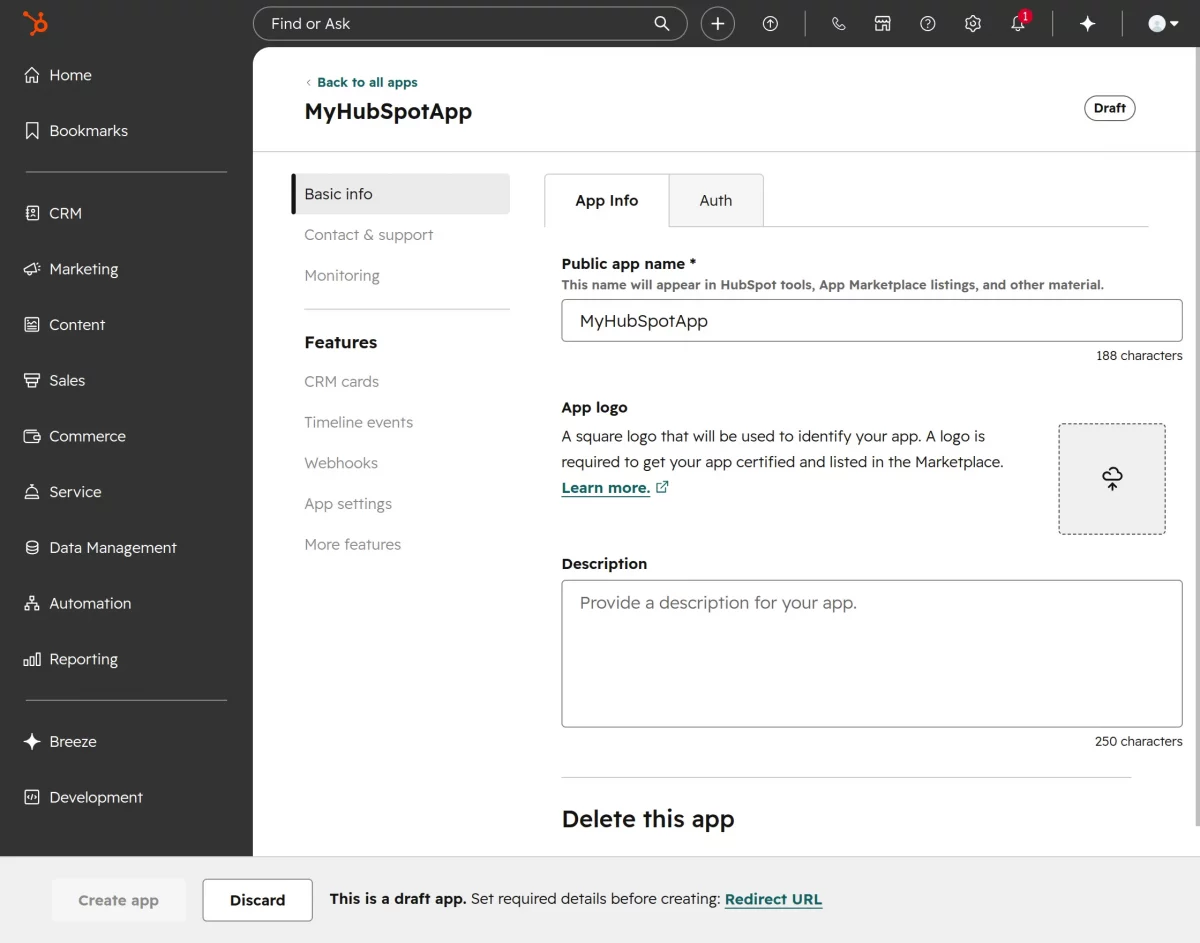
Step 2
Enter app details like public app name, app logo, and description.
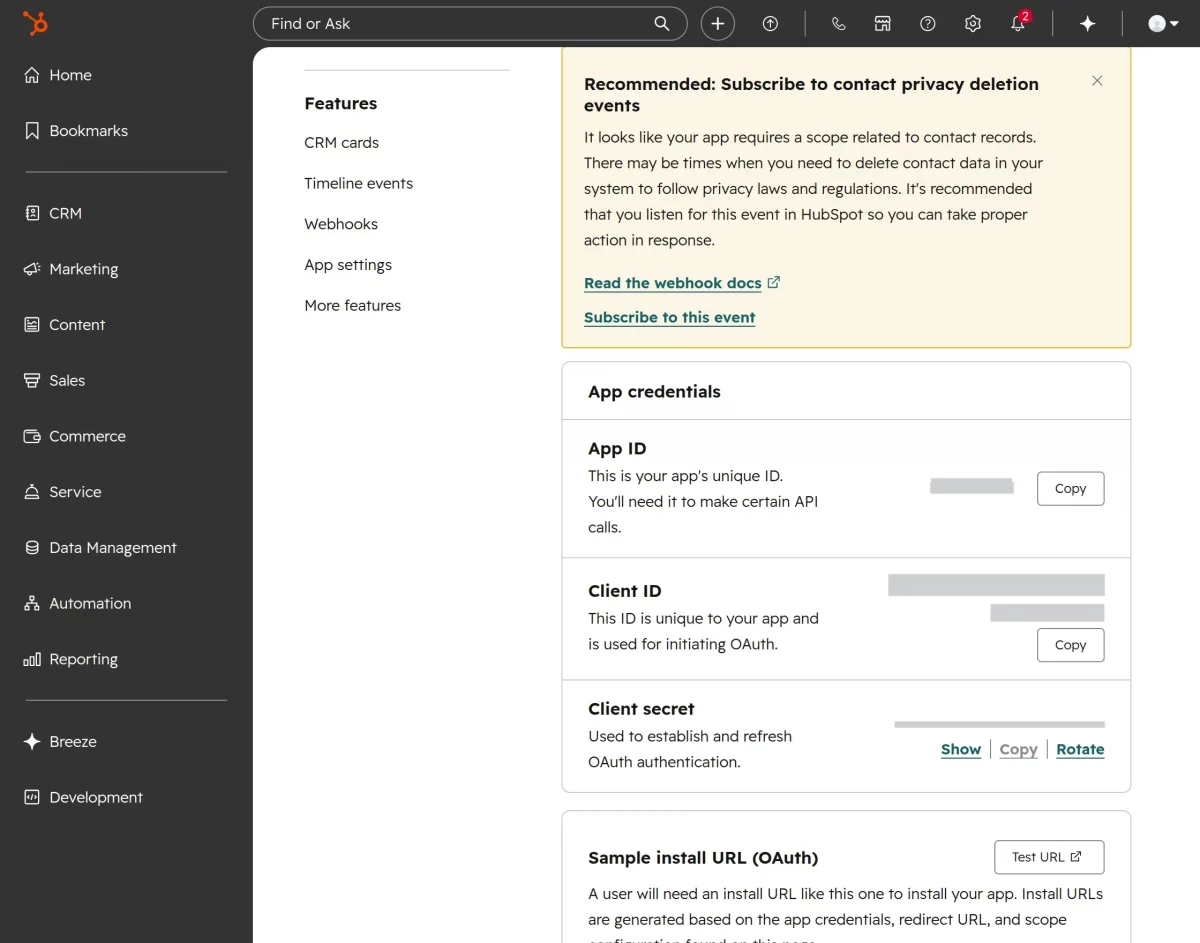
Step 3
Copy the generated Client ID and Client Secret.
Use these credentials while creating the Connector Account.
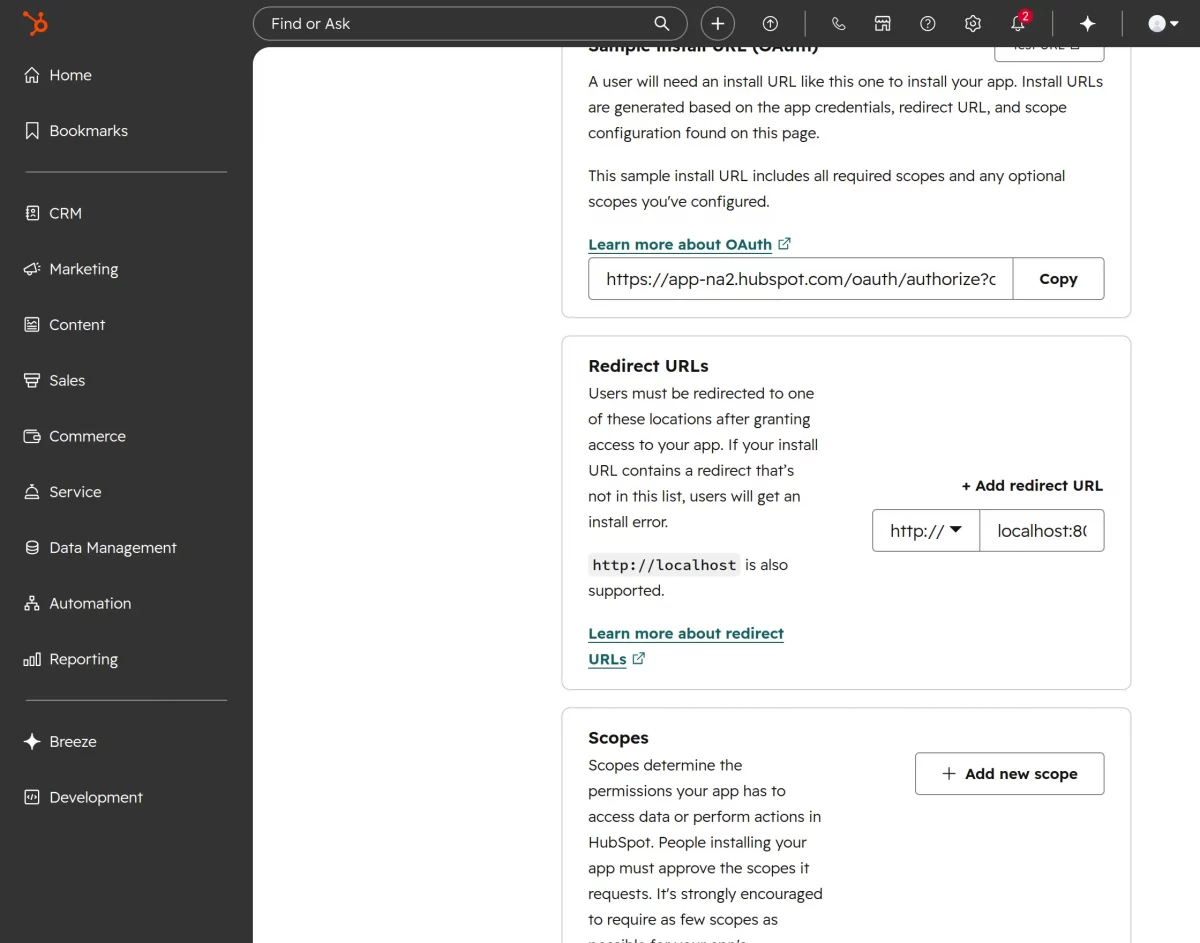
Step 4
Configure application details and OAuth settings. Add the Redirect URL required for ERPNext authentication.
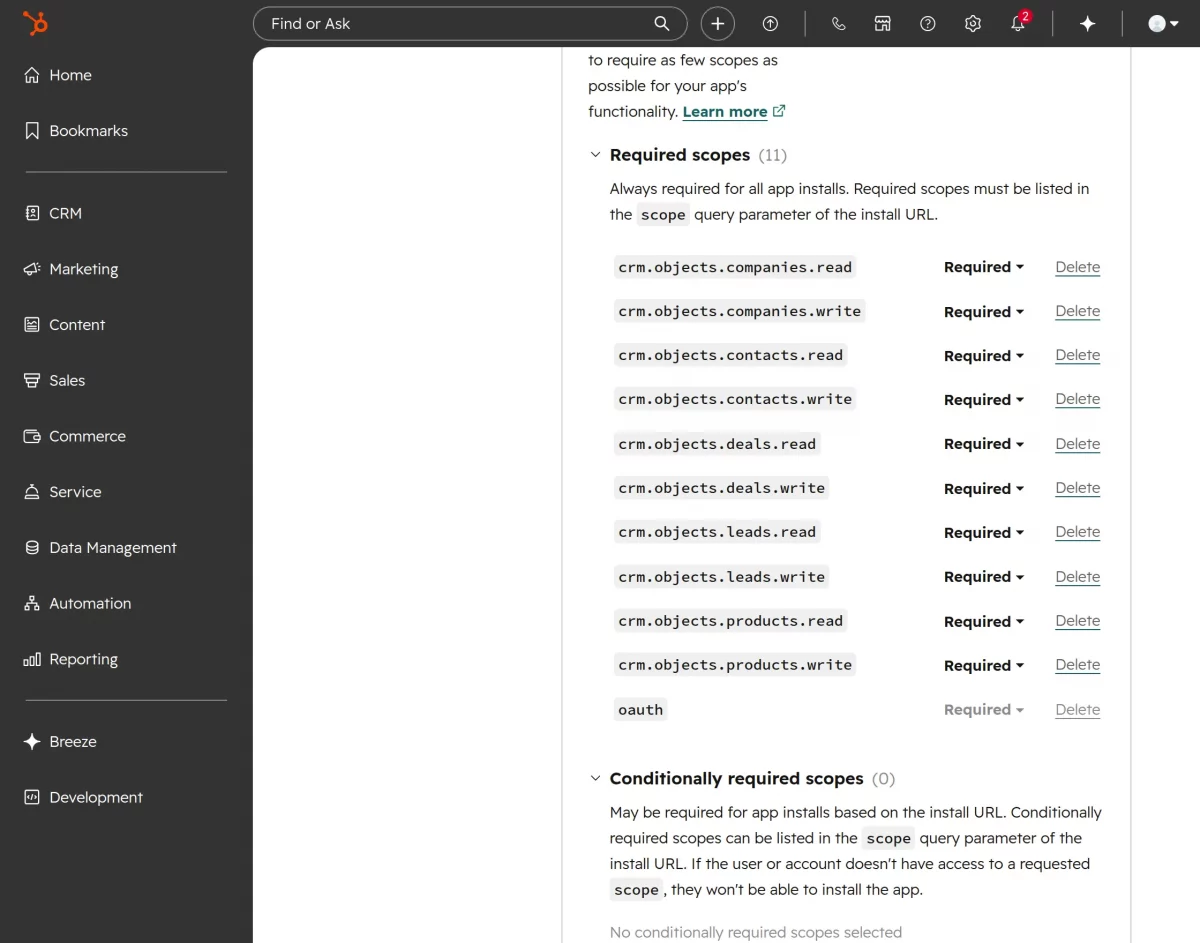
Step 5
Configure the required scopes
Need Help?
Hope you find the guide helpful! Please feel free to share your feedback in the comments below.
If you still have any issues or queries, please create a ticket at the UV Desk.
I hope this helps. In case of any further queries, contact us through our support email: support@webkul.com
Thanks for paying attention!!