User Guide for CS-Cart Canva Connect
CS-Cart Canva Connect allows administrators and vendors to edit images directly from the default CS-Cart image uploader using Canva.
The add-on adds a Design with Canva option to supported CS-Cart image uploaders.
When an image is available in an integrated image uploader, administrators can select the image, open it in Canva, make the required design changes, and return the finished image to CS-Cart.
Moreover, this makes Canva part of the existing CS-Cart image management workflow.
As a result, administrators can edit images directly without downloading them, editing them separately, and uploading the updated versions again.
The integration uses OAuth 2.0 + PKCE to connect CS-Cart with Canva.
Features of CS-Cart Canva Connect
- Add a Design with Canva option to supported CS-Cart image uploaders.
- Allow administrators and vendors to edit images from the CS-Cart backend.
- Open an existing uploaded image directly in Canva.
- Edit CS-Cart images without manually downloading them.
- Return the edited design directly to CS-Cart.
- Automatically replace the original image after editing.
- Retain the same image ID after the image is updated.
- Keep the image in its existing gallery position.
- Automatically clear cached thumbnails after an image update.
- Connect CS-Cart with Canva using OAuth 2.0 + PKCE.
- Configure Canva Client ID and Client Secret from the CS-Cart backend.
- Select the format in which the edited image is returned.
- Support Same as Source, JPG, PNG, GIF, and WebP output options.
- Use Canva editing from supported CS-Cart image widgets.
- Edit different store images wherever the integrated CS-Cart image uploader is available.
- Reduce the need for separate image download and upload workflows.
How CS-Cart Canva Connect Works
CS-Cart Canva Connect works with the existing CS-Cart image upload workflow.
When an image uploader supports the Canva integration, an administrator can use the Design with Canva option associated with the uploaded image.
The workflow is:
CS-Cart Image Uploader → Design with Canva → Canva Editor → Return to CS-Cart → Update Existing Image
The existing CS-Cart image uploader remains the starting point for the image workflow. Canva is used as the editing environment, while CS-Cart continues to manage the image and its location in the store.
Therefore, the add-on is not limited to a single type of store image. Instead, it provides Canva editing functionality wherever the CS-Cart image uploader is integrated with the add-on.
Canva Integration Setup
First, to connect Canva with CS-Cart, sign in to your Canva account and create an integration using the Canva Connect API.
Step 1: Sign In to Canva
“First, sign in to your Canva account using your preferred sign-in method.”

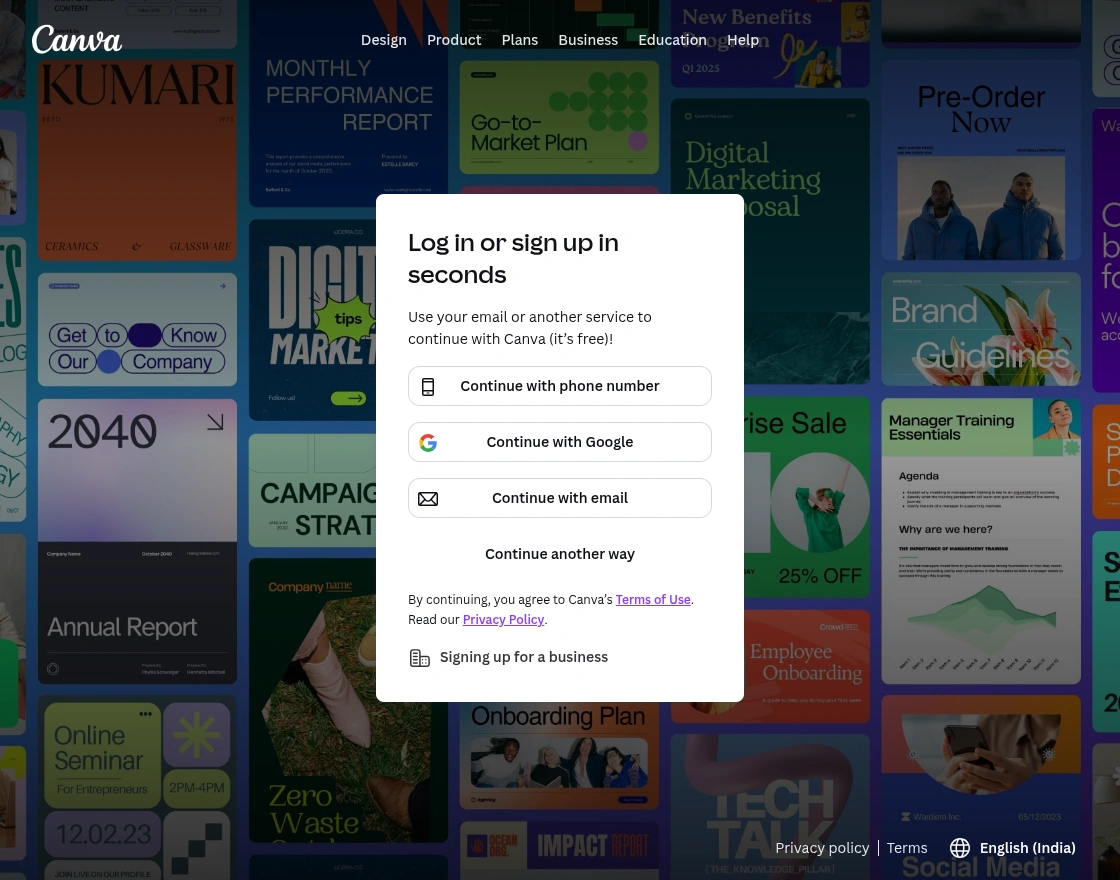
After signing in, open the Canva developer/integration section to create an integration for your CS-Cart store.
Step 2: Create a Canva Integration
In the Canva developer section, locate the Connect API integration area.
Furthermore, Canva provides the Connect API to create integrations that connect Canva with external platforms and enable access to designs, assets, and other Canva functionality.
Click Create an integration to start creating the integration required for CS-Cart Canva Connect.


You can use the Canva Connect API documentation for the integration requirements and available capabilities. Canva Connect API Documentation
Step 3: Create the Integration for CS-Cart
Next, after clicking Create an integration, follow the Canva setup process to create the integration that will be used by your CS-Cart store.
Before creating an integration, set up MFA for your account, then close the window to continue.

Additionally, the created integration provides the credentials and configuration values required to establish a connection between Canva and CS-Cart.
After setting up MFA, select your integration type: Public or Private.
- Public integration: Allows CS-Cart administrators and vendors to connect their Canva accounts. Administrators can use the integration for testing. The integration must be published before vendors can use it.
- Private integration: available only to your team and requires a Canva Enterprise plan.

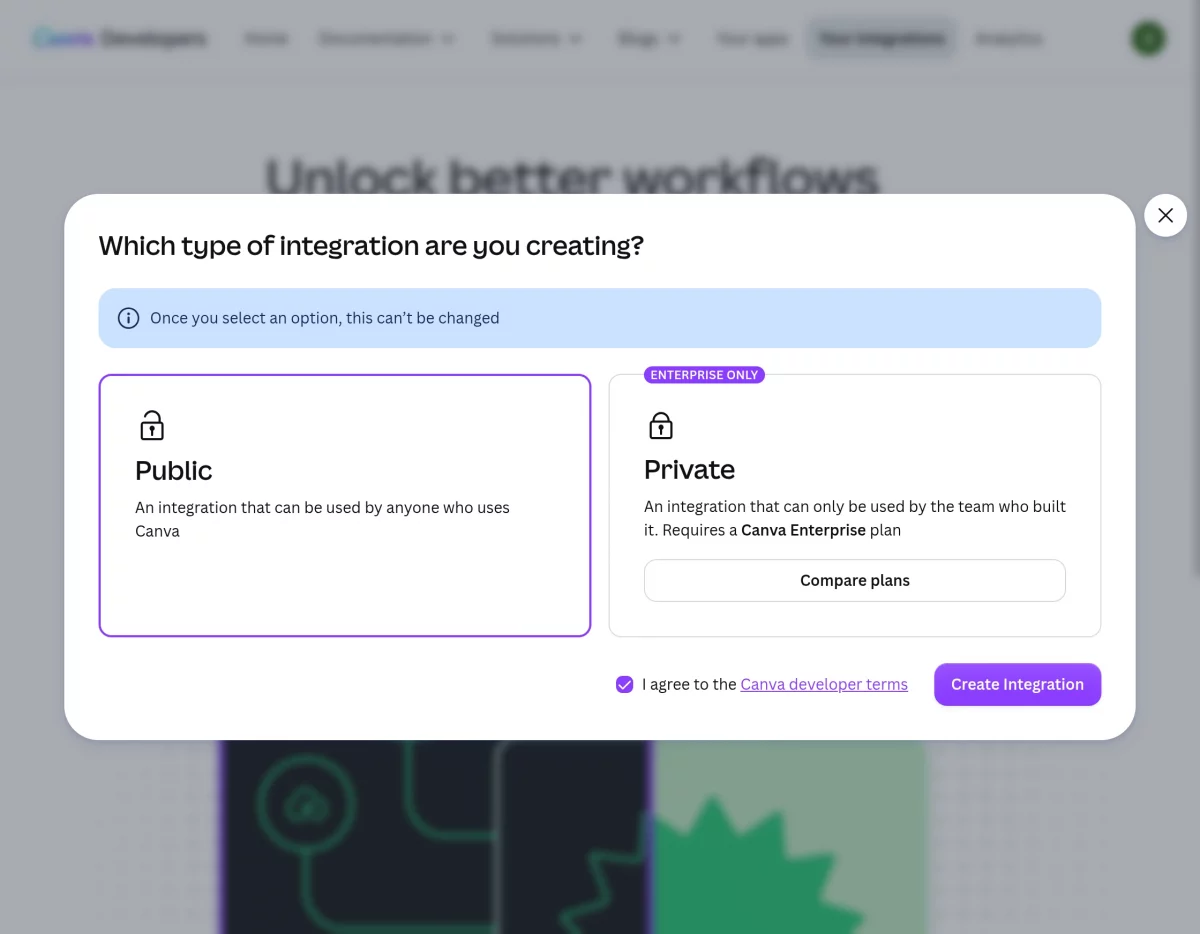
After selecting the integration type, configure your integration by entering an integration name, then click “Generate another secret” and securely save the Client ID and Client Secret.
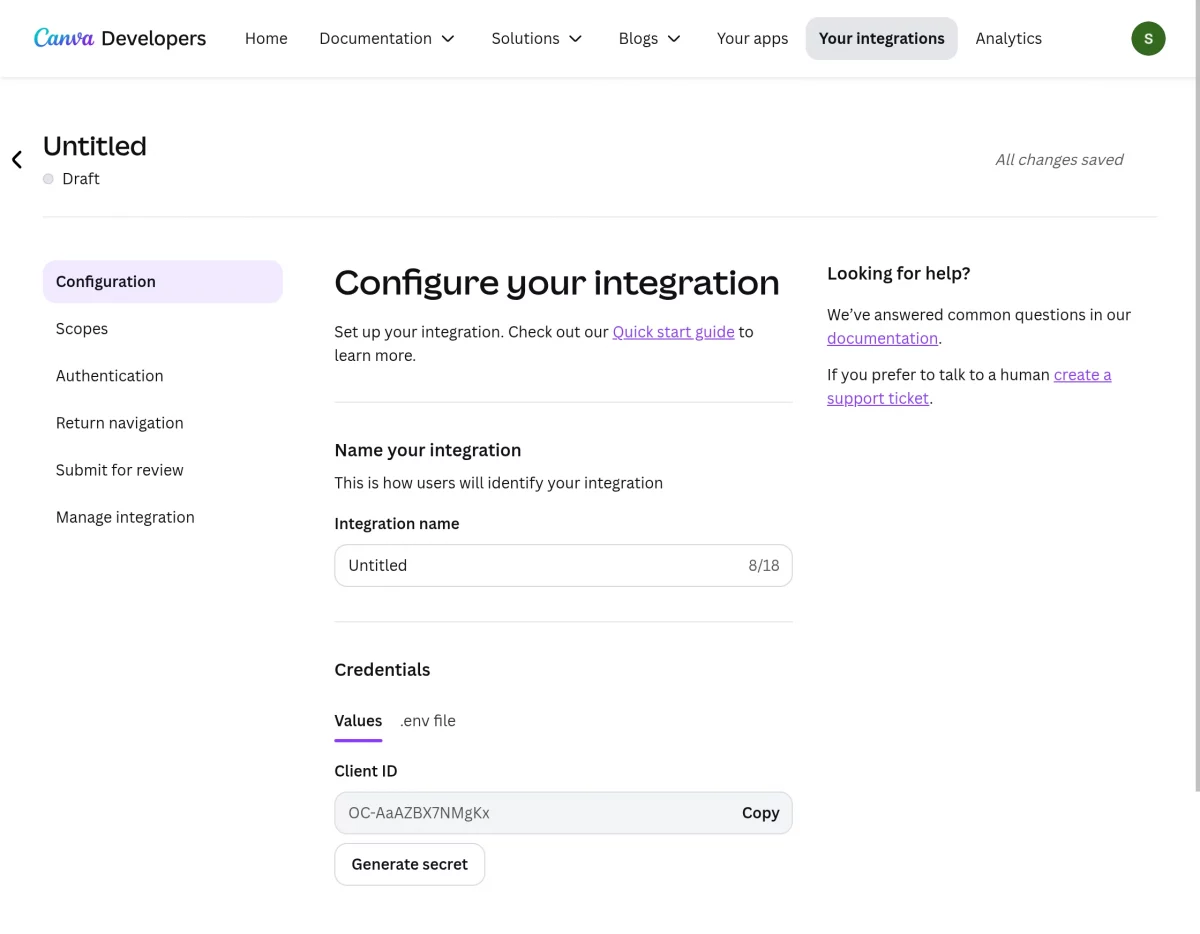
The Client ID and Client Secret generated for the integration are later entered in:
CS-Cart Admin Panel → Add-ons → Canva Connect → Settings
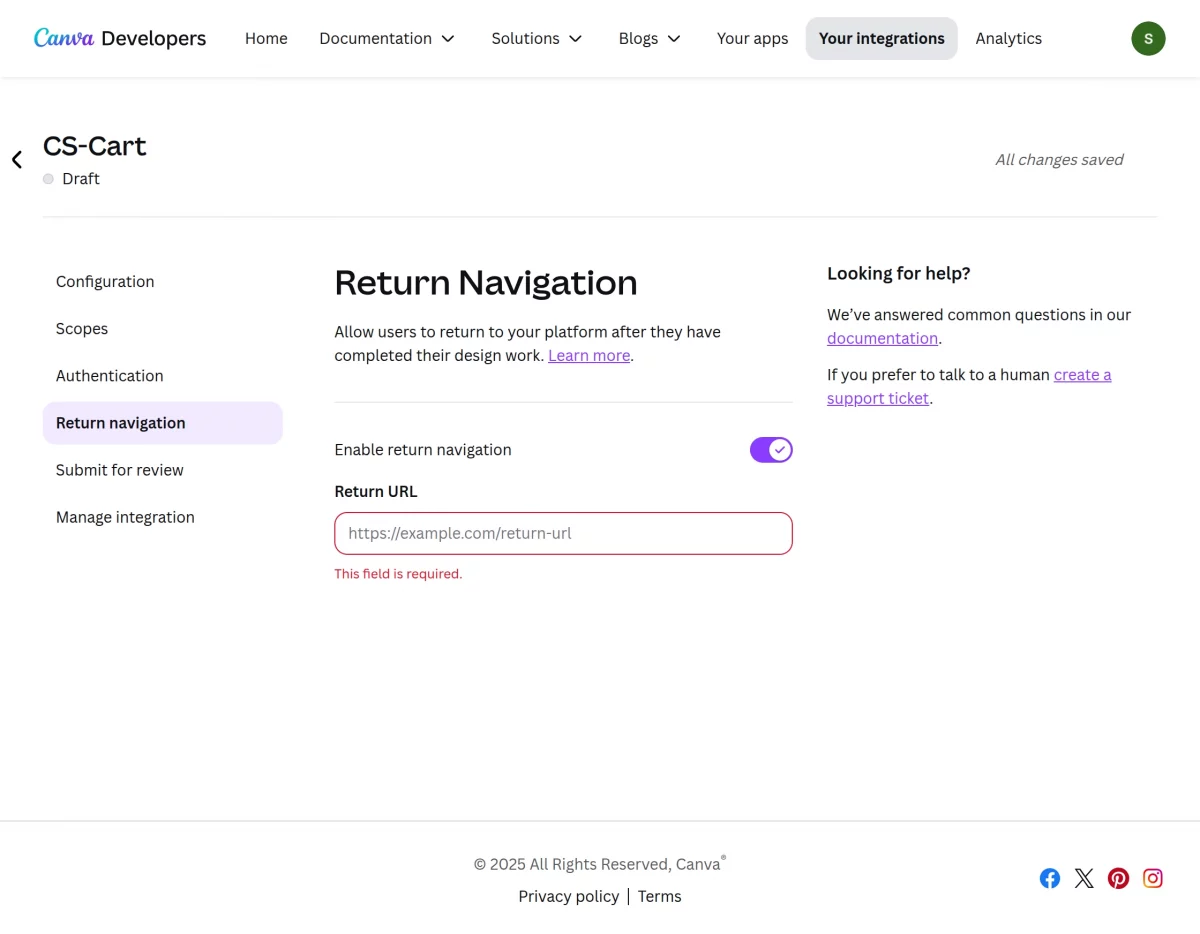
Additionally, the Authorized Redirect URL and Return URL can be found in the Add-on Configuration section in CS-Cart. Copy these URLs and add them to their corresponding fields in Canva.
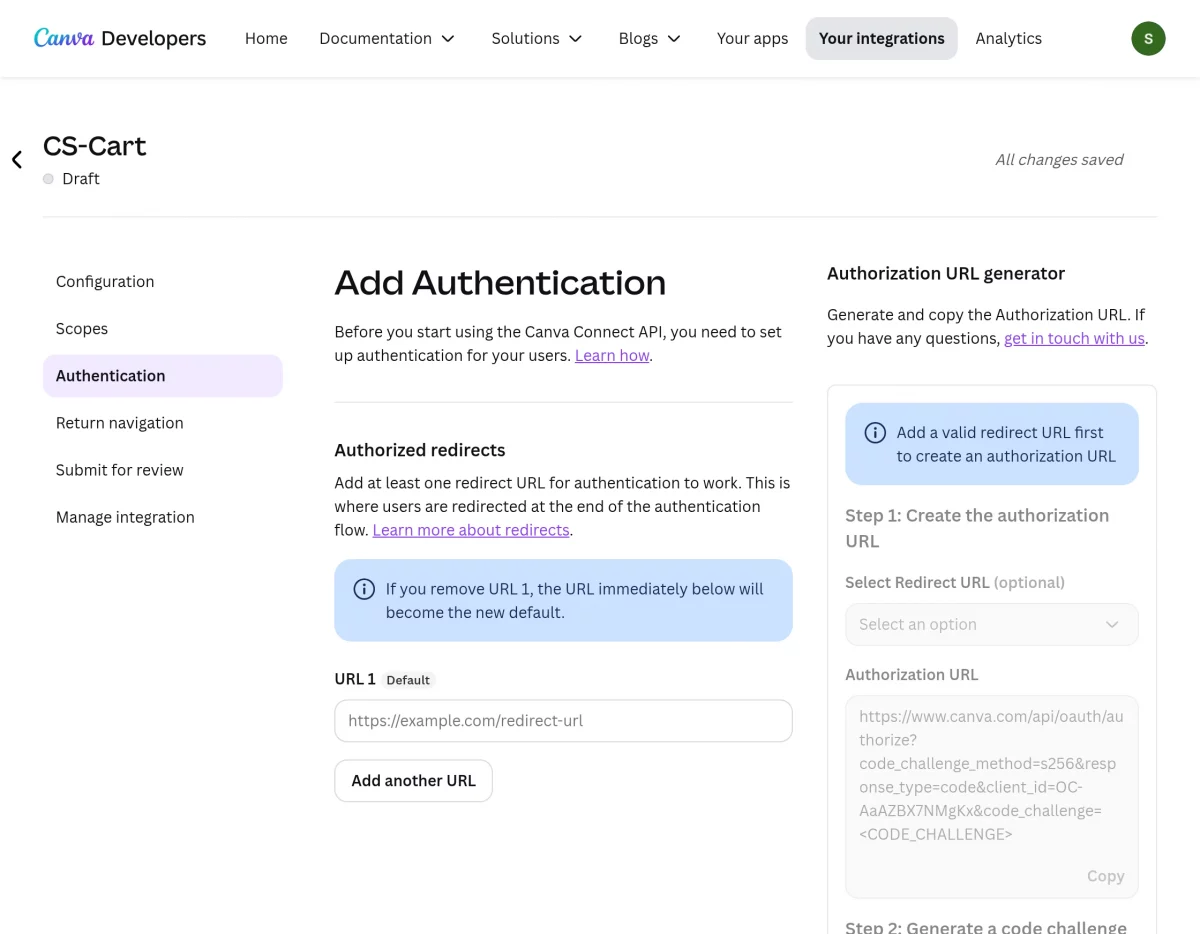
At the end of the Canva setup, enter the Return URL copied from the Add-on Configuration section in CS-Cart.
How To Upload And Install CS-Cart Canva Connect
When you download the User Guide for CS-Cart Canva Connect Add-on you’ll get one zip file, one install.txt file, and a relevant User Guide manual doc. Read it carefully for proper configuration.
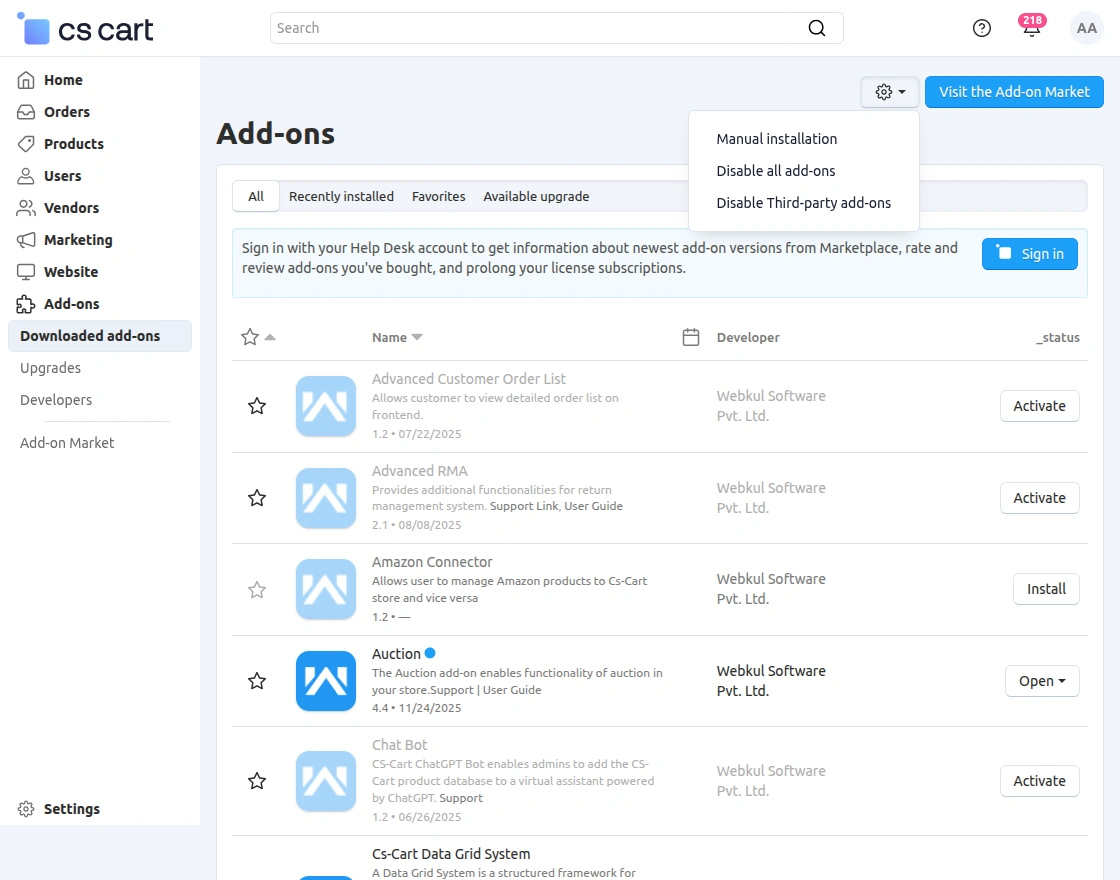
Go to Manage Add-ons, and click on the Settings icon > Manual Installation as shown below in the snapshot.
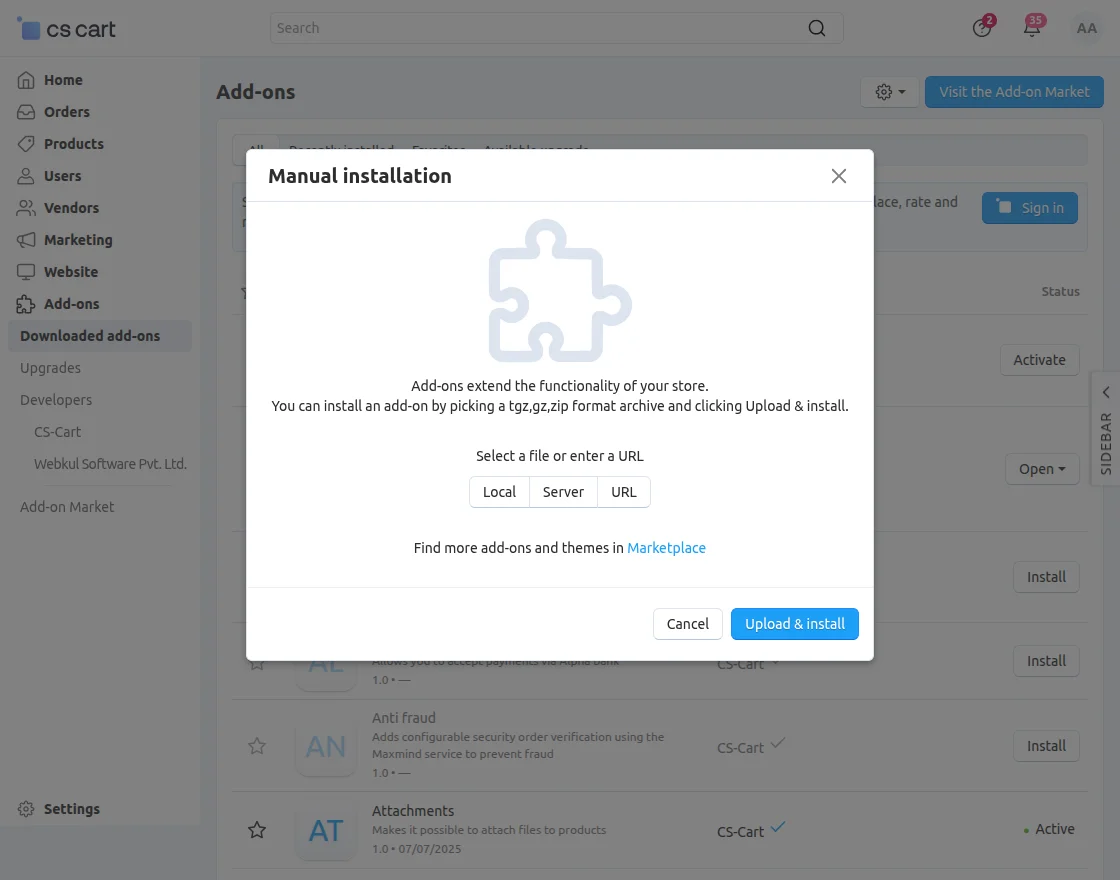
Click on “Local” to browse the zip file and then click on “Upload & Install” as shown below in snapshot.
Add-on installed successfully!
Once the addon is installed successfully, we need to configure the settings of the addon.
Configure Canva Connect in CS-Cart
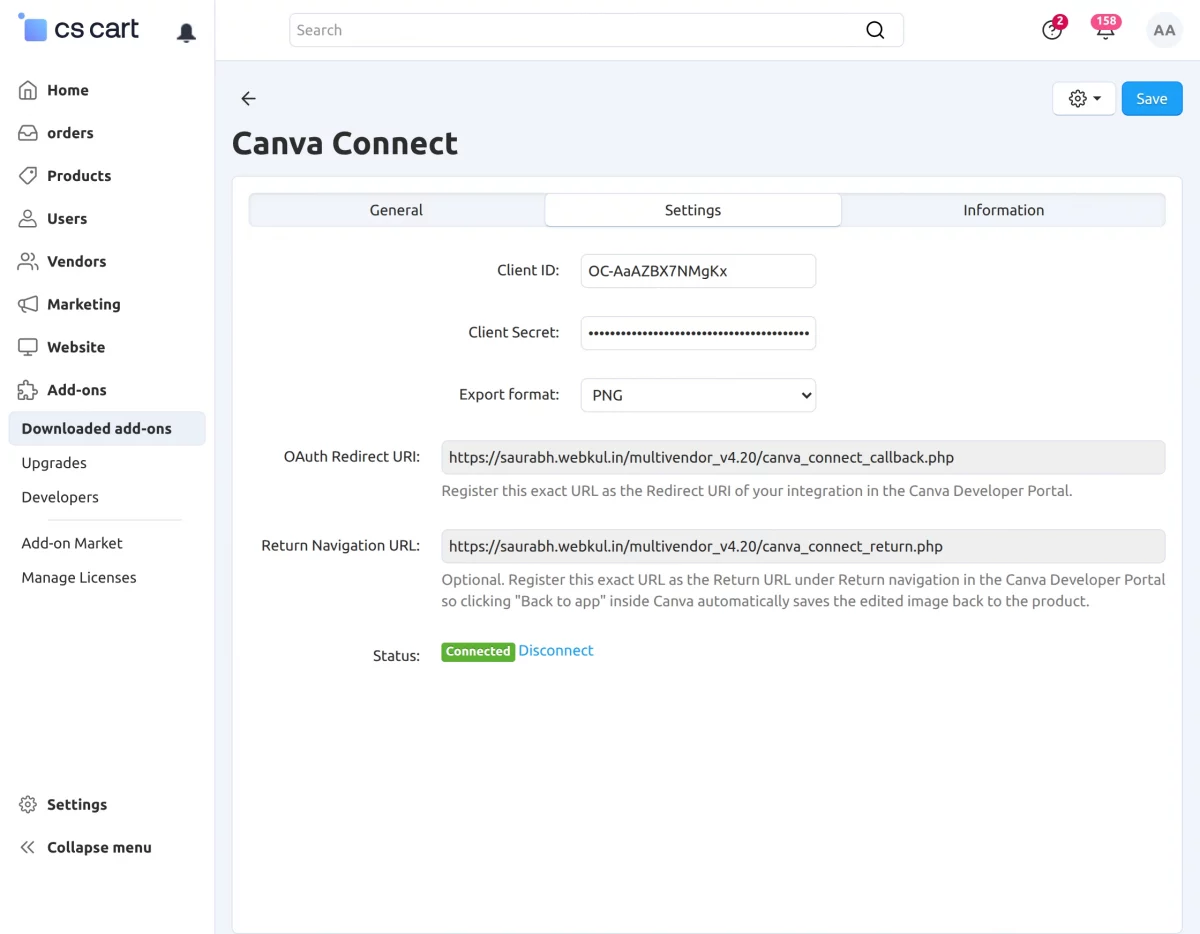
Fill in the following fields:
- Client ID: Enter the Client ID copied from the Canva Developer Portal.
- Client Secret: Enter the Client Secret copied from Canva.
- Export Format: Select the required export format, or keep Same as source.
- OAuth Redirect URI: Enter the exact Redirect URI provided in the CS-Cart add-on configuration.
- Return Navigation URL: Enter the exact Return Navigation URL provided in the CS-Cart add-on configuration.
- Status: Click Connect to Canva to connect the integration.
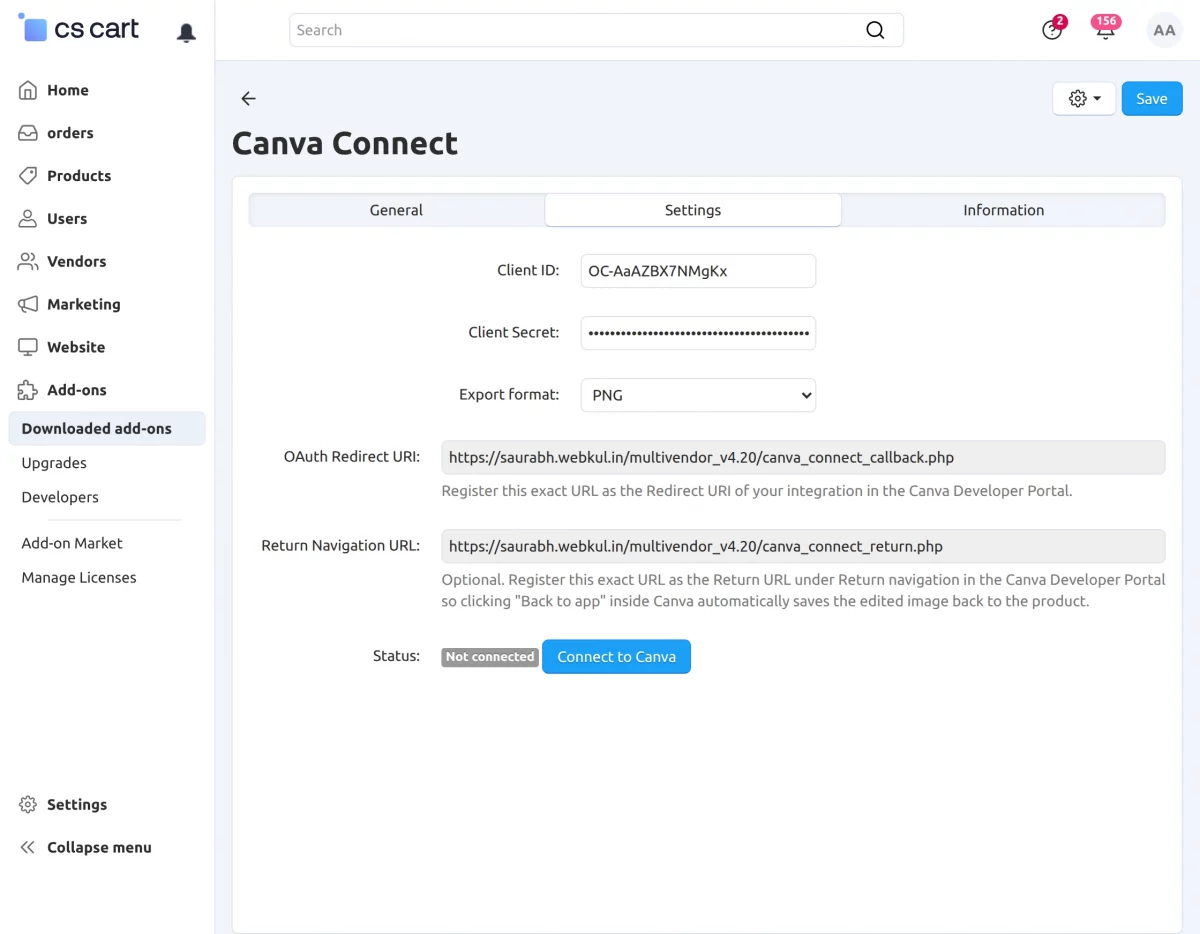
Click Connect to Canva to connect the integration. You will be redirected to the Canva authorization page to authorize the connection.
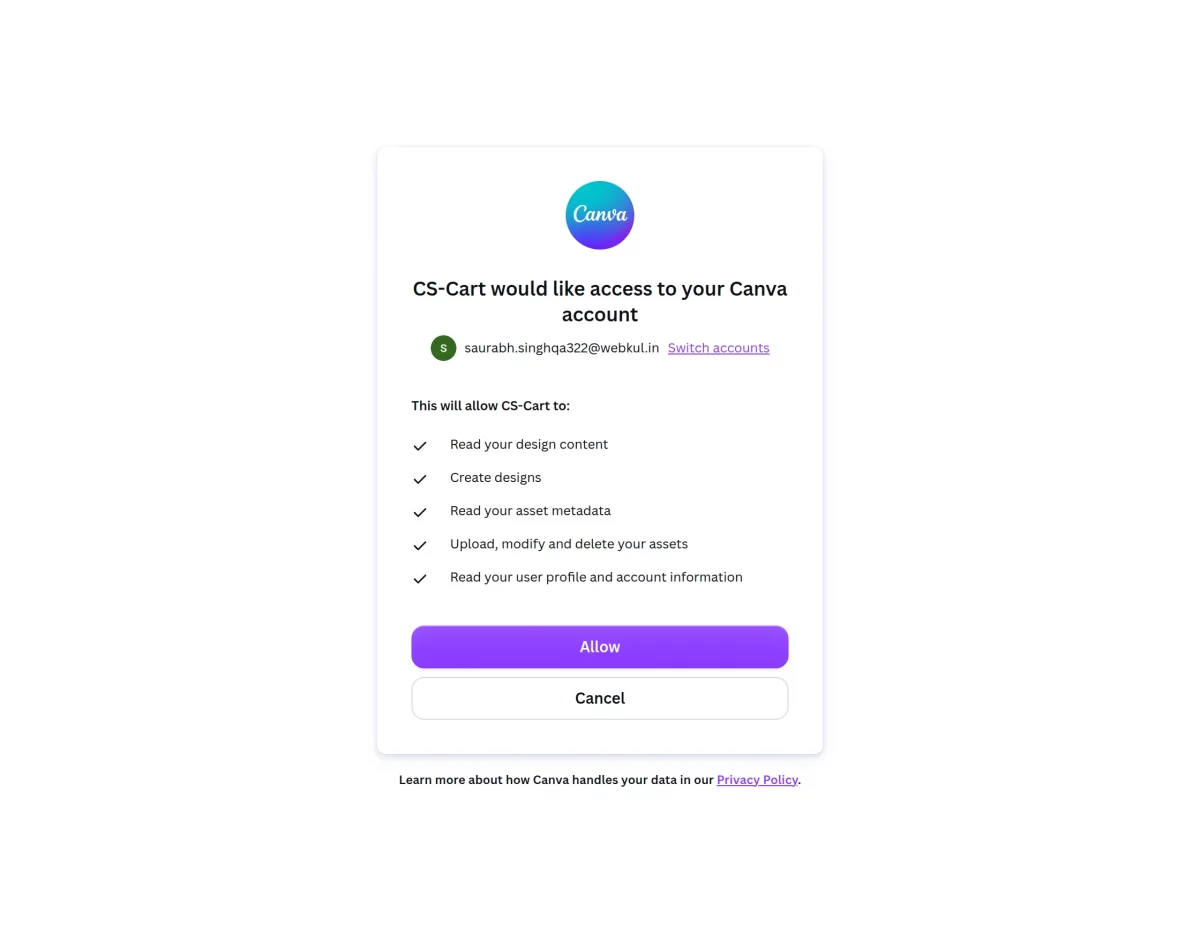
After clicking Allow on the Canva authorization page, the CS-Cart add-on settings will show the status as Connected.
How the Canva Connect Add-on Works in CS-Cart
The Canva add-on integrates with the default CS-Cart image uploader, so you can easily create, edit, and replace images directly from your CS-Cart store.
Where Can You Use It?
The Canva option is available wherever the default CS-Cart image uploader is used, including:
- Products
- Categories
- Promotions
- Banners
- Blog posts
- Other image upload areas
Edit Images with Canva
Now, let’s see how to edit product images using the Canva add-on in CS-Cart.
To edit the image, click Design with Canva in the top-right corner of the image.
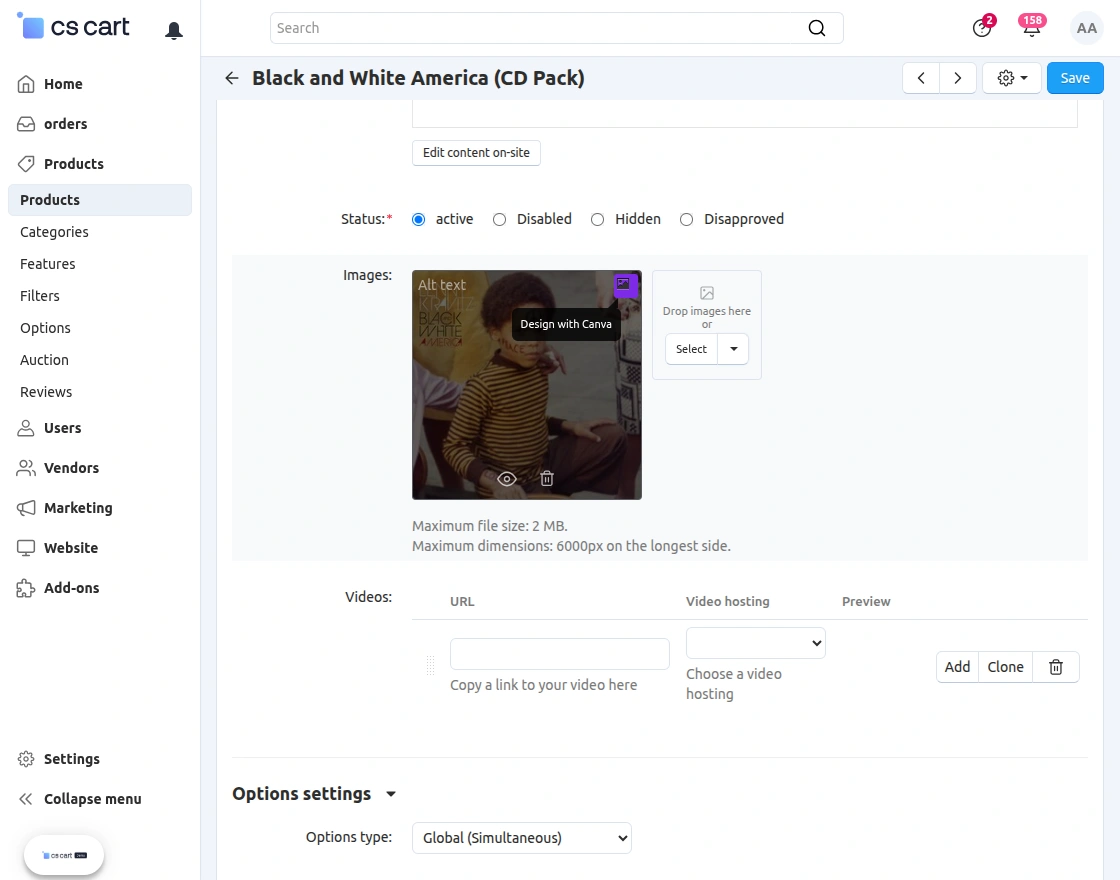
Click the Design with Canva option to open the image editor.
This will open the Canva editing page, where you can edit and customize the image as needed.

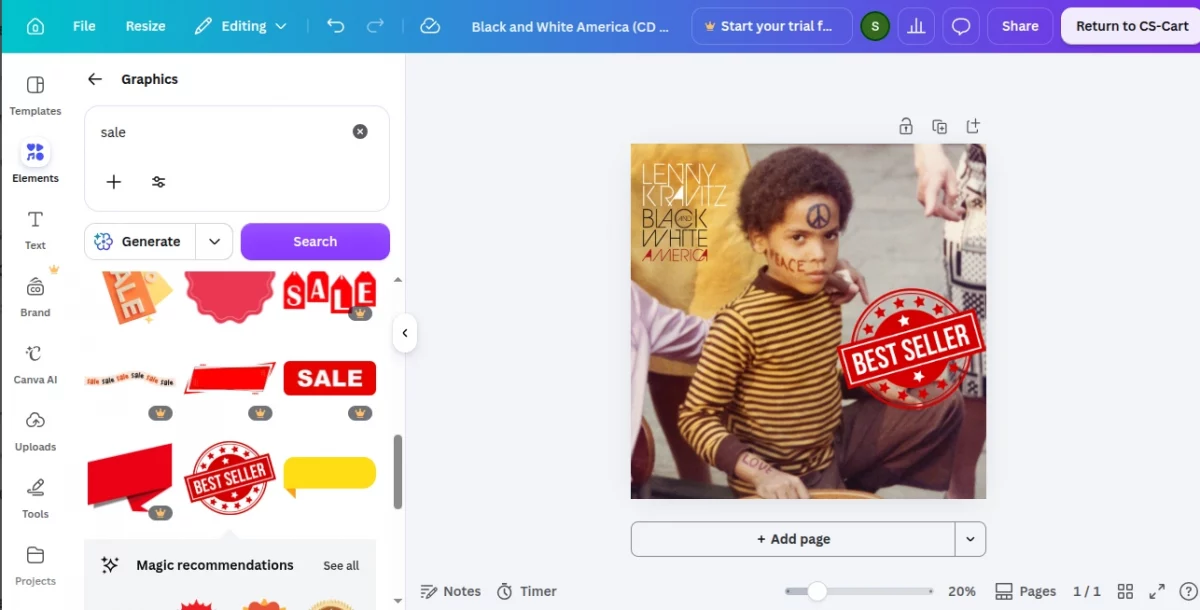
Once you’re done, click Return to CS-Cart (or the integration name you configured) to return to your CS-Cart store.
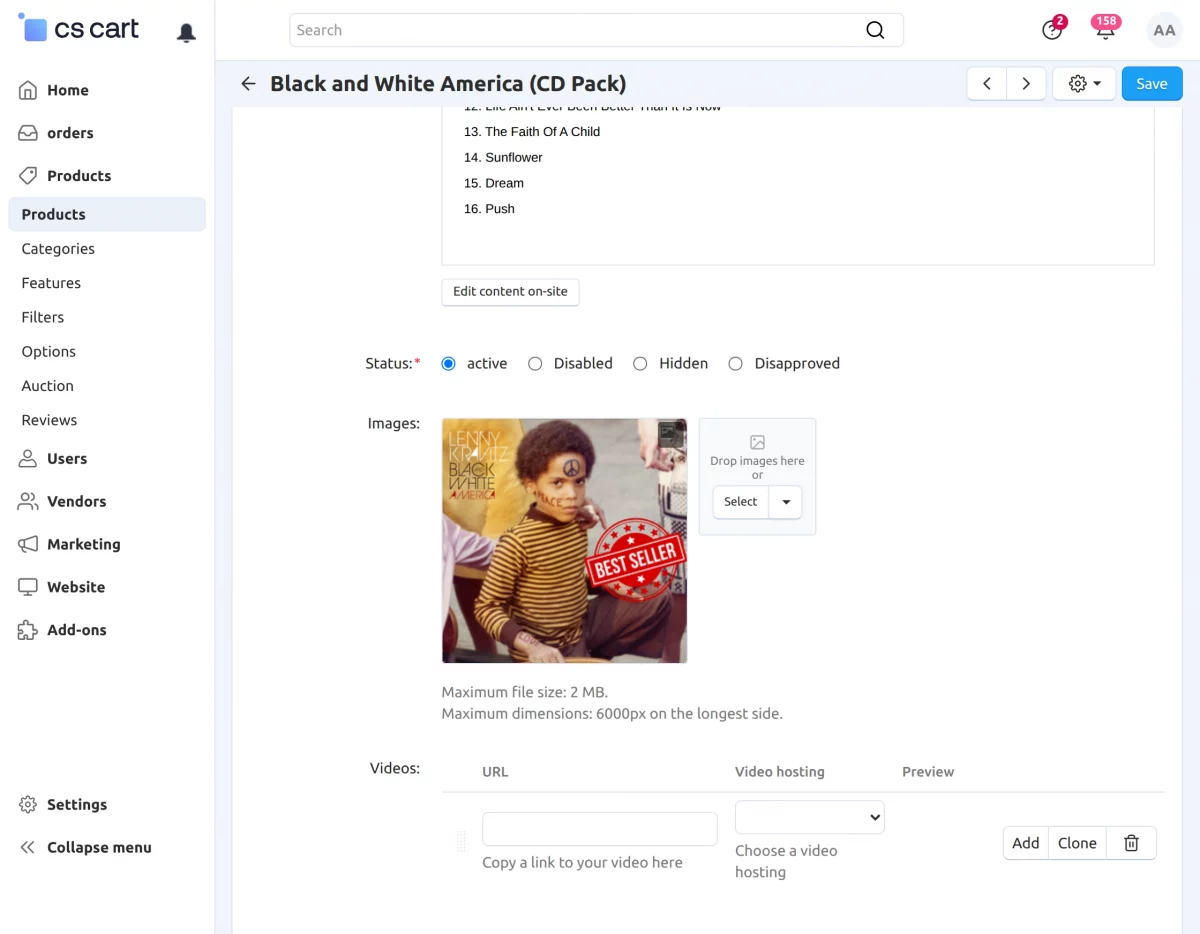
The edited image is added back to the corresponding CS-Cart image uploader.
Finally, once saved, the edited product image will appear on the storefront as the product’s updated image.
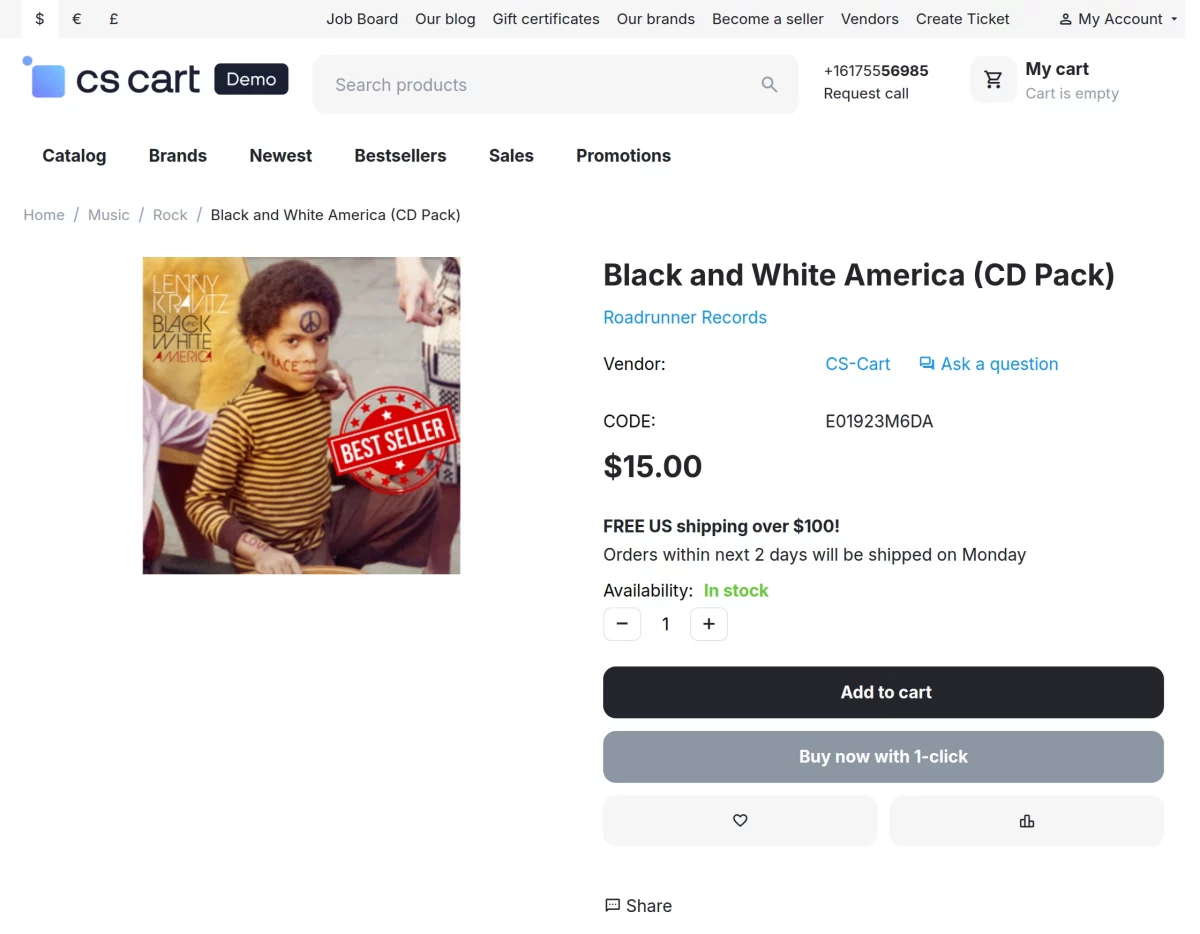
This allows you to edit and update images directly within CS-Cart without downloading and re-uploading them manually.
Moreover, you can use Canva to edit images across all default CS-Cart image uploaders, making it easy to customize and update images wherever needed.