User Guide of Prestashop Generate AI Model by Image
Table of Content
Prestashop Generate AI Model by Image allows admins to generate and save AI model images for their products based on features like age, gender, physique, and skin tone.
Customers can also virtually try on products by selecting the model features and generating realistic AI-based models using artificial intelligence in just a few simple steps.
With this module, merchants can significantly reduce time and photography costs while maintaining a uniform and professional look for their products.
NOTE: Prestashop Generate AI Model by Image is compatible with the PrestaShop Multi-store feature.
Features of Prestashop Generate AI Model by Image
- Use either QWEN or GEMINI NANO for generating AI model images.
- Enable this module for the front office or the back office.
- Generate the model image from the product settings in the back office.
- Choose to save the generated image for that product.
- Enable virtual try-on for products in the front office.
- Save a custom prompt for generating the image.
- Customers will view a button below the product thumbnail.
- Customers can select model attributes and generate realistic AI-based models.
How to Install Prestashop Generate AI Model by Image
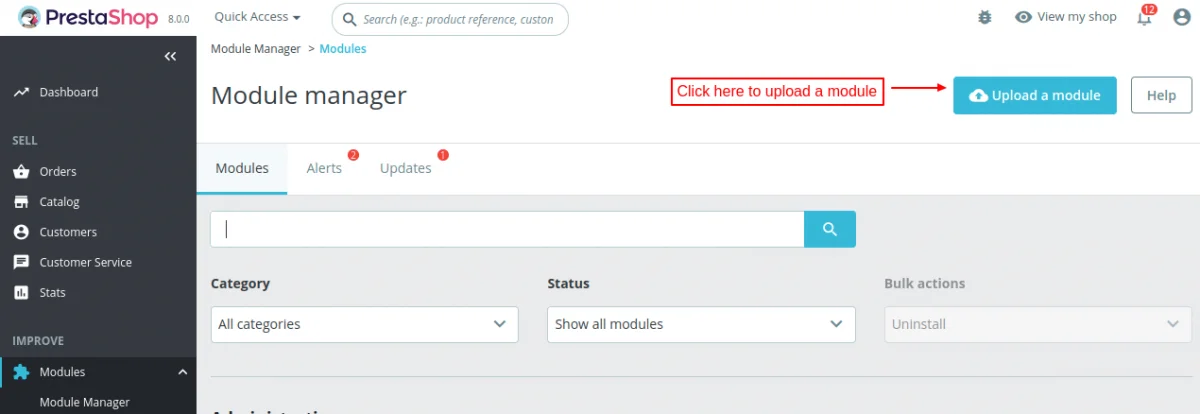
- Firstly, go to the module manager in the back office and click on ‘upload a module’.
- After that, drag and drop the module file or select the file from the system.
- In this way, the module installation will be successful.


How to get your Qwen API key?
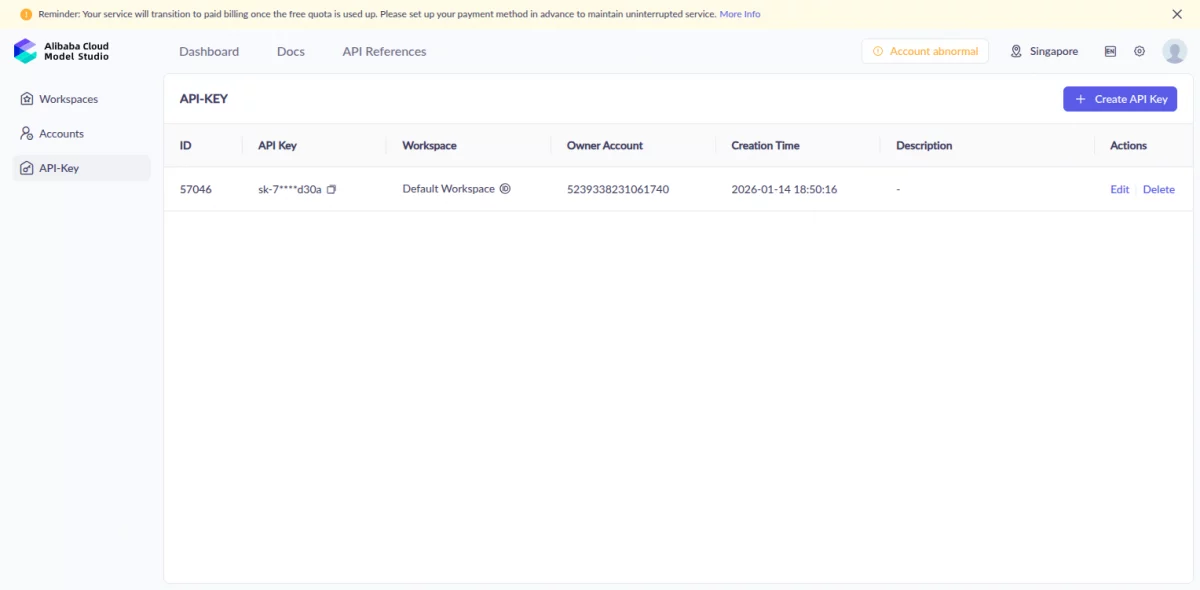
To obtain the Qwen API key, follow the following steps:
- Sign up or log in to the Alibaba Cloud console and navigate to Model Studio.
- Once the Alibaba Cloud Model Studio dashboard opens, click on the API KEY on the left sidebar.
- Click on the Create API key button, and a pop-up window appears.
- Select the account and workspace, and click on okay.
- Once you create the key, the API key dashboard displays it.

How to get your Gemini API key?
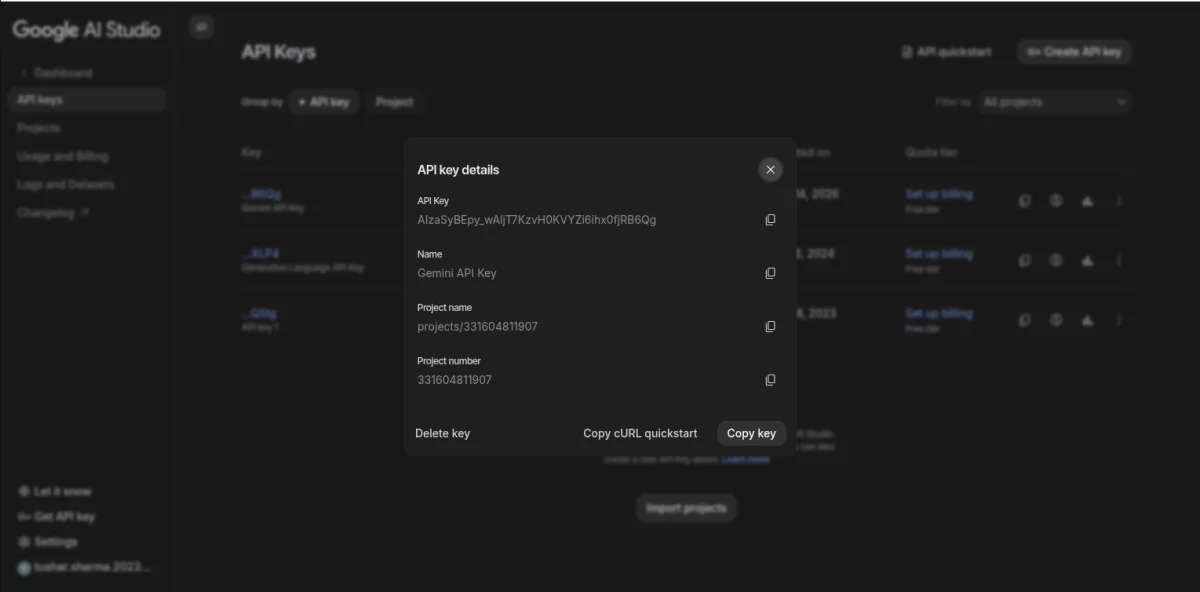
To obtain the Gemini API key, follow the following steps:
- Visit Google AI Studio and sign up with your account.
- Once you log in to Google AI Studios, click on the ‘Get API key’ option in the bottom left corner.
- When the API key dashboard opens, select the ‘Create API key’ button from the top right corner.
- Provide a name for the key along with the project name and click on the Create Key button.
- Once you create the key, it will show inside the dashboard; click on the key and copy it.

Prestashop Generate AI Model by Image Configuration
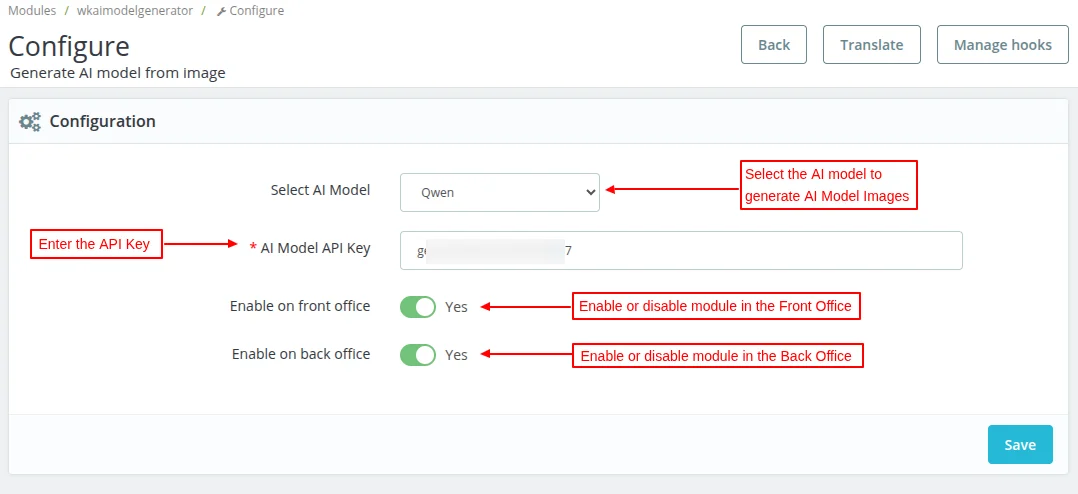
After the successful installation of the module, the admin has to configure the module. In the Module settings, the admin will have to configure the following.
- Select AI Model – Select either QWEN or GEMINI NANO to generate AI Model images
- AI Model API Key – Enter the API Key
- Enable on Front Office – Choose to enable the module on the Front Office
- Enable on Back Office – Choose to enable the module on the Back Office

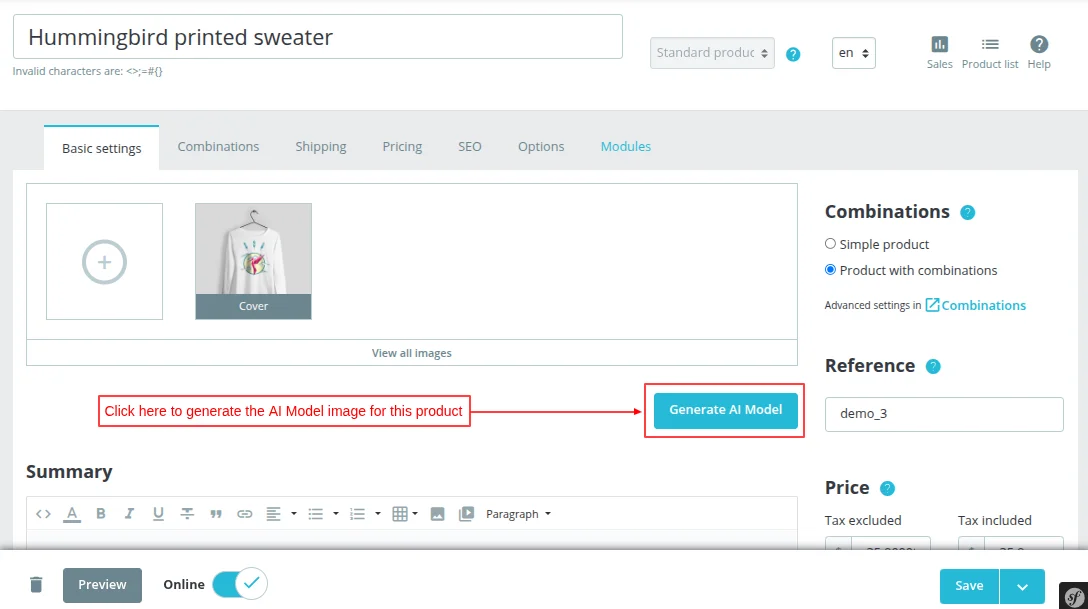
Back Office Workflow
If the module is enabled for the back office, a new button will be added in the Product settings, allowing the admin to generate an AI model for the product.

When the admin clicks the “Generate AI Model” button, a pop-up appears, on which they can choose the product image for Model Generation.

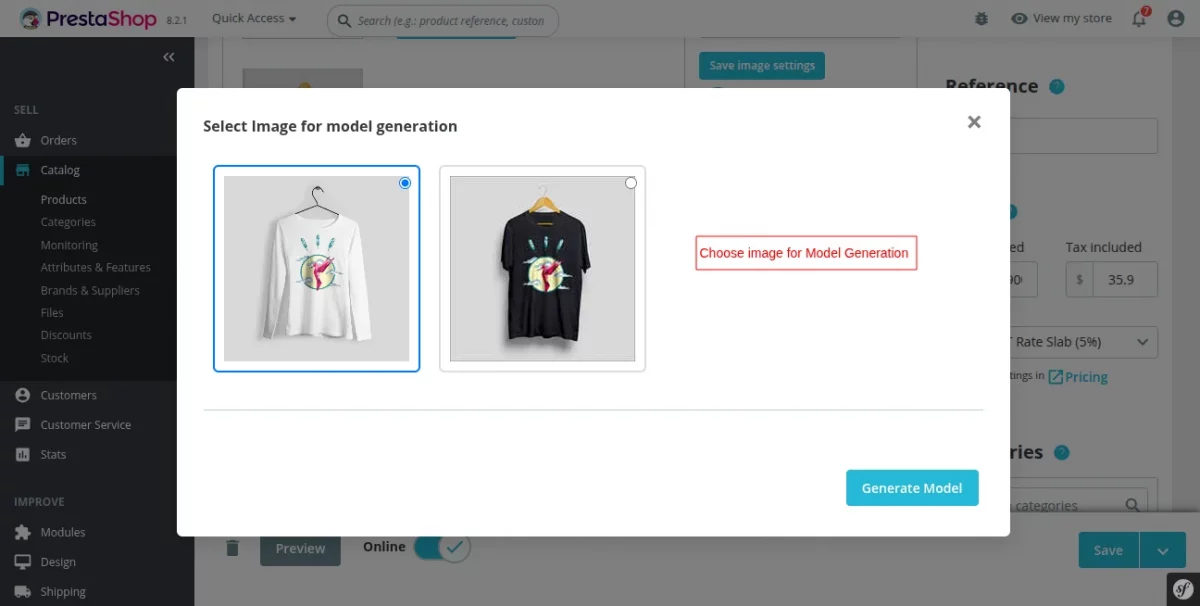
Once the admin selects the required image, they can choose the following model features before generating the image: Age, Gender, Body Type, and Skin Color.
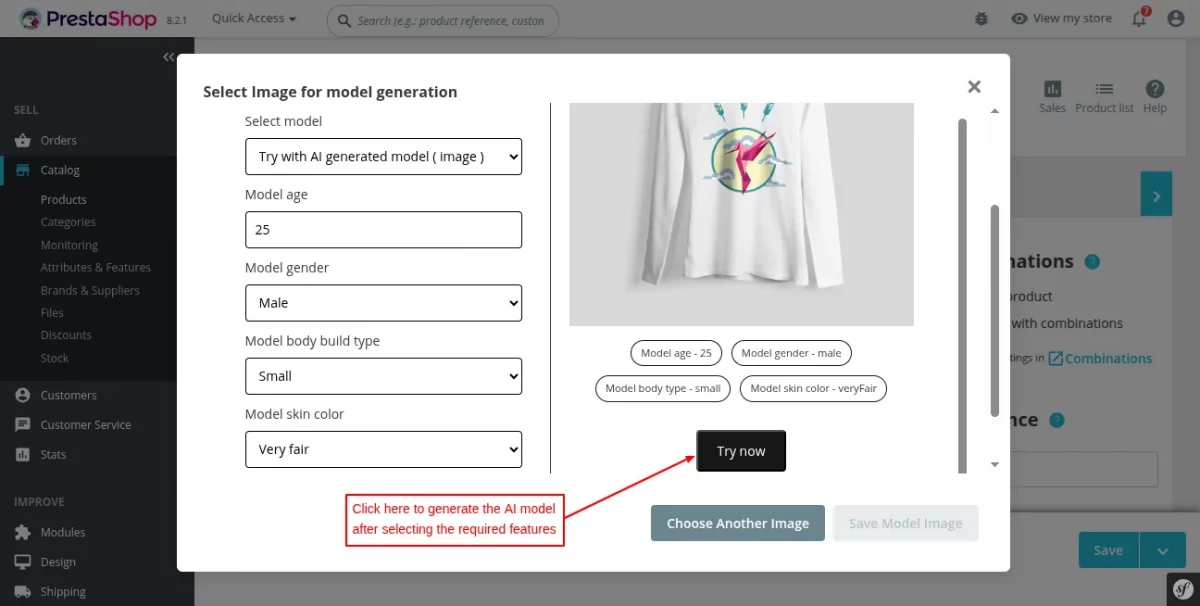
After selecting these features, the admin can click on the Try Now button to generate the AI Model Image.
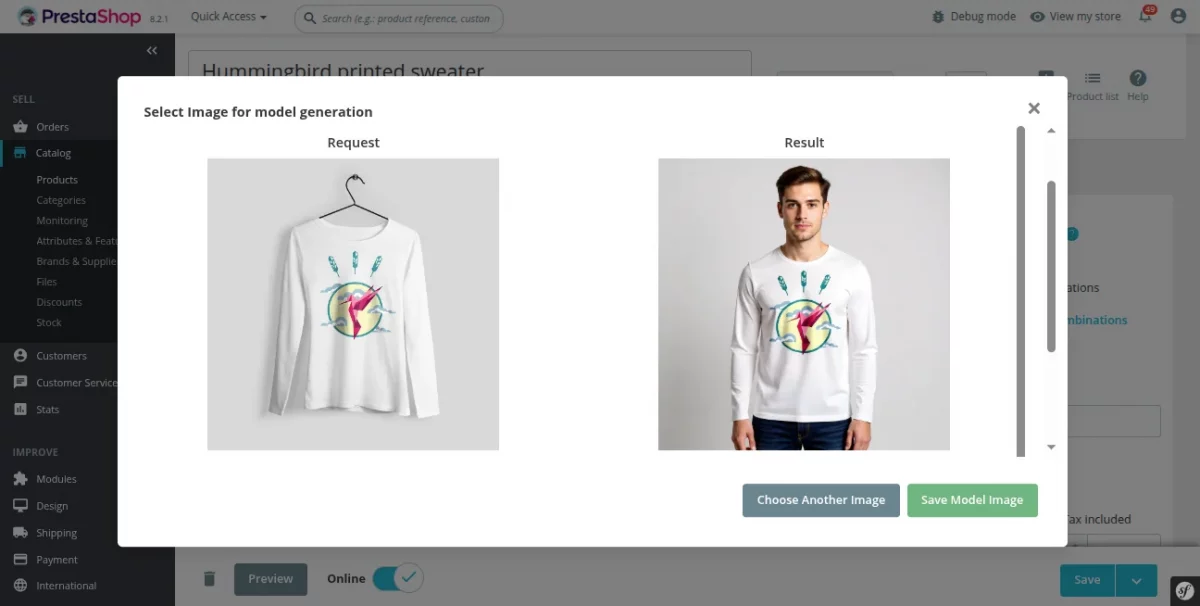
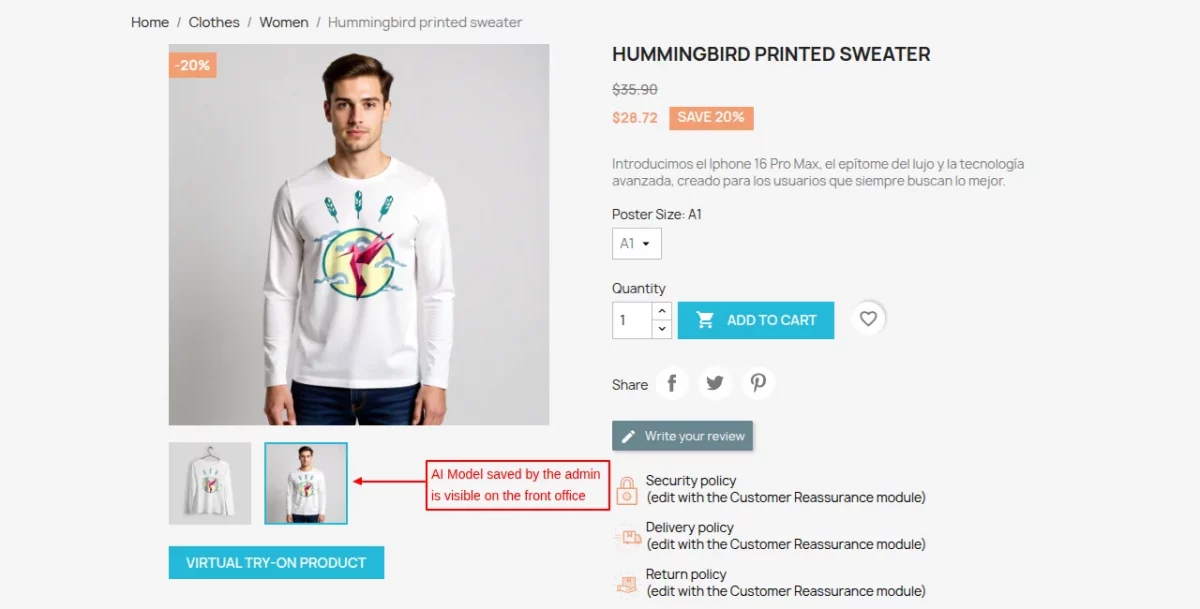
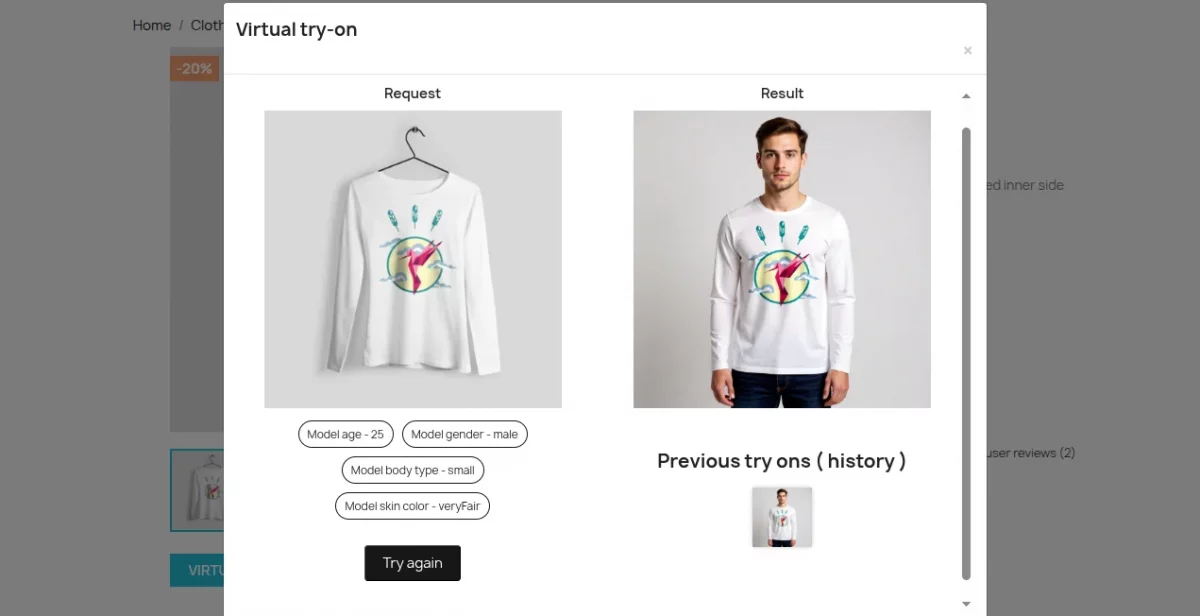
The admin can choose to save the model for the product, and it will be displayed on the Front Office, as referred to in the image below.

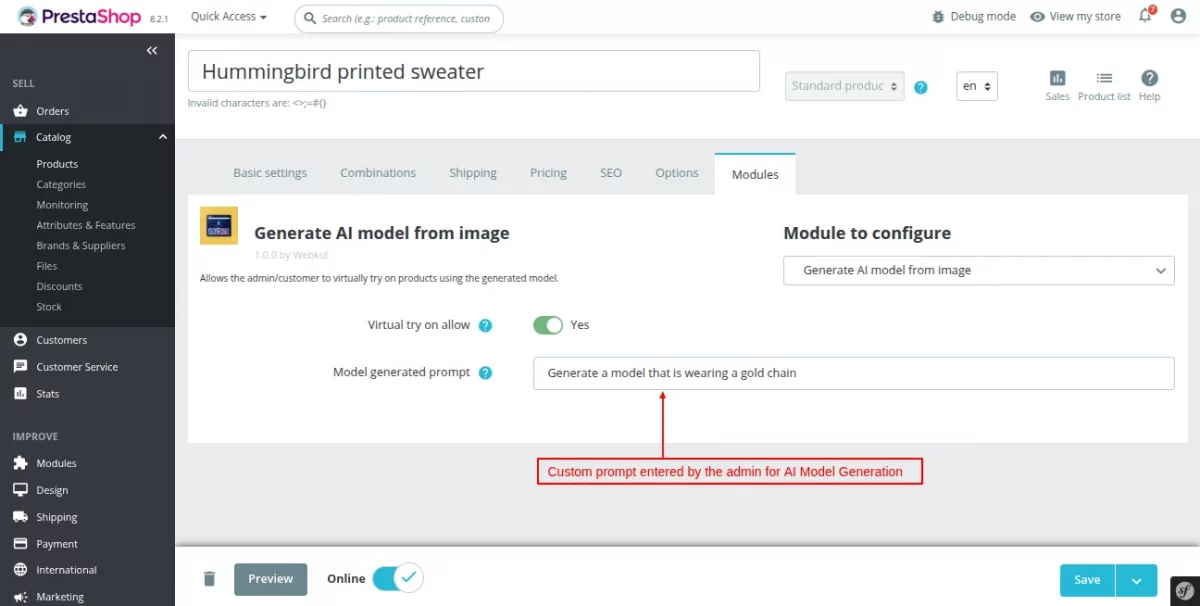
Generate AI Model with a custom prompt
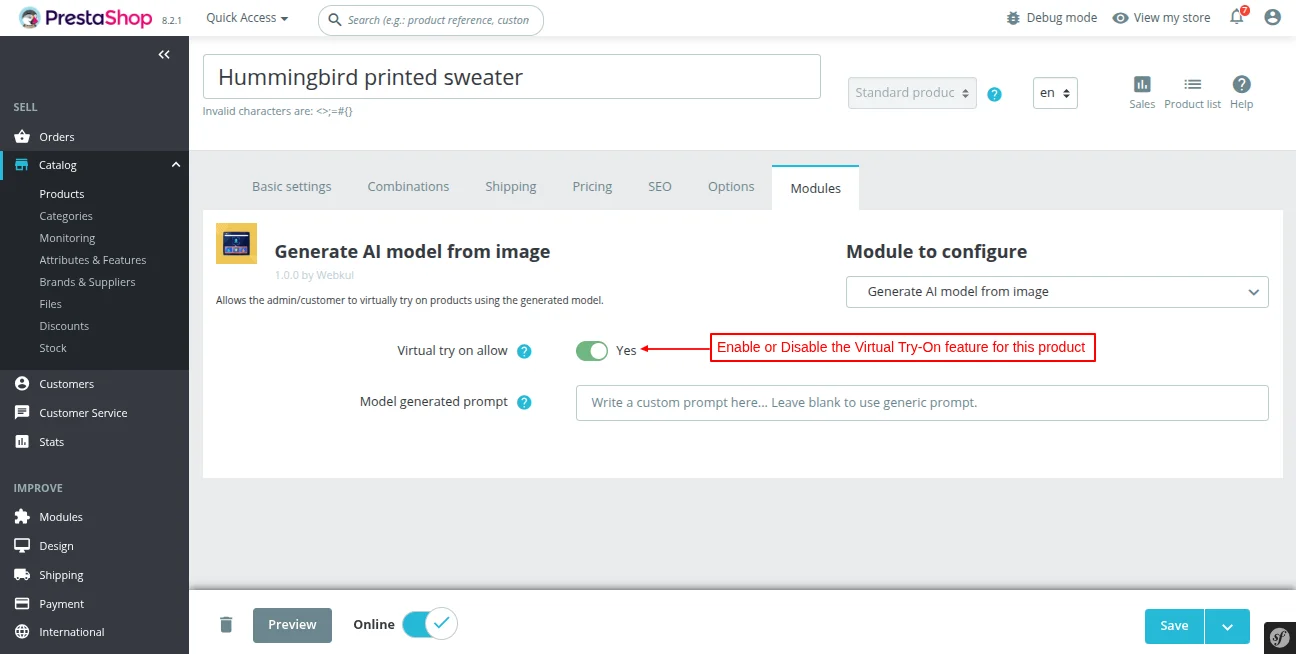
If you want to generate an AI Model for a product with a custom prompt, you can navigate to Catalog -> Products -> Edit Product -> Modules and enter the custom prompt for the AI Model Generation.
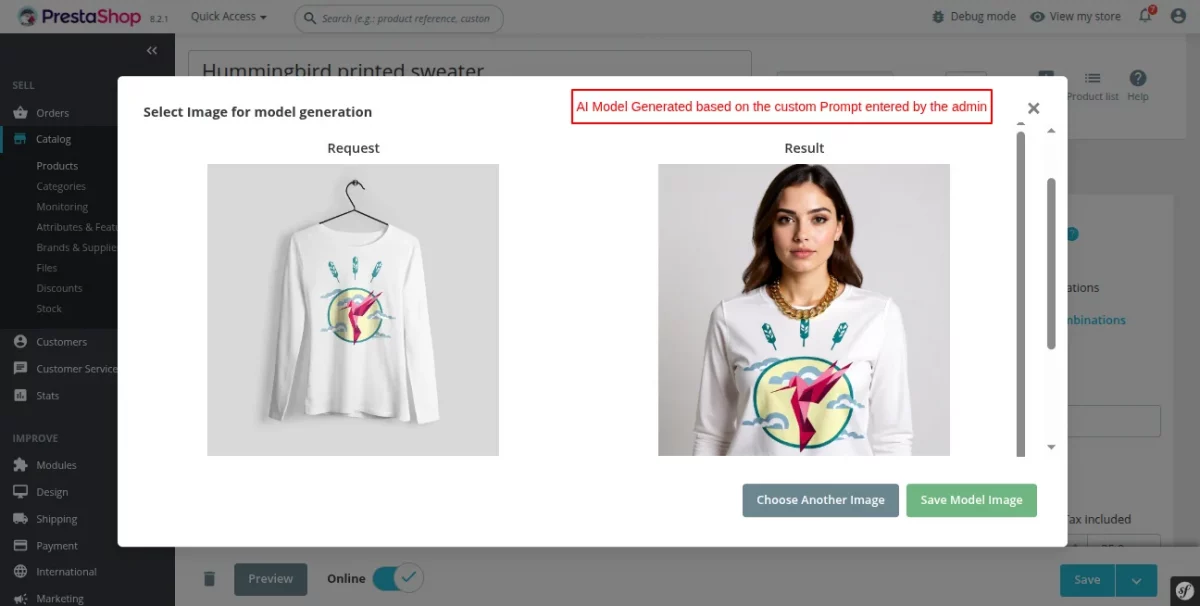
If a custom prompt is configured for the product, the AI Model will be generated based on the custom prompt, as referred to in the image below.
NOTE : This feature is supported only in the Back office. It will not be available on the customer end.
Front Office Workflow
If you want to allow the Virtual Try-On feature in the Front Office, simply go to Catalog -> Products -> Edit Product -> Modules and enable the Virtual Try-On feature for the products.

A new button will be added on the Product Page, using which the customer can Virtually Try-On a product by generating an AI model.

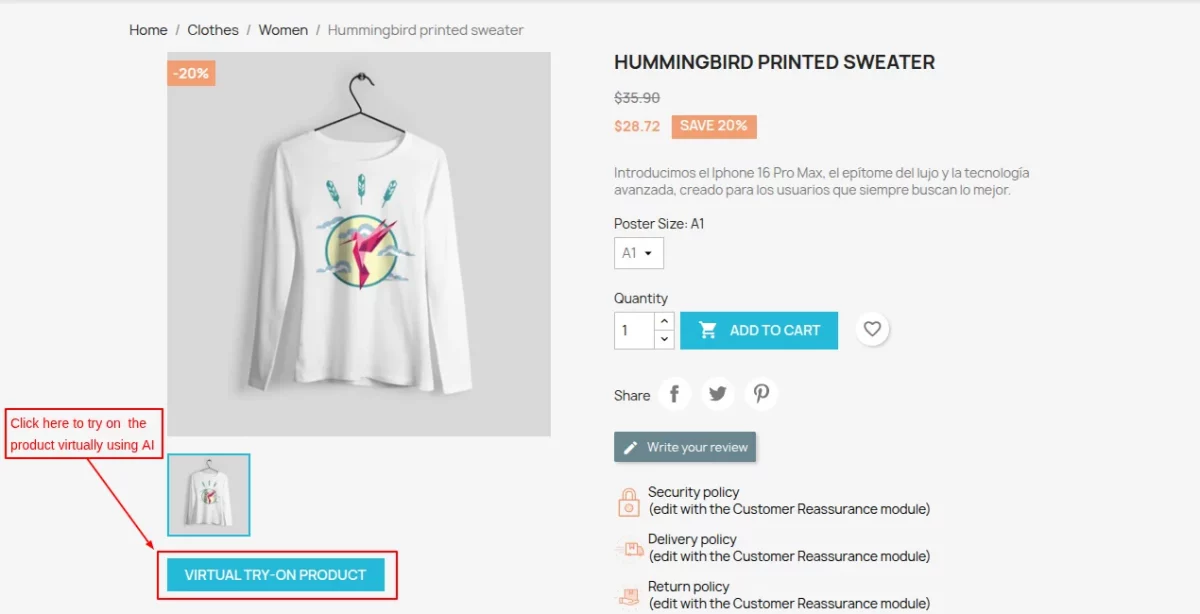
Once the customer clicks the “Virtual TRY-ON Product” button, a pop-up will be displayed, on which they can choose features to generate the AI Model.

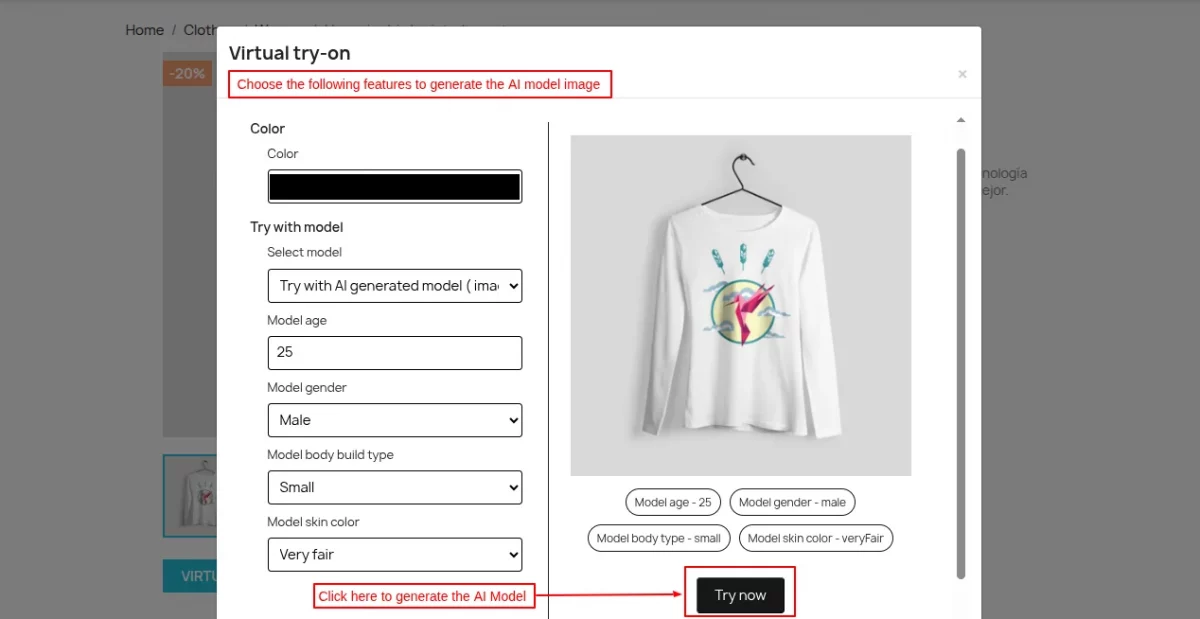
Once the customer clicks on the Try Now button, an AI Model will be generated based on the features selected by the customer.

This was all about the Prestashop Generate AI Model by Image Module. I hope this document will help you in checking the functionality of the module in a better way.
Also, do let us know about your views in the comments.
Support
For any kind of technical assistance or query, please raise a ticket or send us a mail at support@webkul.com
Also, please explore our Prestashop development services and vast range of quality Prestashop addons.