User Guide of Prestashop AI Engine (ChatGPT)
Prestashop Integrate AI Engine (ChatGPT) into your PrestaShop store to generate SEO friendly and high-quality content.
Automatically generate content based on prompts for products, category, and CMS pages. Create catchy descriptions for your products and categories with just a click.
Generate Short descriptions, Descriptions, Meta titles, Meta descriptions, and Meta tags in bulk for multiple products simultaneously.
Optimize your search engine rankings and attract more visitors to your content online store by automatically adding metadata to your product, categories, and CMS pages.
PrestaShop chatbot (AI Engine powered by ChatGPT) saves you time and effort by automatically adding content, so you don’t have to do it manually
Note: AI Engine (ChatGPT) module is compatible with the PrestaShop multi-store feature.
Features of Prestashop AI Engine (ChatGPT)
- Easily create descriptions for products, categories, brands, suppliers, and CMS pages with AI.
- Connect your PrestaShop store with the latest GPT-5 models using the API key.
- Built-in prompt templates to generate SEO friendly and high quality content in your PrestaShop store.
- Generate content using custom prompt templates.
- Generate content for multiple products in bulk.
- Generate Short description, Description, Meta title, Meta description, and Meta tags for multiple products at a time.
- Create prompt templates for products, categories, brands, suppliers, and CMS pages.
- Create descriptions for products and categories with just a single click.
- Create content for brands and suppliers.
- Add meta titles, descriptions, and keywords for products, categories, and CMS pages using AI.
- Keep track of OpenAI usage with token usage and approximated cost.
How to Install Prestashop AI Engine (ChatGPT)
- Firstly, go to the module manager in the back office and click on ‘upload a module’.
- After that, drag and drop the module file or select the file from the system.
- In this way, the module installation will be successful.


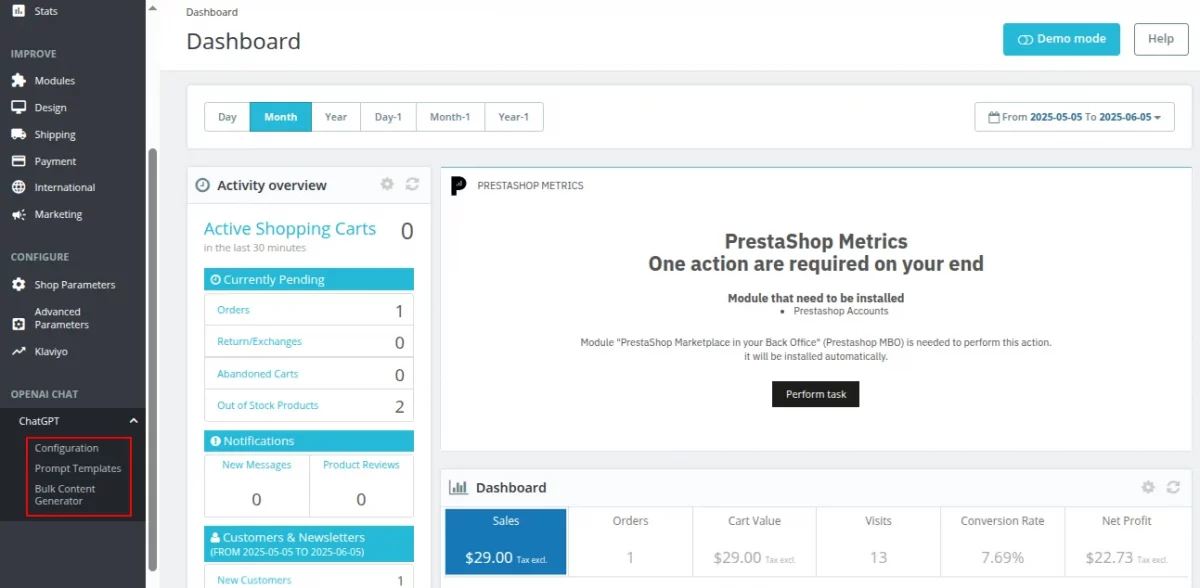
After the successful installation of the module, three new tabs i.e. configuration, prompt templates, and bulk content generator get available in the back office.

Prestashop AI Engine (ChatGPT) Configuration
API


OpenAI API Key: Specify API key that you obtained from OpenAI account.
Generate AI content on one click: Enable this to generate content using default prompt templates. Default prompt templates has been explained in detail in the later section in the blog.
How to get OpenAI API Key
To obtain the OpenAI API key, you need to login to your OpenAI account.
Once you have logged in, click on View API keys button.


Now, click on Create new secret key button to generate a new key.


AI autofill Content


Preferred AI model
Select the model from the following models for AI content.
- gpt-5.2
- gpt-5.2-pro
- gpt-5.1
- gpt-5-mini
- gpt-5-nano
- o4-mini
- o3-pro
- o3
- o3-mini

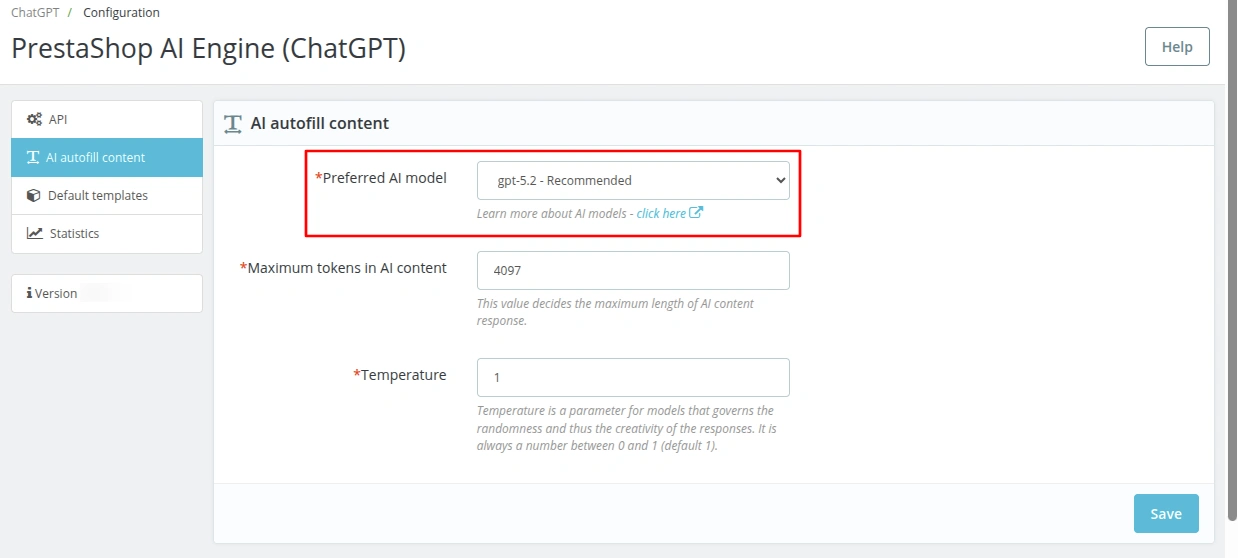
Maximum tokens in AI content
In this field, you can set the maximum tokens to restrict the response of AI model. Content will be filled in the description/summary tabs based on the tokens you have set.
Temperature
Temperature is a parameter that controls the randomness of generated text.
A higher temperature results in more diverse and creative output, while a lower temperature makes the output more deterministic and focussed.
Auto-fill Content for Entities
Products
‘If Generate AI content on one click’ is disabled


A button ‘Fill description” gets available with Summary and Description fields.
On clicking the button, a popup appears on the page where you can select the prompt template.


Based on the selected prompt template, AI will generate content.
Also, you can write a custom prompt message and generate summary based on the message. Select ‘custom prompt message’ in the dropdown list and enter message in ‘prompt message’ field.


‘If Generate AI content on one click’ is enabled
Enable the field under API to generate AI content using default prompt templates in just one click.


Click on the button to fill the content. The AI will auto-fill summary and description based on the selected prompt template. Also, you can change the prompt template from the product page.
Simply click on the settings button alongside fill description button. You will be redirected to default prompt tab where you can change the prompt template.
Similarly, you can auto-fill the content for categories, brands, suppliers, and CMS Pages.
Auto-fill Content for Categories


Auto-fill Content for Brands


Suppliers


CMS Page


Default Templates
Under default templates, you can select the default prompt templates for the fields of product, category, brand, supplier, and CMS pages.
Based on the selected prompt template, ChatGPT will generate content for the respective field.
Product


Category


Brand


Supplier


CMS


Statistics
Under the Statistics tab, you can view the number of tokens used by the AI model.


Adding Prompt Templates
A prompt is an instruction sent to ChatGPT for generating content. ChatGPT generates response based on prompt.
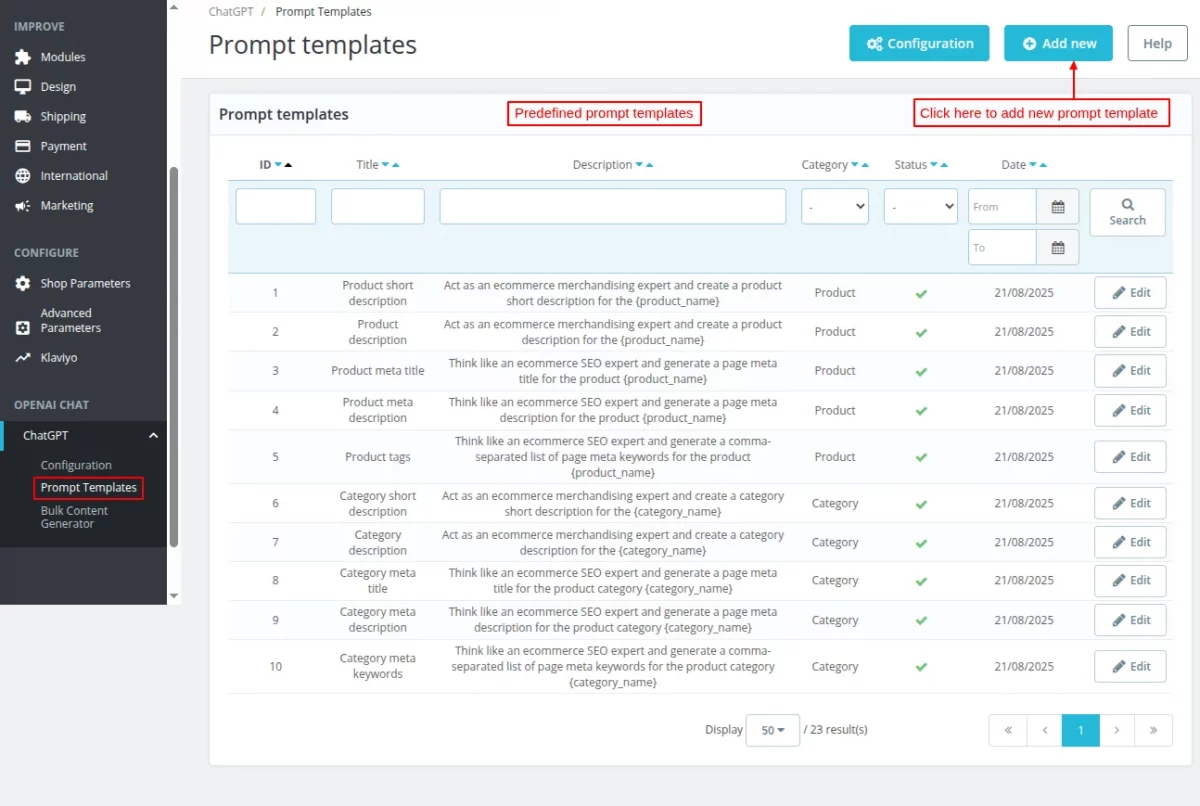
After installation, the system automatically adds a few prompt templates to the back office by default.
Also, you can add custom prompt templates for product, category, brand, supplier, and CMS. Click on ‘Add new’ button for adding a custom prompt template.

On clicking the button, a form appears on the page with following options:
- Category: Here, you need to select for which you want to create custom prompt template.
- Status: Enable or disable the prompt template.
- Title: Set the title for identification of the prompt template.
- Description: Enter the description based on which ChatGPT will generate content.


Also, you can select that will placeholders for description.
Once added, you can view it under Prompt templates.


Bulk Content Generator
You can use this tab to generate content for multiple products in bulk.
When you navigate to this tab, multiple filters will be available to help you search for the products that require content generation.

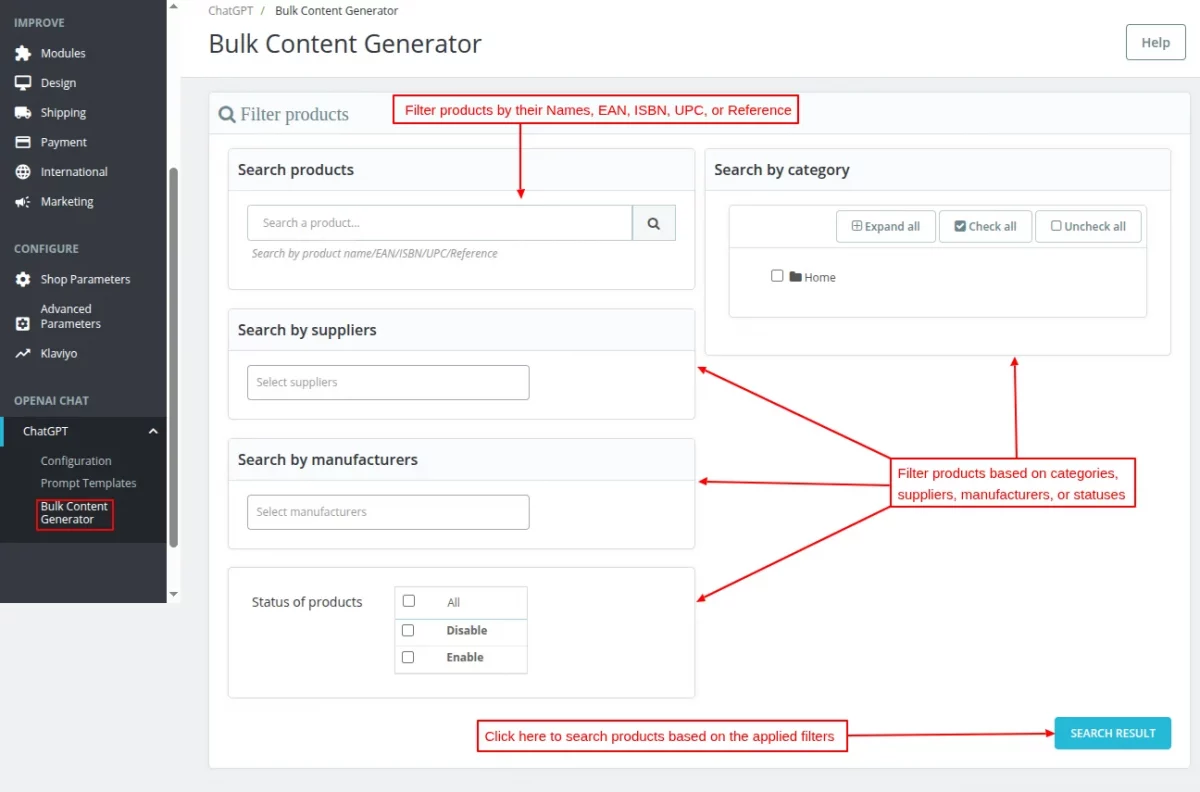
After applying all the required filters, you can click on the Search result button to view a list of products based on the applied filters.

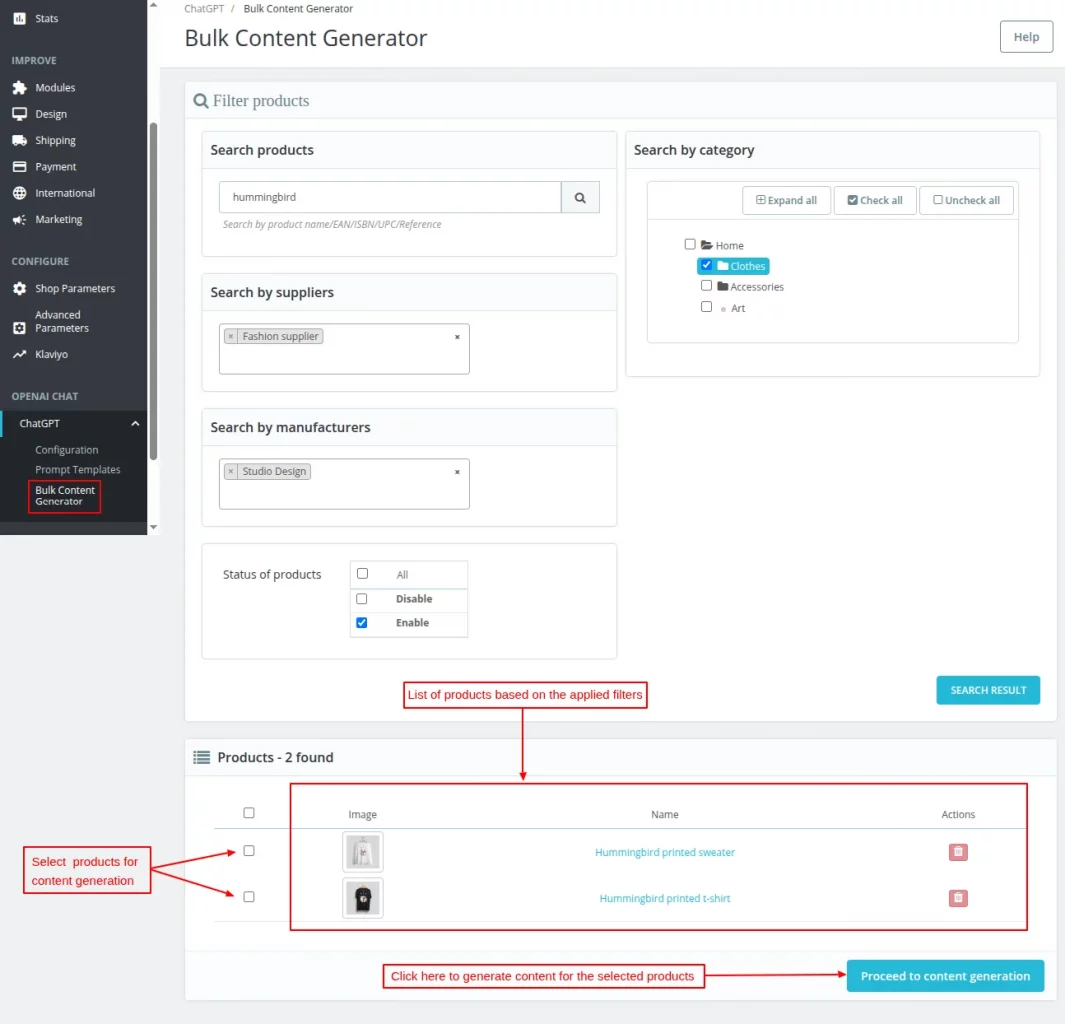
Now you can select multiple products from the list and click on the “Proceed to content generation” button to generate the content for them.
After clicking on the “Proceed to content generation” button, a toggle button “Generate content” will be displayed.
Once the Generate content button is enabled, the following options will be displayed.
- Language: You can select the language in which the content is to be generated.
- Fields: You can select to generate content for the following fields.
- Short description
- Description
- Meta title
- Meta description
- Meta tags

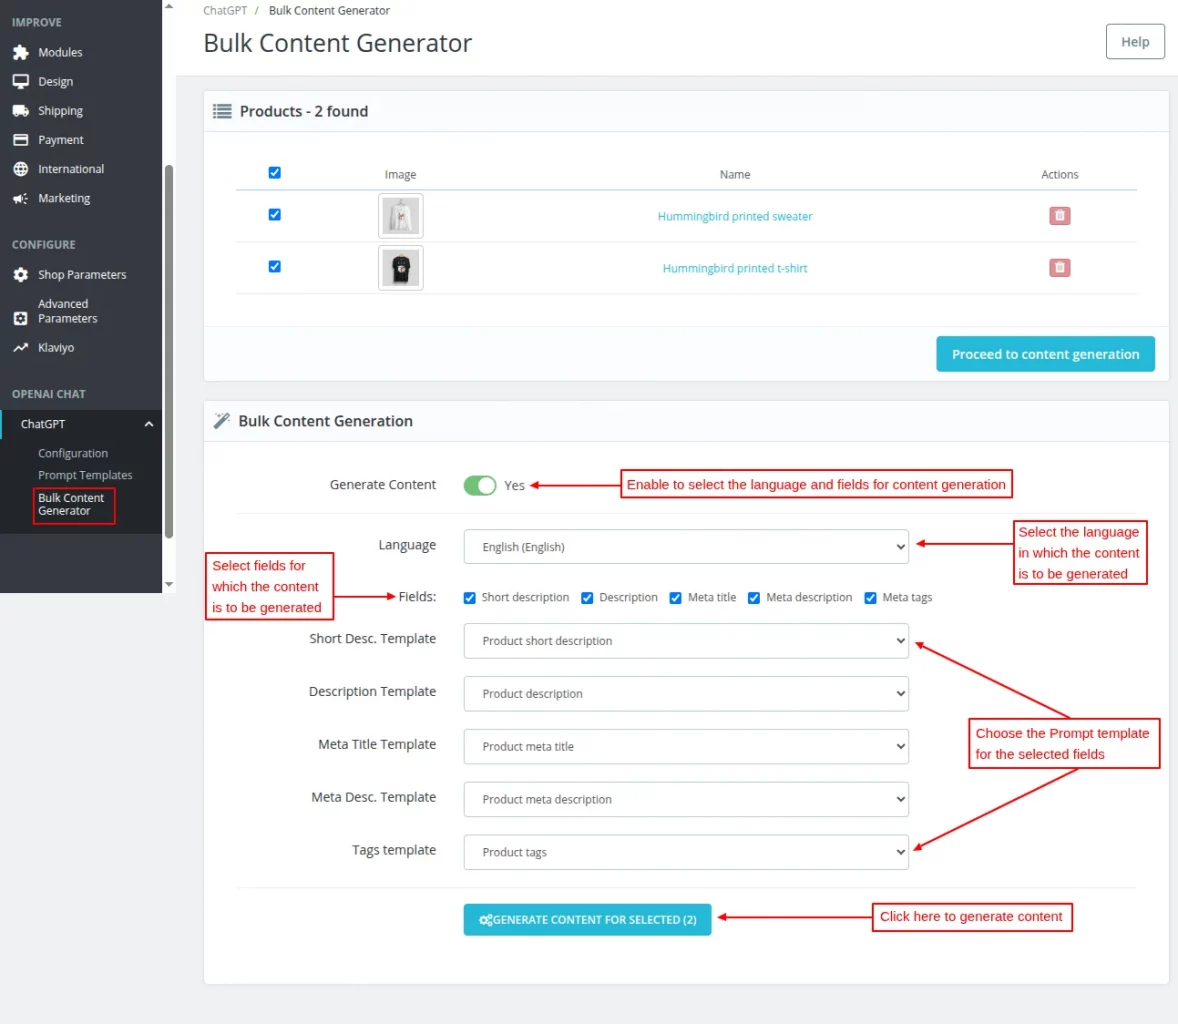
After selecting the fields for content generation, choose the appropriate prompt template for each enabled field.

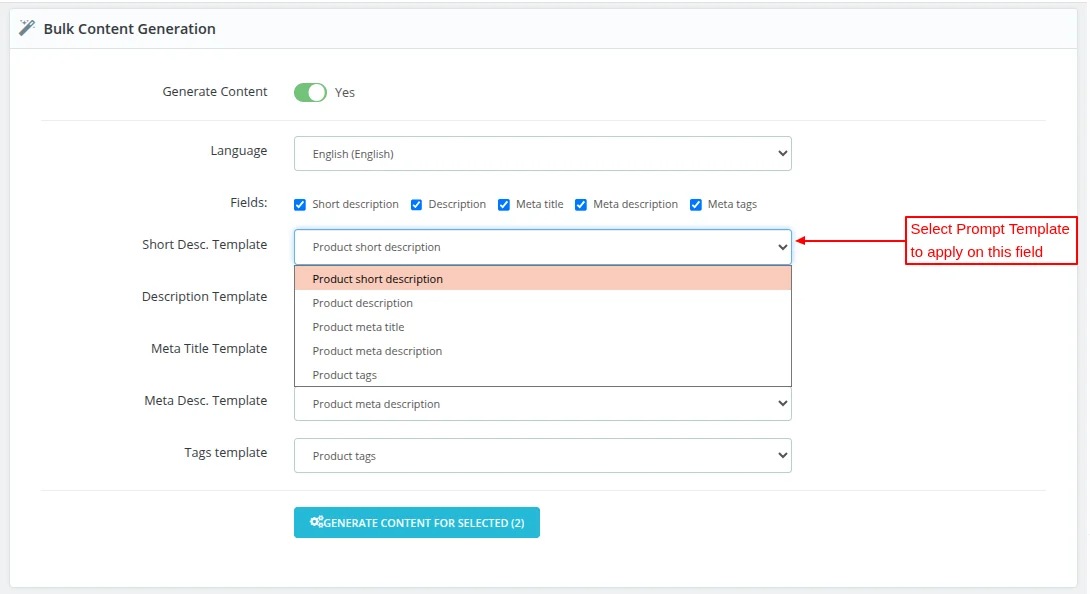
Once the prompt templates are selected, click the Generate Content button to generate content in bulk for all the selected products.
This was all about the Prestashop AI Engine (ChatGPT) Module. I hope this document will help you in checking the functionality of the module in a better way.
Also, do let us know about your views in the comments.
Support
For any kind of technical assistance or query, please raise a ticket or send us a mail at support@webkul.com
Also, please explore our Prestashop development services and a vast range of quality Prestashop addons.