Opencart Marketplace Blog module is easy to use and fairly handy to handle all your store’s posts. It enables the seller to add posts or blogs about products and manage them. The admin can see all blogs, comments and can delete them.
This module is an add-on of the Opencart Marketplace Module. To use this module, you must have installed the Opencart Marketplace Module first.
Note:
1. This module supports all templates and themes including the Journal theme.
2. Opencart Marketplace Blog module supports the Multi-Store feature of default Opencart.
Check a brief overview of the plugin –
Features Of Opencart Marketplace Blog
- Admin and seller can post blog separately
- The Admin and seller can create a blog category
- Image gallery feature for the blog
- Assign blog related product which is display on the blog page
- Module support multi-store and multilanguage
- SEO friendly
- Blog sharing option on Facebook, Twitter, LinkedIn
- Admin approve review
- The Admin can create multiple blog module and set it on the various pages.
- Blog search option based on tag, name, and description.
Opencart Marketplace Mobile App
This is a technology-based era where everything is simplified even online shopping. We all know about shopping apps and its advantages-how it reduces and makes our shopping experience hassle proof.
So it is very important for all the Store owners to have a shopping app for providing a more convenient way to shop from their online store and now Webkul has launched its new app Opencart Marketplace Mobile App. Opencart Marketplace Mobile App converts your marketplace store for Opencart into a mobile app.
Your customers can easily purchase products on the go. They don’t need to have a laptop or desktop, they can easily explore your store through their smartphones. It will not only benefit the store owner and customer it will benefit the sellers too.
Sellers can see their dashboard, order history through the mobile app. So what are you waiting for, you must now have an Opencart Marketplace Mobile App to be a step ahead.
- Seller list.
- The Seller Collection.
- Seller Profile.
- The Seller Dashboard.
- Seller Order History.
- The customer can contact the seller.
- Market Place Sell Page
- Users can review the seller.
- Seller Location is mentioned on the map.
Installation Of Opencart Marketplace Blog
The installation of the module is very easy. You just need to drag your admin & catalog folder file into the Opencart root folder and it will be installed.

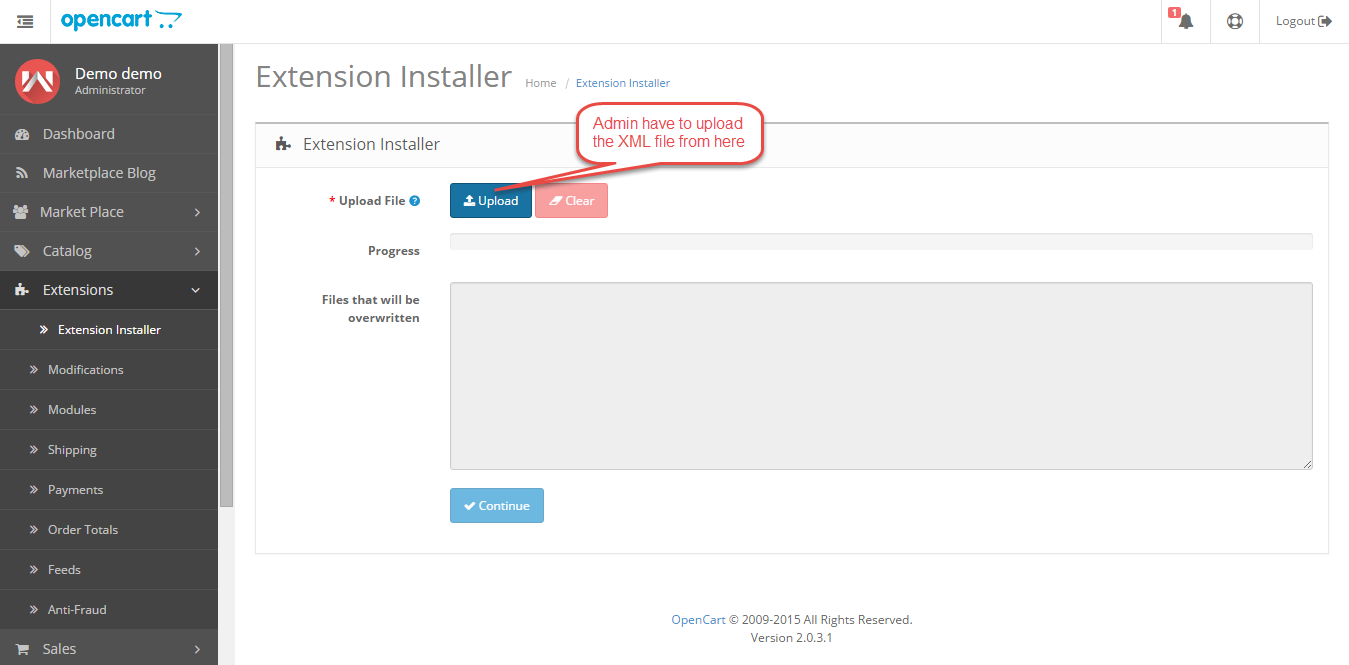
You can also install the Opencart MarketplaceBlog module by uploading the admin & catalog files through the extension installer.
Admin has to install the XML file through the extension installer.
Now admin will go to Extensions > Modifications and then click on the refresh button like the image below.
After that under extension->module menu install marketplace blog module.
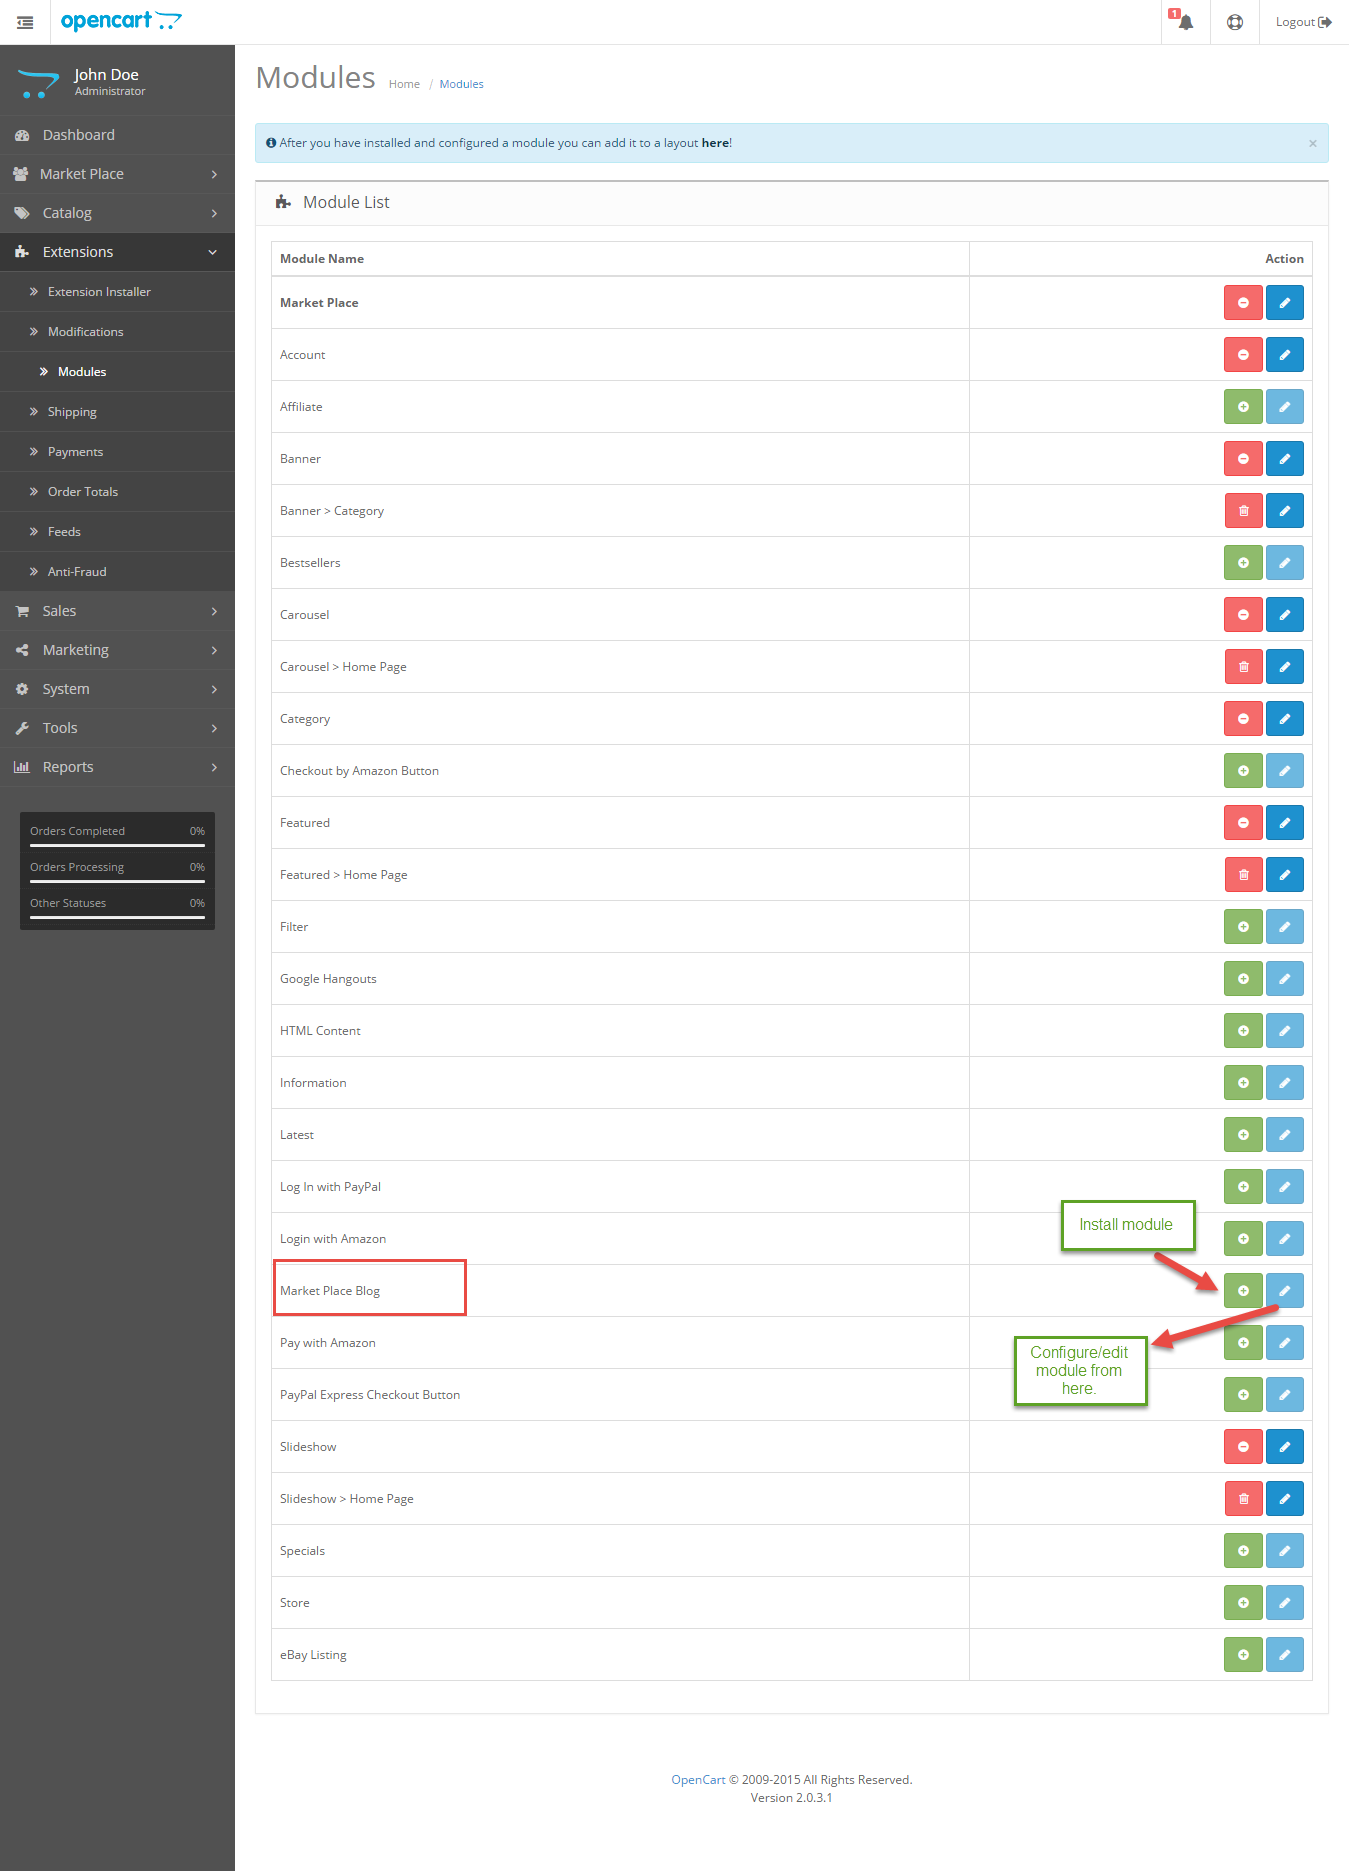
Also, After clicking on the Edit button, the admin will be re-directed to a new page where the admin will provide details and do the configuration for this shipping module.

Here the admin will:-
- Enable or Disable the module.
- It can set a particular timezone.
- Add the number of blogs per page to be displayed on the frontend.
- Enable or Disable the sellers to edit/delete reviews from their dashboard.
- Also, Enable or Disable the email sent to the seller if a customer post review on the website.
- Enable or Disable the mail to be sent to the admin after the customer post a review.
- Also, Enable or Disable the customer to post a review only if they login.
Module Translation
As this Marketplace module supports multiple languages so this section will describe how to make the module work in different languages. Please check this link for language translation
Admin Configuration
After the successful installation of the Opencart Marketplace Blog module, the admin can easily find the Mp Blog blog on the backend & find further three tabs under Mp Blog. Let’s explain each tab one by one.

Now the admin can easily create & update the categories for the blogs to be posted on the website.

By selecting the add button on the top right corner of the category edit page, the admin can easily create new categories.

Here the admin will enter the category information like Name, select the parent category, choose the store, enter sort order & set the status and then save it.
Now after creating the specific categories for the blogs, now the admin can create a new or update an existing blog. For this, the admin will click on the Blog tab.

Here the admin can find the list of all the existing blogs both posted by sellers as well as the admin. To update a blog first select the blog to be edit then click on the edit button.
After this, a new page will open, where the admin can make changes in the fields distributed under three tabs like General, Data & Image.
General:
Here the admin will mention the Blog title, update the content, add the meta tag, description keywords & blog tags.

Data:
Now after the general settings, the admin will open the data option & can select the specific blog category, set the status, enter SEO URL, select the store, add related products to the blog.

Image:
Here the admin can easily add images to the blog.

Now in order to put a review on the store for a blog or to view the list of reviews made by the customers or sellers for the blogs on the store, the admin will move to the reviews tab. Mp Blog > Reviews

Now by selecting a review then clicking on the edit option, the admin can easily update a review.
The admin can update fields like Author, Blog, Review text, Rating, modify the date, and also can modify its status.

Seller End
After this Market Place Blog box added to your my account page and using this seller can add the category and add posts and can view his/her all posts.

Now if the seller wants to add or update a category, the seller will simply click on the category, a new page will open. Where the seller will find the existing blogs created by him/her.

To edit the existing blog, the seller just needs to select the blog then click on the edit button.
After this from here, the seller can edit the name of the category, select the parent category, set the sort order & can change the status for the category & after making the changes will save the category.

Now if a new category is to be made than in this case, the seller will click on the add button on the blog category page.
After this, a new page will open where the seller can set name for the category, assign a parent category, set sort order & can change the status for the category.

The seller by selecting the blog option can view the list of existing blogs created by him/her or can even create new blogs.

If a seller wants to edit a blog, then by selecting the checkbox, the seller needs to edit the blog.

On the edit page, the seller needs to make changes under the three setting options.
General: Here the seller needs to enter the name of the blog, update the text, enter meta title, description, keywords & edit blog tags.
Data: Here the seller can select a category, select the status, enter SEO URL & can assign products to the blog.

Image gallery:- Here the seller can upload additional blog images if needed.

Front End
As the customers want to look for the blogs posted by either sellers or the store owners, for this they just need to click on the MpBlog option placed on the webstore header. As shown in the picture below.

On the MpBlog page, the customer can find the list of all the blogs posted by either sellers or the store owners.

The customer just needs to click on the blog & can easily get through it & find the products associated with it.

Also, the customer can easily share the blog post on their social networks, simply by clicking on the available social networks logos.

MpBlog Layouts
The admin of the store can also create layouts for the proper presentation of the blog posts on the webstore.
For this the admin needs to navigate to the Extensions > Extensions > Modules > Marketplace Blog Layouts.

Here, the admin clicks on the add button in order to create a new layout. As shown in the picture below.

From here the admin can easily create a blog layout by filling the fields like:-
- Enter the name for the layout design.
- Add blogs to the layout design.
- Can set the limit of the blogs to be added on the layout.
- Set the width of the layout.
- Set the height of the layout.
- Change the status of the layout i.e can enable or disable it.
After filling the required information the admin will save the layout.
Now to show the layout on the webstore, the admin will navigate to the Design > Layout, then select the page on which the layout needs to be added.

We have created a layout for the home page so the admin will add the same in the home page.
The admin will click on the edit button on the home page 7 will choose the position on the page where the layout needs to be added & save it.

Now on the webstore, the customer can easily find the blogs inside the created layout on the landing page of the webstore. As shown in the snap below.

All of that information is very much self-explanatory. Still, have any doubt or suggestions for the extension please add a support ticket at webkul.uvdesk.com
Current Product Version - 3.1.0.0
Supported Framework Version - 2.x.x.x,3.x.x.x

2 comments
Thanks for the precious words. If you have any requirements kindly share it on [email protected]
Regards.