User Guide for Odoo POS Table Reservation From Website
Table of Content
INTRODUCTION
Odoo POS Table Reservation From Website allows restaurant customers easily book tables online through your website.
It streamlines the process by displaying real-time table availability, enabling users to make reservations without any hassle.
With Odoo POS Table Reservation From Website, bookings are fully online—customers select a date and time and receive instant email confirmation.
Odoo POS Table Reservation From Website helps restaurants, cafes, and other food businesses manage reservations efficiently while providing a smooth experience to their customers.
FEATURES
- Let customers book tables directly from your website.
- Display only available restaurants and time slots for selected date.
- Automatically filter and suggest tables based on number of guests.
- Customers receive instant email confirmations after booking.
- Allow easy booking cancellation and downloadable booking info.
- Prevent double bookings with real-time availability updates.
- Staff can view, edit, or cancel bookings from backend.
- Offer a simple and clean interface for better user experience.
- Enable or disable table booking anytime with Odoo POS Table Reservation From Website.
INSTALLATION
- Once you purchase the App from Webkul store, you will receive a link to download the module’s zip file.
- Extract the file on your system after the download finishes. As a result, you will be able to see a folder named- ‘pos_table_reservation_from_website’
- Copy and paste this folder inside your Odoo Add-Ons path.
- Now, open Odoo App and click on the Settings menu. Here, click on Activate Developer Mode.
- Then, open the Apps menu and click on ‘Update Modules List.’
- In the search bar, remove all the filters and search ‘pos_table_reservation_from_website’
- You will be able to see the module in the search results. Click on ‘Install’ to install it.
WORK FLOW
Website Flow For Public User Or Portal User
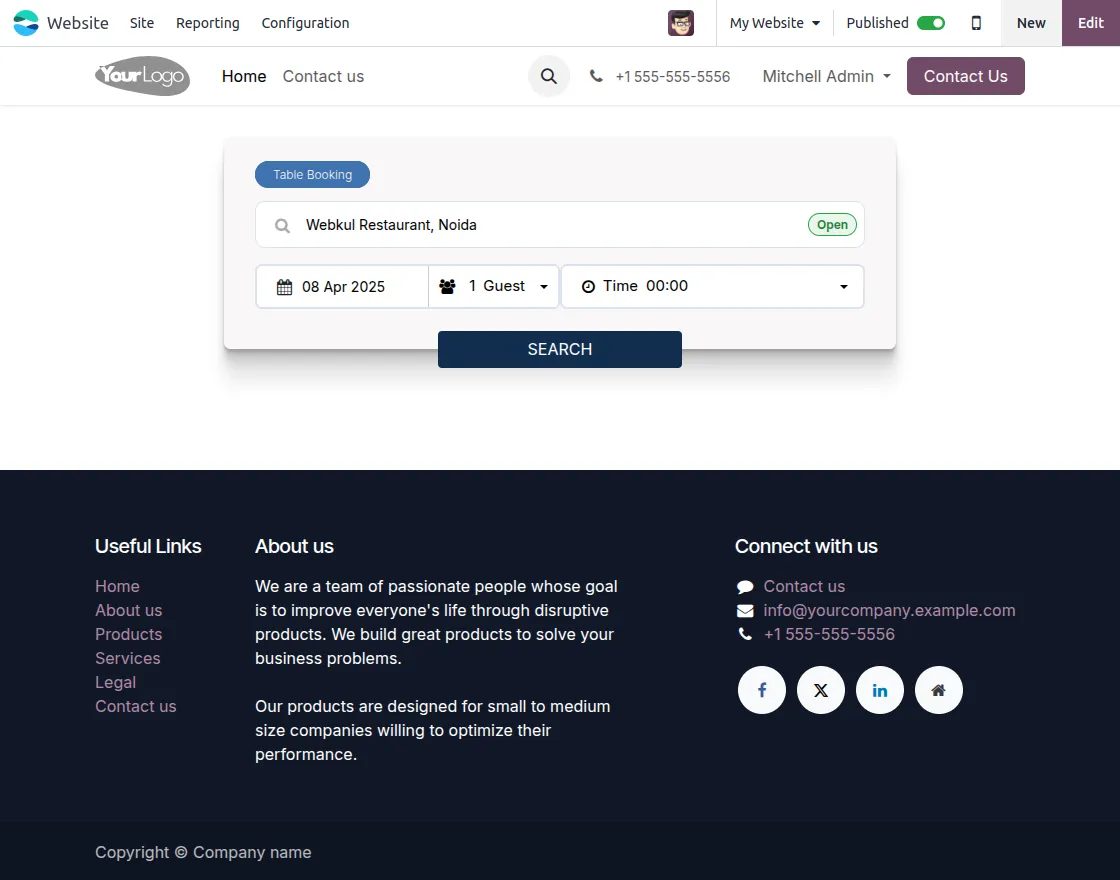
- After installing Odoo POS Table Reservation From Website, customers can select a date, view open restaurants, enter guest count, choose a time slot, and click search to proceed.

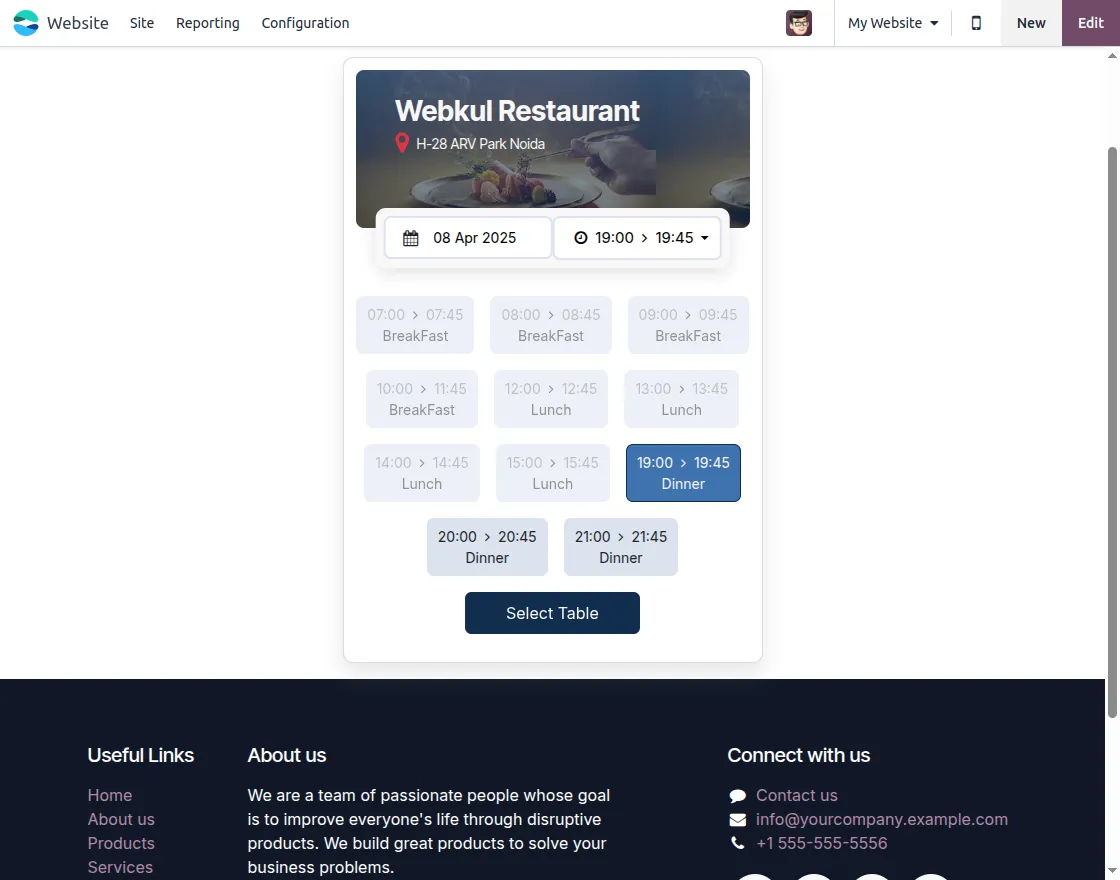
2. Customers can view available time slots for the selected restaurant and date, then pick a preferred slot to proceed with reservation.
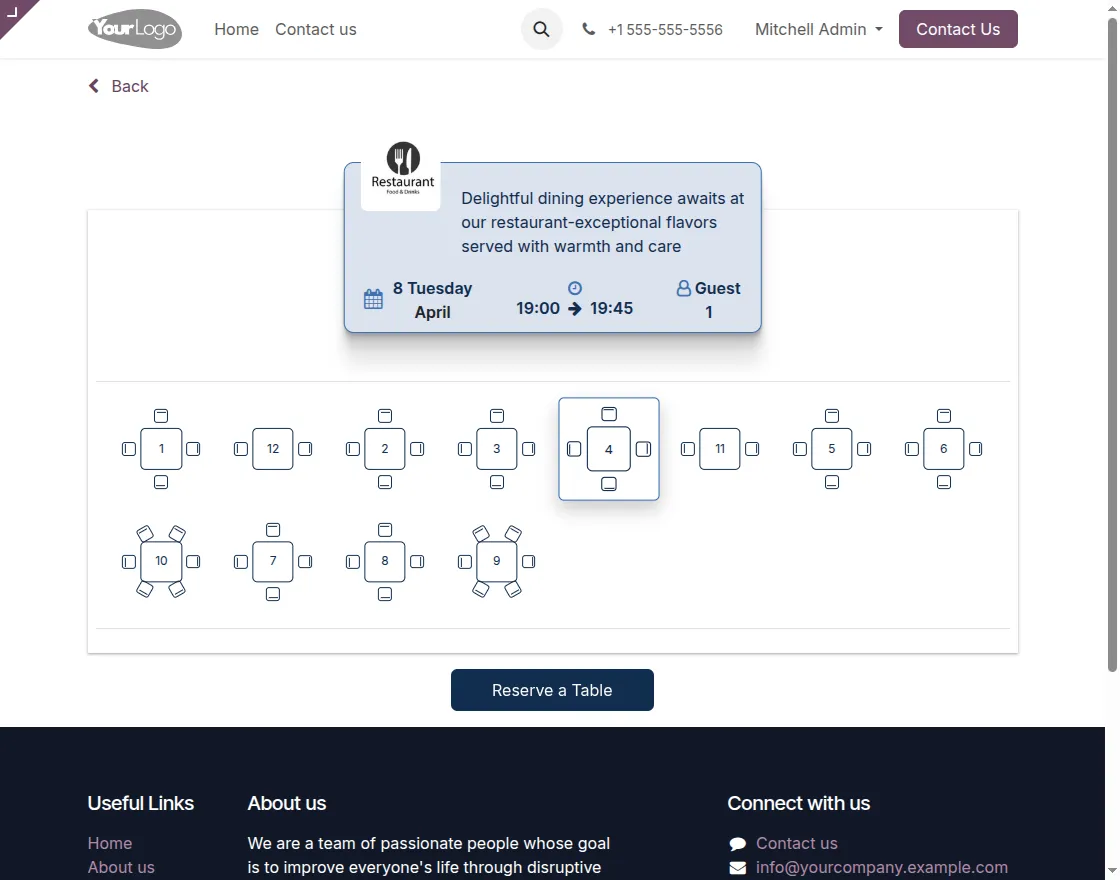
3. Customers can select an available table from visual layout based on selected time and guest count before confirming the reservation.
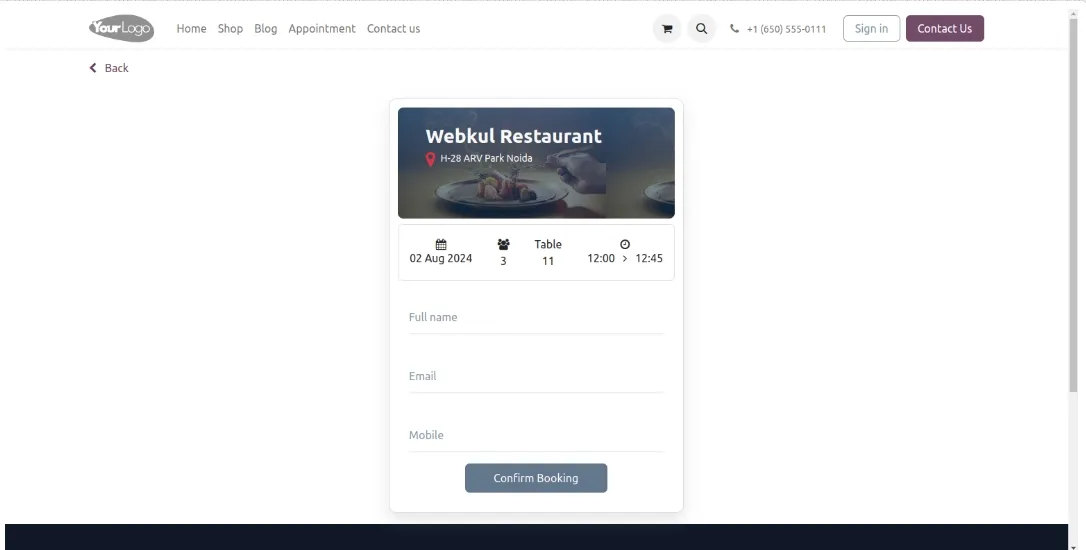
4. In case of portal users, this form will be auto-filled up. Click on ‘Confirm Booking’ to finalize their table reservation.
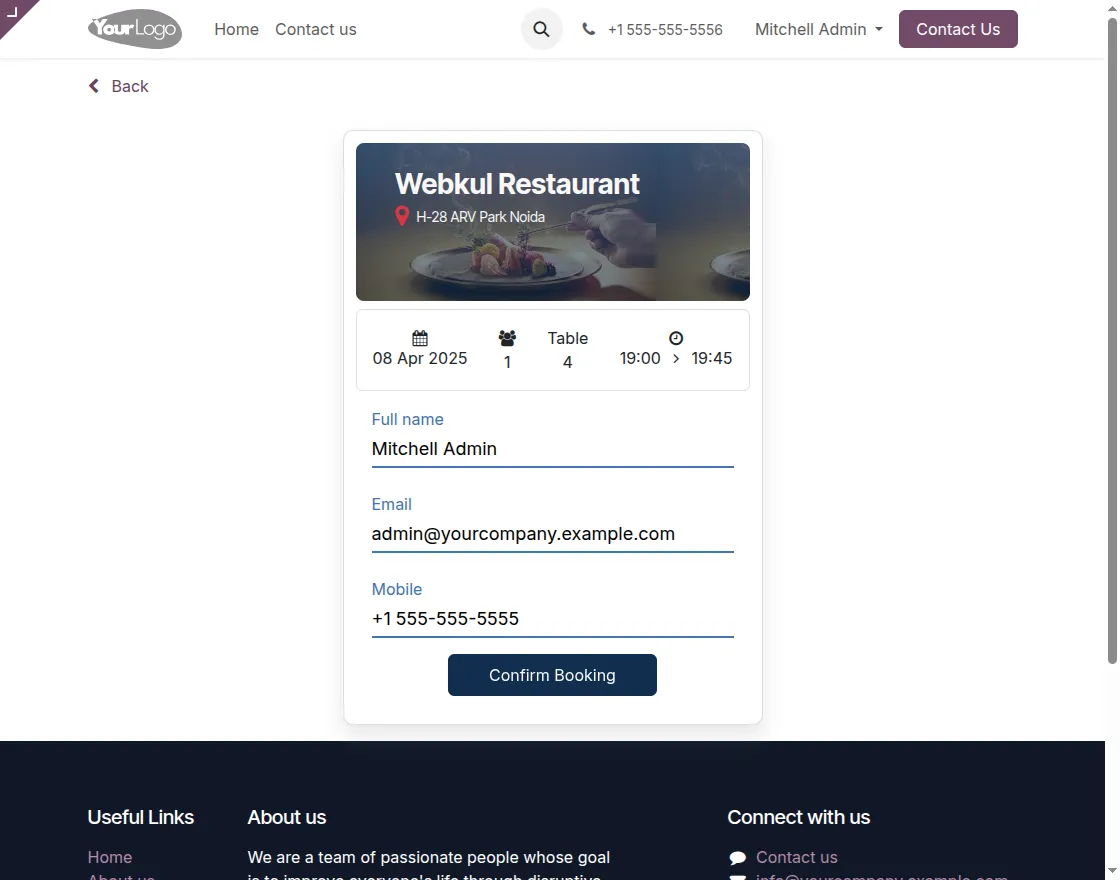
5. In case of public user, this form will not auto filled up, Customers fill in their details and click on ‘Confirm Booking’ to finalize their table reservation.

Odoo Backend Flow For Restaurant Website Configuration
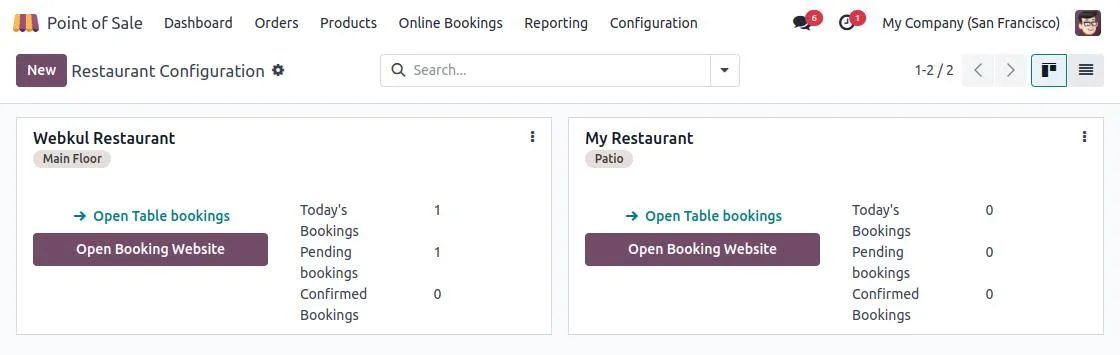
6. Admins can manage bookings, check pending or confirmed reservations, and open the booking website from Odoo POS Table Reservation from Website backend.

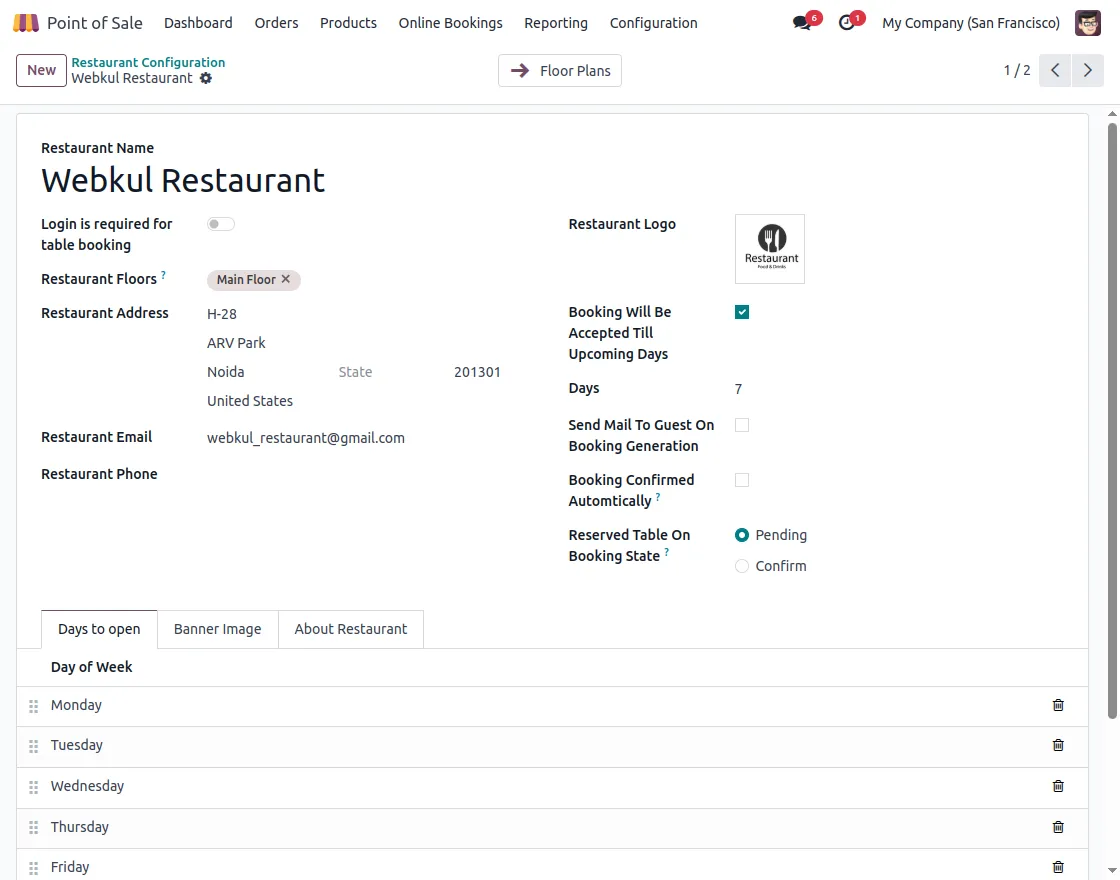
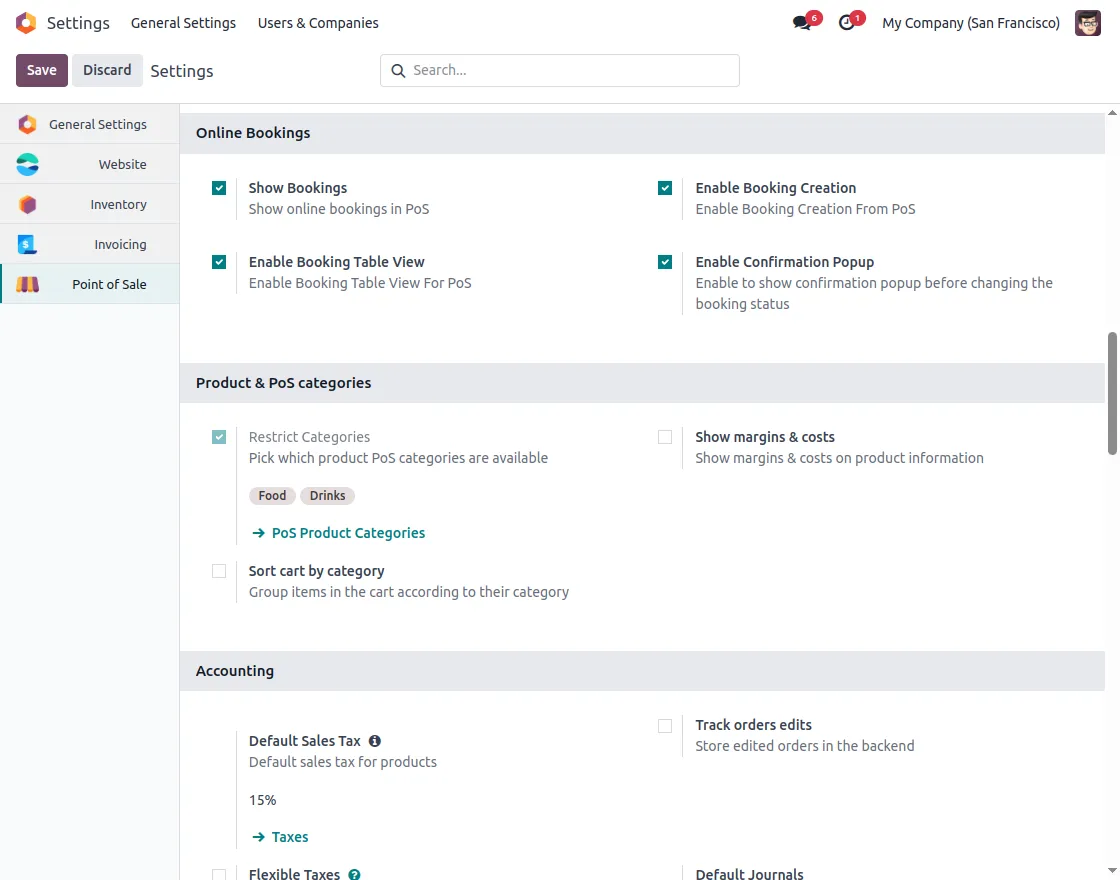
7. Admins can configure restaurant details, booking rules, days of operation, and default reservation status from backend.
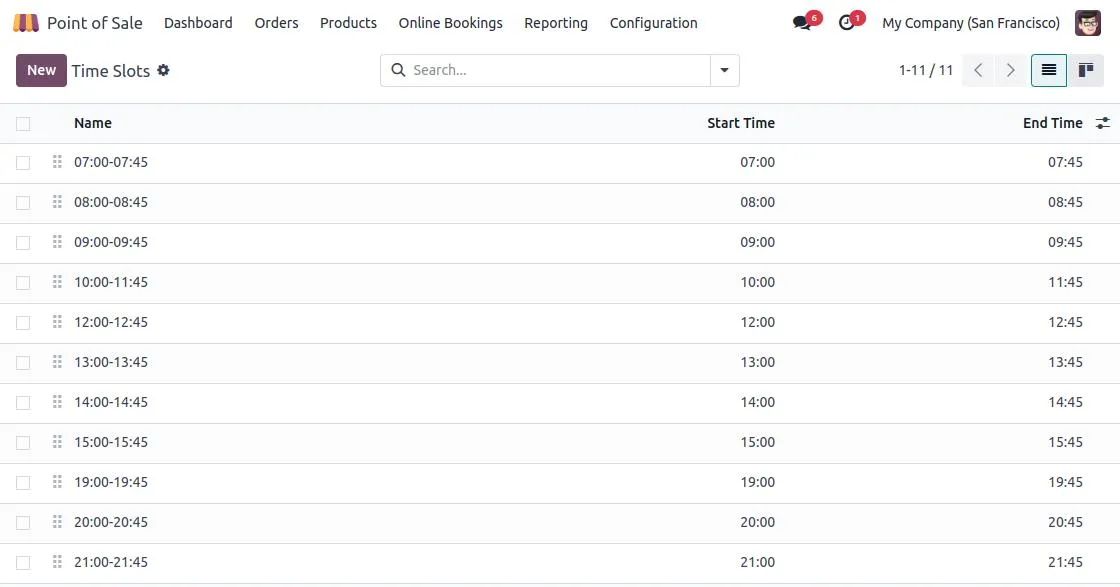
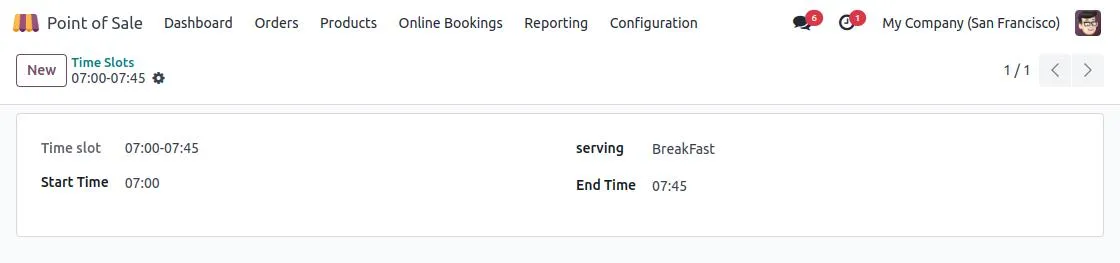
8. Admins can define multiple time slots for reservations, allowing customers to choose from preset dining intervals.

9. Each time slot can be associated with a specific meal type (e.g., breakfast, lunch, dinner) for better service management.

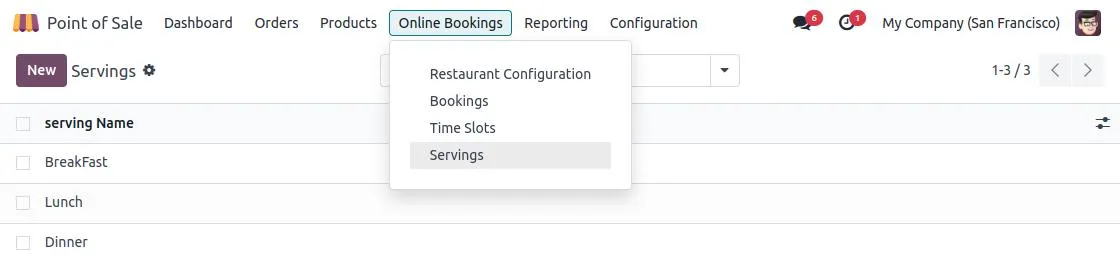
10. Manage different serving types (like Breakfast, Lunch, and Dinner) to organize bookings based on meal preferences.
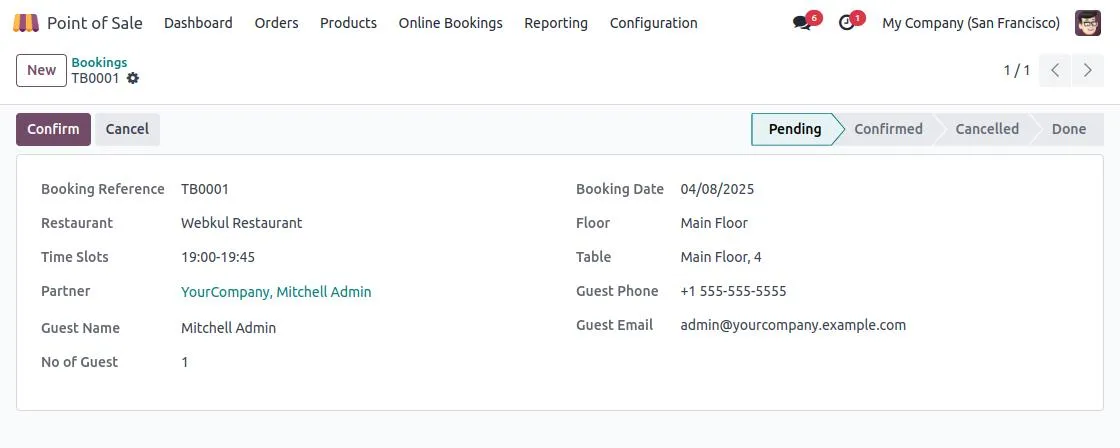
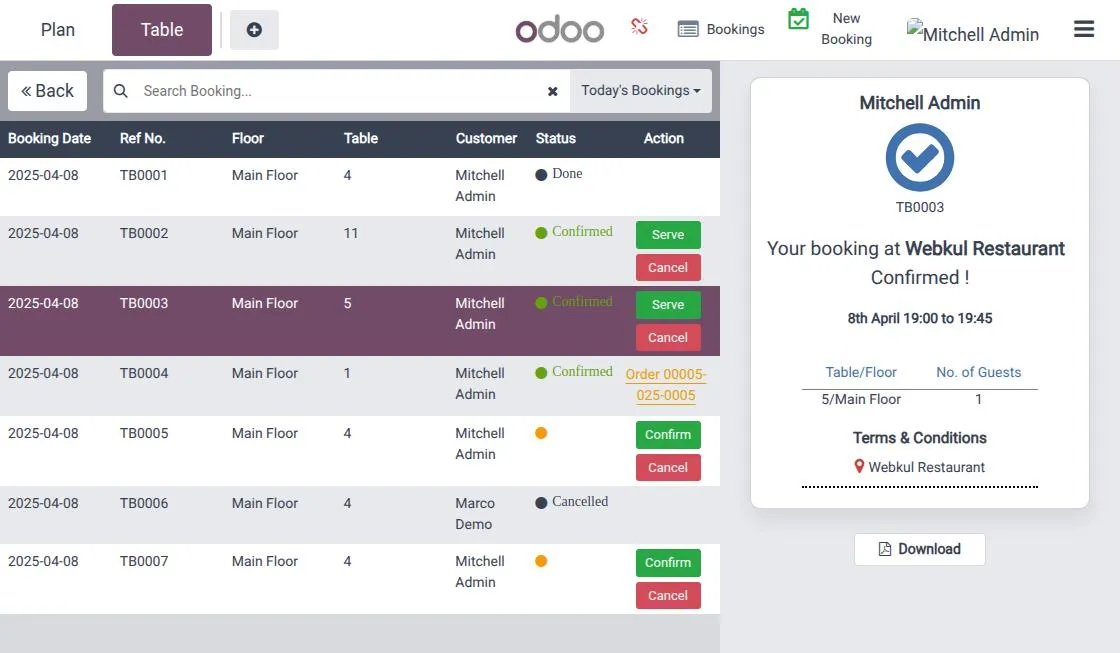
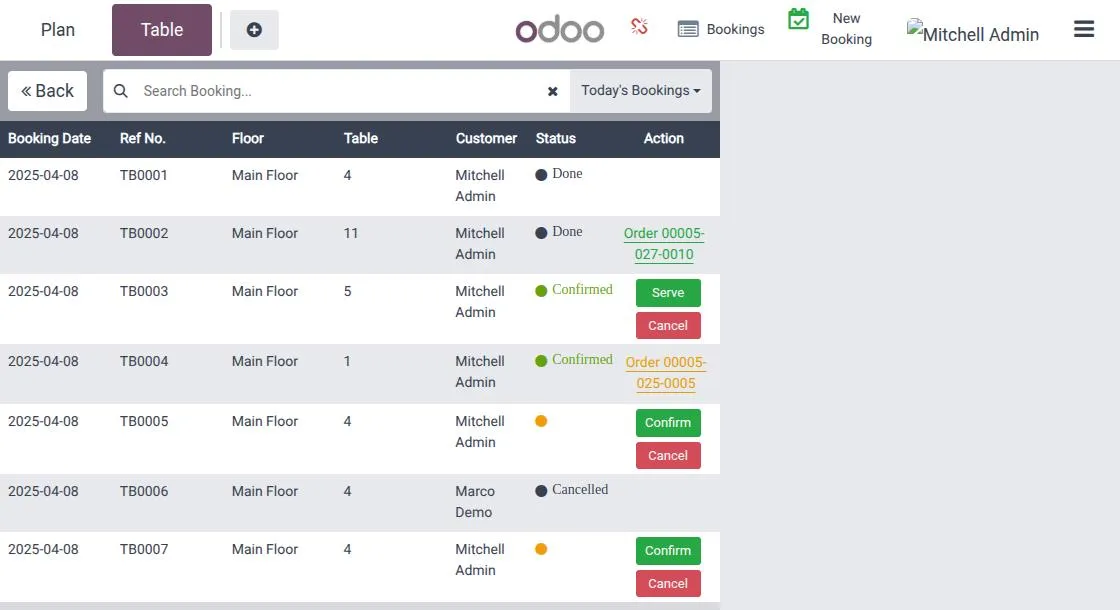
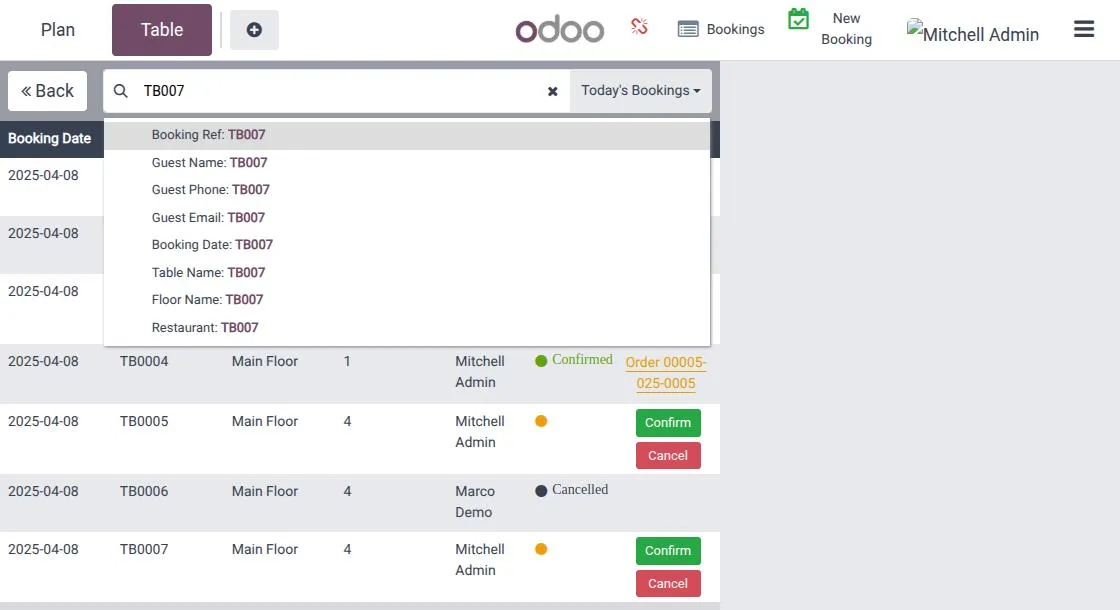
11. View detailed information of each booking including guest info, table, time slot, and status with options to confirm or cancel.

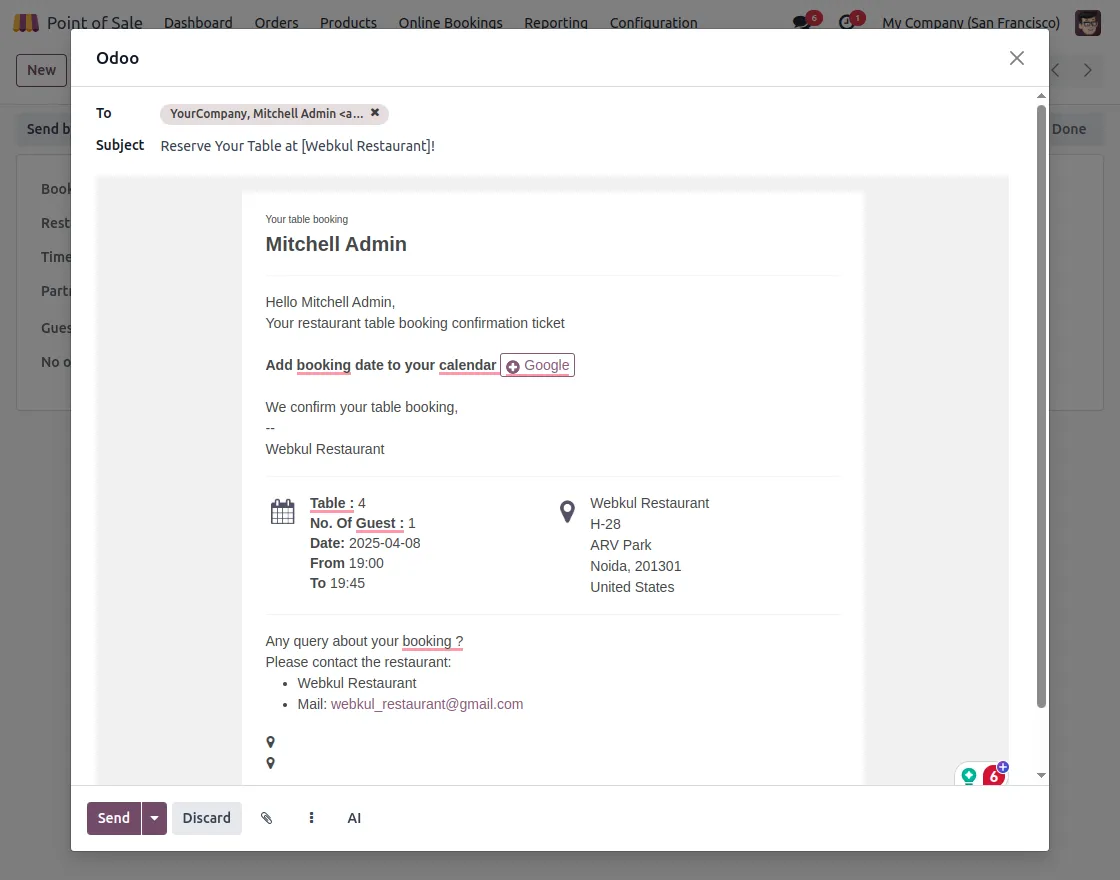
12. Send automated booking confirmation emails to guests with complete booking details.
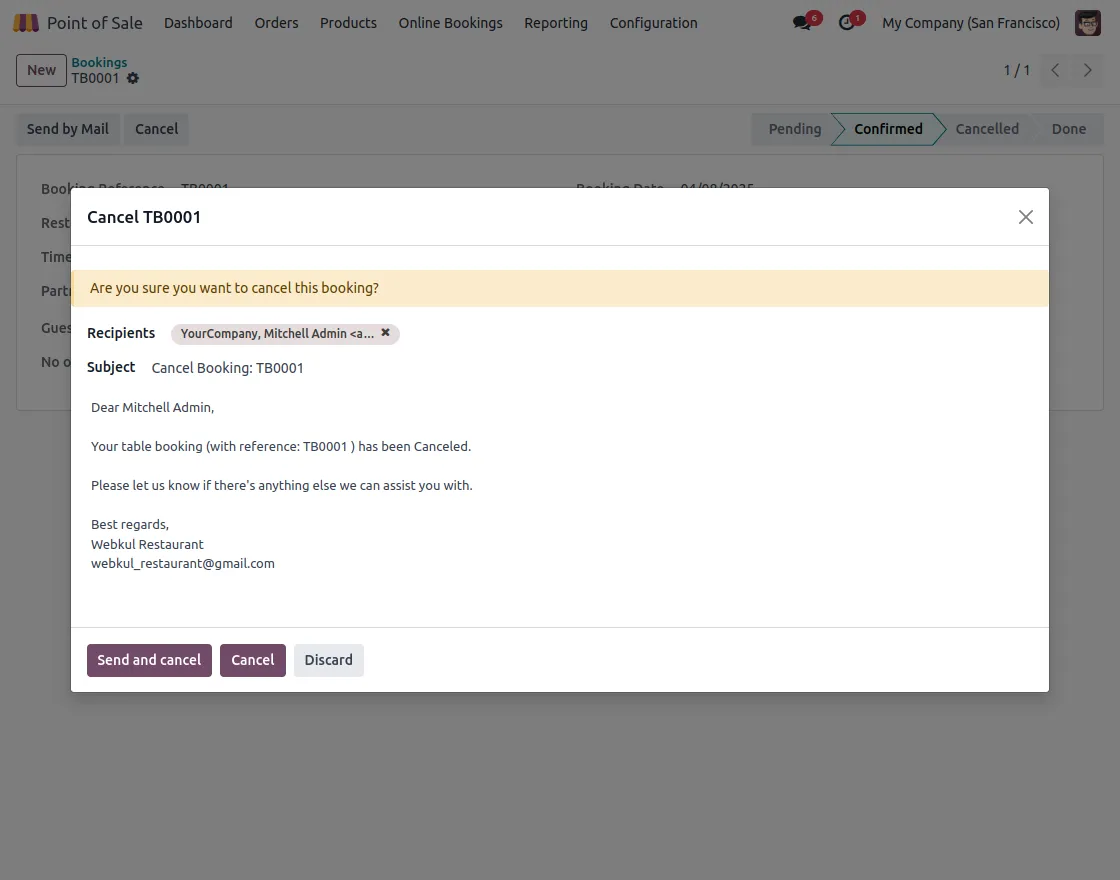
13. Easily cancel bookings with or without email notifications.
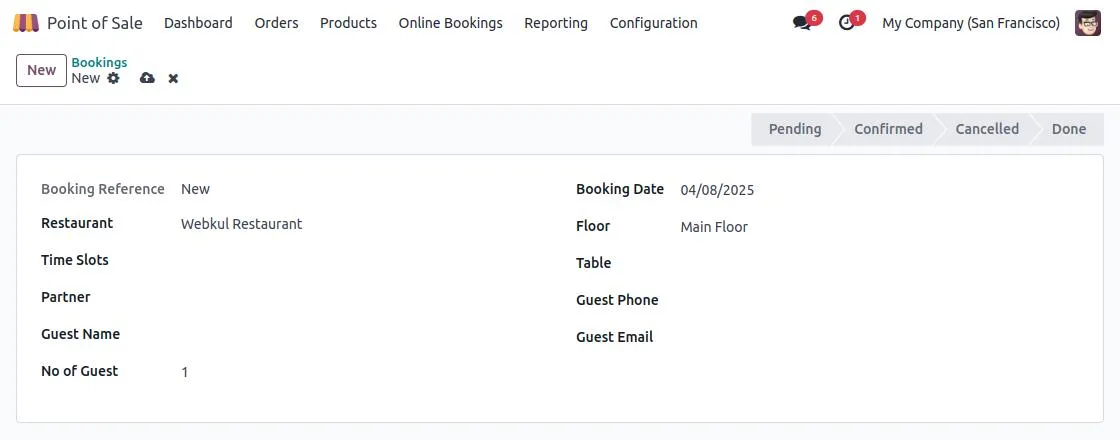
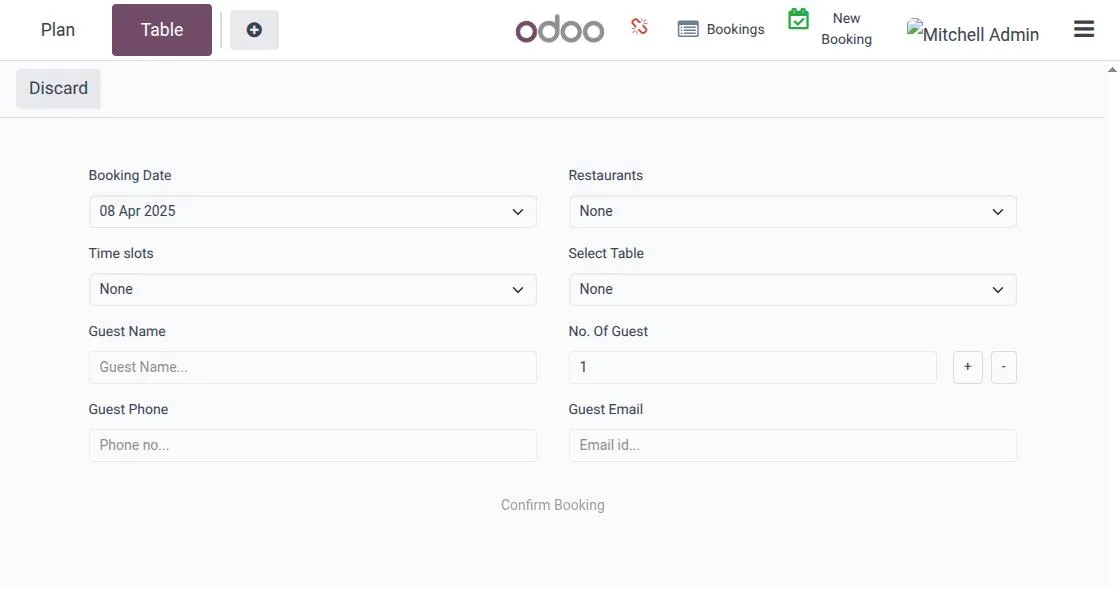
14. Create a new booking by filling in all the required details.

15. In POS Configuration, enable Booking Table View and Confirmation Popup to show a confirmation popup whenever booking status is changed from POS.
POS FRONTEND VIEW
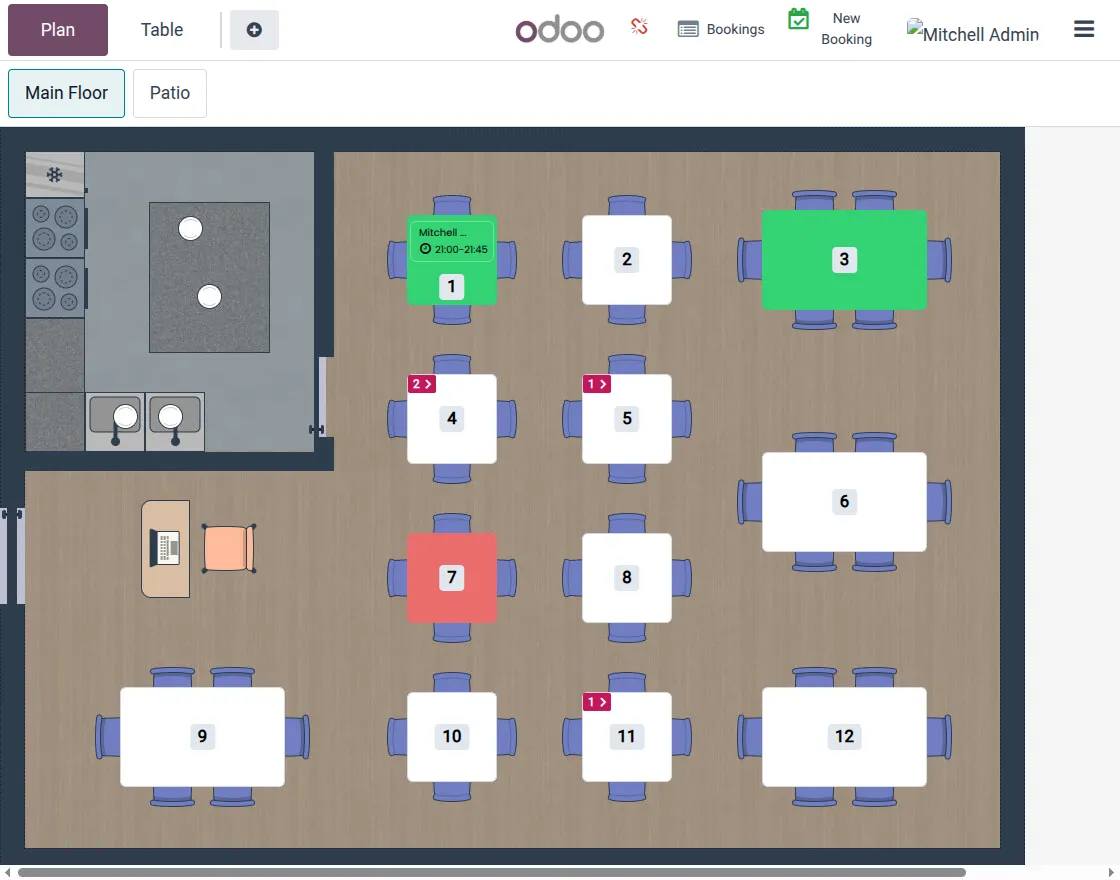
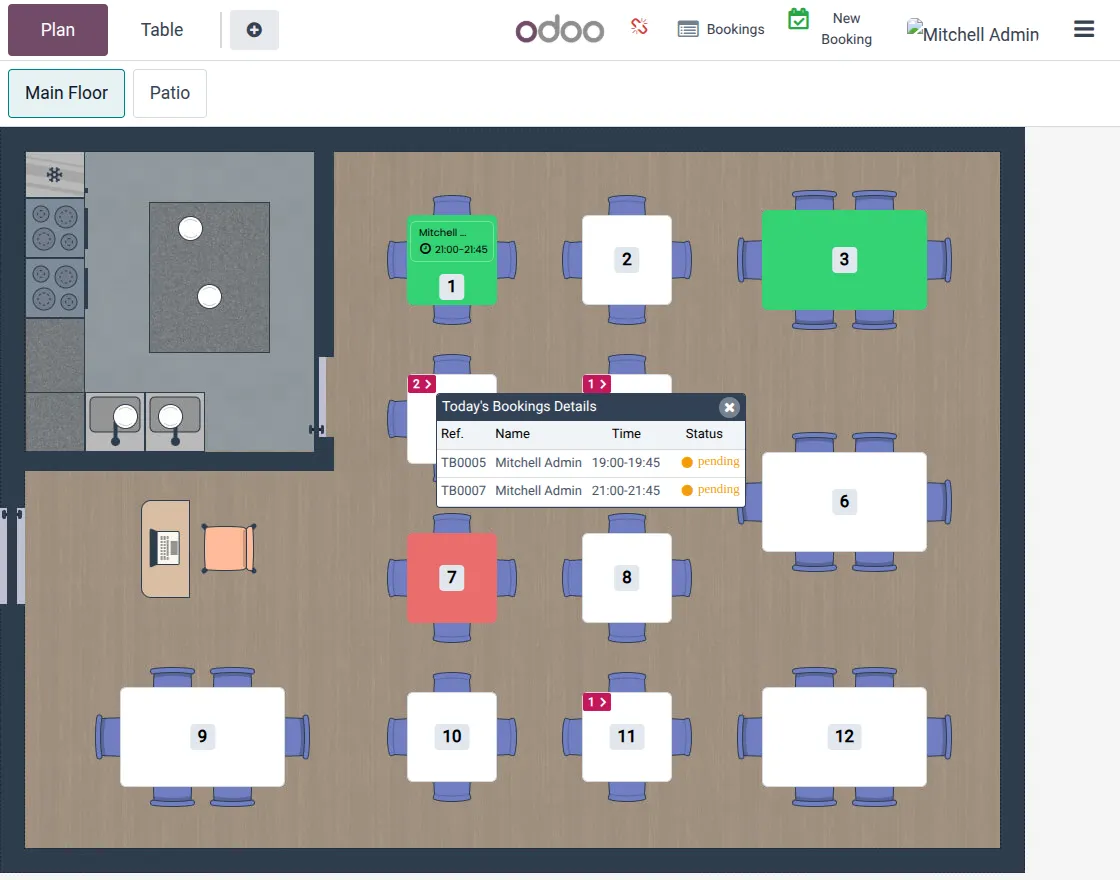
16. Floor view and Table view in case the table is served by online booking.
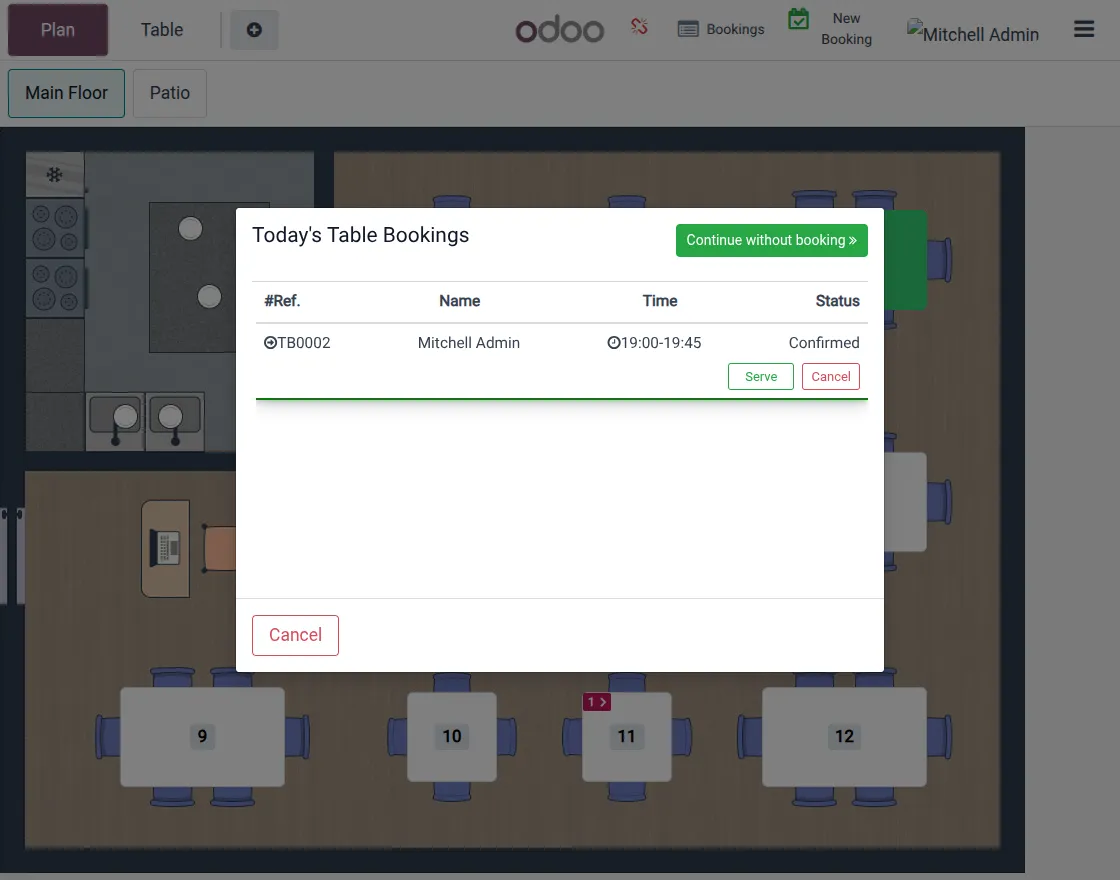
17. Popup view of today’s booking.
18. Tooltip to see today’s booking.
19. Booking screen showing table details, floor, date, status, and available actions.


20. Confirm booking from the booking screen to view the confirmation popup and Serve option.

21. When the admin cancels a booking from the booking screen, a confirmation popup appears.

22. When the admin serves a booking from the booking screen, a confirmation popup appears.

23. View the booking action: green indicator for “Done” and orange for “Under Process.”

24. Search booking records based on any booking field.
25. Create a Booking from PoS by filling in all the required details.

NEED HELP?
Hope you find the guide helpful! Please feel free to share your feedback in the comments below.
If you still have any issues/queries regarding the same, please raise a ticket at the UV Desk.
I hope this helps. In case of any further queries, contact us at our support mail.
Thanks for paying attention!!