User Guide for Odoo POS Nexi Payment Acquirer
Introduction
Odoo POS Nexi Payment Acquirer allows businesses to accept secure card payments directly in Odoo POS using Nexi payment gateway.
The cashier selects Nexi at checkout, and a QR code appears on POS screen for the customer to scan and pay using their own mobile device.
Payment status updates automatically in POS, and all transactions are saved in backend for easy tracking and reconciliation.
Prerequisites for using Odoo POS Nexi Payment Acquirer
Odoo POS Nexi Payment Acquirer works in conjunction with the following module:
You must install the above-mentioned module to use Odoo POS Nexi Payment Acquirer.
Features
- Enable fast QR-based payments in POS system checkout
- Display real-time payment status updates instantly on POS screen
- Allow customers to pay using mobile devices securely through Nexi
- Process transactions on a secure Nexi-hosted page environment safely
- Store complete payment records inside Odoo backend for tracking
- Prevent accidental deletion of successful payment lines in POS orders
- Support multiple payment methods with Nexi gateway integration option
- Provides a better checkout experience for retail customers’ daily operations
- It delivers a reliable and secure QR payment processing workflow
Installation
- Once you purchase the App from Webkul store, you will receive a link to download module’s zip file.
- Extract the file on your system after download finishes. As a result, you will be able to see a folder named- ‘pos_nexi_payment_acquirer’
- Copy and paste this folder inside your Odoo Add-Ons path.
- Now, open Odoo App and click on the Settings menu. Here, click on Activate Developer Mode.
- Then, open Apps menu and click on ‘Update Modules List.’
- In the search bar, remove all the filters and search ‘pos_nexi_payment_acquirer’
- You will be able to see module in the search results. Click on ‘Activate’ to install it.
Workflow
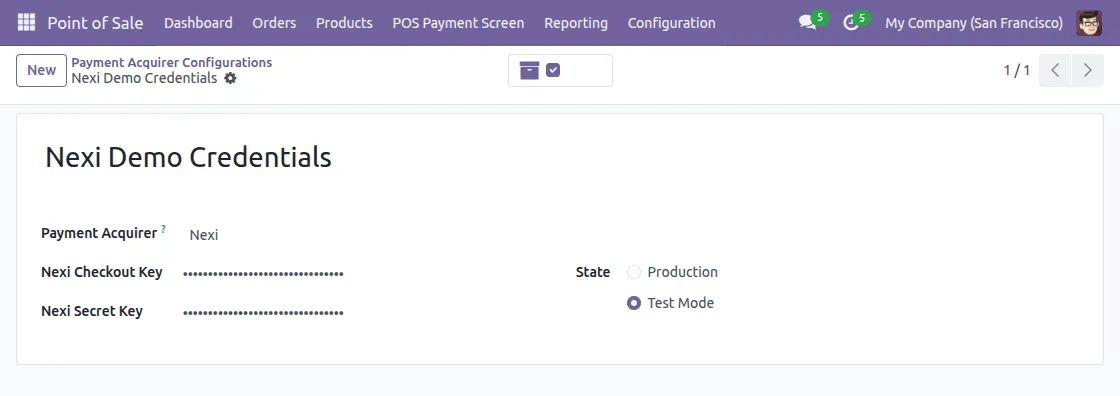
1. After installing Odoo POS Nexi Payment Acquirer, go to Payment Acquirers and open Nexi configuration.
Enter the Merchant ID and Authorization details provided by Nexi and save the settings.

2. Open POS session and proceed to the checkout screen. Select Nexi from the available payment options.


3. Upon selecting Nexi, a unique QR code appears on POS screen. The customer scans the QR code using their mobile device.


4. The customer is redirected to the secure Nexi payment page and enters card details. Nexi processes payment securely on its hosted page.

5. POS updates the payment line after receiving the payment result. A confirmation pop-up appears before validating an order.

6. Completed Nexi payments cannot be removed from the POS order. If the payment is still in progress, a warning message will appear.

7. After successful payment, the order can be validated and receipt can be printed or previewed.

8. Your payment details are automatically saved for future reference.


Need Help?
Hope you find guide helpful! Please feel free to share your feedback in the comments below.
If you still have any issues/queries, please create a ticket at the UV Desk.
I hope this helps. In case of any further queries, contact us at our support mail.
Thanks for paying attention!!