User Guide for Odoo Job Sheet and Estimation Manager
Introduction
Odoo Job Sheet and Estimation Manager is a complete Job Estimation Software that helps businesses manage job sheets with accurate cost calculation and a structured workflow.
It works as a Cost Estimation Software to calculate material, labour, overhead, and service charges before starting any job or production process.
This module is ideal for service, repair, and Manufacturing Cost Estimation, ensuring clear pricing and simplified Job Management before execution.
Features
- Create job sheets easily using predefined smart templates
- Structured cost estimation for materials, labour, and overhead
- Dynamic customer questionnaires with conditional logic support
- Digital signature approval directly from the customer portal
- Automatically generate sales orders and invoices if enabled
- Auto-create manufacturing orders after job confirmation if enabled
- Customer portal access for job review and approval
- Track job status from draft to completion stage
- Generate professional PDF job sheet reports instantly
Installation
- Once you purchase the App from the Webkul store, you will receive a link to download the module’s zip file.
- Extract the file on your system after the download finishes. As a result, you will be able to see a folder named ‘job_sheet_and_estimation_manager’
- Copy and paste this folder inside your Odoo Add-Ons path.
- Now, open Odoo App and click on the Settings menu. Here, click on Activate Developer Mode.
- Then, open the Apps menu and click on ‘Update Modules List.’
- In the search bar, remove all the filters and search ‘job_sheet_and_estimation_manager’
- You will be able to see the module in the search results. Click on ‘Install’ to install it.
Workflow
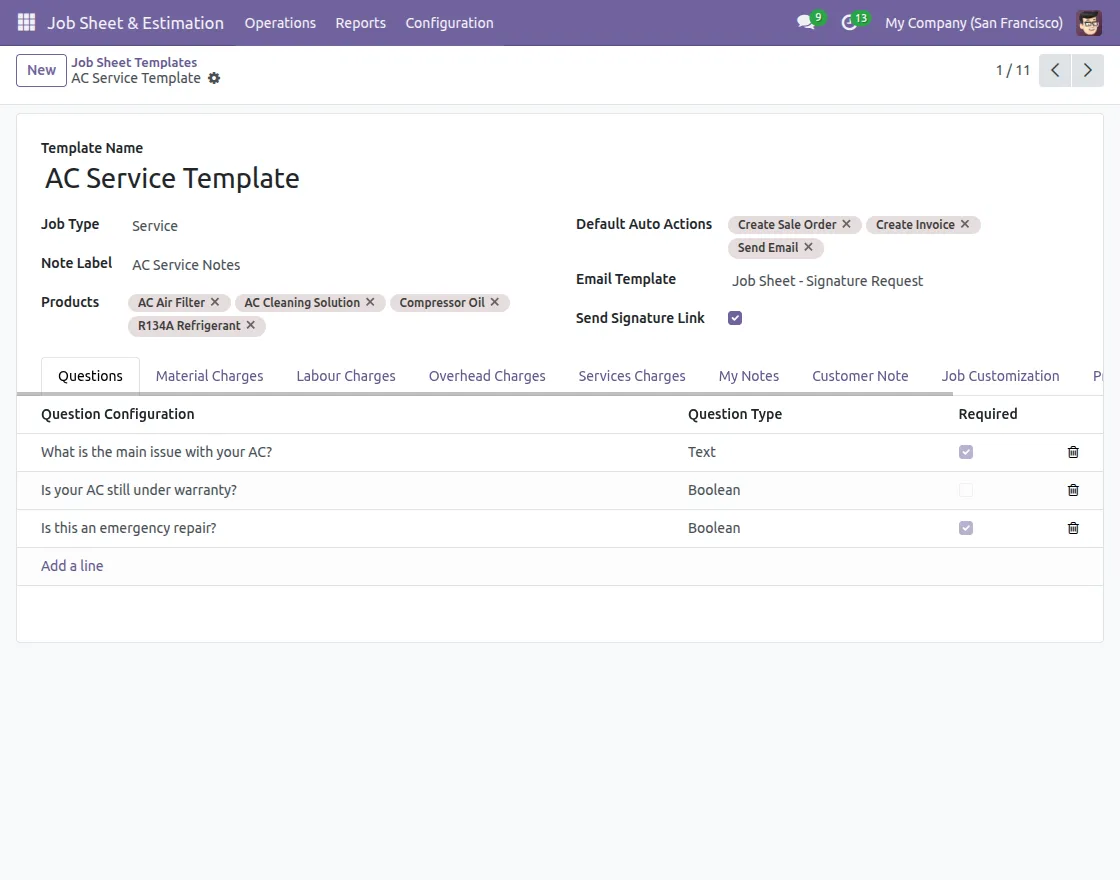
1. After installing the Odoo Job Sheet and Estimation Manager module, create the Job Sheet template from Job Sheet & Estimation > Configuration > Job Sheet Template.
Fill out all the details like Template Name, Job Type, Products, Default Auto Actions, etc.
Configure the questions with their Question Type, Charges, Customer Note, etc and click on save.

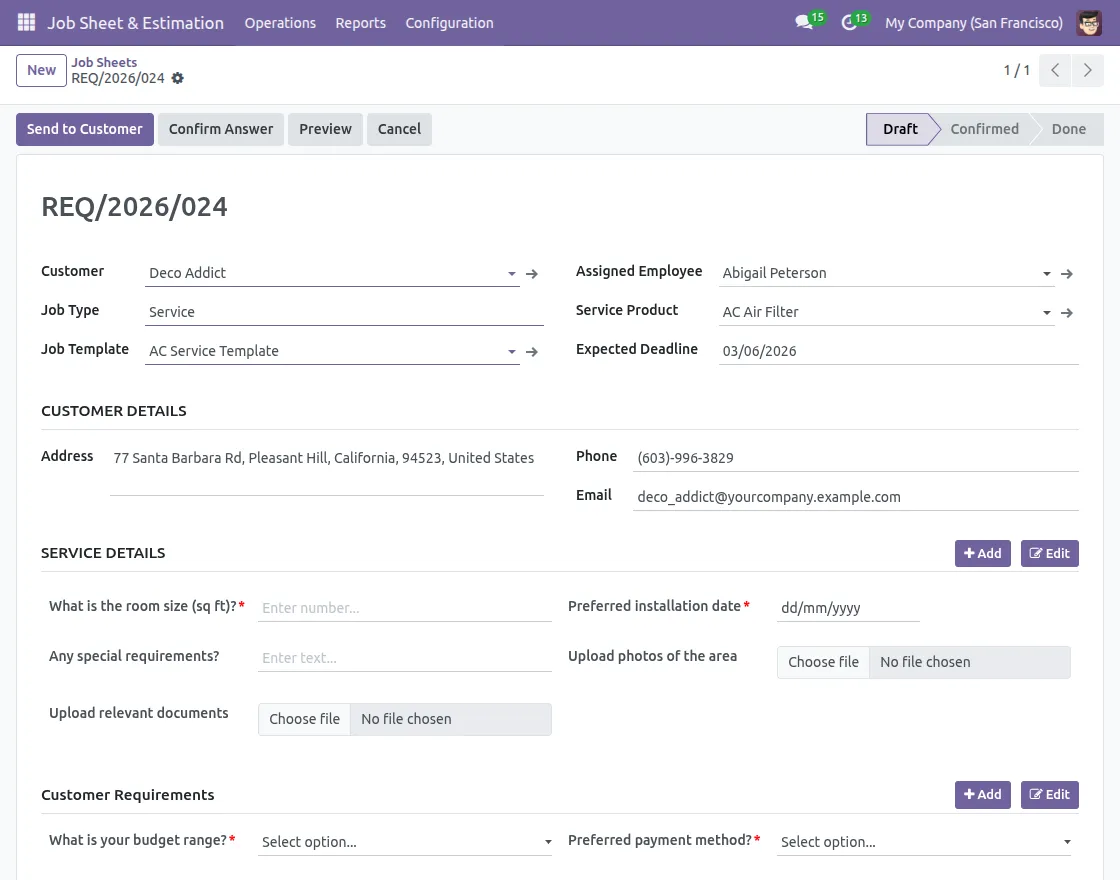
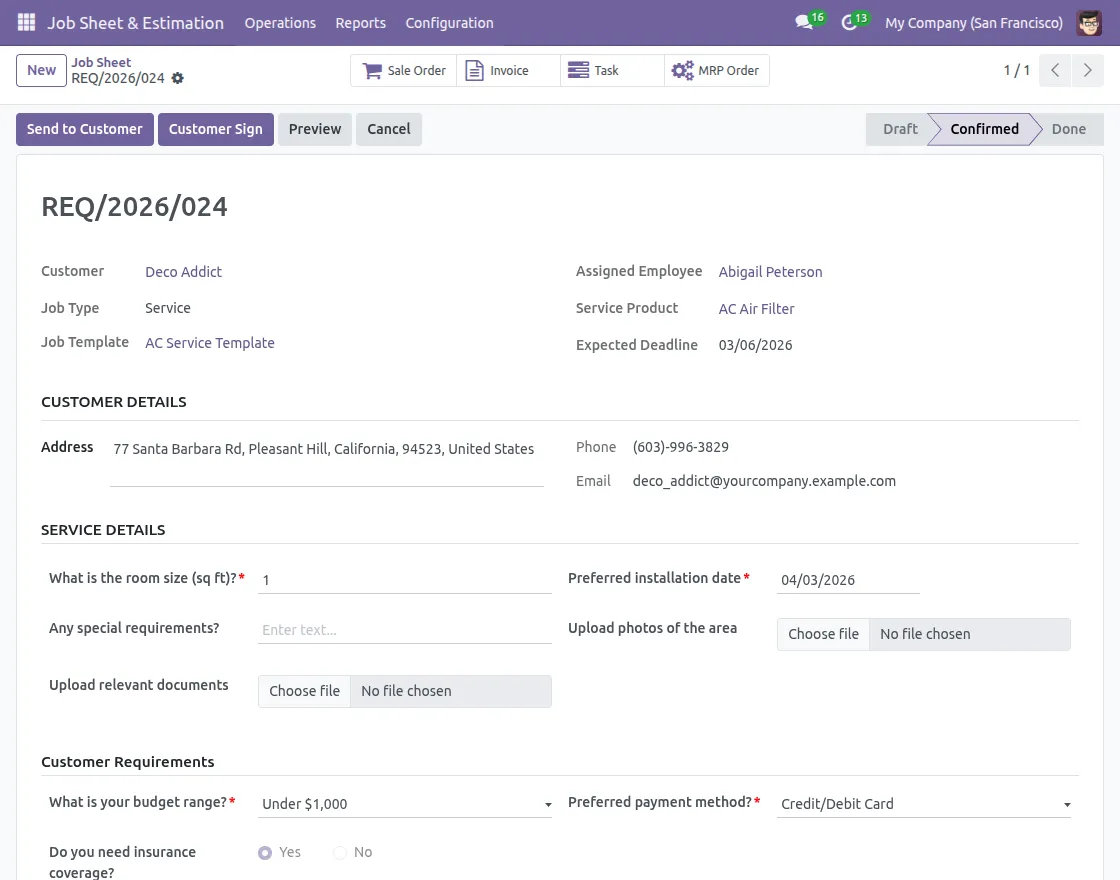
2. Create a new Job Sheet from the Operations > Job Sheet menu.
Fill in the required fields such as Customer Name, Job Type, Job Template, Assigned Employee, and Expected Deadline.
The system will automatically calculate the total cost. Click on Send to Customer to share the job sheet for review and approval.
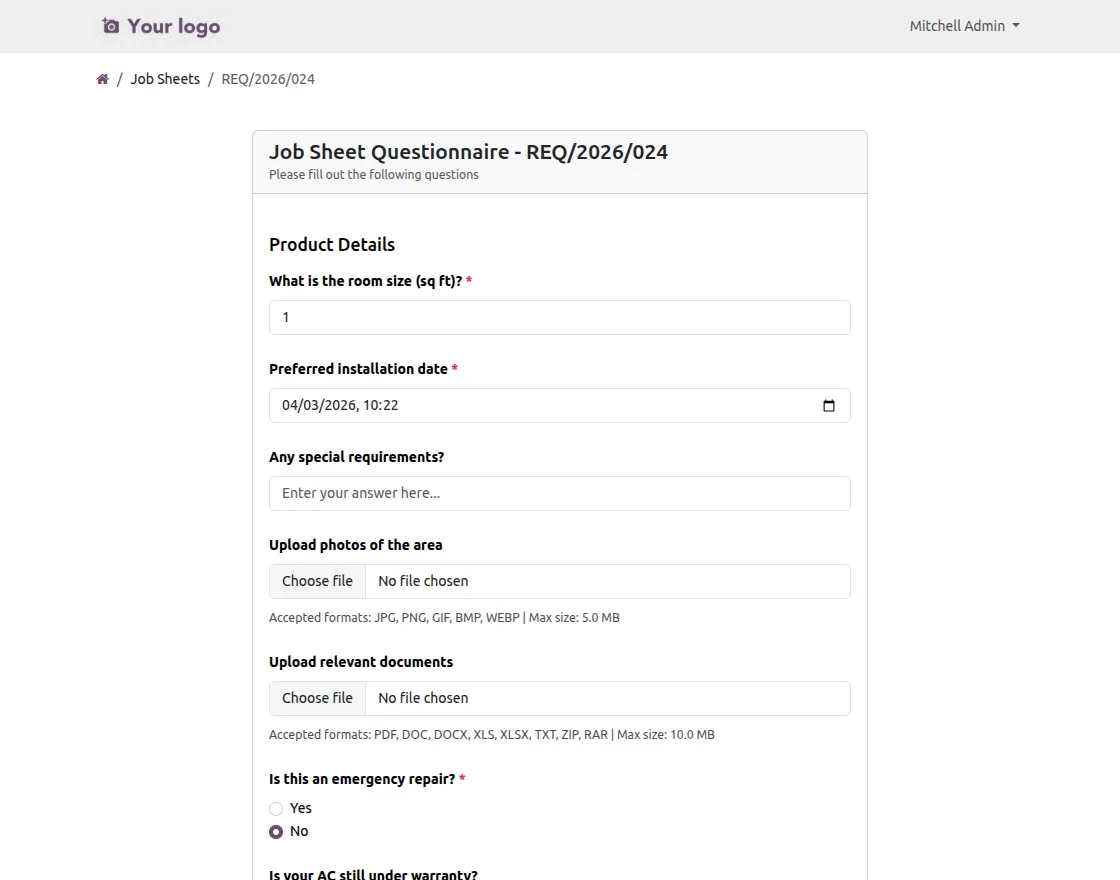
3. Click on Send to Customer, and the customer will receive the job sheet in the portal.
The customer can fill out the dynamic questionnaire, upload images, videos, or documents if required, and click on submit.
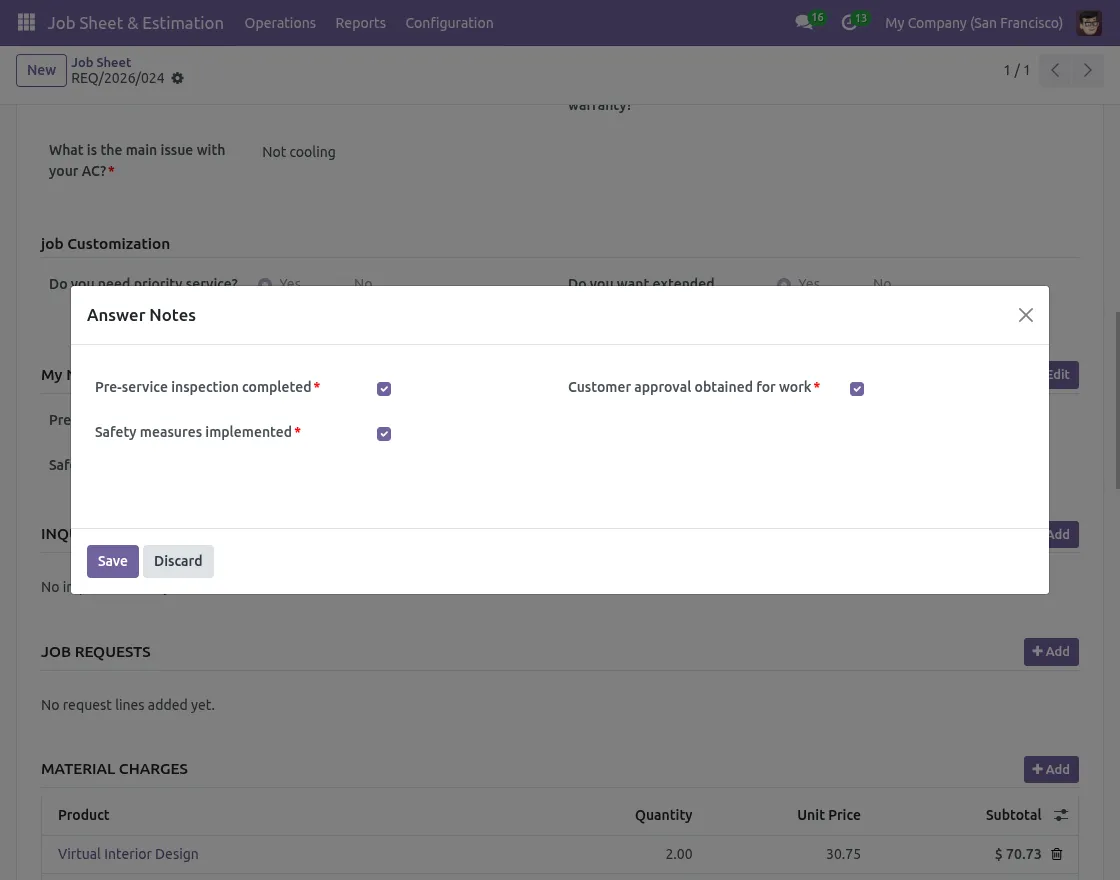
4. Once the customer fills out the questionnaire and submits it, you can review and verify all the provided details.
Check the My Notes and click the responses carefully, click OK, and then proceed by clicking Confirm to finalize the job.
5. Once you click on Confirm to proceed.
The system will automatically create the Sales Order, Invoice, Manufacturing Order, and Task (if enabled), and the job status will move from Draft → Confirmed.
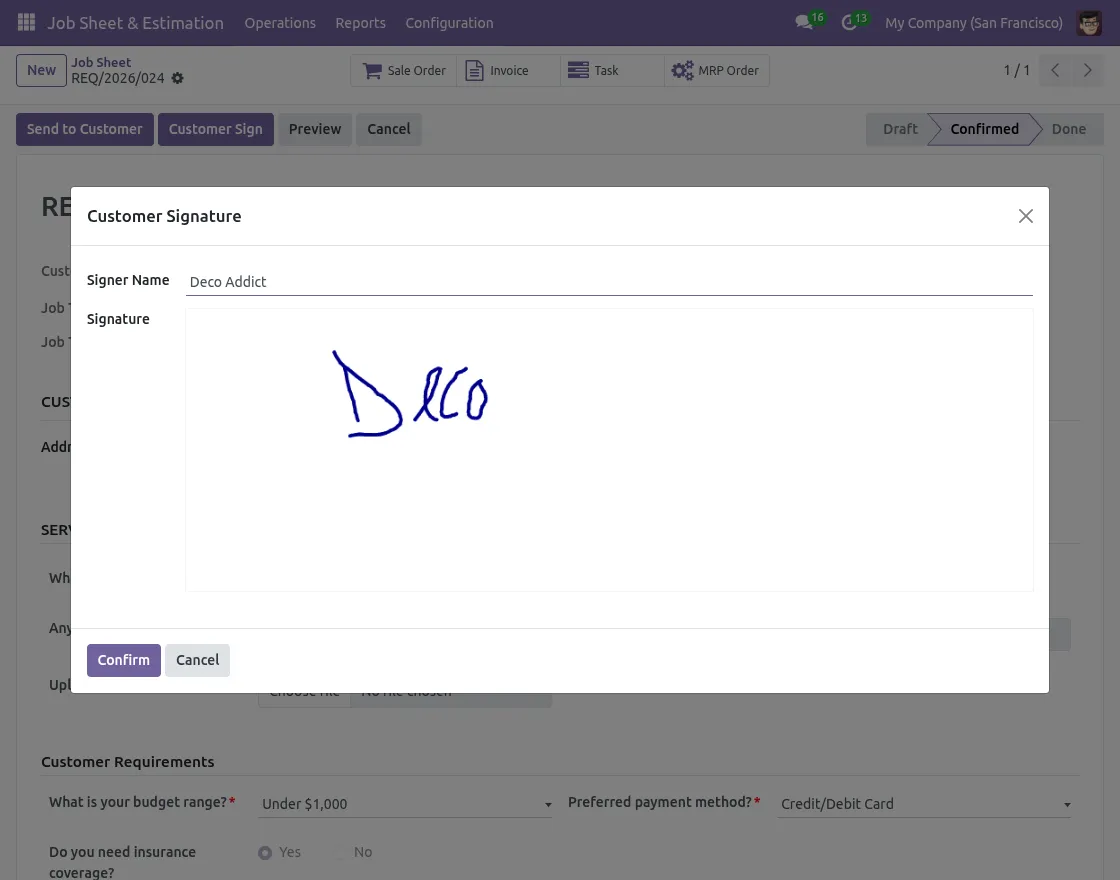
6. Click on Customer Sign. The customer can review the job sheet directly from the portal, provide a digital signature for approval, and download the PDF job report.
Track the job status in real time from their portal account. Click on Done.
Need Help?
Hope you find the guide helpful! Please feel free to share your feedback in the comments below.
If you still have any issues/queries, please create a ticket at the UV Desk.
I hope this helps. In case of any further queries, contact us at our support mail.
Thanks for paying attention!!