User Guide for Odoo GST – Returns and Invoices
Table of Content
INTRODUCTION
Odoo GST – Returns and Invoices helps businesses manage GST activities, reporting, and compliance directly within Odoo.
Using this module, users can create GSTR1 and GSTR9 reports, manage GST invoices, and download GST files in JSON, CSV, and Excel formats for GST filing and verification purposes.
This module automatically categorizes invoices into B2B, B2C, Export, HSN, CDNR, and CDNUR sections, helping users maintain accurate GST records and reduce manual effort.
Users can monitor GST invoices, tax amounts, summaries, and filing-ready data from a centralized dashboard. This module also supports GST reconciliation, GST invoice validation, HSN reporting, and GST return management across multiple companies within a single Odoo system.
FEATURES
- Generate GSTR1 GST return reports with ready GST data for filing activities.
- Create GSTR9 annual GST reports with tax summaries and organized GST records.
- Download GST reports in JSON, CSV, and Excel formats for upload and verification.
- Automatically categorize invoices into B2B, B2C, Export, HSN, CDNR, and CDNUR sections.
- Manage GST reporting periods by configuring fiscal years and monthly GST periods.
- Monitor GST invoices, tax amounts, summaries, and filing-ready data from a centralized dashboard.
- Compare GST records and tax summaries using GST reconciliation reports.
- Support GST reporting and GST return management for multiple companies in Odoo.
- Validate GSTIN details, invoice information, tax rates, and HSN data before generating returns.
INSTALLATION
- Once you purchase the App from the Webkul store, you will receive the link to download the zip file of the module.
- Extract the file from your system after the download finishes. You will be able to see a folder named- ‘gst_invoice’.
- Copy and paste this folder inside your Odoo Add-Ons path.
- Now, open the Odoo App and click on the Settings menu. Here, click on Activate the Developer Mode.
- Then, open on Apps menu and click on ‘Update Modules List’.
- In the search bar, remove all the filters and search ‘gst_invoice’.
- You will be also able to see the module in the search result. Click on ‘Activate’ to install it.
WORKFLOW
1. After installing Odoo GST – Returns and Invoices module. Go to Periods > Fiscal Years, enter the Start Date and End Date, then:
- Click Create Monthly Periods to generate monthly GST periods.
- Or, click Create 3 Months Periods to generate GST periods in 3-month batches.


2. Open the Periods menu and create GST reporting periods manually for the selected fiscal year. You can also create periods automatically from the Fiscal Year form using Create Monthly Periods or Create 3 Months Periods.


3. Navigate to the GST TOOL, click on the GSTR1 Tool, and create a new GST return report. Select the reporting period and click on fetch invoices to fetch the data for processing.
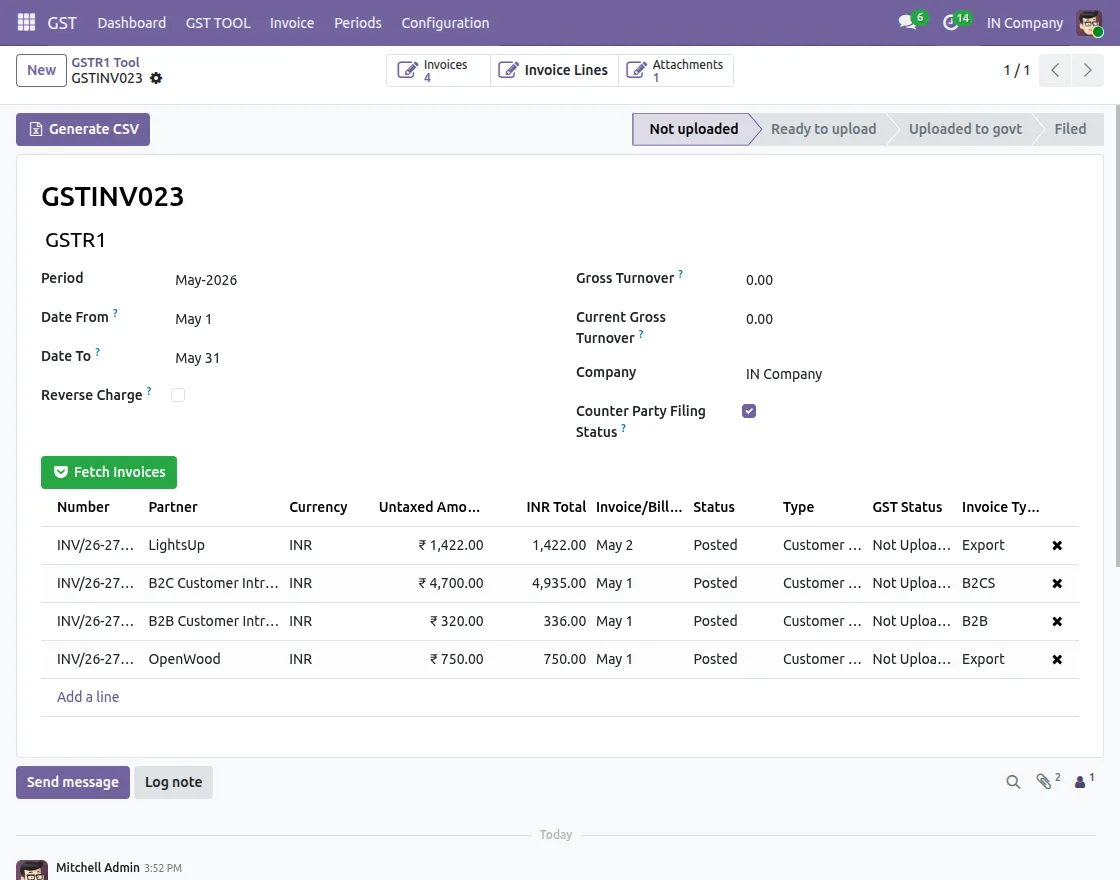
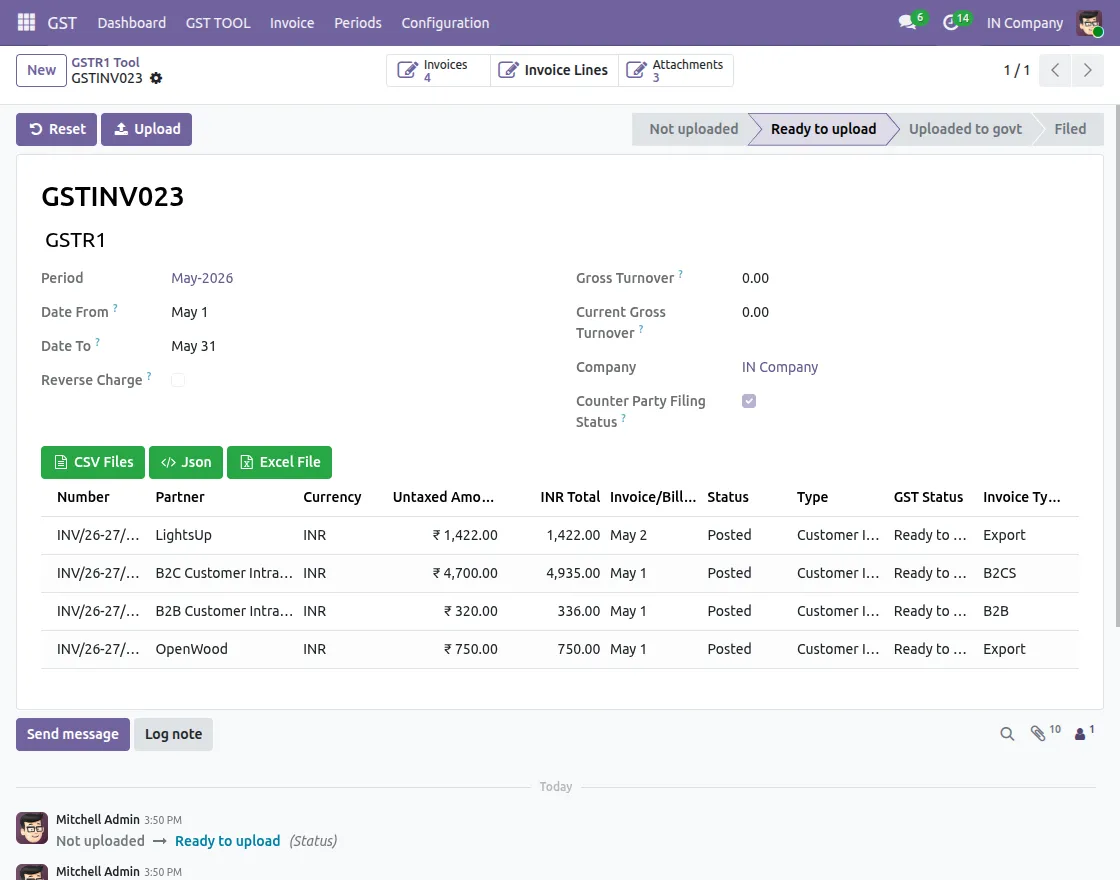
4. After fetching posted invoices, click Generate File to prepare GST return data. Download the generated file in JSON, CSV, or Excel format.
5. Click on the GSTR9 Tool to create a GSTR9 report by selecting the required financial year. Fetch annual GST data and generate tax summaries.

6. Generate and download annual GST reports in JSON, CSV, and Excel formats for review and GST filing activities.

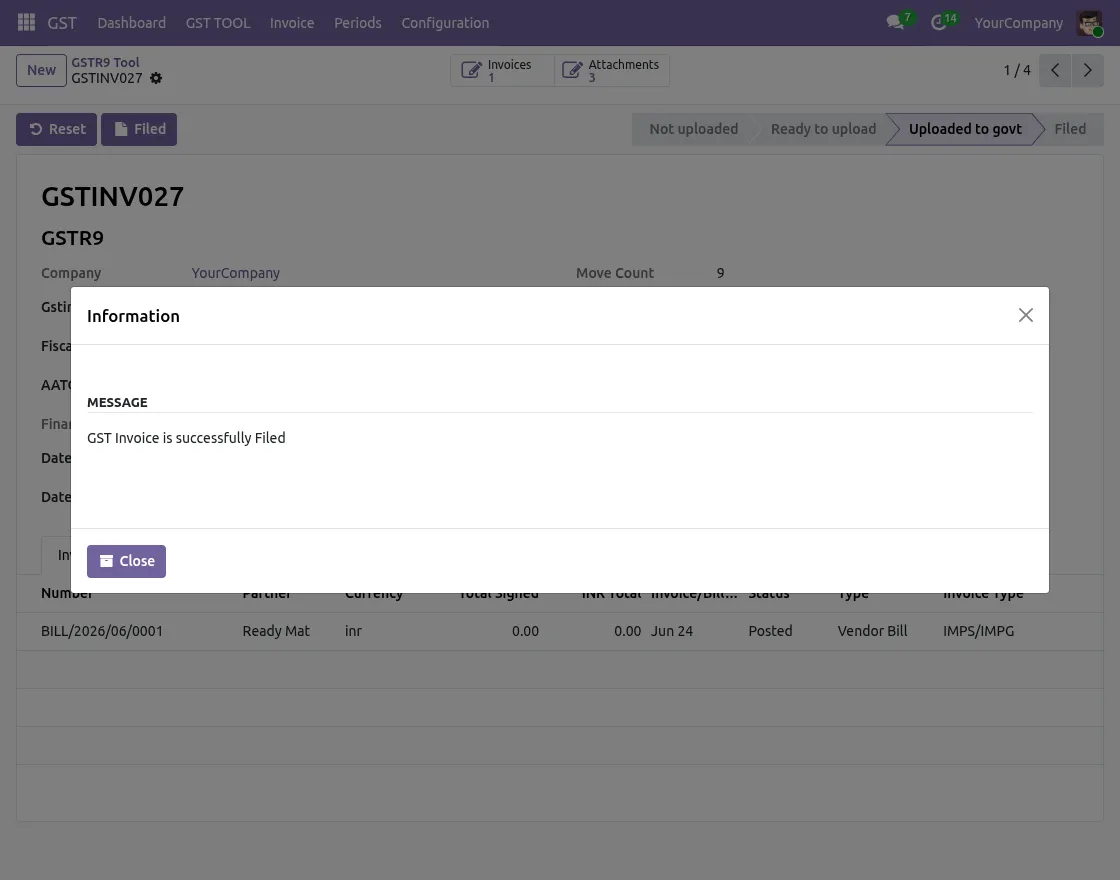
7. After filing the GST return on the GST portal, click Filed in Odoo to update the return status. A confirmation pop-up will appear, indicating that the return has been filed successfully.
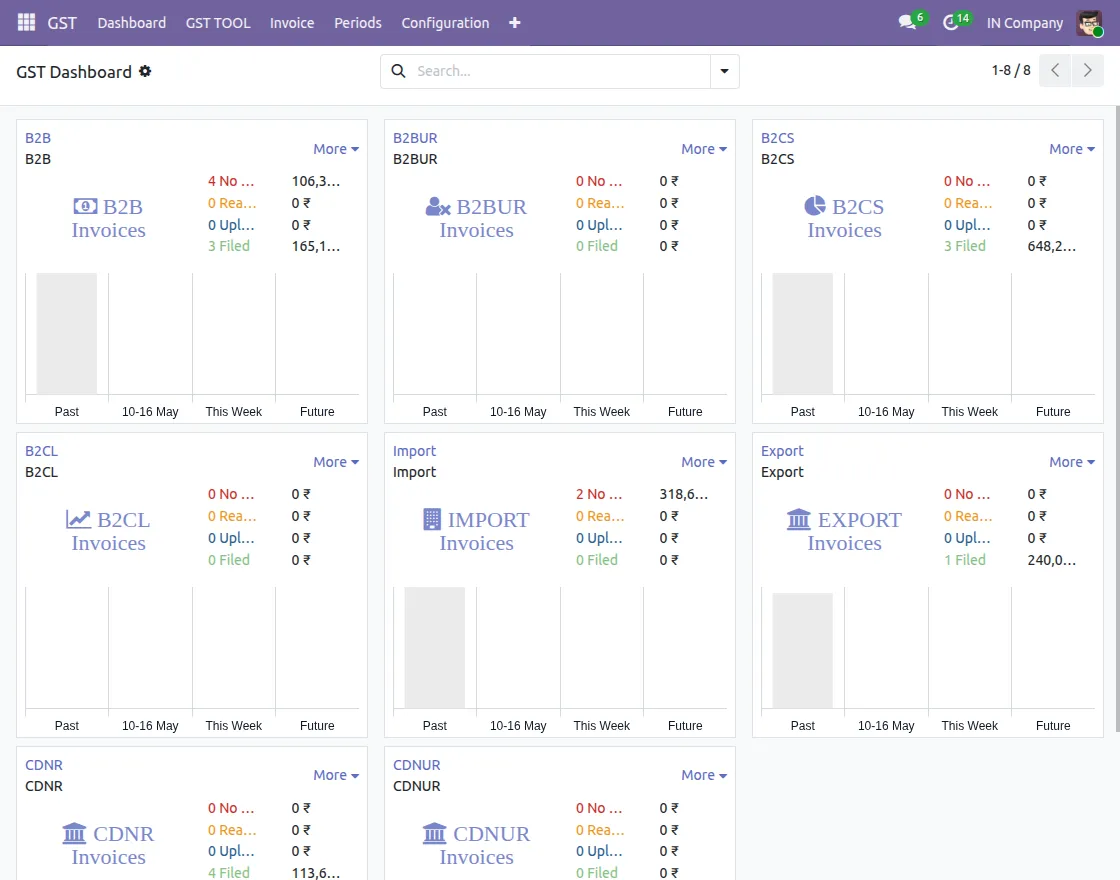
8. Access the GST Dashboard to view GST invoices, tax amounts, summaries, and filing-related information from a single location.
NEED HELP?
Hope you find the guide helpful! Please feel free to share your feedback in the comments below.
If you still have any issues/queries, please create a ticket at the UV Desk.
I hope this helps. In case of any further queries, contact us at our support mail.
Thanks for paying attention!!