User Guide for Odoo DPD Cloud Shipping Integration
Introduction
Odoo DPD Cloud Shipping Integration connects your system with DPD Cloud so you can create shipments and print labels directly from delivery orders. It removes the need to log in to the DPD portal and helps your team manage all courier tasks from one place.
This module also displays tracking references inside delivery orders, allowing you to monitor shipments without switching between multiple platforms. This ensures faster order handling, fewer errors, and a smooth shipping workflow for DPD deliveries.
Prerequisites for using Odoo DPD Cloud Shipping Integration
Odoo DPD Cloud Shipping Integration works in conjunction with the following module:
You must install the above-mentioned module to use Odoo DPD Cloud Shipping Integration.
Features
- Apply fixed DPD shipping rates directly to sales orders.
- Create DPD shipments from delivery orders in one click.
- Automatically generate and print DPD shipping labels.
- Track DPD orders in real-time from the backend.
- Configure the DPD carrier easily using API credentials.
- View tracking references inside delivery orders.
Installation
- Once you purchase the App from Webkul store, you will receive a link to download module’s zip file.
- Extract the file on your system after download finishes. As a result, you will be able to see a folder named- ‘dpd_cloud_shipping_integration’.
- Copy and paste this folder inside your Odoo Add-Ons path.
- Now, open Odoo App and click on the Settings menu. Here, click on Activate Developer Mode.
- Then, open Apps menu and click on ‘Update Modules List.’
- In the search bar, remove all the filters and search ‘dpd_cloud_shipping_integration’.
- You will be able to see module in the search results. Click on ‘Activate’ to install it.
Workflow
Configuration of Odoo DPD Cloud Shipping Integration
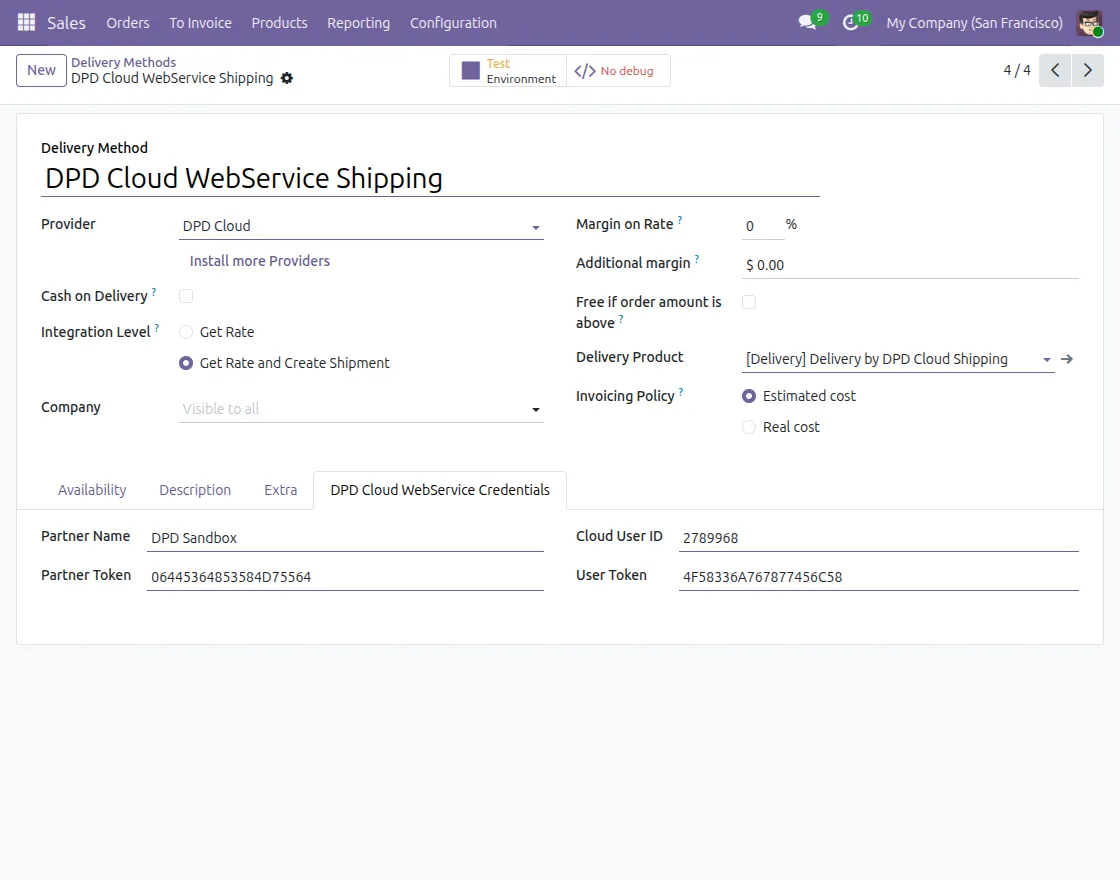
1. After installing the module, go to Sales → Configuration → Delivery Methods from your backend.
Then, open DPD Cloud WebService Shipping to configure the carrier, integration level, margins, and required DPD credentials.

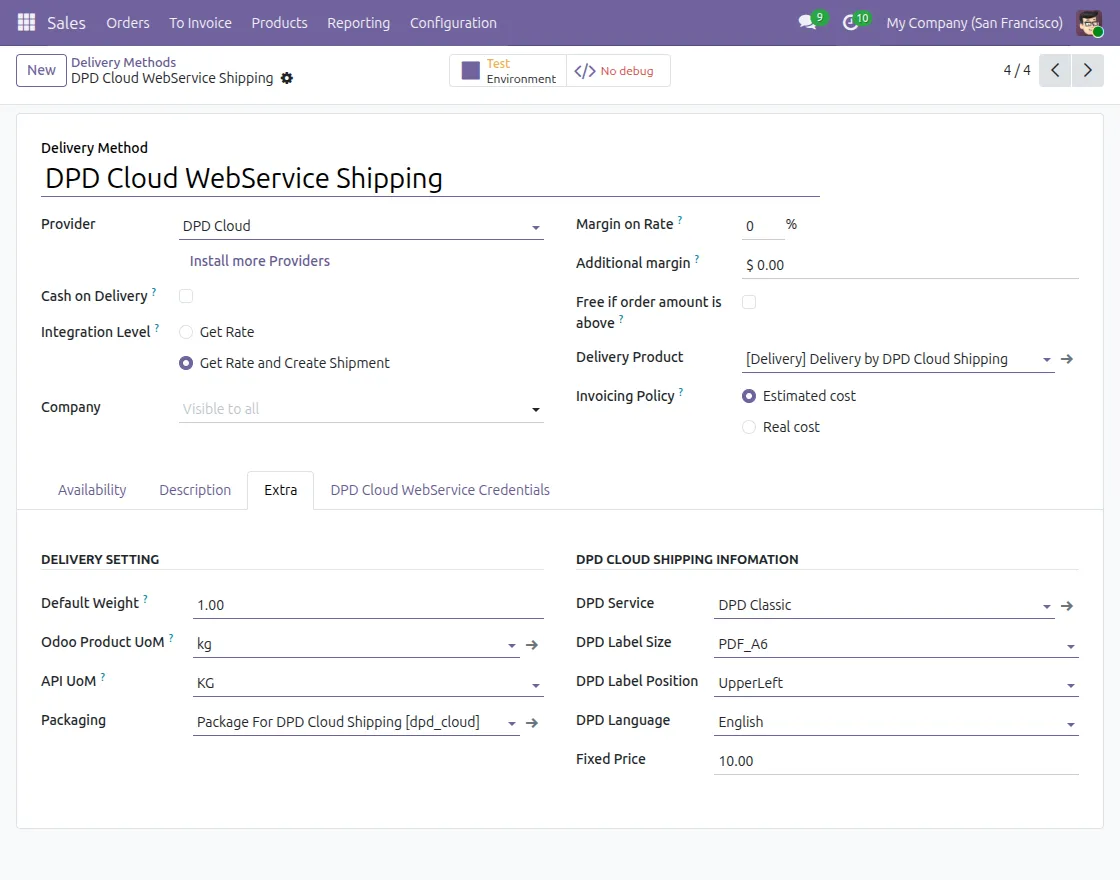
2. Next, under the Extra tab, configure the delivery settings such as default weight, DPD service type, label size, label position, language, and fixed price as required.
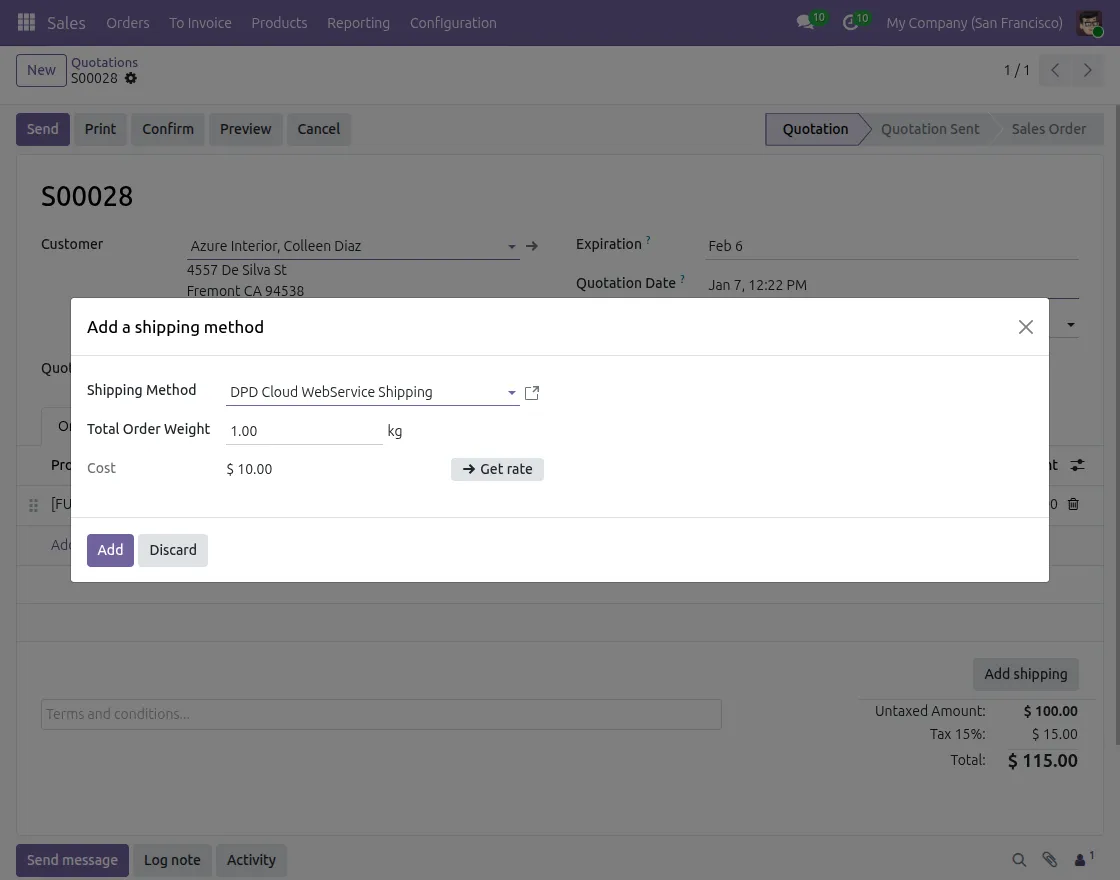
3. After configuring the carrier, open a Sales Order and click on Add Shipping.
Then, select DPD Cloud WebService Shipping and click Get rate to fetch the fixed DPD shipping charge.
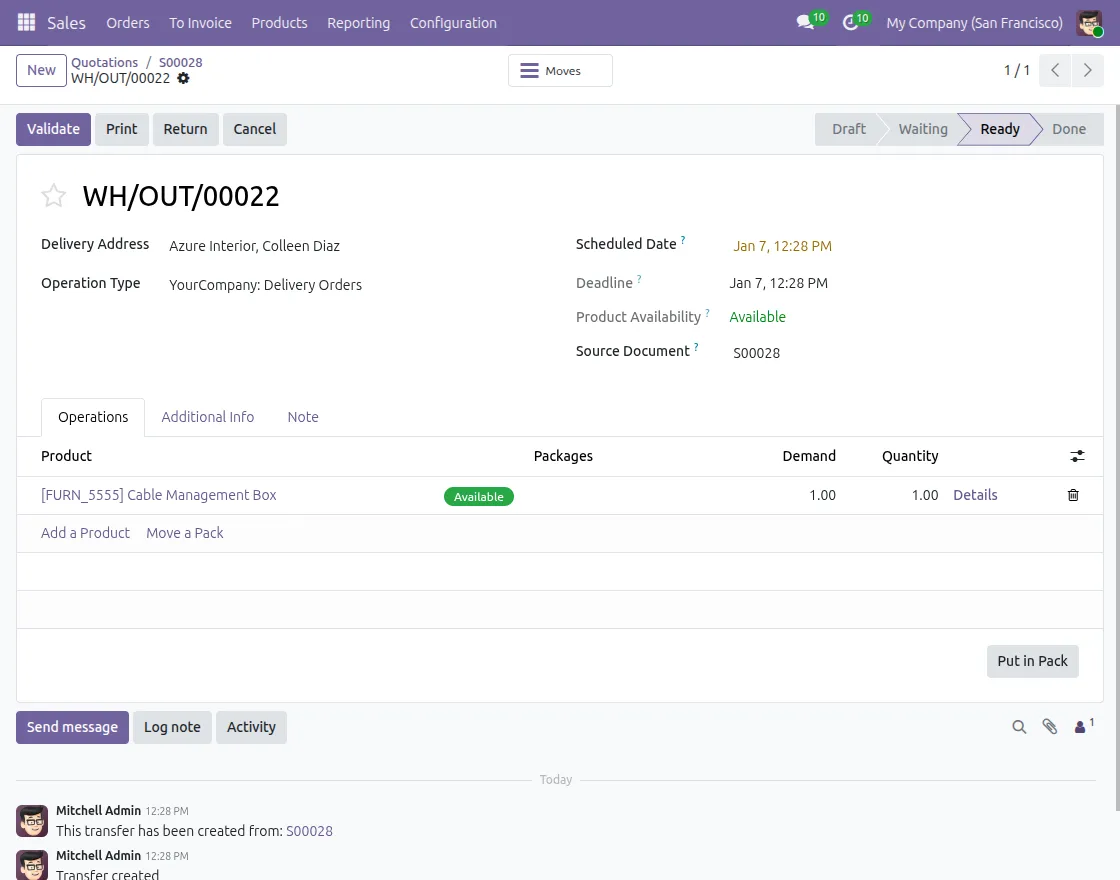
4. Next, confirm the quotation and open the related Delivery Order from the sales order.
Then, make sure the order status is set to Ready before creating the shipment.
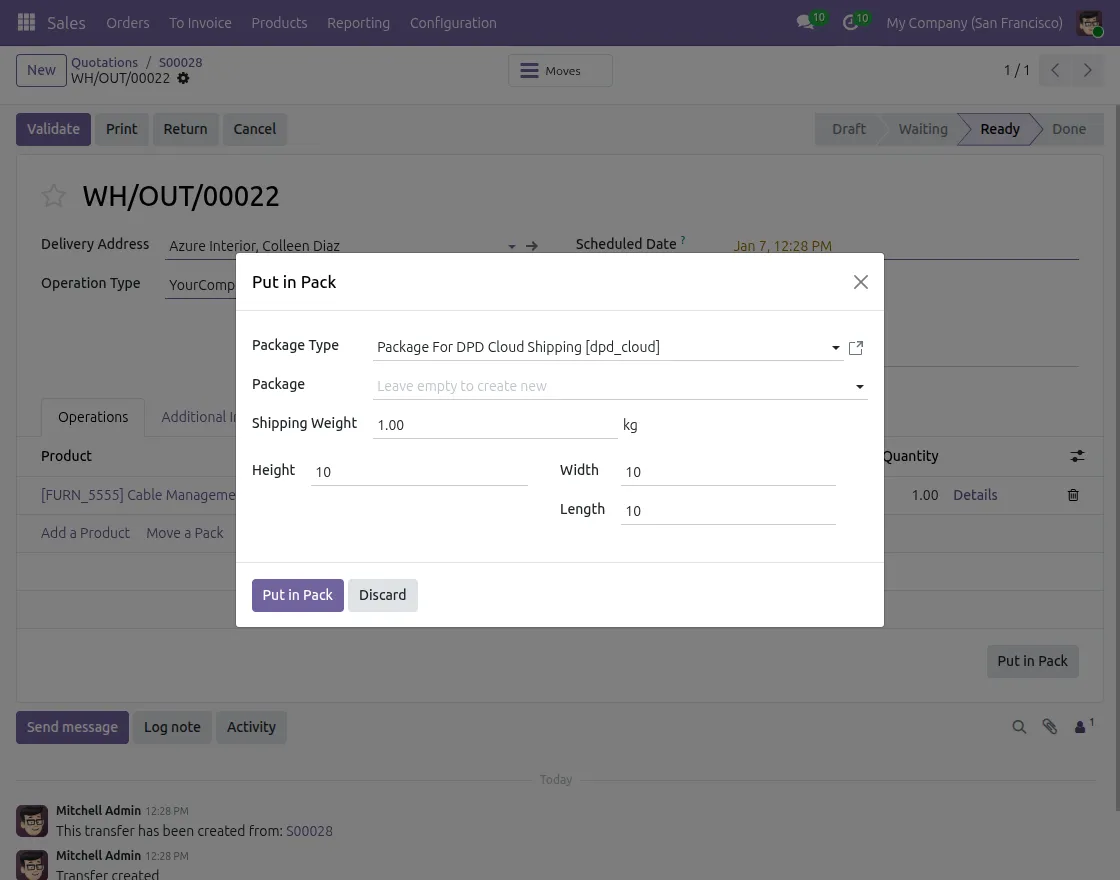
5. Next, click Put in Pack on the delivery order to open the package window. Then, enter the package weight and dimensions and confirm to pack the products.
6. After packing the products, click Validate to complete the delivery order.
Then, the system creates the DPD shipment, generates the shipping label, and shows the tracking reference in the Shipping Information section.

7. Finally, download the generated DPD shipping label from the chatter and share the tracking reference with the customer.
This completes the DPD shipment process and allows you to monitor the delivery status anytime.
8. Lastly, use the DPD tracking page and enter the parcel label number to view real-time delivery status such as In transit, At delivery centre, and Delivered.
Need Help?
Hope you find guide helpful! Please feel free to share your feedback in the comments below.
If you still have any issues/queries, please create a ticket at the UV Desk.
I hope this helps. In case of any further queries, contact us at our support mail.
Thanks for paying attention!!