User Guide for Odoo BPoint Payment Acquirer
Table of Content
Introduction
Odoo BPoint Payment Acquirer helps businesses accept secure online payments from website checkout using BPoint’s hosted payment pages.
Customers are redirected to a secure Commonwealth Bank-hosted payment page to complete card payments safely. The module supports real-time payment updates and secure transaction handling.
Odoo BPoint Payment Acquirer also supports Sandbox and Production environments. Businesses can test payment workflows before accepting live customer payments.
Features
- Secure hosted checkout through Commonwealth Bank payment pages
- Support for Visa, Mastercard, and other secure card payments
- Real-time payment status updates in the backend transaction records
- Separate Test and Live payment environments for safe testing
- Automatic payment confirmation after successful payment processing
- Multi-currency payment support based on merchant account settings
- Secure payment communication between the website and BPOINT services
- Centralized backend tracking for all payment transactions
- Automatic creation of payment records after successful transactions
Installation
- Once you purchase the App from Webkul store, you will receive a link to download module’s zip file.
- Extract the file on your system after the download finishes. As a result, you will be able to see a folder named ‘wk_payment_bpoint’.
- Copy and paste this folder inside your Odoo Add-Ons path.
- Now, open the Odoo App and click on the Settings menu. Here, click on Activate Developer Mode.
- Then, open Apps menu and click on ‘Update Modules List.’
- In the search bar, remove all the filters and search ‘wk_payment_bpoint’.
- You will be able to see module in the search results. Click on ‘Activate’ to install it.
Workflow
Configuration of Odoo BPoint Payment Acquirer
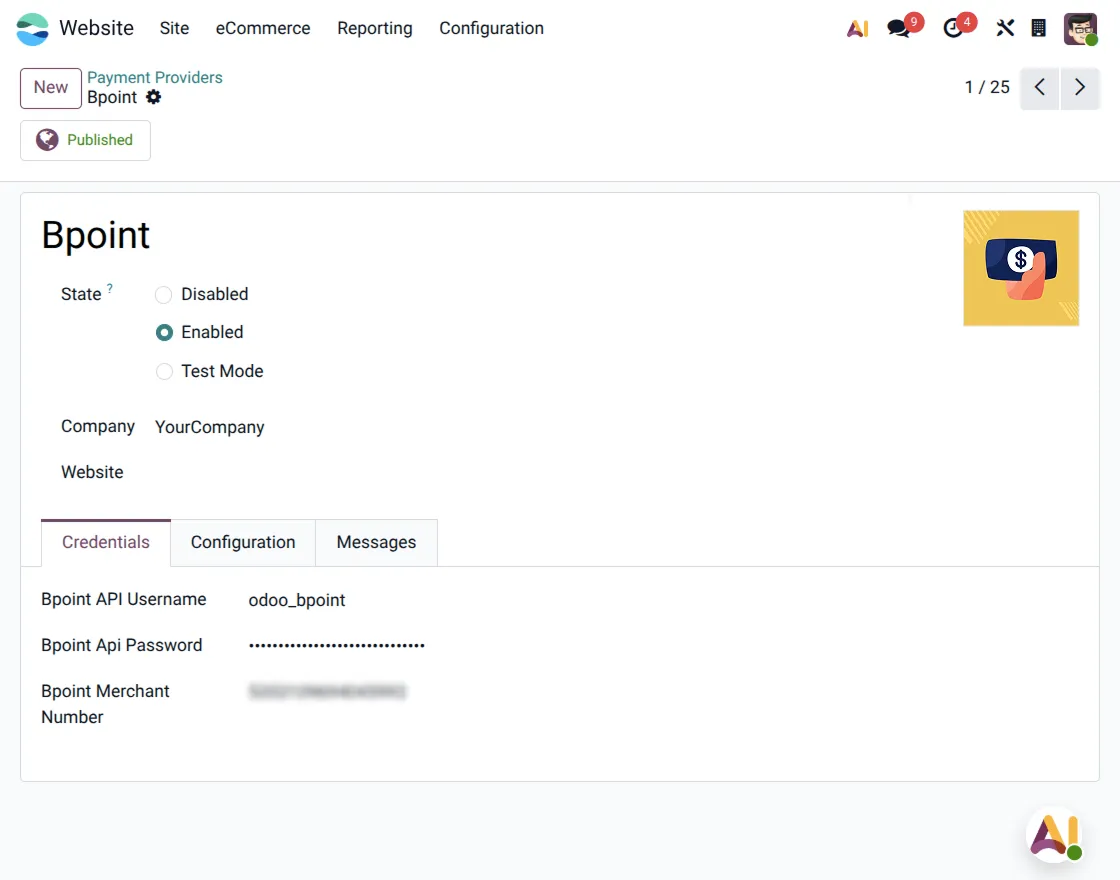
1. Go to Website → Configuration → Payment Providers and open the BPOINT payment provider.
Set the provider state to Enabled or Test Mode, add the BPOINT API Username, API Password, and Merchant Number, then save the settings to activate the payment provider.

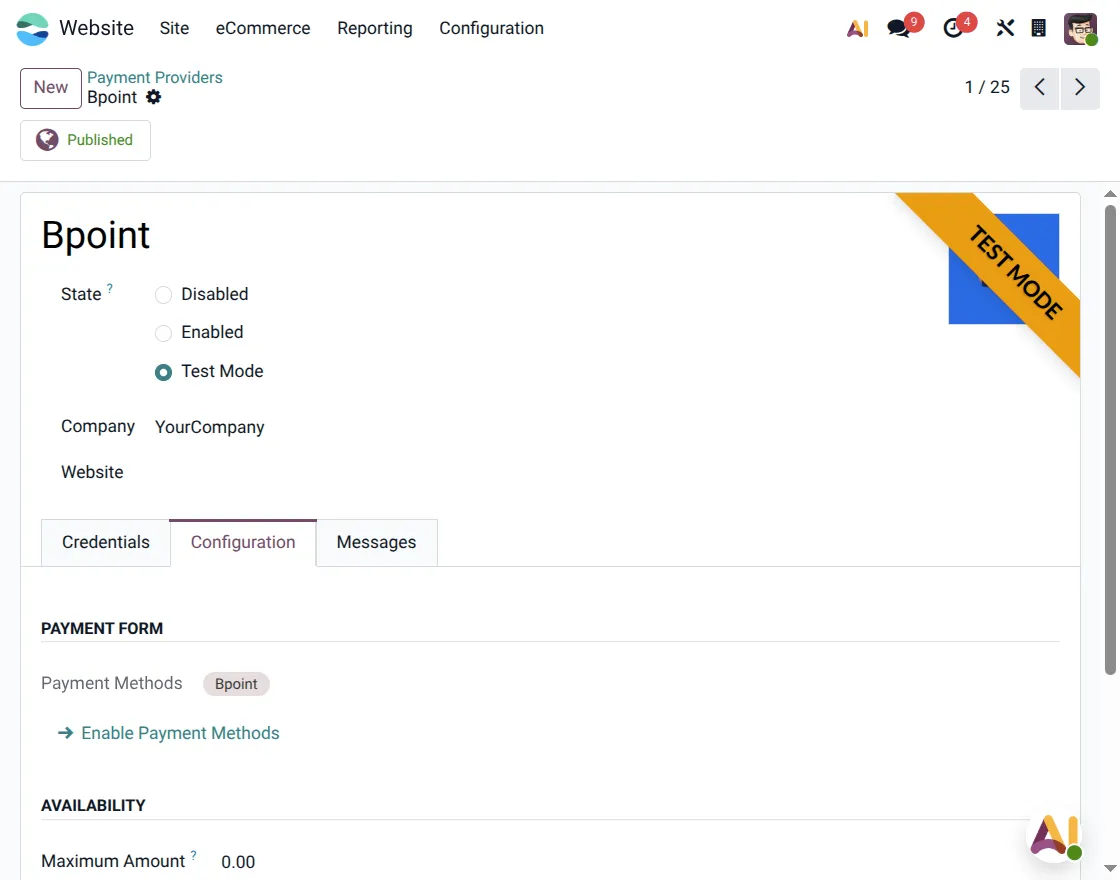
2. Open the Configuration tab in the BPOINT payment provider. Enable the required payment methods and configure payment settings for website checkout transactions.
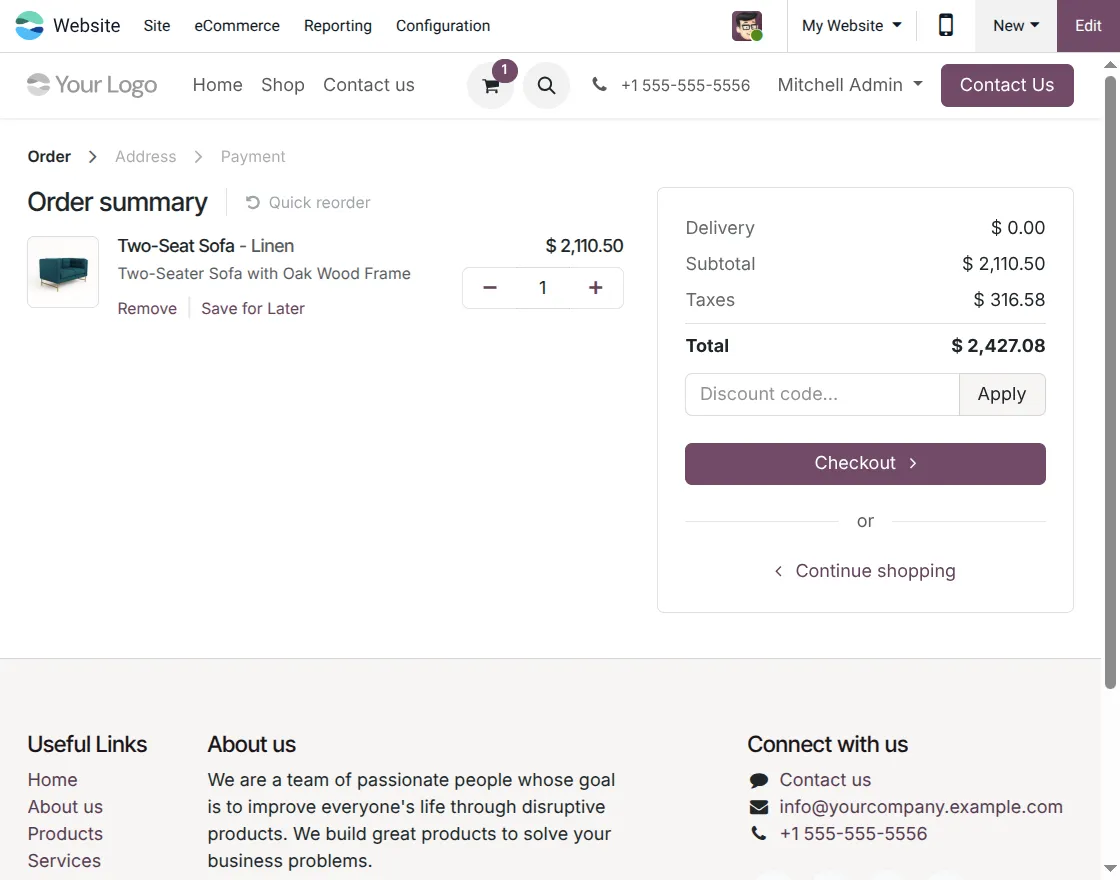
3. Add products to the cart and continue to the website checkout page. Customers can review the order summary before choosing a payment method.
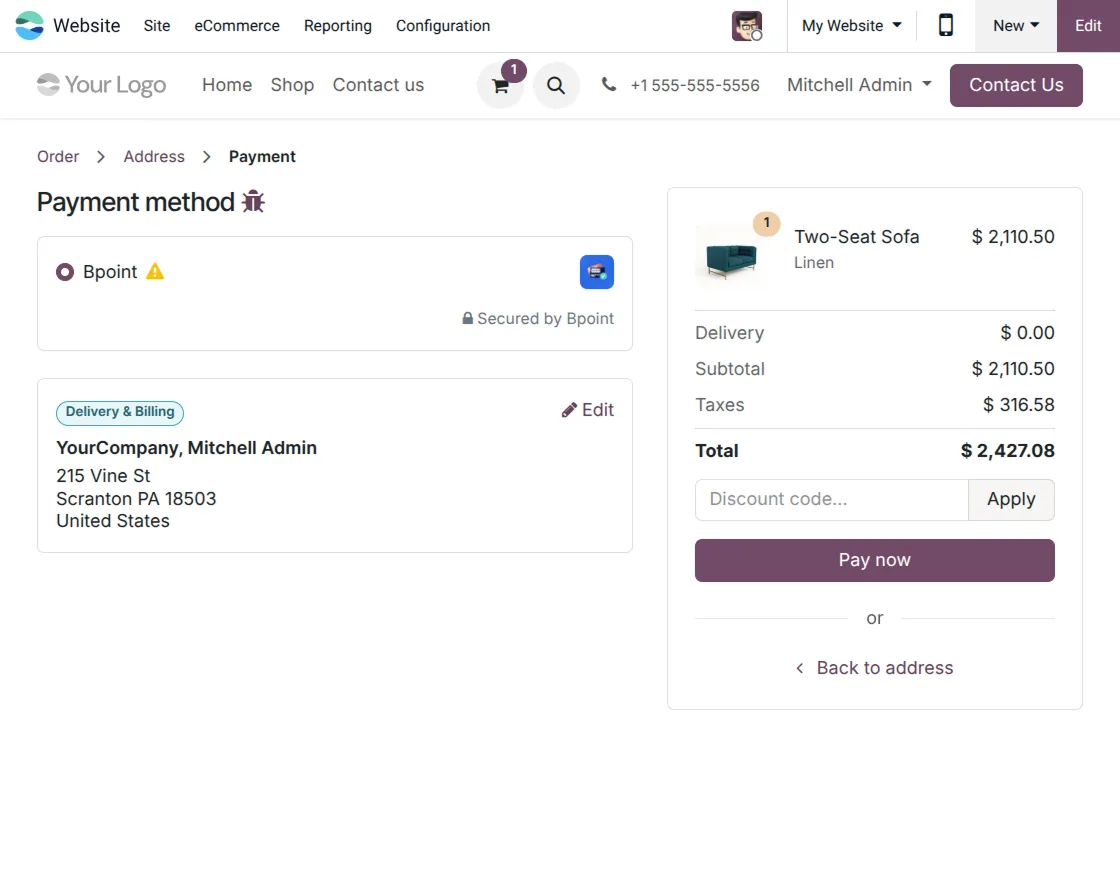
4. Choose BPOINT from the available payment methods on the checkout payment page. Then click on the Pay Now button to continue to the secure payment page.
5. Customers are redirected to the secure Commonwealth Bank-hosted payment page after clicking Pay Now. They can enter card details safely and continue the payment process.

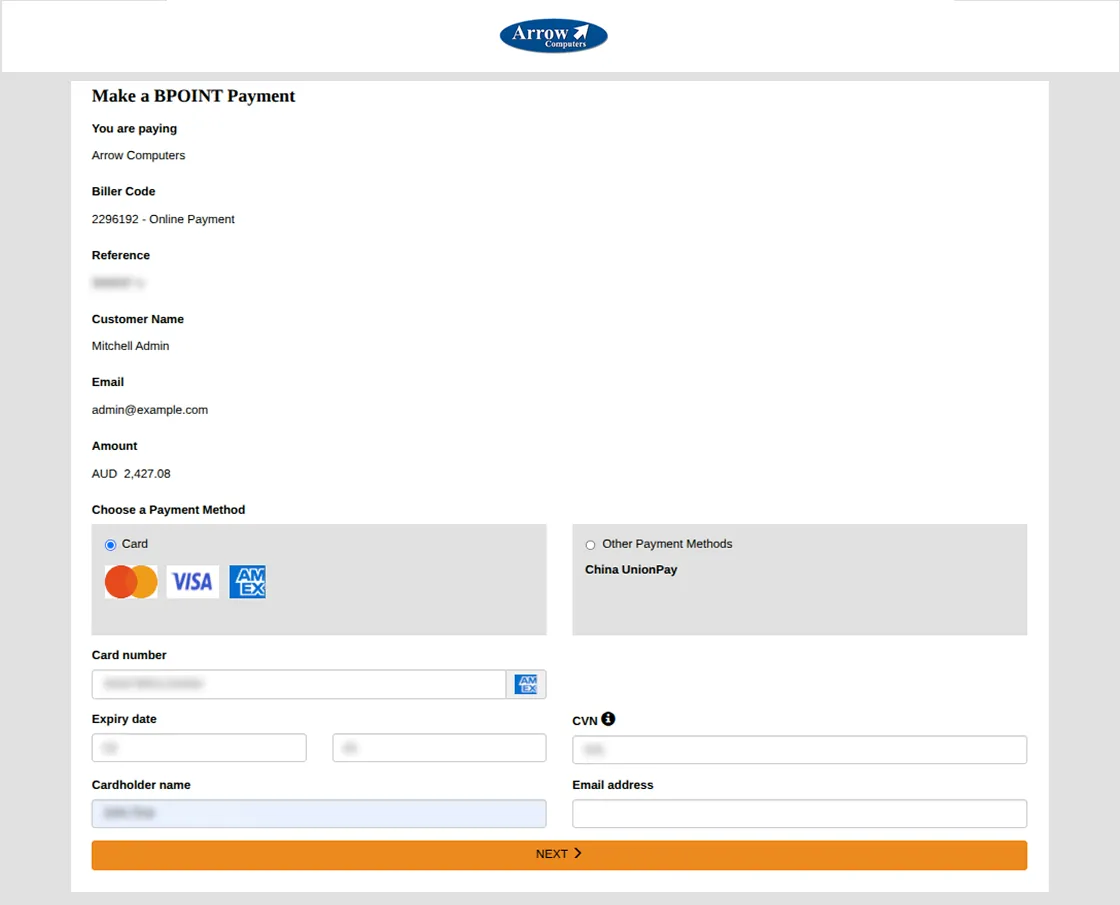
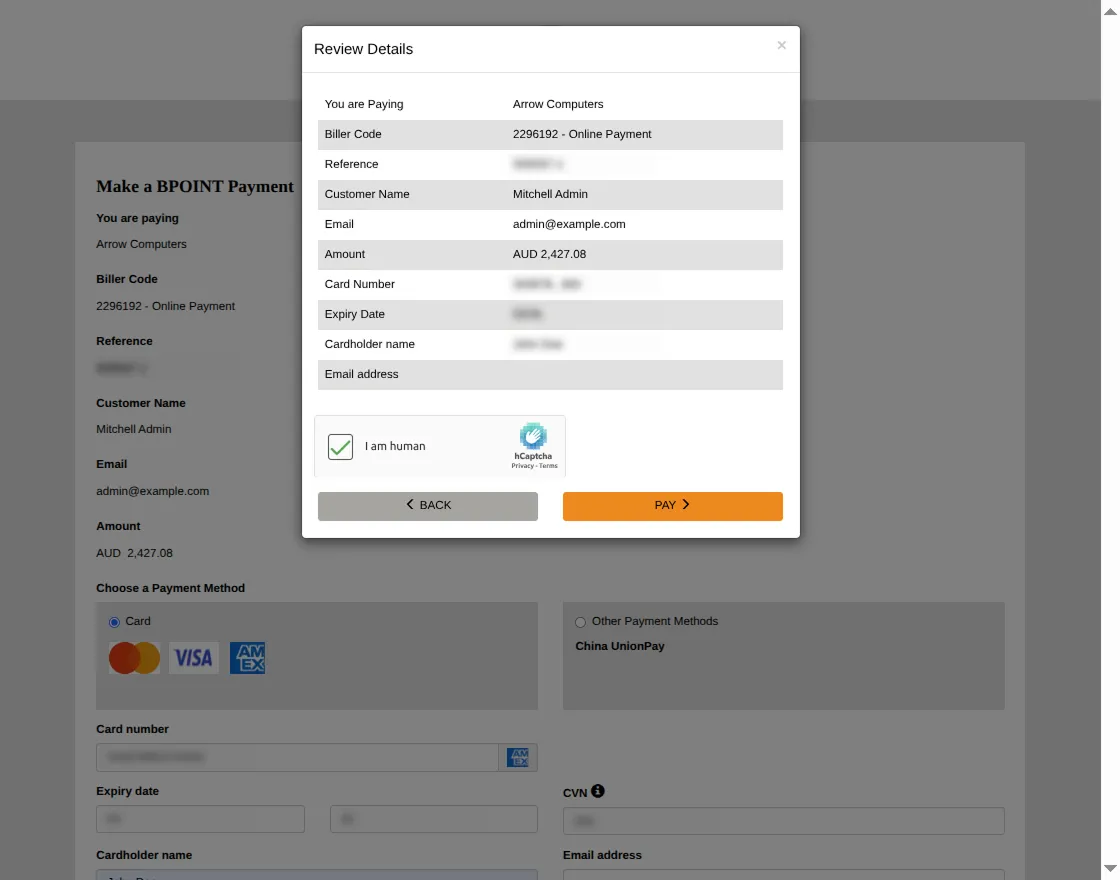
6. Customers can review payment details before confirming the transaction. After checking the details, click on the Pay button to complete the payment securely.
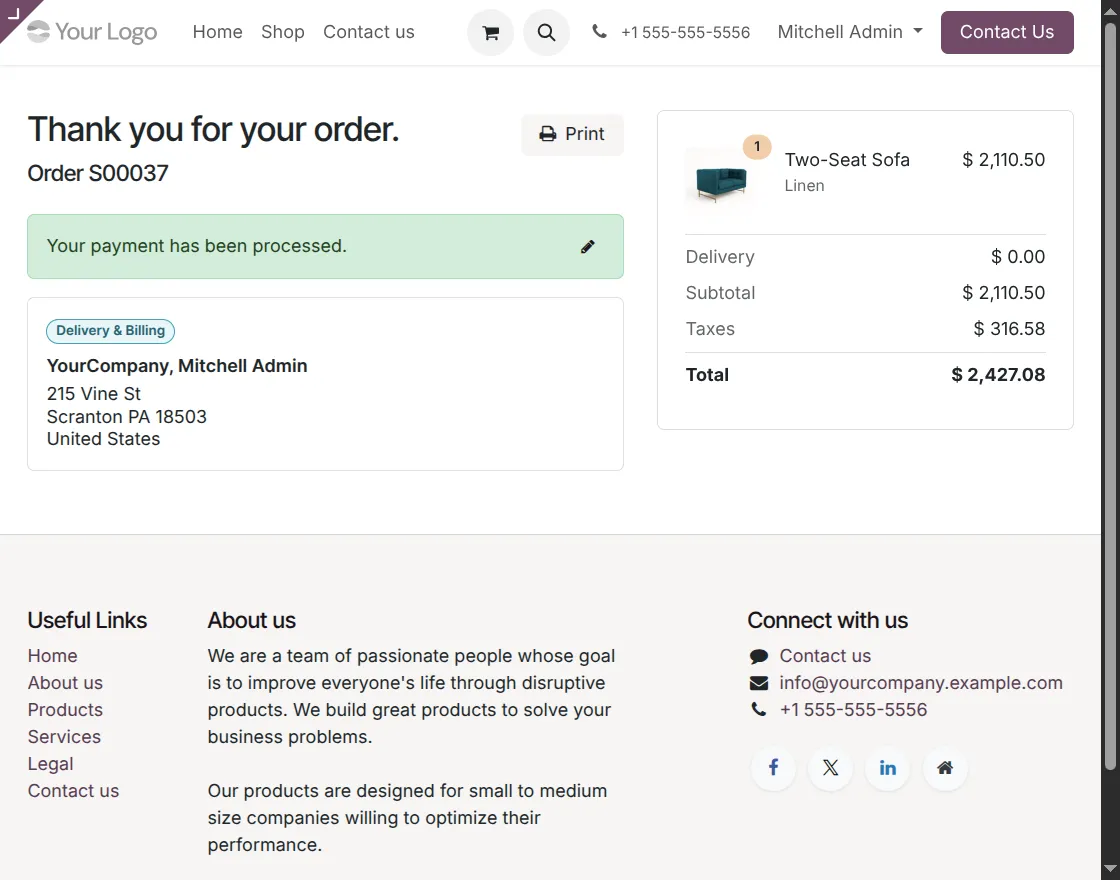
7. After successful payment processing, customers are redirected back to the website automatically. The order confirmation page shows the successful payment message and order details.
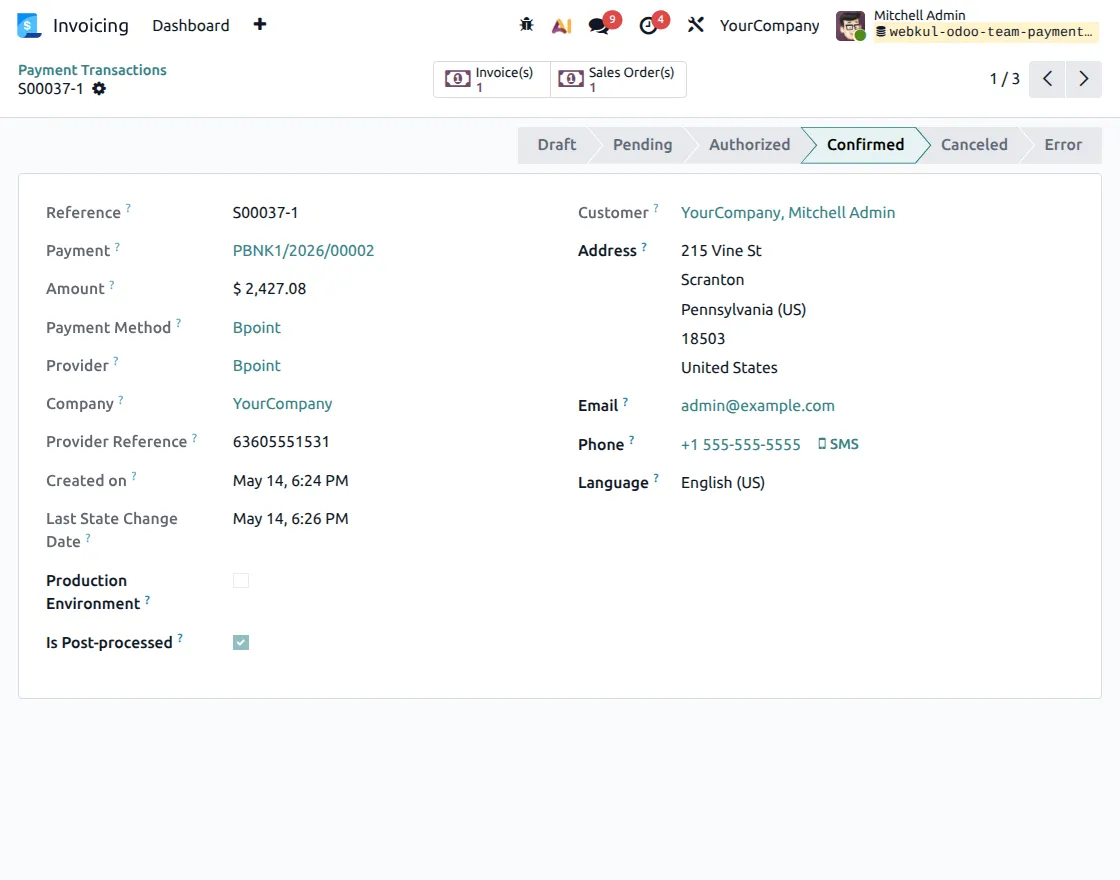
8. Go to Invoicing → Payment Transactions to view all BPOINT payment records. Admins can track transaction references, payment methods, customer details, and payment statuses from one place.
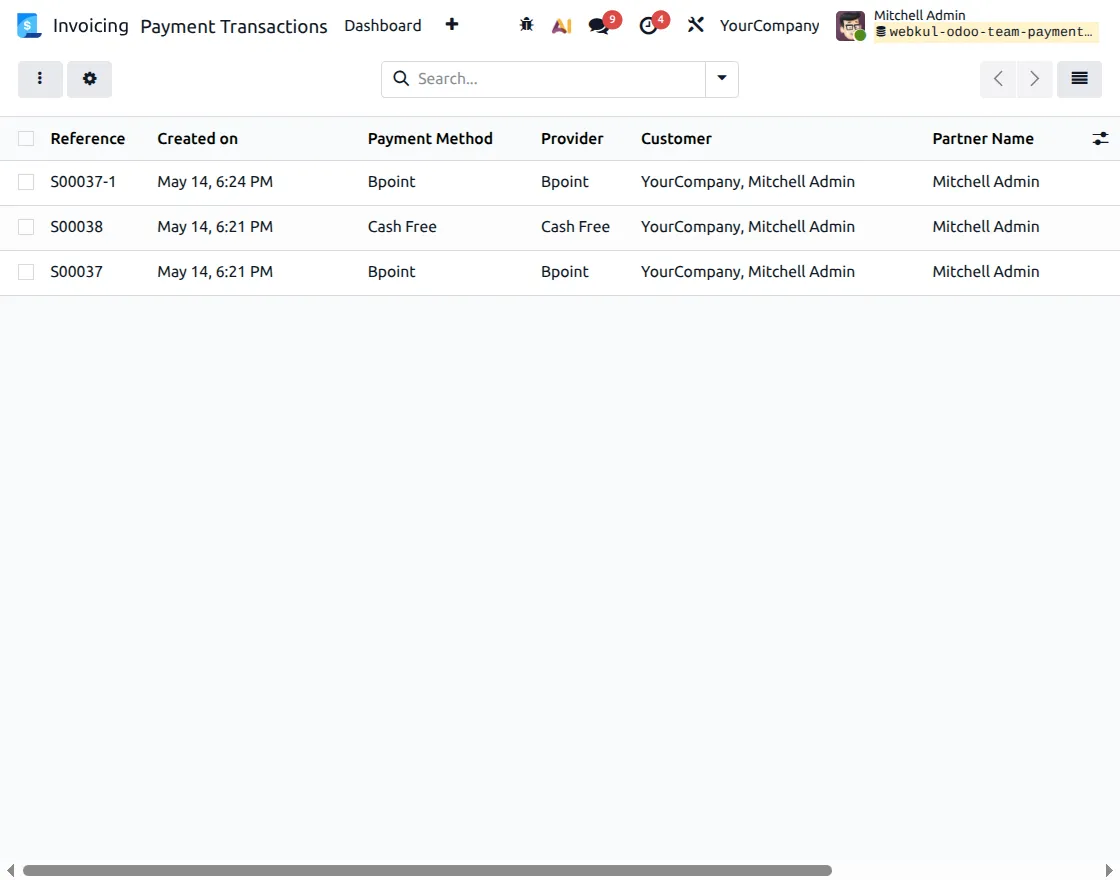
9. Open the payment transaction record to view complete payment details and transaction status.
Admins can verify confirmed payments, customer details, provider references, and payment information from the backend.
Need Help?
Hope you find guide helpful! Please feel free to share your feedback in the comments below.
If you still have any issues/queries, please create a ticket at the UV Desk.
I hope this helps. In case of any further queries, contact us at our support mail.
Thanks for paying attention!!