User Guide for Odoo Bosta Shipping Integration
Table of Content
Introduction
Odoo Bosta Shipping Integration helps you manage shipping by connecting Odoo with the Bosta courier system. You can create shipments, print labels, and track orders directly from one dashboard.
This module removes manual courier steps and keeps all delivery actions in one place. It helps businesses ship orders faster and with fewer mistakes.
Features
- Apply fixed Bosta shipping rates on sales orders.
- Create courier shipments from delivery orders in one click.
- Generate and print Bosta shipping labels automatically.
- Track Bosta consignments in real time from Odoo.
- Configure the Bosta carrier easily using API credentials.
- Sync order shipping data between Odoo and Bosta.
- Cancel Bosta shipments directly from delivery orders.
Installation
- Once you purchase the App from Webkul store, you will receive a link to download the module’s zip file.
- Extract the file on your system after download finishes. As a result, you will be able to see a folder named- ‘bosta_shipping_integration’.
- Copy and paste this folder inside your Odoo Add-Ons path.
- Now, open Odoo App and click on the Settings menu. Here, click on Activate Developer Mode.
- Then, open Apps menu and click on ‘Update Modules List.’
- In the search bar, remove all the filters and search ‘bosta_shipping_integration’.
- You will be able to see the module in the search results. Click on ‘Activate’ to install it.
Workflow
Configuration of Odoo Bosta Shipping Integration
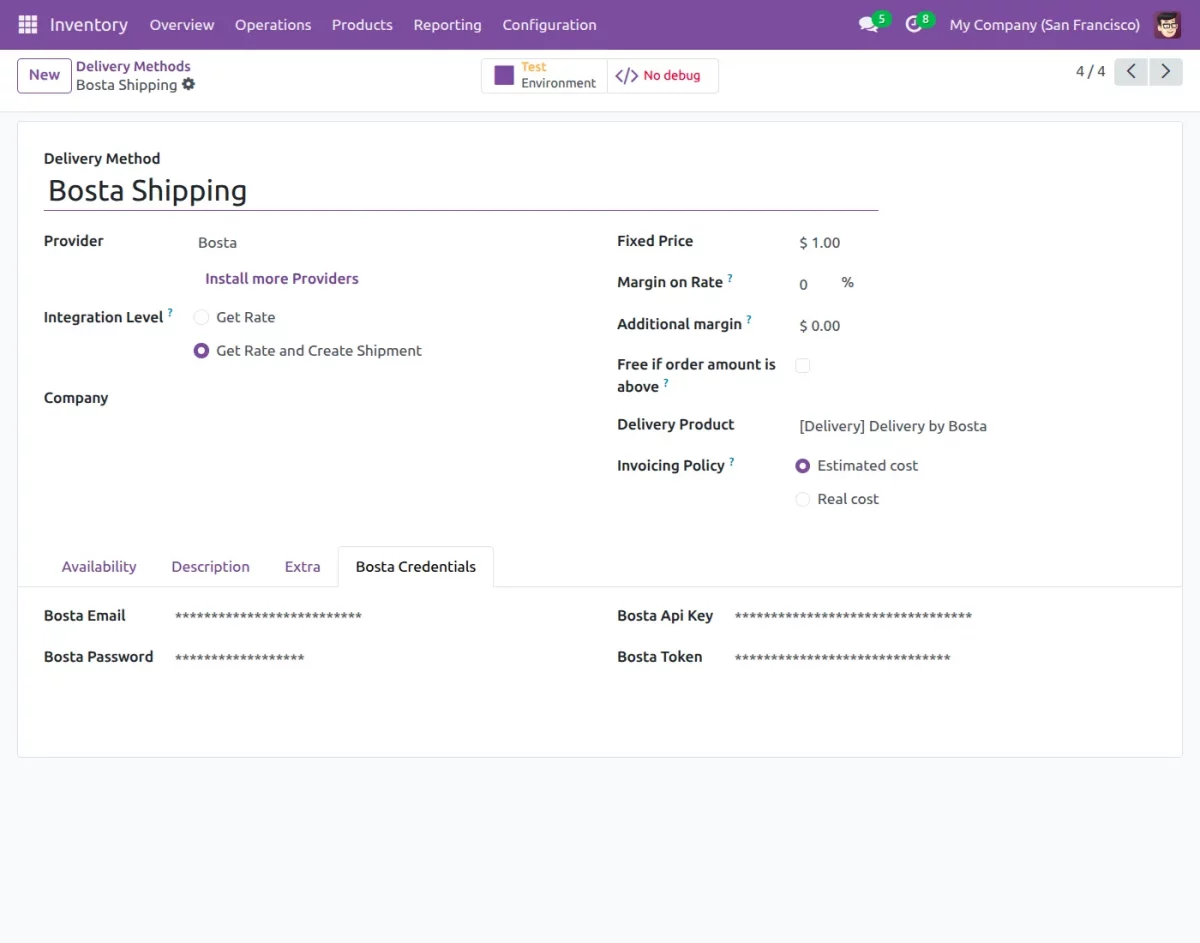
1. First, go to Inventory → Configuration → Shipping Methods, select Bosta Shipping, choose Get Rate and Create Shipment, and enter your Bosta Email, Password, API Key, and Token.

2. Next, open the Extra tab, set the default weight, unit of measure, packaging, enable void shipment, and import Bosta cities for the selected country.

3. Then, open a quotation, click Add Shipping, select Bosta Shipping, and click Get rate to fetch the shipping cost.


4. After fetching the rate, add the shipping method and confirm the quotation so it converts into a sales order with Bosta delivery applied.

5. Then, click Put in Pack, enter the package weight and dimensions, and save the details to prepare the Bosta shipment.

6. After the shipment is created, the system generates a Bosta tracking reference and shows it inside the delivery order.
7. After the tracking reference is created, the Bosta shipping label is generated and can be downloaded from the delivery order.

8. Lastly, copy the tracking reference from Odoo, enter it on the Bosta tracking page, and view the live delivery status.
9. To cancel a shipment, click Cancel next to the tracking reference, confirm the action, and the system will void the Bosta shipment.

10. After confirming cancellation, the system voids the tracking reference and shows a success message in the delivery order.

Need Help?
Hope you find guide helpful! Please feel free to share your feedback in the comments below.
If you still have any issues/queries, please create a ticket at the UV Desk.
I hope this helps. In case of any further queries, contact us at our support mail.
Thanks for paying attention!!