Guide for Magento 2 Product Revision History Extension (Adobe Commerce)
Magento 2 Product Revision History Extension (Adobe Commerce) allows you to track and manage changes made to your products. This user guide will walk you through the steps to utilize this functionality effectively.
Similarly, the admin can also track the Magento 2 Product User Activity at the storefront.
Do check the below video to get to know the functionality,
Features
- It helps keep an audit trail of all edits made to product attributes.
- Merchants can easily compare the changes in the product.
- It also identifies who made the changes and when.
- Provides a detailed overview of the changes that were made.
- It is user-friendly and easy to access.
- Merchants can manage and control product information.
- Product history is saved per store view with version tracking.
- Admin can revert the product to any previous version as needed.
- Magento 2 Product Revision History Extension ensures transparency and accountability.
Installation
The installation is quite simple just like the standard Magento 2 Extensions.
Install an Extension from Webkul Store
#1 Download the Module
Firstly, you need to log in to the Webkul Store, go to My Account>My Purchased Products section, verify and then download and extract the contents of this zip folder on the system.
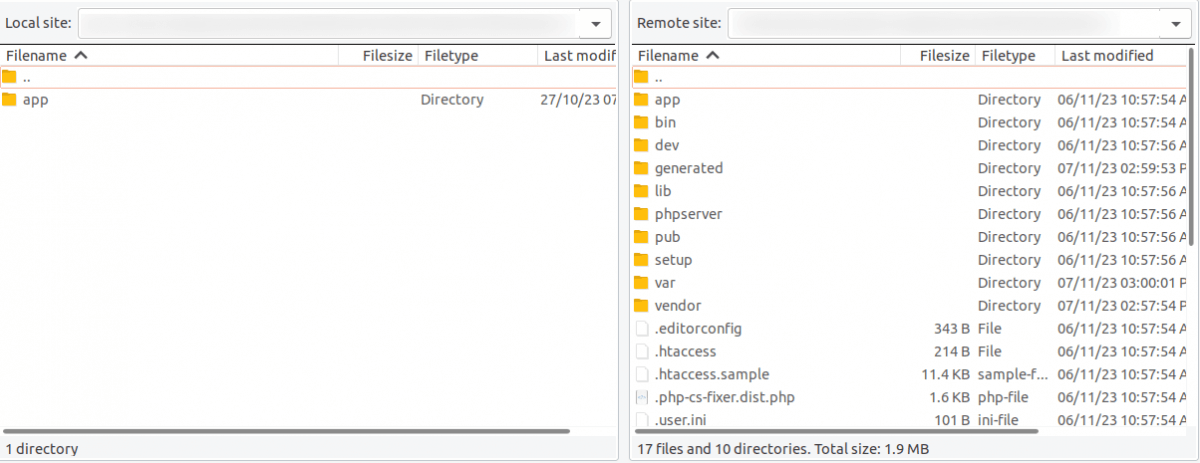
#2 Upload Folder
Once the module zip is extracted, follow path src>app and then copy the app folder into the Adobe Commerce Cloud root directory on the server as shown below:

#3 Run Commands
After uploading the module folder, you need to run the following commands in the Magento 2 root directory:
php bin/magento setup:upgrade
php bin/magento setup:di:compile
php bin/magento setup:static-content:deploy
php bin/magento indexer:reindex
php bin/magento cache:flush
Configuration of Multi-Lingual
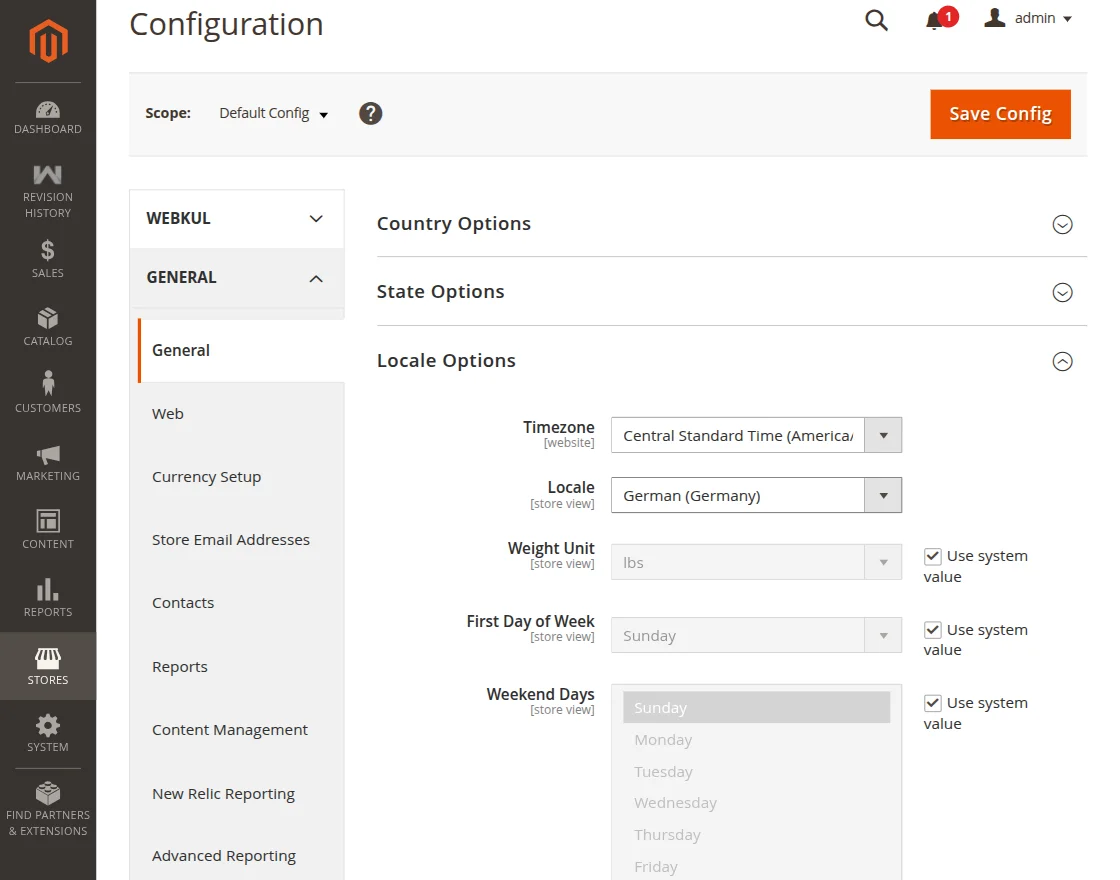
The admin will navigate through it. Store > Configuration > General ->Locale Options.
Then, select the locale as German. (the language into which the admin wants to translate his store content)

Language Translation
If you need to do the module translation, please navigate the following path in your system. app/code/Webkul/RevisionHistory/i18n. Open the file named en_US.CSV for editing as shown in the below screenshot.

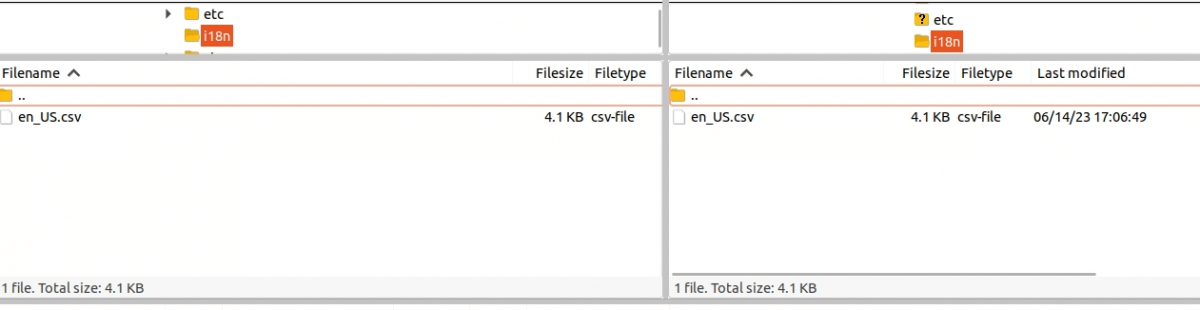
Once you have opened the file for editing, replace the words after the comma(,) on the right with your translated words.


After editing the CSV file, save it and then upload it to the same path app/code/Webkul/Revisionhistory/i18n. The module will now be translated into your desired language. It supports both the LTR and RTL languages.


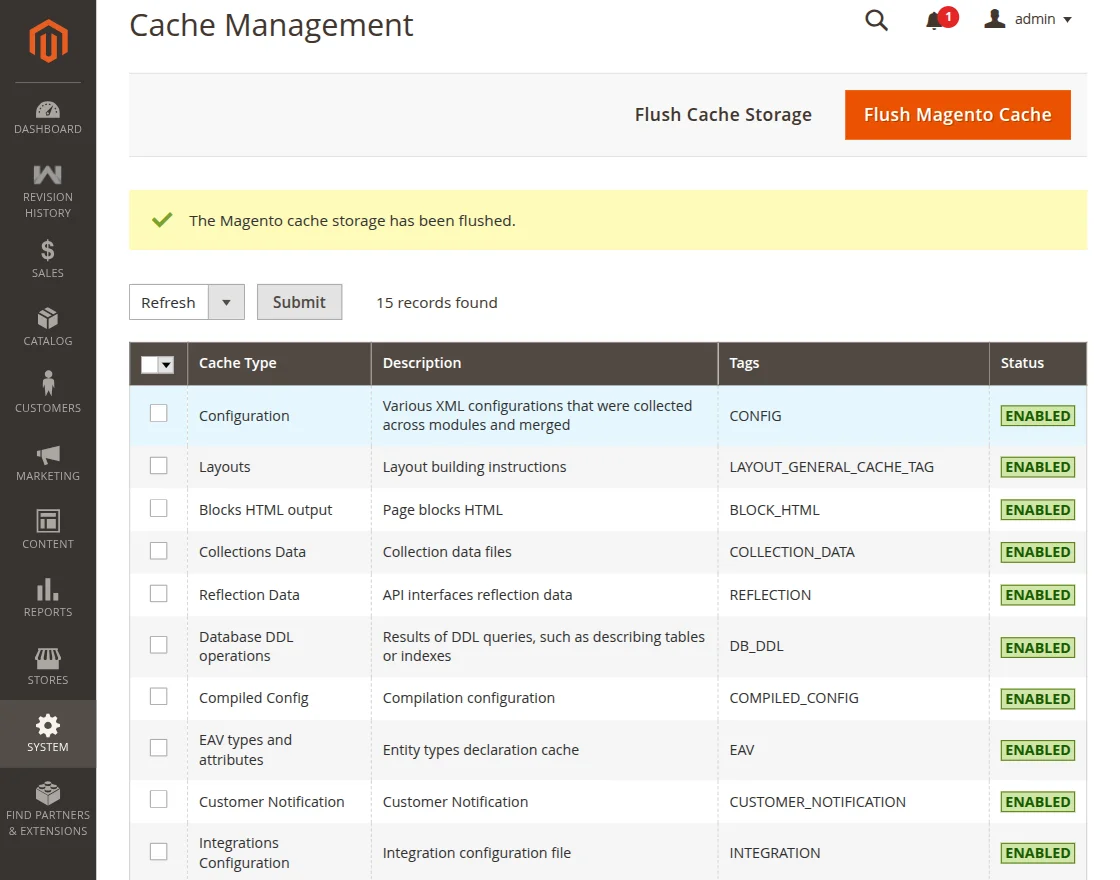
Lastly, flush the cache and re-index all by navigating through System->Cache management.
Initial Configuration
The admin will navigate through Stores>Configuration>Revision History to do the settings in the Magento 2 Product Revision History.
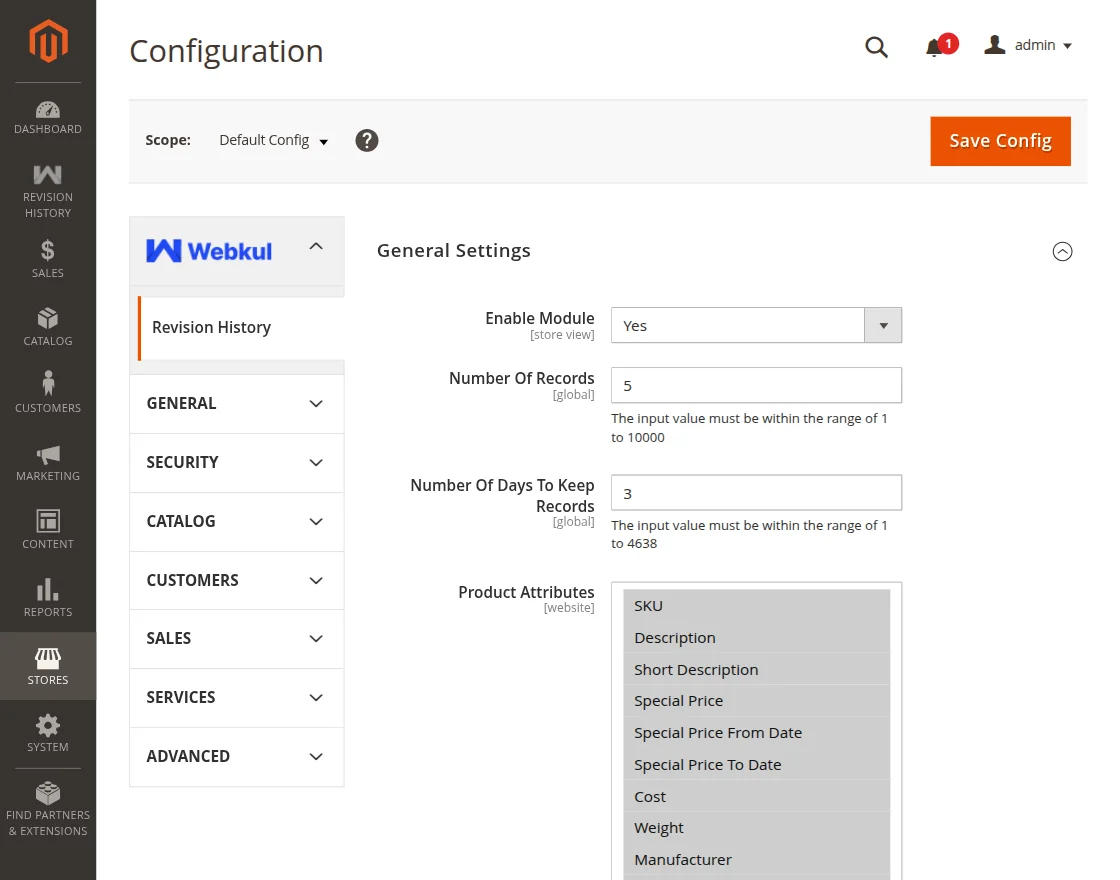
Enable Module: The admin can set the module status to Yes or No.
Number of Records: Set the number of records to be displayed.
Number of Days to Keep Records: Enter the number of days till which the record details will auto-delete.
Product Attributes: Select the attributes of which the admin wants to show the product revision history.
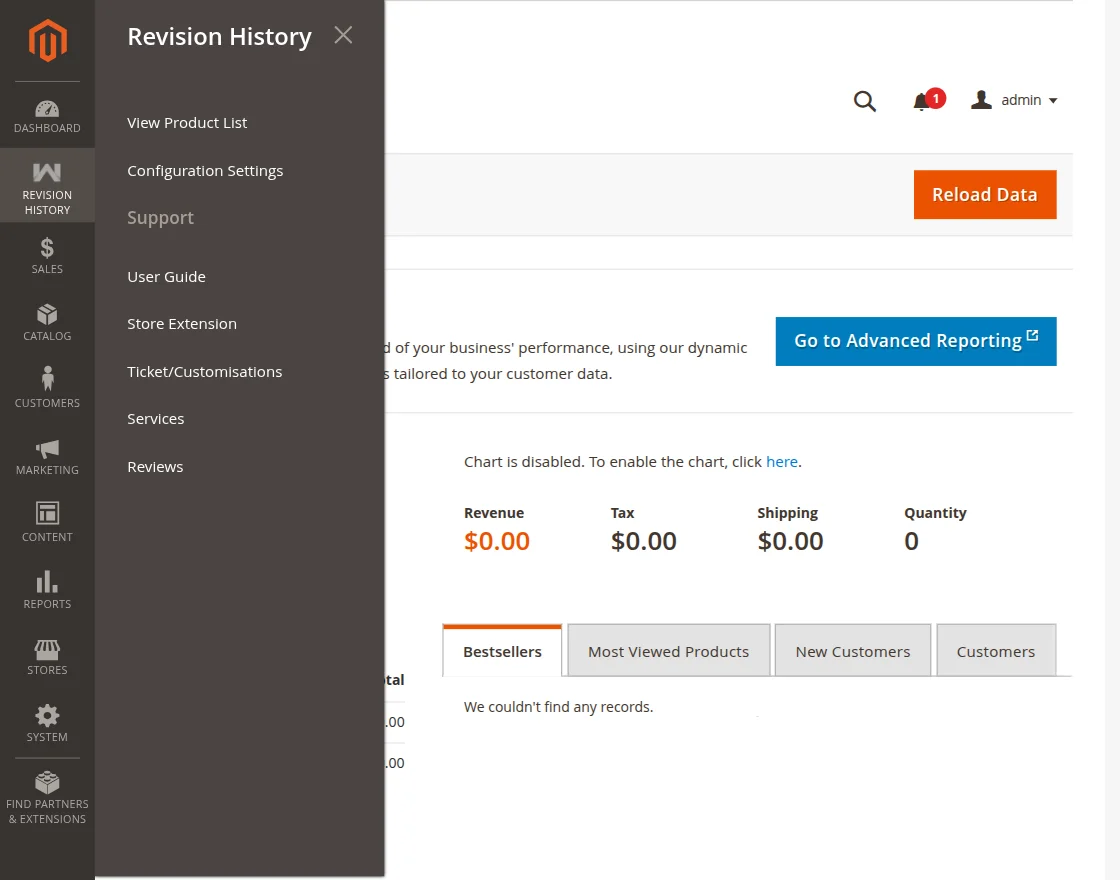
Admin can also navigate to the Configuration by tapping on Revision History and clicking on Configuration Settings from the side panel.
You can also, explore the Adobe Commerce Cloud development services by Webkul.
Revision History
Magento 2 Product Revision History allows the admin the track and keep a record of the changes made to the product by the users.
Now, Click on Revision History from the sidebar menu then go to View Product List.
Here the admin can check the Product List of those products which have been edited. SKU, Product Name, Product Type when it was created and when it was last updated all the details are mentioned.
The admin can also export the details by clicking on the export option.
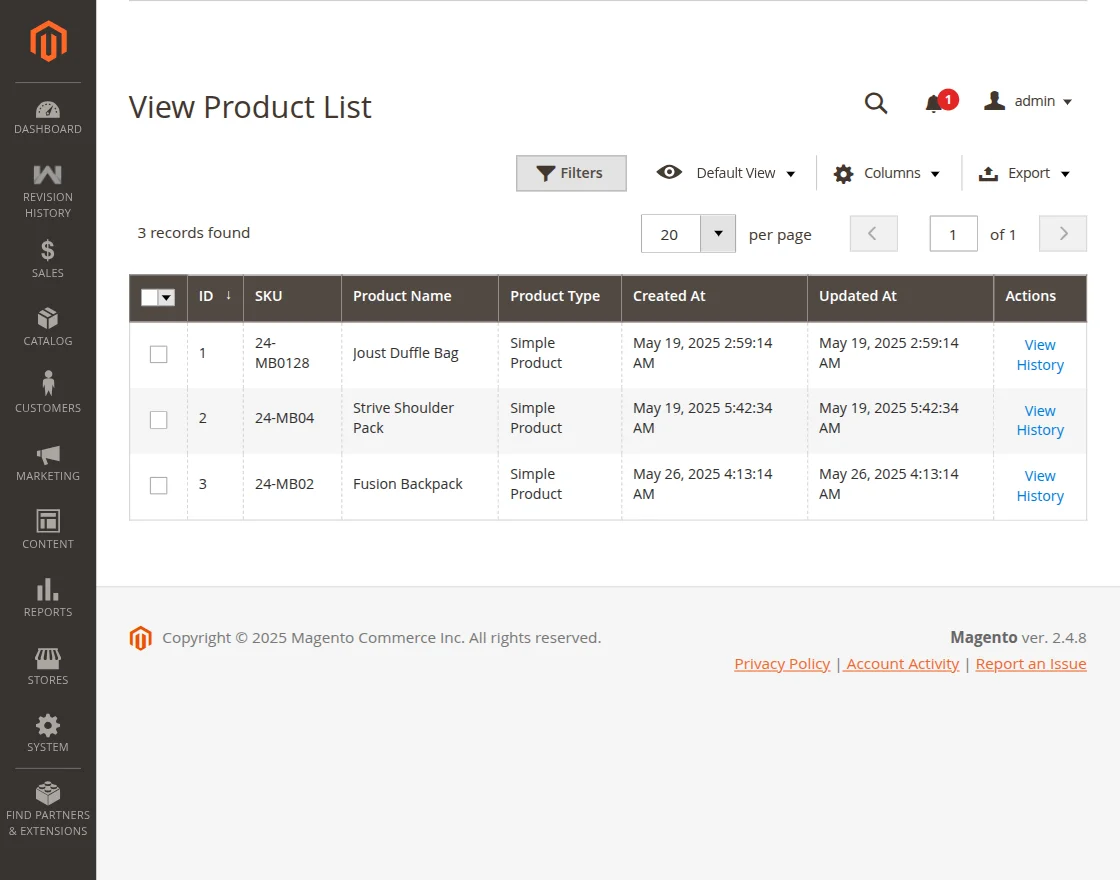
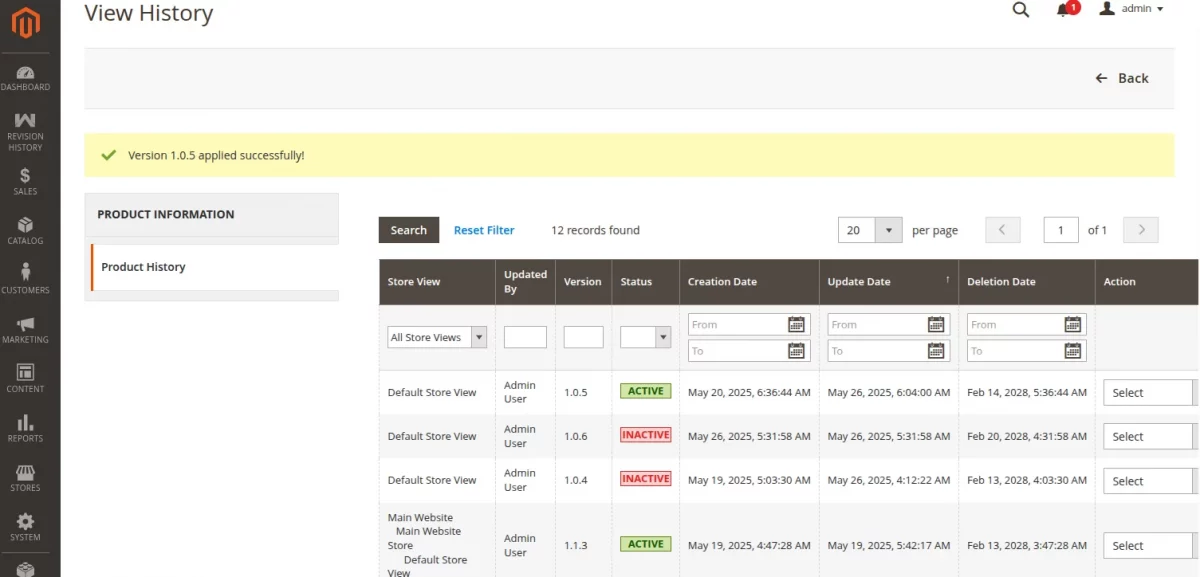
By clicking on View History, the admin can view the revision history of the product.
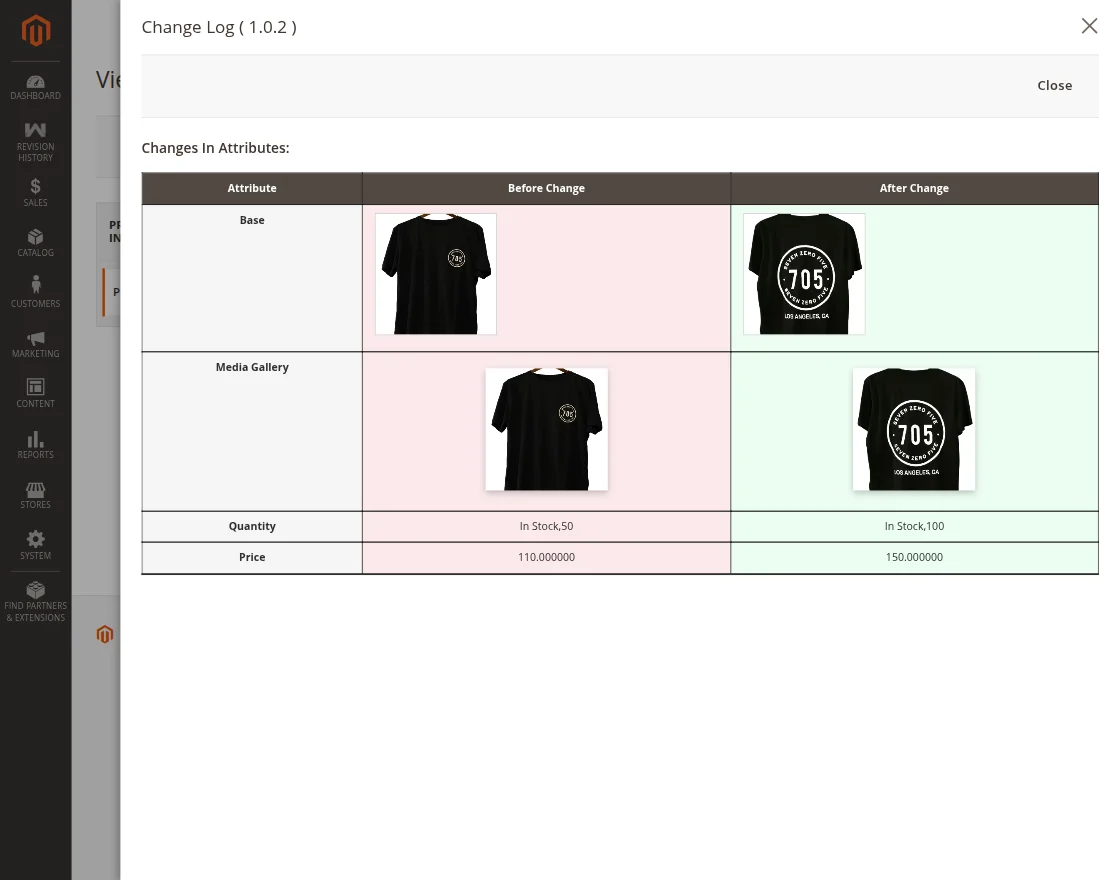
It includes details like Updated By, Creation Date, Deletion Date, and the Action taken.

The product history gets saved according to store view along with specific version for each changes made.
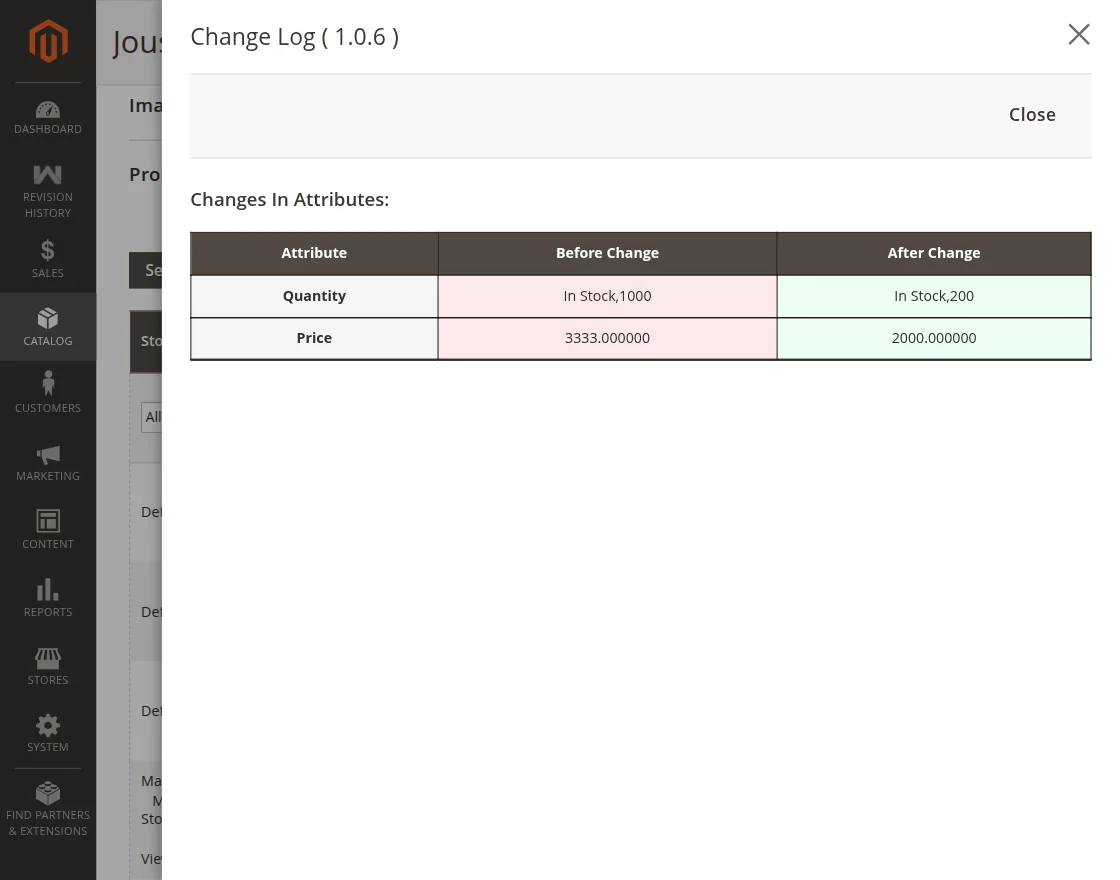
For viewing the action click on View. Here view the details in brief of the changes made to the product by any of the particular users.
Moreover, by clicking the ‘Apply Version‘ button, the admin can apply any previous changes made to the product for that specific version.


Then a confirmation message will appear on the screen indicating that the selected changes have been successfully applied by the admin.

Note – If you want to import and export the products on multiple platforms, like Wix you can use our Magento 2 Wix Connector extension for the same.
Access the Product History for a Specific Product
Go to Catalog then click on Products, The product list will appear as mentioned in the below snapshot. Next, click on Edit.

Here the admin can view the Product History for a specific product by scrolling down and clicking on Product History. For the details click on the view option.
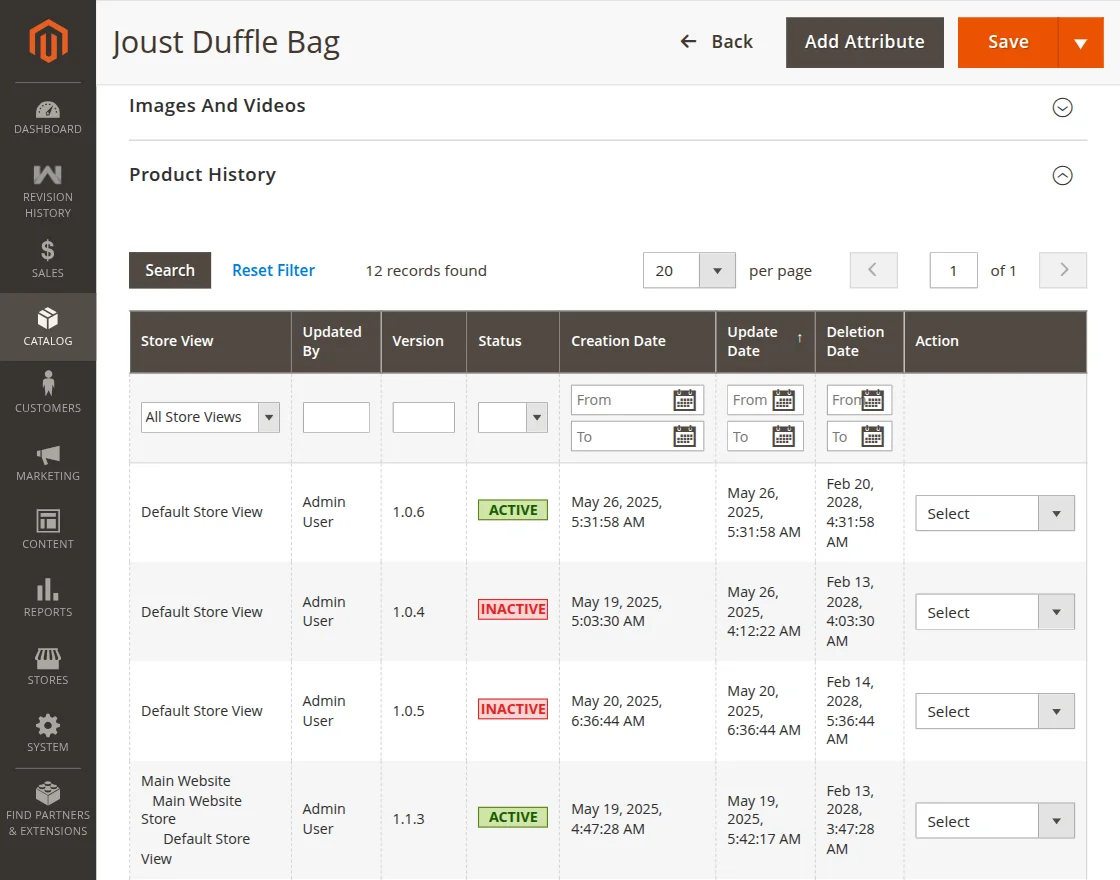
View the Change Log by clicking on the View option of a specific product as mentioned below:
Support
So, that’s all the Magento 2 Product Revision History extension for Adobe Commerce. Still, if you face any issues feel free to add a ticket.
Let us know your views on making the module better by navigating to our Helpdesk System.