User Guide for Magento 2 POS Stripe Reader Extension
Magento 2 POS Stripe Reader Extension integrates Stripe Terminal with Magento 2 POS to enable fast and secure in-store payments.
It supports card and contactless payment methods for a smooth checkout experience.
Payments are processed securely through Stripe readers. Orders and payment details sync in real time with Magento 2.
This ensures accurate reporting and seamless POS operations.
Additionally, you can check the Magento 2 POS Thermal Printer , add-on allows the POS agent to print order receipts through any POS-connected printer.
Features
- Seamless integration with Magento 2 POS
- Easy interface with no special training needed
- Accepts Visa, MasterCard, American Express, and Discover
- Supports tap, chip, and swipe payments
- Fast payment processing in real time
- Automatic payment status updates in Magento POS
- Works in both online and offline POS modes
- Smooth and contactless checkout for customers
Installation
Please Note: To use this module you must have installed Magento 2 Point of Sale in the first place.
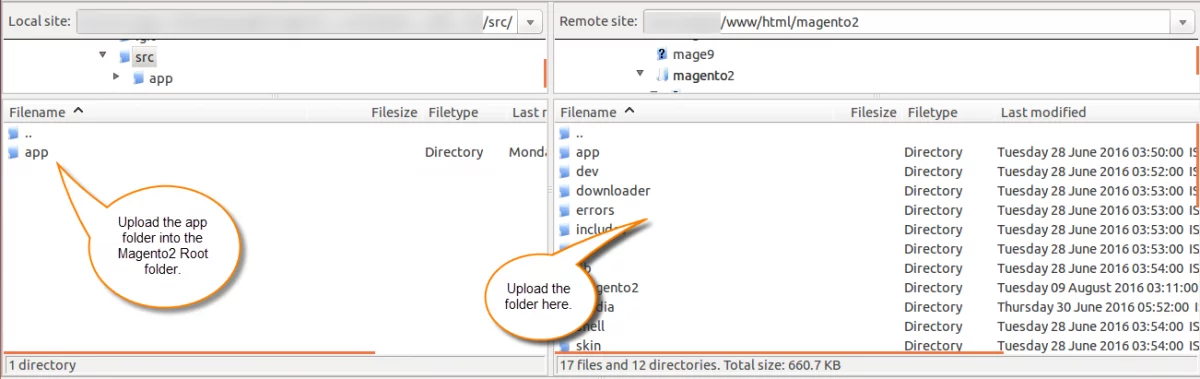
Customers will get a zip folder then they have to extract the contents of this zip folder on their system.
The extracted folder has an src folder, inside the src folder you have the app folder.
You need to transfer this app folder into the Magento 2 root directory on the server, as shown below.

After the successful installation, you have to run these commands in the Magento2 root directory.
composer require stripe/stripe-php:^16.0.0
php bin/magento setup:upgrade
php bin/magento setup:di:compile
php bin/magento setup:static-content:deploy
php bin/magento indexer:reindex
php bin/magento cache:flush
Multi-lingual Support
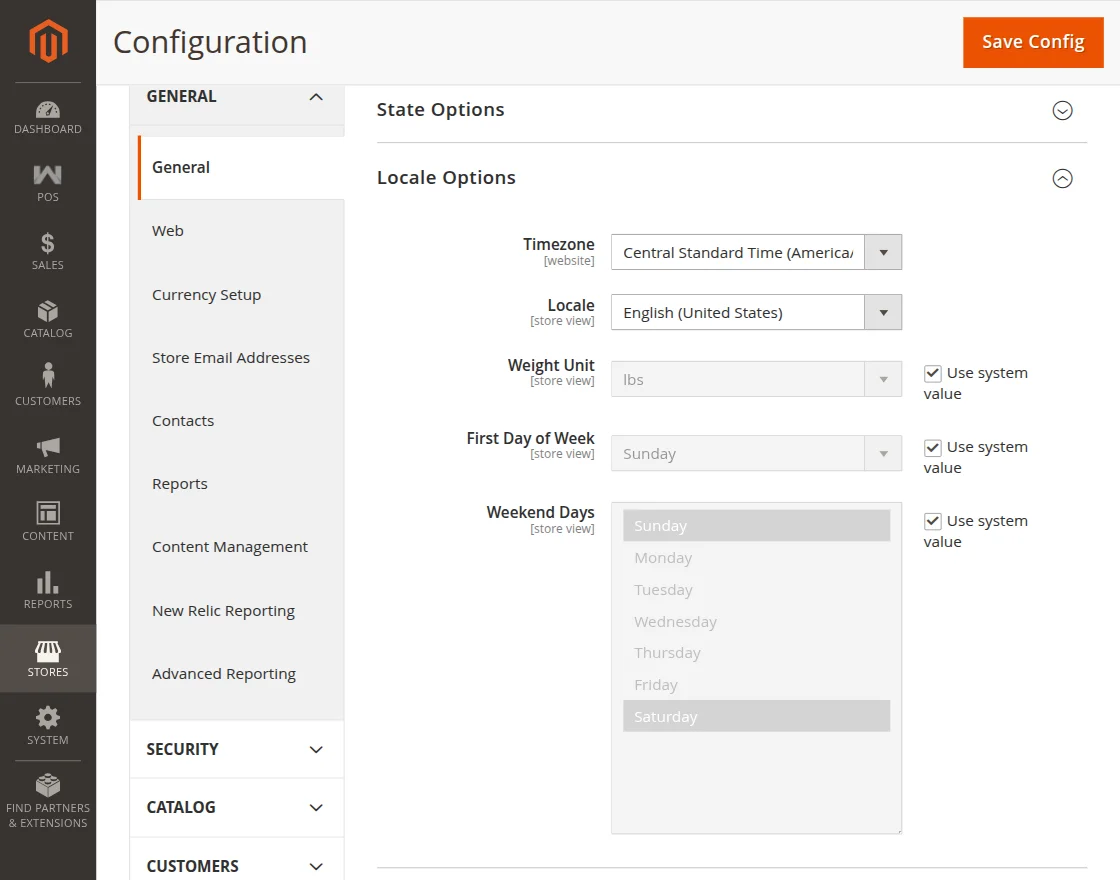
For the multilingual support, the admin will navigate through Store->Configuration->General ->Locale Options and select the locale as German
(the language into which the admin wants to translate his store content).

Language Translation
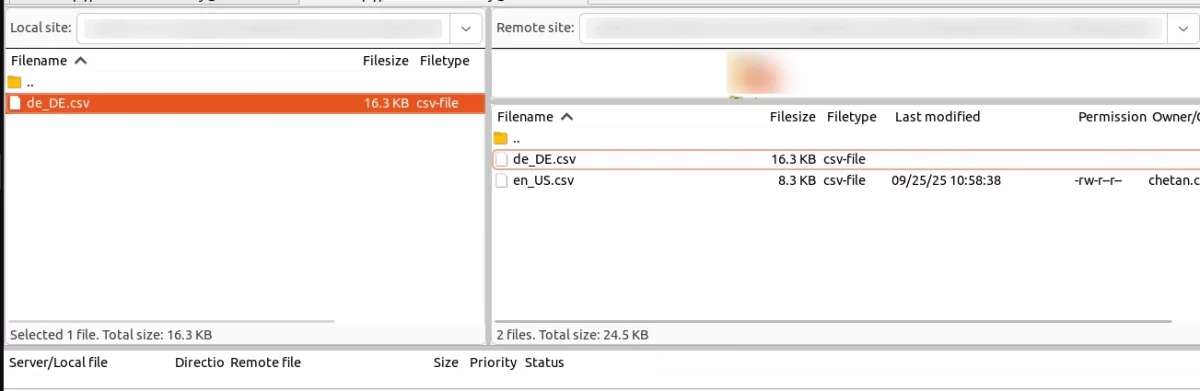
For Magento 2 AI Base Image Generator translation, navigate to the following path in your system src/app/code/Webkul/PosStripeTerminal/i18n.
Open the file named en_US.CSV for editing as shown in the below screenshot.

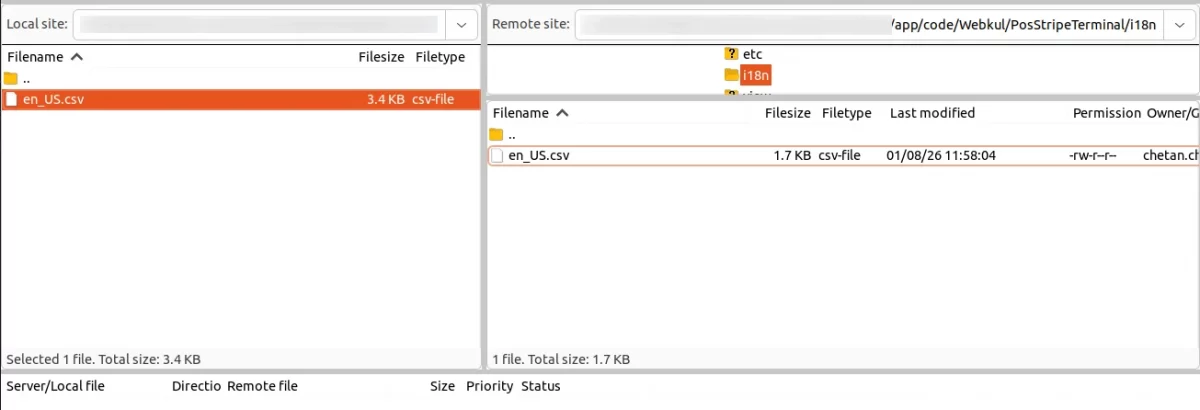
Now, upload it to the path src/app/code/Webkul/PosStripeTerminal/i18n where the installation of Magento 2 is on the server.
The module gets translated into the desired language.
The user can edit the CSV like the image below.

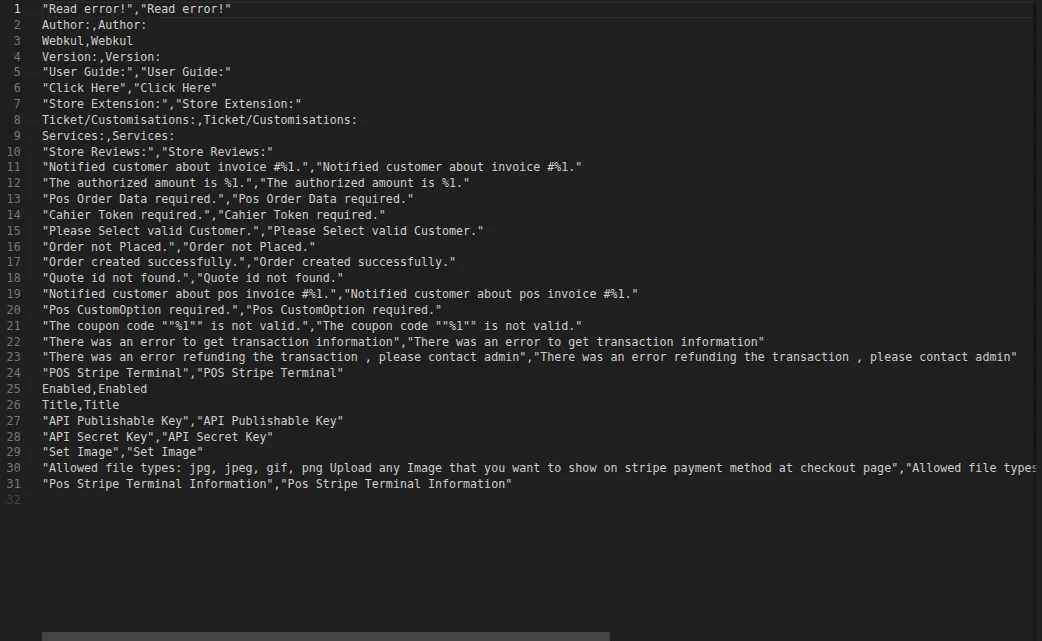
After editing and translating the CSV file, you need to save the translated file name according to your region, language, and country code, such as – de_DE.CSV.
Followed by uploading the translated file to the same folder from where you have obtained it. Now your module translation is complete.

Manual Installation
- The Customers will get a zip folder and they have to extract the contents of this zip folder on their system.
- The extracted folder has a NextJs folder, move the folder into the directory where you want to install it.
- Setup env – Duplicate env.template rename the duplicate to .env. Now update the values mentioned below in the env file:
MAGENTO_URL=http://magento-url.com
IMAGE_DOMAIN=magento-url.com
APP_URL=http://localhost:3000/
DEMO_CREDENTIALS='email password'
STRIPE_API_URL=https://example-stripe-api-url.com
STRIPE_SECRET_KEY=secret-key
MODE=production
FALLBACK_LOCALE=en
- Run the following command via the terminal:
npm install OR yarn install
npm run build OR yarn build
npm run start OR yarn start
- It will serve on a 3000 port to your server for eg: http://localhost:3000/.

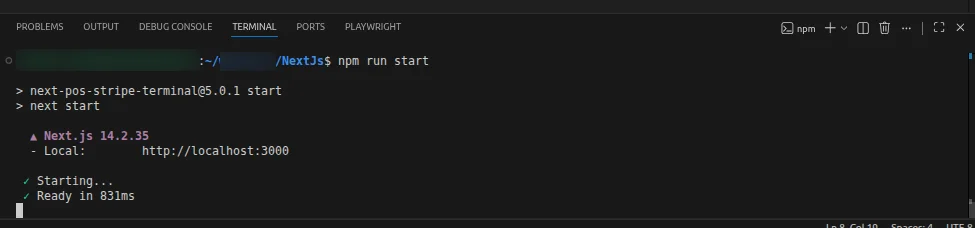
- You can access POS-Stripe-terminal by using your-serverip:3000 and also you can ask your server team to map your 3000 port to any dedicated domain.
Module Configuration
After the installation of the Magento 2(Adobe Commerce) POS Stripe Reader Extension module, the admin can configure the module settings.
By navigating to Stores > Configuration > Sales > Payment Methods > POS Stripe Terminal as per the below image:
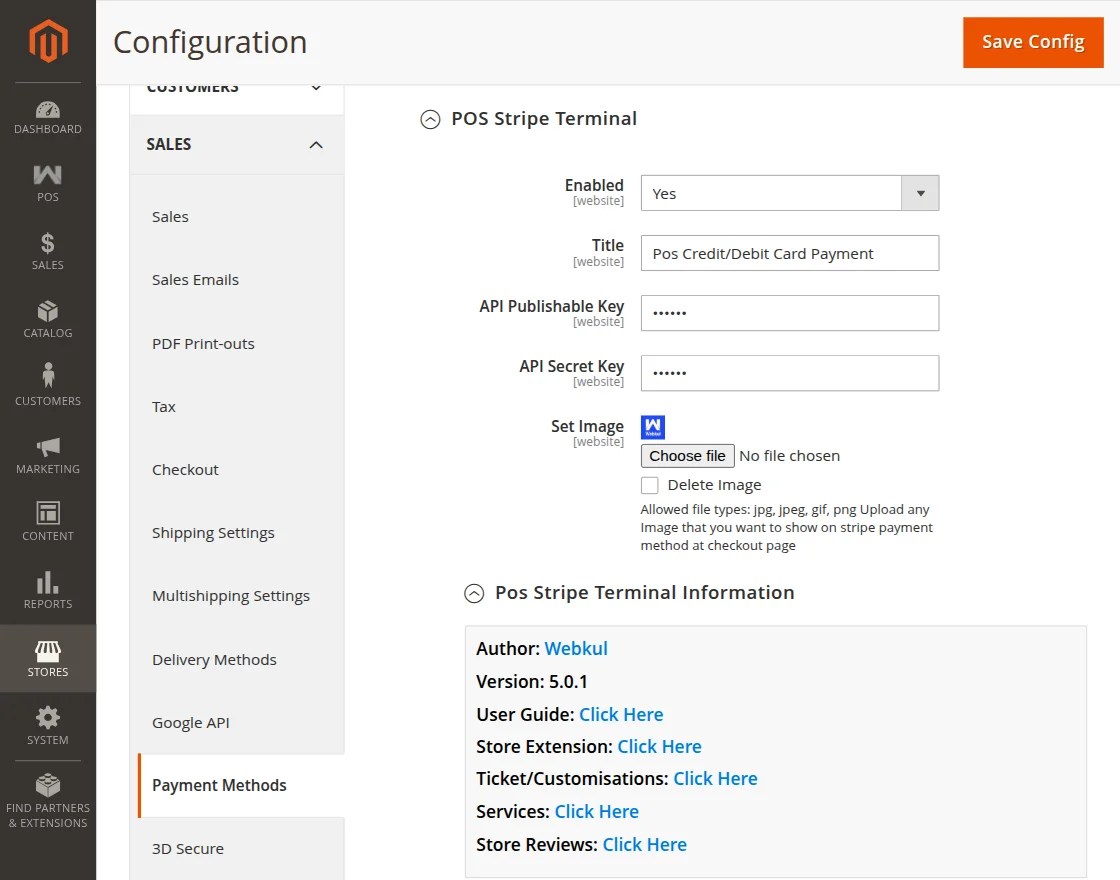
Here, the admin can:
- Enabled- The admin can grant cashiers permission to enable and use the POS Stripe Terminal module.
- Title– Enter the module title that will be visible during checkout.
- API Publishable Key- Enter the API Publishable key
- API Secret Key- Enter the API Secret key
- Set Image- Upload the logo that you want to display on stripe payment method at checkout page.
Magento 2 POS Stripe Reader Extension Workflow
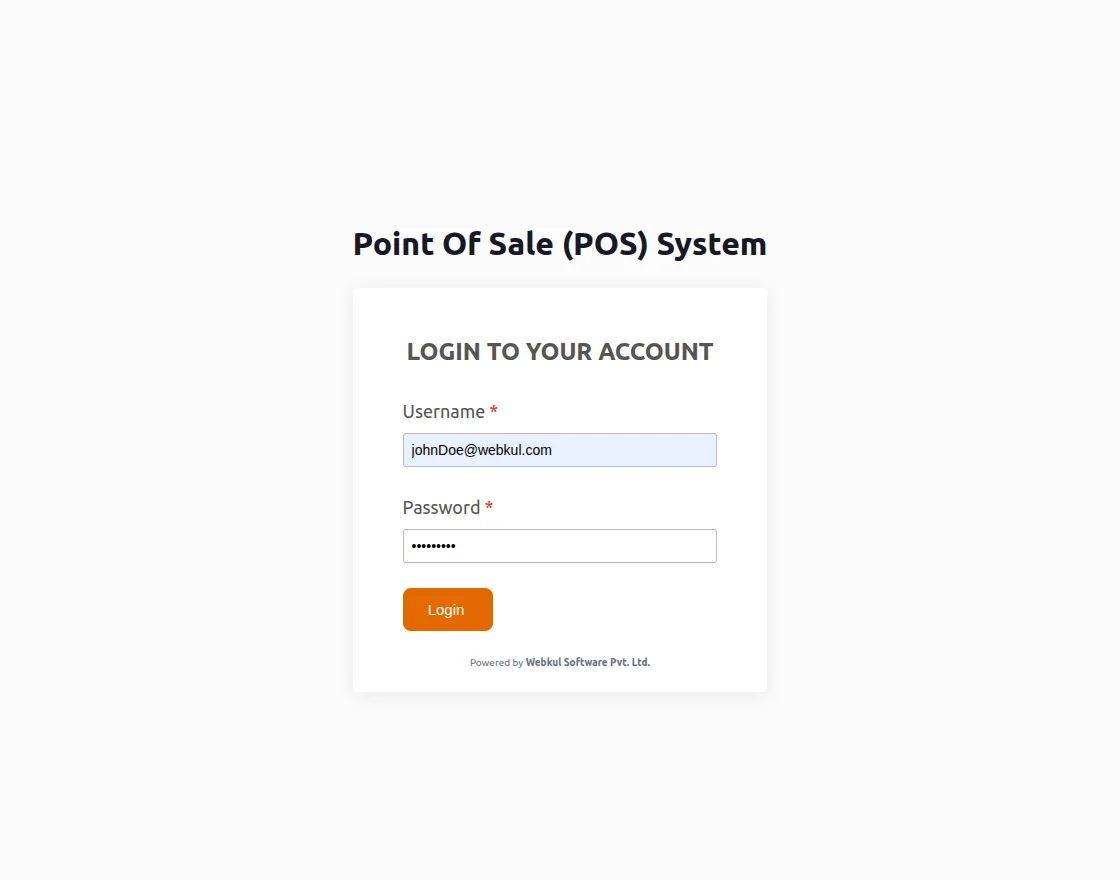
After the admin configuration, POS users can log in directly from the POS terminal.
Note: Before checking the Pos configurations ensure that Node Server is running.
When the Stripe server is not connected, the Stripe payment gateway symbol will appear as “No Reader Found” on the POS as per the below image :
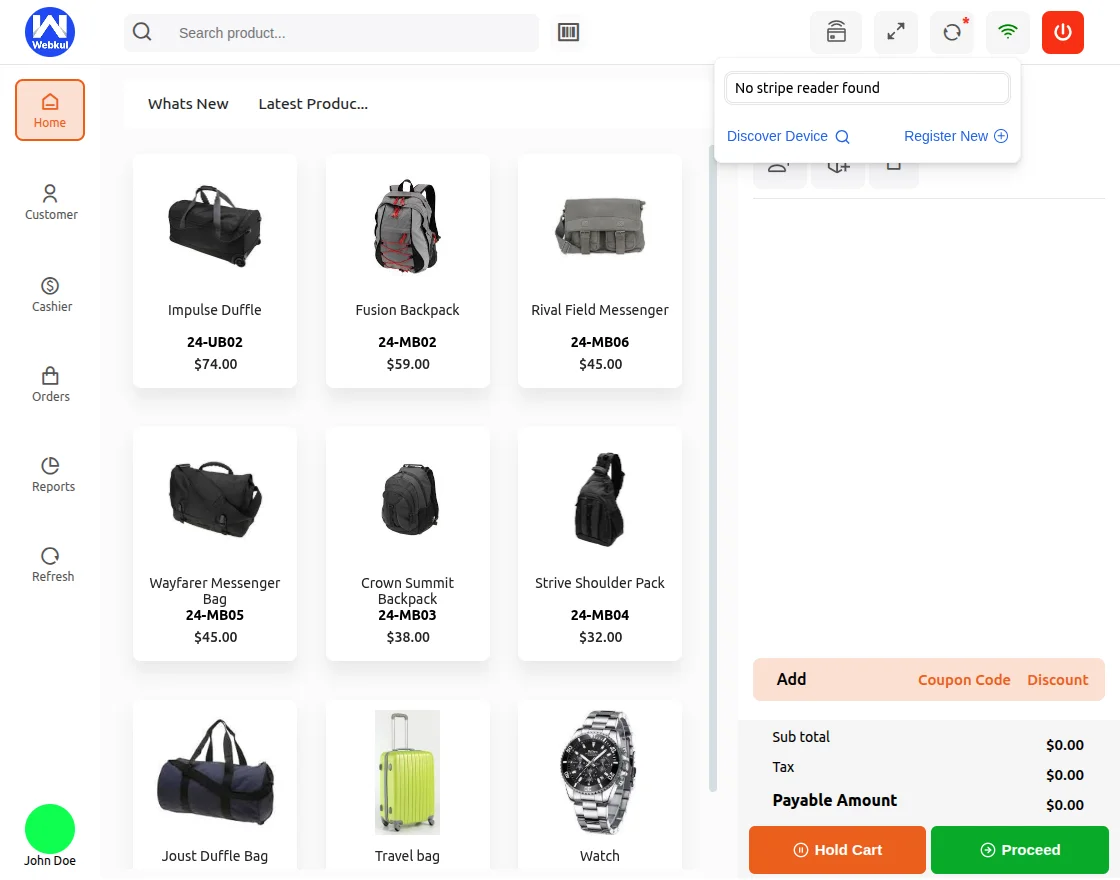
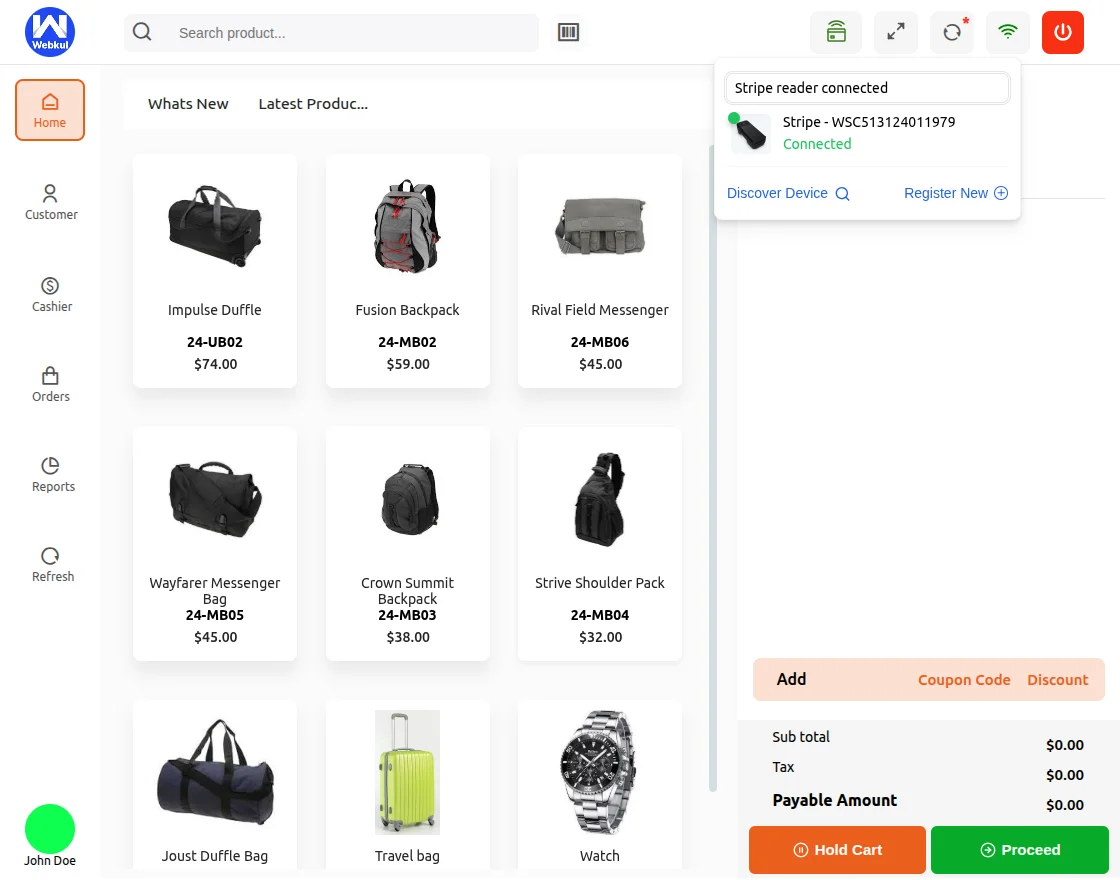
Once connected, Stripe will confirm that the application is successfully linked by changing the icon color.
Clicking the icon will display a message indicating that the Stripe reader connected.
After that, the POS user can select the customer’s product and add it to the cart.
Next, the POS user can proceed to the checkout page.
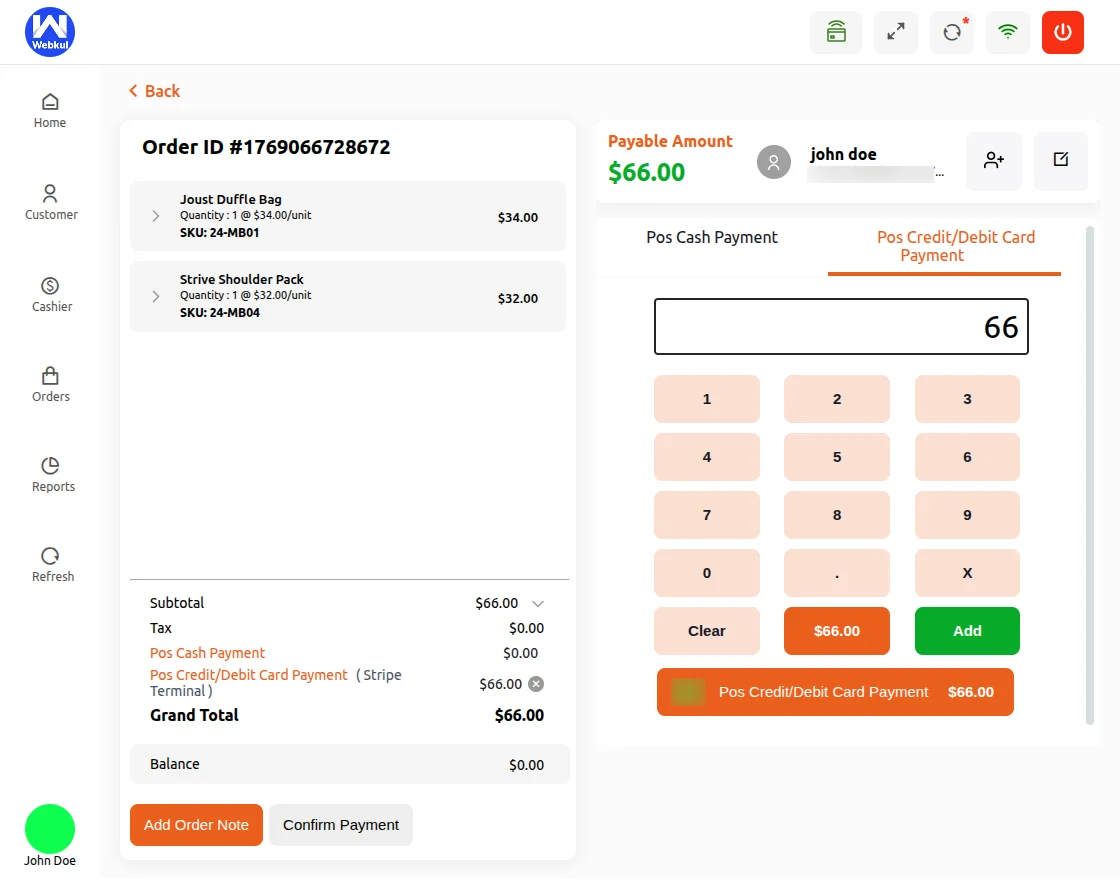
Then select POS Credit/Debit Card Payment as the payment method for the customer’s product purchase.
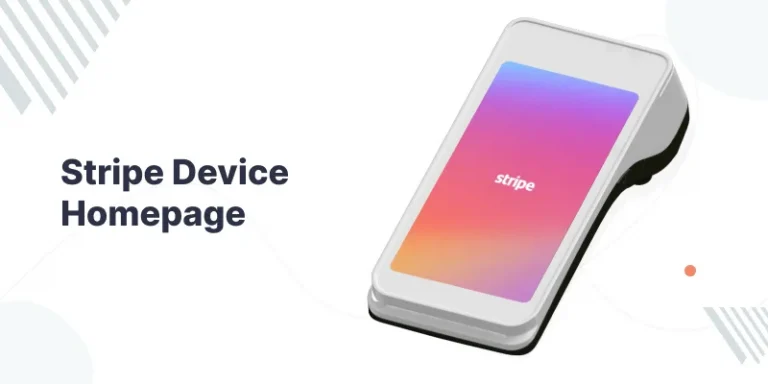
Now, Pos user will login to stripe device to complete the payment process through stripe card payment gateway. The Device opens with stripe Homepage.

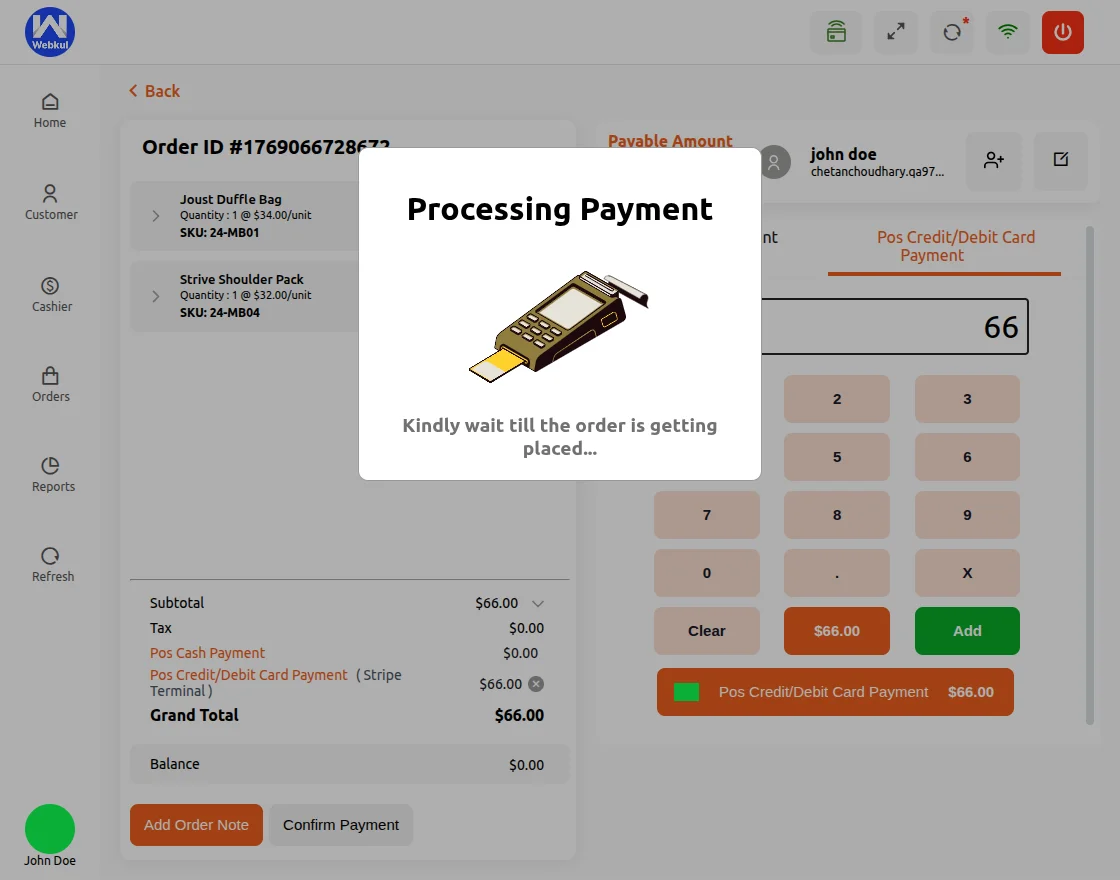
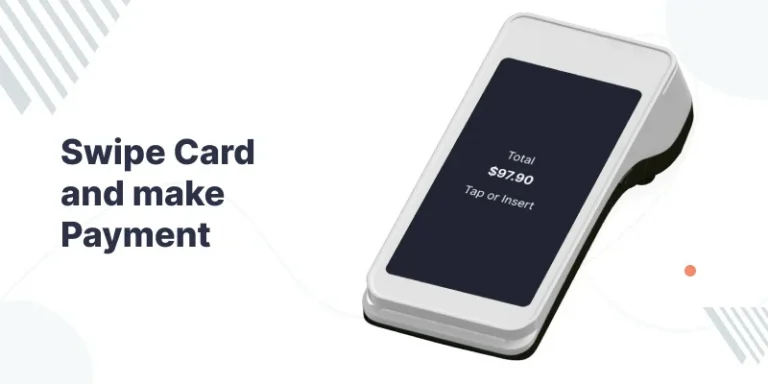
Pos user need to tap or Insert the card to complete remaining amount to pay.
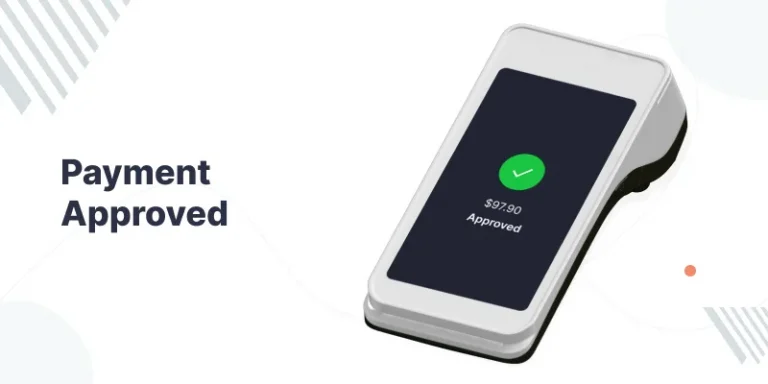
After inserting the card or tapping it, the payment processes and as soon as the amount is deducted, it processes the payment.
After this, the status is set to complete as shown in the image.

The payment is Approved and Completed from the desired card and device.Status for the payment of the product is confirmed by the device and approved.
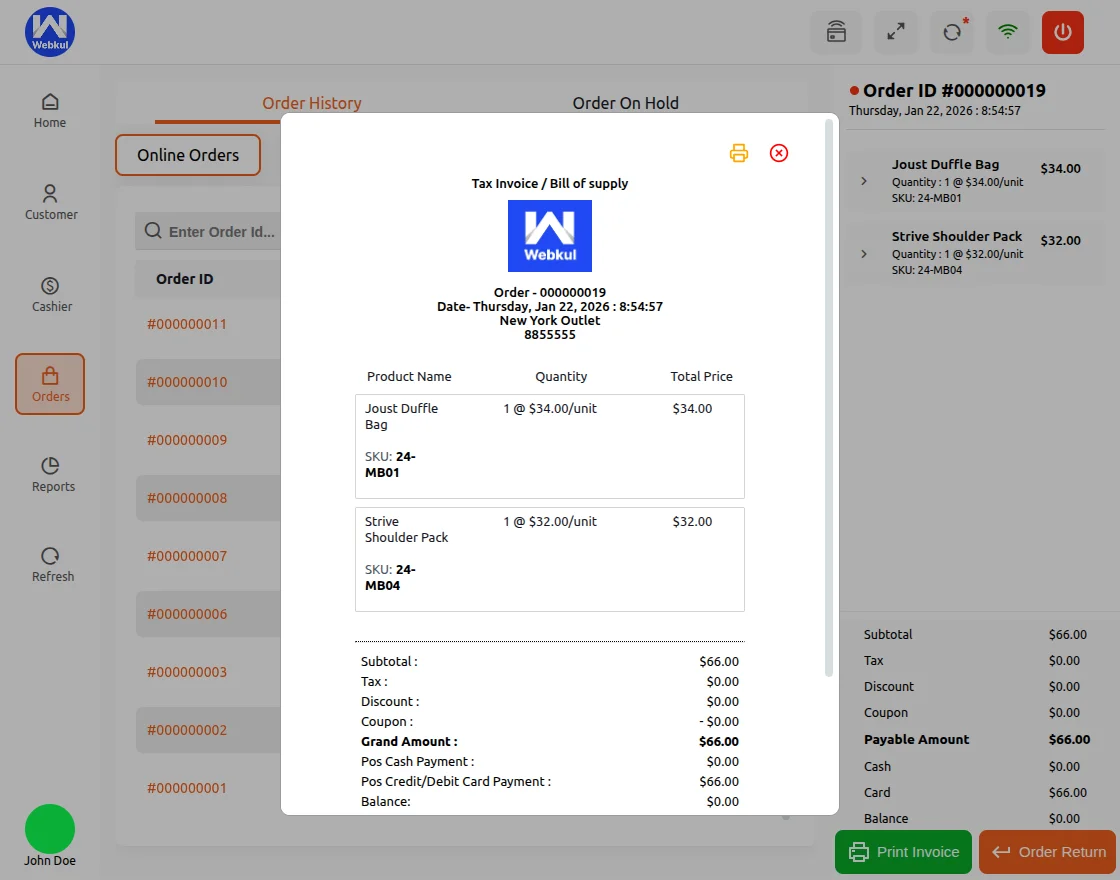
Once the payment is confirmed by the device, the order details along with the payment confirmation are redirected to the POS panel.
The POS then generates the product invoice, as shown below.
You can track your orders from the sales history section for reference and record-keeping.
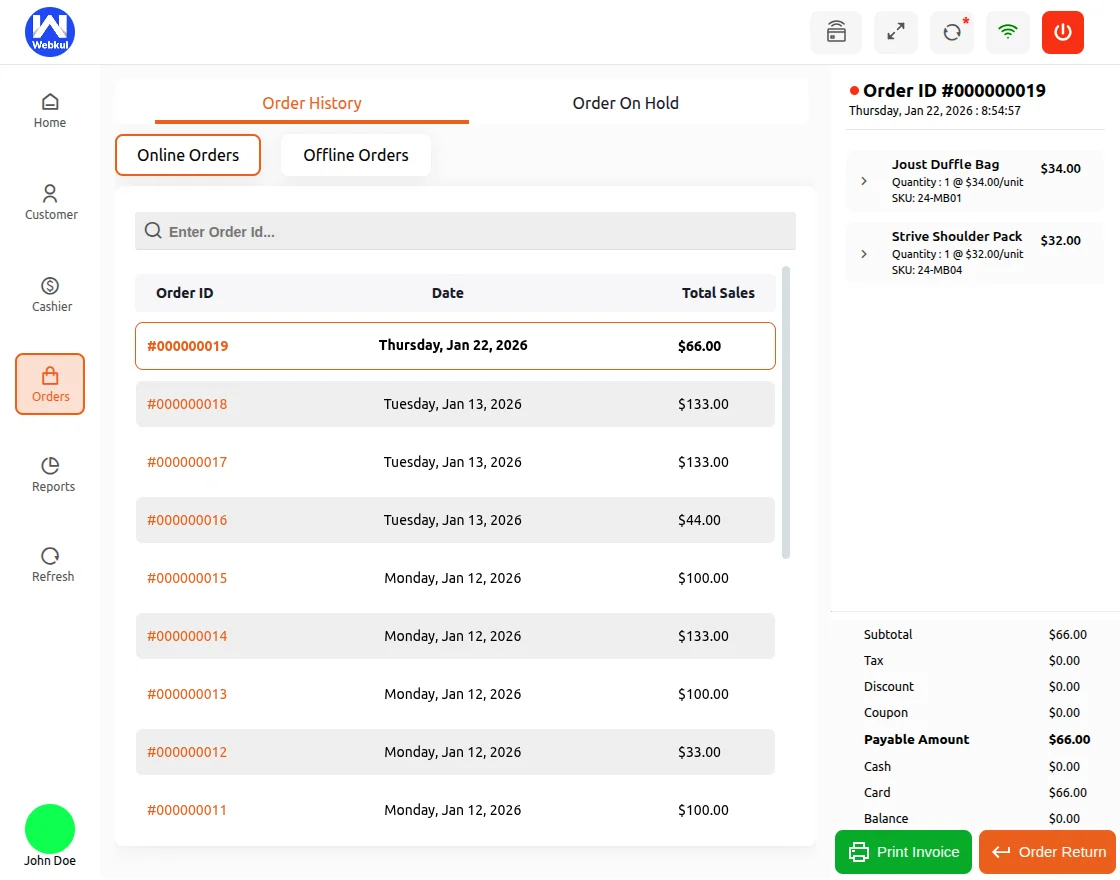
This section helps store owners and staff monitor completed transactions, check order details, and maintain an organized history of all sales activities.
Support
So, that’s all for Magento 2 POS Stripe Reader Extension.
If you have any questions, suggestions, or customization requests, feel free to contact us at support@webkul.com or submit a ticket at webkul.uvdesk.com.
Please explore our Magento Development Services and Quality Magento 2 Extensions.