User Guide For Magento 2 EasyPost Shipping
Table of Content
Magento 2 EasyPost Shipping connects the store with EasyPost. It shows real-time shipping rates at checkout and helps the admin manage shipments from the order view.
Furthermore, admins can create shipments, verify addresses, purchase and download labels, save tracking numbers, and manage EasyPost credentials from a single interface.
Please Note:
- You need to have an EasyPost account to use this extension, please click here to signup on EasyPost
Features of EasyPost Shipping Module
- Admin can turn the module on or off.
- Admin can add EasyPost credentials.
- It shows real-time rates at checkout.
- Buyers can choose a carrier service.
- Admin can create EasyPost shipments from Magento shipments.
- Admin can check the ship-to address through EasyPost.
- Admin can buy labels from the order view.
- Admin can download labels in PDF, ZPL, or EPL2 format.
- It saves tracking numbers in shipments.
- It stores shipment records and address checks.
- Admin can log API calls for debug work.
- Admin can limit the method to selected countries.
- If no shipping rates are returned, then admins can display a custom error message.
Installation
First, customers receive a ZIP folder. Next, they extract its contents on their system.
The extracted folder has a src folder, inside the src folder, you have the app folder.
The extracted folder is having an src folder, inside the src folder you have the app folder.

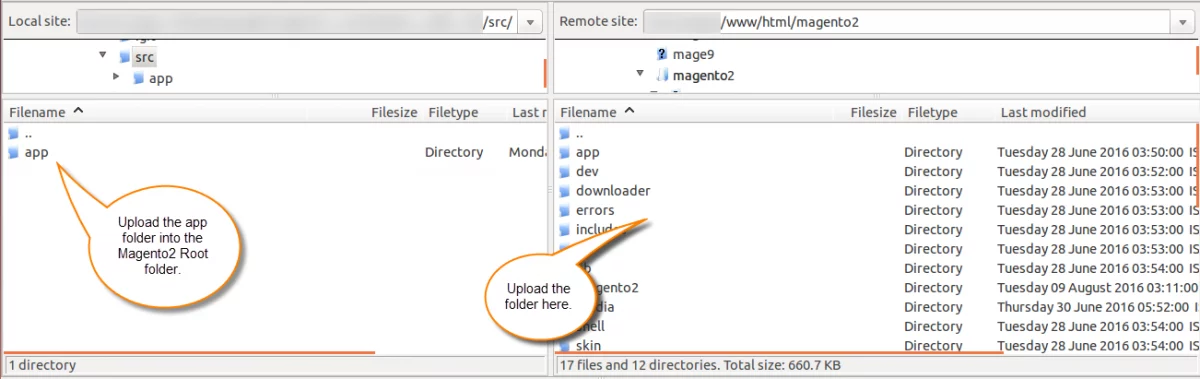
After that, run the following commands from the Magento 2 root directory.
composer require easypost/easypost-php
php bin/magento setup:upgrade
php bin/magento setup:di:compile
php bin/magento setup:static-content:deploy
php bin/magento indexer:reindex
php bin/magento cache:flush
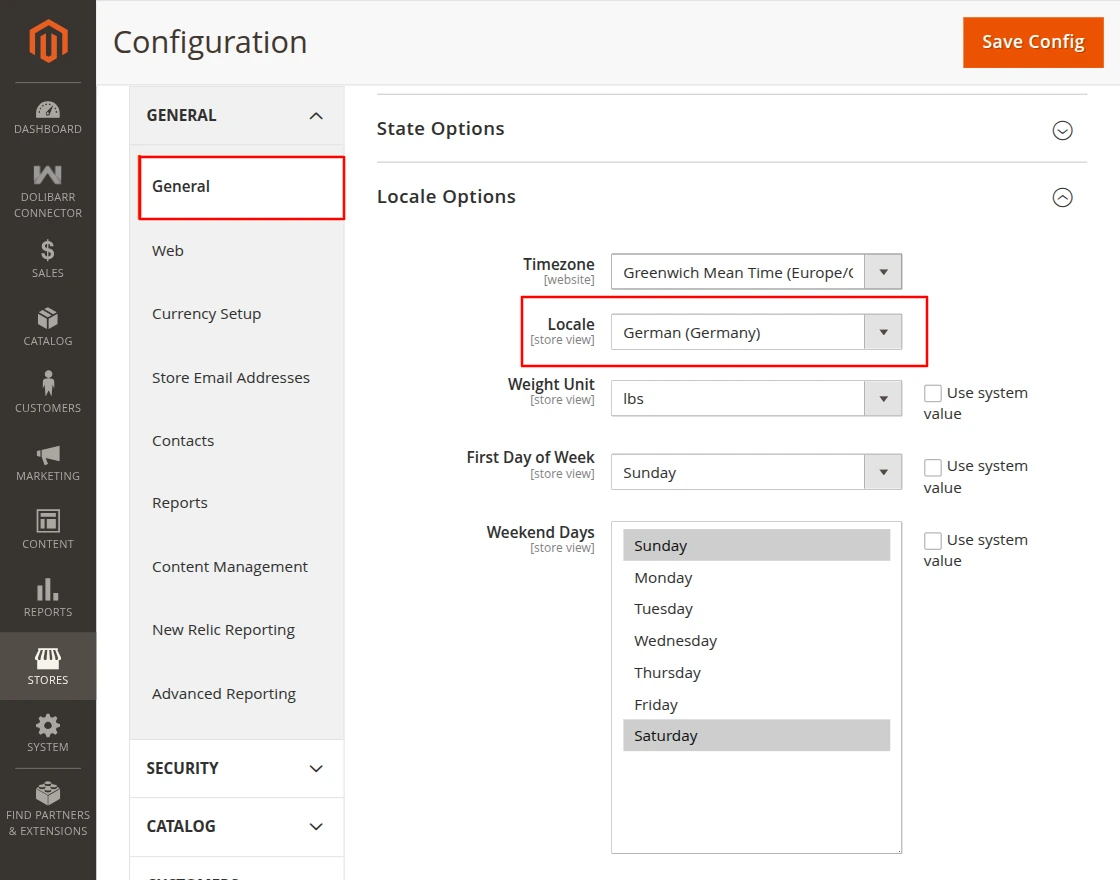
Multi-Lingual Configuration of Adobe Commerce
For Multilingual support, please navigate to Store>Configuration>General >Locale Options. And select your desired language from the Locale option.

Language Translation
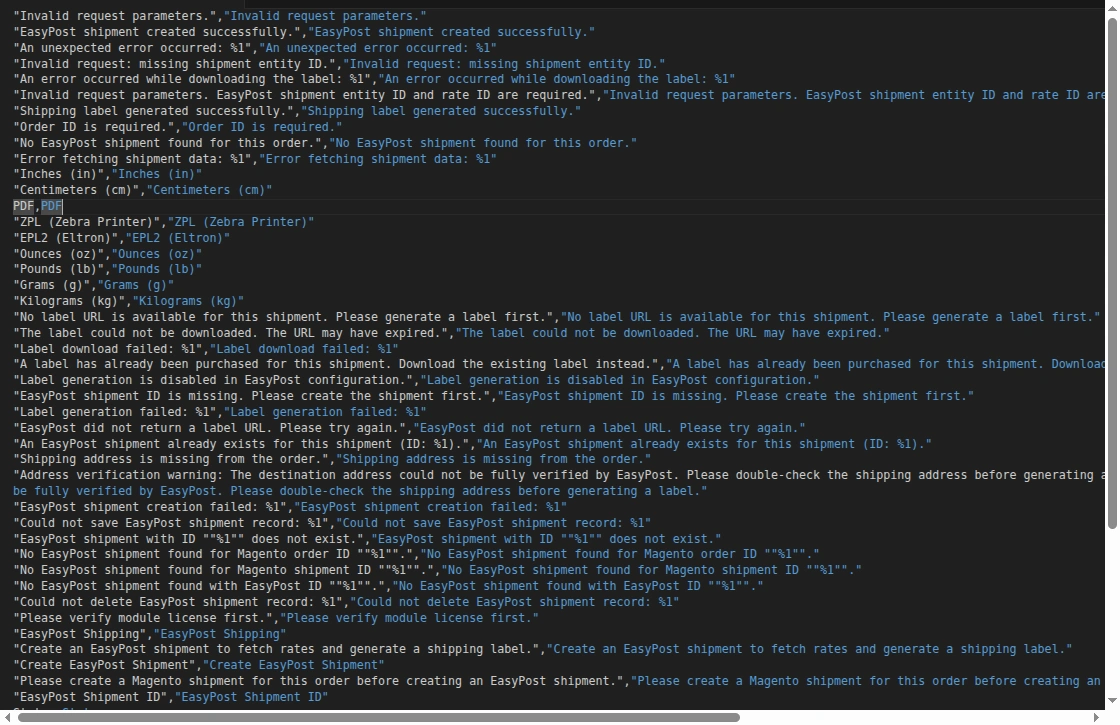
For translating the module language, navigate through the app/code/Webkul/EasyPostShipping/i18n and edit the en_US.csv file.
Thereafter, rename the CSV as “en_SA.csv” and translate all right side content after the comma in the Arabic language. After editing the CSV, save it.


Now, upload it to the path app/code/EasyPostShipping/i18n, where the installation of Magento 2 is on the server.
Magento 2 EasyPost Shipping Module will be translated into the Arabic Language. Moreover, the extension supports both right-to-left (RTL) and left-to-right (LTR) languages.
The user can edit the CSV like the image below.

Engage and hire Magento developers to solely concentrate on your personalized e-commerce projects for a unique experience.
Admin Configuration of EasyPost Shipping Module
After installation, the admin can set up the module from the backend. The admin will go to:
Stores > Configuration > Sales > Delivery Methods > Webkul EasyPost Shipping
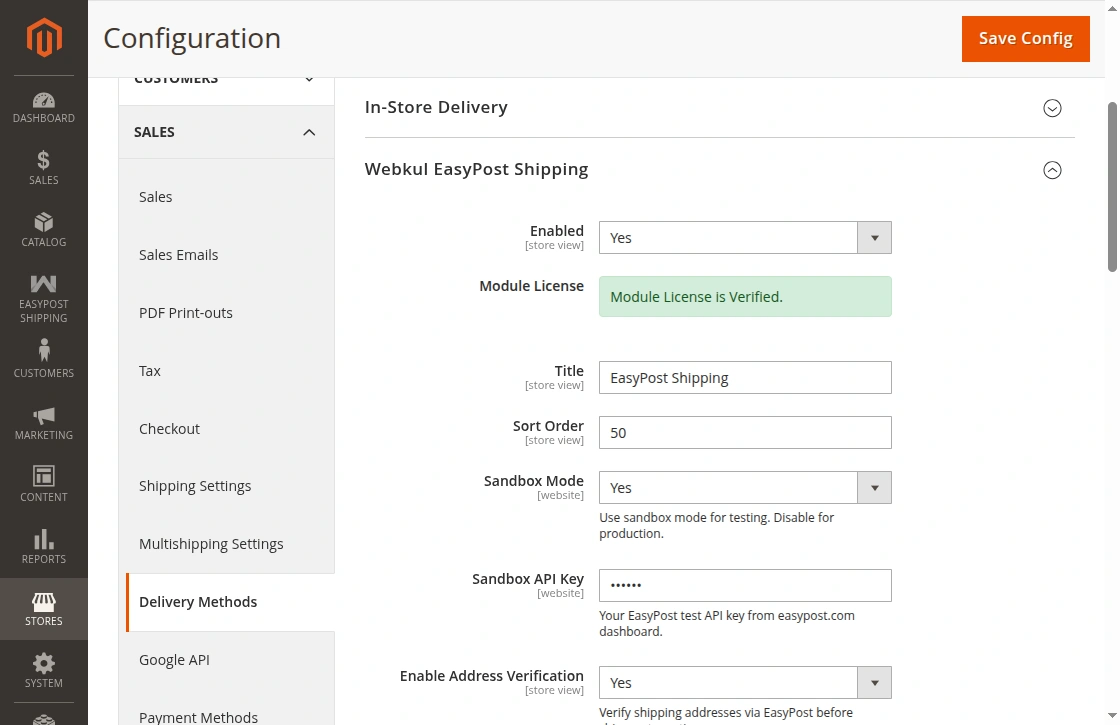
To configure the extension, the admin will:
- Enabled – Set Yes to show the method at checkout.
- Title – Enter the method title for checkout.
- Sort Order – Set the sort order for checkout.
- Sandbox Mode – Select Yes to use sandbox mode.
- EasyPost Credentials – Enter the credentials from the EasyPost account. It uses the credentials for the selected mode.
- Enable Address Verification – Set Yes to check the ship-to address.
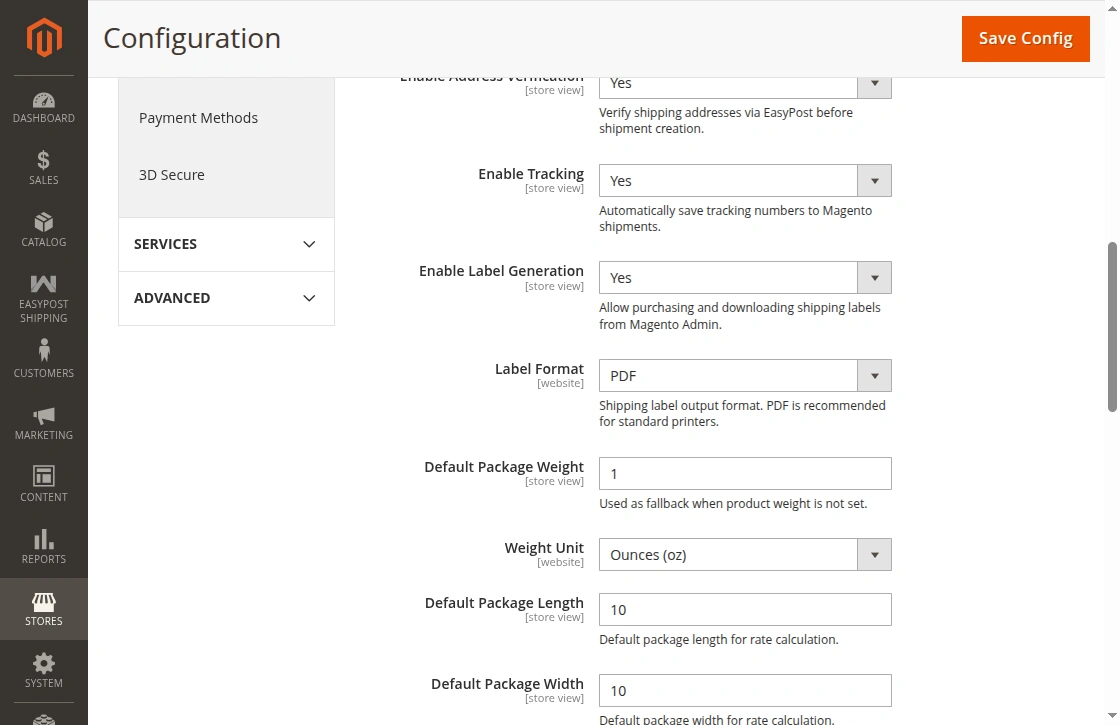
- Enable Tracking– Set Yes to save tracking in Magento shipments.
- Enable Label Generation – Set Yes to buy and download labels.
- Label Format – Select PDF, ZPL, or EPL2. Use PDF for standard label files. Use ZPL or EPL2 for supported thermal printers.
- Default Package Weight – Enter the fallback package weight.
- Weight Unit – Select Ounces, Pounds, Grams, or Kilograms.
- Default Package Length – Enter the package length.
- Default Package Width – Enter the package width.

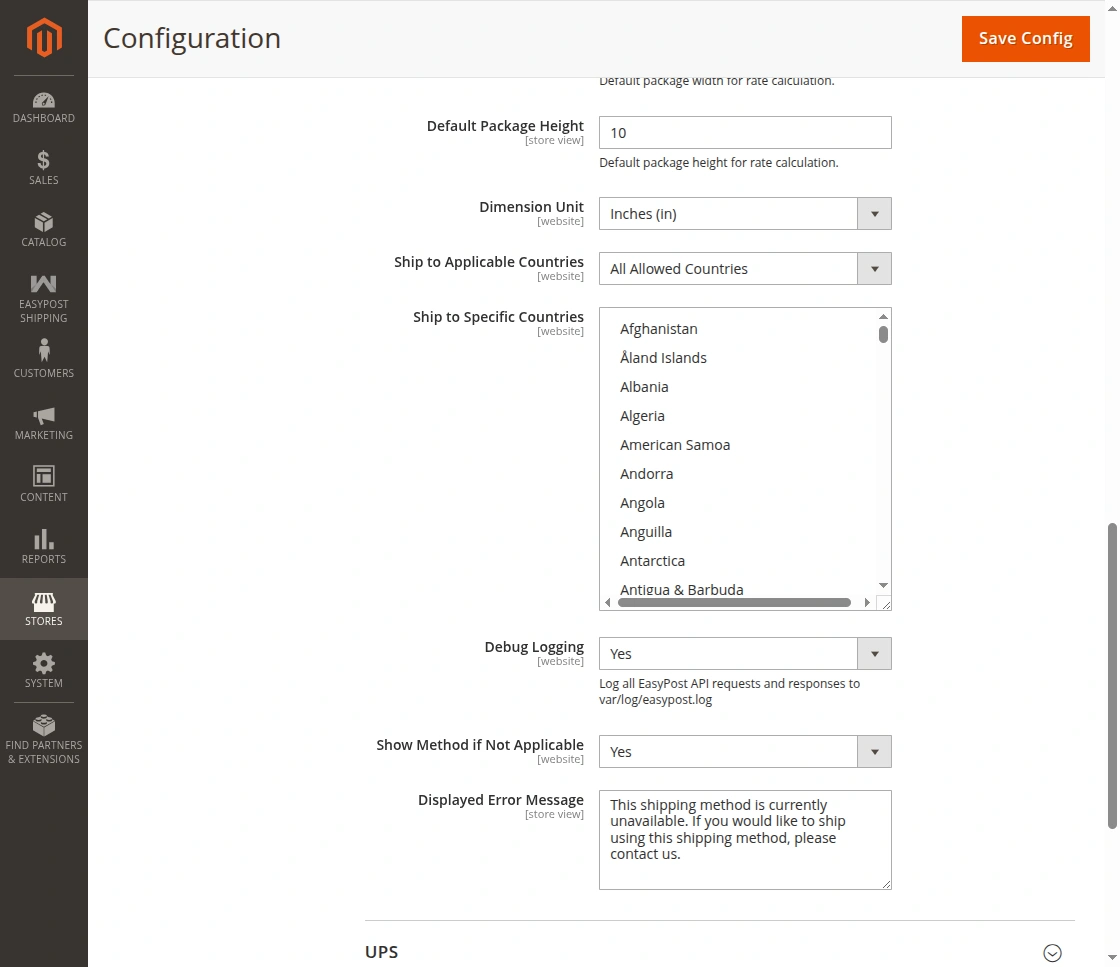
- Default Package Height – Enter the package height.
- Dimension Unit – Select Inches or Centimeters. It converts package weight to ounces for US carrier rates.
- Ship to Applicable Countries – Select all countries or selected countries.
- Ship to Specific Countries – Select the countries where the method will work.
- Debug Logging – Set Yes to log EasyPost API calls. It writes debug logs at this path: var/log/easypost.log
- Show Method if Not Applicable – If shipping rates are unavailable, then set this option to Yes to display the shipping method.
- Displayed Error Message – Enter the message for customers.
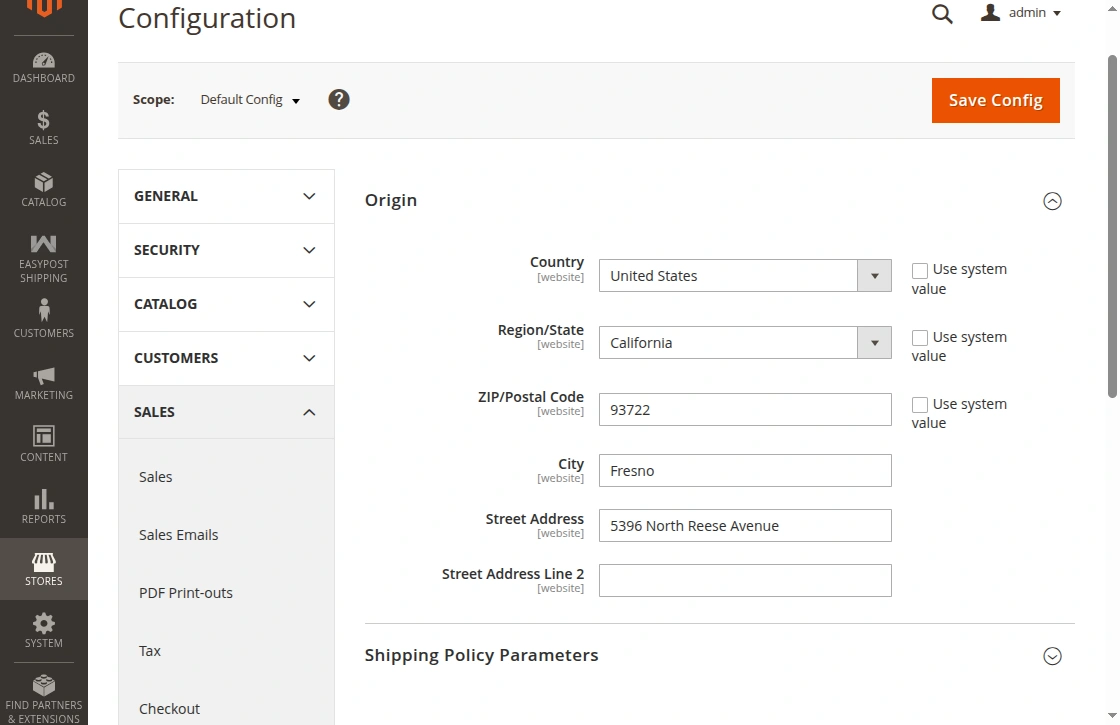
Shipping Origin Configuration
EasyPost needs a ship-from address for rates and shipments. It uses the store’s origin address.
The admin will go to: Stores > Configuration > Sales > Shipping Settings > Origin
Enter the store address or warehouse address. Save the setting.
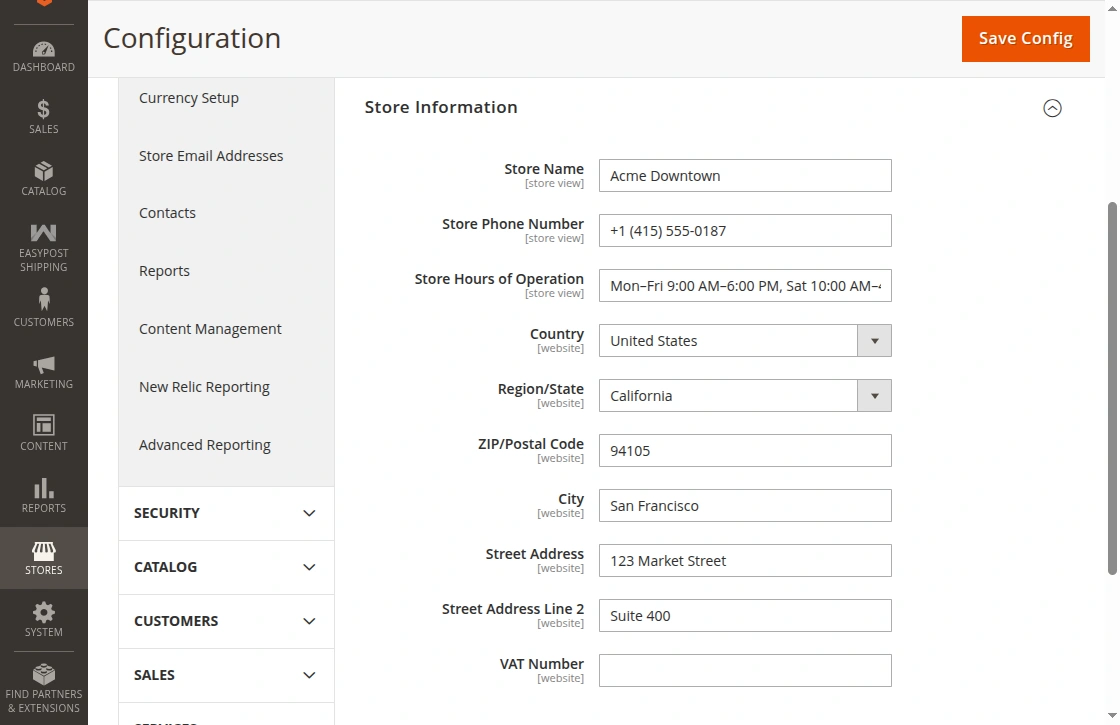
The admin can add the store contact and address details from the Magento
backend. The admin will go to:
Stores > Configuration > General > General > Store Information
Here, the admin can enter the store details.
Magento 2 EasyPost Shipping Workflow:
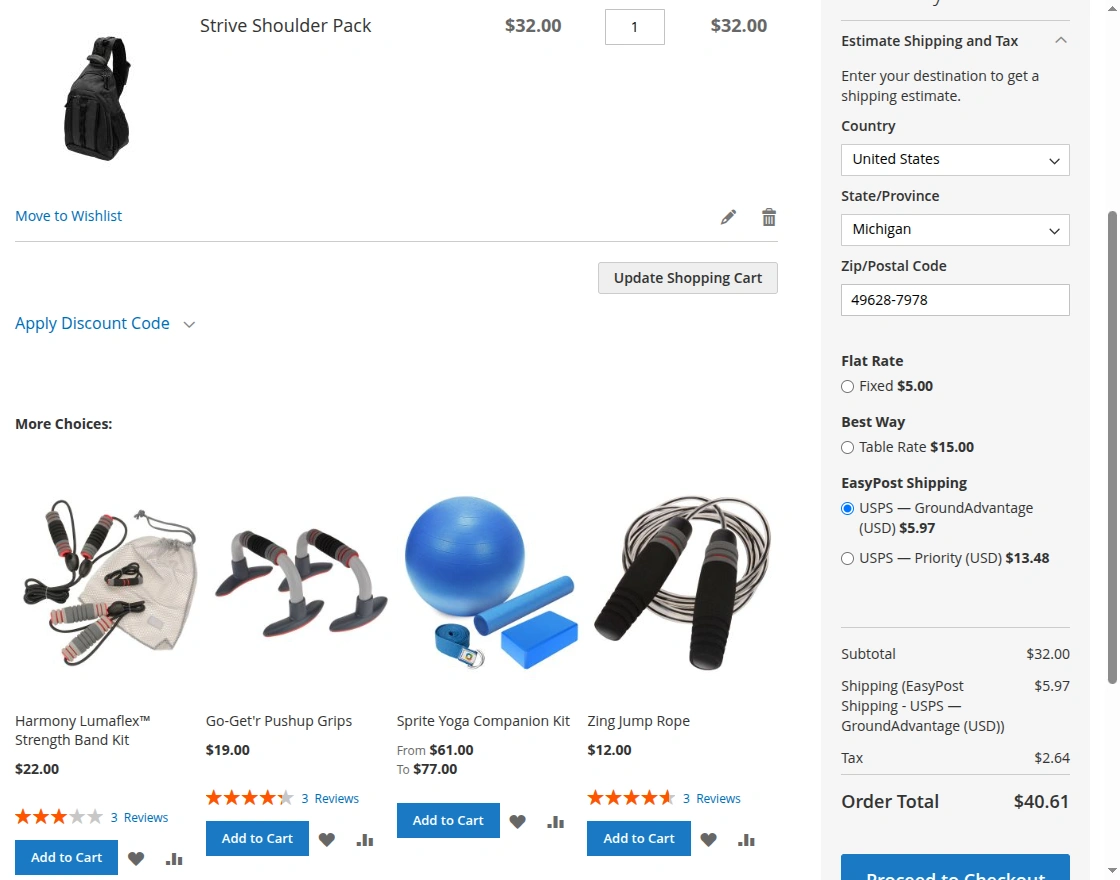
Once the setup is complete, buyers can then select EasyPost shipping rates during checkout. The system sends the origin address, ship-to address, package weight, and dimensions to EasyPost.
Next, the system displays the available shipping rates in the shipping method list.
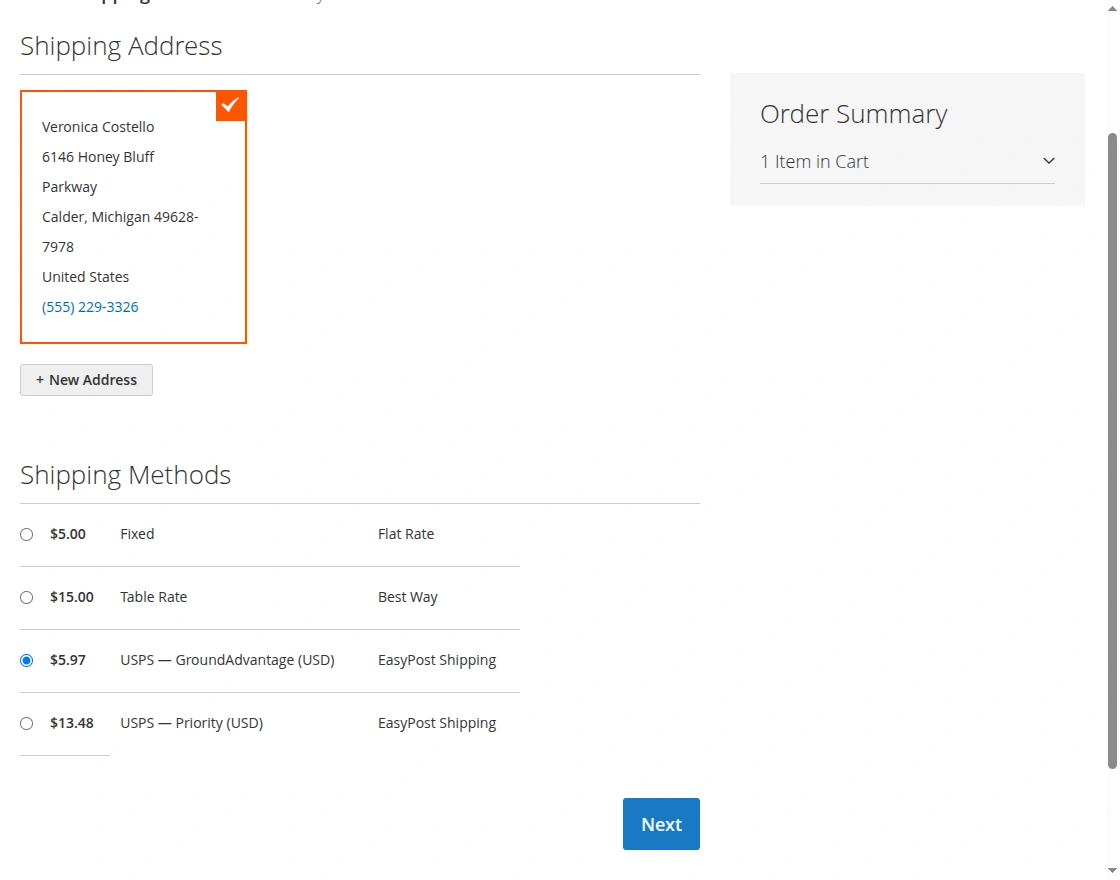
The buyer can select a carrier service on the checkout shipping step.
To select the EasyPost shipping method:
- Add a product to the cart.
- Open the checkout page.
- Select a saved address or enter a new address.
- Select the required rate.
- Click Next.
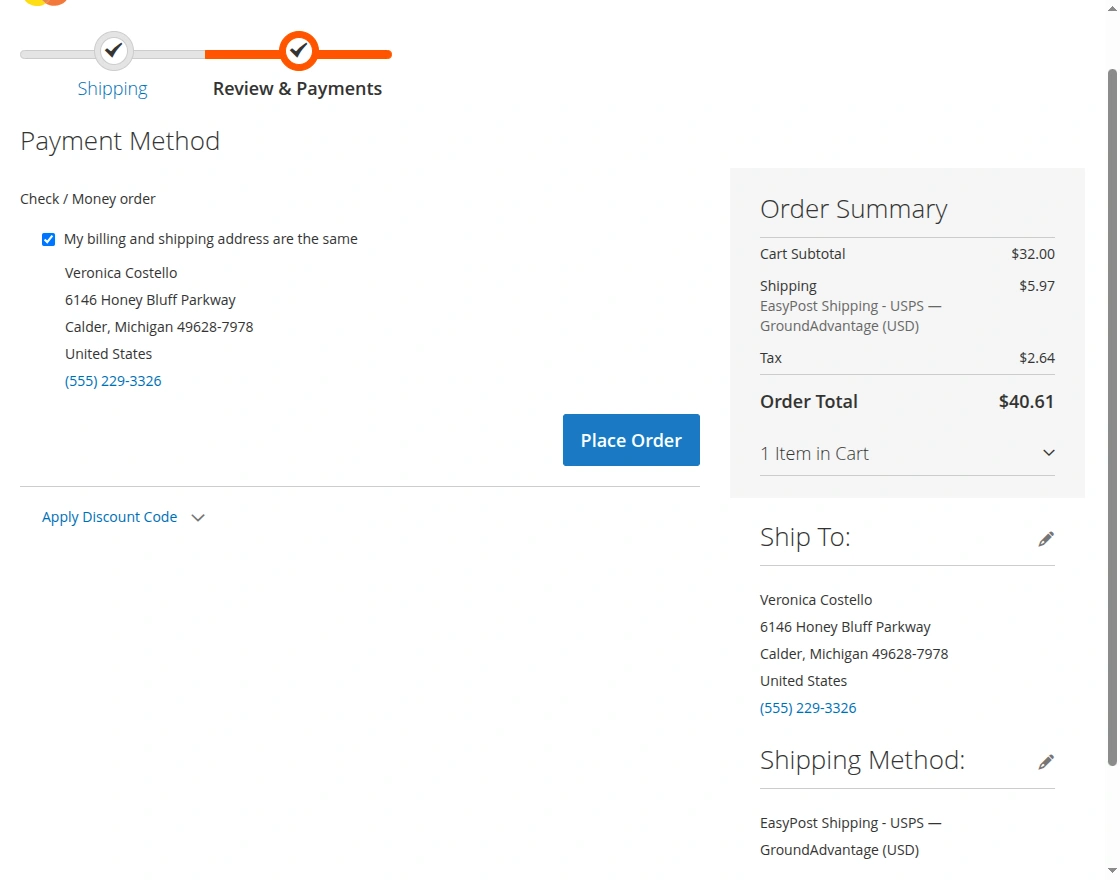
The payment step shows the chosen EasyPost method in the order summary.
To place the order:
- Review the order summary.
- Check the chosen EasyPost method.
- Select a payment method.
- Click Place Order.
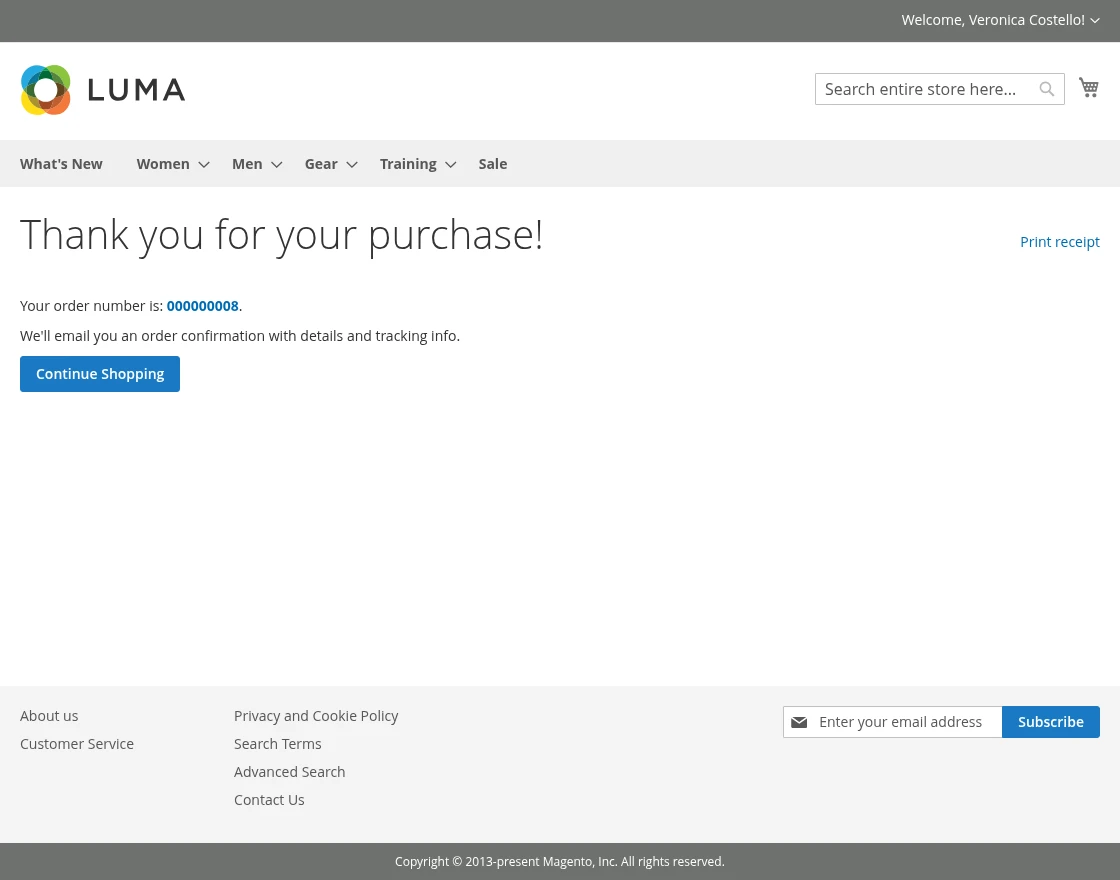
After order placement, Magento shows the order success page.
The buyer can open the order from the account area and check the chosen method.
The order detail page shows the method under Order Information.

Admin EasyPost Shipment Workflow
After a buyer places an order, the admin can check the chosen EasyPost method from the order view. The admin will go to: Sales > Orders > View Order
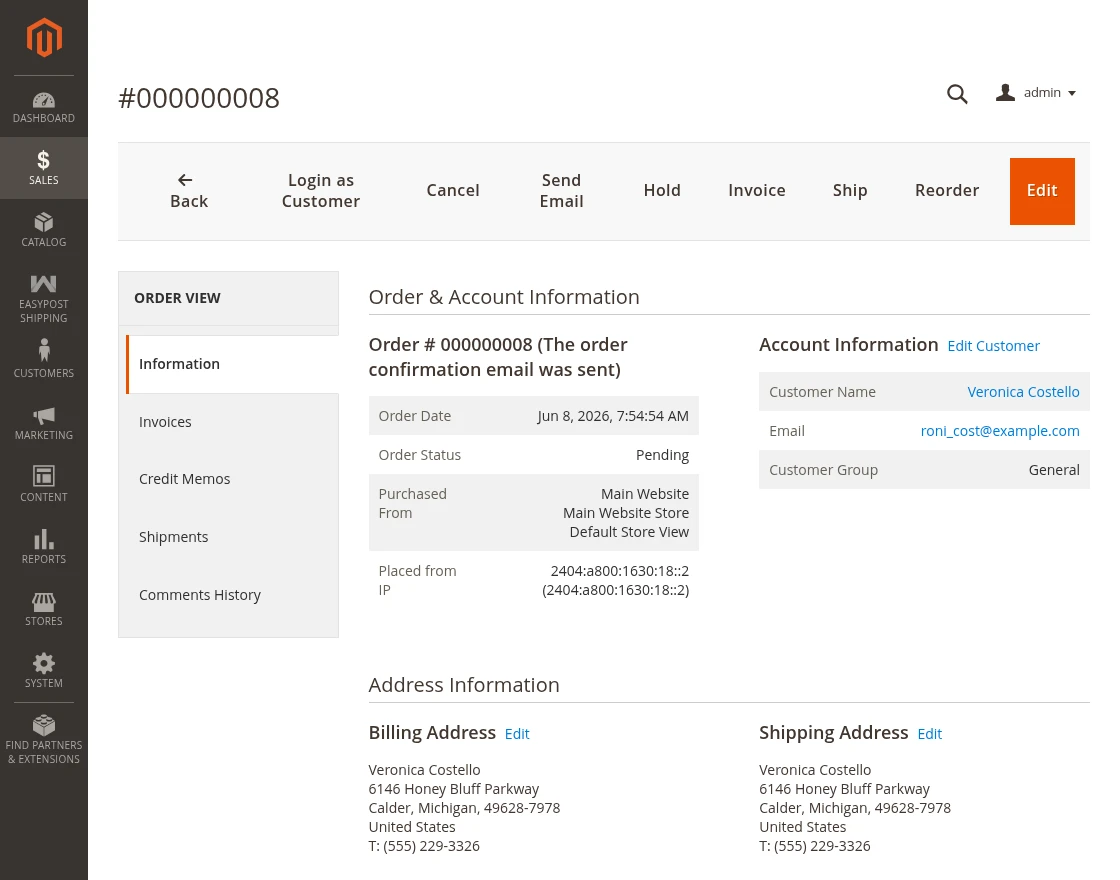
However, if a Magento shipment does not exist, then the panel prompts the admin to create one first.
To create an EasyPost shipment, the admin must first create a Magento shipment. To create the Magento shipment:
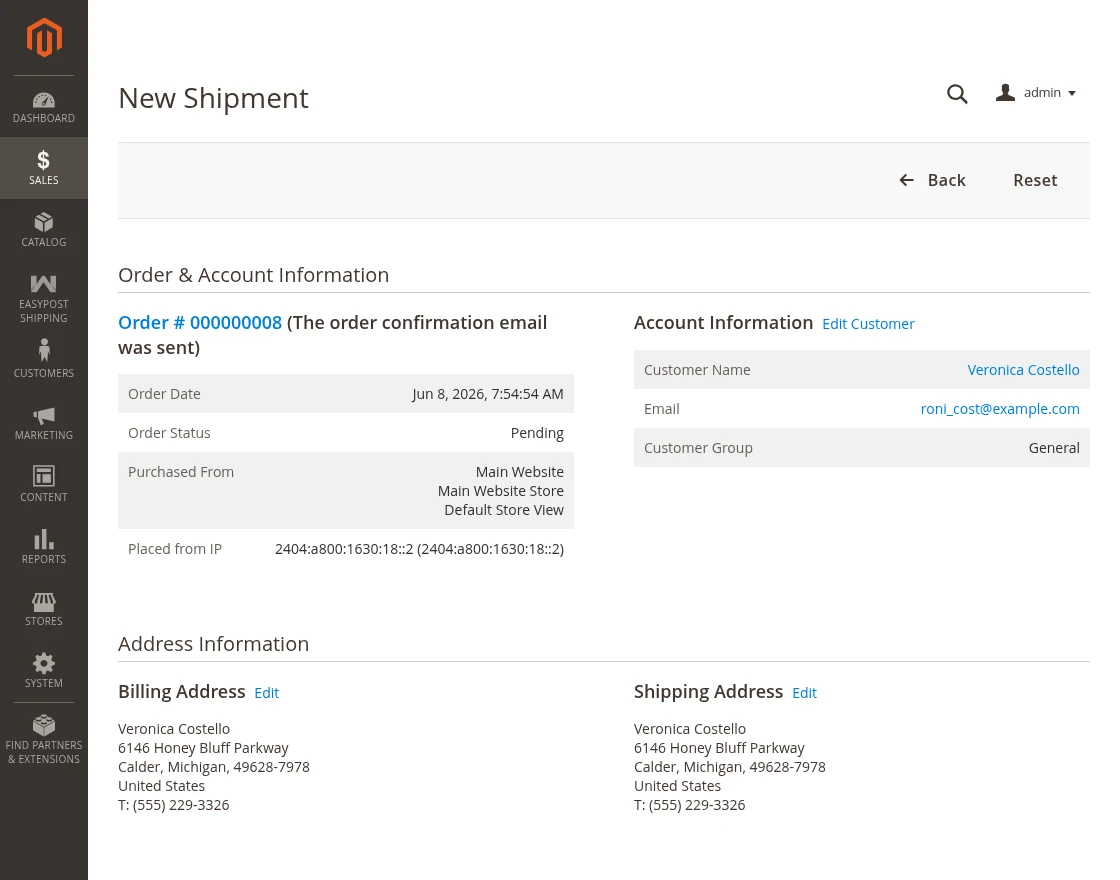
- Open the Magento order from Sales > Orders.
- Click Ship.
- Check the shipment items.
- Submit the shipment.
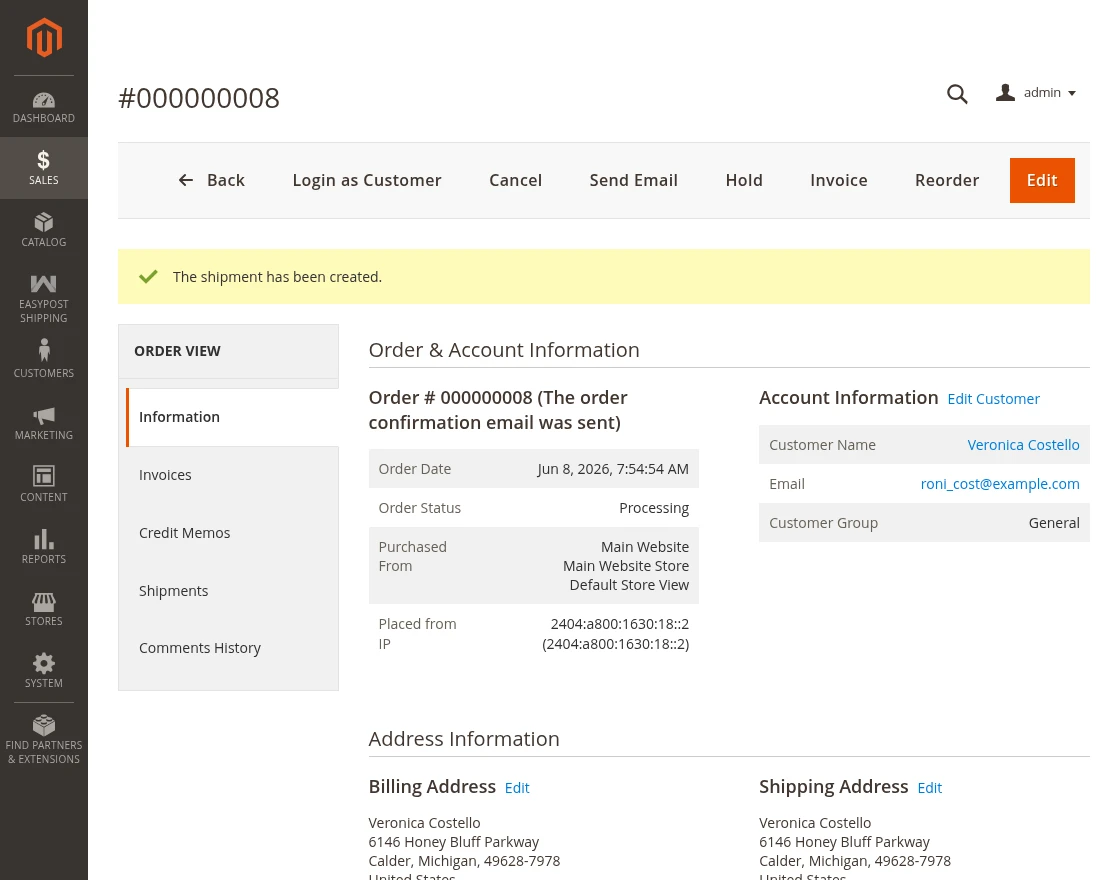
After that, Magento returns to the order view and shows the Create EasyPost Shipment action.
The action sends shipment data to EasyPost and saves the response in Magento.
To create the EasyPost shipment:
- Find the EasyPost Shipping panel.
- Click Create EasyPost Shipment.
- Check the shipment ID and rates.
It does not create the EasyPost shipment when the customer places the order. The admin creates it after the Magento shipment exists.
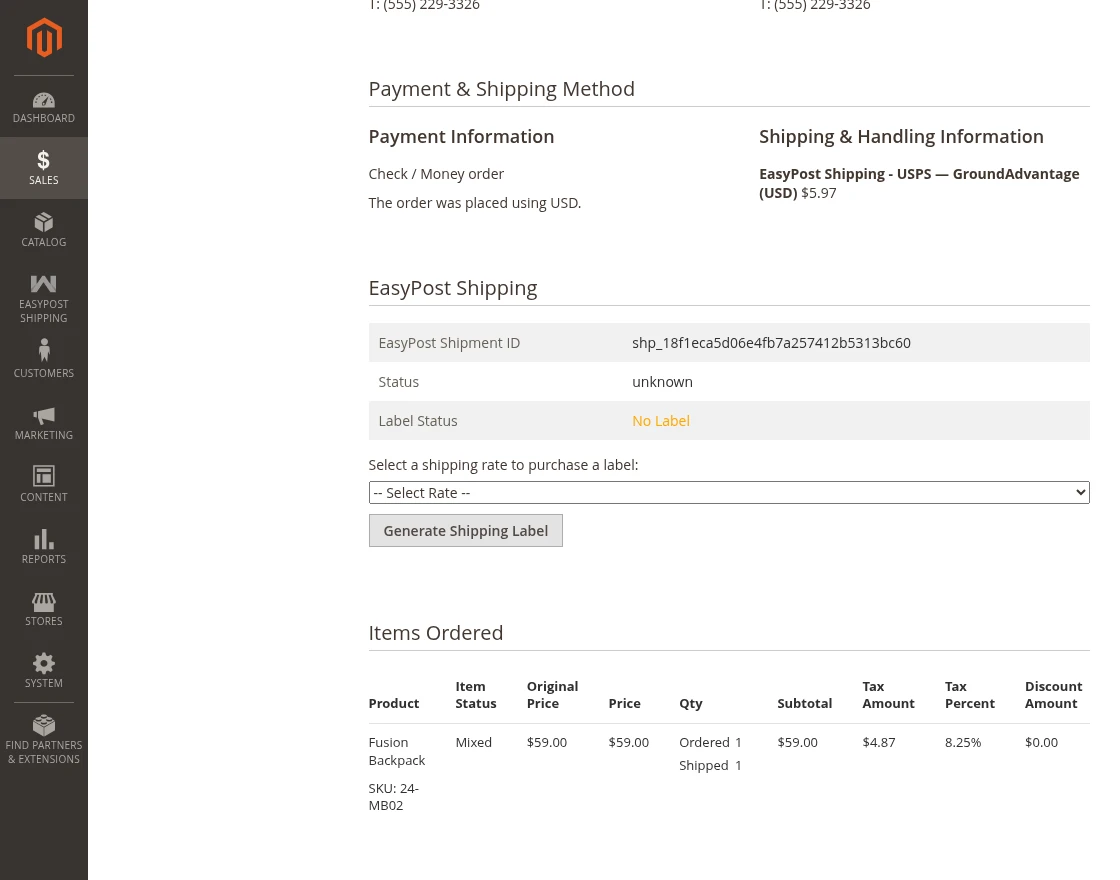
After shipment creation, the admin can select a rate and generate a label. To generate the label:
- Click Generate Shipping Label.
- Check the carrier, service, tracking number, and label status.
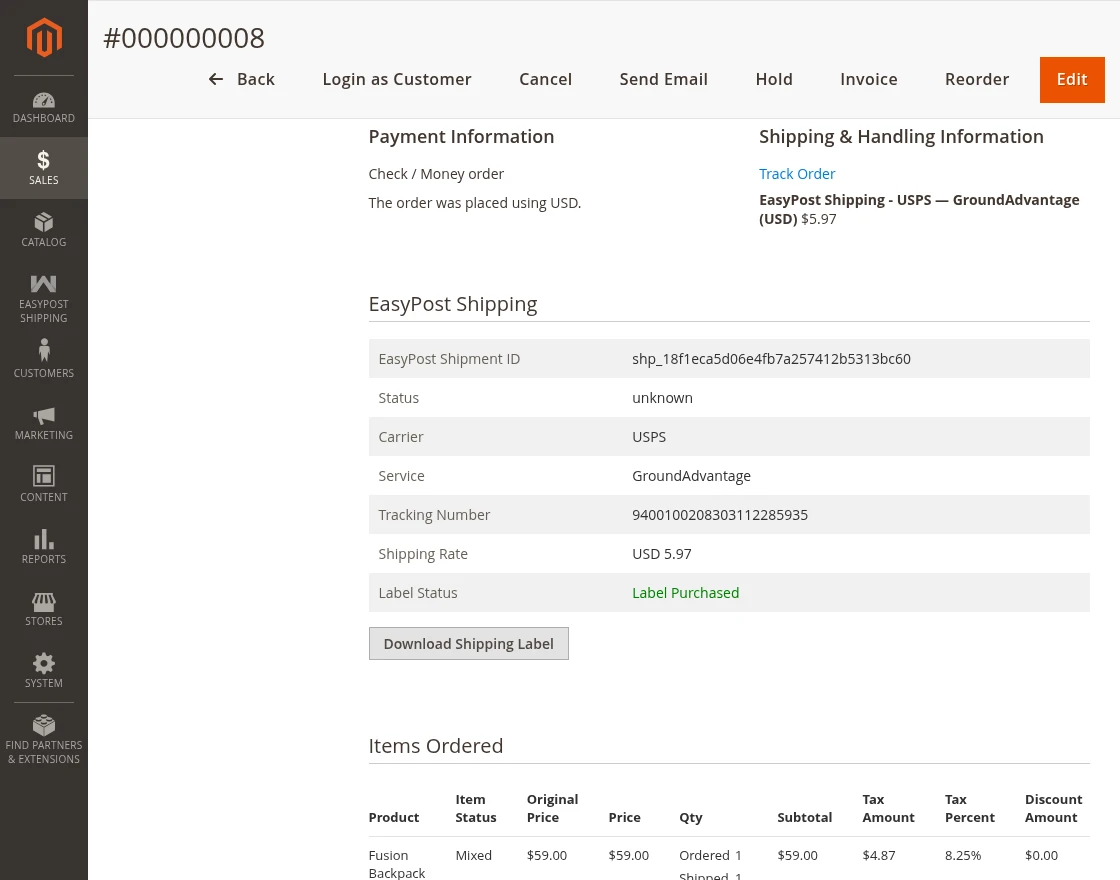
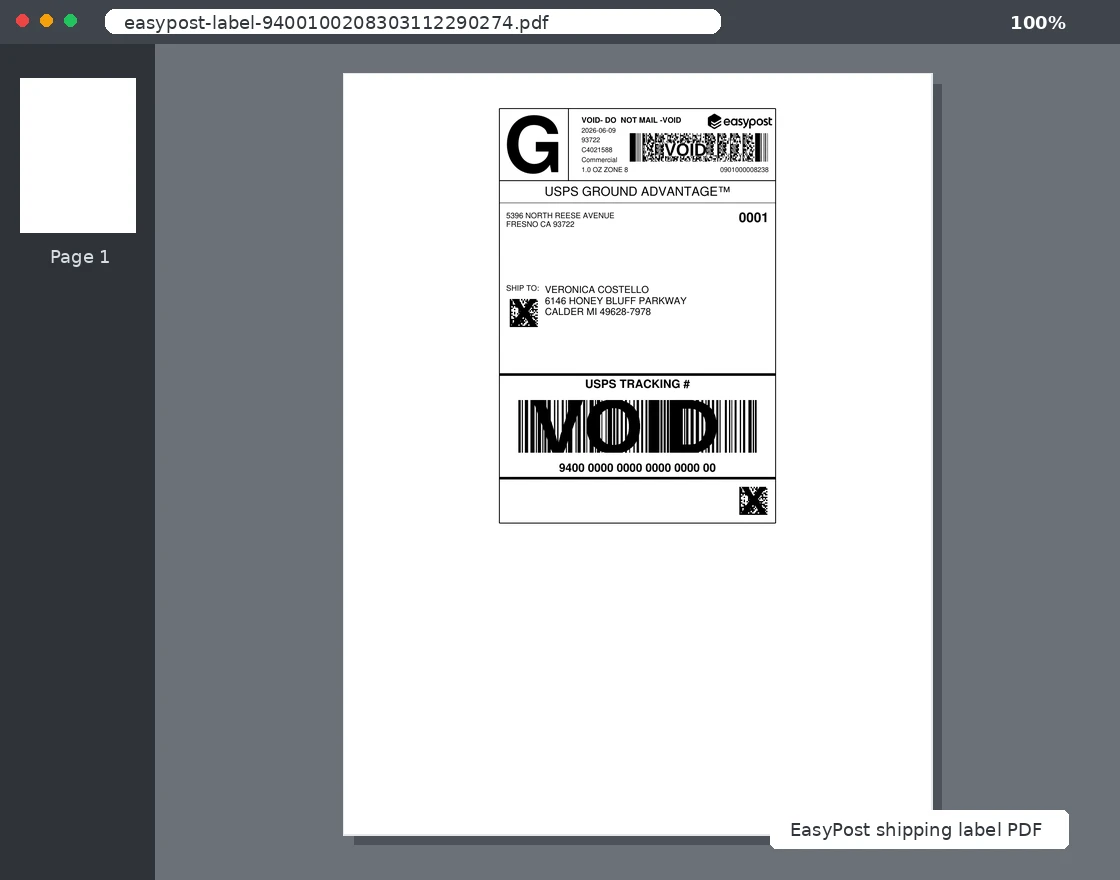
After label generation, the admin can download the label from the order view or shipment view.
- Find the Download Shipping Label action.
- Click Download Shipping Label.
- Save or print the label file.
When tracking is enabled, the system saves the EasyPost tracking number in the Magento shipment.
The label service saves the tracking number after EasyPost returns the label data. If no tracking record exists, the shipment save observer can automatically add the EasyPost tracking number later.
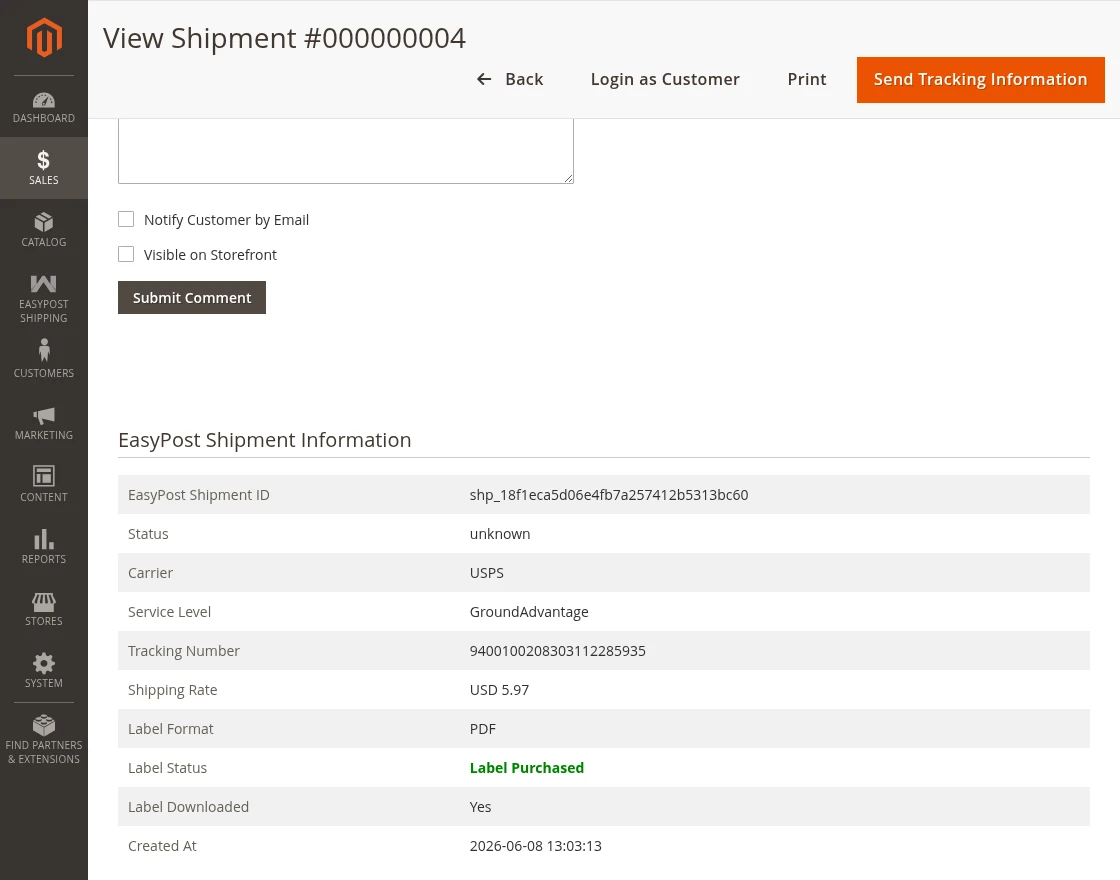
When an EasyPost shipment record exists, the Magento shipment view displays the shipment details.
The shipment view can show:
- EasyPost shipment ID
- Shipment status
- Carrier
- Service level
- Tracking number
- Shipping rate
- Label format
- Label status
- Label downloaded status
- Created date
Support
For any issue with the Magento 2 EasyPost Shipping module, the admin can raise a ticket at the Webkul support system. Use the Webkul support portal: https://webkul.uvdesk.com
Furthermore, there is no need to search elsewhere; seize the chance to initiate your projects with the accredited Magento 2 development company.
For a personalized touch, engage and hire Magento developers who are focused on delivering exceptional results for your custom e-commerce projects.