User Guide for Social Login for Magento 2
Magento 2 Social login module allows users to sign up on their site using social networks like Facebook, Twitter, Google, LinkedIn, and Instagram.
Also, the admin can manage settings for social networks on the back end, such as App ID, secret key, etc.
In Magento 2(Adobe Commerce) Social Signup module, the guest users can simply sign up at the checkout page as well as through social media options.
These options are present at the checkout page where the guest user can choose any option to log in.
Also, secure your user logins and activity on various pages you can enable the EU captcha for the front with the help of the Magento 2 EU Captcha extension.
The customer can also register or log in to the Magento 2 store using their existing Apple ID credential by Magento 2 Sign In With Apple ID.
Watch the below video tutorial to understand the extension workflow:
Features
- It allows users to sign up on their site using social networks.
- The customer selects one of their preferred social networks to sign up on your site.
- Among the available social accounts, the customer can select the desired one.
- Multiple social media options are present on the checkout page where the guest user can choose any option to log in.
- The admin can enable or disable the customer to log in to their site using social networks.
- Settings for social networks are managed by the admin on the backend such as App ID, secret key, etc.
- All browsers are compatible (IE7+, FF, Chrome, etc).
- compatible with Multi-Store.
- The code is fully open & you can customize it according to your needs.
- This extension is compatible with the Hyva theme.
Installation
Customers will get a zip folder and they have to extract the contents of this zip folder on their system.
The extracted folder has an src folder and inside the “src folder” we have – app folder.
You need to transfer the app, folder into the Magento2 root directory on the server as shown below.

If you have downloaded the Magento 2(Adobe Commerce) Social Signup module from Magento Connect, then,
unzip the respective extension zip and create Webkul(vendor)
then SocialSignup(module) name folder inside your Magento root directory as app/code/Webkul/
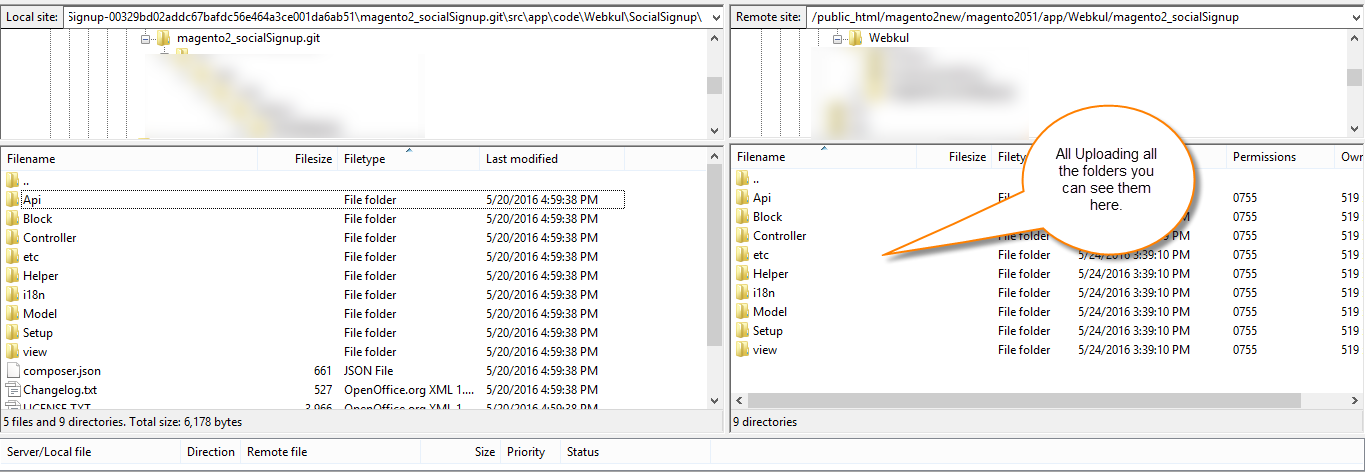
After that, move all module’s files inside /app/code/Webkul/SocialSignup/ folder in Magento root directory.
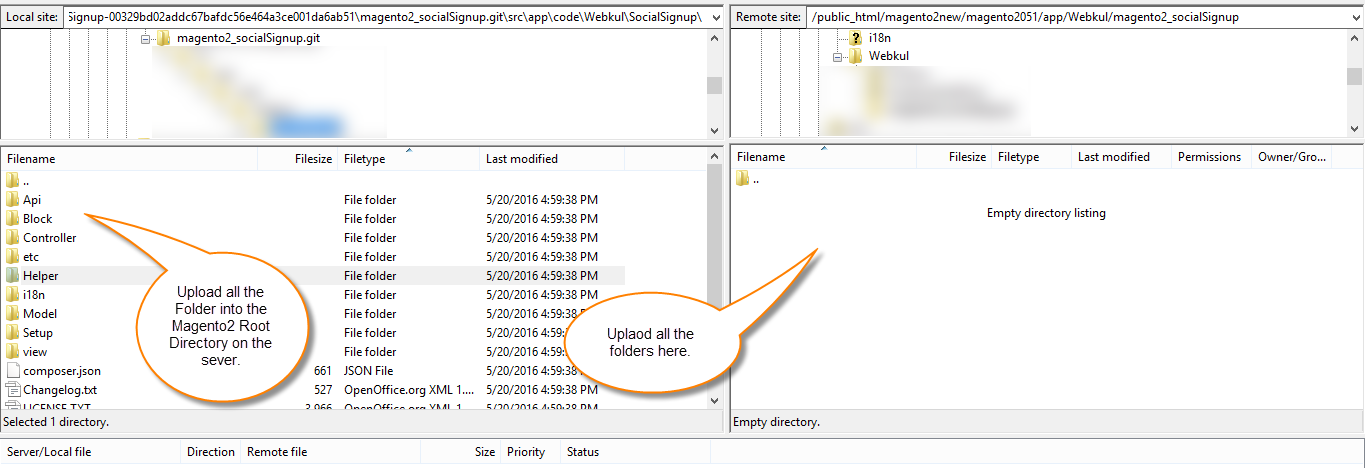
Just after the upload, you can see the folders in your Magento2 Root Directory.
Once the installation is completed, you have to run these commands in the Magento 2 root directory.
composer require laminas/laminas-oauth --ignore-platform-req=php
php bin/magento setup:upgrade
php bin/magento setup:di:compile
php bin/magento setup:static-content:deploy
php bin/magento indexer:reindex
php bin/magento cache:flush
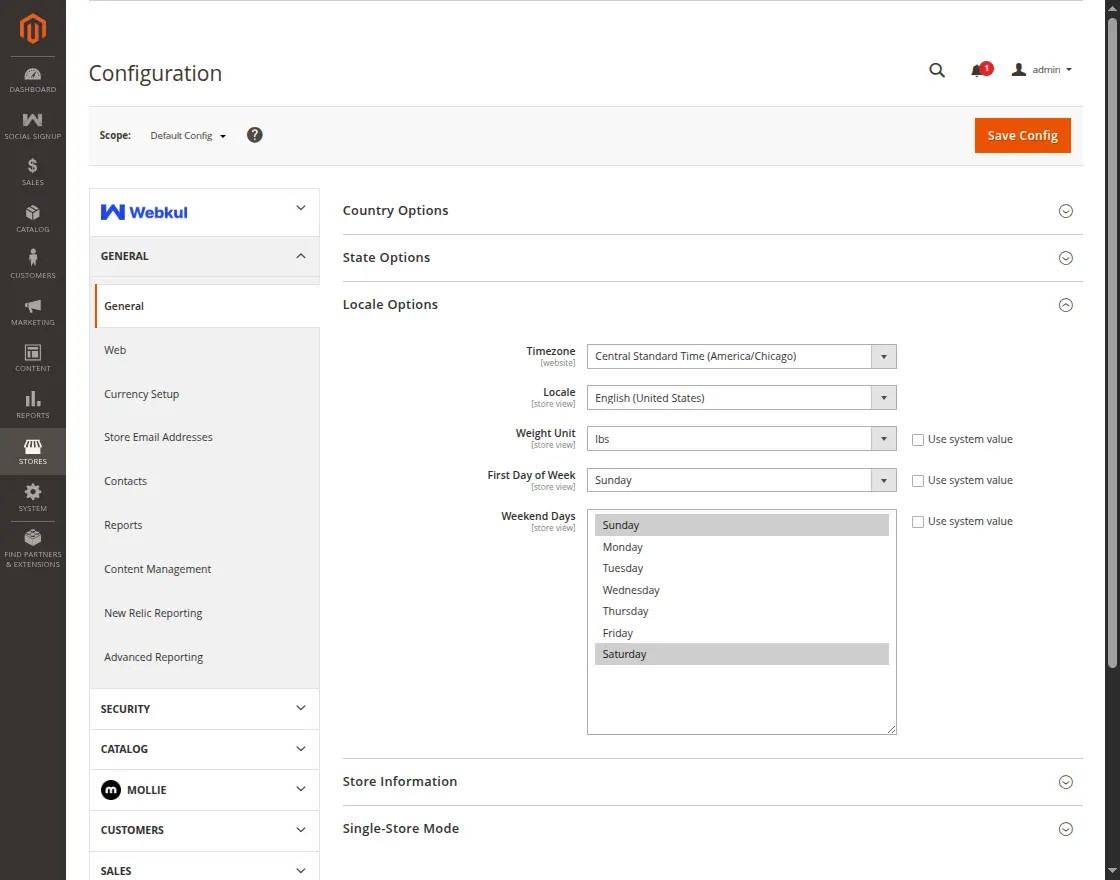
Configuration of Multi-Lingual Support
For multilingual support, the admin will navigate through Store->Configuration->General ->Locale Options and select the locale as German.

Language Translation
If the user wants to translate their module from English to German then they need to follow the path app/code/Webkul/SocialSignup/i18n in their unzipped Magento Marketplace folder.
It will get a CSV file with the name “en_US.csv”.
After that, they will rename that CSV as “de_DE.csv” and translate all right side content after the comma in the German language.
After editing the CSV, save it and then upload it to the path app/code/Webkul/SocialSignup/i18n where they have installed Magento2 on their server.
The module will get translated in the German Language.
It supports both the LTR and RTL languages.

Module Configuration
Admin will be able to view Magento 2 Social Signup configuration setting under Stores > Configuration > Social Signup.
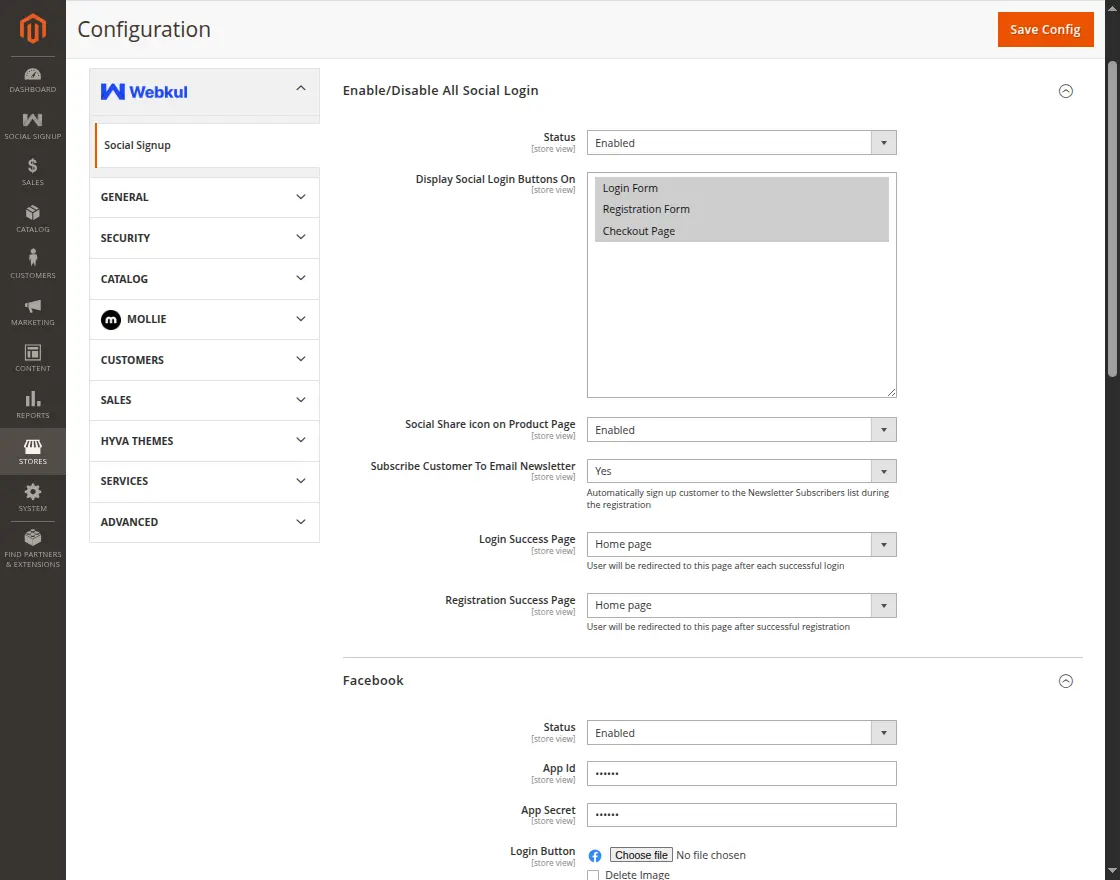
For Social Log-in here we have all the Configuration settings.
- Status: The Admin can enable or disable the status of the module.
-
Social Login Button display: Social login buttons on the listed page can also be shown by the admin through the Login form, checkout page, and registration form.
-
Login form: A login page is an entry page that requires user identification which is often accomplished by providing an email and password combination.
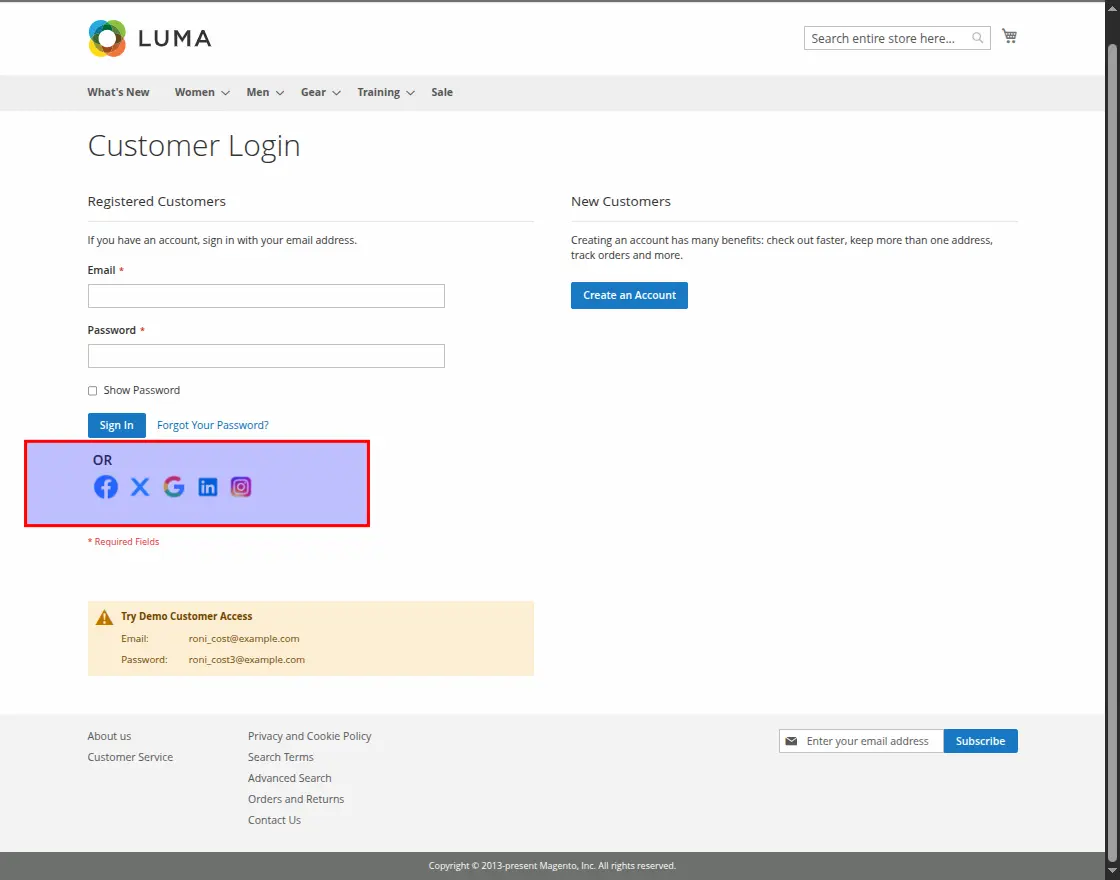
- Registration Form: Customers’ registration form is used to track consumer data and accept payments.
![]()
- Checkout Page: On the checkout page customers enter their shipping information and payment details before placing the order as mentioned below.
![]()
- Social Share icon on Product Page: The admin can enable or disable the social share icon on the product page.
![]()
-
Subscribe Customer To Email Newsletter: The admin can enable or disable to subscribe to the email newsletter for customers.
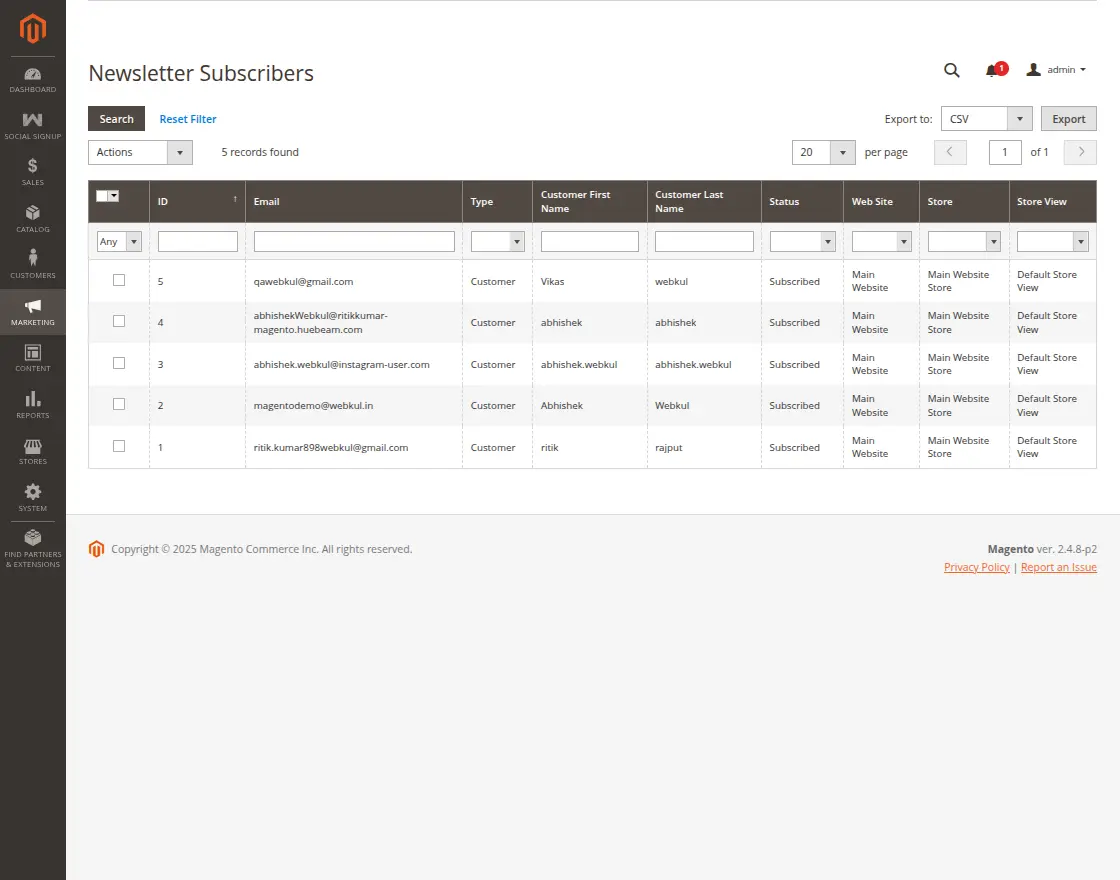
Navigate to Stores > Settings > Configuration on the Admin sidebar after that in the left panel, expand Customers and select the customer, then click Newsletter.

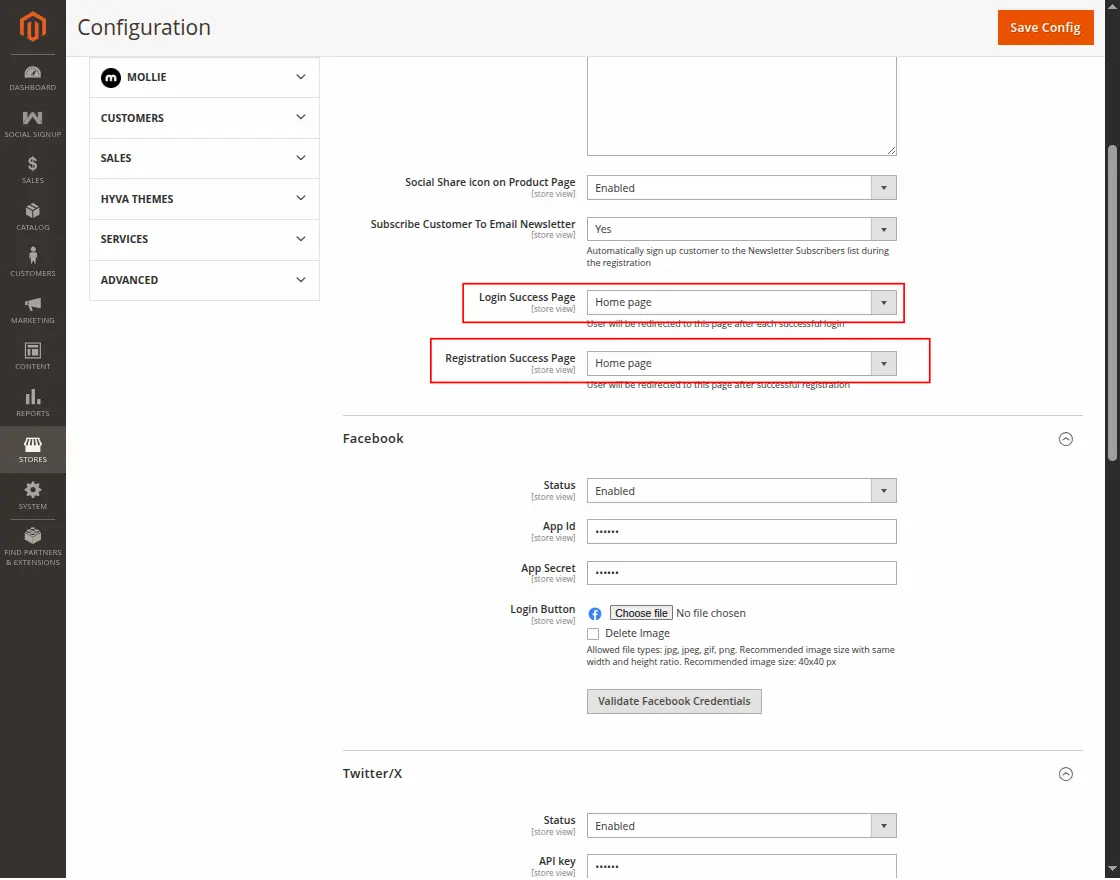
- Login Sucess Page: The user will be redirected to this page after each successful login.
Staying on the current page, customer account dashboard, homepage, privacy, and cookie policy, or Redirecting to the custom URL.
-
Registration success page:
Users will be redirected to this page after registration such as –
Stay on current page, customer account dashboard, homepage, privacy, and cookie policy, or Redirect to customer URL.
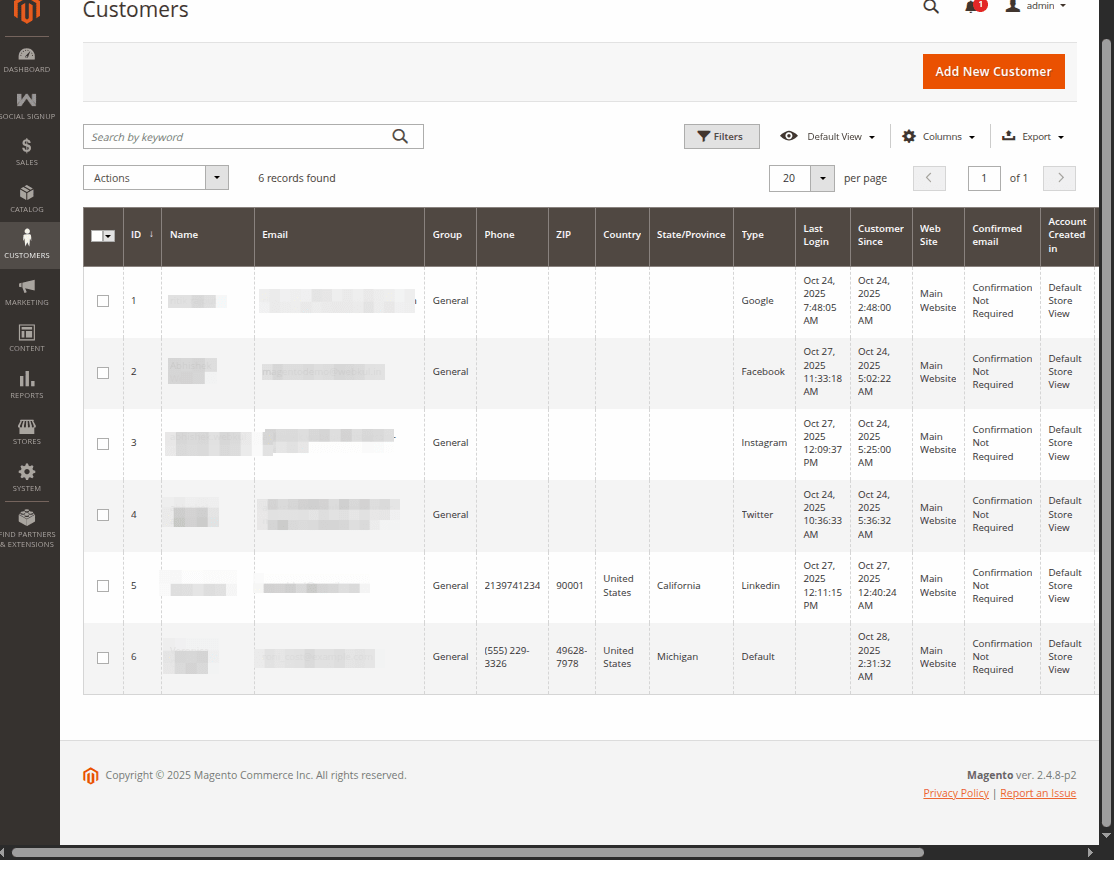
Social Sign-up Details On Backend
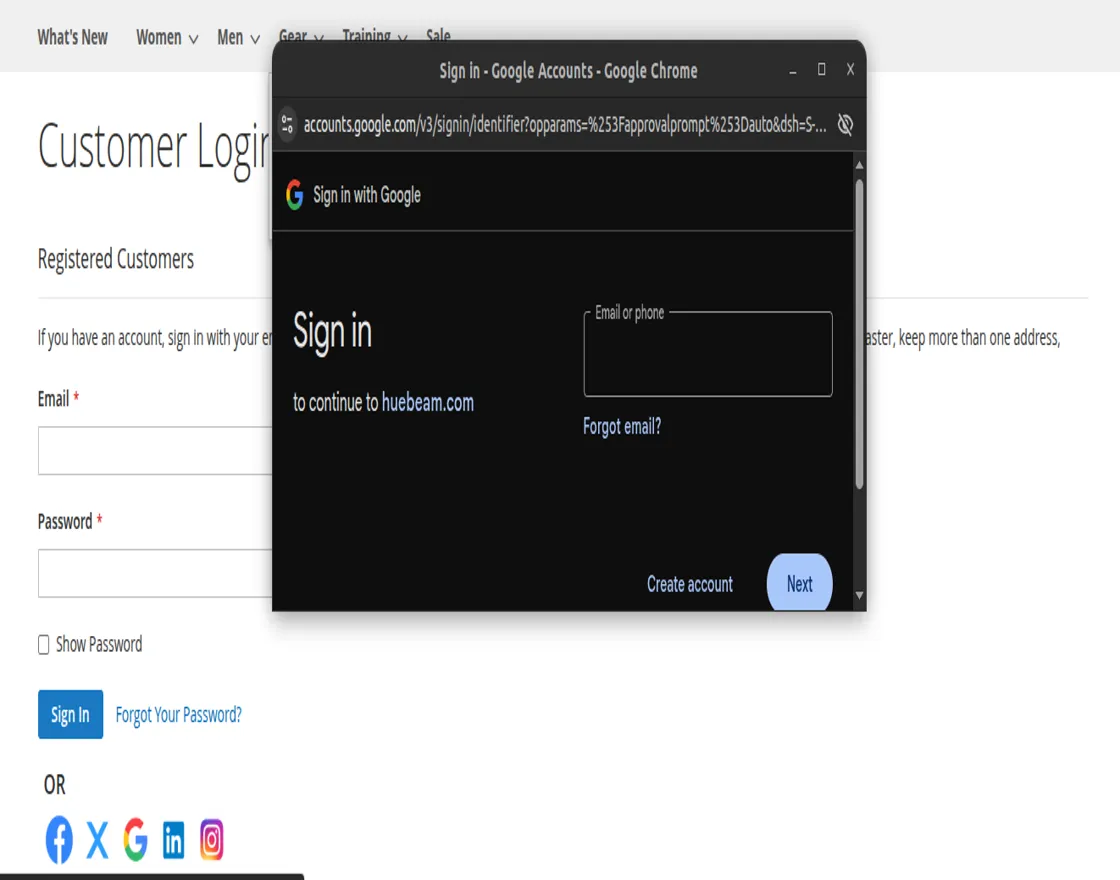
After configuration settings, Customers can find various social networks on the log-in page and also sign up for their site using social networks like Facebook, Twitter, Google, and Instagram.
There is no need to fill in various fields for sign-up.
LinkedIn API Credentials
First, click on the LinkedIn login button below page will be open.


How to set up an Application for LinkedIn
You can create a LinkedIn application using this link https://www.linkedin.com/secure/developer.
To create an application Please follow these steps:
1. Clicking the above link will navigate the user to the “My Application” page. Here, the user will click on the “Create Application” button.

2. Moreover, fill out the form to register a New Application.


3. After that, you can receive Application details with your “Consumer Key” and “Consumer Secret”.

**Note:
Set the OAuth Redirect URL like this – www.example.com/socialsignup/linkedin/connect/
4. In the product section scroll down and select Sign In with LinkedIn using OpenID Connect.

Here, click on the request access tab and it will show a popup to approve the access.

Once the access is granted you can check the endpoints.

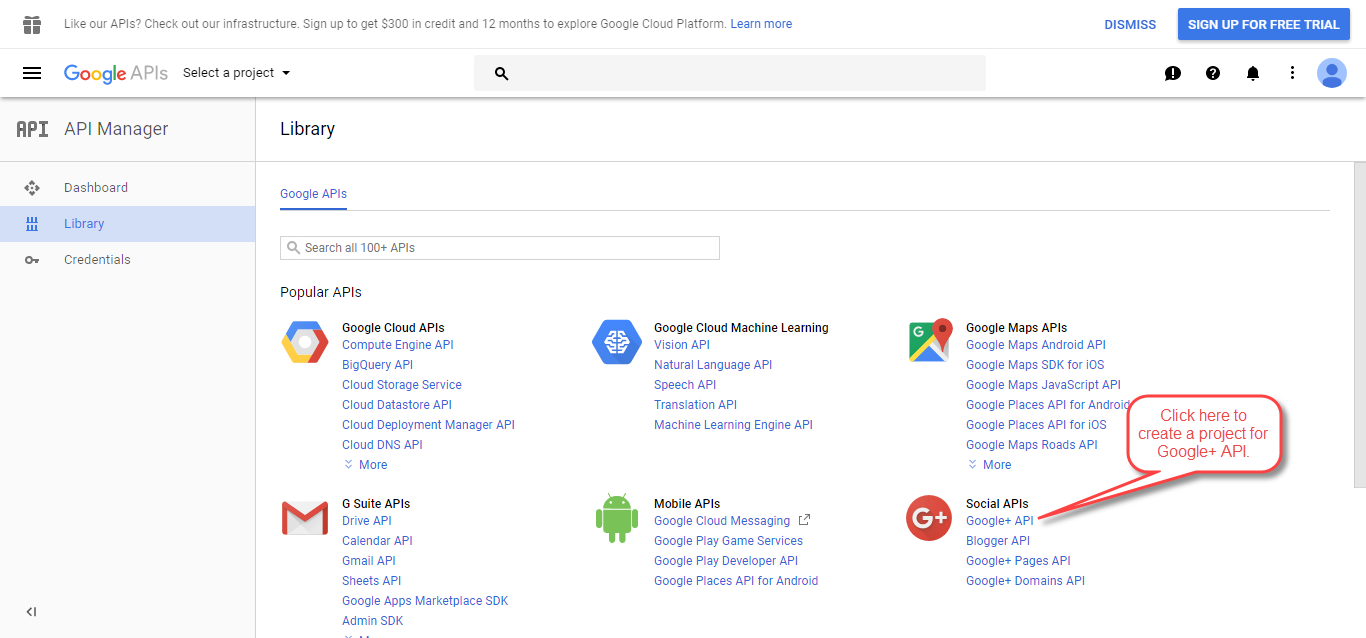
Google API Credentials
After clicking on the Google login button below page will be open.
How to set-up Application for Google
You can create a Google application using this link https://console.developers.google.com/project
Steps to create an Application:
1. Go to your API & Services ->Library

2. Now click Google+API under the section Social.

3. Now, click the Enable button to enable the Google+ API.

4. Now, click My Project to create a new project.

5. On clicking My Project, a pop-up will appear. Click “New Project” link.

6. Enter the name for your project so that you can identify your project. Please note that you should not include any Google word for your project name.

7. Meanwhile, go to the Credentials menu option and then click on Create credentials.

8 After that, click to create the OAuth client ID.

9. To configure the consent screen, click the “Configure consent screen” button.

11. Enter the App name, User support email and Developer contact information that is to be shown to the users and then click the Save button.

12. Select the Application type and enter the Authorized JavaScript origins and the Authorized redirect URLs. Click the Create button.

**Note:
Set the OAuth Redirect URL like this – www.example.com/socialsignup/google/connect/
13. Finally, after clicking the Create button in the above step you will get the Client Id and Client Secret.

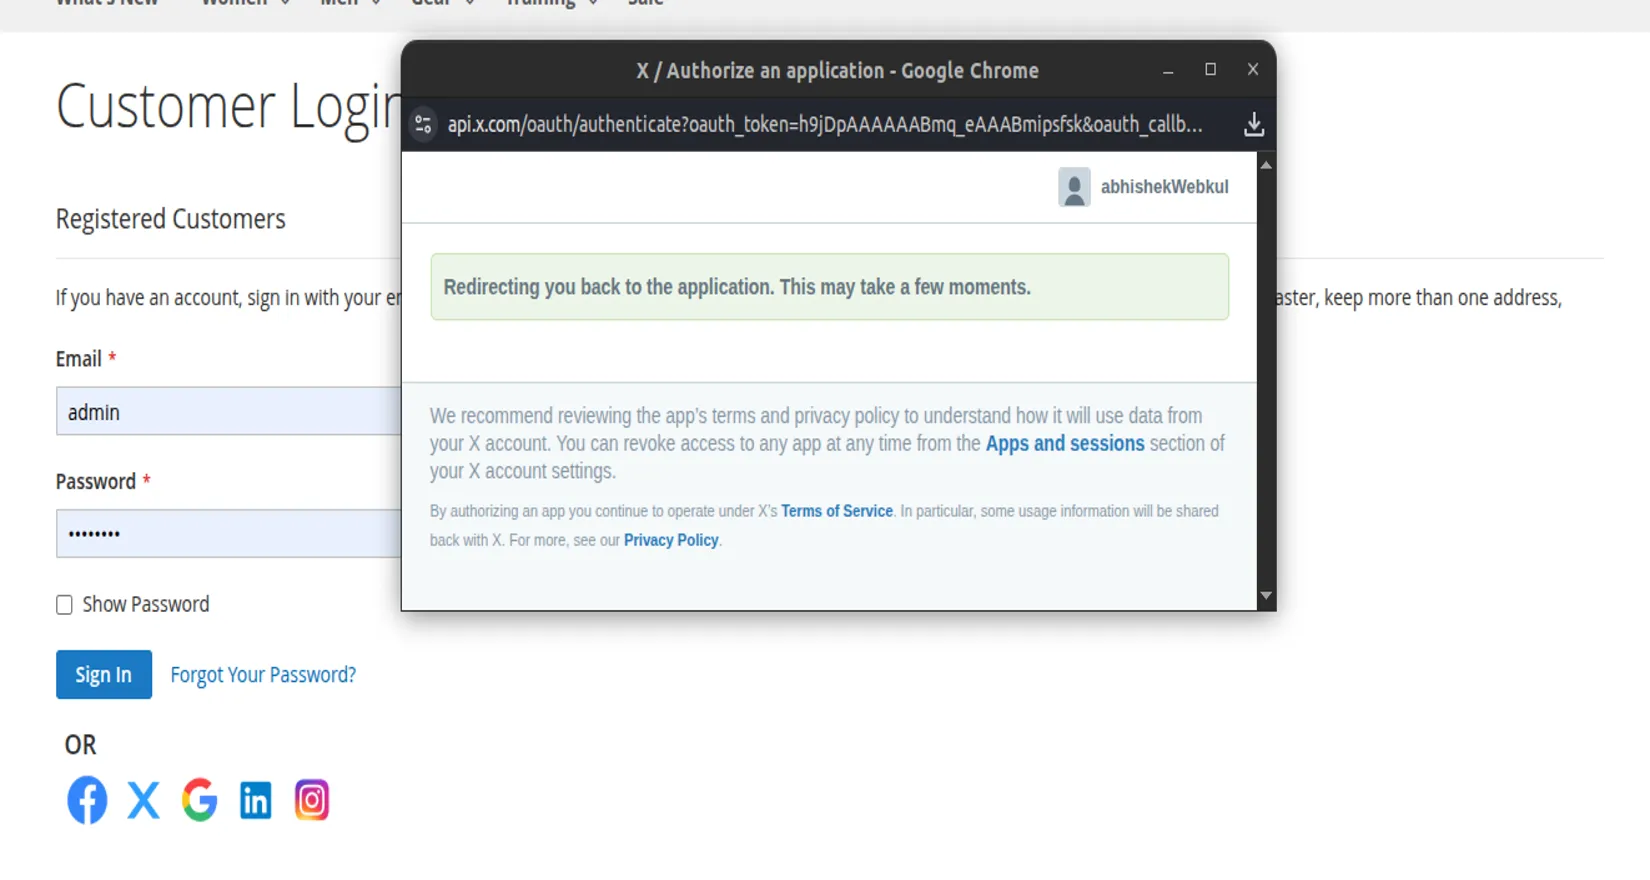
Twitter API Credentials
After clicking on the Twitter login button below page will open.

How to set up an Application for Twitter
You can create a Twitter application
Steps to Create a Twitter Application:
1. Click on “Create New App”


2. If you dont have a developer account for Twitter then a popup will display for the same.

3. Click on the Apply button and here you have to select the plan for the developer account or choose a free account for sign up.

4. Once you choose the option it will navigate to the policy page to fill in some details.

5. Once you submit the info it will display the dashboard here you can create a New Twitter Application.

6. Enter the app name and click on the next button.

7. In the key & token, you will receive your Consumer Key and Secret under Keys And Access Tokens

Note:
Twitter doesn’t send the Email ID of the customer at the time of Logi-n. It sends only Screen Name. So kindly update your Email ID and Password after signing up with Twitter.
8. Once the app is created a project will show in the project list.

9. Click on the setup button a new page will open.
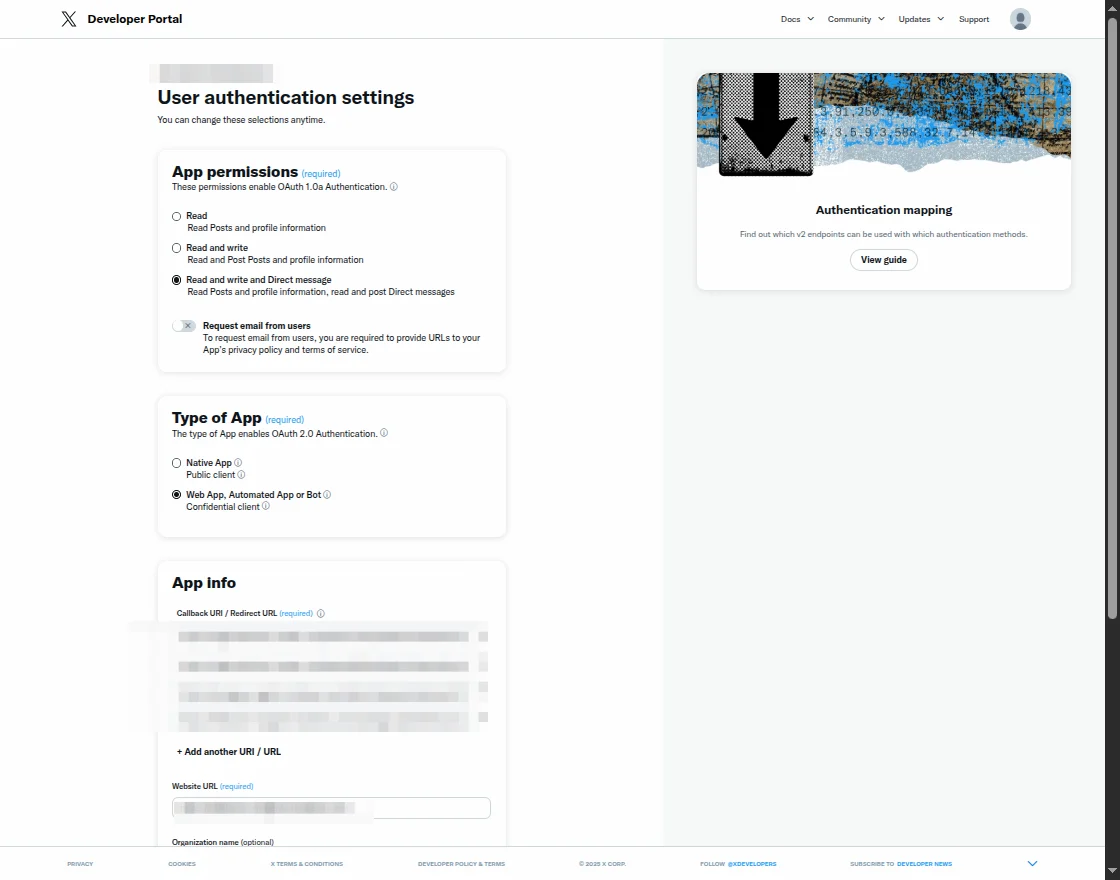
10. After selecting the permission you need to add app info with the call back URL and web URL.

**Note:
Set the Callback URL as – www.example.com/socialsignup/twitter/connect/
11. Once click on save it will show the client ID and secret key.

You can use these keys while configuring the module.
Facebook API Credentials
How to set up an Application for Facebook
You can create a Facebook application
- Facebook requires that you create an external application linking your website to their API.
- App ID and App Secret (also sometimes referred to as Consumer Key and Secret or Client ID and Secret) are what we call an application credential.
- Meanwhile, this application will link your website example.com to Facebook API and these credentials are needed in order for Facebook users to access your website.
To enable authentication with this provider and to register a new Facebook API Application, follow the steps:
Step 1
To generate the Facebook credential the admin needs to click this link-
Here the admin needs to log in or sign up with their account.


Step 2
After login, the admin needs to click on “My Apps”.


Step 3
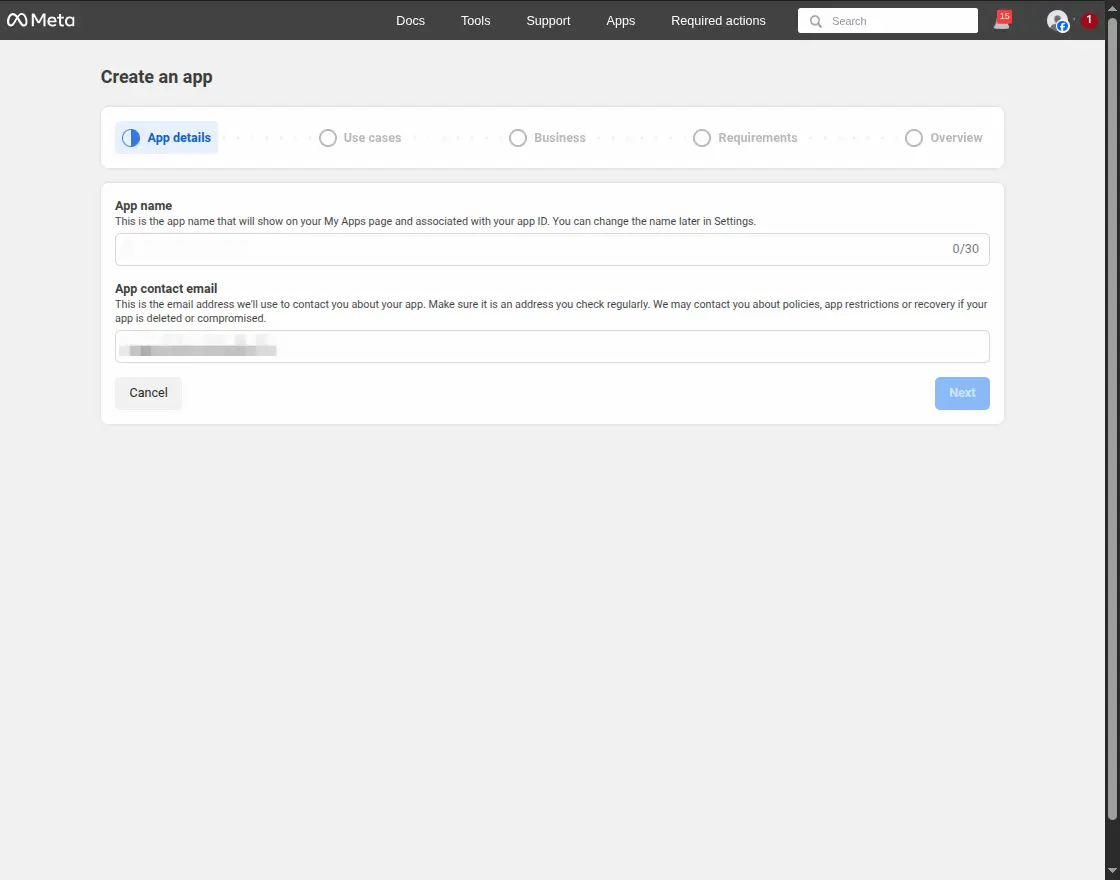
After clicking on My Apps, now the admin needs to click on “Create App”.


Step 4
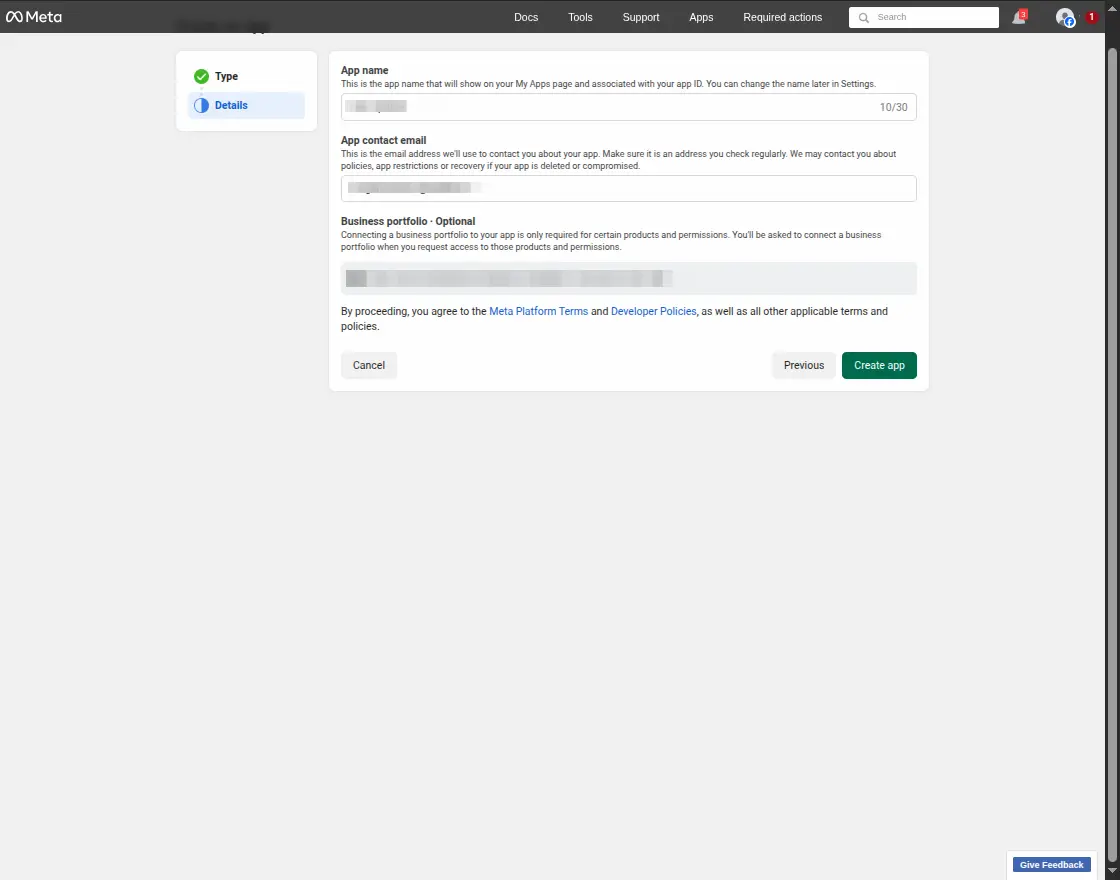
Here the admin needs to fill in some details such as:
- Add an App Name: Here the admin needs to enter the app name.
- App Contact Email: Here the admin can enter their email ID.
After filling both of the options the admin needs to click on “Next”.
Step 5
Here, the admin needs to click “other”
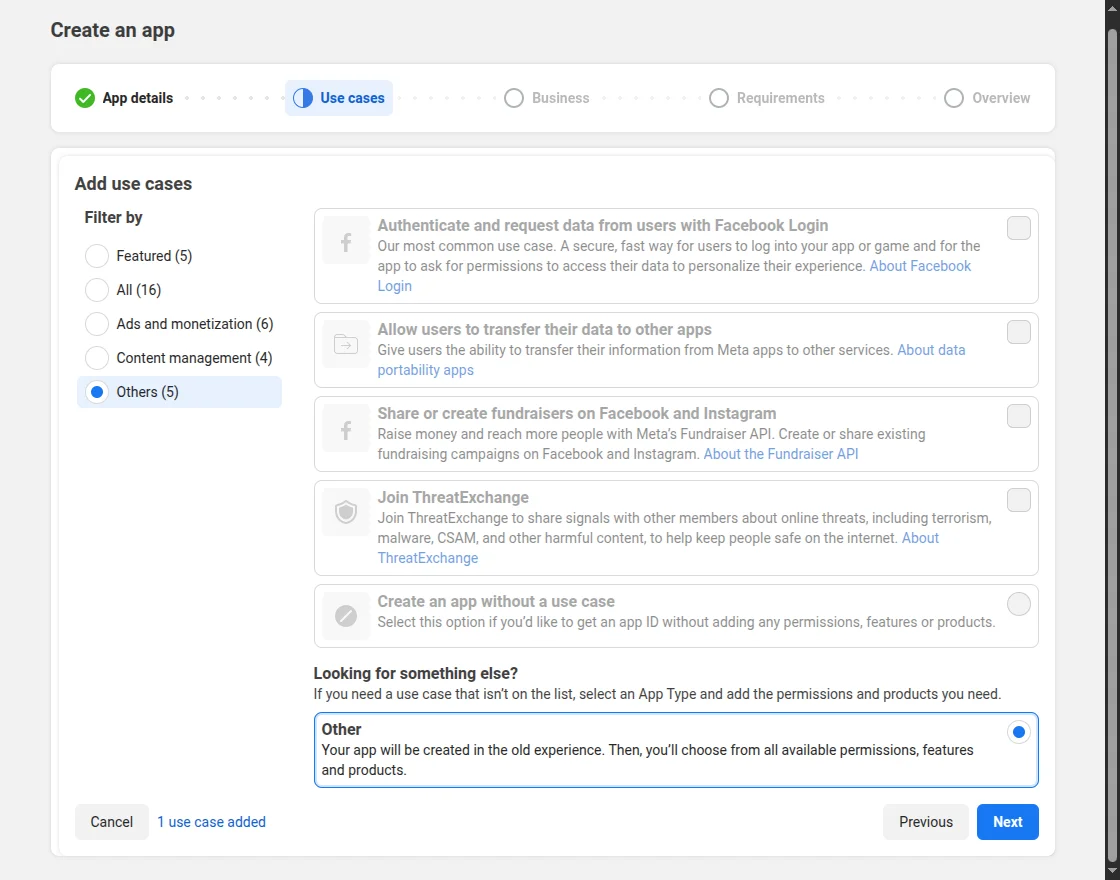
Step 6
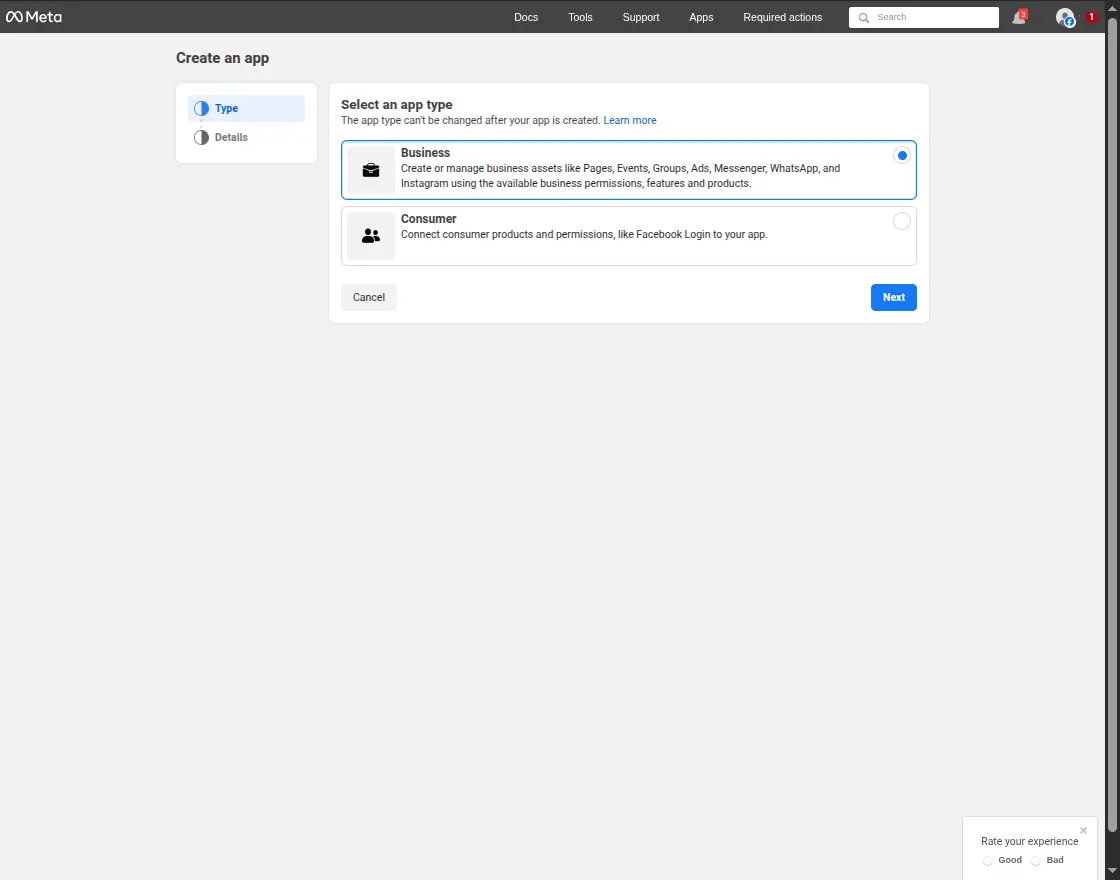
Here, the admin needs to select the app type as “Business“
After selecting the options, the admin needs to click on “Next”.
Step 7
The admin can now review the details and then click the Create button
Step 8
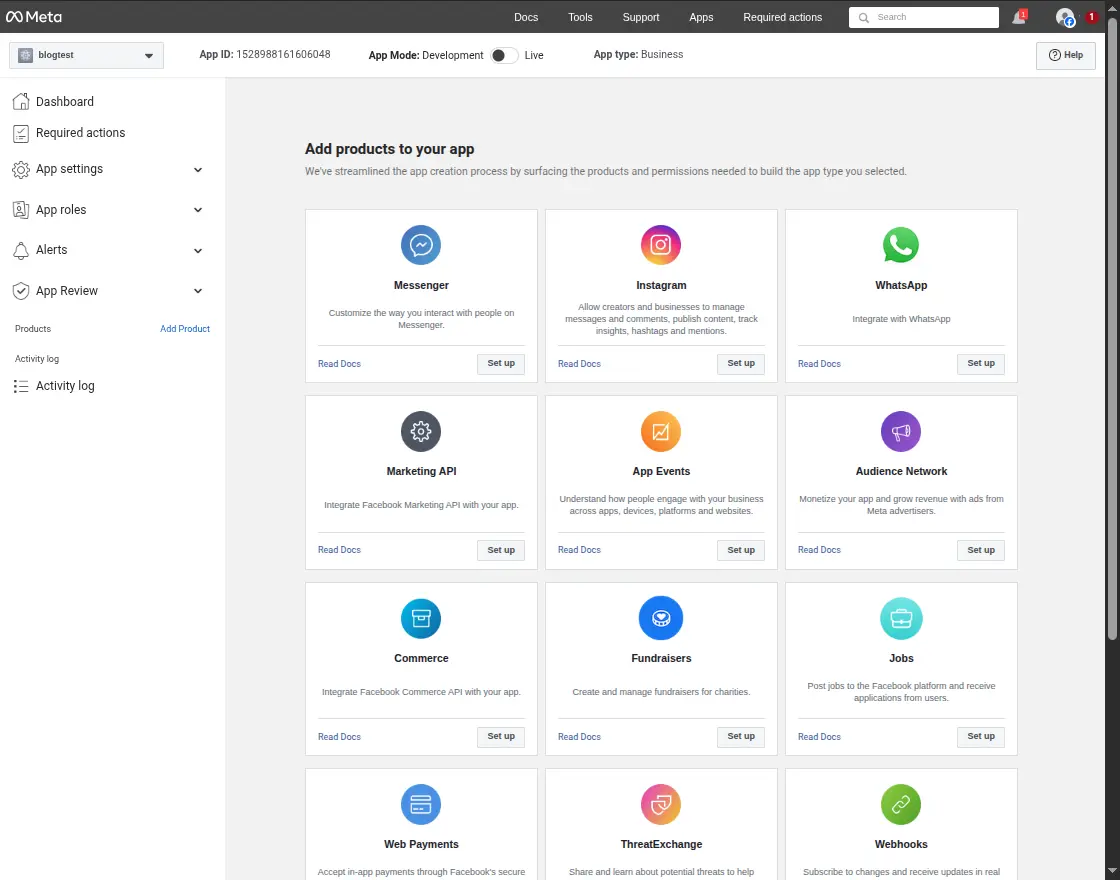
Here the admin needs to click on the “Set Up” button of “Facebook Login”.


Step 9
Here the admin needs to follow the left-side menu and click on “Setting”.


Step 10
The admin needs to enable some client OAuth settings:
- Client OAuth Login: Enable.
- Web OAuth login: Enables web-based Client OAuth Login.
- Enforce HTTPS: Enable.
- Use Strict Mode for redirect URIs: Enable.
- Login with the JavaScript SDK: Need to enable.
- Allowed Domains for the JavaScript SDK: Here the admin needs to enter their domain.


- Deauthorize callback URL: Here the admin needs to enter their store URL.
- Data Deletion Request URL: Same the admin needs to enter their store URL.
After filling in all details the admin needs to click on “Save Changes”.


Step 11
To get the App ID and App secret the admin needs to follow “App Setting>Basic”.


Note – Set the callback URL as www.example.com/socialsignup/facebook/connect/
Instagram API Credentials
Step 1
Note: Instagram integration supports only business or creator accounts, not personal accounts.
To get started, visit Facebook, access the “My Apps” section, and proceed to establish a new application.
After successfully creating your app and entering the App Dashboard, head over to the “Settings”>”Basic” tab, then scroll to the bottom of the page and select “Add Platform.”


Step 2
Here the admin needs to click on “Website”.


Step 3
After clicking on ‘Website” the admin needs to enter “Site URL” and save changes.
After saving changes, the admin needs to click on “Add Product”.


Step 4
After clicking on “Add Product”, the admin needs to click on the “Set Up” button of “Instagram Basic Display” OR “Instagram”.
Step 5
Here the admin needs to click on “API setup with Instagram login”.

Step 6
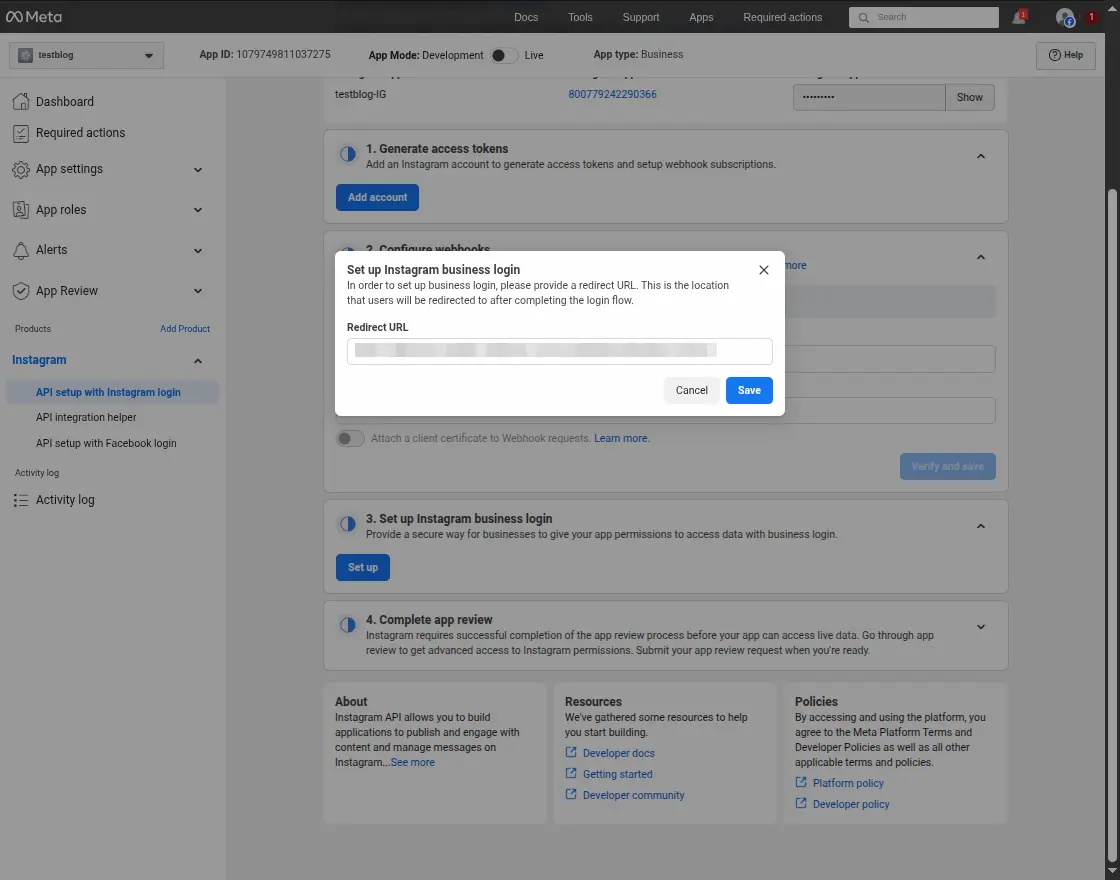
The admin clicks the “Set up” button under the ‘Set up Instagram business login’ section.
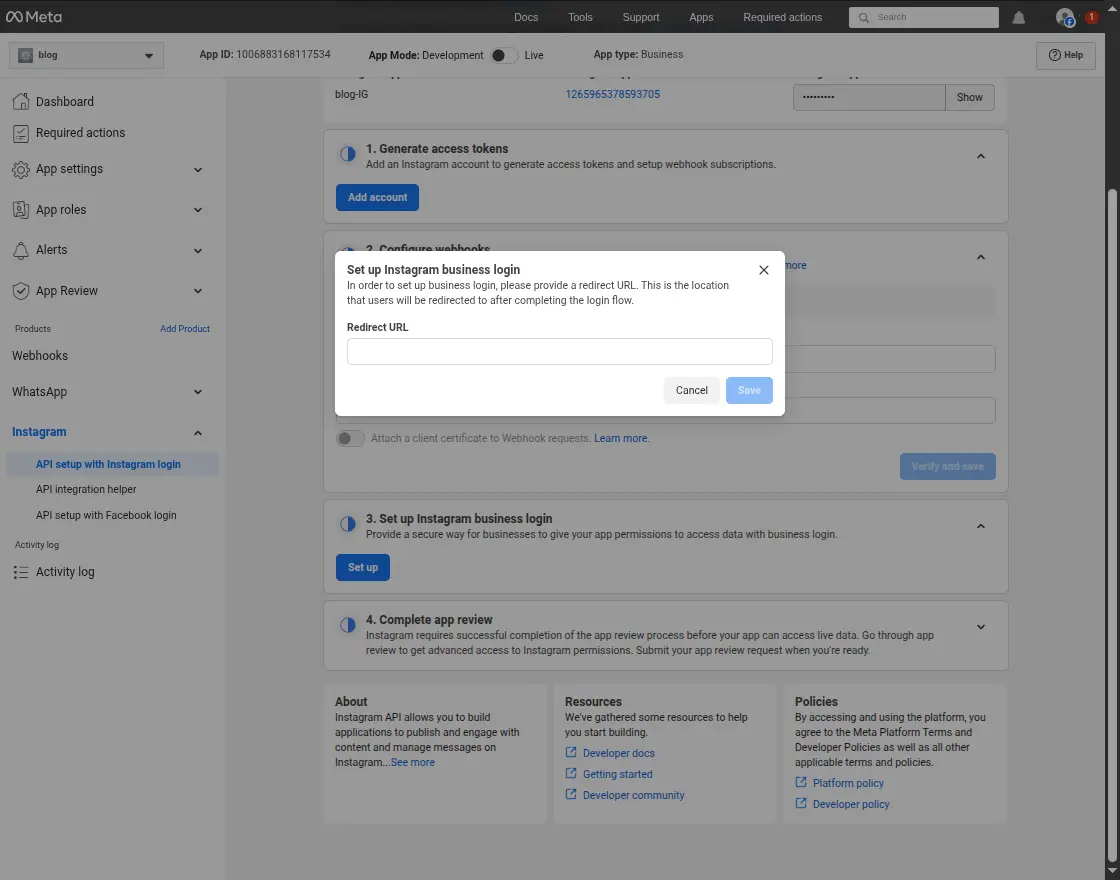
Step 7
The admin needs to enter the ‘Redirect URL’ and click the ‘Save’ button.
Step 8
Here the admin will get an Instagram App ID and App Secret ID.
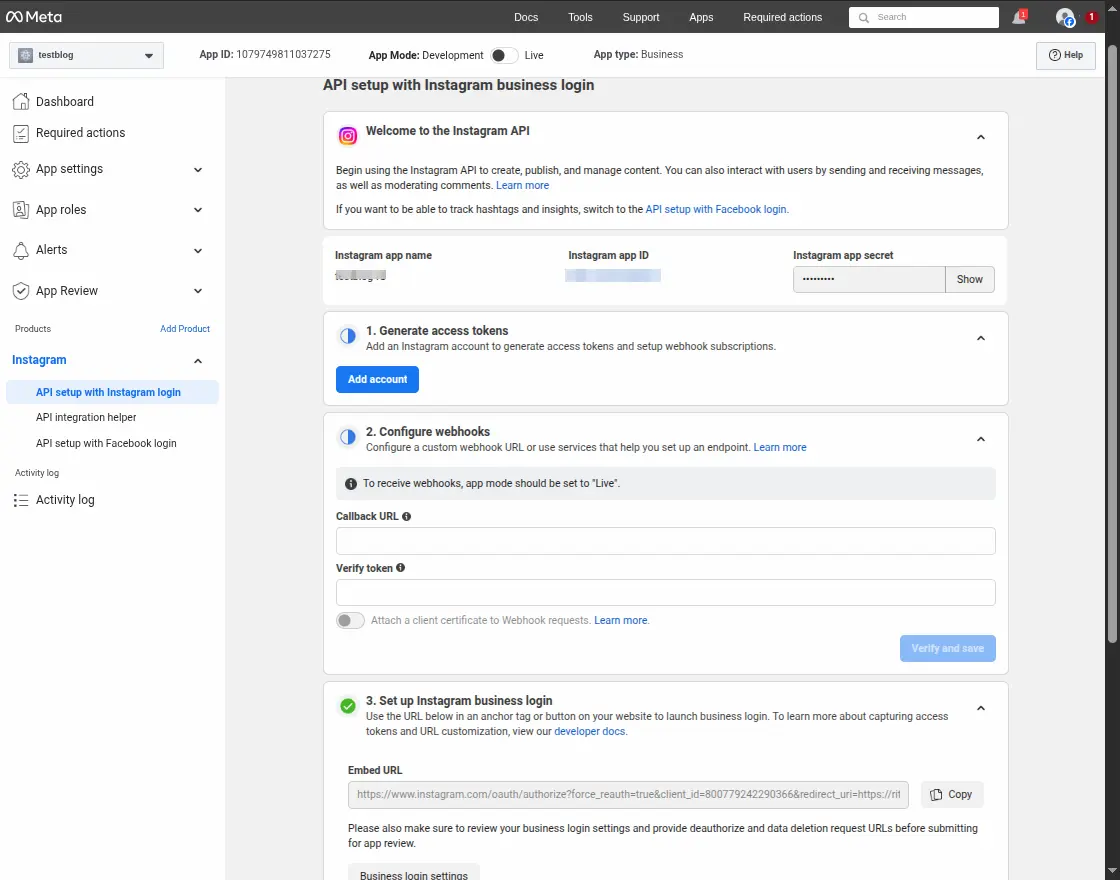
Step 9
Add an Instagram Test User
To navigate, go to “App Roles” and select “Roles” and click the ‘More’ drop-down button, then click “Instagram Testers”.
Click on “Add people” then input your Instagram account’s username and send the invitation, and the Instagram user should accept the invitation.


Note – Set the callback(redirect) URL as www.example.com/socialsignup/instagram/connect/
Social Signup for Guest Users
The customer can proceed to choose a product from the store and after adding the product to cart, proceed to checkout as shown in the image.
![]()
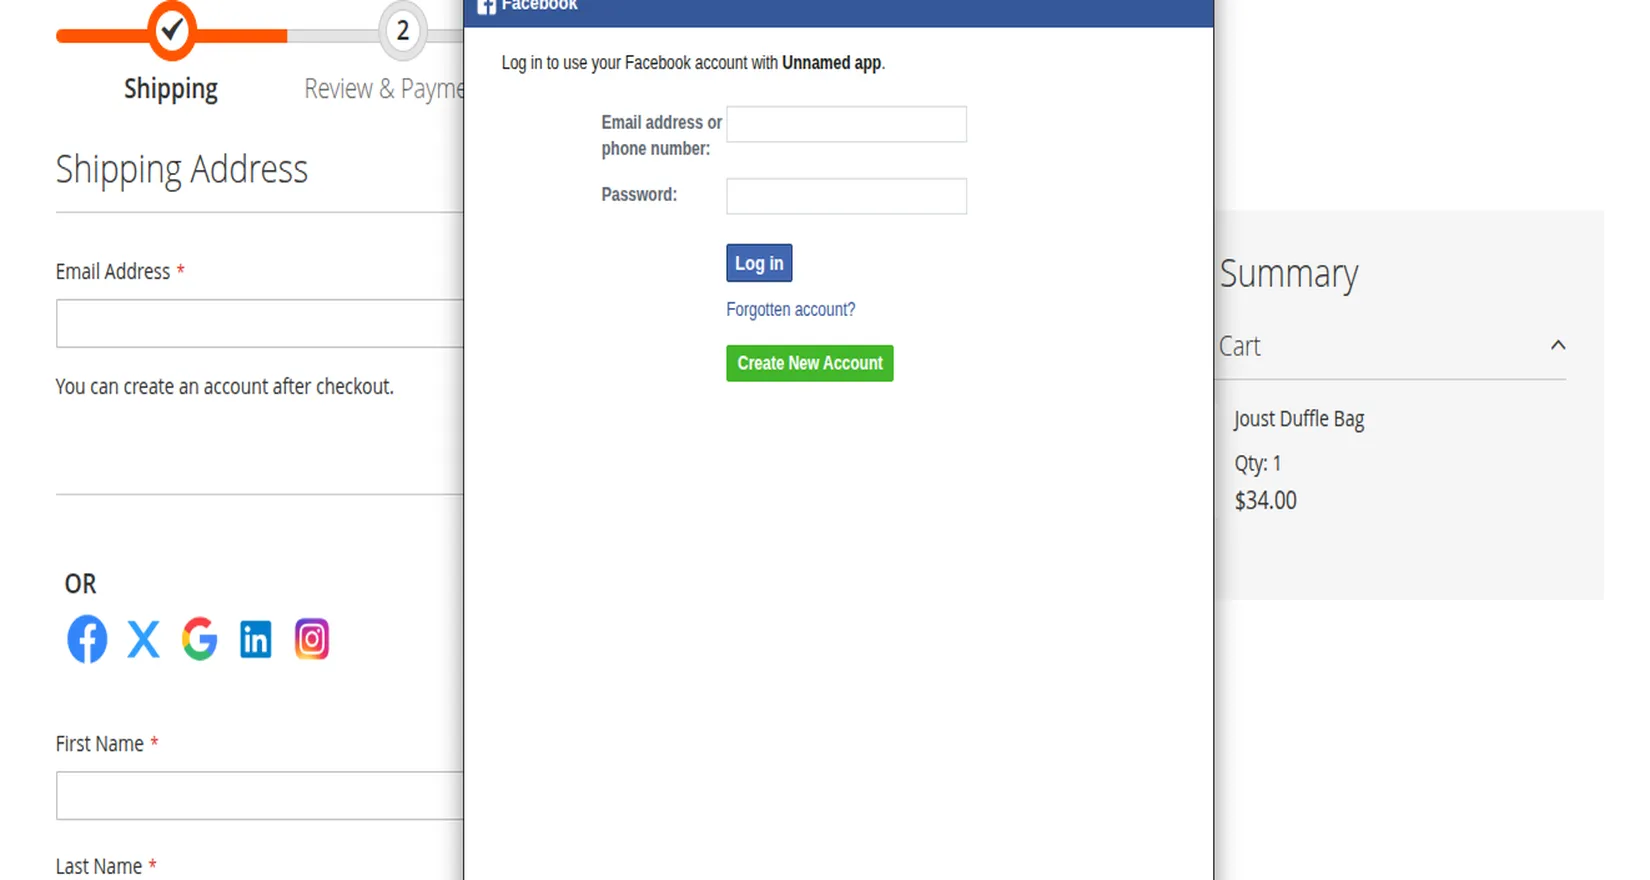
In the Checkout Page, the customer or a guest user can sign up through any social media site.
Multiple options for the social media are present in the checkout page and the guest user/ customer can simply click on any of the options in order to login.
![]()
In the image below, the customer has chosen to log in through Facebook.com.
On clicking the Facebook log in button on the checkout page, a Facebook login page would open through which the guest user can easily log in.
Further, the customers need to log in to any social media account by filling up the credentials. Further, the customer will proceed for checkout.
Meanwhile, the customer will provide the details and click on Next.
After that, the customer will move to the payment selection page. Once, the selection is done the customer will click on Place Order.


Also, the customer will receive a success message with the order number as shown in the image below:


Note: Using Social Media Auto Publish in Magento 2, admin can auto publish the magento products into social media channels.
That is all for the Magento 2 (Adobe Commerce)Social Sign-up module.
Still, have any issues feel free to add a ticket and let us know your views to make the module better at http://webkul.uvdesk.com.
You may also check our quality Magento 2 Extensions.