User Guide for Odoo Material Requisition and Approval
Table of Content
Introduction
Odoo Material Requisition and Approval helps users create and manage material requests easily. It simplifies the request, approval, and delivery process.
The module ensures a smooth workflow with stock checking, approvals, and fulfillment. As a result, it reduces confusion and improves control over material handling.
Additionally, you can manage requests, approvals, and delivery tracking in one place using this module. Therefore, it helps organizations maintain a clear and structured process.
Features
- Multi-level approval workflow ensuring structured validation at each stage
- Flexible approver setup with manual selection or manager hierarchy support
- Real-time stock checking to decide between transfer or purchase options
- Automatic internal transfer creation with stock reservation and validation
- RFQ and Purchase Order generation for seamless procurement handling
- Clear tracking of delivered, pending, and cancelled request quantities
- Complete request lifecycle management from creation to final fulfillment
- Simple request creation with products, quantity, and required details
- Easy completion process with received confirmation and request closure
Installation
- Once you purchase the App from the Webkul store, you will receive a link to download the module’s zip file.
- Extract the file on your system after the download finishes. As a result, you will be able to see a folder named ‘material_requisition_and_approval’.
- Copy and paste this folder inside your Odoo Add-Ons path.
- Now, open Odoo App and click on the Settings menu. Here, click on Activate Developer Mode.
- Next, open the Apps menu and click on ‘Update Modules List’.
- In the search bar, remove all the filters and search ‘material_requisition_and_approval’.
- You will be able to see the module in the search results. Click on ‘Activate’ to install it.
Workflow
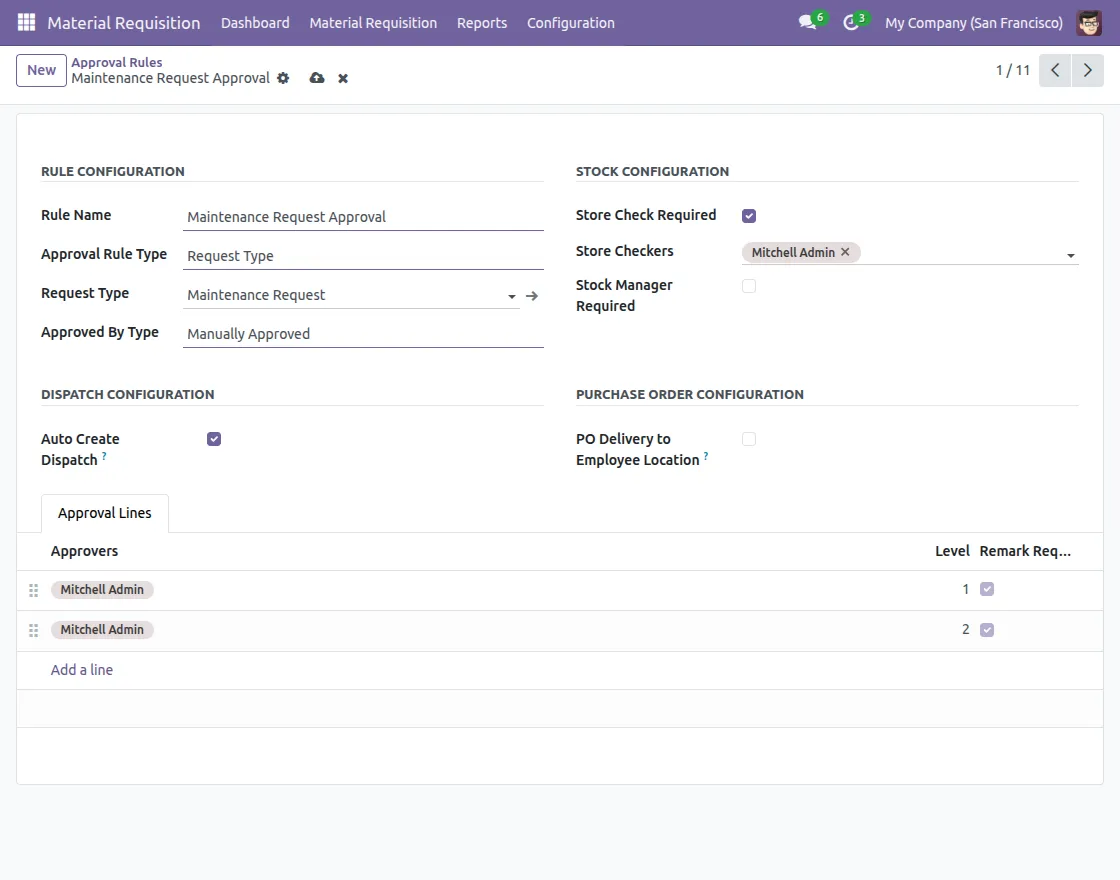
1. After installing the Odoo Material Requisition and Approval Manager module, first, navigate to Configuration > Approval Rules and click on the New button to create a rule.
After that, you can set the Rule Name, Approval Rule Type, Request Type, and Approval Method.
Enable Store Check Required to assign Store Checkers, and enable Stock Manager Required to define Stock Managers for approval.
If Auto Create Dispatch is enabled, the system will automatically generate an internal transfer or RFQ without requiring stock checks or manager approval.
If PO Delivery to Employee Location is enabled, ensure that the RFQ is delivered directly to the employee’s location.
Additionally, define the approvers along with their respective approval levels to ensure a proper approval workflow.

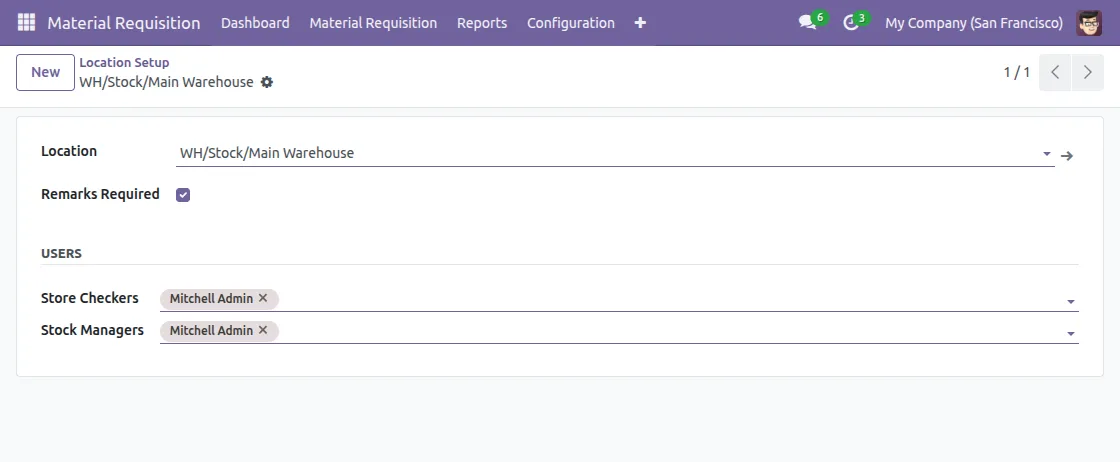
2. In the Location Setup, you can define the Location and assign users such as Store Checkers and Store Managers.

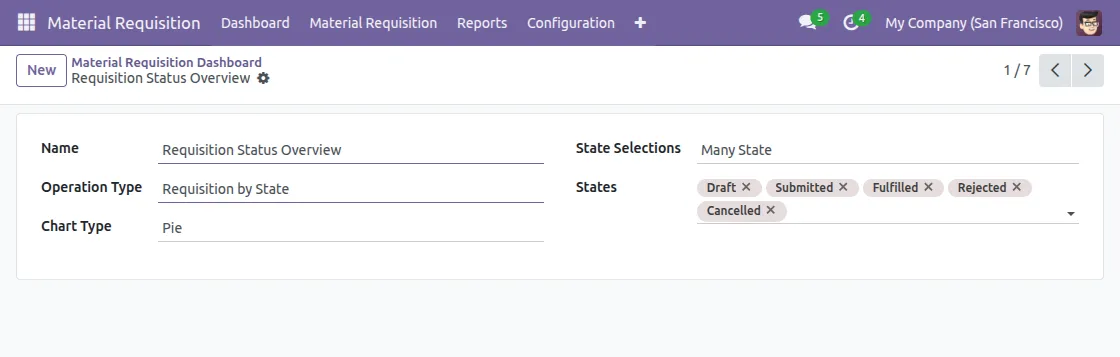
3. In the Material Requisition Dashboard, configure the dashboard by defining the name and operation type. Then, select the chart type as per your requirement.
Additionally, choose the state selection and define the relevant states to complete the setup.

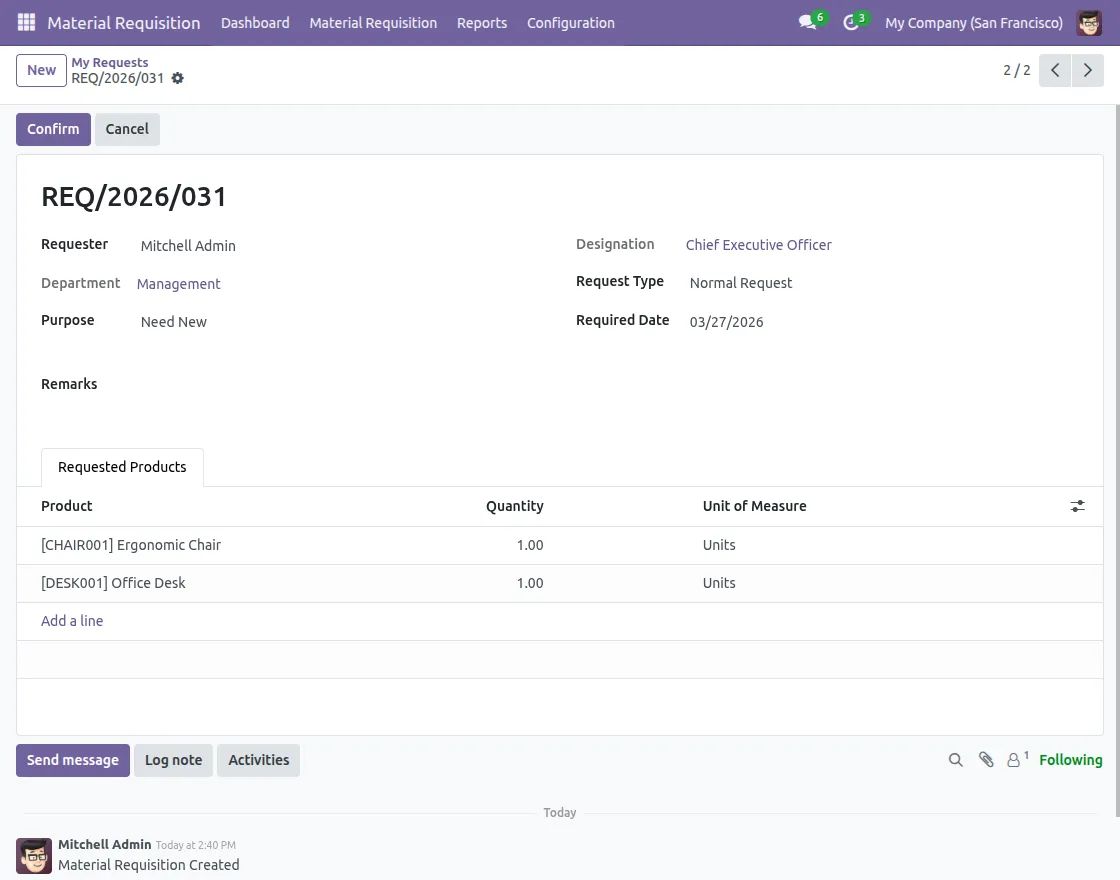
4. Click on New to create a material request. Then, enter details like requester name, department, purpose, designation, request type, and required date. Then, add the products with quantity and submit the request for further approval.
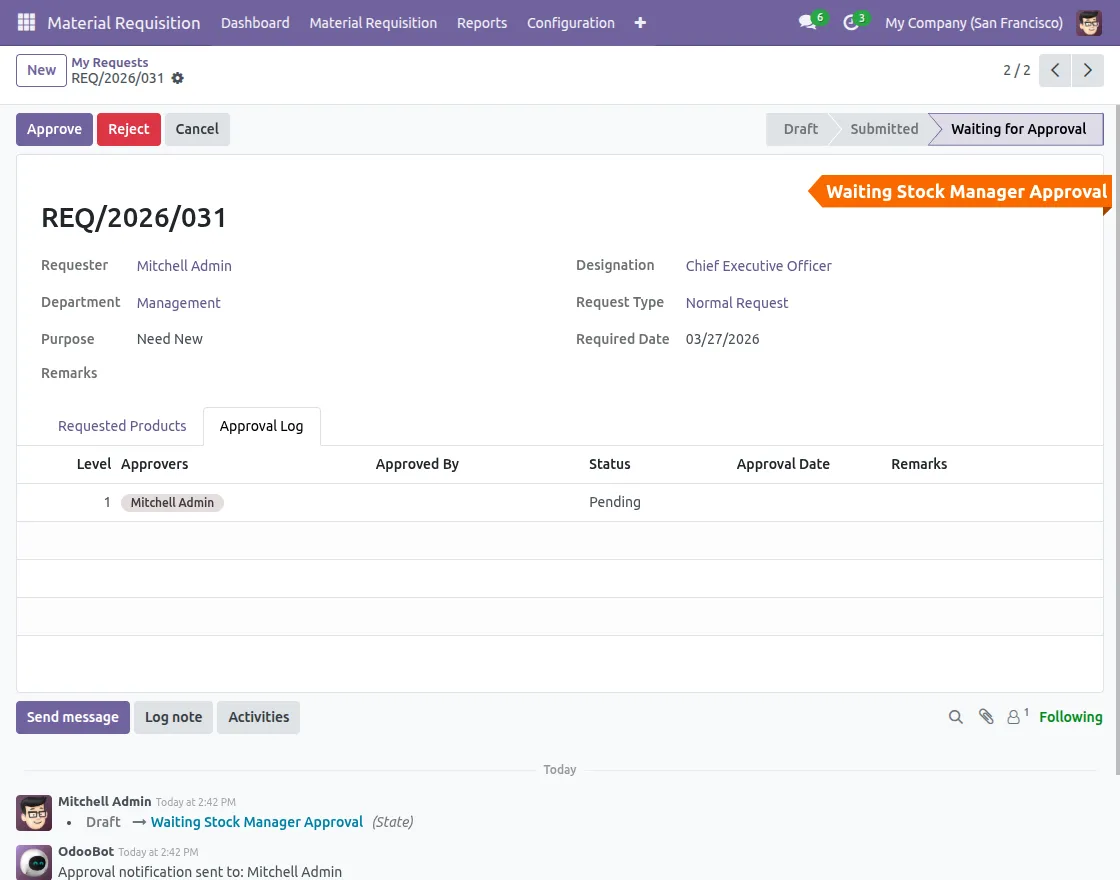
5. After clicking on Confirm, the request is sent to the manager, and the status updates to Waiting for Approval.
An Approval Log tab is created where each approval level and approvers are visible. Requests move step by step to managers, where each manager can easily approve or reject.
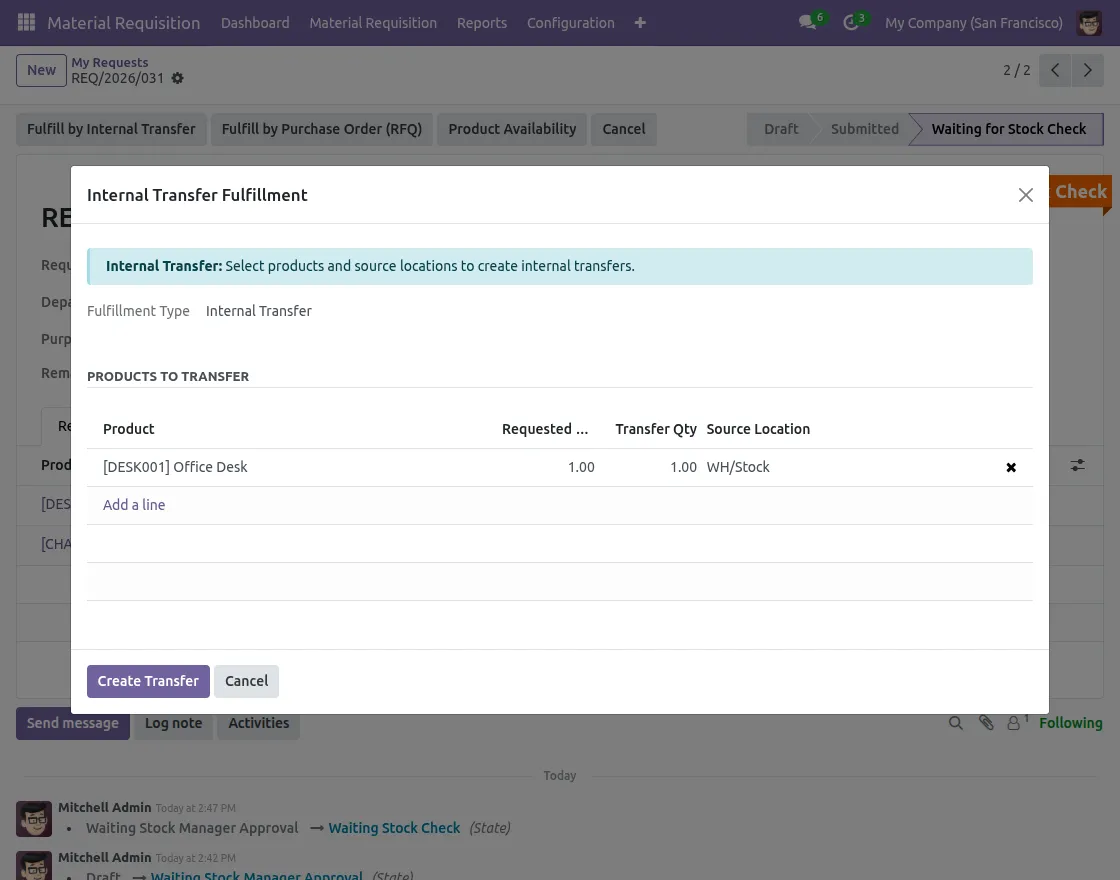
6. After clicking the Approve Button, the system shows options to fulfill the request. The stock manager checks product availability and decides whether to fulfill the request through internal transfer or purchase.
If stock is available, the system creates picking, reserves items, and auto-validates dispatch based on configuration.
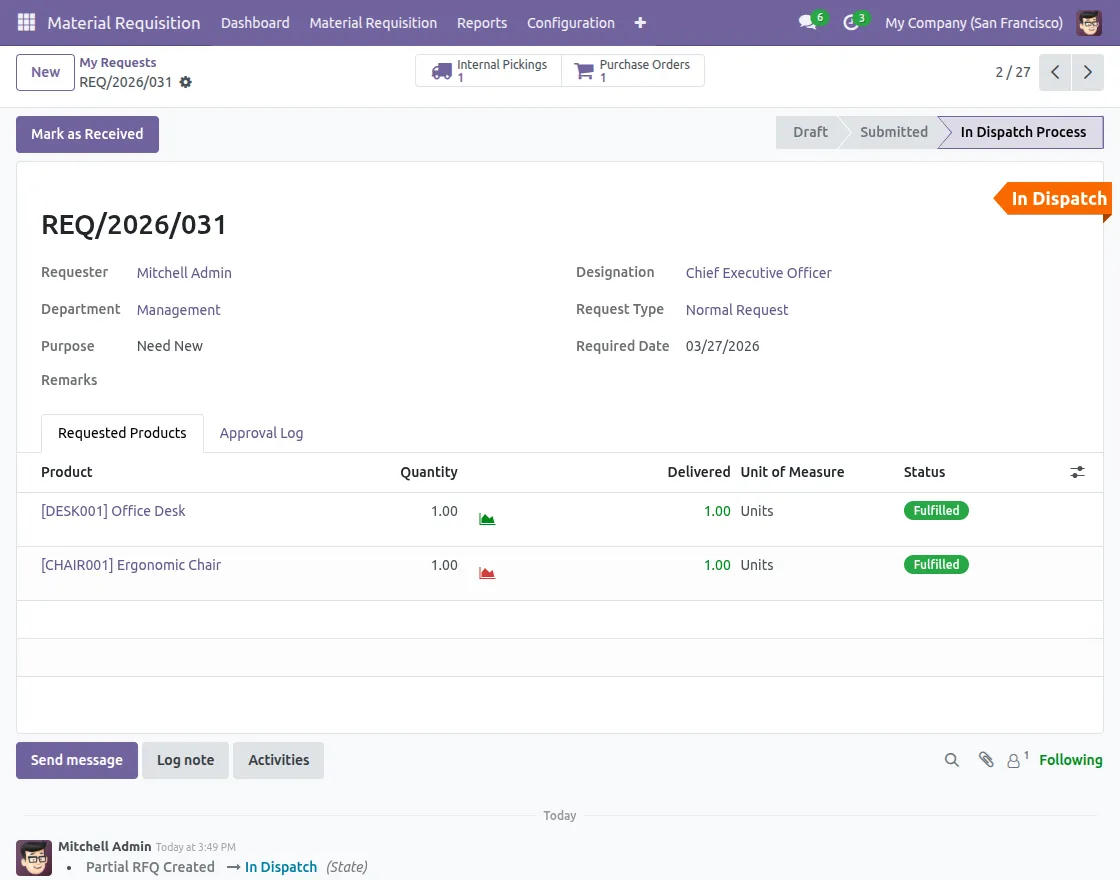
7. If stock is not available, choose Fulfill by Purchase Order (RFQ) and the system creates an RFQ or Purchase Order. After that, Select the vendor, confirm the order, and track receipt and delivery status in purchase or dispatch.

8. The system updates delivered item quantities and shows cancelled as well as remaining quantities in real time. It also updates upon receipt and tracks the complete delivery process step by step.
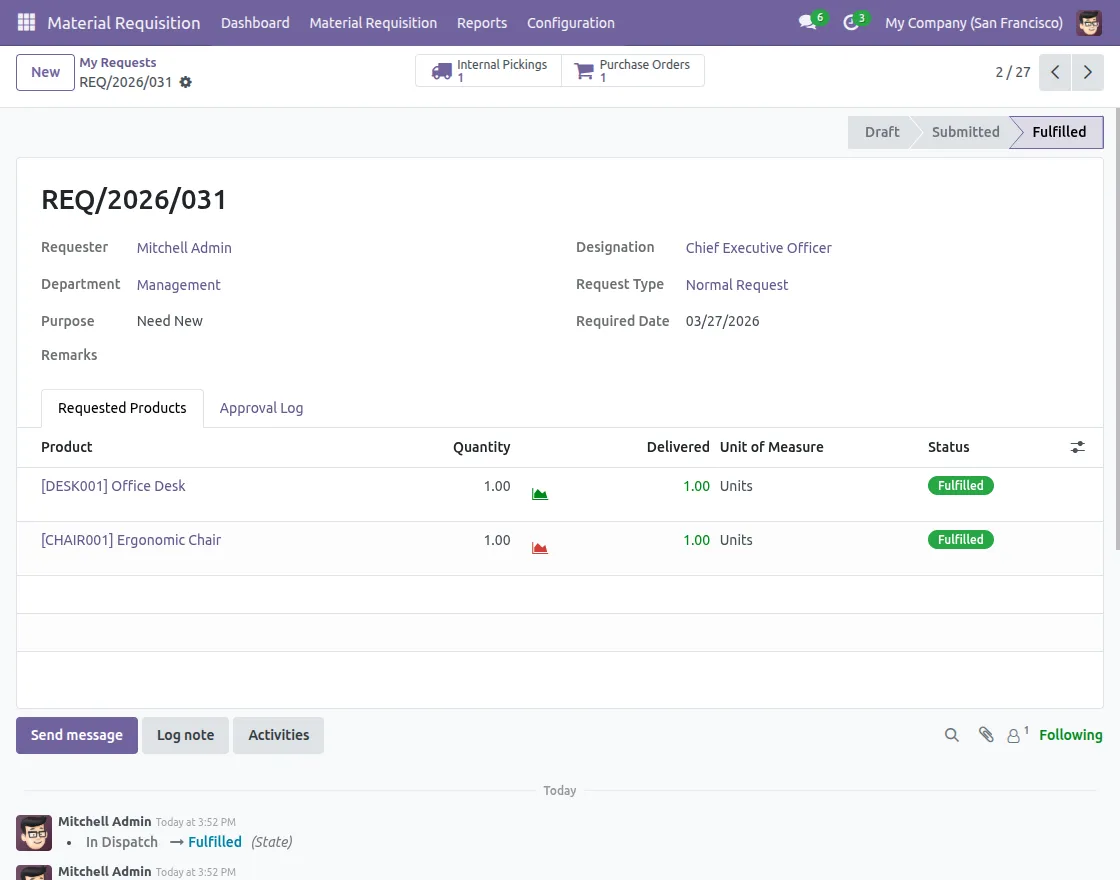
9. The employee receives the items and confirms by clicking on Mark as Received. The status updates to fulfilled, completing the process and automatically closing the request.
Need Help?
Hope you find the guide helpful! Please feel free to share your feedback in the comments below.
If you still have any issues/queries, please create a ticket at the UV Desk.
I hope this helps. In case of any further queries, contact us at our support mail.
Thanks for paying attention!!