User Guide for ERPNext Website Display Packaging Options
Live Demo
Introduction
ERPNext Website Display Packaging Options lets a shopper pick a pack size on the Webshop product page. Each pack shows its own price, its name and how many base units it holds.
Additionally, the app reads the packs from the Packaging Options table on the Website Item. It prices every pack from Item Price and the item Unit of Measure (UOM) conversion.
You will set up the item UOM conversion and switch on Website Packaging Settings. You will then add packaging options, and follow one pack from the product page into the cart and the quotation.
Prerequisites for using ERPNext Website Display Packaging Options
ERPNext Website Display Packaging Options works in conjunction with the following module:
You must install the above-mentioned module to use the ERPNext Website Display Packaging Options.
Features of ERPNext Website Display Packaging Options
- Add any number of packaging options to a Website Item.
- Price each pack size from Item Price and the item UOM conversion.
- Show the packs as cards or as a radio list.
- Give every pack a label, a badge, an image and a short description.
- Sort the packs by display order, and hide any pack from the website.
- Mark one pack as the default for the product page and the shop listing.
- Add the chosen pack to the cart with the right UOM and conversion factor.
- Keep the pack name on the Quotation Item and the Sales Order Item.
- Block a duplicate UOM, a second default, or a UOM the item does not carry.
Installation
1. After purchasing the app from Webkul Store, you will receive a link to download the module ZIP file.
2. Extract the ZIP file. You will see a folder named ‘website_display_packaging_options’.
3. Set up the module in your git repository, then fetch it using:
bench get-app --branch main https://git.webkul.com/erpnext-apps/website-display-packaging-options.git
(Replace “main” with your branch name and replace the “HTTPS URL” with your HTTPS clone URL.)
4. Install the app on your site:
bench --site install-app website_display_packaging_options
5. Run bench migrate to complete the setup.
Workflow of ERPNext Website Display Packaging Options
Setting Up the Item UOM Conversion
Every pack is a multiple of the item base unit. ERPNext Website Display Packaging Options reads that multiple from the item itself, so set the units up first.
- Open the Item you sell on the website.
- Check the Default Unit of Measure on the first tab. This is the base unit.
- Open the UOM tab. The UOM Conversion Details table lists the alternate units.
- Click Add row. Pick the pack in UOM and type how many base units it holds in Conversion Factor.

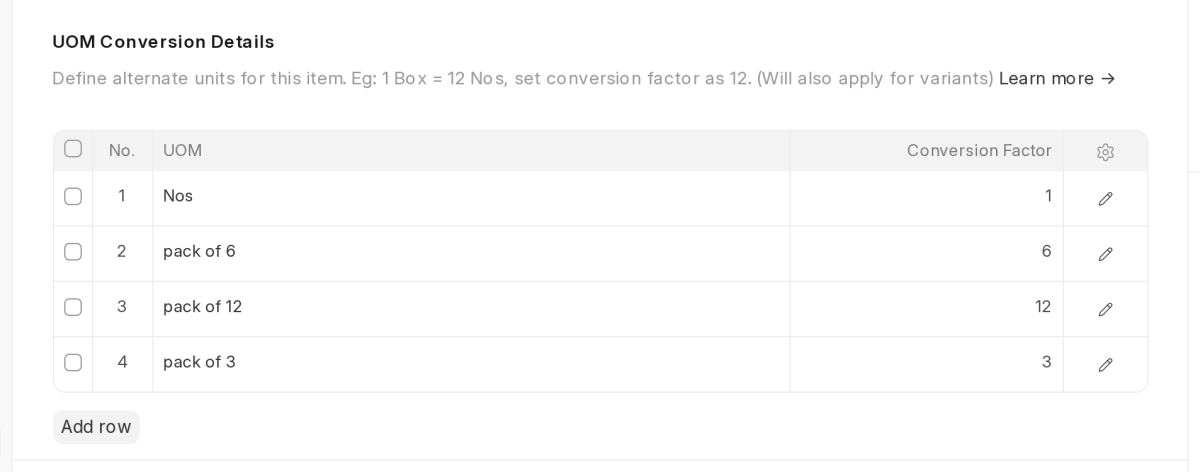
The backpack above sells in Nos . The row pack of 3 has a conversion factor of 3, so one pack holds three backpacks.
- Add a row for every pack size you plan to sell. Then click Save.
- Open Item Price and check the item has a selling rate on the price list your website uses.
Note: The app multiplies the base rate by the conversion factor, so a pack of 3 costs three times. Add a separate Item Price for a pack UOM only when that pack has its own rate.
Setting Up Packaging Options in ERPNext
1. Open the Website workspace. The app adds a Packaging Options group with two links.
2. Click Website Packaging Settings. Tick Enable Packaging to switch the packaging options on for the whole website.

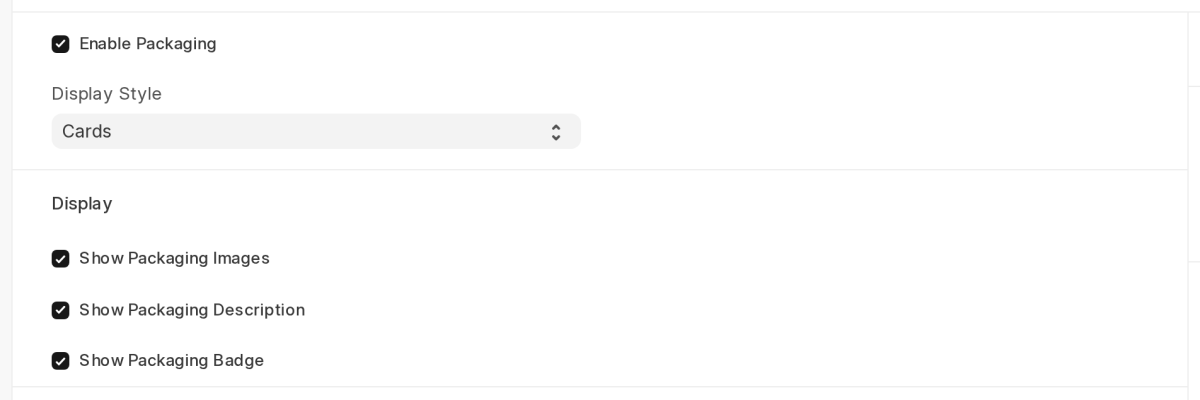
3. Then, select a Display Style. The Cards option displays each pack as a tile, whereas the Radio List option presents them as a simple list.le, and Radio List shows a plain list.
4. Tick Show Packaging Images, Show Packaging Description and Show Packaging Badge for the parts you want the shopper to see. Then click Save.
5. Next, open the Website Item for your product and scroll to Packaging Options.
6. Click Add row for each pack size you set up on the item.

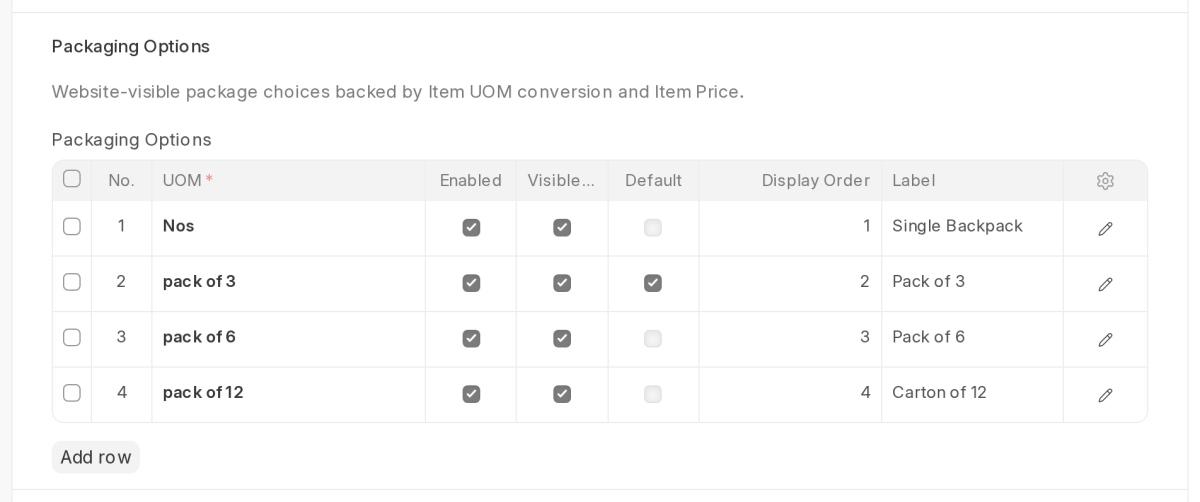
7. Click a row to open it and fill in the rest of the fields.

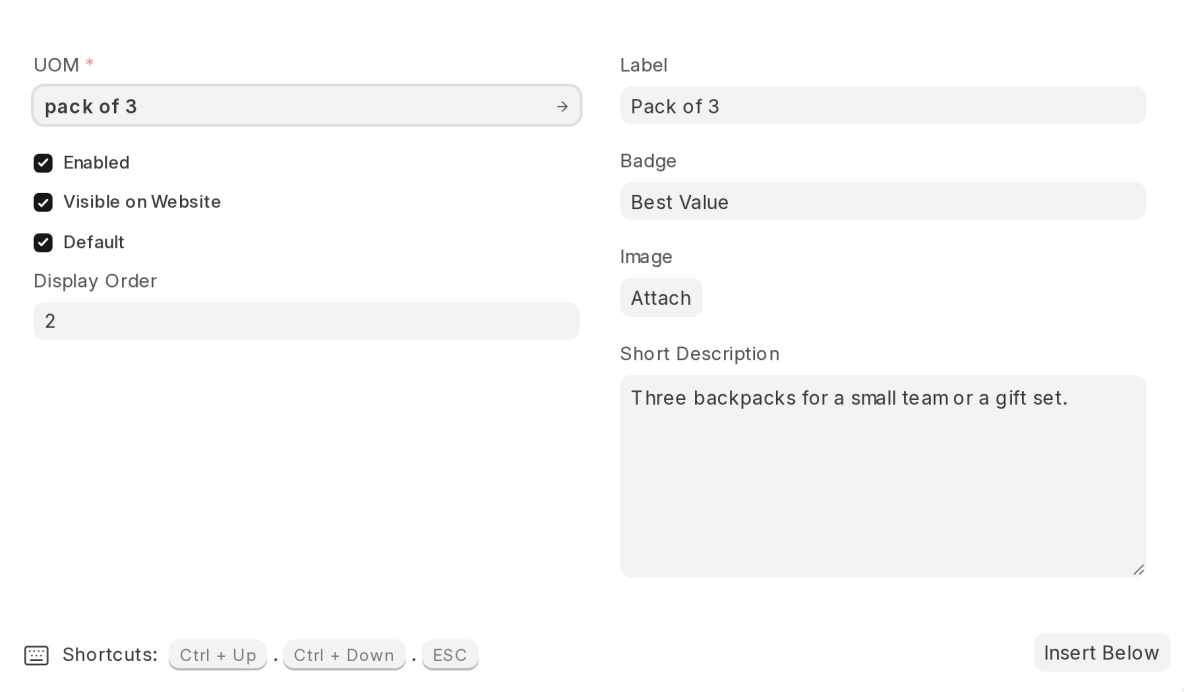
- UOM — the pack unit. The item must already carry it.
- Label — the name the shopper reads, such as Pack of 3 .
- Badge and Short Description — the tag and the line under the label.
- Display Order — the position in the list. Lower numbers come first.
- Default — the pack the website picks first. Only one row can be the default.
- Enabled and Visible on Website — clear either one to drop the pack from the website.
8. Click Save. ERPNext stops the save if two rows share a UOM, if two rows are the default, or if the item does not carry the UOM.
Choosing a Pack Size on the Website
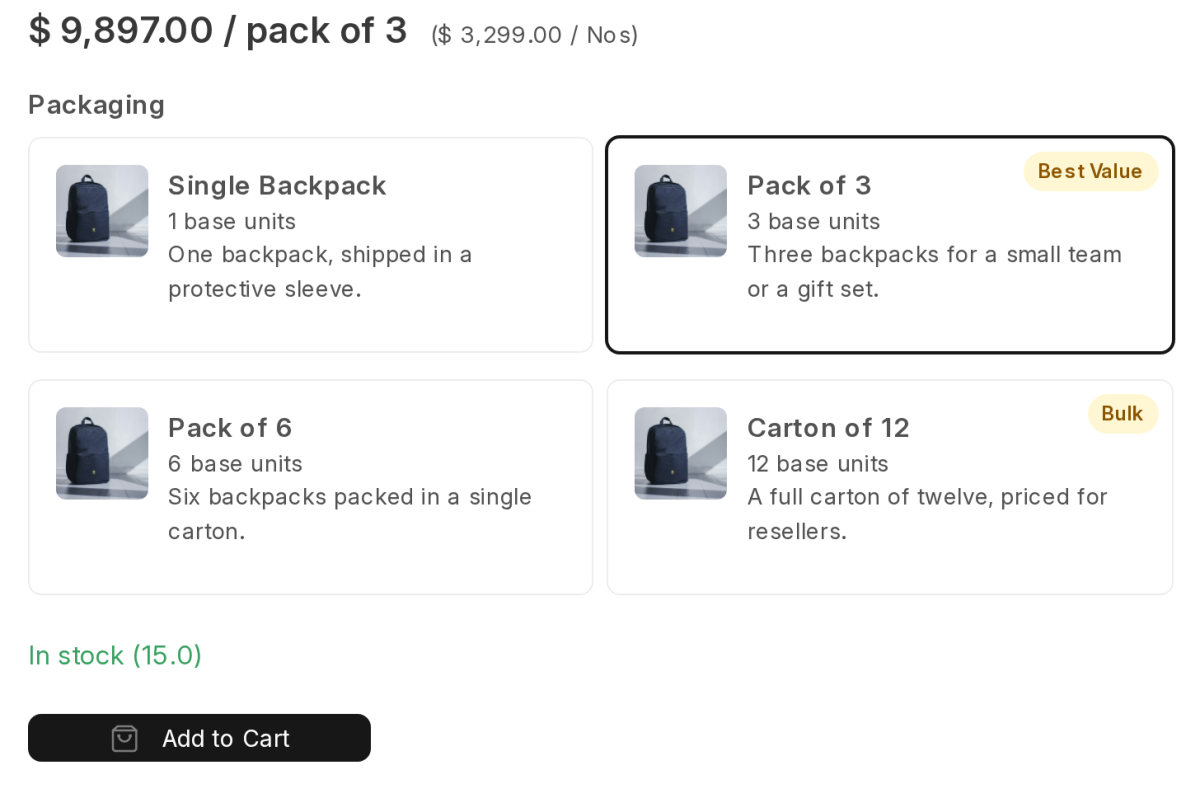
- Open the product page. Additionally, the Packaging block appears below the price, displaying one card for each pack. The website selects the default pack for the shopper.

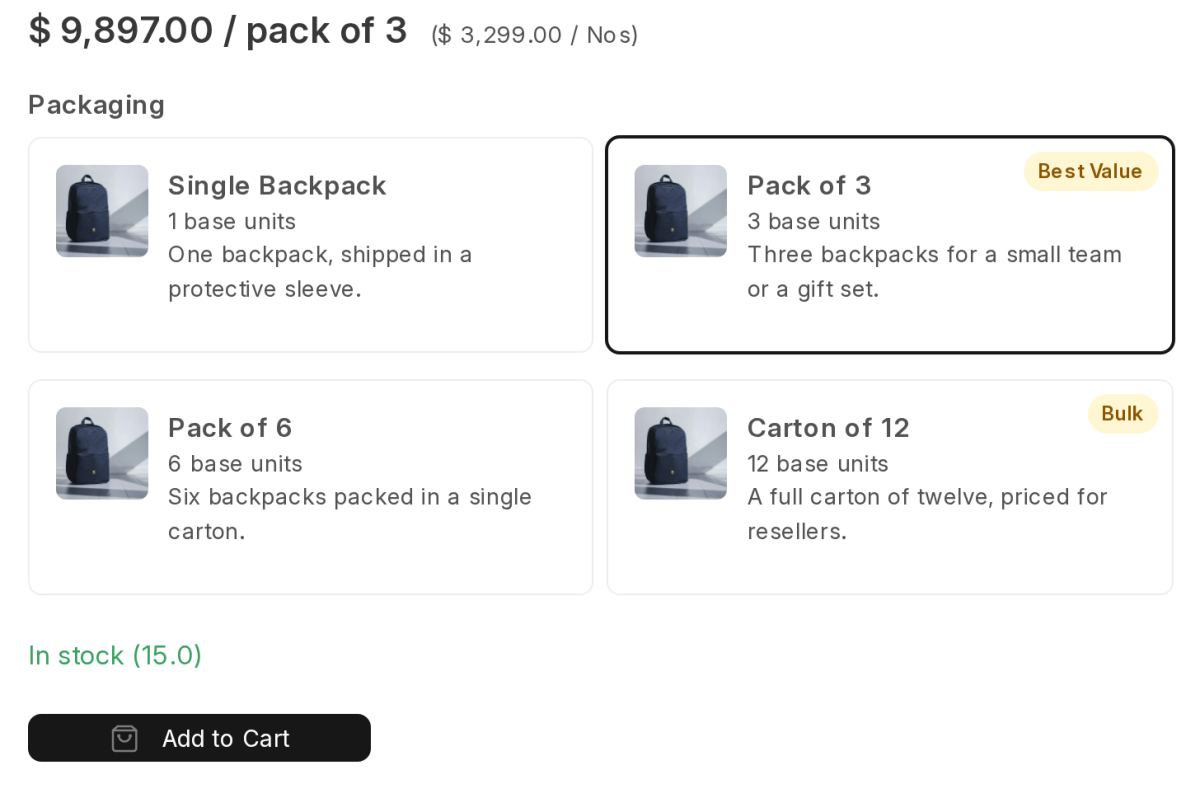
2. Click another pack. The price line now reads the pack price, and the price per base unit in brackets.


3. Click Add to Cart. The app sends the pack UOM with the item, so the cart holds one pack and not one base unit.
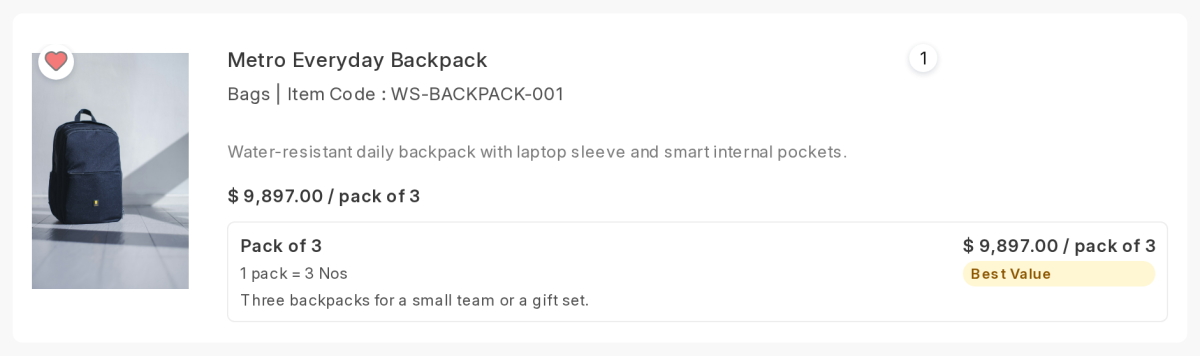
4. The shop listing shows the same default pack, its price and the units per pack.

Packaging in the Cart and the Sales Documents
1. Open the cart. Each line names the pack, the pack quantity and how many base units one pack holds.
2. Change the quantity with the plus and minus buttons. The quantity counts packs, so 2 means two packs.
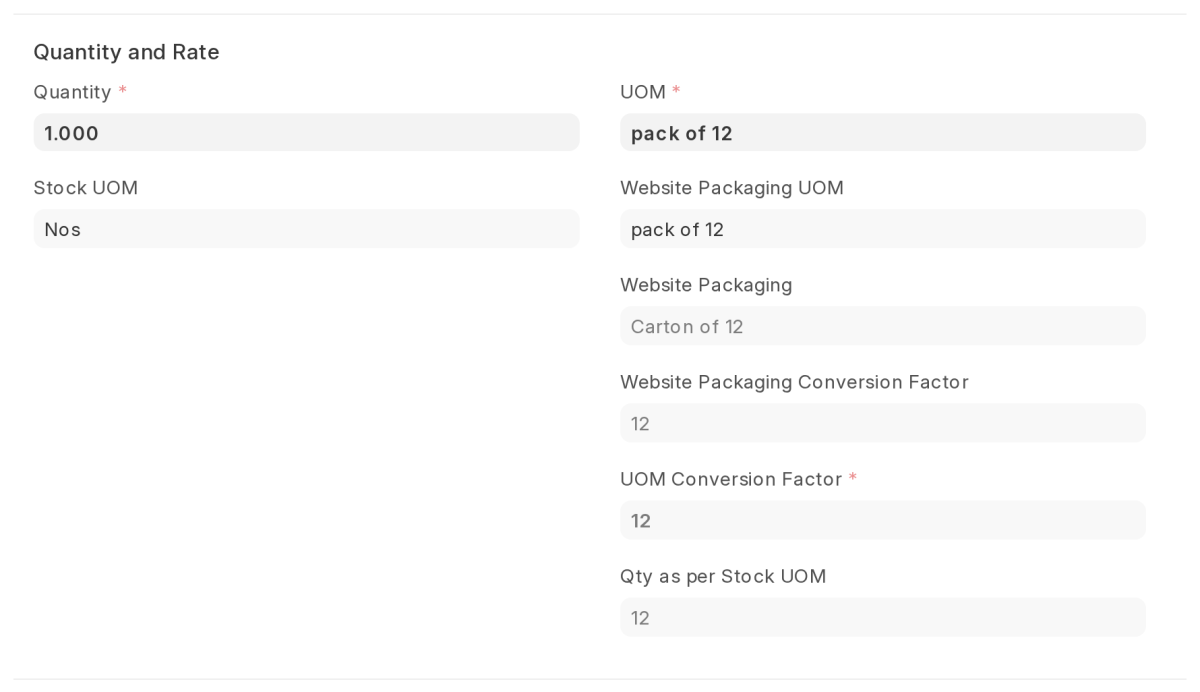
3. Place the order. ERPNext writes the cart into a Quotation, and the sales team sees the pack on the item row.
4. Open the Quotation in the backend and click the item row.
Need Help?
Hope you find this guide helpful! Please feel free to share your feedback in the comments below.
If you still have any issues/queries, please create a ticket at the UV Desk.
I hope this helps. In case of any further queries, contact us at our support mail.
Thanks for paying attention!!