User Guide for ERPNext MultiVendor Marketplace
Table of Content
Introduction
ERPNext MultiVendor Marketplace turns your ERPNext Webshop into a multi vendor marketplace. Many sellers can list and sell their products next to your own catalogue.
Sellers sign up through a public seller registration page. Once you approve them, each seller runs a shop from the seller dashboard.
They add products, update stock, track orders and ask for payouts.
As the store admin, you stay in control. You approve sellers, products and stock changes.
You split orders by seller, pay sellers and moderate their reviews. This guide walks through each of these tasks.
Prerequisites for using ERPNext MultiVendor Marketplace
ERPNext MultiVendor Marketplace works in conjunction with the following module:
Webshop
You must install the above-mentioned module to use the ERPNext MultiVendor Marketplace.
Features
- Let sellers sign up from a public seller registration page.
- Approve, reject or suspend each seller from the desk.
- Give every seller a seller dashboard with sales, orders and earnings.
- Add products one by one, as variants, or in bulk from a ZIP file.
- Hold new products and stock changes for product approval.
- Give each seller their own warehouse and public shop page.
- Split one customer order into a draft delivery note and invoice per seller.
- Charge a commission and pay sellers on request.
- Let customers rate sellers, with reviews you moderate.
- Track the multi vendor marketplace in analytics and reports.
Installation
- After purchasing the app from Webkul Store, you will receive a link to download the module ZIP file.
- Extract the ZIP file. You will see a folder named ‘erpnext_multivendor_marketplace’.
- Set up the module in your git repository, then fetch it using:
bench get-app --branch main https://git.webkul.com/erpnext-apps/erpnext-multi-vendor-marketplace.git
(Replace “main” with your branch name and replace the “HTTPS URL” with your HTTPS clone URL.)
- Install the app on your site:
bench --site <your-site-name> install-app erpnext_multivendor_marketplace
- Run bench migrate to complete the setup.
Workflow
Setting Up the Marketplace
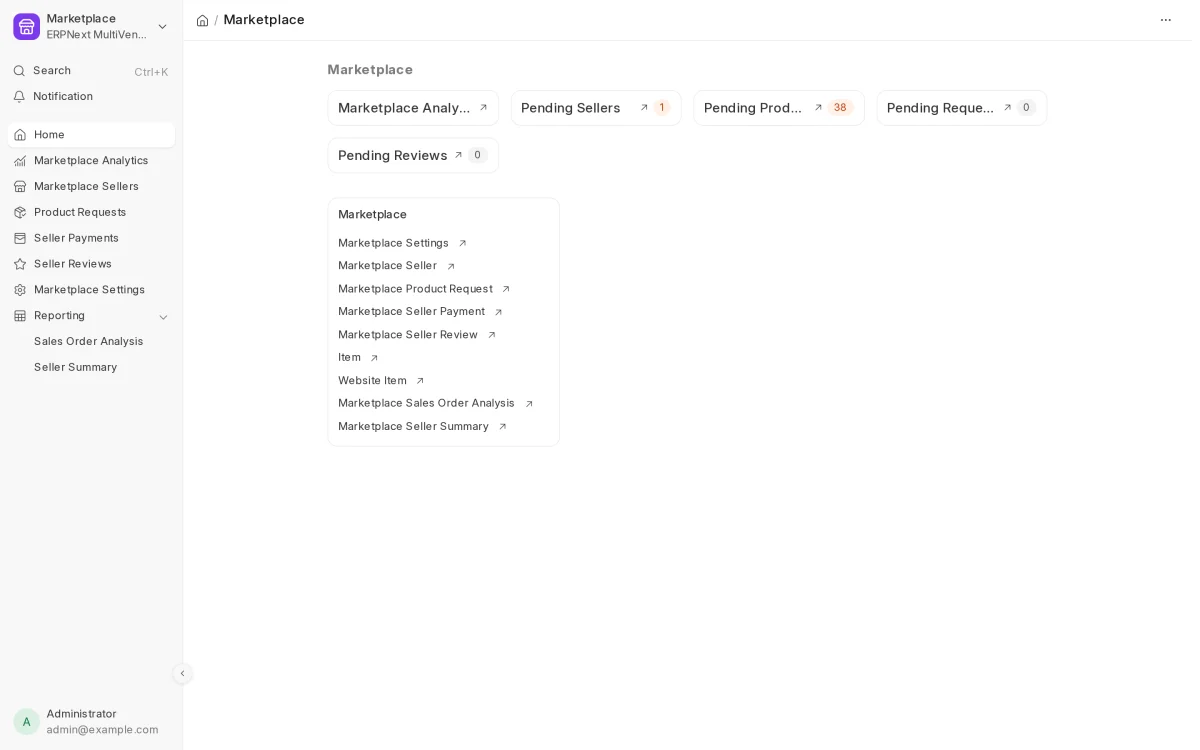
- After you install the app, a Marketplace workspace appears in the desk. It links to sellers, requests, payments, reviews, settings and reports.

- Open Marketplace Settings. Tick Enable Marketplace and choose how to Register Sellers As.
- Choose which requests to approve on their own. Use Auto Approve Seller Requests, Auto Approve Seller Products and Auto Approve Quantity Updates.
- Set the Default Marketplace Commission (%) and the Company. Then set the Parent Warehouse for Seller Warehouses.

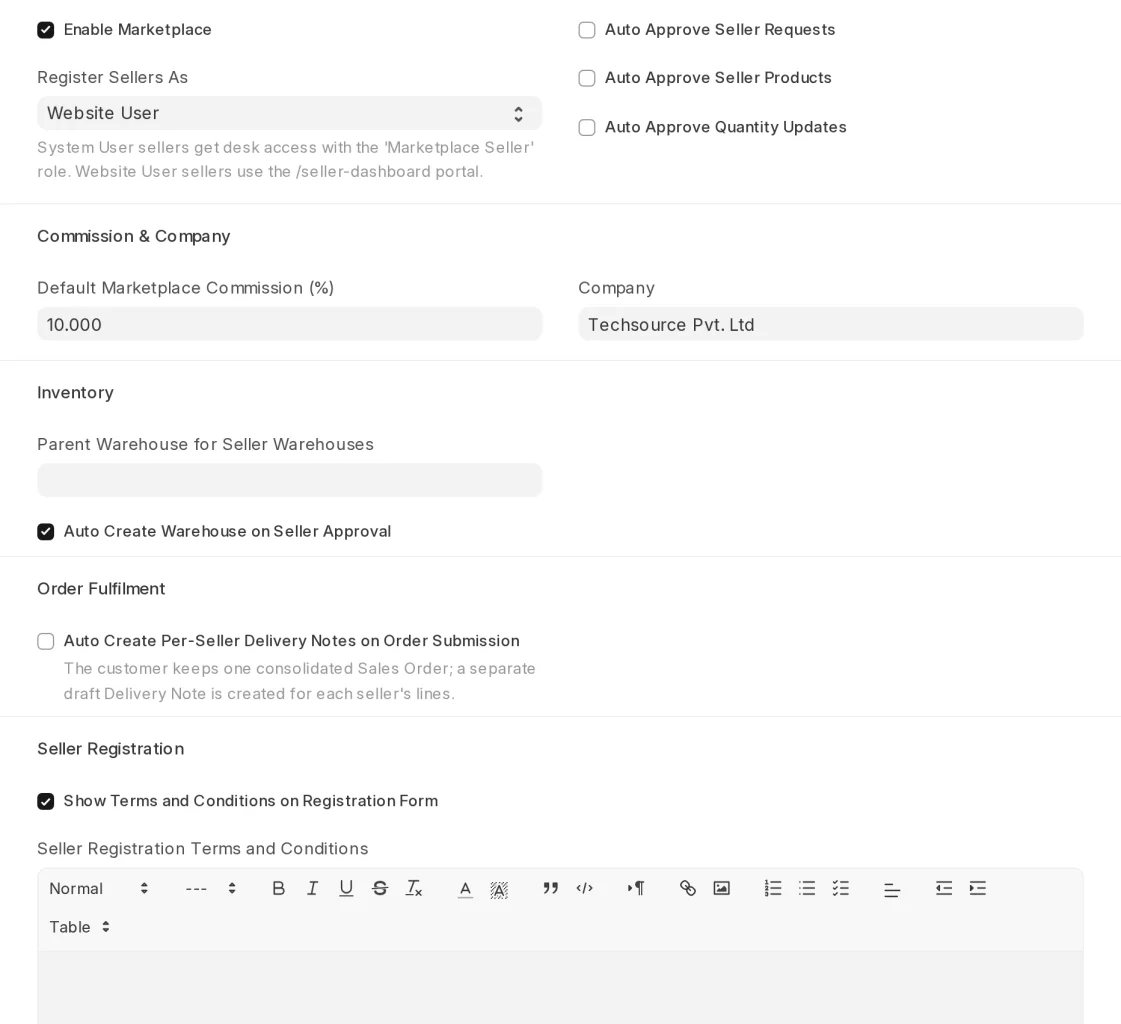
- Further down, set the seller registration terms, review rules, seller details shown on the store and email alerts. Click Save.
Note: When an auto approve option is off, the request waits for you. Nothing goes live on the website until you approve it.
Registering and Approving Sellers
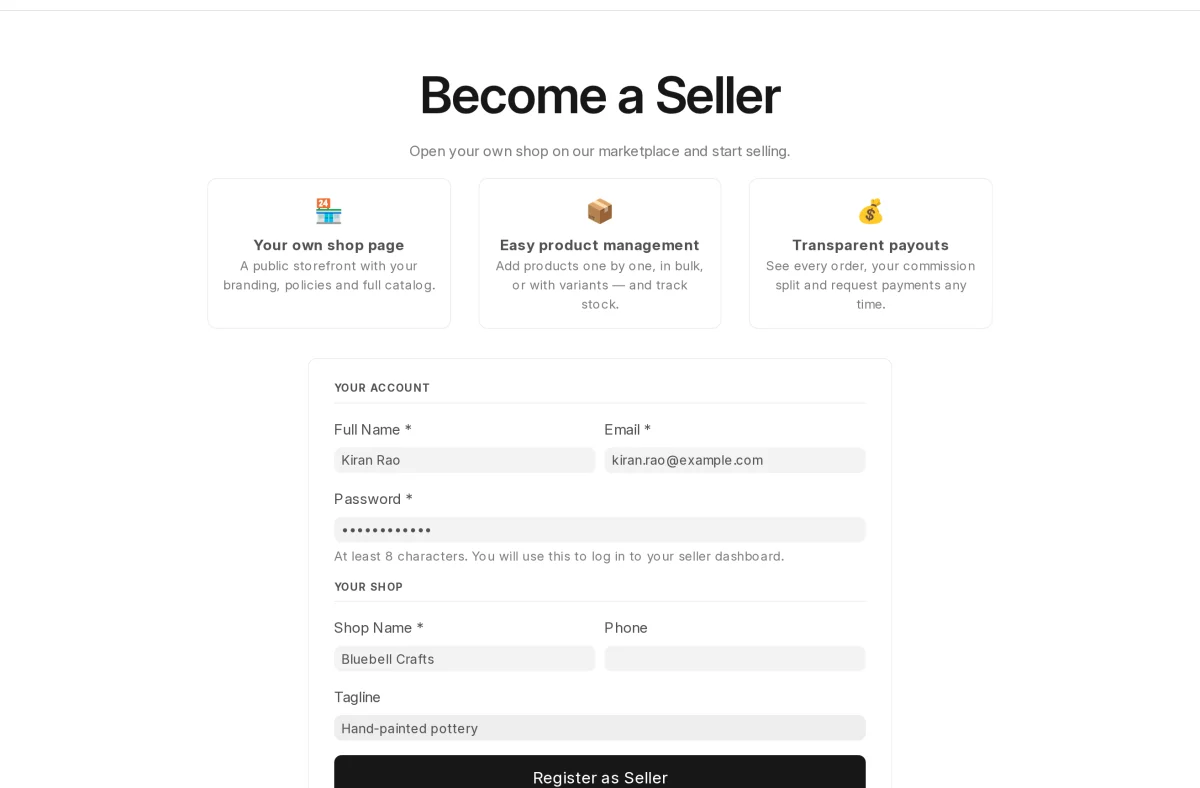
- A new seller opens the Become a Seller page at /seller-registration. They fill in their account and shop details.
- The seller clicks Register as Seller to send the seller registration request.

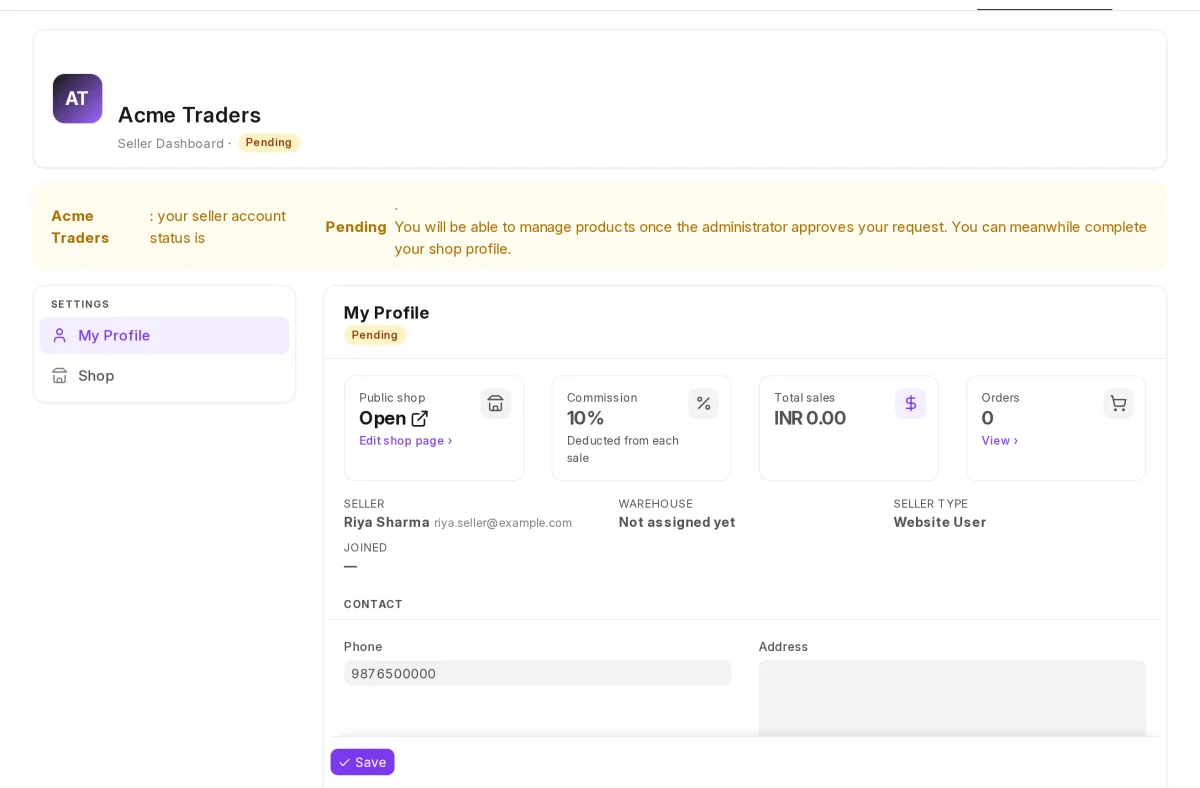
- The seller can sign in at once. Until you approve them, their seller dashboard shows the Pending status. They can only edit My Profile and Shop.
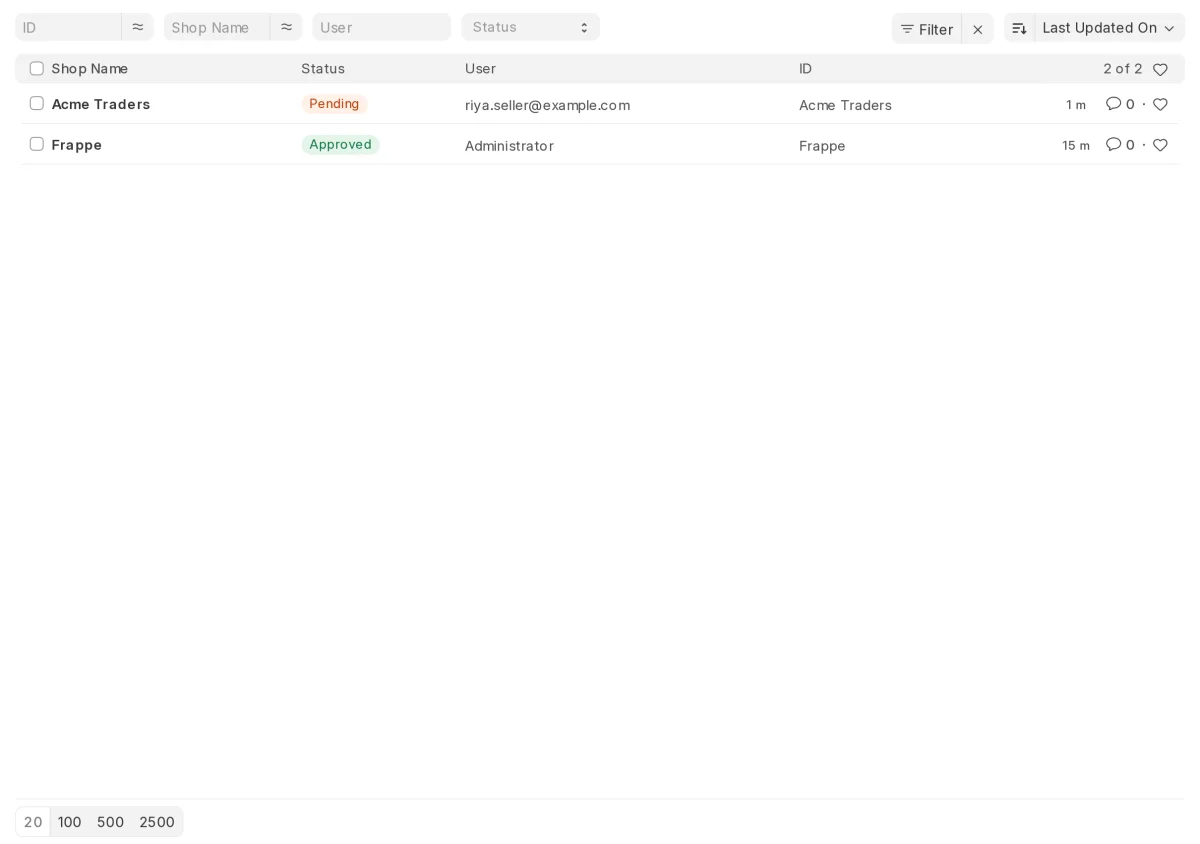
- In the desk, open Marketplace Seller. New sellers show the Pending status.

- Open the seller. Click Status, then Approve. Use Reject to turn the request down.
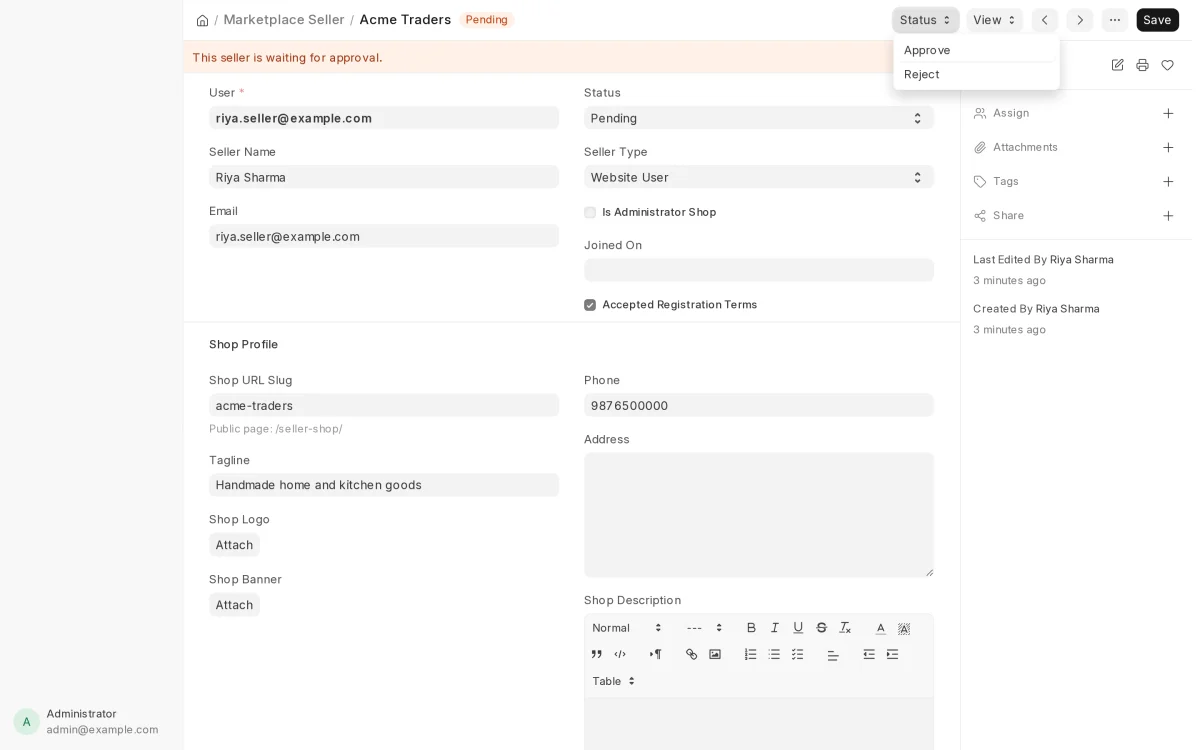
When you approve a seller, the system can create a warehouse for them under the parent warehouse. Use Suspend later to stop an approved seller from selling.
Managing Products from the Seller Dashboard
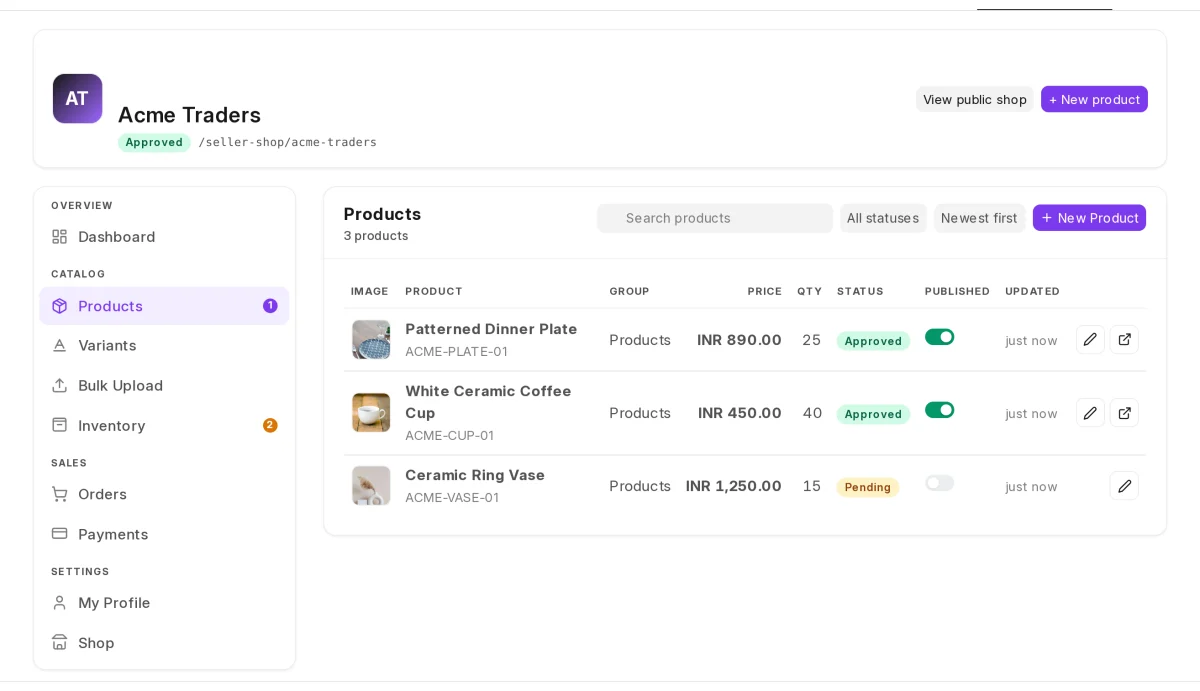
- The seller opens Products in the seller dashboard. The list shows each product, its stock and its approval status.

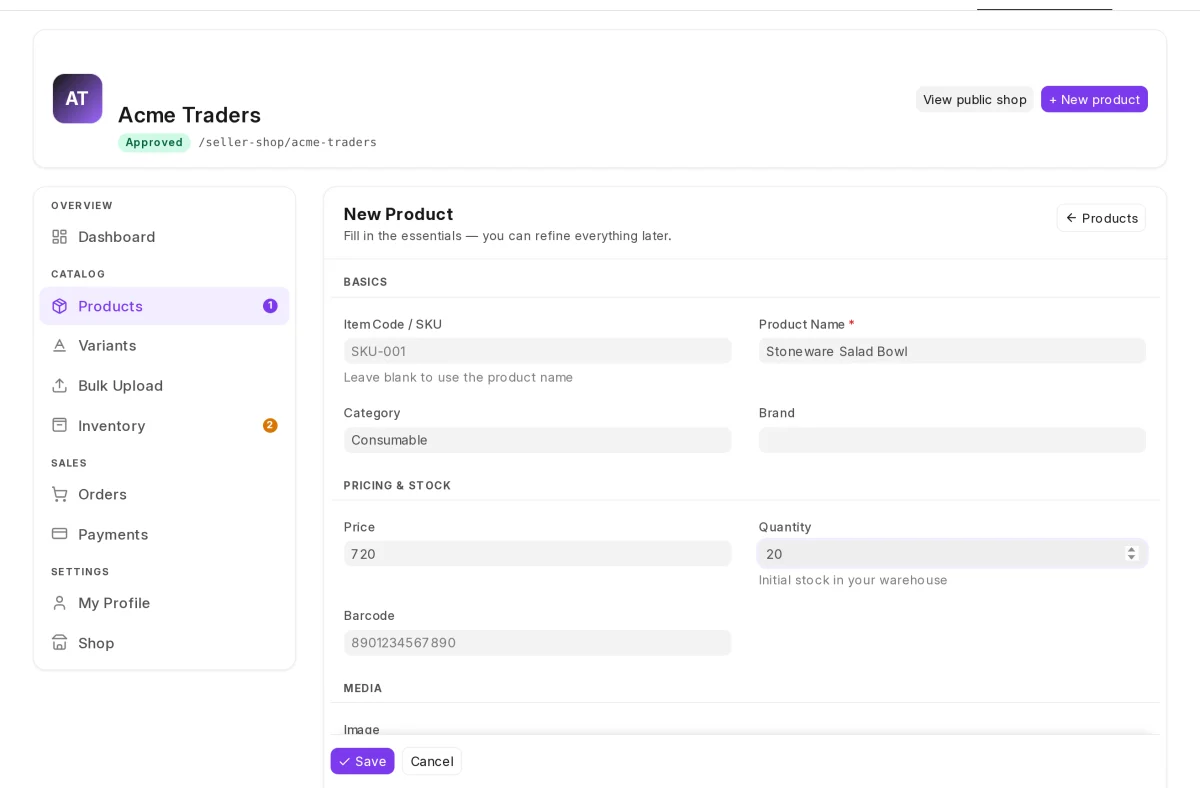
- The seller clicks New product. They fill in the name, price, stock, image and description, then click Save. The new product waits for product approval.
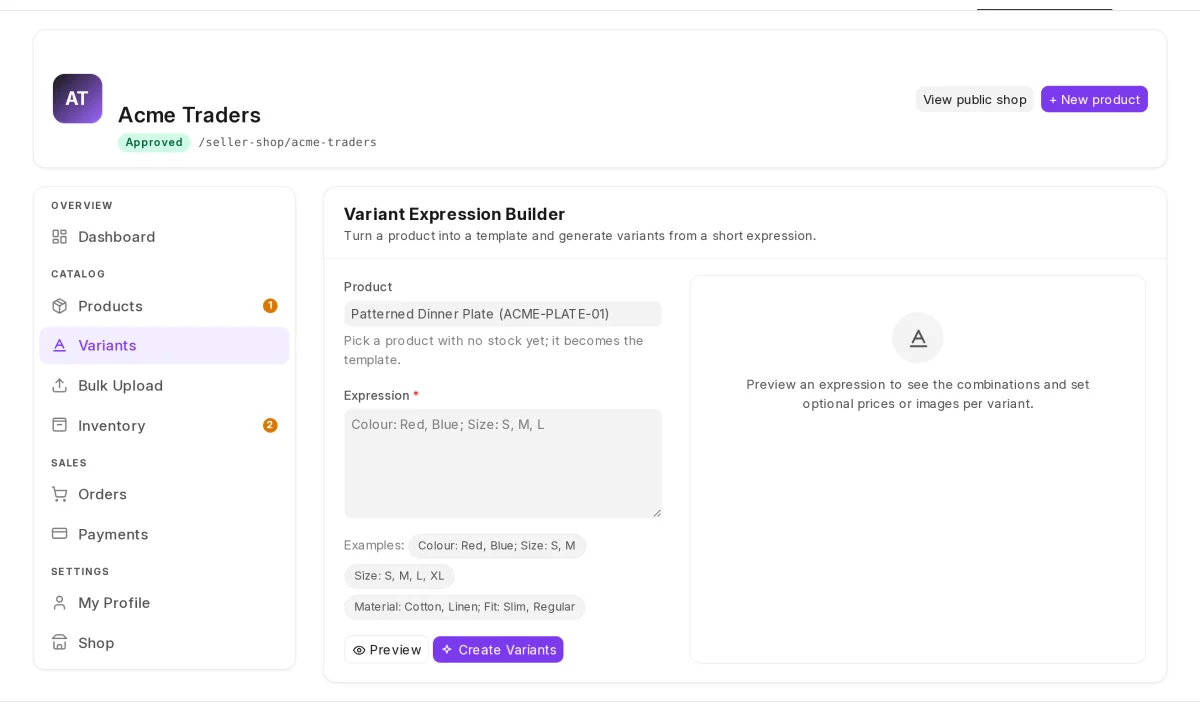
- To add sizes or colours, the seller opens Variants. They pick a product and type an expression such as Colour: Red, Blue; Size: S, M. They click Preview, then Create Variants.

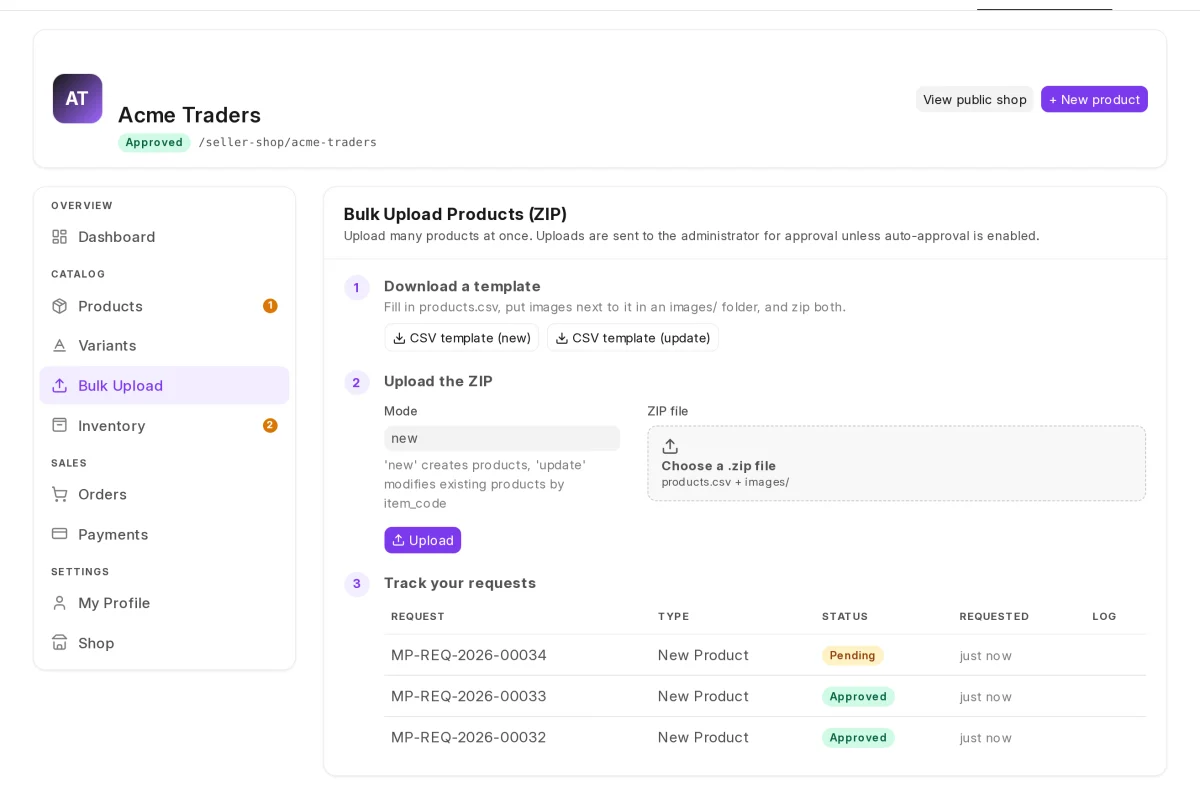
- To add many products at once, the seller opens Bulk Upload. They download a CSV template, fill it in and zip it with the images. Then they click Upload.
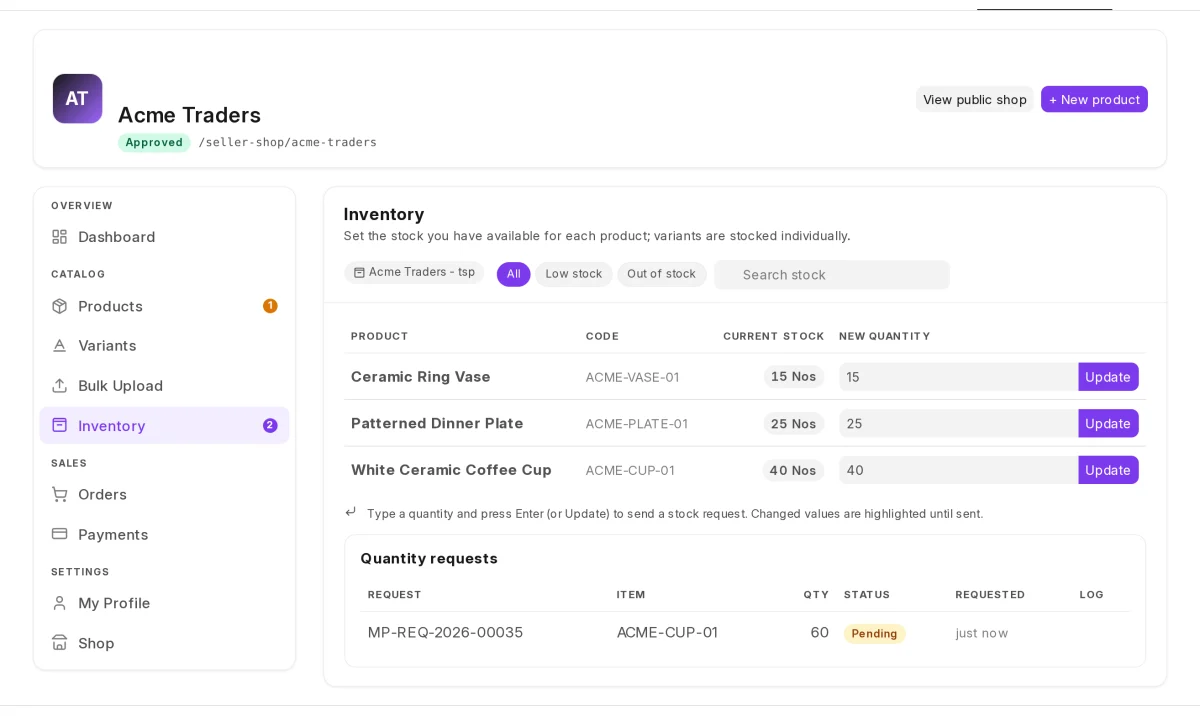
- To change stock, the seller opens Inventory. They type the new quantity and click Update. This sends a quantity request to you.

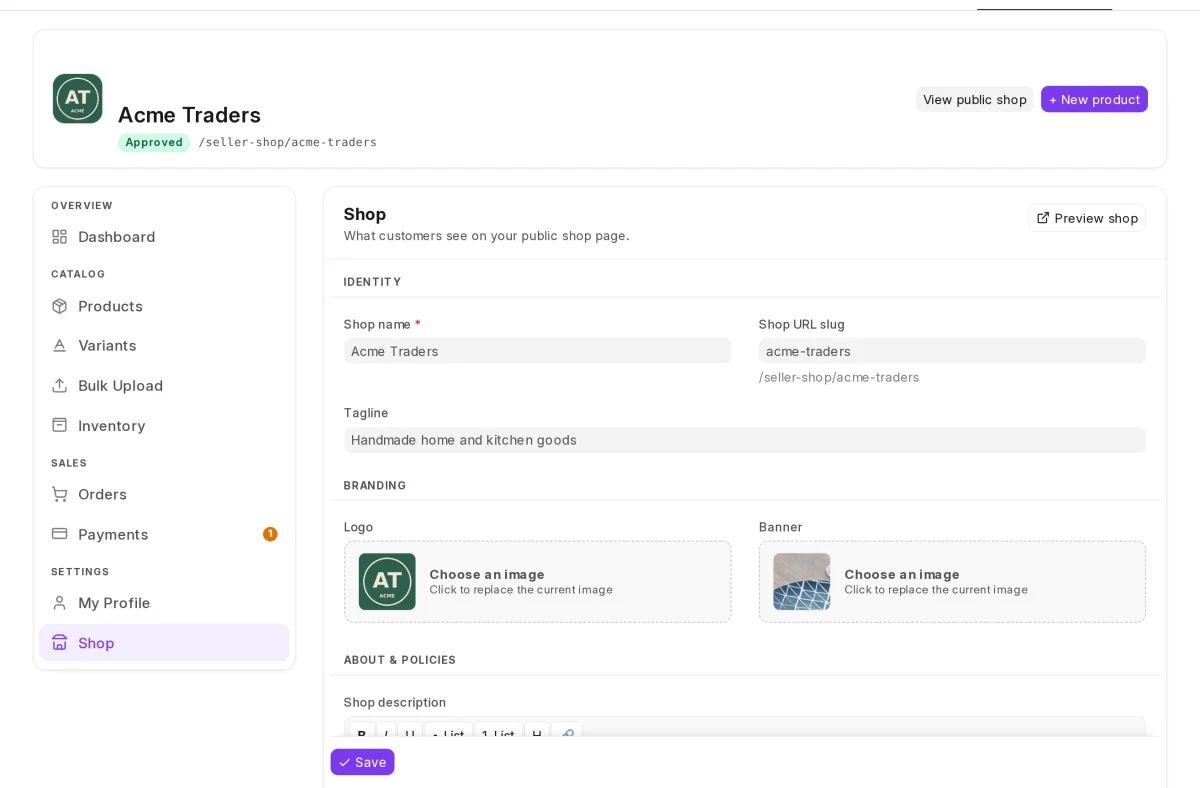
- The seller opens Shop to set the shop name, tagline, logo, banner and policies.
Approving Products and Stock Updates
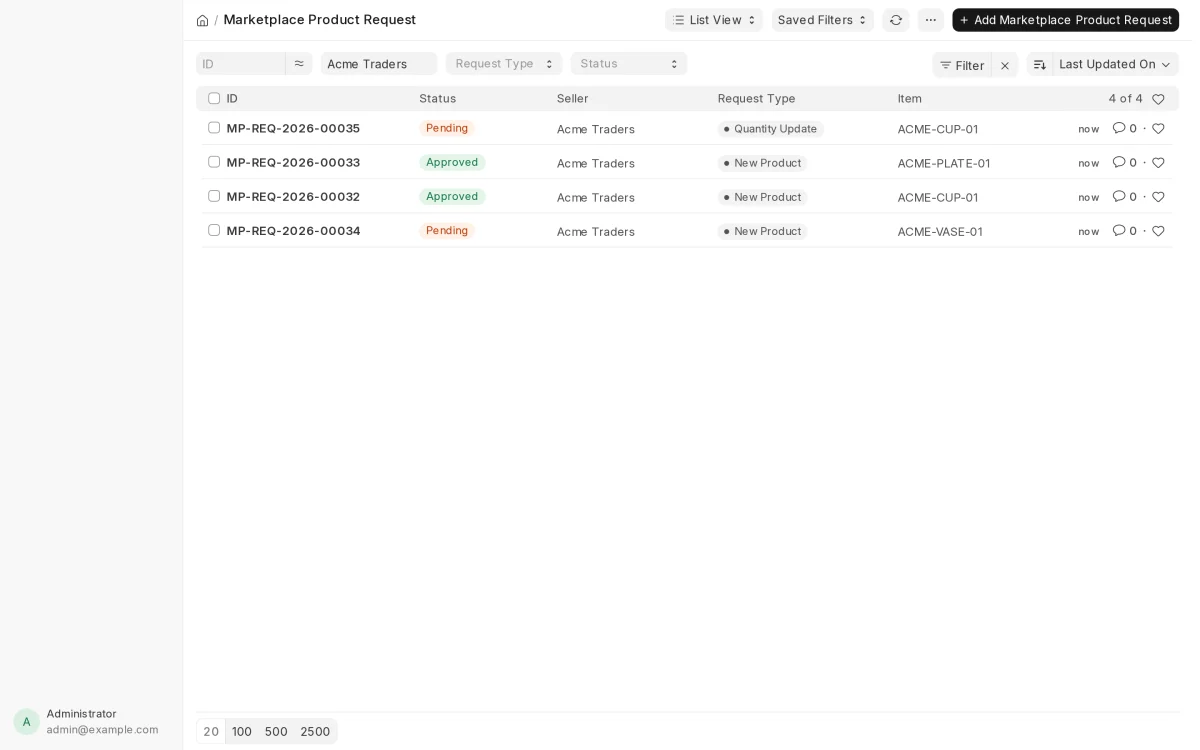
- Open Marketplace Product Request in the desk. It lists every new product, product change and quantity update from sellers.
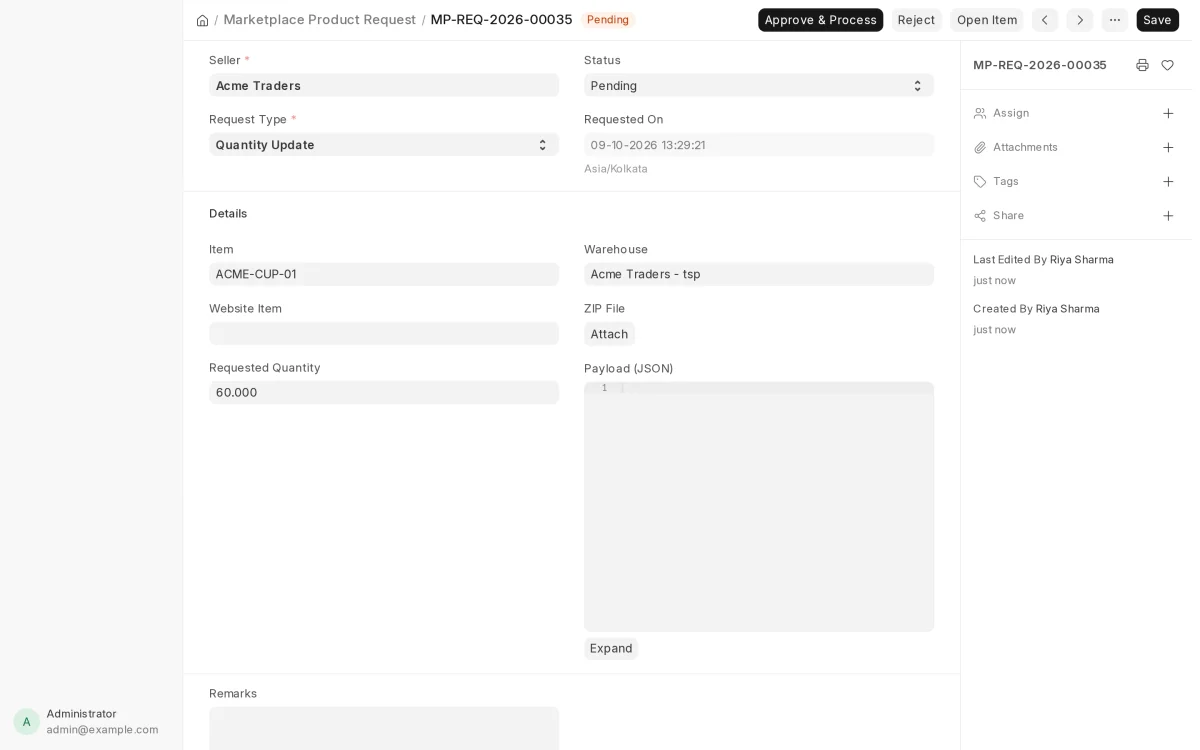
- Open a request. Click Approve & Process to accept it, or Reject to give a reason. Approving a quantity update posts the stock into the seller’s warehouse.
- You can also give product approval from the Item form. Click Marketplace, then Approve for Marketplace or Reject for Marketplace.
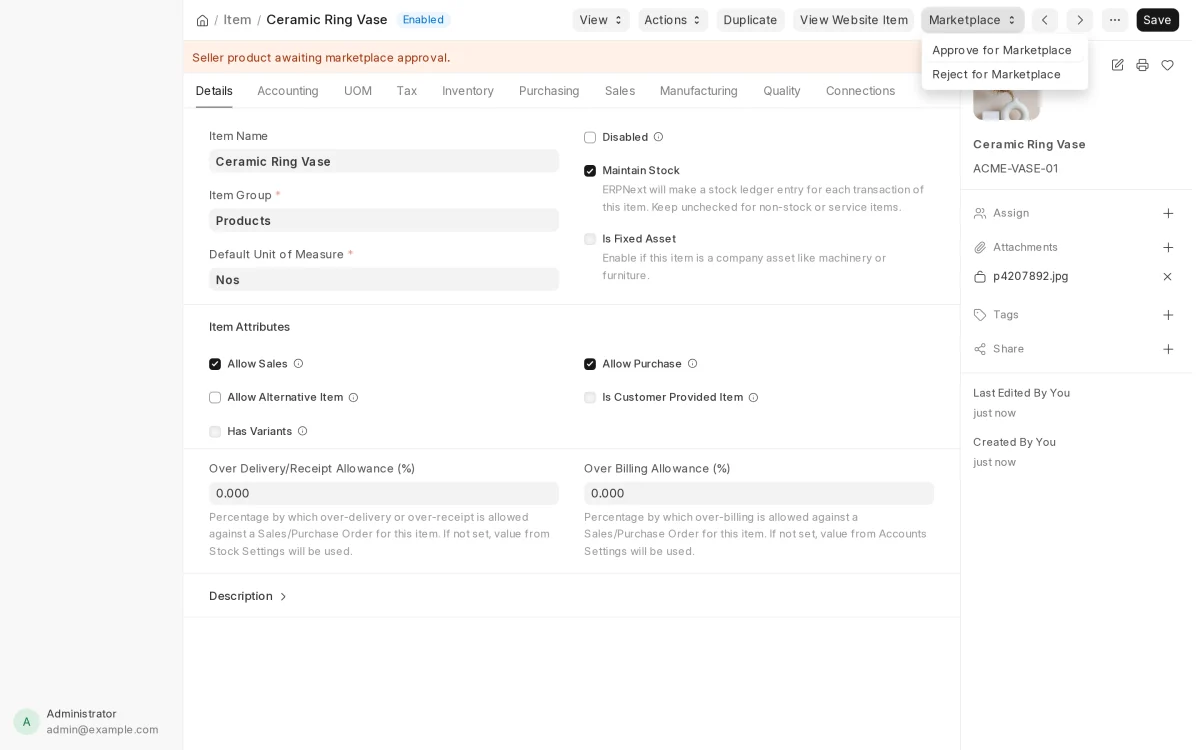
Note: A seller’s product appears on the website only after you approve it. If the seller edits an approved product, it goes back to Pending until you approve it again.
Orders, Fulfilment and Payouts
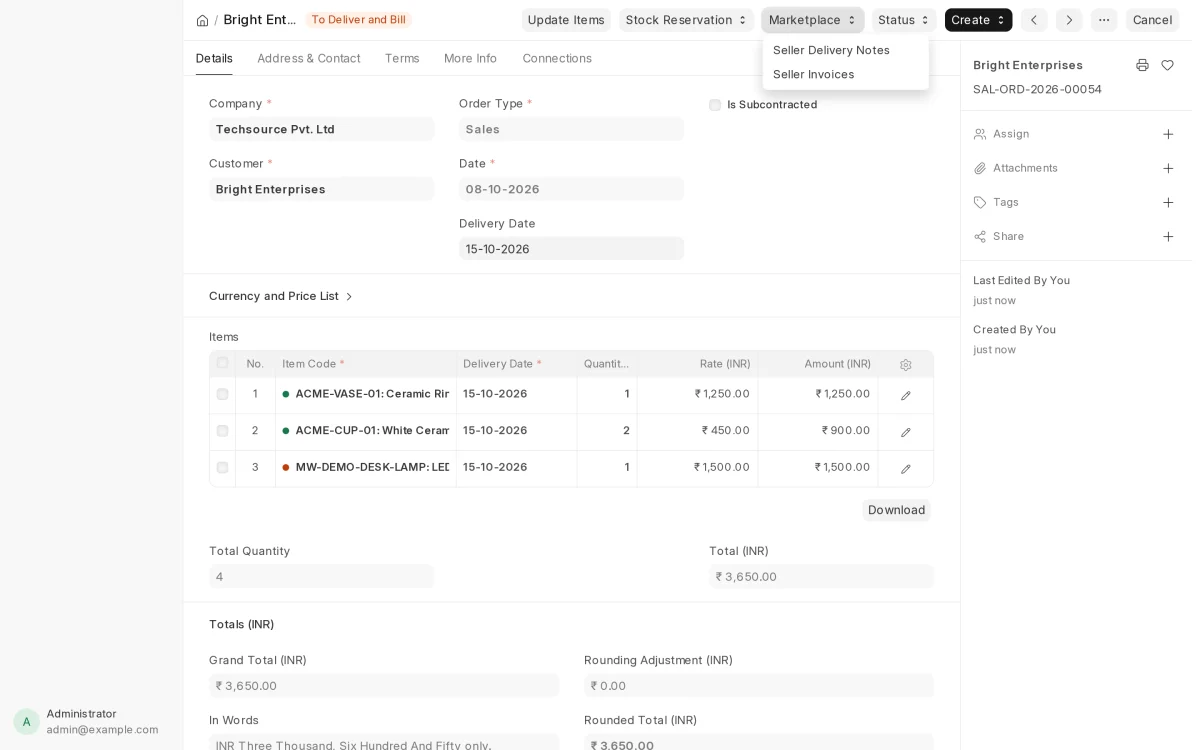
- The customer places one order, even when it holds items from many sellers. Open the Sales Order and click Marketplace.
- Click Seller Delivery Notes or Seller Invoices. The system creates one draft document for each seller.
- The seller sees their own lines in Orders on the seller dashboard. Lines from other sellers stay hidden.
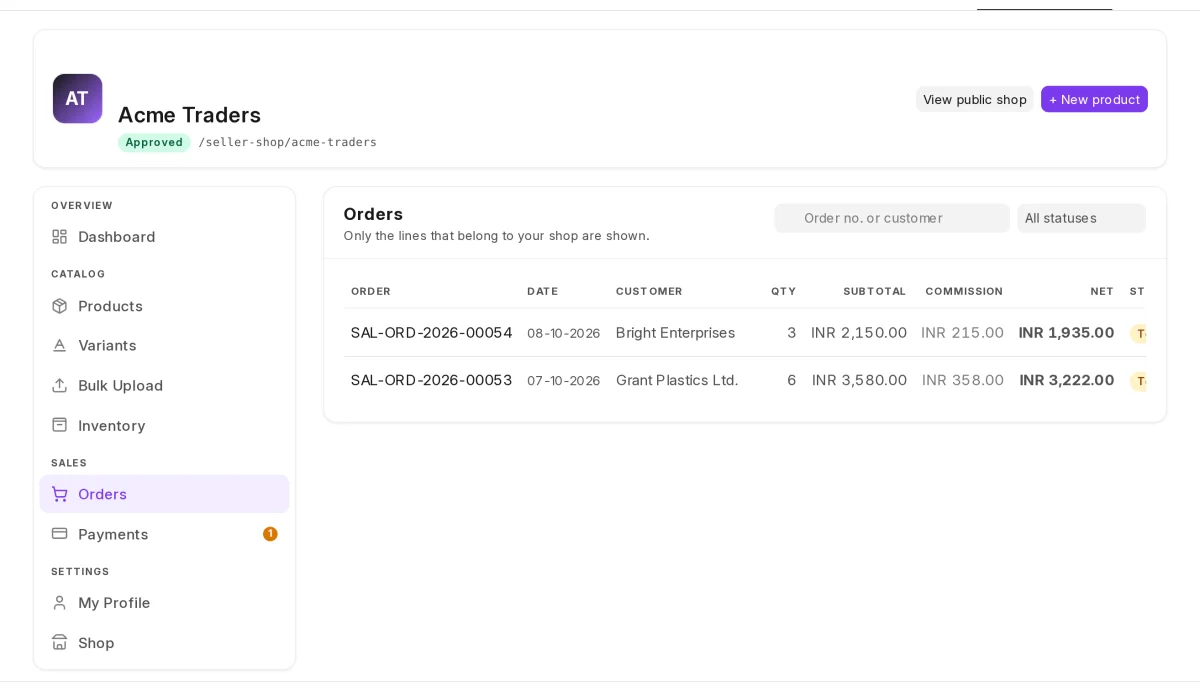
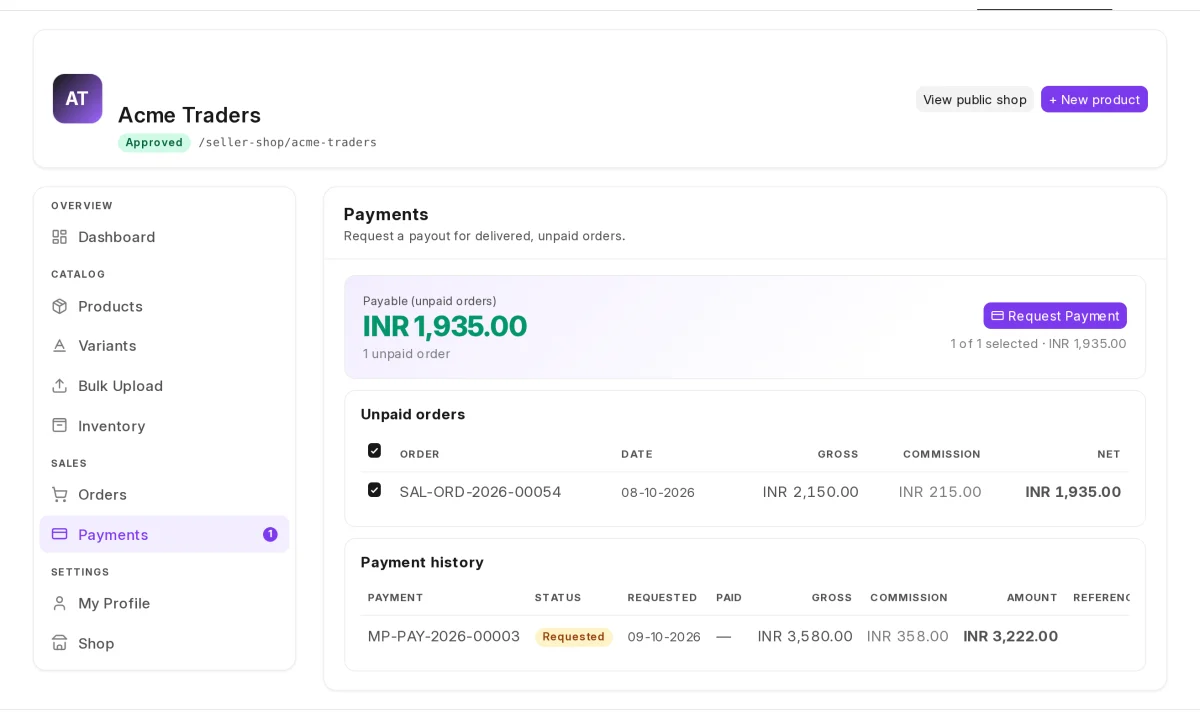
- The seller opens Payments. It shows what they can claim after your commission. They click Request Payment.

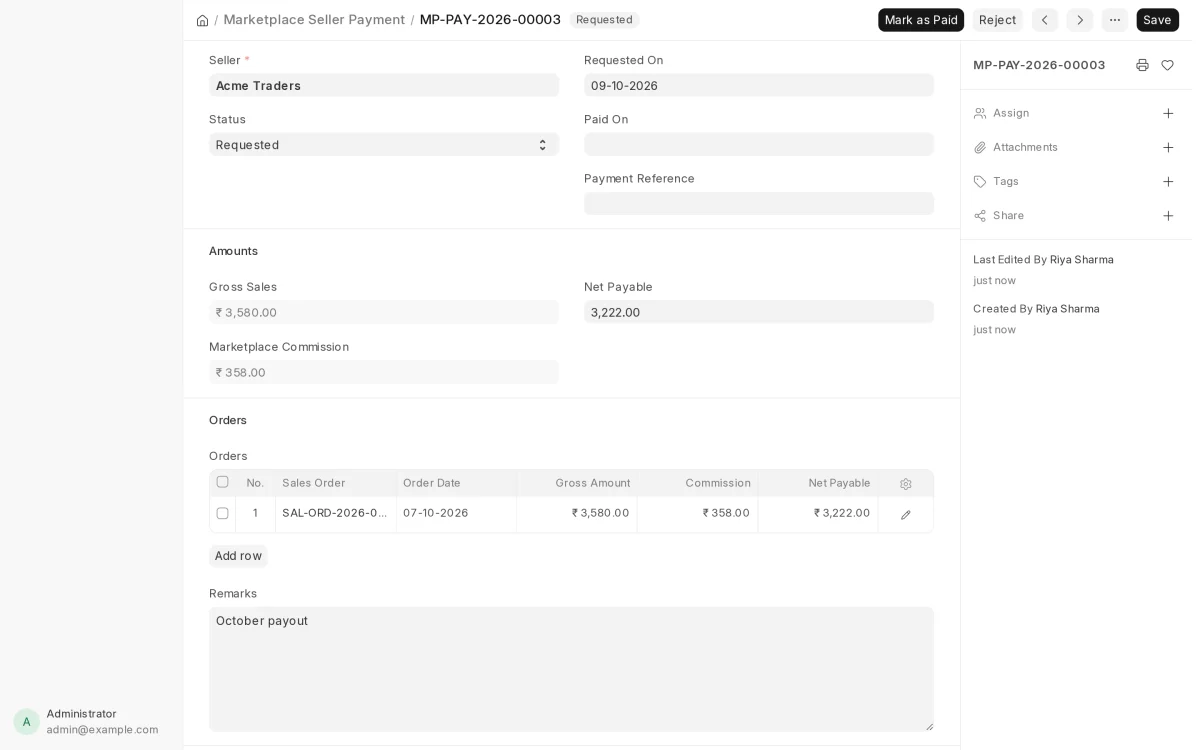
- Open the request in Marketplace Seller Payment. Check the orders and amounts. Then click Mark as Paid or Reject.
The Storefront and Seller Reviews
- Customers find every approved seller on the Our Sellers page at /sellers.

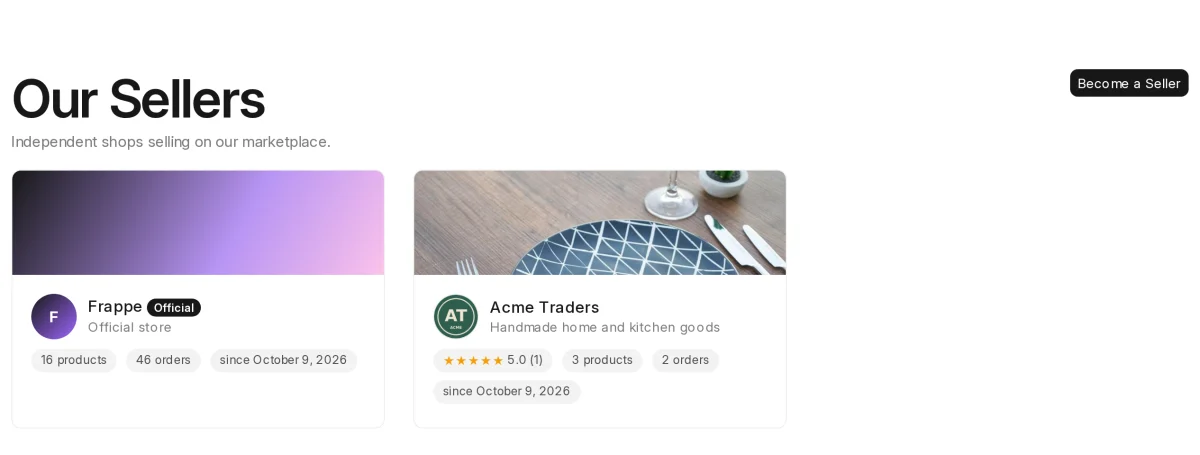
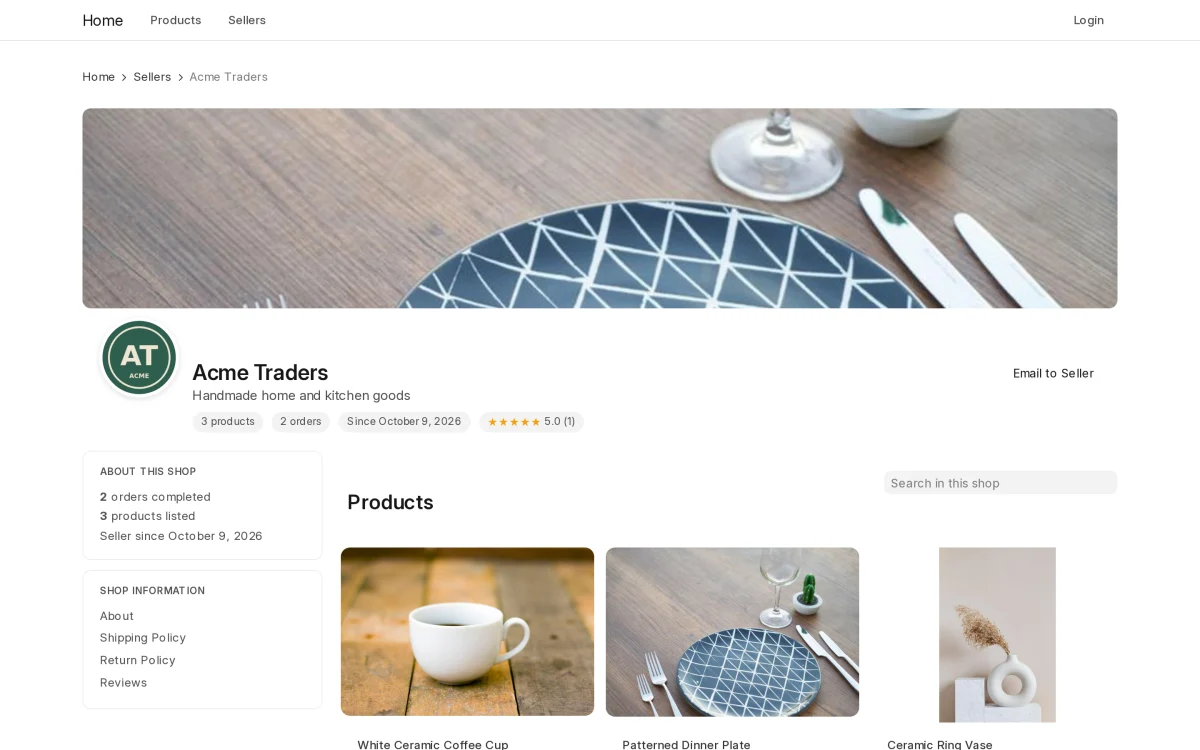
- Each seller has a shop page with their banner, products, policies and rating. Signed-in customers can rate the seller here.
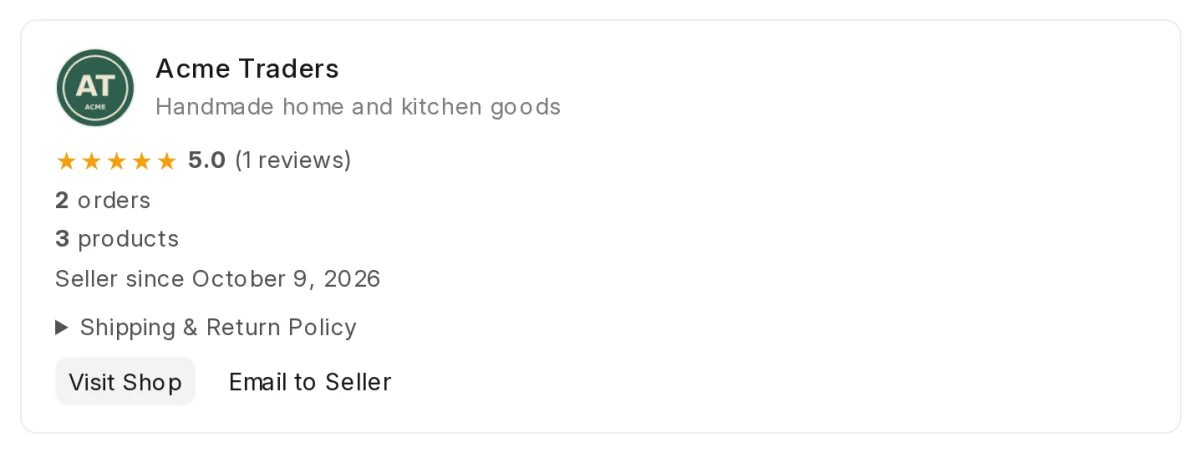
- Each product page shows a seller card. Customers can open the shop with Visit Shop or write with Email to Seller.

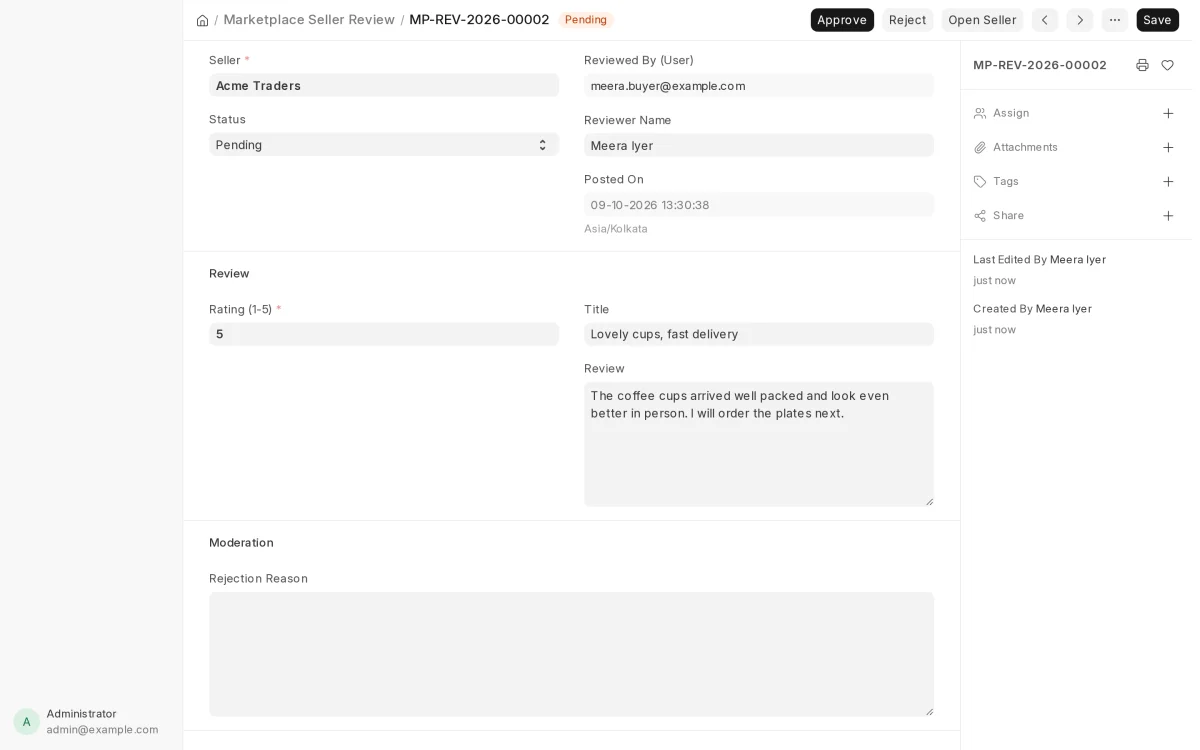
- New reviews wait in Marketplace Seller Review. Open one and click Approve to publish it, or Reject to hide it.
Tracking Sales and Analytics
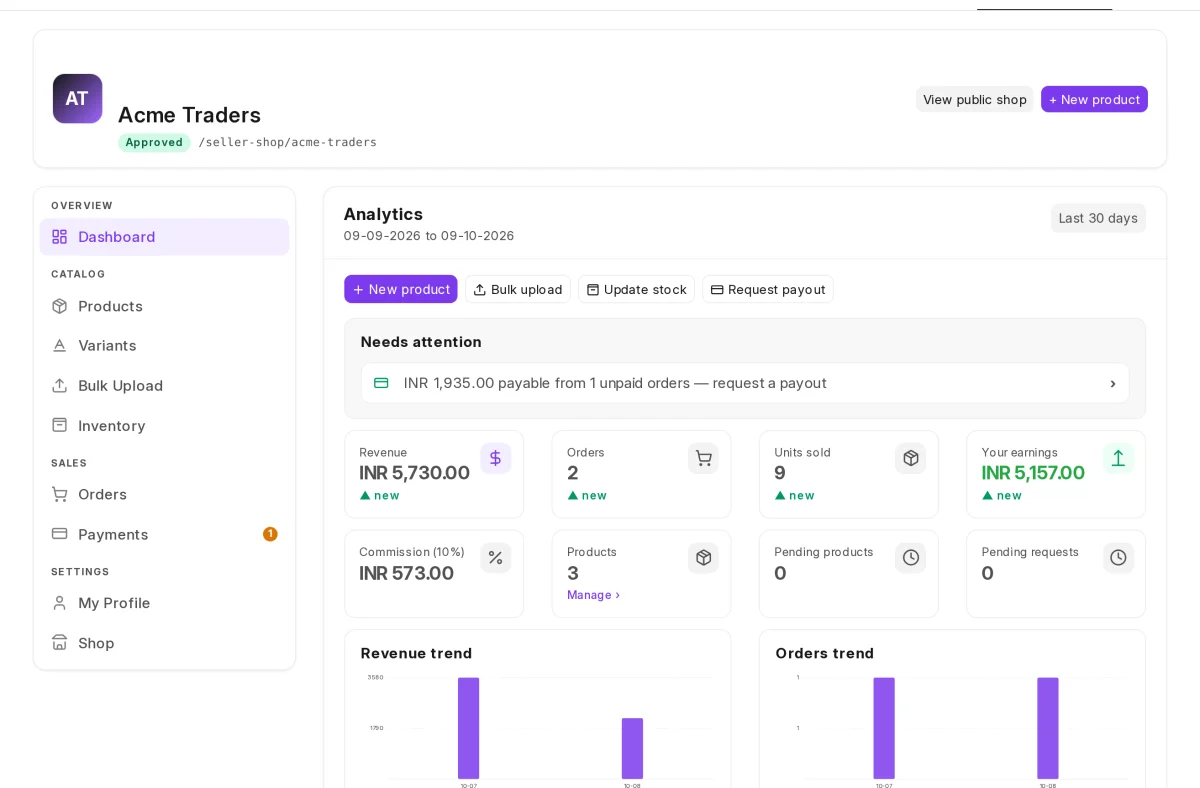
- The seller opens Dashboard for their own sales, orders, earnings and best-selling products. The Needs attention panel lists tasks such as payouts to claim.
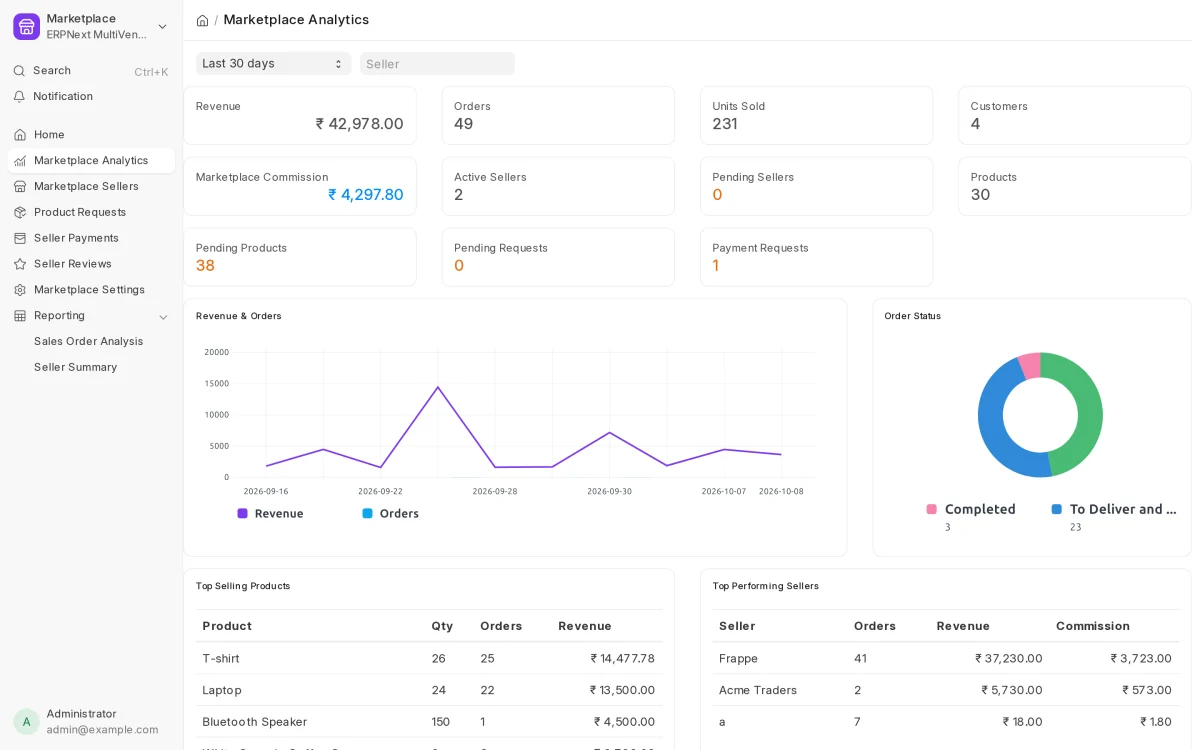
- In the desk, open Marketplace Analytics. It shows revenue, orders and commission for the whole multi vendor marketplace, with the top sellers.
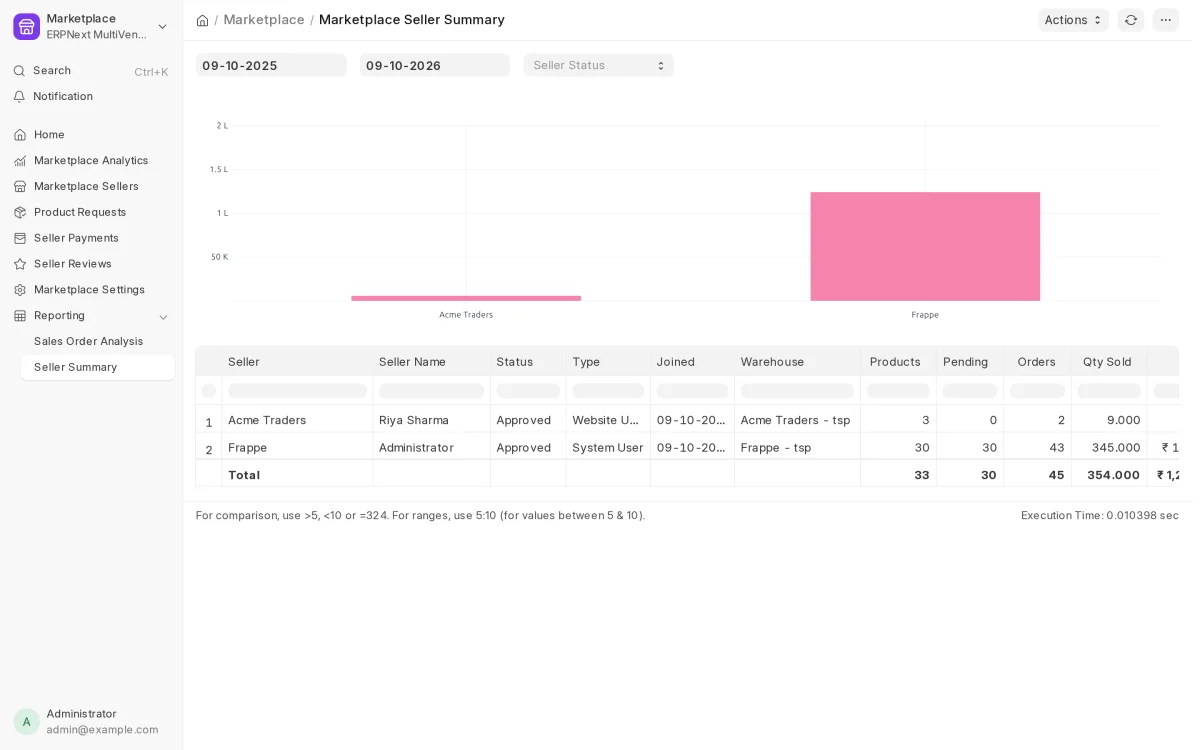
- Open the Marketplace Seller Summary report for each seller’s products, orders and sales. Use Marketplace Sales Order Analysis for order lines by seller.
Need Help?
Hope you find this guide helpful! Please feel free to share your feedback in the comments below.
If you still have any issues/queries, please create a ticket at the UV Desk.
I hope this helps. In case of any further queries, contact us at our support mail.
Thanks for paying attention!!
Current Version – 0.0.1
Supported Framework Version – ERPNext v16