User Guide of Digipin for WooCommerce
Digipin for WooCommerce helps store owners make their checkout process better. It offers a simple way to gather accurate location details from customers.
Customers can generate a Digipin using their billing address or current location and verify it directly on an interactive map before placing an order.
The plugin ensures that accurate location coordinates are stored along with the order, making deliveries more reliable.
With precise location tagging, businesses can handle orders more smoothly. The plugin lets customers add their location using either their billing address or current location.
This can be done right on the checkout page. They can also manually choose a preferred location.
Store administrators can configure all location settings from the backend, including default map coordinates, delivery radius restrictions, preferred geocoding provider, and custom map markers.
After an order is placed, the Digipin code along with the location coordinates is available in both the order summary and order details for admins and customers.
It brings more clarity to the checkout process for both customers and store owners.
Note: This plugin is now compatible with WooCommerce’s latest High-Performance Order Storage (HPOS) and Cart and Checkout block.
Features
You can also have a look at the Shiprocket Shipping for WooCommerce which allows to integrate Shiprocket logistics to the store.
You can also check the below video to check the functionality of this Woocommerce plugin

- Admin can enable or disable Digipin functionality from the backend.
- Customers can fetch their location using either their current location or billing address. Supports WooCommerce Blocks Checkout with complete state synchronization.
- Supports multiple geocoding providers including Google Maps, Mapbox, and OpenStreetMap.
- Admin can configure Delivery Radius Validation to allow orders only within a specified distance.
- Interactive map preview helps administrators set default latitude and longitude visually.
- Supports custom map markers using image URLs with automatic fallback to the default marker.
- Smart mobile interaction requires two-finger map movement to avoid accidental page scrolling.
- Billing and shipping coordinates are synchronized correctly when “Use same address for billing” is enabled.
- Digipin code along with latitude and longitude is displayed in both customer and admin order details.
Installation
The user will get a zip file that he has to upload in the “Add New” menu option in the WordPress admin panel.
For this, login to WordPress Admin Panel then Under the Dashboard, hover your mouse over the “Plugins” menu option which brings out a Sub-Menu then select the “Add New” option.
After this, you will see an option on the top of your page that is “Upload Plugin”, Now clicks the option to upload the zip file.


By clicking on the “Upload Plugin” option, below that you will see a button “Choose File” click on the button to browse for the zip file as per the snapshot below.


After browsing the file, click the “Install Now” button to install the plugin as per the snapshot.


Now when the plugin is installed correctly, you will see the success message & an option to activate the plugin.
Henceforth now, click on “Activate Plugin” to activate the installed plugin.


After the plugin is installed successfully, it is visible under the Installed Plugins section as per the image below,


Module Translation
To learn how to translate the module, you can click here.
Installation
Check how to activate your WooCommerce plugin through the purchase code and get updates on Webkul Modules directly on the Plugins page.
Digipin for WooCommerce Configuration
Once the plugin is successfully installed, admin proceeds for its configuration. To do so, they navigate to Webkul WC Addons > Digipin from the admin sidepanel.

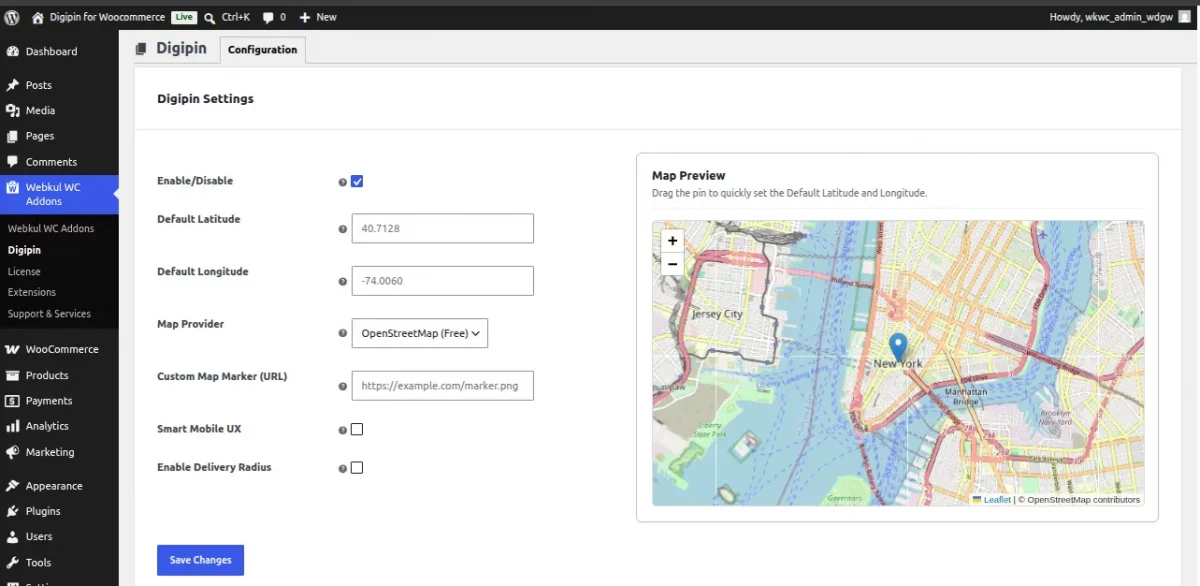
Enable/Disable
Enable or disable the Digipin functionality for customers.
When enabled, customers can verify their delivery location while placing an order or updating their address.
Default Latitude & Longitude
Set the default map center by entering the latitude and longitude coordinates.
These coordinates determine the initial location displayed on the map before customers select their delivery location.
Interactive Map Preview
Alongside the configuration settings, the plugin provides a live Map Preview.
Instead of manually determining coordinates, the administrator can simply drag the map pin to the desired location.
The selected position automatically updates the Default Latitude and Default Longitude fields, making configuration faster and more accurate.
Here, the admin can Enable or Disable the Digipin functionality for the customers and tap on the Save Changes button accordingly.

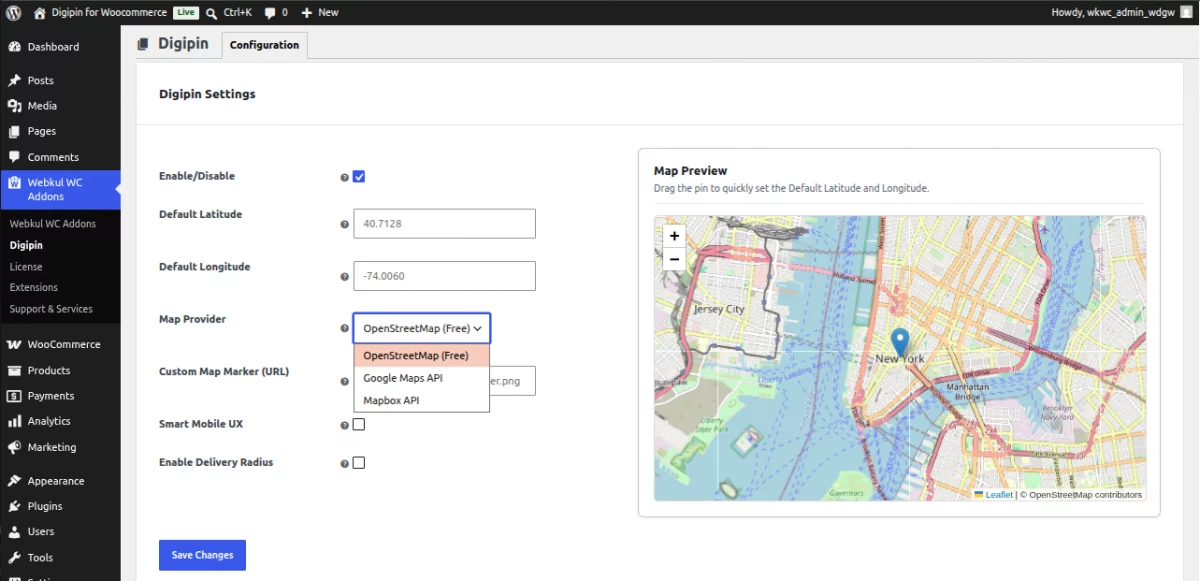
Map Provider
Choose the map service used for location detection.
The plugin supports multiple providers including:
- OpenStreetMap
- Google Maps
- Mapbox
This allows store owners to select the provider that best fits their business requirements.
Google Maps API Configuration
If you choose Google Maps as the map provider, you’ll need to configure a Google Maps API key.
Follow these steps:
- Go to the Google Cloud Console and create a new project.
- Enable both the Maps JavaScript API and Geocoding API for your project.
- Navigate to APIs & Services → Credentials.
- Generate a new API key and copy it.
- Enter the generated API key in the plugin’s Google Maps API Key field and save the configuration.
Read the complete Google Maps API setup guide.
Mapbox API Configuration
If you select Mapbox as the map provider, you’ll need a Mapbox access token.
Follow these steps:
- Create a free account on Mapbox.
- Open your Account Dashboard and navigate to Access Tokens.
- Copy your Default Public Token, which starts with pk.
- Paste the token into the plugin’s Mapbox Access Token field.
- Save the configuration.
Read the complete Mapbox API setup guide.
Custom Map Marker
Upload or specify the URL of a custom marker image to personalize the map appearance.
If no custom marker is provided, the plugin automatically uses the default Digipin location marker.
Smart Mobile UX
Enable Smart Mobile UX to improve the map interaction on mobile devices.
When enabled, customers must use a two-finger gesture to move the map. This prevents accidental page scrolling while selecting the delivery location during checkout.
Enable Delivery Radius


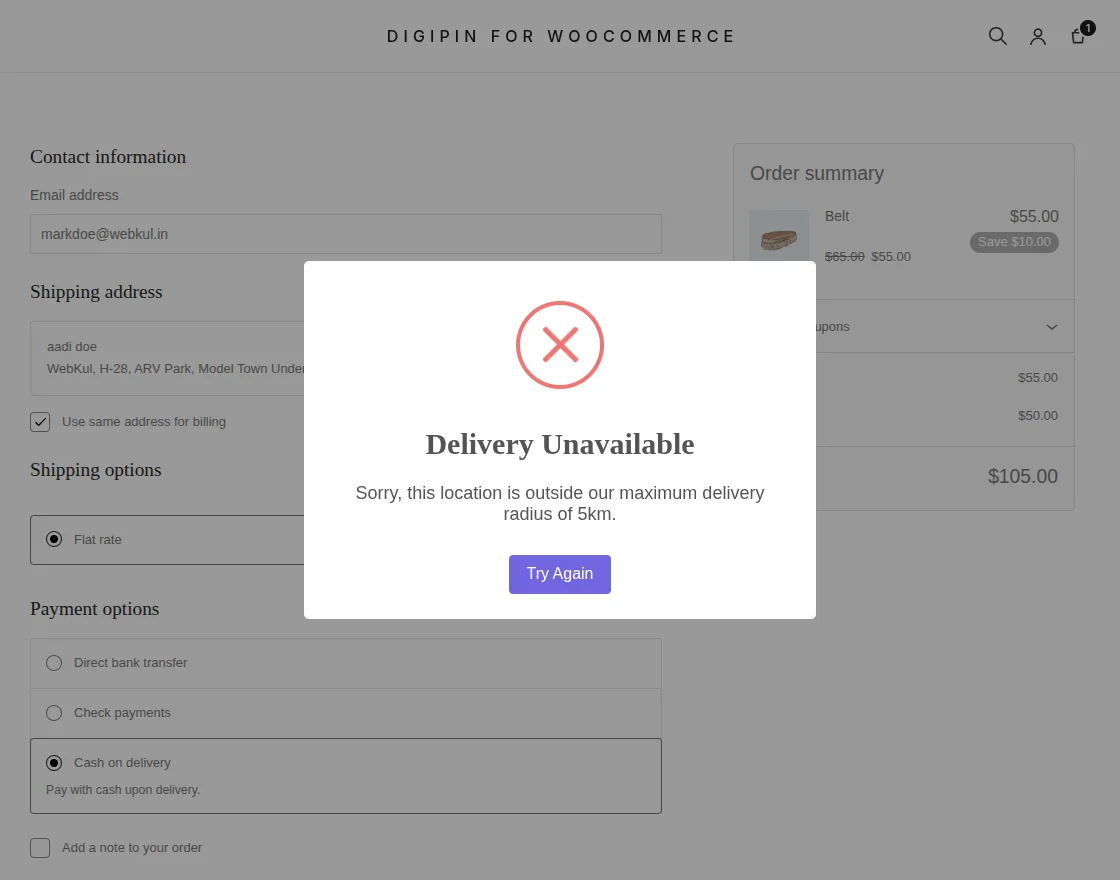
Enable Delivery Radius Validation to restrict deliveries to a predefined service area.
Once enabled, an additional field appears where the administrator can specify the maximum delivery radius in kilometers.
Only customers whose selected delivery location falls within this radius can successfully place an order.
Delivery Radius (km)
Enter the maximum delivery distance supported by your business.
For example, entering 5 km allows orders only when the customer’s selected location is within five kilometers of the configured default location.
Finally, click Save Changes to apply the configuration.
Now, let’s check the Digipin feature on the storefront.
Digipin – Customer End
Now that Digipin is enabled on storefront, let’s check its working on the storefront for customers.
Once a customer adds a product to their cart and proceeds to the Checkout page, here, they’ll have to get the Location fetched.

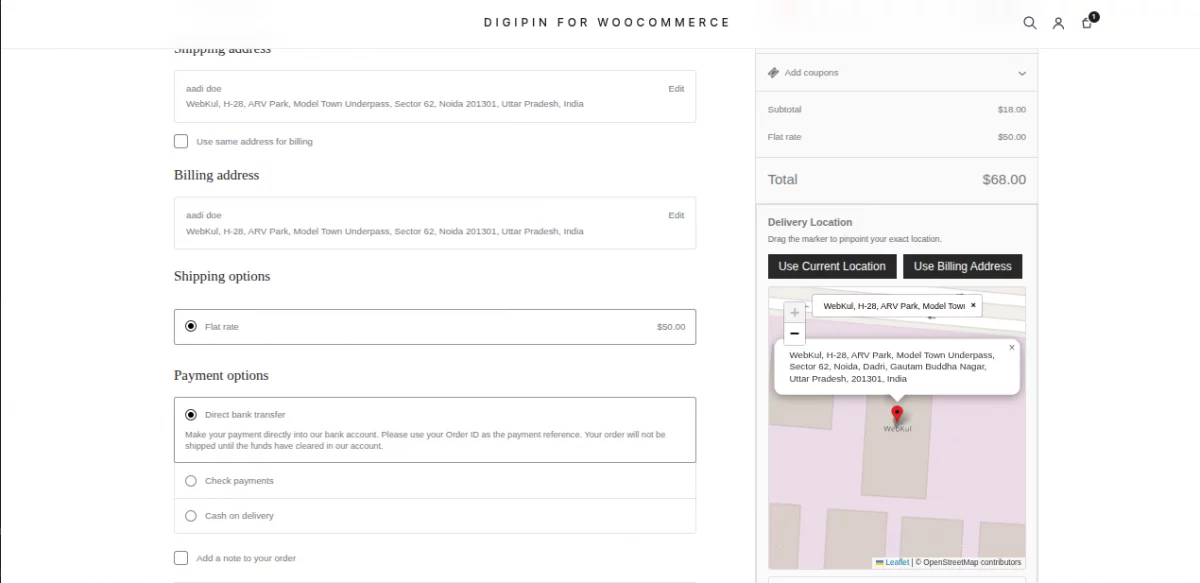
Customers get 2 options for Digipin location fetching as per the below image,
Use Current Location – If Customer tap on this option, then the current geolocation (Latitude and Longitude) will be fetched and Digipin will be generated.
Use Billing Address – If the Billing address is selected, then the billing address entered by customer shall be used to fetch the location and Digipin will be generated accordingly.
If customer fetches current location and geolocation is not supported, then a warning popup is displayed to enter the Billing address instead for fetching location,

Next, If Billing Address is selected, a popup is displayed which notifies that location is being fetched as per the below image,

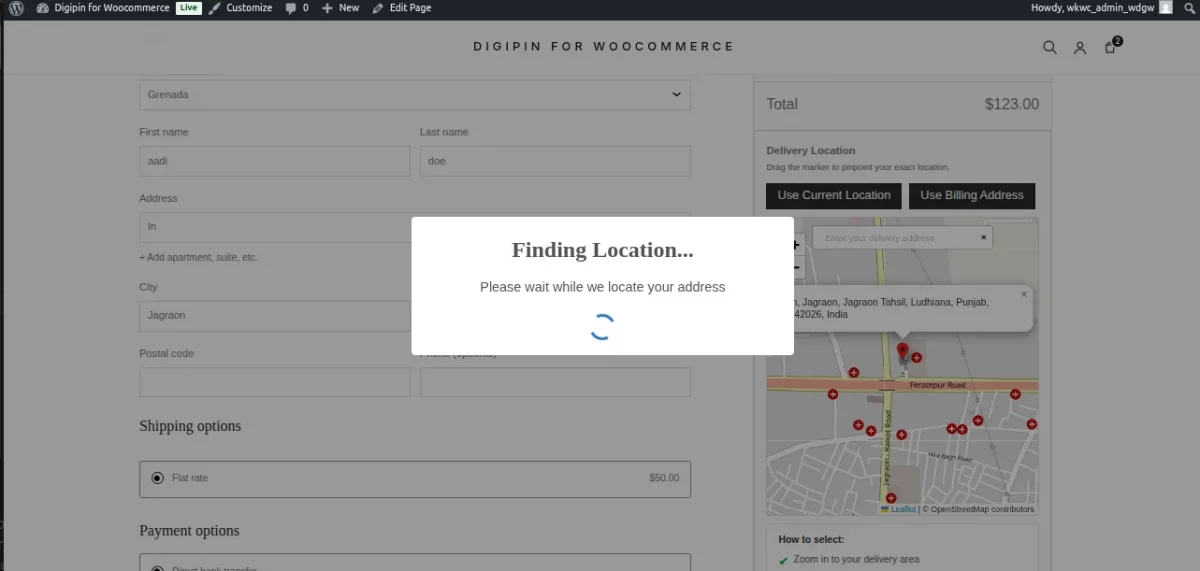
When the location is fetched successfully, it’ll be visible on the map along with the address details,
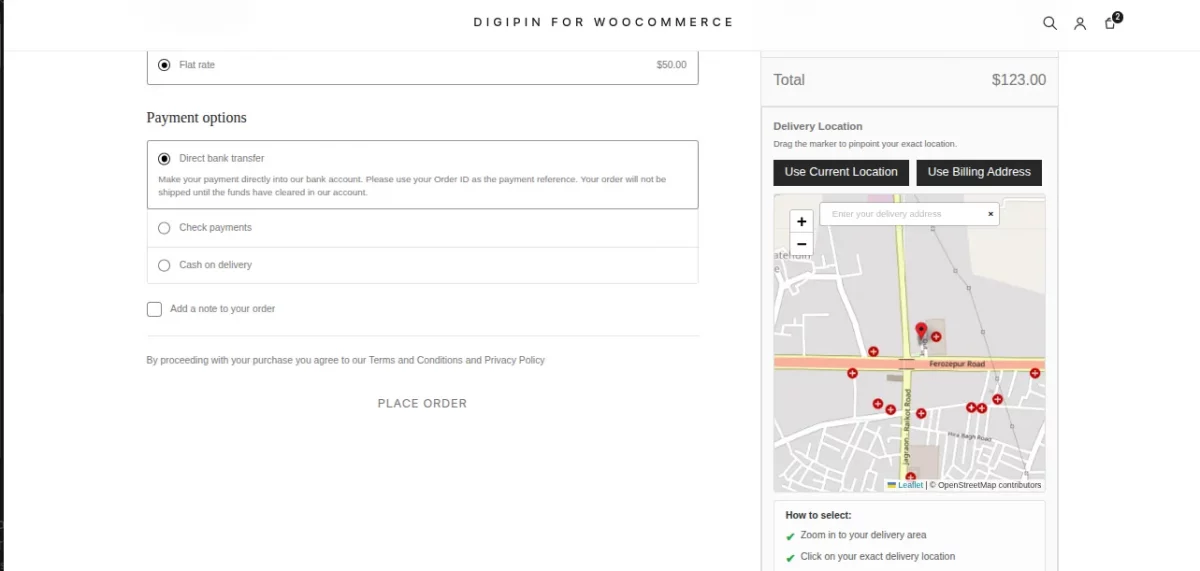
From here, Customers can either Continue Anyway or also Fix Address as per requirement and proceed to place order.
Managing Delivery Location from My Account
Customers can also configure their delivery location while updating their Billing Address from the My Account → Addresses section.
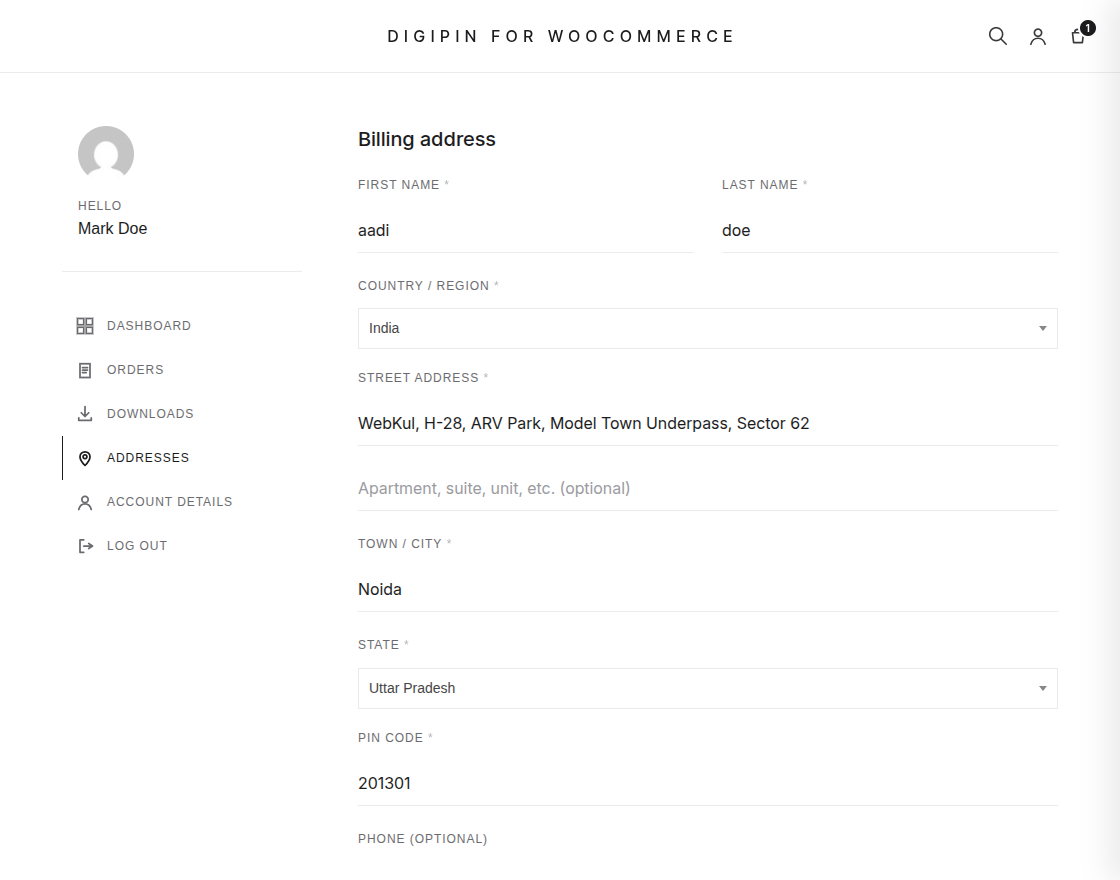
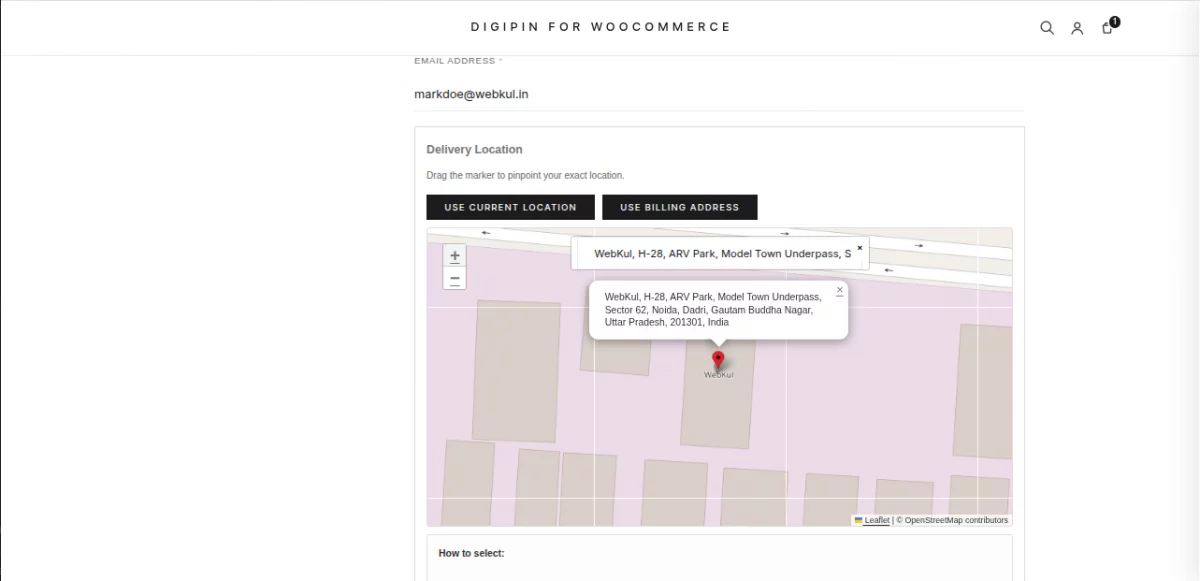
The address form includes the same Delivery Location map available during checkout.
After entering or updating the billing address, customers can:
- Fetch their current location.
- Use the billing address to locate the address automatically.
- Fine-tune the marker position on the map.
- Verify the selected location before saving the address.
Finally, clicking Save Address stores both the billing address and its associated delivery coordinates for future orders.
Digipin Information in Order Details
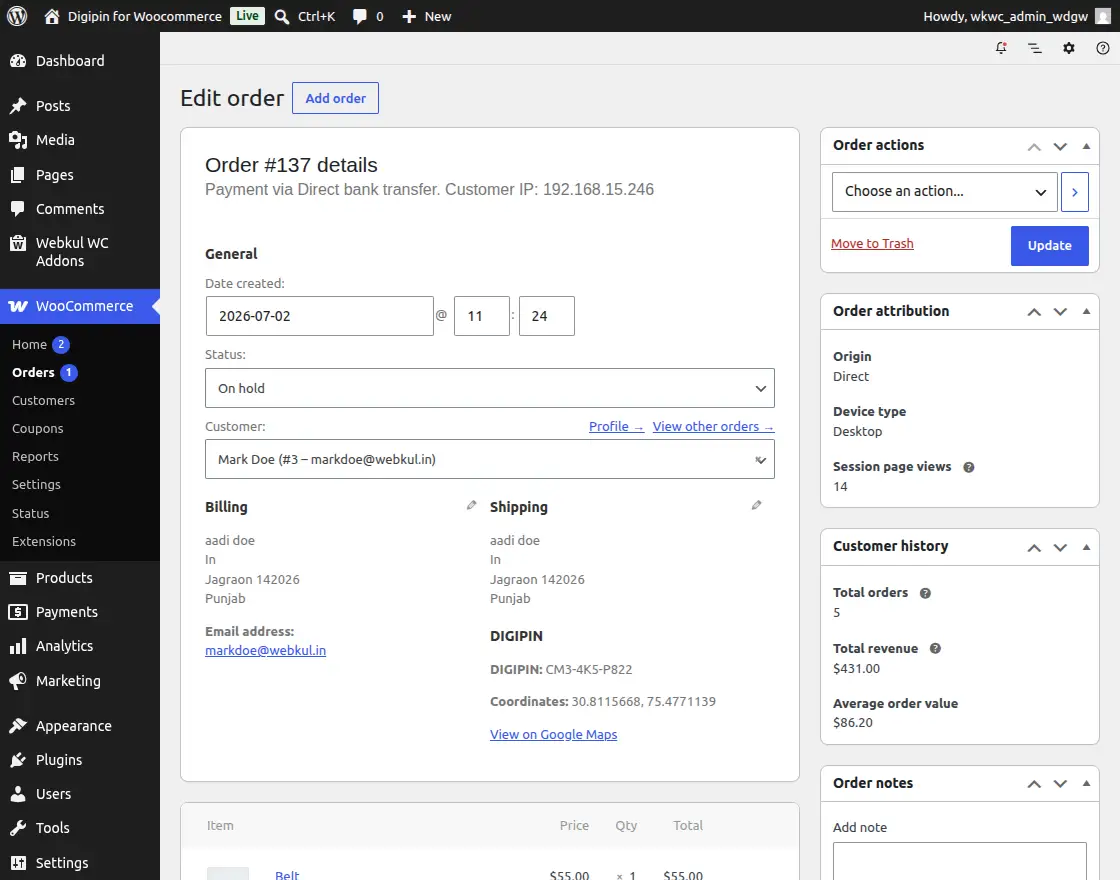
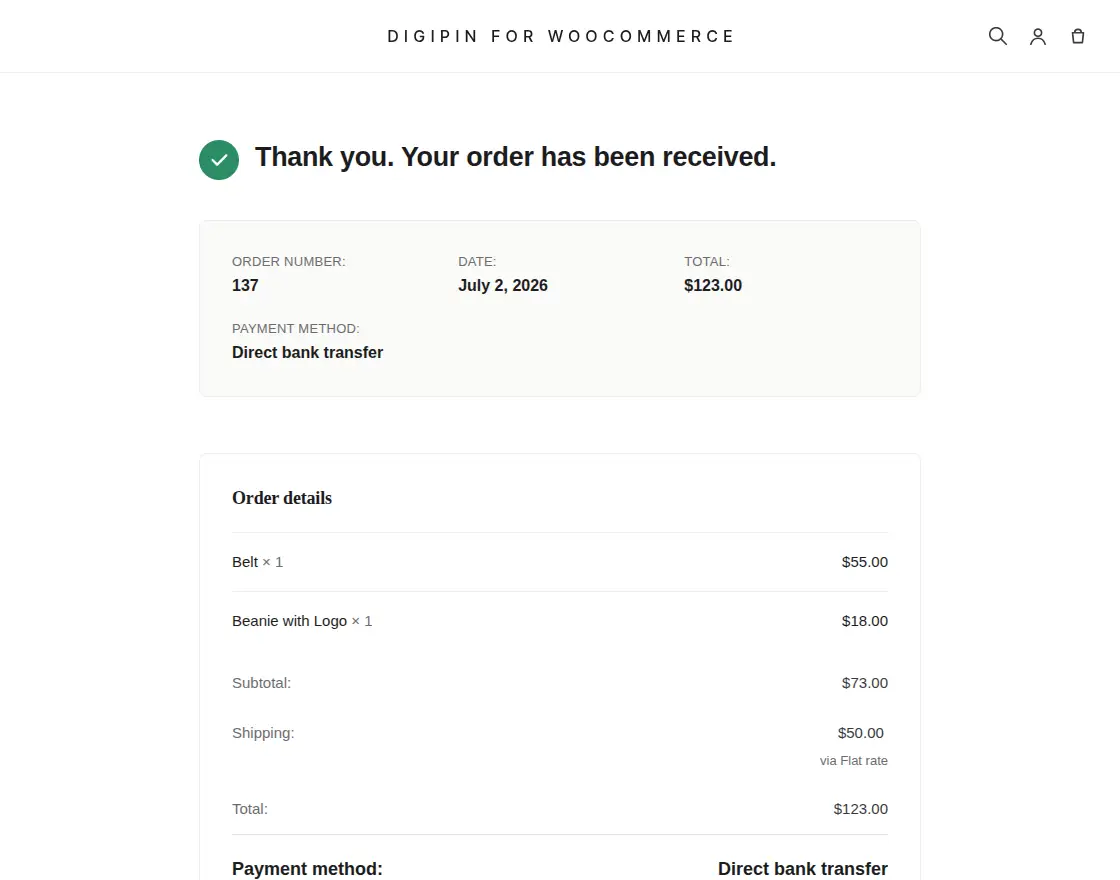
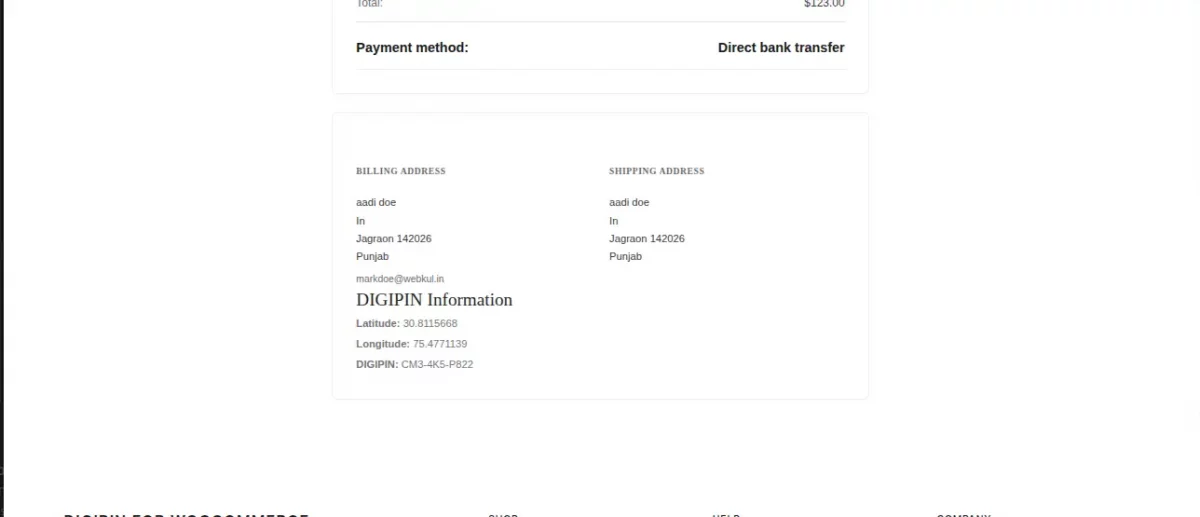
The Digipin code along with the Latitude and Longitude co-ordinates are visible in the Orders section for both Admin and Customer end.
Admin End
In the Orders Section, Admin can view the Digipin and Co-ordinates as per the location fetched.
Customer End
Customers can also check the Digipin information in their Order section.

Support
So that is all for the Digipin for WooCommerce plugin.
If you need any further support, please drop us an email on support@webkul.com or create a ticket.