User Guide for CS-Cart Power BI Connector
CS-Cart Power BI Connector is a powerful integration add-on that connects CS-Cart and Multi-Vendor stores directly with Microsoft Power BI.
It enables store administrators to synchronize critical storefront data with Power BI datasets, thereby transforming operational data into meaningful business intelligence and interactive reports.
Moreover, using secure Azure Active Directory (Azure AD) OAuth 2.0 authentication, the connector ensures a reliable connection between your eCommerce platform and Microsoft Power BI.
Furthermore, once connected, administrators can automatically push store data, register dataset schemas, and visualize key business metrics through embedded Power BI reports available directly within the CS-Cart administration panel.
Whether you need sales analysis, customer insights, inventory tracking, vendor performance monitoring, or return management reporting, the CS-Cart Power BI Connector provides a centralized analytics solution that helps businesses make informed decisions based on real-time data.
Note:
Before installing the add-on, extract the downloaded package.
- Install the License Manager add-on first.
- Then install the required add-on.
- Follow the license activation steps to generate your license key.
Features of CS-Cart Power BI Connector
- Azure AD OAuth 2.0 authentication for secure Microsoft Power BI connectivity.
- Tenant-specific configuration for Microsoft Azure environments.
- Client ID configuration for Power BI authentication setup.
- Client Secret configuration for secure API access.
- Direct integration between CS-Cart and Microsoft Power BI.
- Direct integration between Multi-Vendor and Microsoft Power BI.
- Power BI dataset schema registration from the storefront.
- Custom dataset push engine for data synchronization.
- Automatic creation of Power BI tables based on storefront entities.
- Synchronization of Orders data to Power BI datasets.
- Synchronization of Order Items data for transaction reporting.
- Synchronization of Customer data.Synchronization of Product and Category data.
- Synchronization of Payment, Shipping Method, Tax, and Promotion data.
- Synchronization of Vendor data for Multi-Vendor reporting.
- Synchronization of RMA Return Request data.Manual bulk synchronization of storefront data.
- Event-driven synchronization for real-time data updates.
- Real-time synchronization on order placement and product update events.
- Embedded Power BI reports and report creator accessible directly from the CS-Cart administration panel.
How To Upload And Install
When you download the User Guide for CS-Cart Power BI Connector Add-on you’ll get one zip file, one install.txt file, and a relevant User Guide manual doc. Read it carefully for proper configuration.
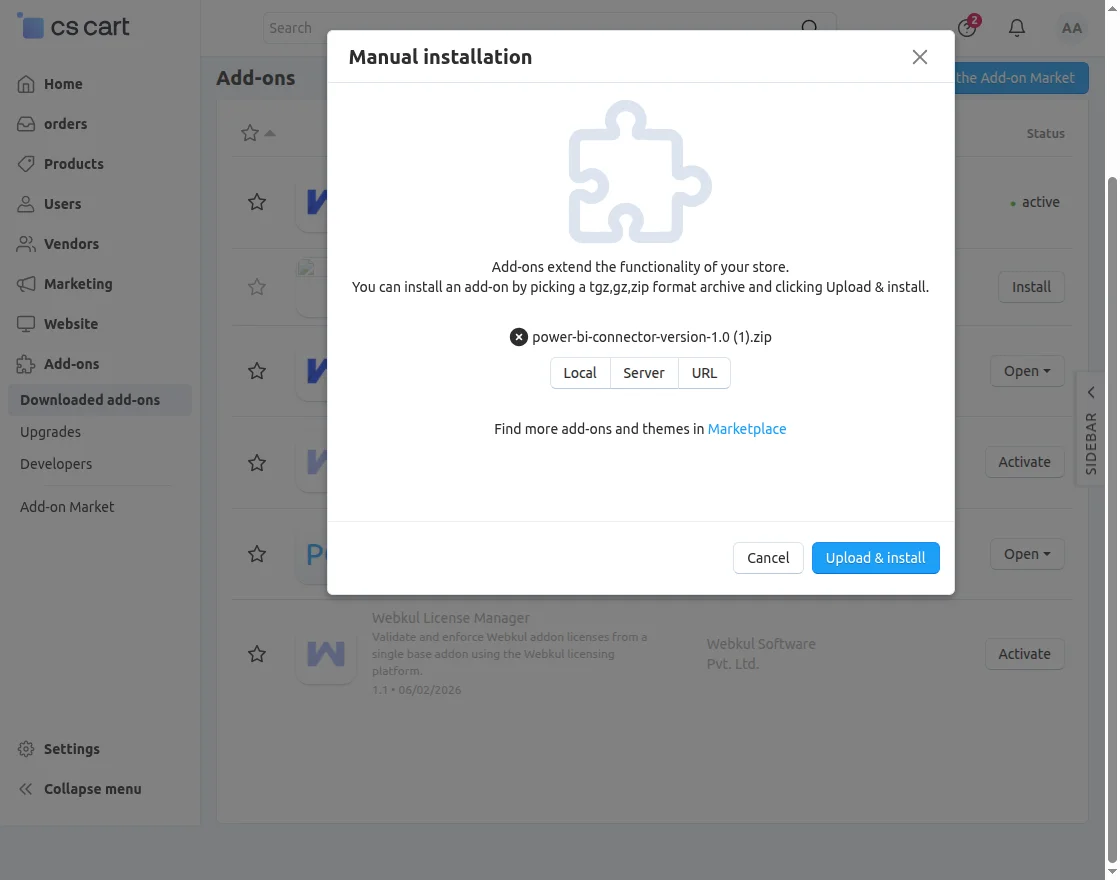
Go to Manage Add-ons, and click on the Settings icon > Manual Installation as shown below in the snapshot.


Click on “Local” to browse the zip file and then click on “Upload & Install” as shown below in snapshot.
Once the addon is installed successfully, we need to configure the settings of the addon.
Power BI Connector – General Settings (CS-Cart)
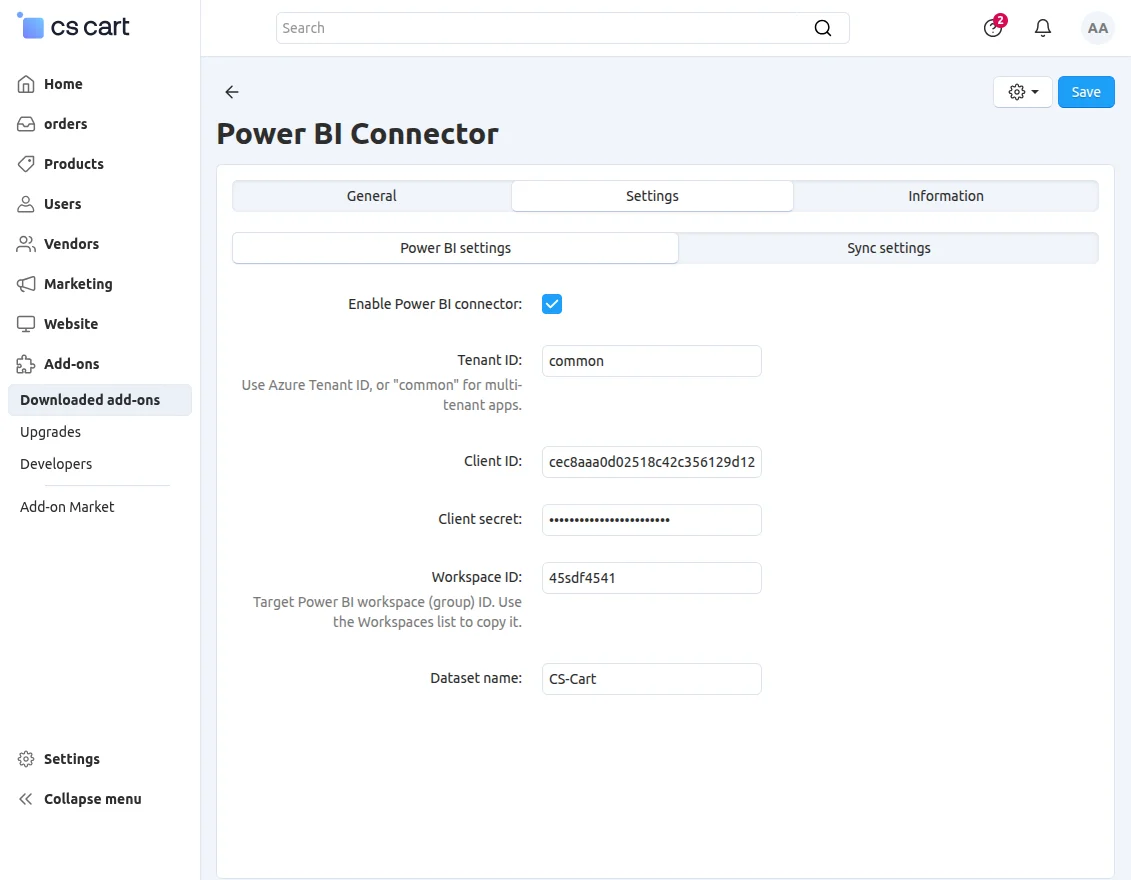
Moreover, the General Settings section of the Power BI Connector in CS-Cart is used to configure the connection between CS-Cart and Microsoft Power BI.
These settings are required to authenticate the application and define where the data should be sent in Power BI.
- Enable Power BI Connector – Activates or deactivates the Power BI integration. When enabled, data synchronization between CS-Cart and Power BI is allowed.
- Tenant ID – Specifies the Azure Active Directory tenant used for authentication.
You can enter a specific Azure Tenant ID or use “common” for multi-tenant applications. - Client ID – The unique application ID registered in Azure AD.
It is used to authenticate CS-Cart with Power BI services. - Client Secret – A secure key generated in Azure AD for authentication.
This value is hidden for security reasons and should be kept confidential. - Workspace ID – The Power BI workspace (group) ID where datasets and reports will be published.
You can copy this ID from the Power BI Workspaces section. - Dataset Name – Defines the name of the dataset created in Power BI.
Example: CS-Cart.

Power BI Connector – Sync Settings (CS-Cart)
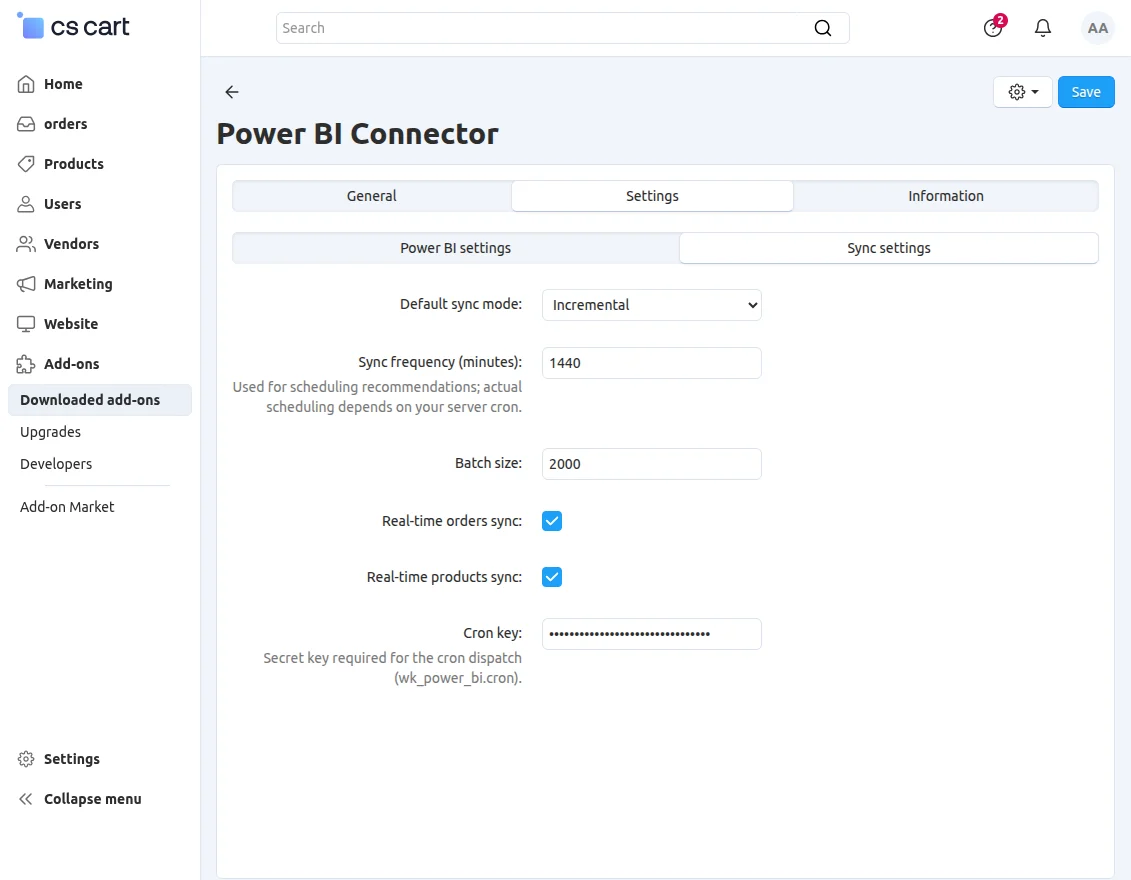
The Sync Settings section in the Power BI Connector allows administrators to control how data synchronization is processed between CS-Cart and Power BI.
These settings define the sync mode, scheduling behavior, batch processing, real-time updates, and cron security configuration.
- Default Sync Mode – Determines how data is synchronized with Power BI.
Incremental sync transfers only new or updated records, improving efficiency and reducing server load. - Sync Frequency (Minutes) – Defines the interval for scheduled synchronization.
Default value is 1440 minutes (24 hours). The actual sync execution depends on the server cron configuration. - Batch Size – Sets the number of records processed in each sync cycle.
Default value is 2000, helping to balance performance and system resource usage during large data transfers. - Real-Time Orders Sync – Enables immediate synchronization of order data to Power BI whenever an order is created or updated in CS-Cart.
- Real-Time Products Sync – Enables instant synchronization of product updates, ensuring Power BI always reflects the latest catalog information.
- Cron Key – A secure key used for cron-based sync execution (
wk_power_bi.cron).
It protects synchronization endpoints and should remain confidential.
Power BI Section in CS-Cart Admin Panel
The Power BI section in the CS-Cart admin panel is available under the Marketing menu after enabling the Power BI Connector.
It provides a centralized interface to manage the integration between CS-Cart and Microsoft Power BI.
Moreover, this section allows administrators to connect their Power BI account, manage workspaces and datasets, run synchronization, view reports, and monitor logs for all data transfer activities.
1. Connect
The Connect tab is used to establish and manage the connection between CS-Cart and Microsoft Power BI.
Displays connection status (connected/disconnected)
Authenticates the store with Azure Power BI services
Uses Tenant ID, Client ID, and Client Secret for secure login
Ensures successful linkage before data sync begins
- Workspace ID – Displays the Power BI workspace (group) ID where CS-Cart data is being published.
Example:4be6b20e-8bf3-4cb3-95af-f29a941 - Dataset ID – Shows the unique identifier of the dataset created in Power BI for CS-Cart data.
Example:ede4a625-2141-4fab-b318-502407 - Last Successful Sync – Displays the date and time of the most recent successful data synchronization between CS-Cart and Power BI.
Example:2026-05-29 05:47

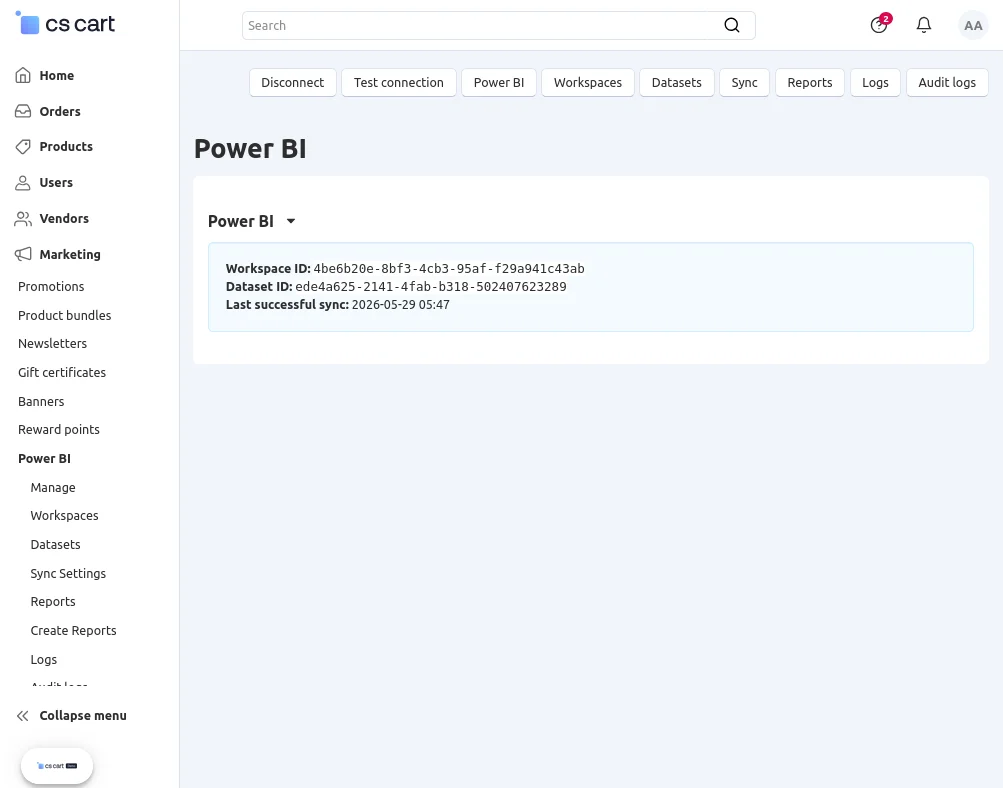
It provides a quick overview of the active workspace used for data synchronization and reporting.
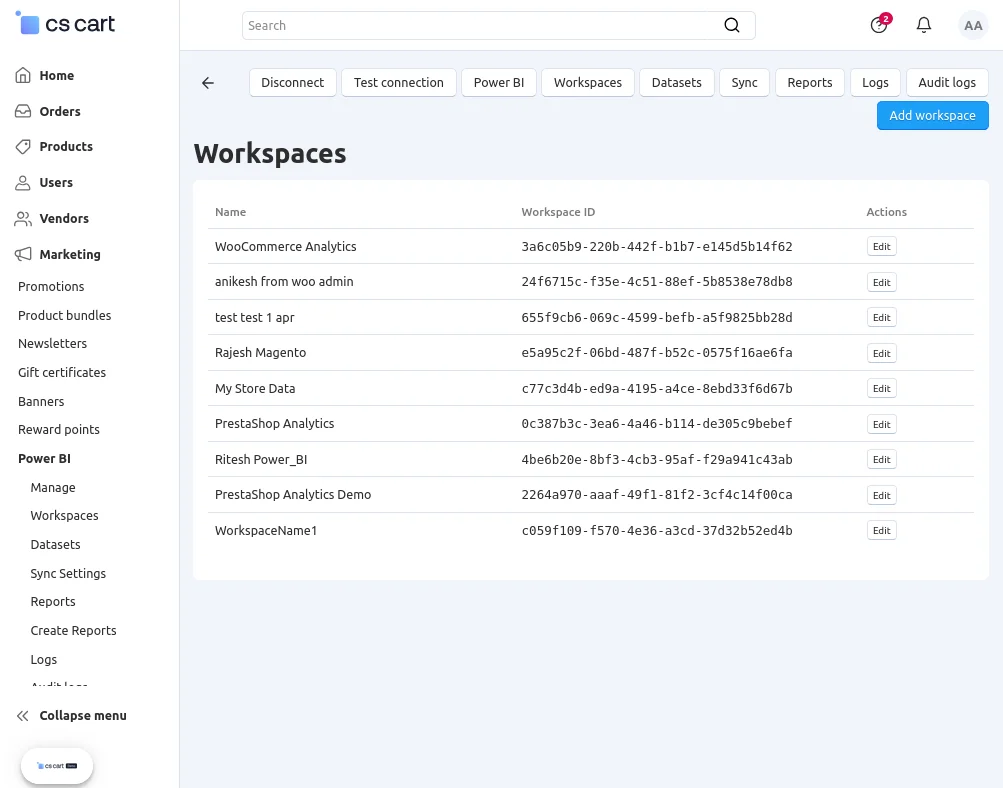
2. Power BI Workspaces
The Workspaces tab displays all available Power BI workspaces linked to the connected account.
- Lists all accessible Power BI workspaces (groups)
- Helps select the target workspace for data publishing
- Ensures correct workspace mapping for datasets and reports
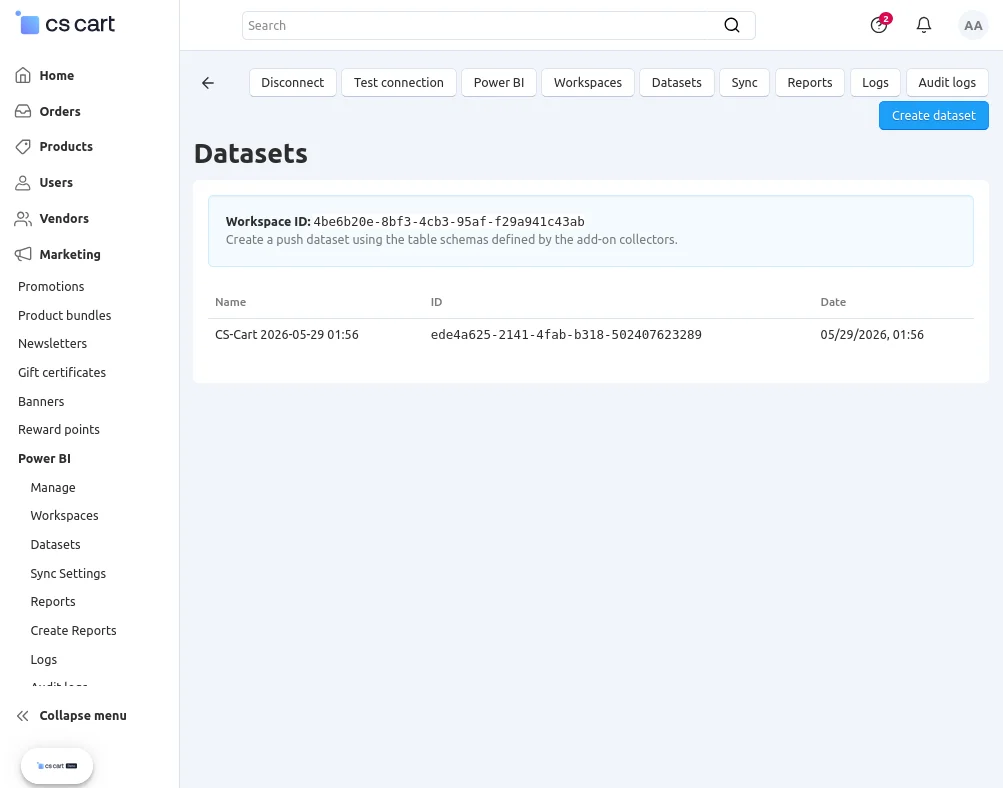
3. Datasets
The Datasets tab manages datasets created in Power BI from CS-Cart data.
- Shows all generated datasets (e.g., CS-Cart dataset)
- Allows dataset selection and mapping
- Ensures structured data is available for reporting and dashboards
4. Sync
The Sync tab controls data synchronization between CS-Cart and Power BI.
- Triggers manual synchronization of data
- Supports syncing of orders, products, and other store data
- Works alongside cron-based or real-time sync settings
- Displays sync status and progress

5. Reports
The Reports tab provides access to Power BI reports linked with the connected workspace.
- Displays available Power BI reports
- Allows quick navigation to analytics dashboards
- Helps visualize sales, products, and customer insights
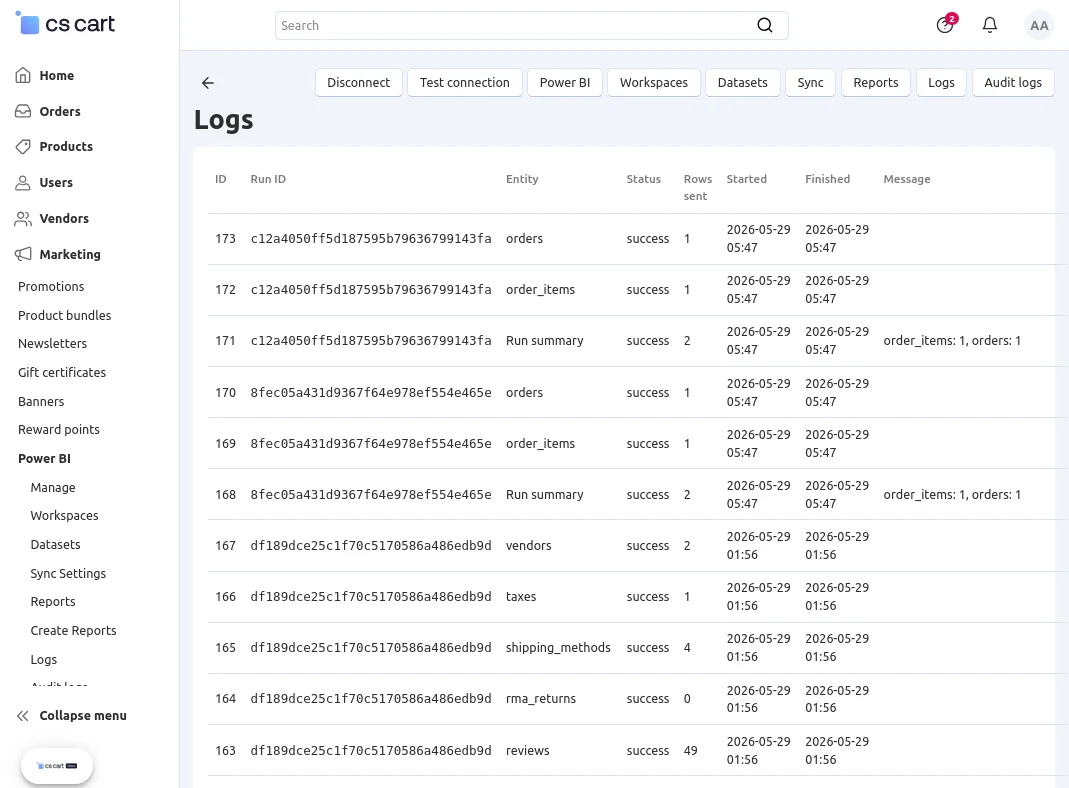
6. Logs
The Logs tab records synchronization activities.
- Tracks all sync operations (success and failure logs)
- Helps debug synchronization issues
- Provides timestamped records of data transfer activities

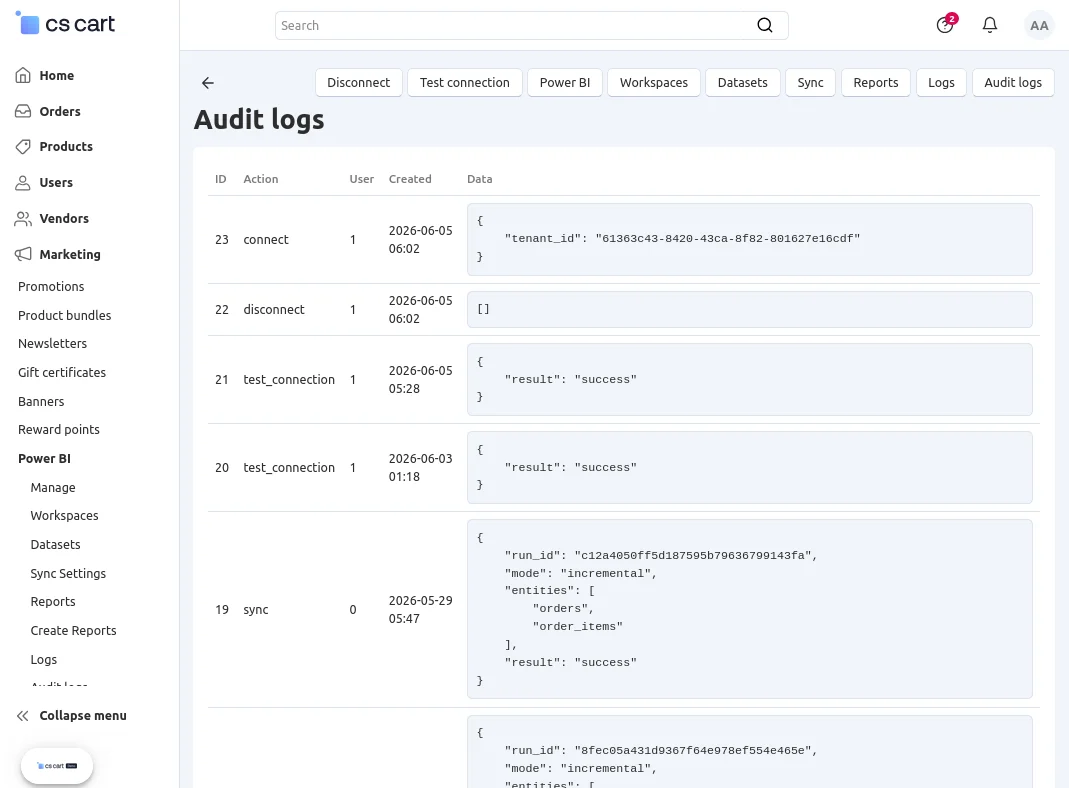
7. Audit Logs
The Audit Logs tab maintains a detailed history of all actions performed in the Power BI section.
- Records user activities and configuration changes
- Helps monitor system usage and security actions
- Useful for compliance and troubleshooting purposes
How to get the Credentials?
First of all, you must have a Microsoft Outlook account to access the Power BI account and the Microsoft Azure account
(to create the application there to get the API credentials to be used while configuring at CS-Cart backend).
To create a Microsoft Outlook account, tap this link.
Generate the keys at Azure :
Navigate to the Microsoft Azure login section, and tap on the Sign In option in the top right-hand corner.


This brings the section to sign in with the Microsoft account. Here, enter the details and tap the next button. After that, enter your password and tap the Sign in button.


After signing in, go to all services and tap the Active Directory option.


This brings up the below section. Here tap on the App registrations option on the side panel.


After that, tap the New Registration option to register a new app. Now, enter the app name choose the supported account types, and tap the Register button after that.


Thereafter, you can see the credentials being generated for the application that we created.


Now here, you will get the –
- Client ID
- Tenant Id
How to get the Client Secret:
Now, in the same side panel section, go to Certificates & Secrets and tap the New Client Secret option.


As a result, the section to add a description for the Client Secret appears. After that, enter the required details and finally, click the Add button.


After tapping the Add button, the Client’s secret key will be generated.


Note: You need to copy the Value for the secret key. This is displayed only once, so copy it somewhere safe for use at a later time in the extension configuration part.
Configure Platform & Set Redirect URL:
Now, on the side panel for the app, go to Authentication->add a platform->web.


After tapping on the Web option, enter the redirect URL. Next, provide the base URL of your website, such as www.example.com/.
Then, grant the required permissions. Finally, click the Configure button to complete the app setup.


Access your Power BI Console:
Now, navigate to this link to access your Power BI console.
You can log in using your Microsoft Outlook account credentials.

After login, you can see your Power BI dashboard as per the snapshot below.


Next, from the side panel, select the Workspace you want to work on. After that, you can view all the Workspaces imported from the CS-Cart store.rt store.
Select the one that you want to work on.

First, choose the Orders data that was created in the CS-Cart store. Afterward, you will see the dataset that was created at the CS-Cart store end. Then, select the same dataset to proceed.


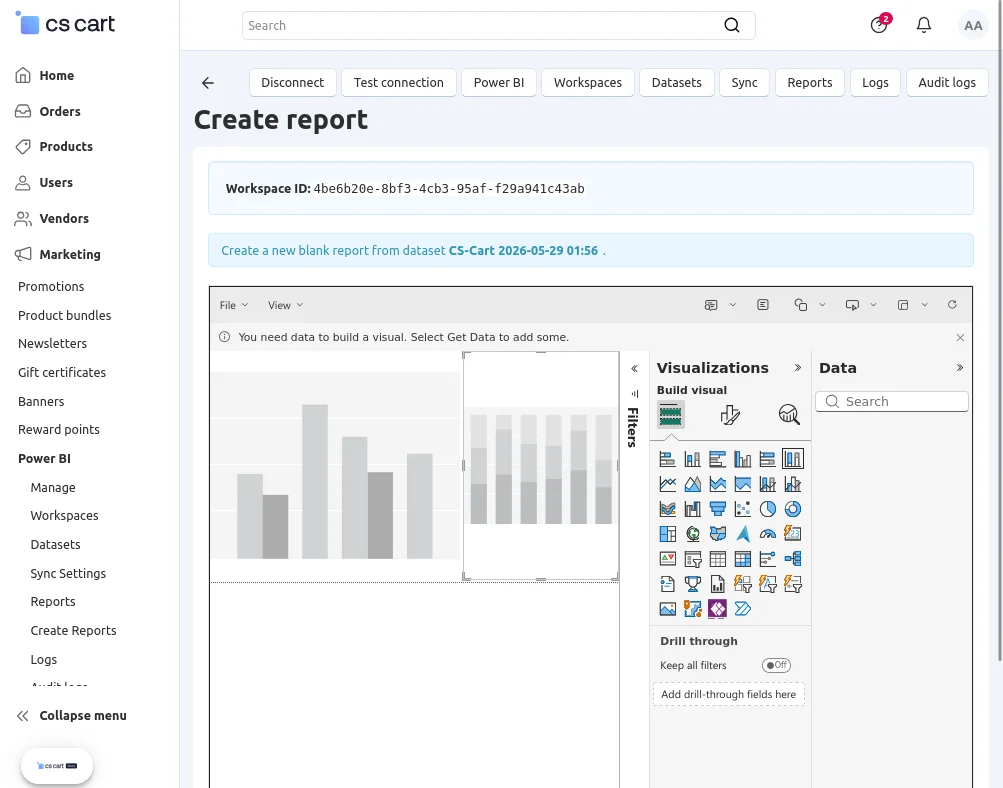
Afterward, upon selecting the Order dataset, you can access the report creation option. At the same time, the relevant table data for generating the report will be displayed.

Tap the Create a Report option and choose Start from the scratch option.

After that select the order table data that you want to use for the report and the particular graph for the same will be generated as per your selections.

Now, save the report by choosing the option.

After tapping the Save button, you need to give a name for the report and choose the Workspace for the same. After that, tap the Save button to save the report for the orders.

Similarly, you can proceed with the Invoices Workspace. Once the configuration is complete, save the report for the same.

Support
If you have any questions, suggestions, or customization requests, feel free to contact us at support@webkul.com or submit a ticket at webkul.uvdesk.com.
Explore our premium-quality CS Cart Extensions to enhance your store functionality.
You can also explore our CS-Cart Development Services and Quality CS-Cart add-ons.