CS-Cart Delivery Date – User Guide
The admin and the vendors can manage and set the settings for displaying the estimated delivery dates. This delivery date is visible on their respective products along with the shipping method.
Using the CS-Cart Delivery Date add-on,
the admin and the vendors can show two types of shipping methods as required. The admin will be able to manage the holidays and can even choose the weekend days.
Check the video mentioned below for an overview of the workflow of this add-on:
Features
- Admin can manage holidays ( Add, Update, Delete ).
- Admin can choose weekend days and select shipping ( Free & Paid ).
- Admin & vendor both can manage delivery data shipping method-wise.
- The admin can select the shipping methods to display along with the delivery dates.
- Shipping methods and the date of delivery are visible to the customers on the product page.
- Well integrated with CS-Cart and Multivendor.
CS-Cart Delivery Date Installation
After you download the add-on, you get one zip file and the install.txt file. Please read it carefully and follow it.
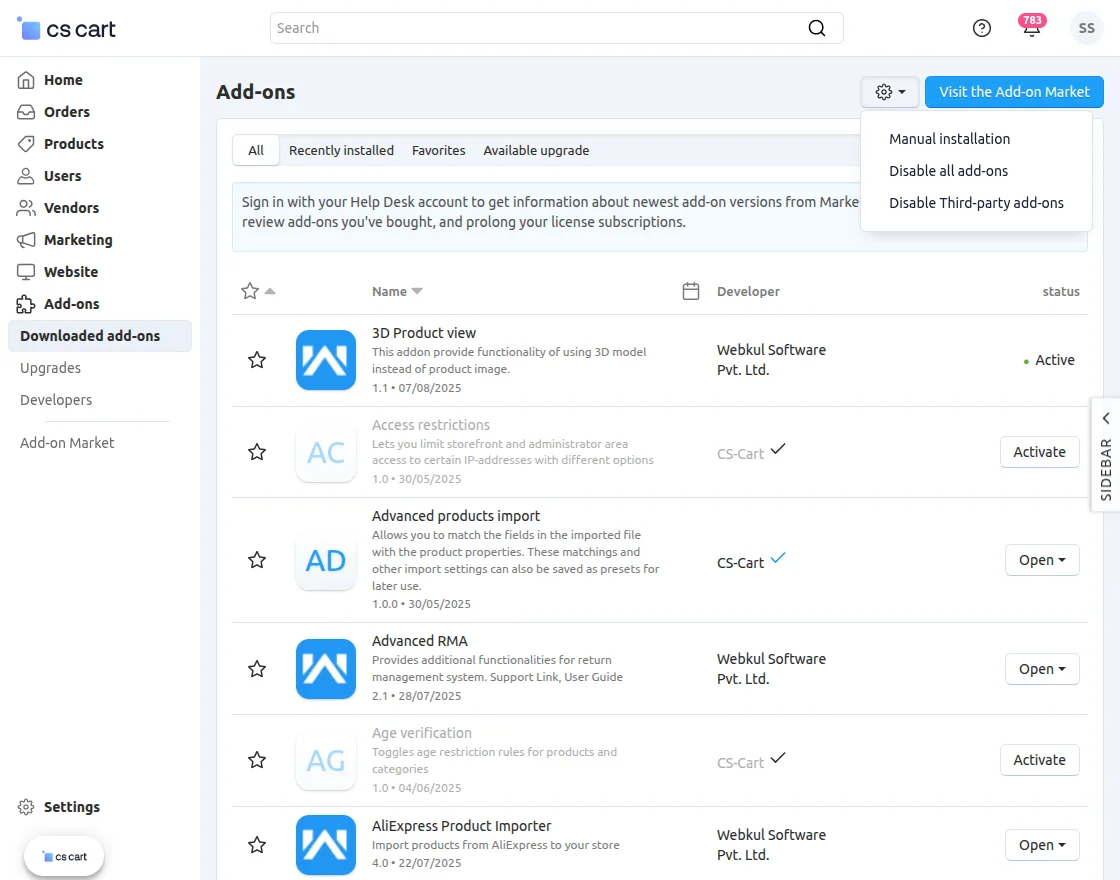
Now, navigate to the admin backend panel via Add-ons->Manage add-ons and tap on the cog icon and then tap the Manual installation option.

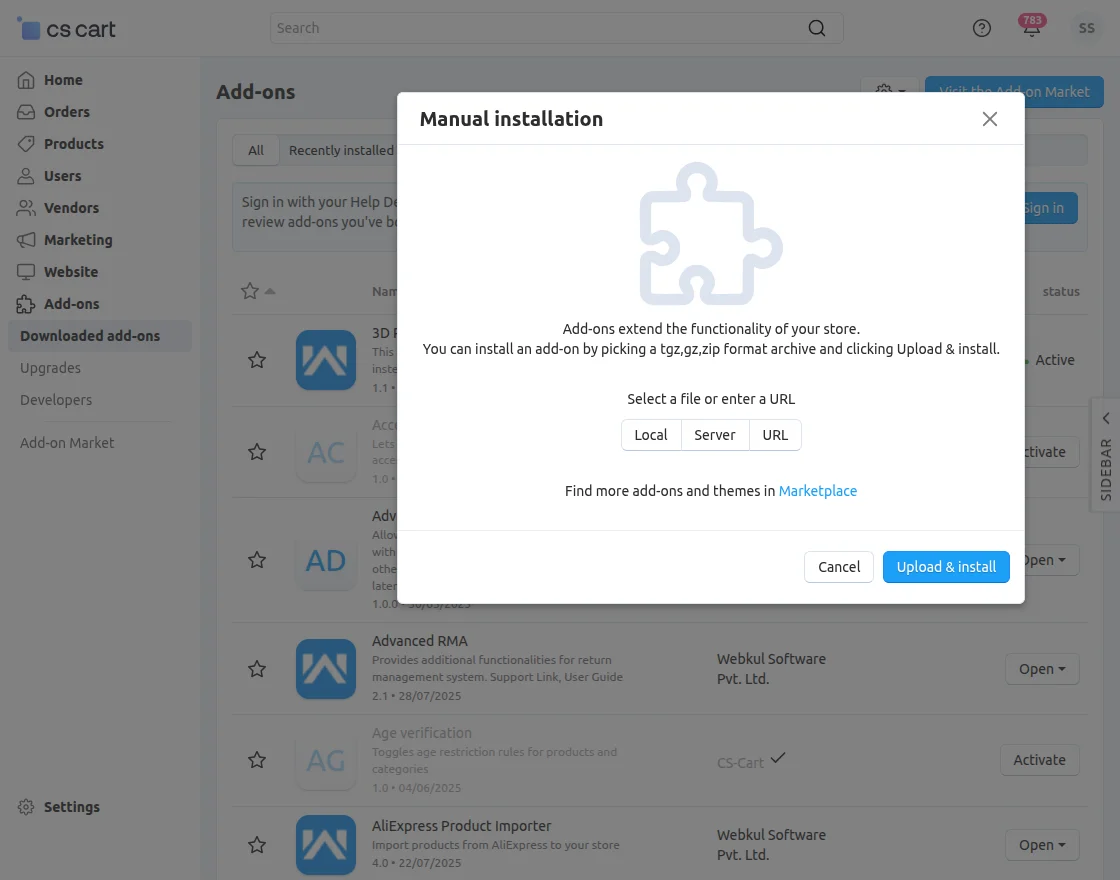
Thereafter a pop-up comes up, on that click on “Local” to browse the zip file, and then click on the “Upload & install” button.
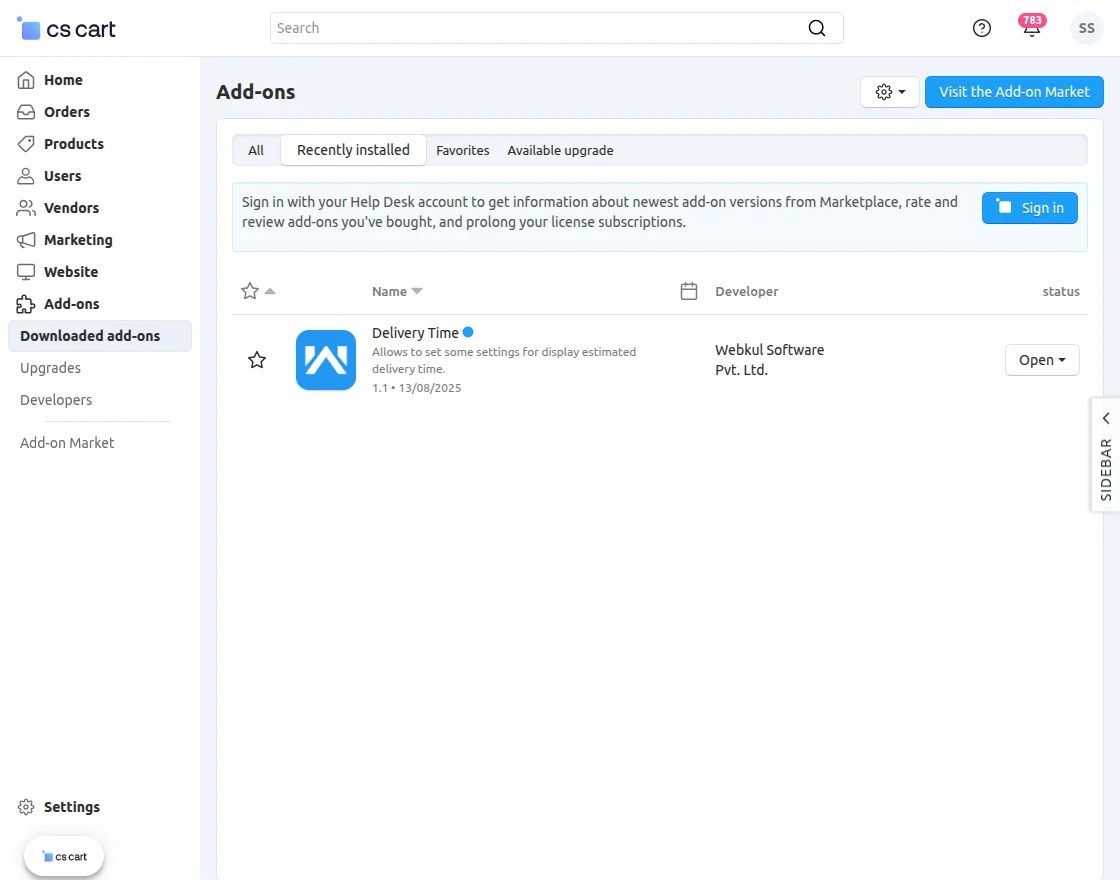
After installation of the add-on, you will find the “Delivery Time” in the list of available add-ons.
CS-Cart Delivery Date: Main Admin Configuration Settings
After the installation of the cs-cart delivery Date add-on, the admin can configure it. Now, navigate to the Add-ons section and tap on the Delivery Time add-on, and then go to the settings tab.
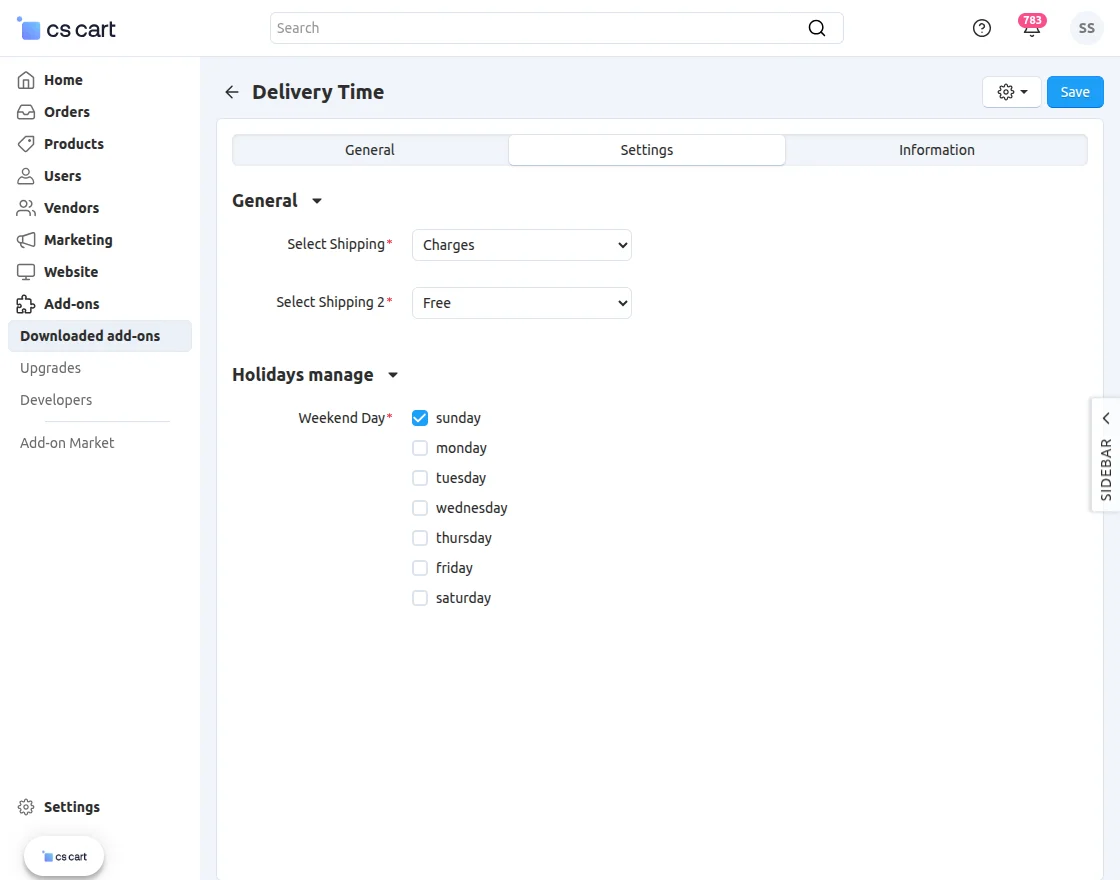
Here, the admin will have to configure the General and the Holidays Manage settings.
General
Select Shipping – Choose two shipping methods that will be displayed to the customers at the time of checkout.
Holidays Manage
Weekend Day – Here, the admin will select the weekend days when the delivery will not be available.
After making the configurations tap on the save button to save the changes.
Settings for the Shipping Methods Created
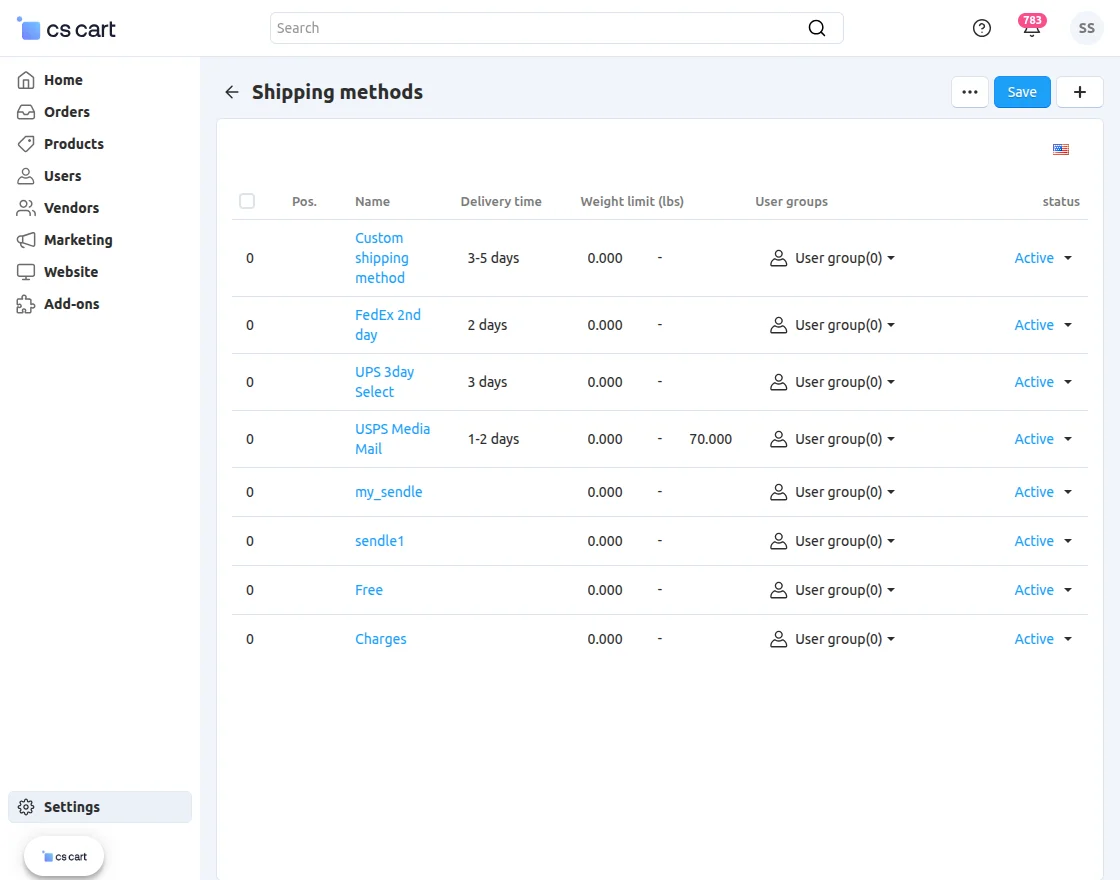
You need to create your shipping methods as per the default CS-Cart flow.
For this example, you can see that we have created two shipping methods Free and Charges.
For the Free shipping method, under the tab Shipping time & rates we have set the countries in which this shipping method will be applicable along with the rates as 0.
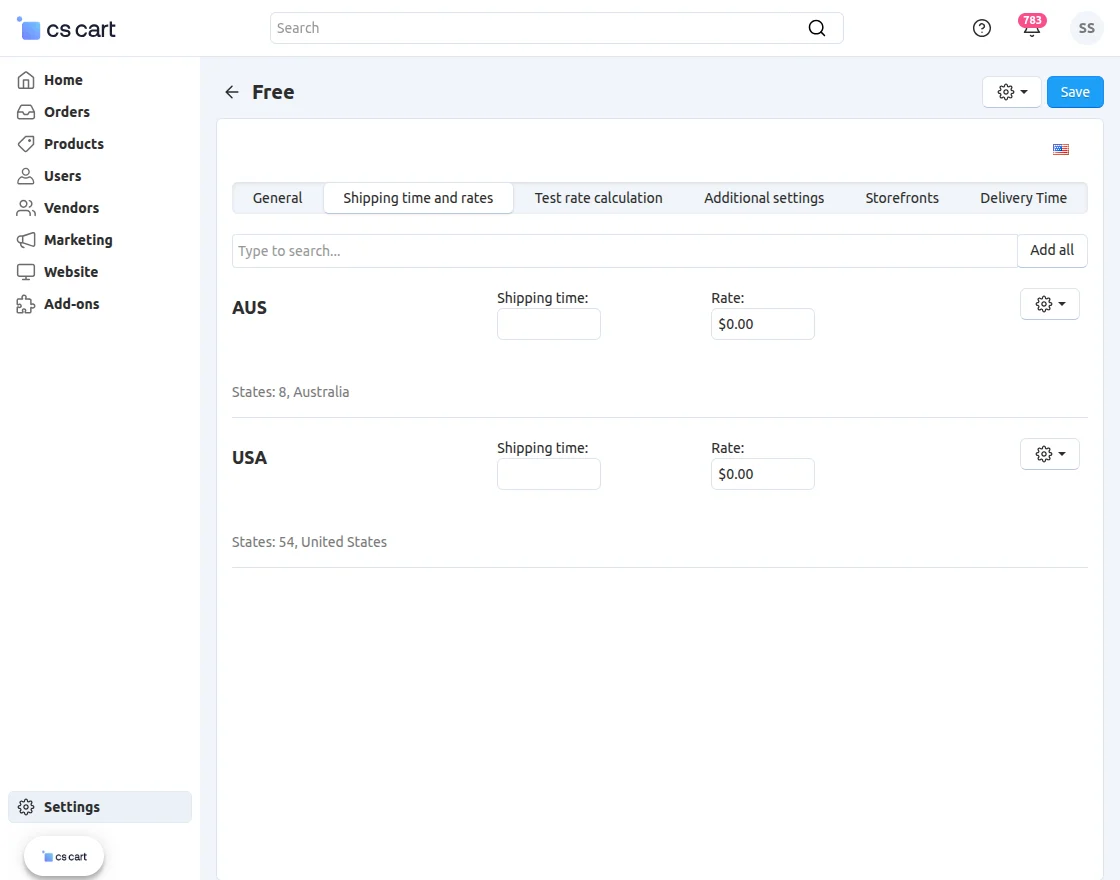
Now, for the Charges shipping method, under the tab Shipping time & rates we have set the countries in which this shipping method will be applicable along with the rates like $50 for USA states.

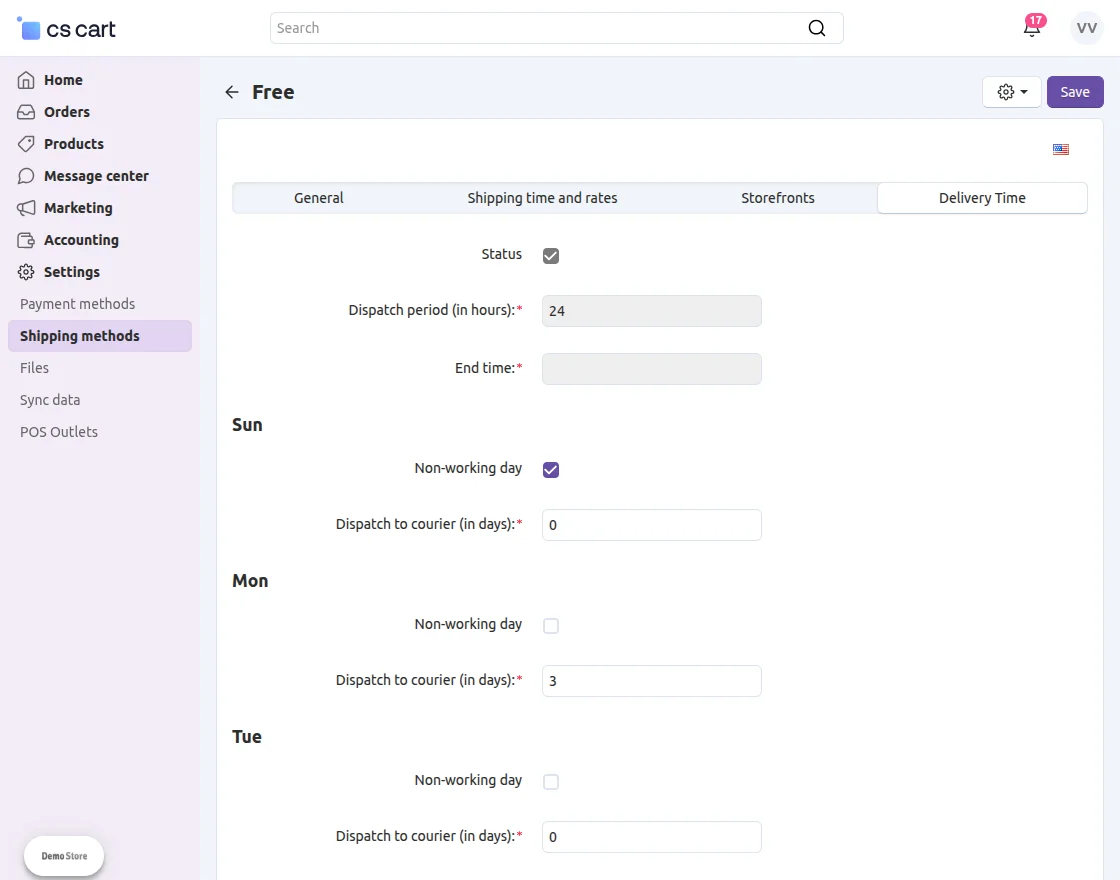
So, after the installation of the add-on, you will get one more tab which is Delivery Time, tap on that to configure the same.
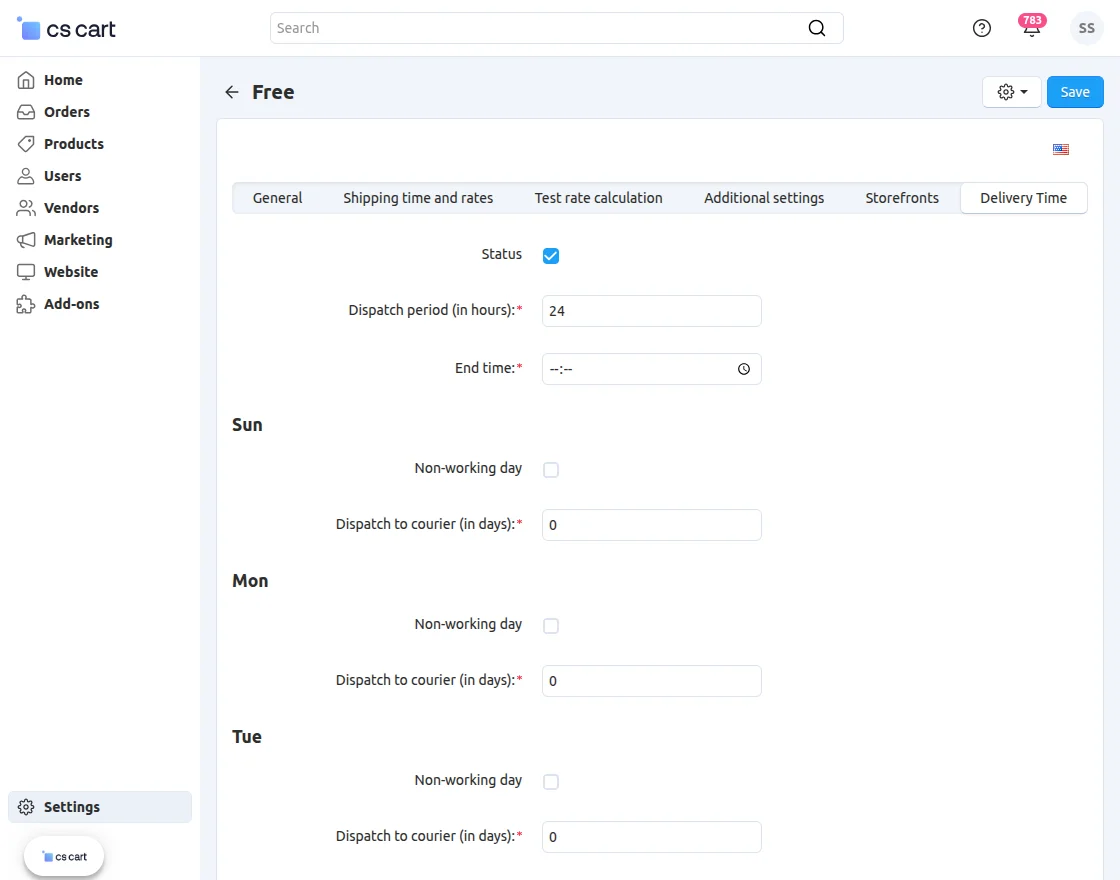
Now, here the admin needs to configure the –
Status – Enable the status of the CS-Cart shipping method for Delivery Time by checking the checkbox.
Dispatch period(in hours) – Set the dispatch period in the hours within which the order will be shipped.
End Time – (This feature will be available in the next release of the plugin).
For the days of the week, the admin from here also can set whether the delivery is available on a respective day or not.
Now, on a particular day if you check the option Non-working day then the delivery will not be available for that day.
Note: Admin panel configuration will only work if the vendor delivery configuration is set as disabled. As the priority is always given to the vendor configuration.
Vendor – Setting up Delivery Dates
Using this add-on the vendors will also be able to set up the Delivery Time for their products.
To do so, under the vendor account panel navigate to settings->Shipping Methods as per the snapshot below.
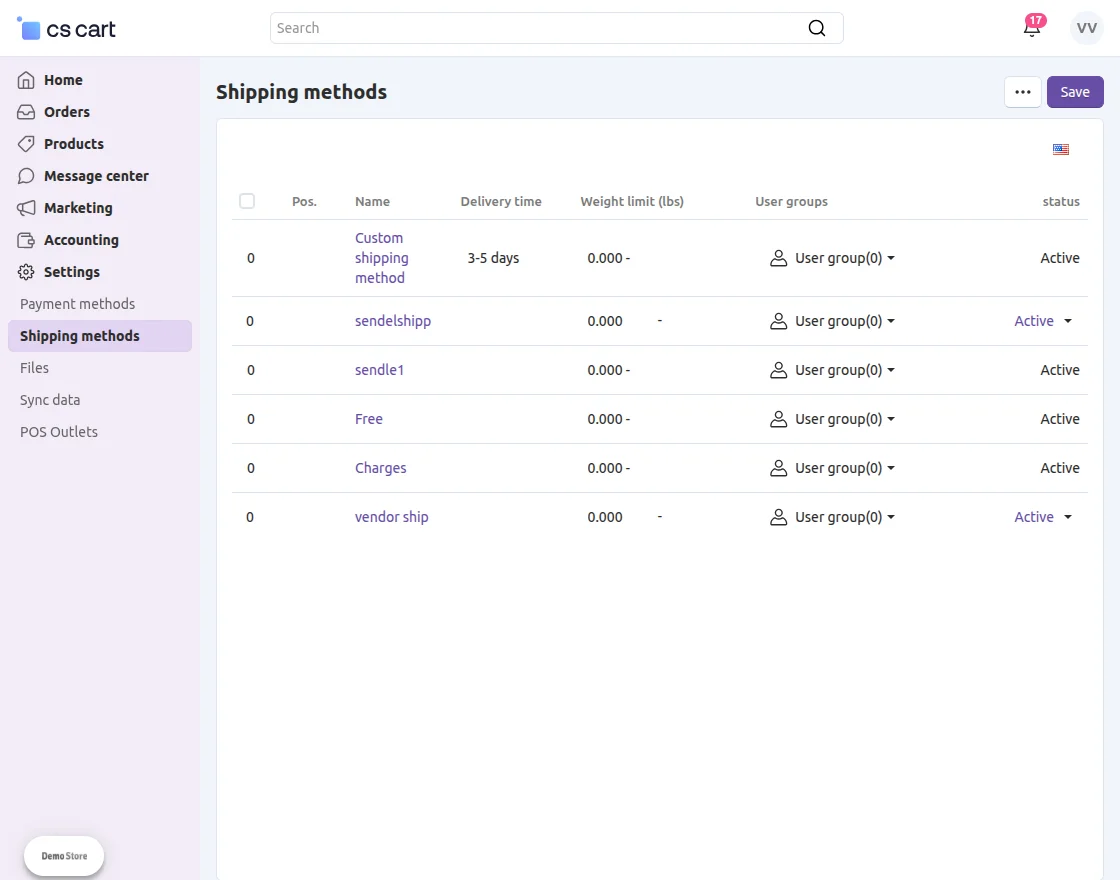
Here, the vendors will find the shipping methods enabled for them for the Delivery date setup. Vendors can use any of the shipping methods for their products from the enabled ones.
Note: In case, all of the delivery days are disabled/set as non-working days by the vendor then the admin delivery Dates will be applicable to the vendor products.
Else if the vendors enable the delivery dates then their delivery dates will be applicable to their products.
The vendor for each working day can set the Dispatch to courier (in days).
So, if a customer views the product page, the estimated delivery date that is visible to the customer is dependent on this number(in days).
If this is set as zero, then the dispatch period is
set to 24 hrs(by admin) and the delivery date would be of the next day.
While it is set as 3 days and the customer is ordering the product on the 1st of the month, then the delivery date is visible as the 4th of the month.
Admin Manage Delivery Holidays
The admin can manage the days when the delivery will not be available in case of holidays. The admin can do it one by one or in bulk (by importing the holidays using a CSV file) as well.
Adding Delivery Holidays one by one –
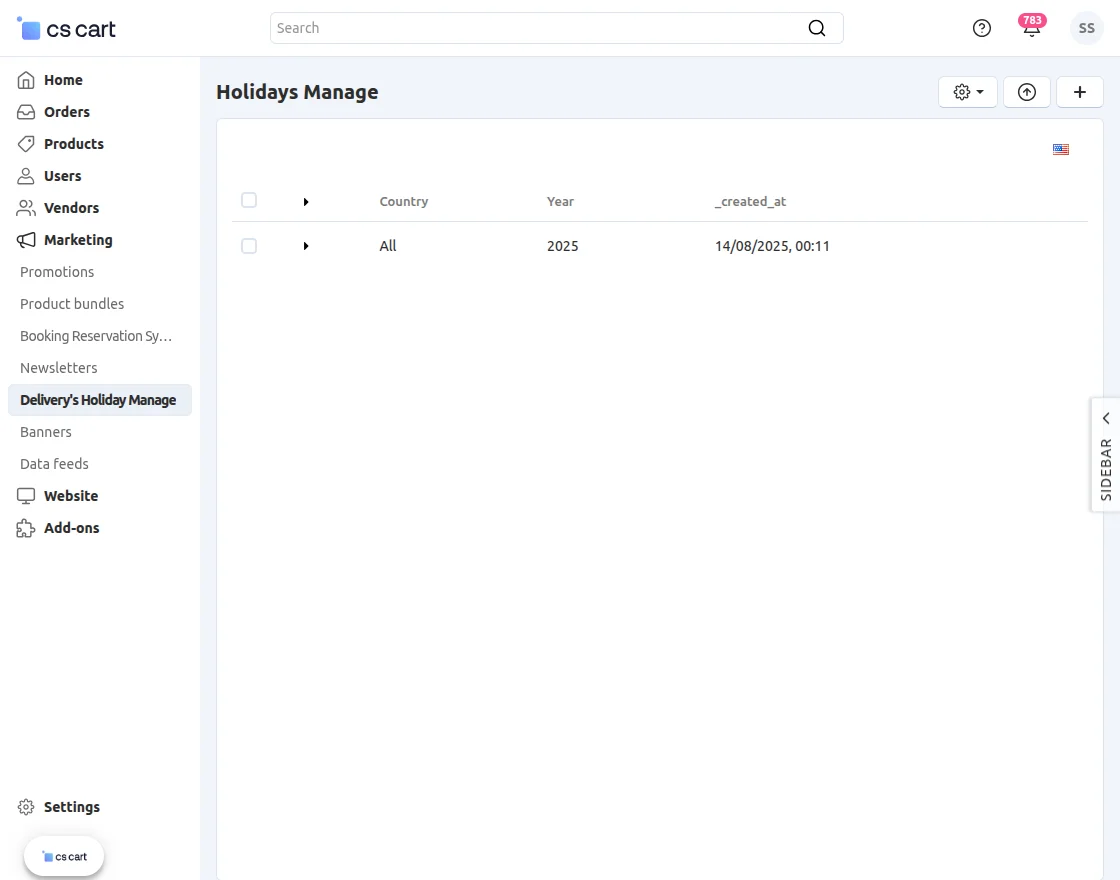
In the admin backend panel navigate through Marketing->Delivery’s Holiday Manage as per the snapshot below.
This brings up the section where the admin can add the holidays one by one and can view the ones already added if any. Here, tap on the Create Holiday button in the top right-hand corner.
Tapping the Create Holiday (+) button as shown in above image brings up the section to create the holiday.
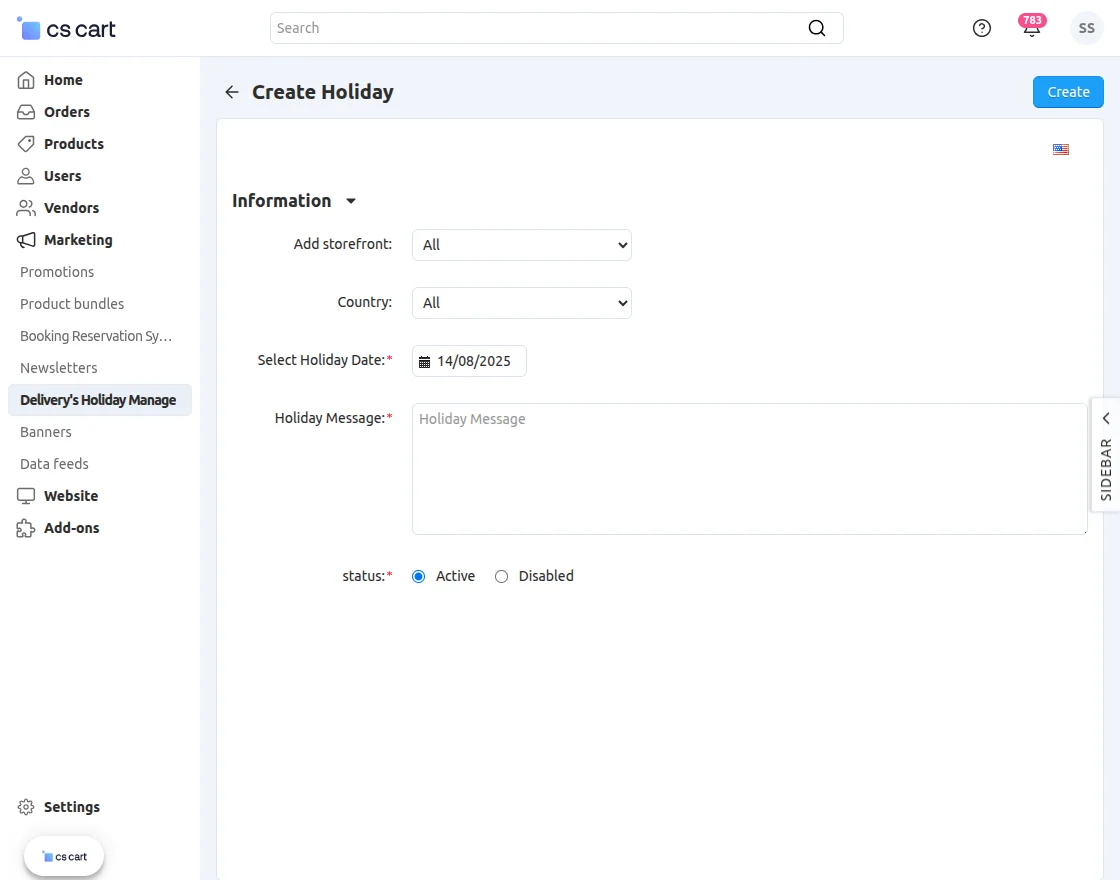
Here, choose the storefront, select the country, select the holiday date, enter the holiday message, and set the status as activated.
After that, tap on the Create button in the top right-hand corner to save the holiday.
Adding Delivery Holidays in Bulk –
Navigate through Marketing->Delivery’s Holiday Manage .
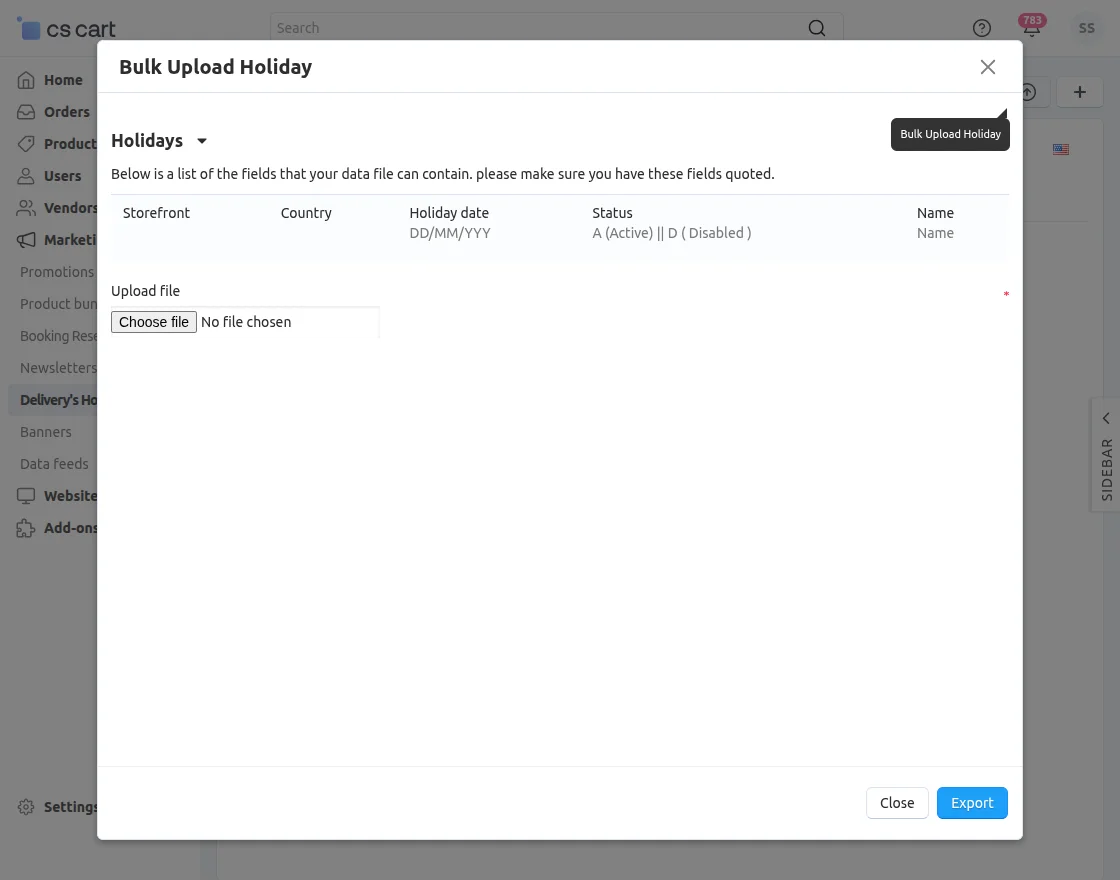
Now, tap on the Bulk Upload Holiday button as per the snapshot below..

This brings up a pop-up wherein you can import the holidays using a CSV file.
Just include the given fields and the data for the same in the CSV file to import.
Then, click on the Export button to upload it.
Workflow – Delivery Date Visible to Customers
After configuration let’s see how customers can view the delivery date on the product page.


The customers would see the Delivery by date for both shipping methods if the Delivery time section is enabled and configured for them.
After adding the product to the cart and going for checkout will the customer be able to view the charges for the Charges shipping method.


Also, now going to the product page again then they can see the charges displayed for the Charges shipping along with the updated delivery date.


Note:
When adding the product to the cart, the API gets hit, and according to the country whichever shipping charges and shipping date are there will be visible to the customer.
Support
That’s all about the CS-Cart Delivery Date add-on. However, if you still have any questions regarding the CS-Cart extensions,
please create a support ticket by clicking Webkul Support System or send an email to support@webkul.com