Introduction
Convert your Magento (Adobe Commerce) store into B2B Marketplace like Alibaba, Indiamart, ThomasNet, and EC21.
Magento 2 B2B Marketplace will create an online platform where business buyers and suppliers around the globe can connect and do business transactions with each other.
Webkul B2B Marketplace extension has various built-in features such as – Separate Supplier Microsite, Request Quotations, Quick Order, Contact Supplier, Supplier Reviews, and much more. Also, check out Magento 2 B2B Marketplace Android & iOS Mobile App.
Watch the video to understand the plugin workflow:-
Features
- Each supplier will have a separate microsite
- Customers can create quick order
- Contact supplier
- Send quotation request to the supplier.
- Buying leads option work only if Suppliers have selected categories prior under the Supplier settings.
- Supplier dashboard for analyzing sales, reviews, customers
- Featured products section
- Supplier verification process
- Supplier review section
- Contact information section
- Social channels of suppliers
- Supplier policies
Installation
When you extract the downloaded zip file you will find three modules in it. Please follow the installation process with the sequence as follows:
1 – First of all install Webkul Magento 2 Multi-Vendor Marketplace module, for this extract magento2_marketplace extension zip, and follow its readme.txt file installation procedure.
2 – Installation of Webkul Magento 2 Marketplace Vendor Sub-Domain Module, for this extract magento2_vendor_sub_domain extension zip and follow its readme.txt file installation steps.
3 – Then unzip the magento2_b2bMarketplace extension zip and then move “app” folder (inside “src” folder) into Magento root directory.
4 – After that run following command via terminal
:- First Command – php bin/magento setup:upgrade
:- Second Command – php bin/magento setup:di:compile
:- Third Command – php bin/magento setup:static-content:deploy
5 – In the end, flush the cache and reindex all.
Language Translation
For translating the module language, please go to app>code>Webkul>magento2_b2bMarketplace>i18n and edit the en_US.csv file.
Now, translate the words on the right and upload the modified file to the same location.
The filename of the translated file should be according to the language and region code like de_DE.csv.

Module Configuration
Once you have installed the modules, then login to the admin panel and go to Stores>Configuration>Webkul. After that in the B2B configuration, you can set the admin email address, global commission rate, set supplier approval settings.
General Settings

Supplier Dashboard Layout Settings – From this option, the admin can upload a default logo for the supplier dashboard logo.
![]()
Supplier Product Settings
The admin has various options through which it can manage and set restrictions for all the products of marketplace suppliers.
Attribute Set ID – The admin can select the attribute sets for the suppliers. The attribute set determines the fields that are available during product data entry and the values that appear to the customer.
Note:- This option will work only if Magento 2 Custom Attribute Marketplace Add-on is already installed.
Product Approval Required – First of all select Yes if admin approval is required for adding a new product. Else, select No for auto-approval.
Product Update Approval Required – Then select Yes if admin approval is required for updating the product. Until the admin approves it, the product is disabled. Select No for auto-approval on product update.
Allow Category tree view like admin product category tree – After that select Yes to enable category tree for the suppliers.
Allowed Categories for the supplier to add products – Now, enter the category IDs (, comma separated) for which the supplier can add products.
Product Type For Supplier – Then, select product type for the suppliers that they can add.
Allow Suppliers to add products with SKU type – After that select Static or Dynamic option.
Allow Supplier to Add Related Products – Now, select Yes to allow suppliers to add related products.
Enable Supplier to Add Up-Sell Products – Thereafter select Yes to allow suppliers to add up-sell products.
Allow Supplier to Add Cross-Sell Products – Next select Yes to allow suppliers to add cross-sell products.
Allow Supplier to Add Limit on Product Purchase for Customer – After that select Yes to allow suppliers to set a limit on purchase quantity.

Supplier Order Settings
Order Approval Required – Now, here select Yes for admin approval when a new order is received for the supplier. So that after the approval of the admin, that order becomes visible to the supplier. Select No for auto-approval.

Inventory Settings
Enable Low Notification – Now, select Yes to send a low stock email to suppliers.
Low Stock Quantity – Thereafter, the admin needs to mention the low stock value.
Supplier Profile Page Settings
Supplier Policies Enable at frontend – Now, select Yes to display supplier shipping and refund policies information on the supplier profile page.
Rewrite Supplier’s Shop URL – Then, select Yes to enable suppliers to edit their shop URL.
Allow to automatically create supplier public URL on supplier registration – After that select Yes to enable the supplier to set their shop URL at the time of registration.

NOTE – If you are using multiple store view, after using seller sub-domain module if you need use ‘Rewrite Supplier’s Shop URL’ feature then you need to enable it from each store view.
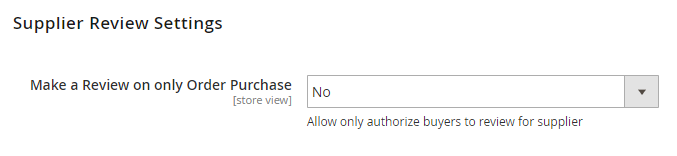
Supplier Review Settings
Make a Review on only Order Purchase – Now, select Yes to allow only the actual final buyers to write a review for the suppliers.
Landing Page Settings
Here, you can configure the marketplace landing page settings where the admin can customize the layout, banner, title, button label, feature icons, terms & conditions URL, and much more.

Marketplace Product Page Fields Hints
Select Yes to enable product page field hints for the supplier pages. The admin can provide field hints for – product category, product name, product description, short description, SKU, price, special price, special price start & end date, product quantity, stock availability, product tax types, weight, image, and product enable.

Marketplace Transactional Emails
There are different types of email notifications that are sent to admin, customer, and supplier. The admin can also select email templates from the Marketplace Transaction Emails section.
Supplier Registration
On the frontend, a new supplier can register on the website by clicking the Supplier Registration link in the header section.
Various information needs to fill when a new supplier registers on the website such as first name, last name, contact details, address, shop URL, shop name, etc.

After filling all the information, the supplier can go to its dashboard and manage the shop.

Supplier Dashboard
From the Dashboard section, the supplier can get an overview of its shop. From lifetime sales, top-selling products, categories, customers, latest orders, and comments.

Verification – A supplier also needs to verify its email address and account for displaying the verified badge on the frontend.

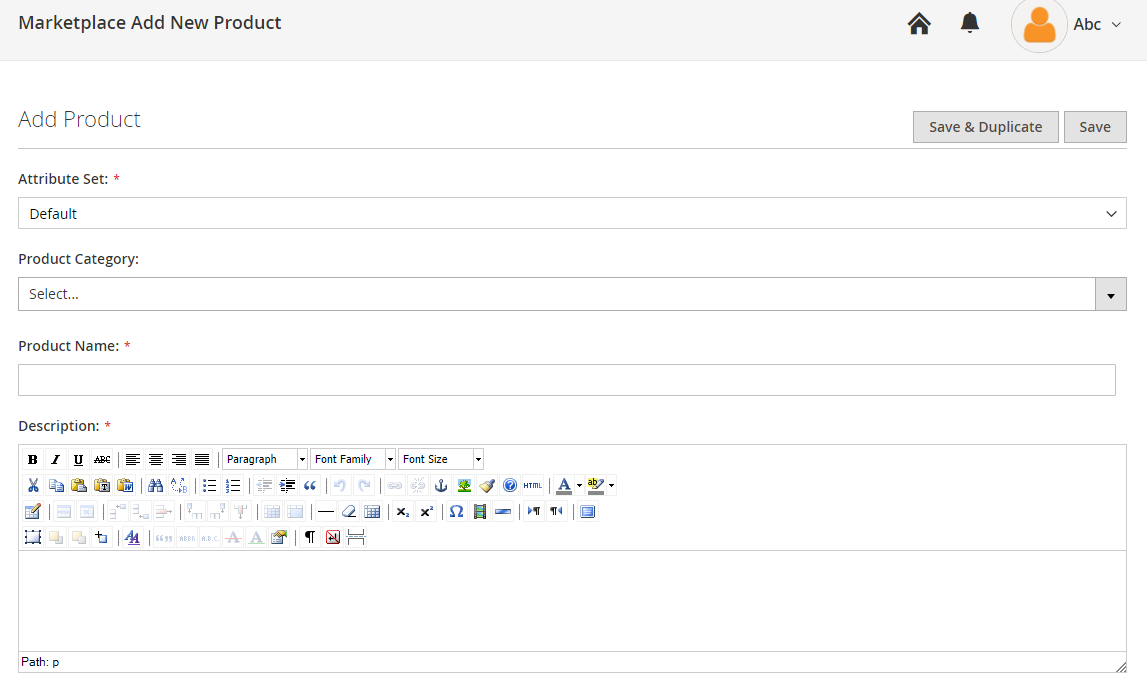
Adding Product
A supplier can add three types of products – simple, downloadable, configurable, moreover virtual types of products.

Forthwith, enter detailed product information such as name, price, stock, meta information. Select category, enter a description, short description using WYSIWYG editor.
Quantity Restriction – A supplier can set the minimum quantity for a product that will be added to the cart.

After adding all the information in the new product, the supplier needs to nevigate to Products>My Products List to see further changes. The product needs admin approval to display on the storefront.

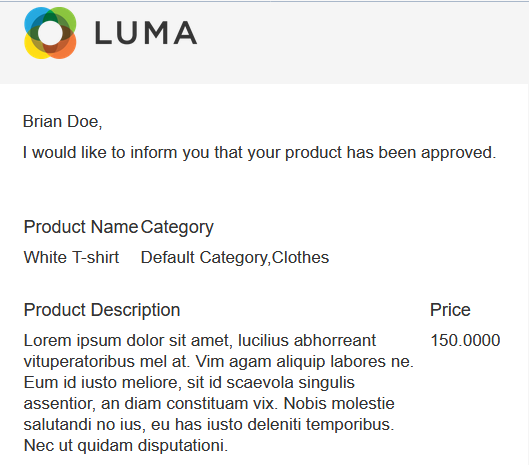
Approval by Admin
For approving a supplier product, the admin needs to follow B2B Marketplace>Manage Product>Actions>Approve. The product becomes ready to purchase on storefront after confirmation.

An email notification will go to the supplier to inform about product approval status.
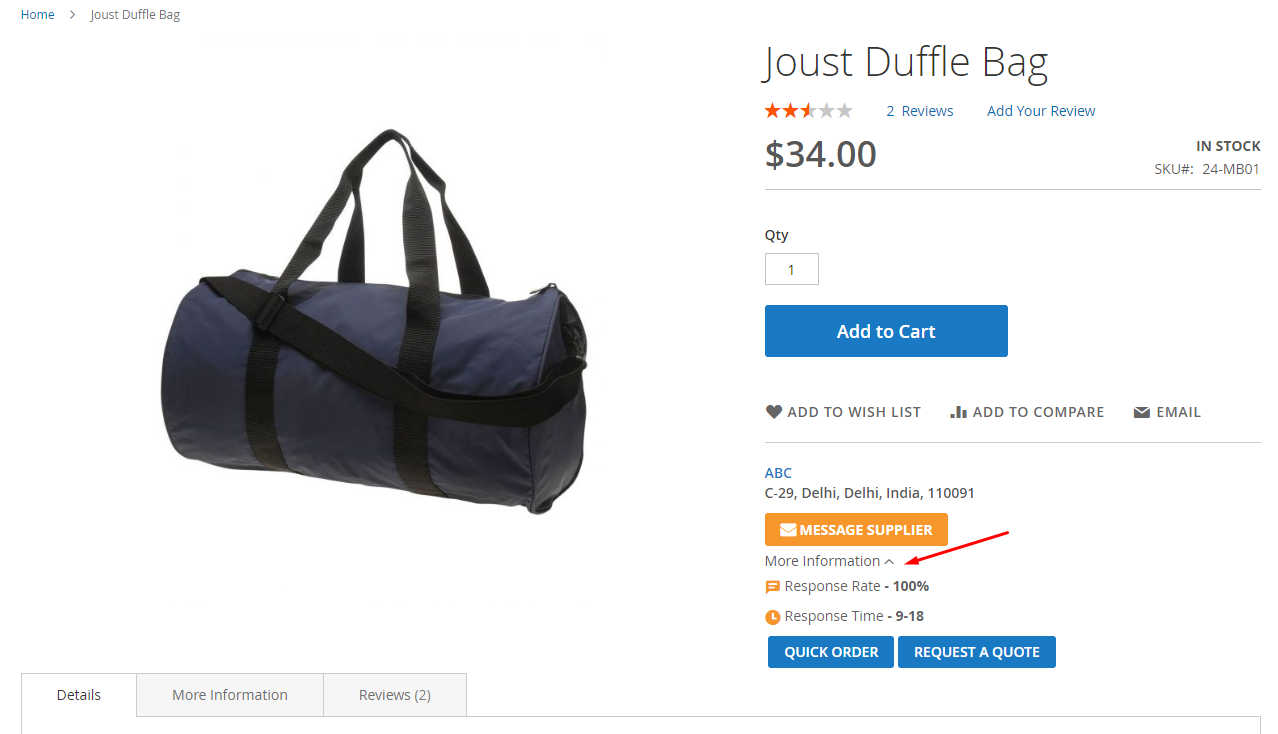
Product Page
On the product page supplier information is available with the request a quote and quick order feature.
Supplier Information
A supplier can provide and display detailed information about its shop to its customers. First, log in to the supplier account and then go to the Settings page.
Company Info – In this first tab, a supplier can provide company name, contact details, addresses, registered date, certification, etc.

Company Overview – From here, the supplier can provide some description of its business and mention social media links.
Supplier Info – From here, the supplier can provide its personal information such as name, role/designation, address, email, contact, etc.

Policies – A supplier can also display its return and shipping policy information to customers.

Categories:- From here Supplier can select the specific categories whom products are available for the customers to quote.

Supplier Profile Page
Once the supplier has provided all the information about its shop, the customers can view the same information on the supplier profile page. Customers can view banner, company name, ratings, address, contact details, featured products, recently added products, policy information, etc.

To view the supplier profile page, the customers can find the link and click supplier company name.

Collection Page – On the Product(s) page, a customer can check out all the product listings of the supplier. There are various filters available through which customers can sort the products and view them in a grid or list layout.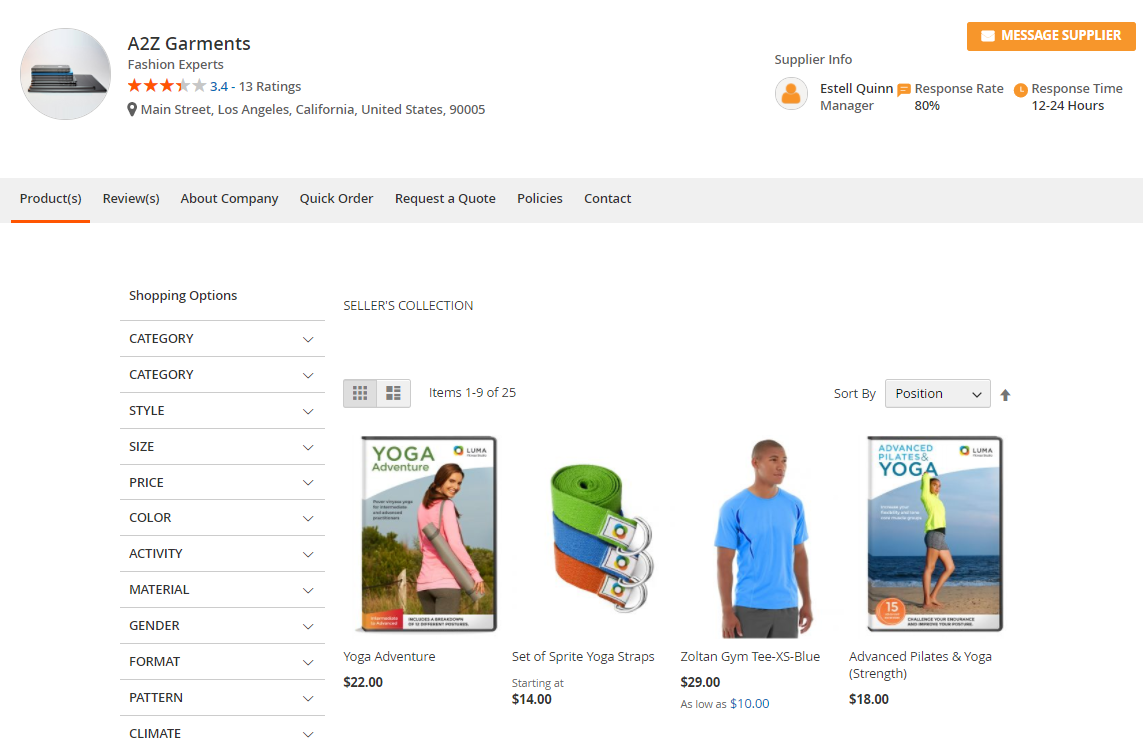
Supplier Reviews – On the same page, the customers can read some reviews & ratings about the supplier and its products.

About Company – Here the customers can see the company name with a tagline, registered date, team size, operational address, and corporate address with contact details. In the company overview section, customers can view social media links also.

Policies – Here, the customers can see the shipping policy and return policy information of a supplier.
Supplier Contact – Here, the customer can get the contact information of supplier – name, designation, phone, email, etc.
Message Supplier
When a customer clicks the Message Supplier button, the following pop-up window will appear. Here the customer can see the supplier response rate with time. A customer can also upload an attachment to the message.

On new message arrival, an email notification will go to the supplier.
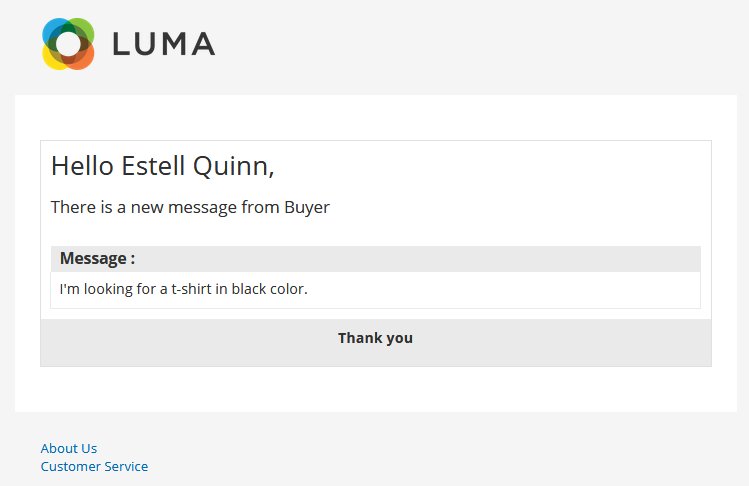
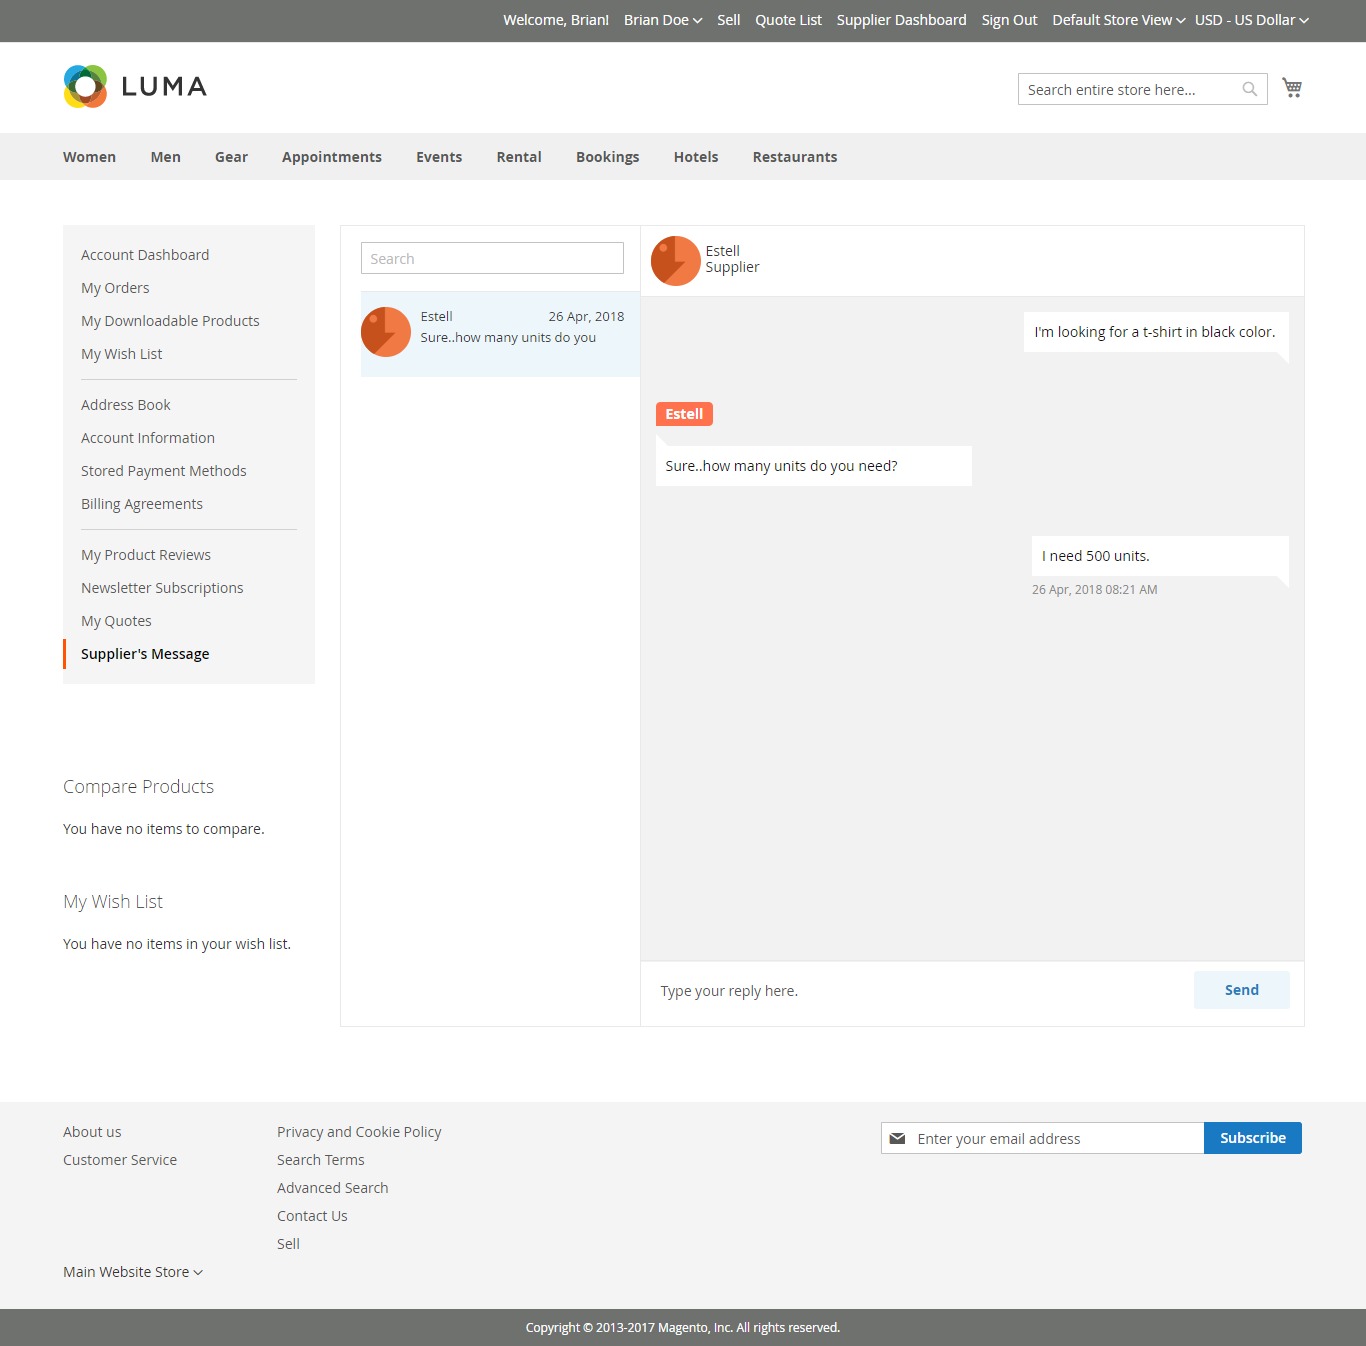
The supplier can check the messages by logging into the supplier account and navigate to Messages. After that, the supplier will see all the customer names who have sent messages. Simply click a customer name, enter a message, and hit the send button. An email notification will go to the customer email.

The customer can check the replies from the suppliers by going to My Account>Supplier’s Message.
Quick Order
A customer can place a quick order on the B2B marketplace for quickly adding and purchasing the products by searching them using a product name or SKU.
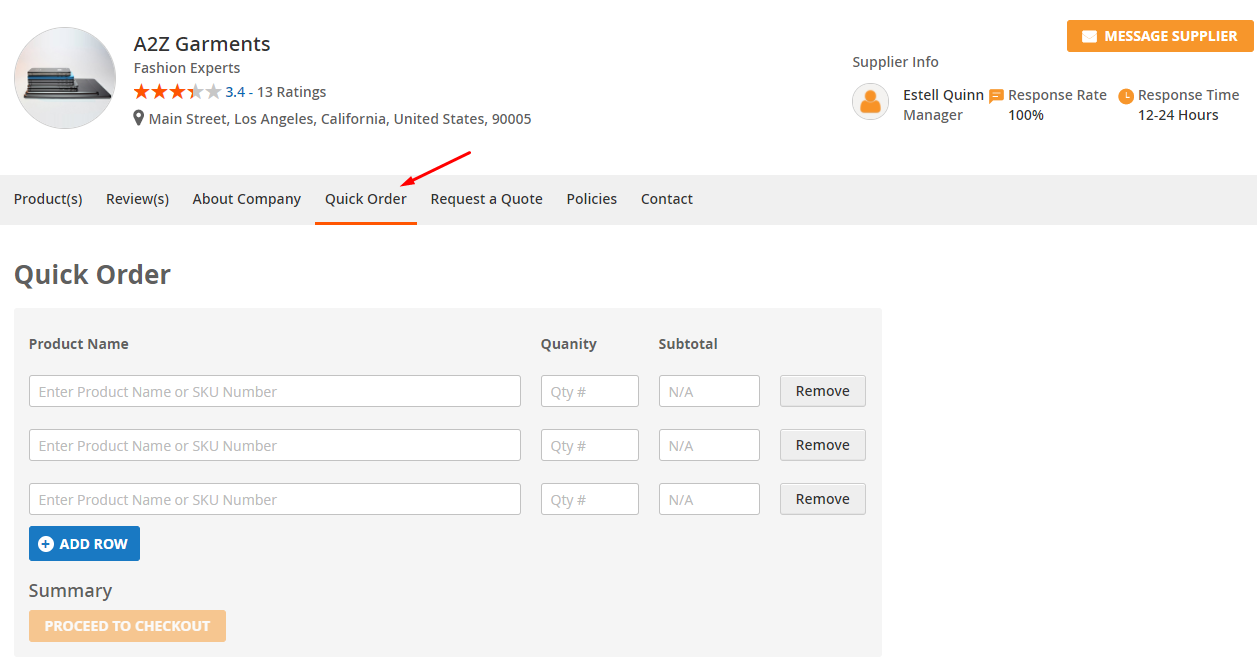
Go to the Quick Order page, find a product by entering a product name or SKU number, enter a quantity, click Add Row to add more products and proceed to checkout.
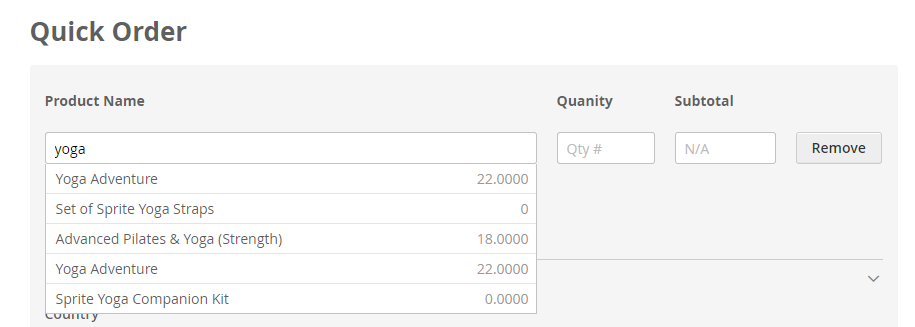
Update quantity, check sub-total value, and see the estimated cost of shipping with discount details.

The check-out process works the same as the default Magento(Adobe Commerce Cloud) order. First, the customer needs to select a shipping address, and then choose a payment method and place an order.

Select a payment method and place a quick order.
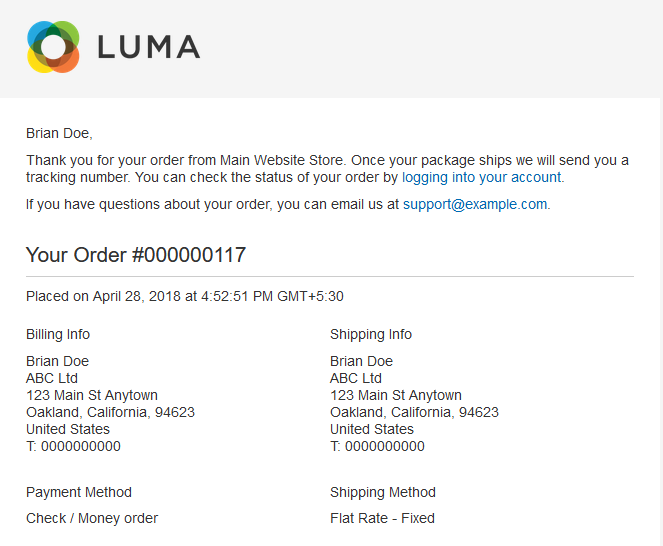
 Order ID is created.
 An email notification is sent to the customer and the supplier when a new order is placed.
Request FOR Quote
To send a request for a quotation to a supplier, the customer can click on the ” Request a Quote ” option on the product page which will redirect the customer to a specific Supplier profile page where the customer needs to first provide detailed information about the product and click Add Product.
After that, the customer will provide details about quote requests – quote title with a message, and contact information as well.
Also, customers can Request Quotes for specific Supplier products by visiting the Supplier profile page and their customer needs to provide detailed information as done above.

Once the request is submitted, the customer is redirected to the My Requested Quotes page as below:

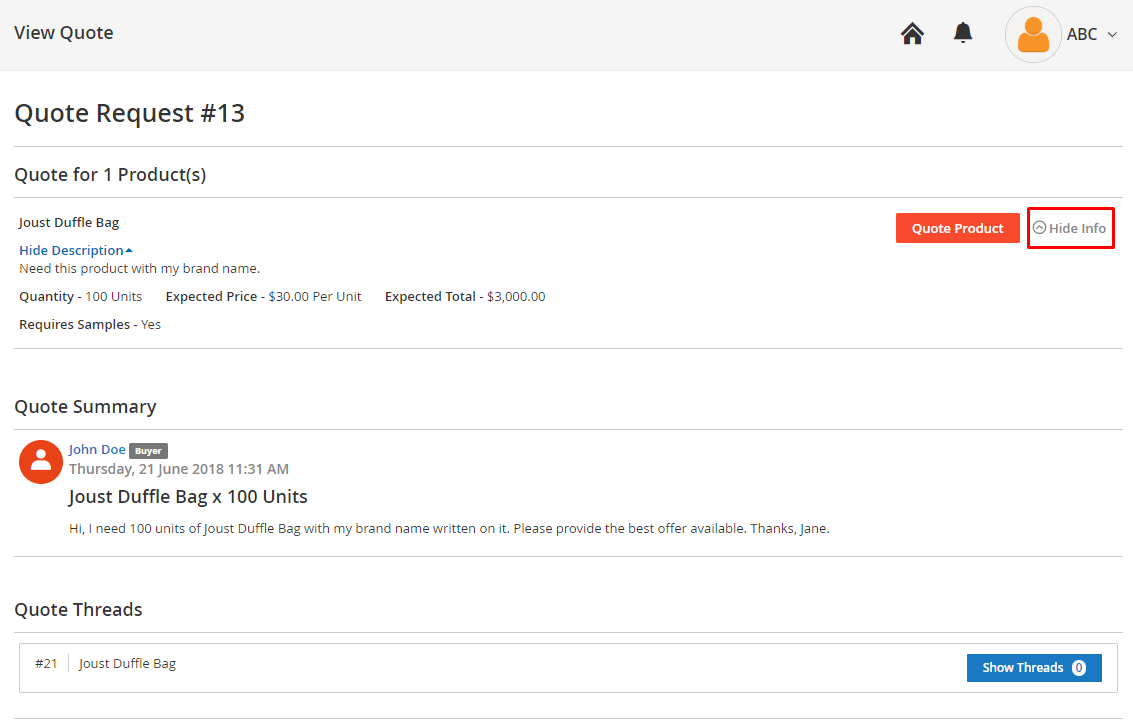
After submitting the request, the supplier can check the request by going to the RFQ menu option.

After viewing a request, the supplier can see detailed information about the quote. A supplier can also send a message to the customer. Click Show Info for viewing complete details.
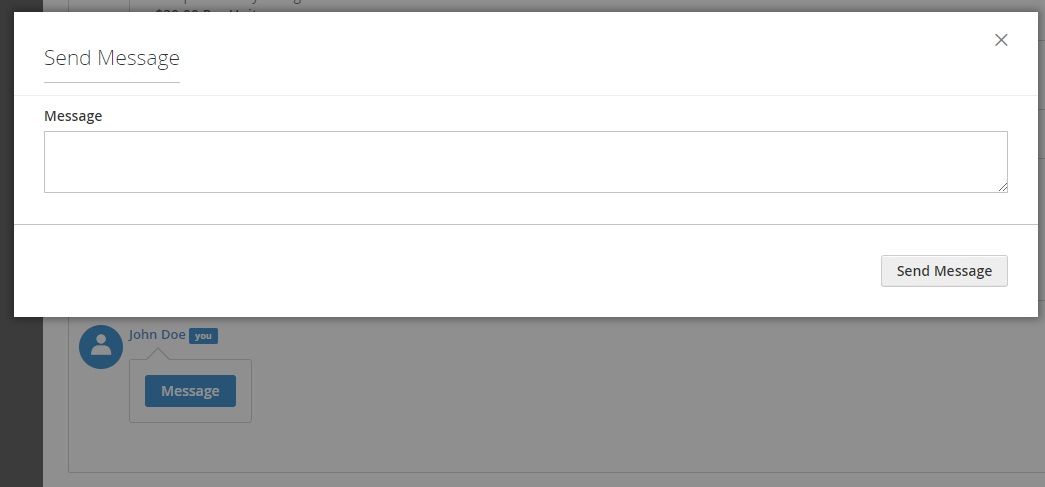
Send Message
To send a message to the customer, click Show Threads>Message. A pop-up window will appear, enter your message content.
Quote Product
On clicking the Quote Product, the following page appears. Here, the supplier will enter Quote Quantity, Quote Price Per Quantity, provide Sample information – price, availability, unit, shipping time, and some note for the customer.

After the quote is sent by the supplier, the customer can check the same from My Requested Quotes section.

After clicking the respond button, the customer can check the quote sent to the supplier and can approve, reject or send any message.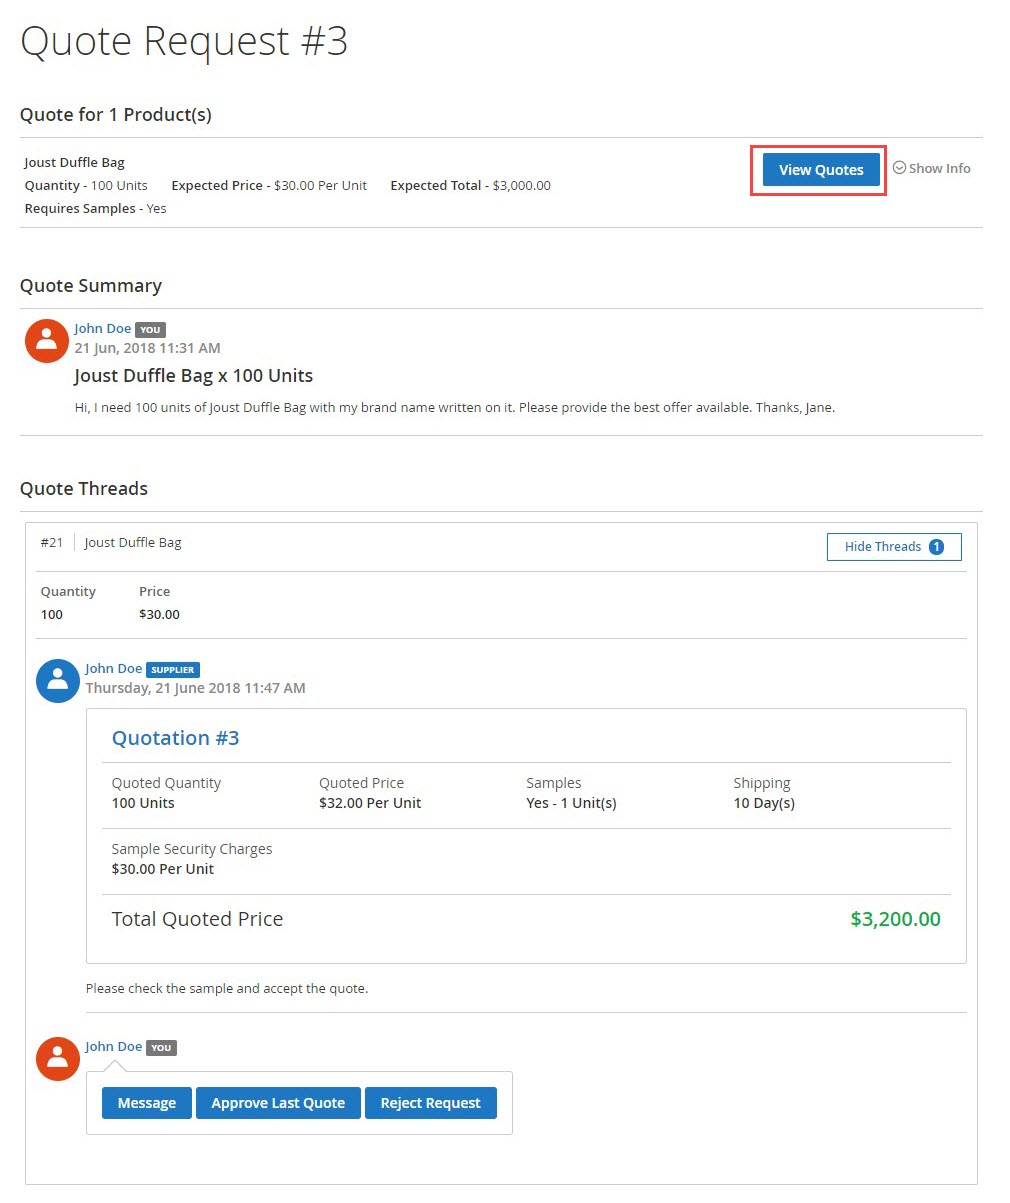
To approve the quote, the customer can click Approve Last Quote and enter the message for the supplier.
After that, the customer can simply make the payment for the product via Add to Cart button and complete the checkout process like the default Magento workflow.

After the customer selects the “Add to Cart” option it will direct the customer to the checkout page.

Vendor Subdomain
The admin can configure the module by Store>Configuartion>Webkul>Seller Subdomain.

- Enabled: To enable the module set “Yes” and “No,” to disable the module. Other configuration fields appear after the Enabled has been set to “Yes.”
- Prefix: It is for the admin to give the subdomain. The “shop_url” is automatically extracted from the values given for “Shop URL” at the time of registration of the vendor.
- Display Only Seller’s Public Pages On Seller’s Domain: If “Yes” is set, the only seller pages- profile, collection, location, and feedback will be visible on the subdomain of the vendor. Otherwise if “No” is set then all website pages (cart/checkout/product etc except marketplace landing page and homepage) will be visible on the subdomain of the vendor.
- Display Admin Product On Category Page: In the vendor’s subdomain, the admin can choose to display his / her product. Set “Yes” to show the admin products, or set “No” to show only the vendor’s product in the vendor’s domain.
Customer Vendor Subdomain Settings
- If enabled “Yes,” then the vendor is allowed to have their domain, store view wise, and in this case, the page URL of the vendor will come under the domain of the vendor.

Note: If the above setting is set to “Yes” then each vendor’s domain name (store view wise) may be given by the admin.
Seller Domain
After the subdomain setting of the customer-vendor is enabled, the admin can provide the seller’s domain. The sellers add/edit pages which is Vendor Domain (*) are provided with an additional tab to add the domain name to the seller.

- For each store view the admin can provide the domain.

hence for more details, please check Magento 2 Marketplace Vendor Subdomain
Buying Leads
So, the buying leads functionality helps the customer to raise RFQ for the products that are listed or not listed on the website. In this, Request for Quote is sent to multiple suppliers on the website according to the different categories selected by them under the supplier settings.
As the customer quote for the product Supplier can see all request in the “Buying Leads” option and as the Supplier “Send Quote” to the customer, the respective quote is then visible under RFQ option.

Therefore the above step is must, in order to use the buying leads functionality.
Request for Quote
Henceforth customer will find the “Request for Quote” option in the website header.

Hence after selecting the Request for Quote option in the header, customers can quote products listed in buying leads at the supplier end.

After raising the “Request For Quote” the customer will be directed to the My Requested Quote, where the customer can find all the requests he had done before.

Nonetheless, on the Supplier end, the supplier will find the raised quote under Buying Leads. Here supplier can “Message” the customer about the request as well as can directly “Send the quote”.

Here, the supplier will enter Quote Quantity, Quote Price Per Quantity, provide Sample information – price, availability, unit, shipping time, and some note for the customer.

After the quote is sent by the supplier, the customer can check the same from the “My Requested Quotes’ section.

Now the customer will select the specific request raised by him/her then direct to the supplier response

Approve, Reject, or Message
After clicking the Respond button, the customer can check the quote sent to the supplier and can approve, reject, or send any message.

Furthermore, to approve the quote, the customer can click on “Approve the Last Quote” and enter the message for the supplier.

After that, the customer can simply make the payment for the product via Add to Cart button and complete the checkout process like the default Magento workflow.

After the customer selects the “Add to Cart” option it will direct the customer to checkout page.

Managing Orders
Now, the admin can allow the suppliers to manage their customer orders. Additionally, a supplier can view complete order information, create an invoice, and shipment, add the tracking number, print a document, and create a credit memo.

View Order
The supplier needs to click the view order link to check order details like quantity, price, commission, discount, tax, shipping cost
Moreover, in the customer details section, the supplier can see shipping & billing addresses with the phone numbers, and also see the selected payment method.

Furthermore, the supplier can add the shipping carrier name with the tracking number in this order. 
Customer List
Even a supplier can view and find all the customers from the Customer section. Here, the supplier can see the name, email, contact number, gender, address, base total, and order count.

Supplier Reviews
Write a Review – Now, any customer in the B2B marketplace can submit a review for a supplier. Moreover, the customer needs to click on the write review button it will redirect the customer to another page. The rating scale and description section are there to provide a valuable review.

However, the admin can decide whether to approve the review or not. Also, the reviews which are not approved are not visible on the storefront. The admin can navigate to B2B Marketplace>Manage Feedback>Select a Review>Actions>Approve/Disapprove option.

Even a supplier of the B2B marketplace can check the reviews by going to the Reviews section. The list will mention ratings, review title, summary, customer name, status, and date submitted.

Admin Management
Even, the admin has complete control over the marketplace and its suppliers as well. Moreover from the B2B Marketplace admin panel menu, you can manage suppliers and their products, commission, reviews, transactions, and quotes also.

Manage Supplier Products
Furthermore, from B2B Marketplace>Manage Product, the admin can see the complete list of products created by all the suppliers. Further, the admin can approve, disapprove, deny, edit, and preview a supplier’s product.

Support
Thus, that is all for the Magento 2 (Adobe Commerce) B2B Marketplace Extension. And for further queries or customization requirements, please send an email to [email protected].
Moreover, if you find any issues in this module, please create a support ticket at Webkul Support System
Current Product Version - 5.0.5
Supported Framework Version - Magento 2.0.x, 2.1.x, 2.2.x,2.3.x, 2.4.x

4 comments
Yes this is possible. If you have any customization request, then please mail us at [email protected].
Thanks and Regards
Thank you for checking the article. For any query or request mail us at [email protected].
Regards