User Guide for Adobe Commerce PIM Integration
Adobe Commerce PIM Integration connects Adobe Commerce with open-source PIM/PXM platforms for seamless product synchronization and centralized catalog management.
As a result, merchants can automate product import/export operations and efficiently manage product information across multiple sales channels.
Additionally, the integration supports bidirectional synchronization for products, categories, attributes, attribute families, and media files.
Furthermore, it includes features such as profile-based scheduling, webhook-driven real-time updates, delta synchronization, and message queue processing.
Moreover, Adobe Commerce PIM Integration provides configurable field mapping, image synchronization, cron scheduling, and secure API-based communication for smoother integration workflows.
Consequently, the module simplifies catalog management while improving synchronization accuracy and operational efficiency.
Features
- Seamlessly integrate Adobe Commerce with open-source PIM/PXM platforms for centralized product information management.
- Additionally, synchronize products, categories, attributes, attribute families, and media files between Adobe Commerce and connected PIM/PXM platforms.
- Furthermore, automate product import/export operations with configurable field mapping support.
- Moreover, manage both simple and configurable products efficiently across multiple sales channels.
- At the same time, enable bidirectional synchronization to keep catalog data updated and consistent.
- Besides this, create multiple import and export profiles with custom synchronization configurations.
- In addition, schedule automated synchronization using cron jobs or execute instant updates whenever required.
- Meanwhile, process synchronization tasks asynchronously using message queue support for improved performance and scalability.
- Similarly, receive real-time product updates through secure webhook-based synchronization.
- Monitor synchronization activities with detailed run history, including logs, errors, and entity counts.
Installation
Download Module
You need to log in to the Webkul Store, go to My Account>My Purchased Products section, and verify.
And then, download and extract the contents of this zip folder on the system.
Upload Folder
Once the module zip extracts, follow the path src>app & copy the app folder into Magento 2 root directory on the server, as shown below:


#Run Commands
You need to run the following commands:
composer require webkul/magento2-unopim-connector
php bin/magento module:enable Webkul_UnoPimConnector
php bin/magento setup:upgrade
php bin/magento setup:di:compile
php bin/magento setup:static-content:deploy
php bin/magento indexer:reindex
php bin/magento cache:flush
Language Translation
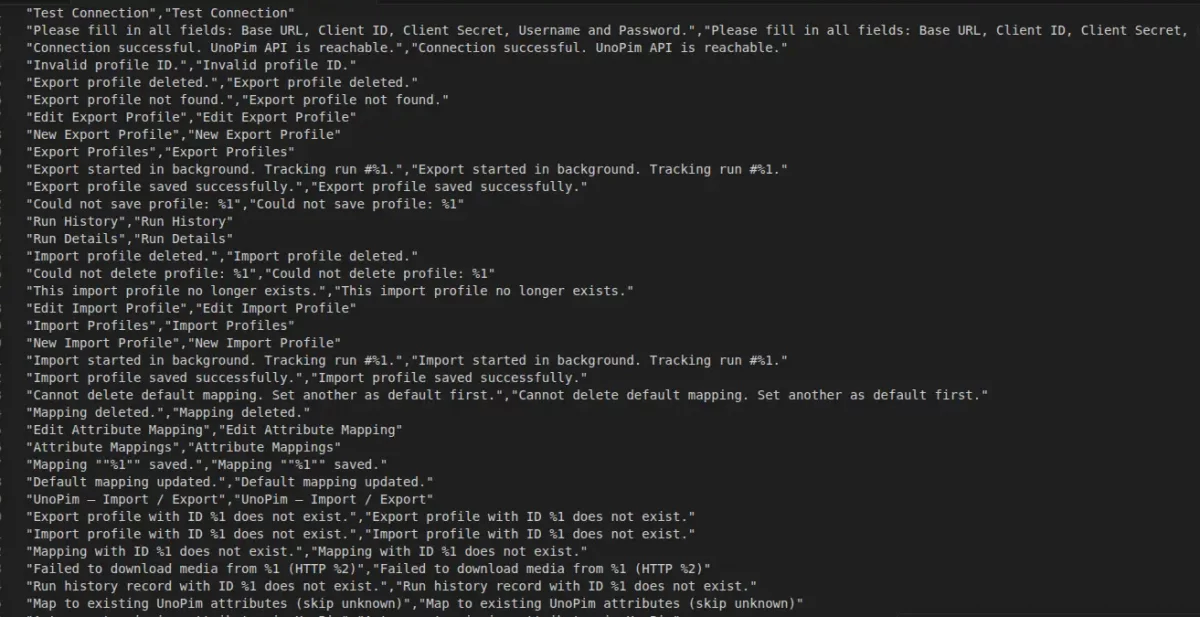
For translating the module language, navigate through src/app/code/Webkul/UnoPimConnector/i18n and edit the en_US.csv file.
Thereafter, rename the CSV as “en_US.CSV” & translate all right-side content after the comma in the Arabic language. After editing the CSV, save it.


Now, upload it to the path src/app/code/Webkul/UnoPimConnector/i18n where the installation of Magento 2 is on the server.
The module supports translation into Arabic; it supports both RTL and LTR languages.
The user can edit the CSV like the image below:

Module Configuration | Admin
After successful installation of the extension, the admin will navigate through Stores->Configuration-> Webkul->UnoPim Connector.

Further, the following options are available for configuration,
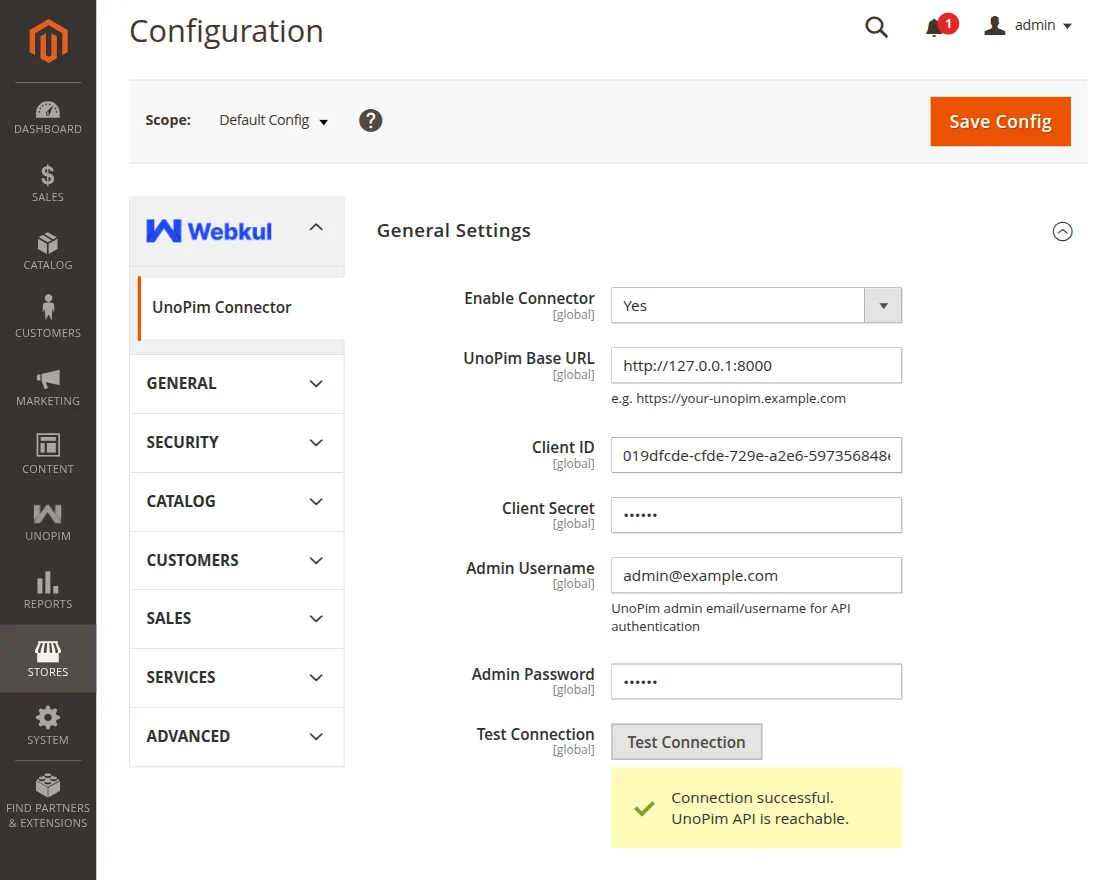
General Settings
This section manages the core activation and global configuration settings of the Adobe Commerce PIM Integration across the entire store.
Using these settings, the admin can establish secure communication between Adobe Commerce and connected PIM/PXM platforms.
Enable Connector: Enable this option to activate the Adobe Commerce PIM Integration module.
PIM/PXM Base URL: Enter the base URL of the connected PIM/PXM platform used for API communication and product synchronization.
Client ID: Provide the OAuth Client ID generated from the PIM/PXM connection settings for secure authentication.
Client Secret: Enter the OAuth Client Secret associated with the configured Client ID.
Admin Username: Specify the admin email/username used for API authentication with the connected PIM/PXM platform.
Admin Password: Enter the password of the admin account for secure API access.
Test Connection: Click this button to verify the connection between Adobe Commerce and the connected PIM/PXM platform.
Note : You can refer to the official UnoPIM documentation to generate your Client ID and Secret Key.
Sync Settings
These settings manage the default synchronization configuration between Adobe Commerce and connected PIM/PXM platforms for efficient catalog and product data synchronization.

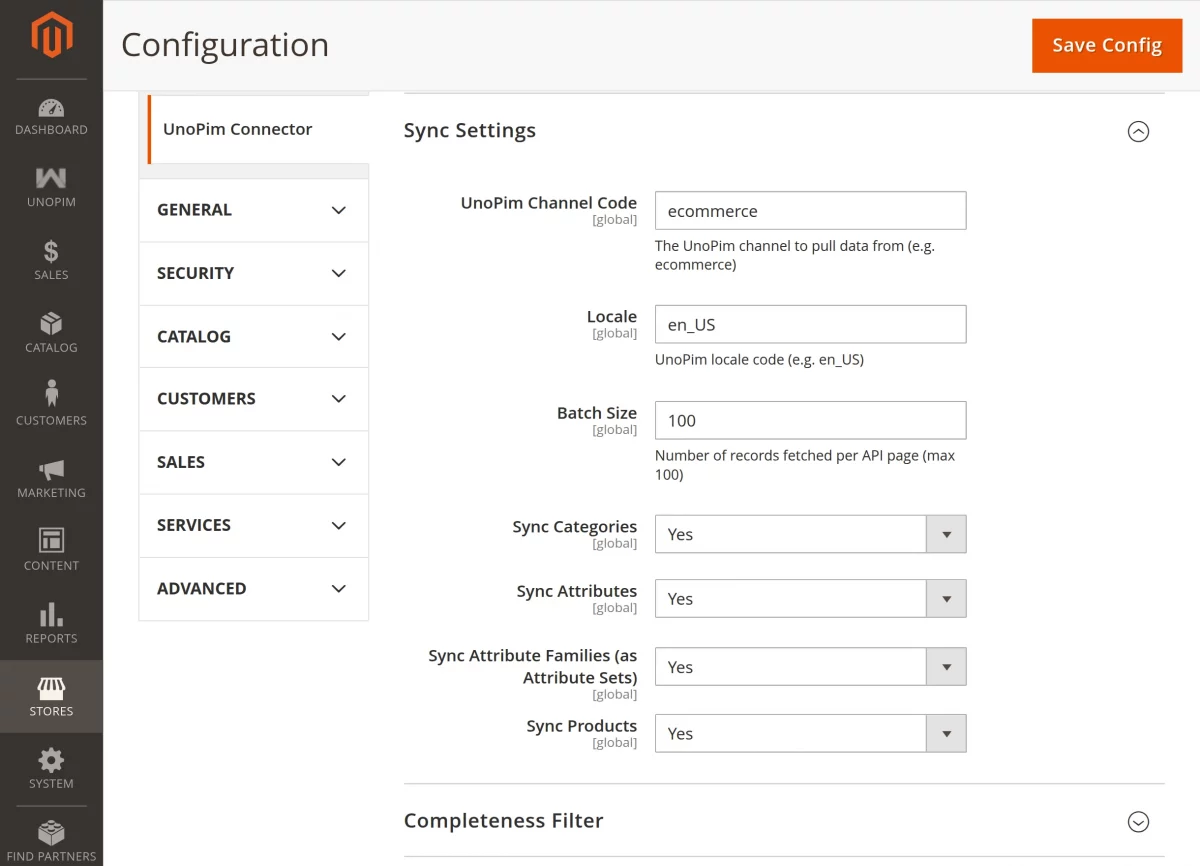
PIM/PXM Channel Code: Enter the channel code from which product data will be synchronized. For example: ecommerce.
Locale: Specify the locale code used during product synchronization. For example: en_US.
Batch Size: Define the number of records fetched per API request during synchronization. The maximum supported batch size is 100.
Sync Categories: Enable this option to synchronize categories between Adobe Commerce and connected PIM/PXM platforms.
Sync Attributes: Enable this option to synchronize product attributes during catalog synchronization.
Sync Attribute Families (as Attribute Sets): Enable this option to synchronize attribute families as Adobe Commerce attribute sets.
Sync Products: Enable this option to synchronize products between Adobe Commerce and connected PIM/PXM platforms.

Completeness Filter
These settings help manage product synchronization based on completeness scores received from connected PIM/PXM platforms.
As a result, the admin can prevent incomplete product data from being enabled automatically in Adobe Commerce.
Enable Completeness Filter: Enable this option to apply completeness-based filtering during product synchronization.
Consequently, products below the defined threshold will be imported as disabled.
Minimum Completeness (%): Specify the minimum completeness percentage required during product import. Products below this value will remain disabled in Adobe Commerce.
The supported range is between 0 and 100.
Scheduled Sync (Cron)
These settings allow the admin to enable automated synchronization between Adobe Commerce and UnoPim using cron jobs.
Enable Cron: Enable this option to run scheduled import and export synchronization tasks automatically.
Email Notifications
Using these settings, the admin can configure email notifications for import and export synchronization reports.
Send Report Email: Enable this option to receive synchronization summary reports through email after each import or export operation.
Report Recipients: Enter the email addresses that should receive synchronization reports. Multiple email addresses can be added using comma separation.
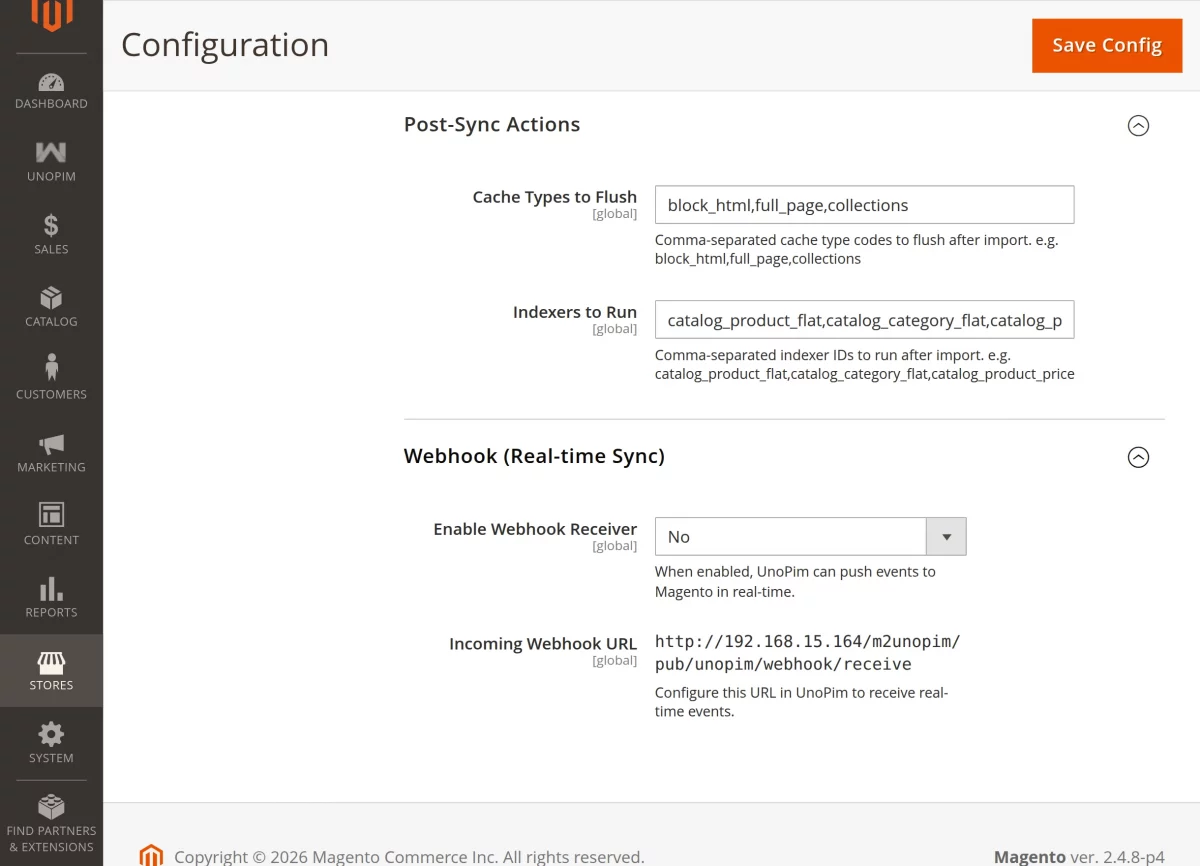
Post-Sync Actions
These settings allow the admin to perform additional actions automatically after product synchronization is completed. As a result, Adobe Commerce data remains updated and optimized after every import operation.
Cache Types to Flush: Enter the cache type codes that should be cleared automatically after synchronization.
Multiple cache types can be added using comma separation.
Example: block_html,full_page,collections
Indexers to Run: Specify Magento 2 indexers that should run automatically after synchronization.
Multiple indexer IDs can be added using comma separation.
Example: catalog_product_flat,catalog_category_flat,catalog_product_price
Webhook (Real-time Sync)
These settings help enable real-time synchronization between UnoPim and Adobe Commerce using webhook events. Consequently, product updates can be processed instantly without waiting for scheduled synchronization.
Enable Webhook Receiver: Enable this option to allow UnoPim to send real-time synchronization events directly to Adobe Commerce.
Incoming Webhook URL: Configure this webhook URL in the UnoPim platform to receive real-time product and catalog events in Adobe Commerce.
After Configuring all the details click on save config button to save the details.
UnoPim
After the successful installation and configuration, the UnoPim menu option is visible to the admin.
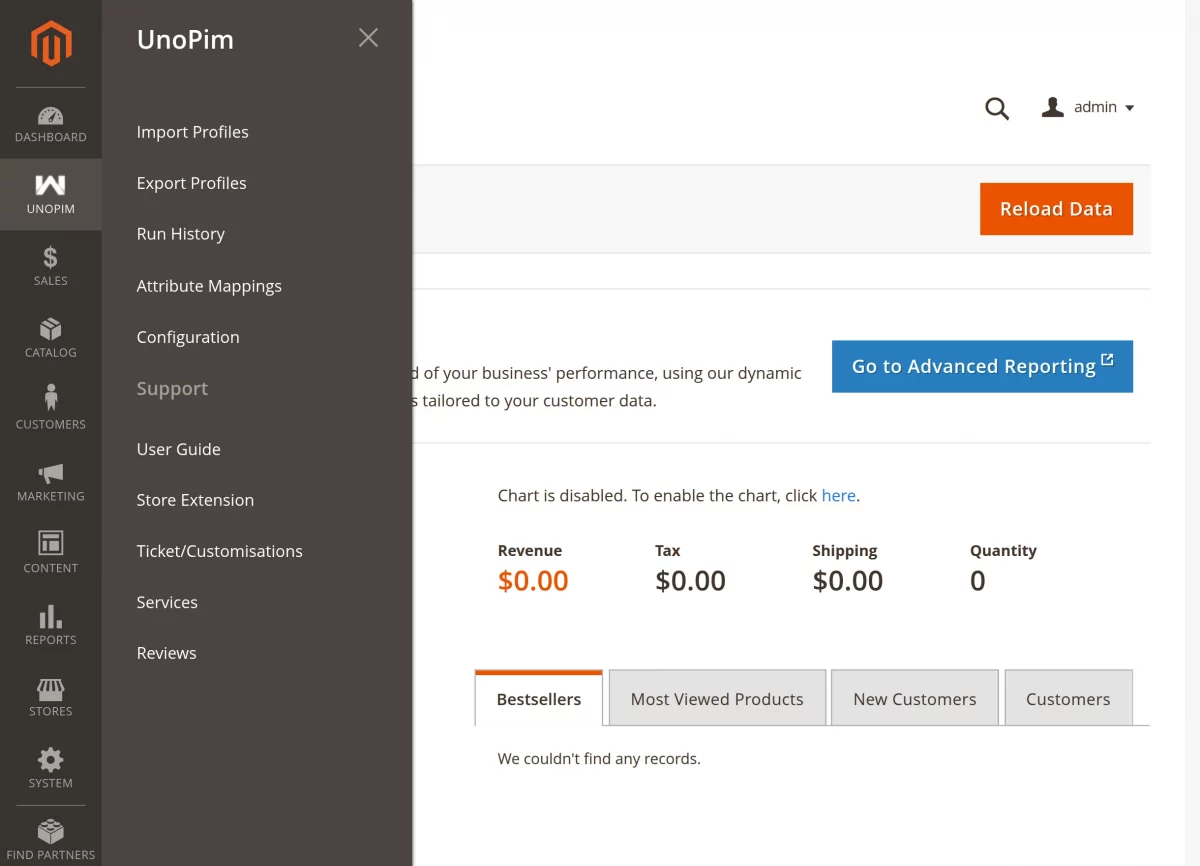
Here, the admin has the following options to configure and manage UnoPim operations across the store –
- Import Profiles
- Export Profiles
- Run History
- Attribute Mapping
- Configuration
Import Profiles
Under this section, the admin can create and manage UnoPim import profiles for product synchronization between UnoPim and Adobe Commerce, as shown in the snapshot.
Here, the admin can view profile details such as profile name, synchronized entities, channel, locale, synchronization status, last run time, and active status.
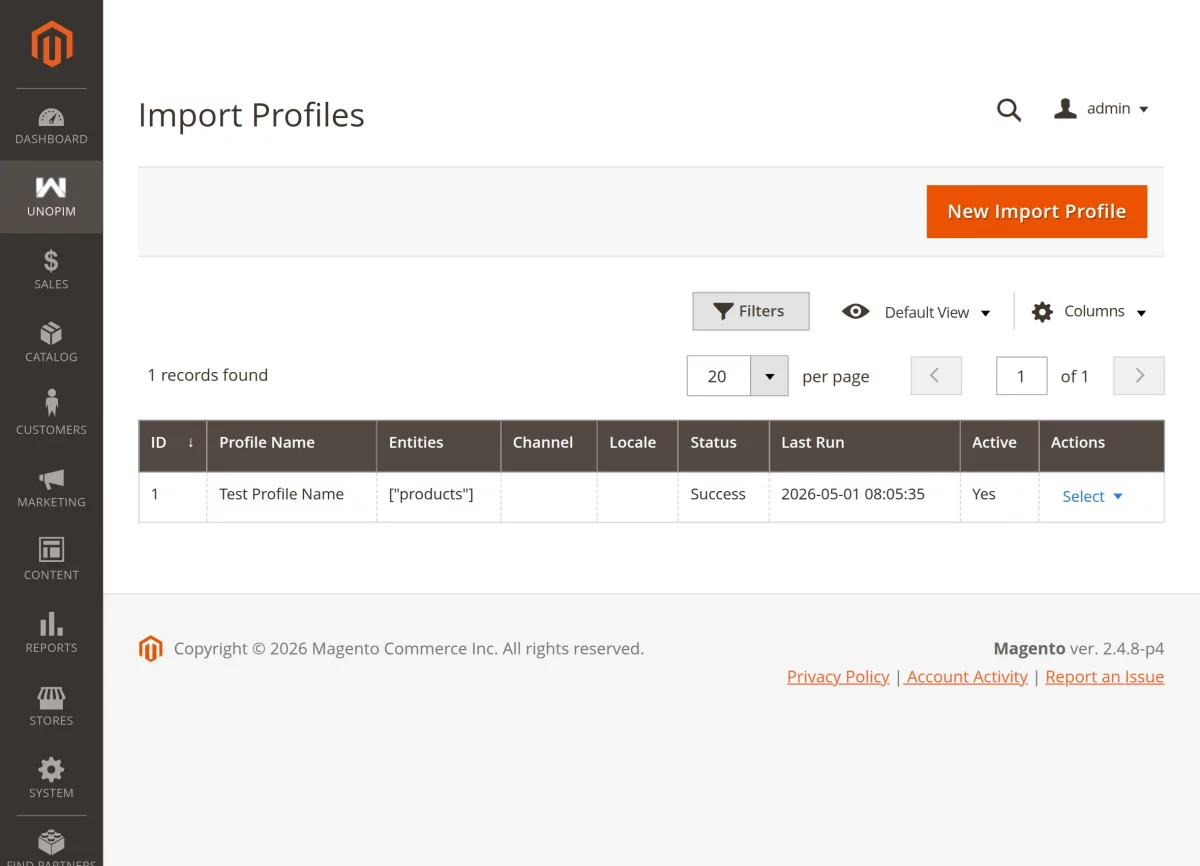
To create a new import profile, the admin needs to click on the New Import Profile button, which opens the section shown below.
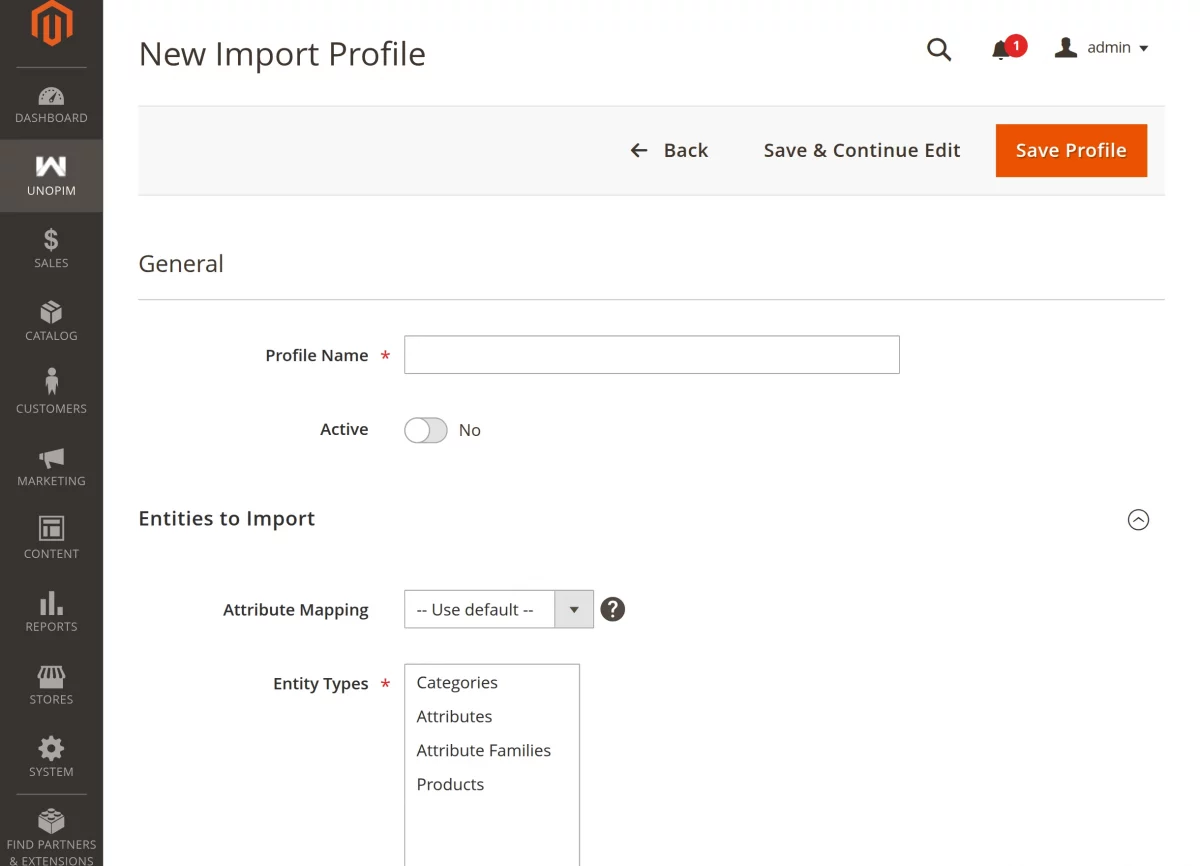
Profile Name: Enter a unique name to identify the UnoPim import profile easily.
Active: Additionally, select Yes or No to enable or disable the import profile.
Attribute Mapping: Here, the admin can choose the attribute mapping configuration that will be applied during synchronization.
Entity Types: Furthermore, select the entities that need to be imported from UnoPim, such as Categories, Attributes, Attribute Families, and Products.
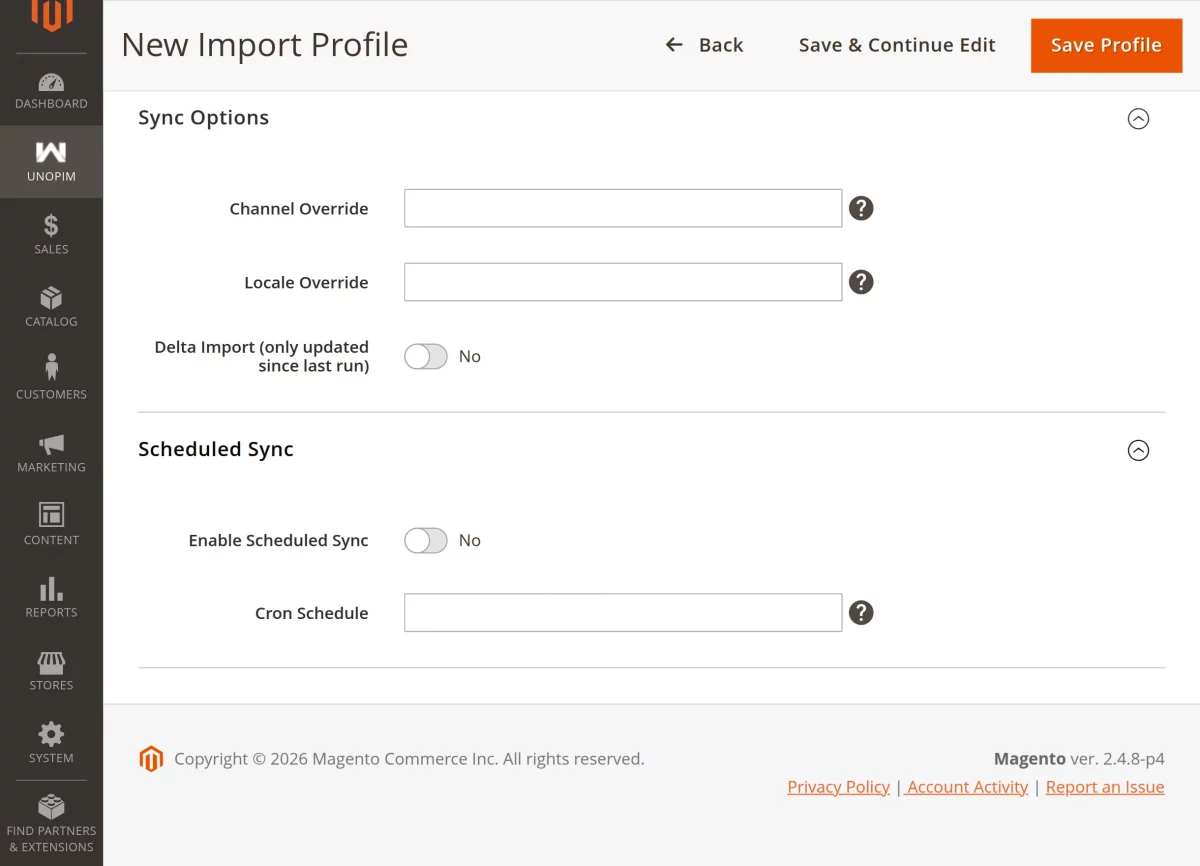
Channel Override: Optionally, enter a specific UnoPim channel code to override the default synchronization channel.
Locale Override: Similarly, specify a locale code if you want to override the default synchronization locale for this profile.
Delta Import (only updated since last run): Moreover, enable this option to import only the entities updated after the previous synchronization run.
Enable Scheduled Sync: In addition, select Yes or No to enable automated synchronization using cron scheduling.
Cron Schedule: Finally, enter the cron expression that defines the synchronization schedule for the import profile.
Export Profiles
Under this section, the admin can create and manage export profiles for synchronizing product data from Adobe Commerce to connected PIM/PXM platforms, as shown in the snapshot.
Here, the admin can view profile details such as profile name, synchronized entities, product status, last synchronization status, last run time, and active status.
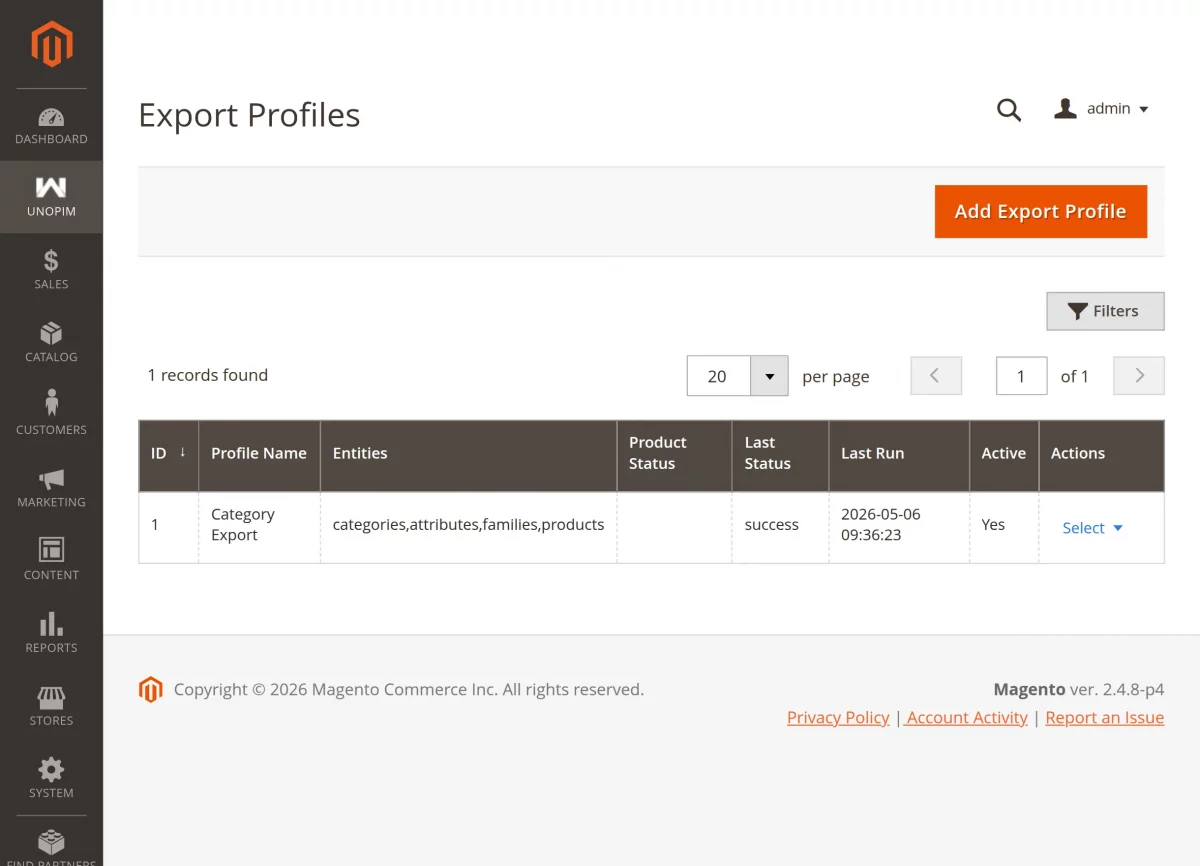
To add a new export profile, the admin needs to click on the New Export Profile button, which opens the configuration form shown below.
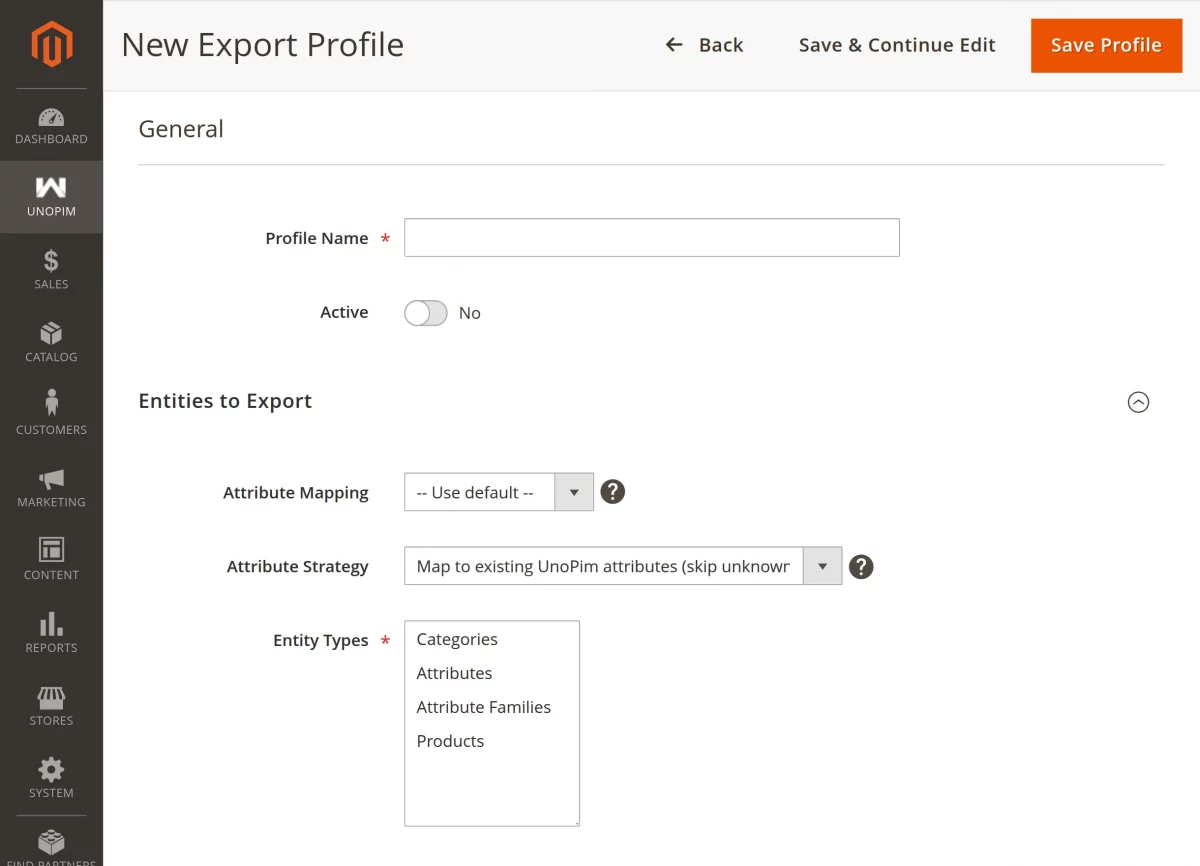
Profile Name: Enter a unique name to identify this specific export profile.
Active: Use this toggle to enable or disable the export profile as needed.
Attribute Mapping: Select your preferred mapping configuration to link Magento attributes to the corresponding UnoPim attributes.
Attribute Strategy: Define exactly how the system should handle and format attributes during the export process.
Entity Types: Select the specific data types to move from Magento 2 to UnoPim, such as Categories, Attributes, Attribute Families, or Products.
Multiple entity types can be selected based on business requirements.
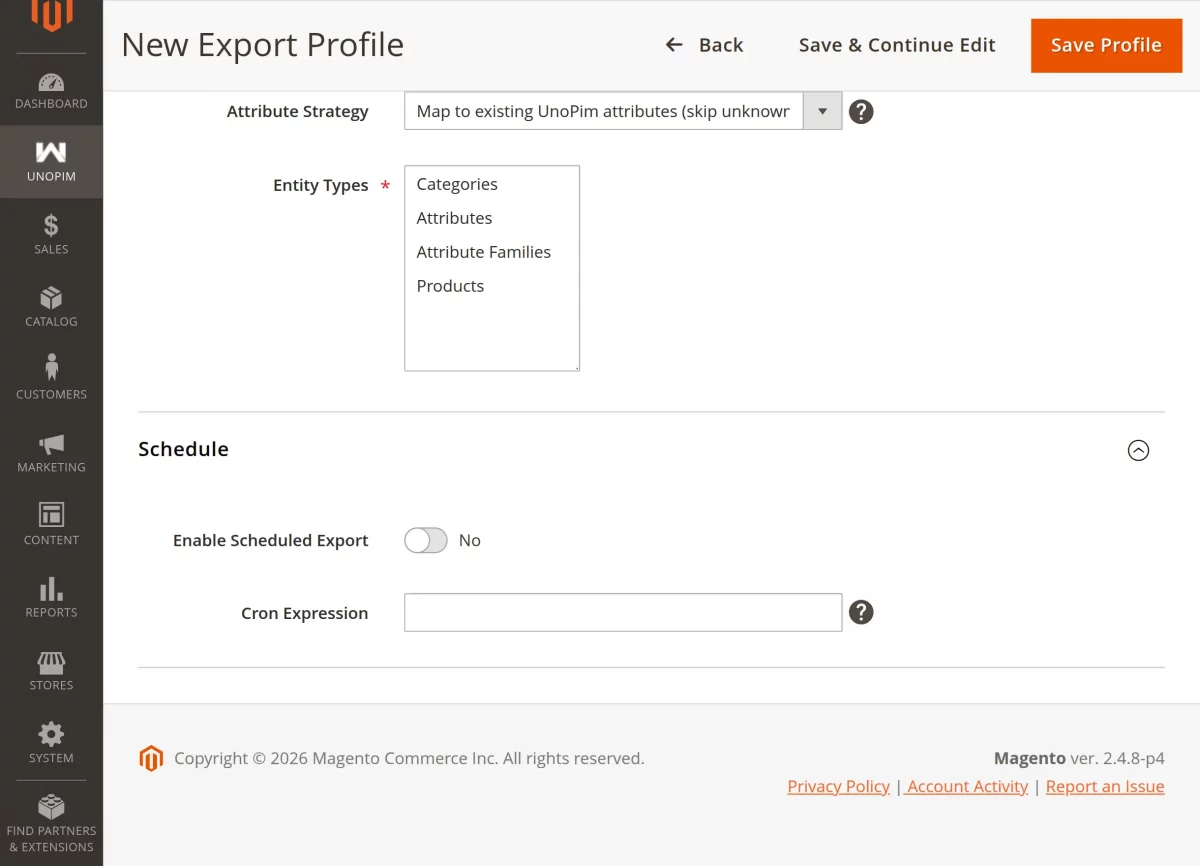
Enable Scheduled Export: Turn this option on to allow automatic exports using cron.
Cron Expression: Define the schedule for automatic export execution (e.g., 0 0 * * * for daily at midnight).
Save Profile: Click this button after configuring all settings to finalize the profile.
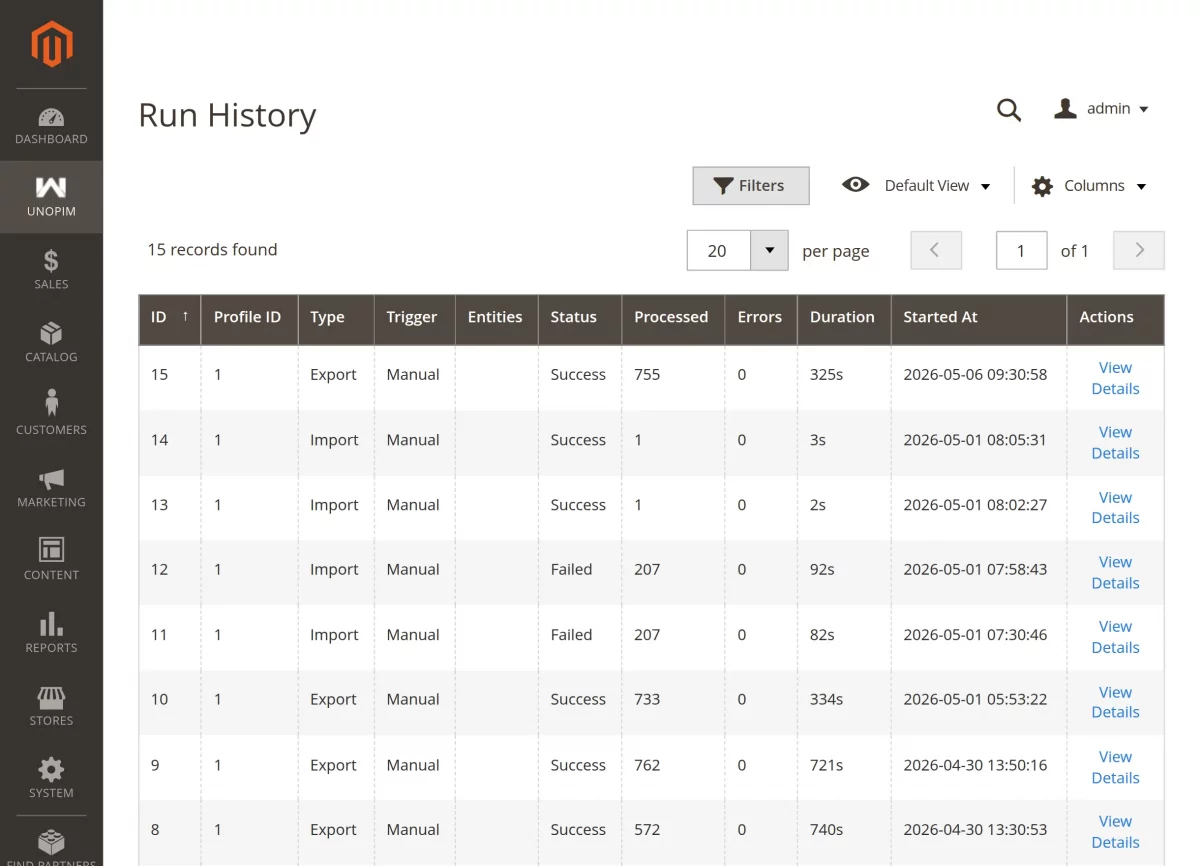
Run History
Access the Run History at UnoPim > Run History to monitor your data synchronization tasks. This dashboard provides a full audit trail for every import and export operation.
Profile ID & Type: Identify the profile and whether the action was an Import or Export.
Trigger & Status: See if the sync was Manual, Cron, or Webhook and if it resulted in Success or Failure.
Processed & Errors: Track the number of items handled and view a count of any failed entities.
Time & Duration: Review exactly when the task started and how long it took to complete.
View Details: Open this link to troubleshoot specific errors or view a per-entity breakdown of the sync.
Run Details
Clicking View Details in the Run History grid opens a comprehensive breakdown of a specific synchronization task.
This page provides a granular look at the performance and outcome of the data transfer.
Run Summary: View key metrics like execution status, trigger method, start/end times, total processed items, and error summaries.
Entity Results: Monitor sync progress for entities such as categories, attributes, or products, including counts for created, updated, skipped, and errored items.
Error Details: Troubleshoot issues by searching SKUs or error messages. Logs include API error codes and validation details to help resolve data mismatches.
Use the Re-run button to execute the same profile again directly from this screen and retry failed items.
You can also click Refresh to update the page and see live progress for tasks currently in execution.
For offline analysis or to share logs with your technical team, use the Download CSV option to export the full error report.
Attribute Mappings
Under this section, the admin can manage the relationship between Magento and UnoPim attributes to ensure data flows correctly between the two platforms as shown in the snapshot.
Here, the admin can create new mapping configurations, set primary defaults for automated exports, and perform bulk actions to maintain data consistency.
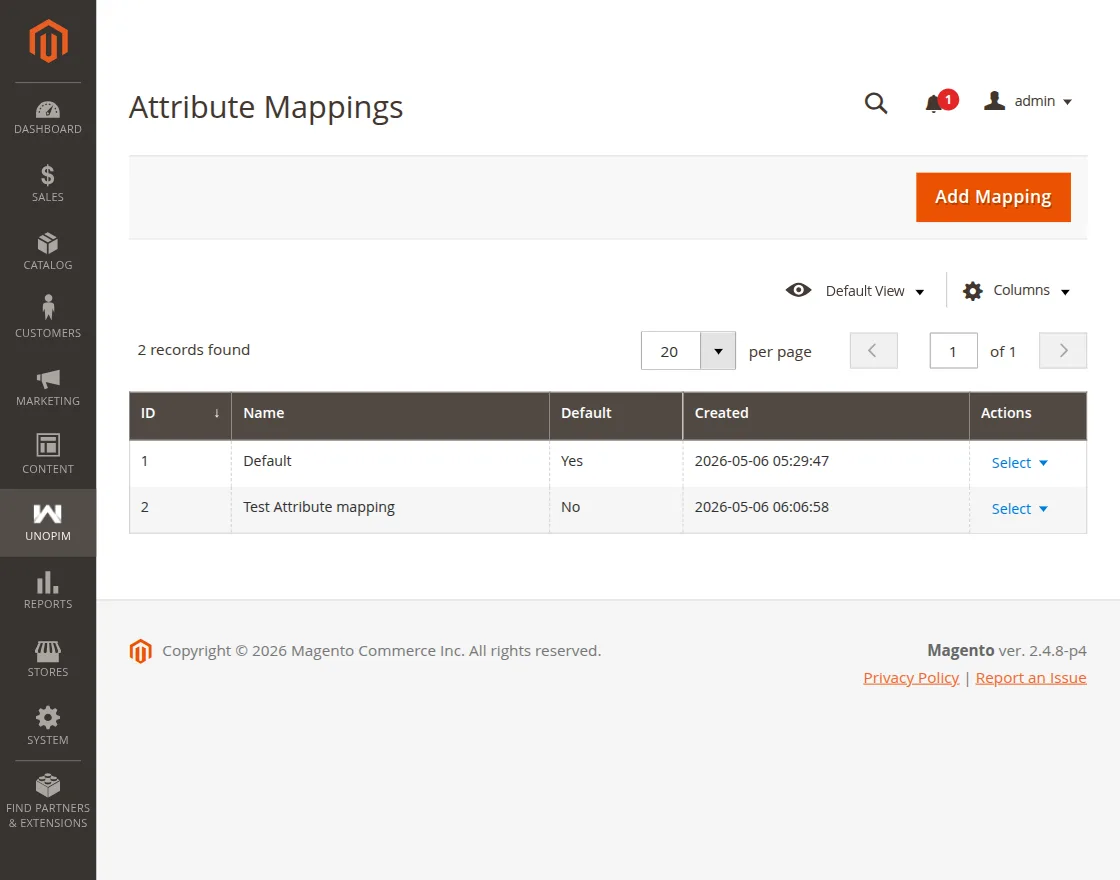
To create a new attribute relationship, the admin needs to click on the Add Mapping button, which opens the configuration interface.
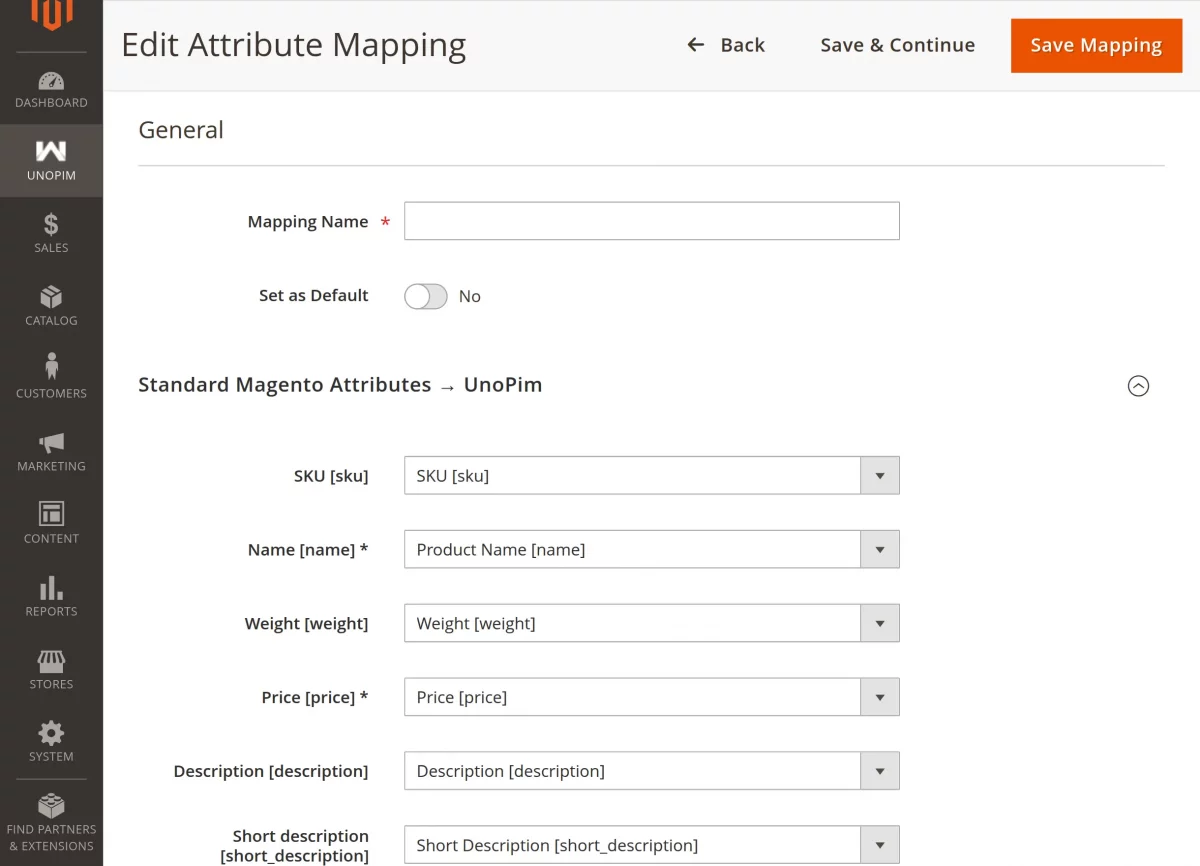
Mapping Name: Enter a unique title to identify this specific attribute mapping configuration.
Set as Default: Use this toggle to designate this configuration as the primary mapping for export operations.
Standard Magento Attributes: Link core Magento fields like SKU, Name, Price, and Description to their corresponding attributes in UnoPim.
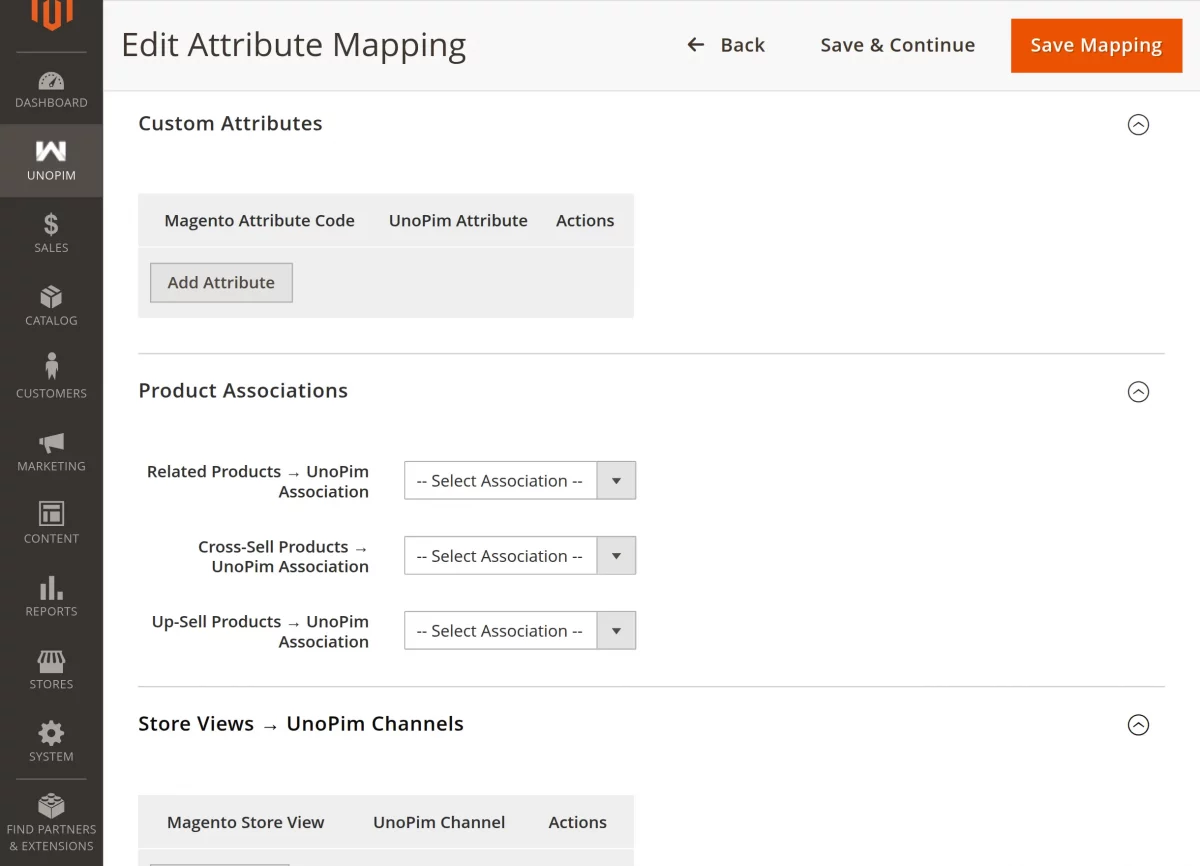
Custom Attributes: Add and map additional user-defined Magento attribute codes to specific UnoPim attributes as required.
Product Associations: Configure how the system synchronizes related products, cross-sell products, and up-sell products with UnoPim associations.
Store Views: Map specific Magento store views to the appropriate UnoPim channels to ensure localized data accuracy.
Save Mapping: Click this button to store the configuration and make it available for use in export profiles.
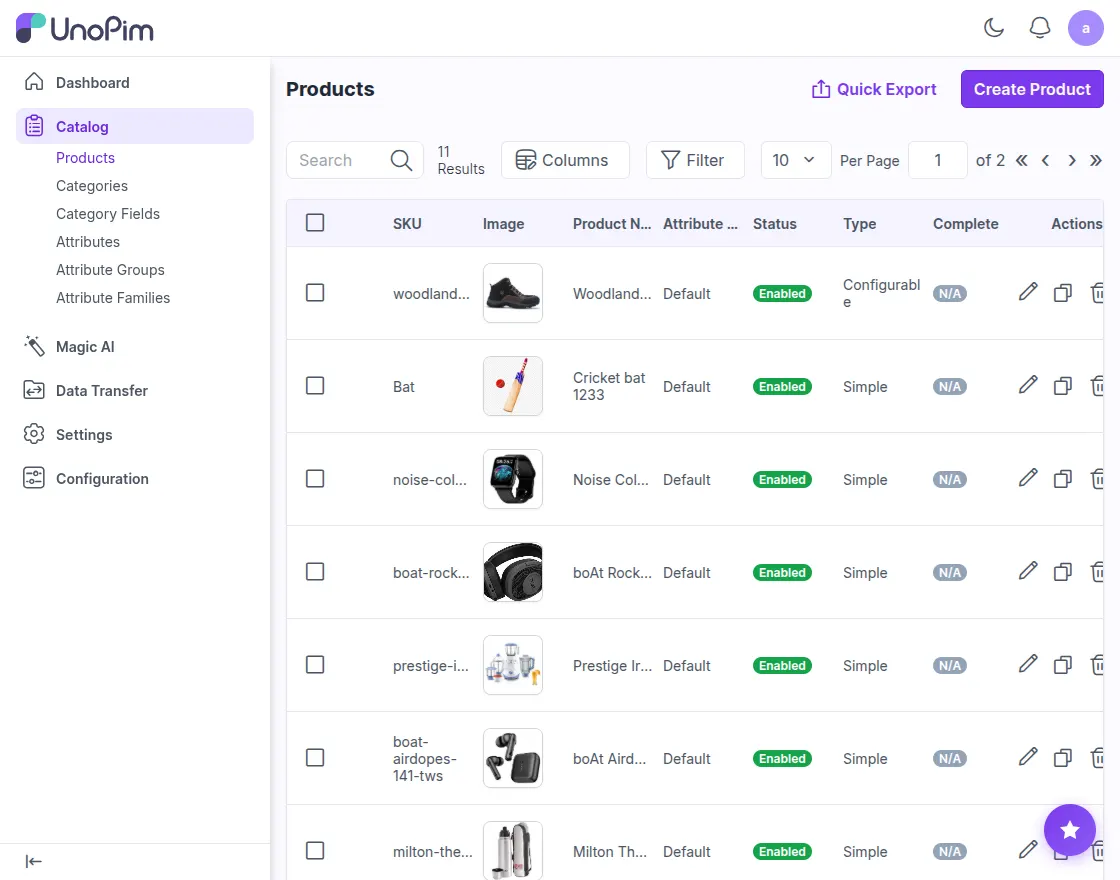
Post-Sync Verification in UnoPim
You can verify all synchronized data by logging into your UnoPim admin dashboard and navigating to the catalog section.
Support
So, that’s all for Adobe Commerce PIM Integration.
If you have any questions, suggestions, or customization requests, feel free to contact us at support@webkul.com or submit a ticket at webkul.uvdesk.com.
Please explore our Magento Development Services and Quality Magento 2 Extensions.